
In Part 4 of this Photoshop Tutorial, I will teach how to use advanced Photoshop overlays and what stunning effects you can create with them.
This post has been adapted from the YouTube tutorial found here.
Part 4. Advanced Photoshop overlays and special effects
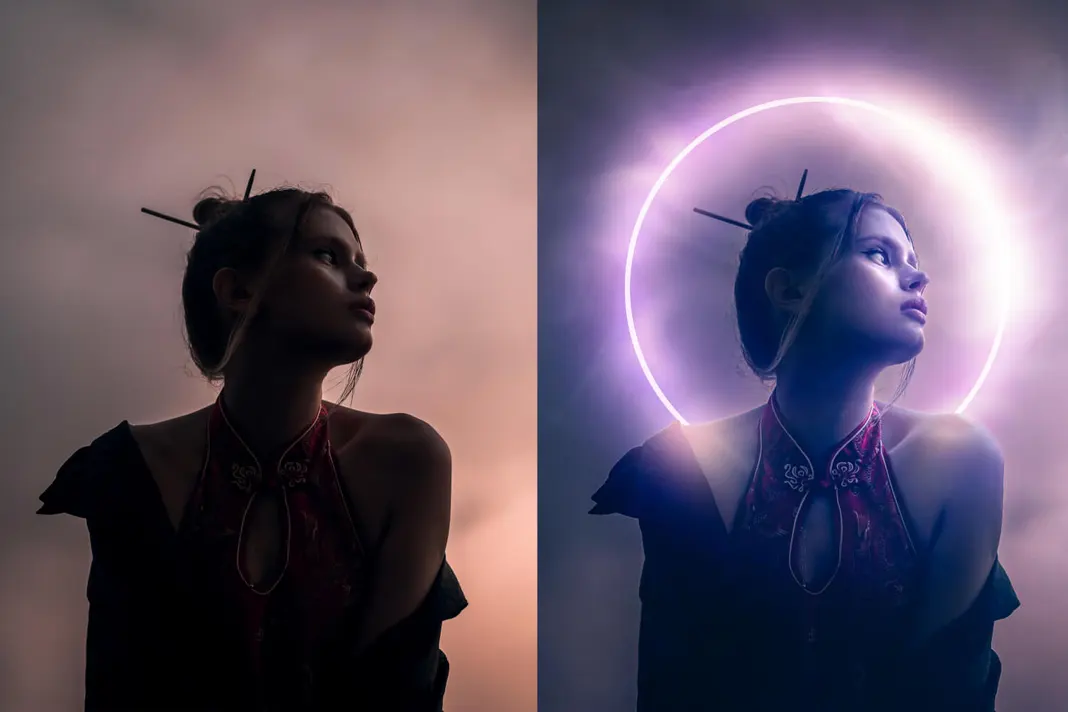
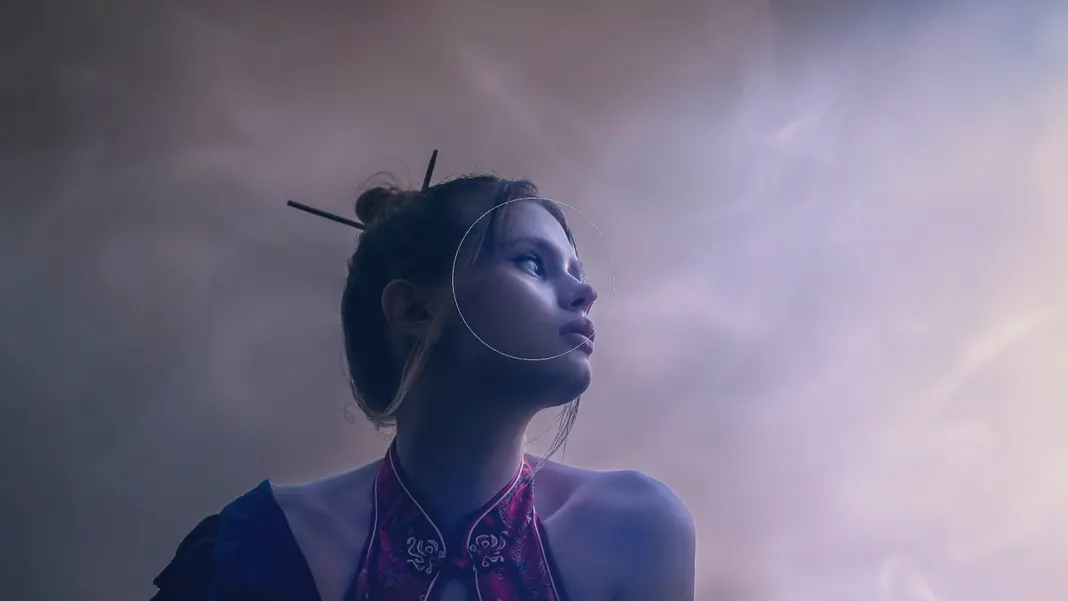
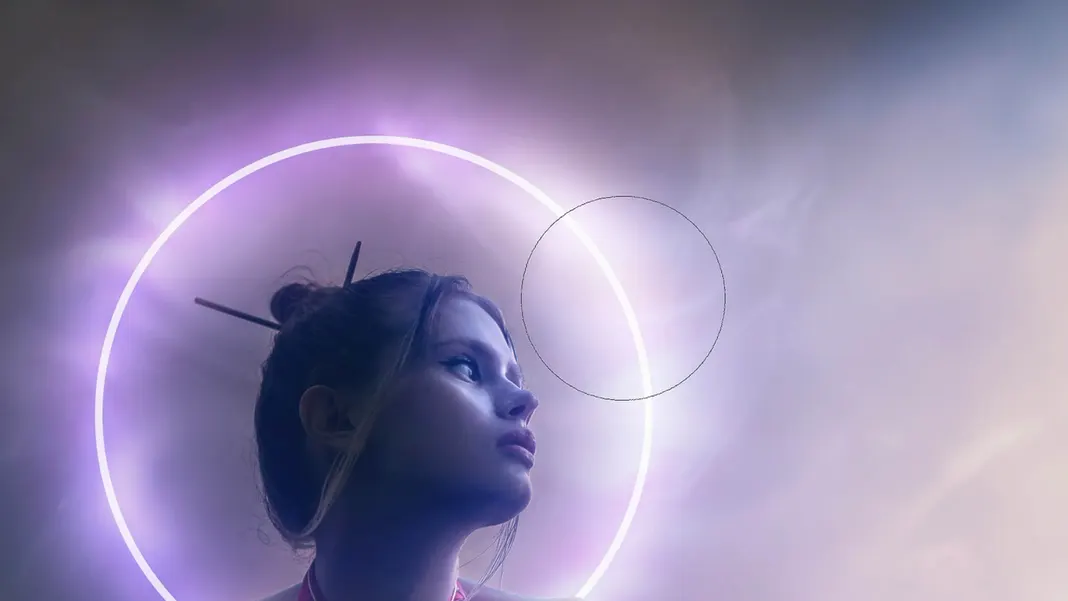
Finally, in the last project we’re going to work on adding some Photoshop special effects. You can see the before (left) and the after (right) here:
Here is where I’m going to teach you how to use my glow actions, if you have them, as well as how to introduce some smoke or mist and then create a bunch of cool colors using camera RAW and other cool filters.
Let’s get started
Our last project is a little more complex. We’re going to mix a bunch of things we’ve learned and then add some new things. We’re going to introduce some camera RAW changes in there, and I’m going to teach you how to use my glow actions if you have them.
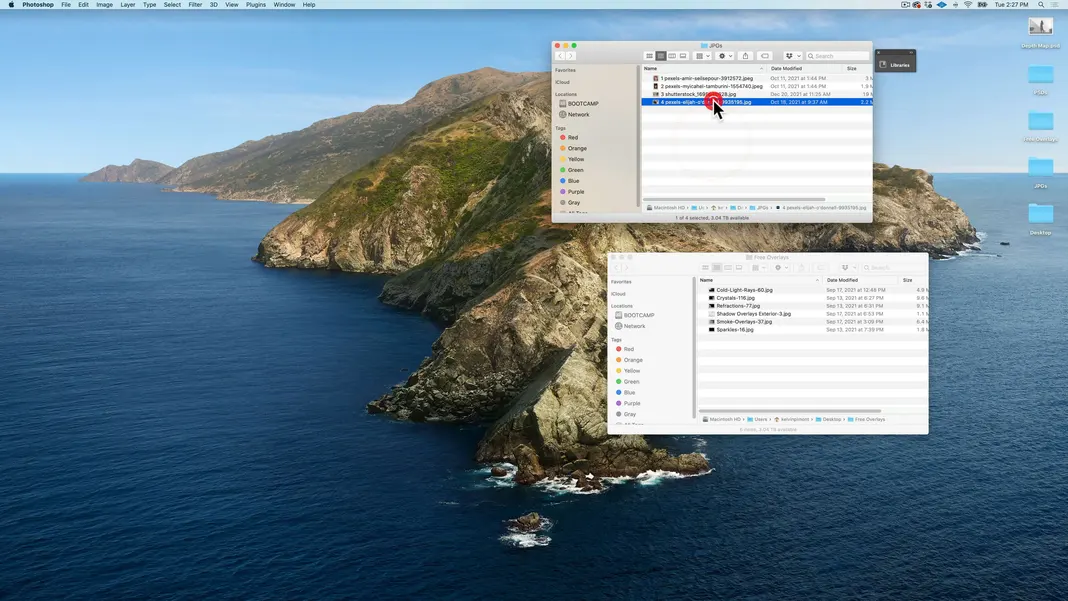
Let’s start off by opening image 4 in Photoshop.
And once again, zoom in and then zoom out to get my artboard a size that I can easily work with.
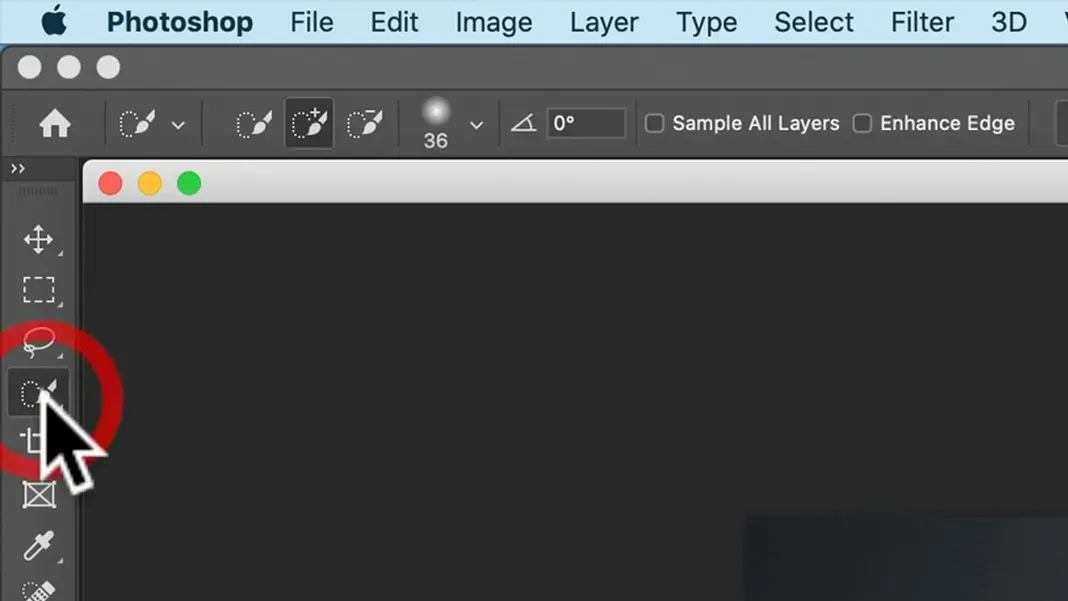
Like the last project, the first thing I’d like to do is outline the subject. This may or may not be useful in this project, but it’s a good habit when doing compositing to outline your subjects. So I’m going to go to the Quick Selection tool. I will then use Option-Control to make my brush a little bigger. Then, as always, I will select the background of the subject.
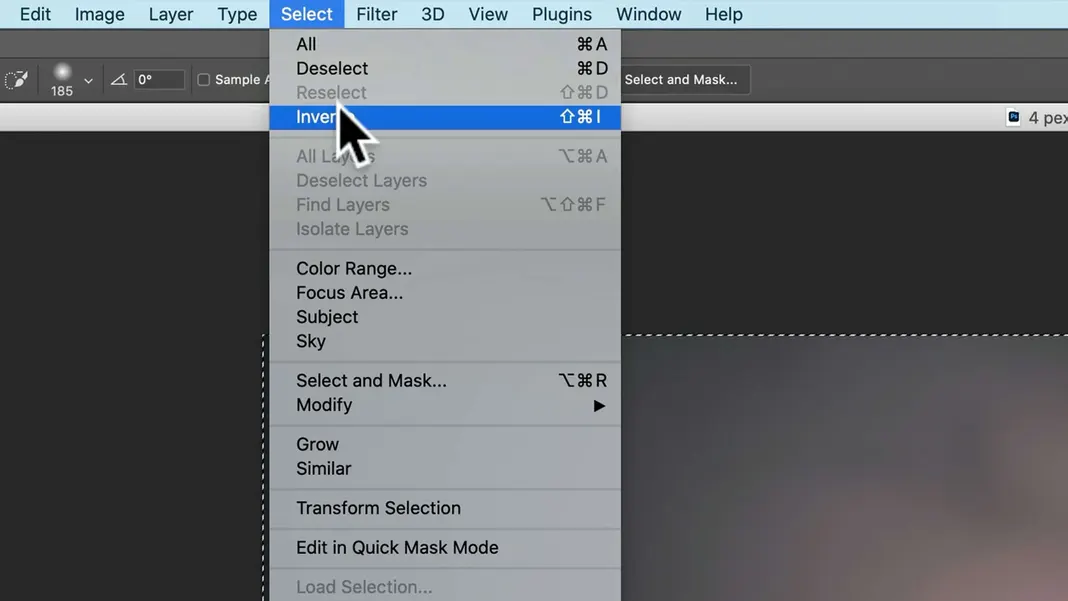
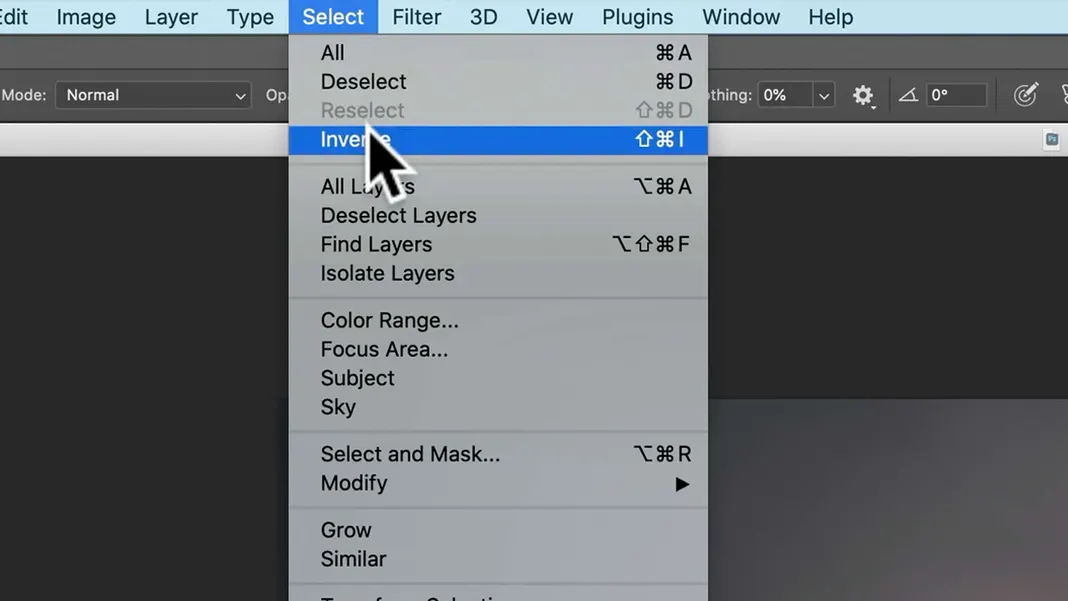
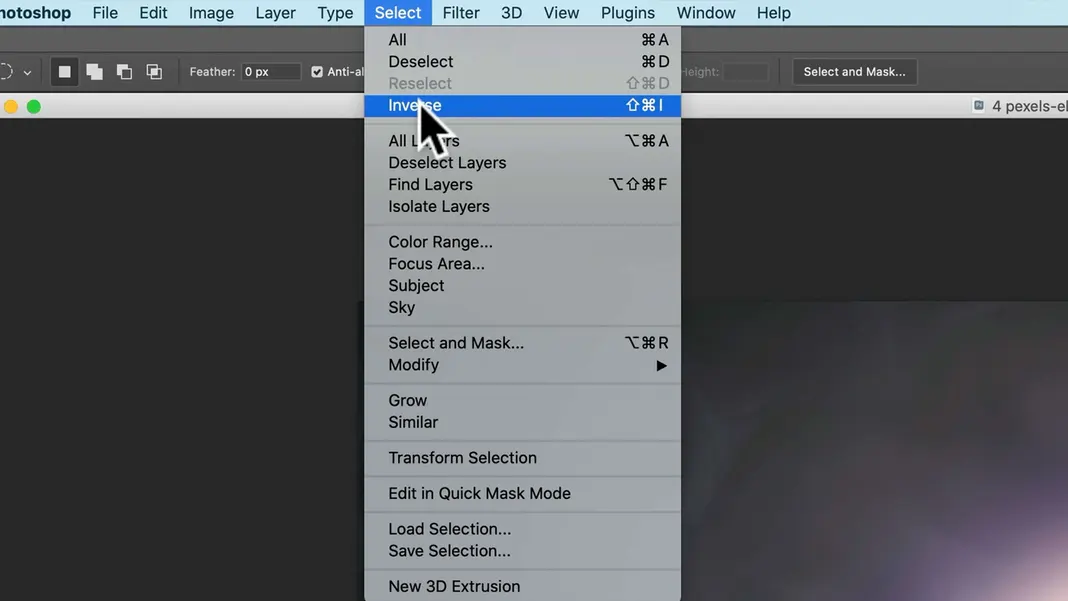
I will invert the selection, either using the keyboard Command-Shift-I or by going to Select > Inverse.
Then hit Select and Mask.

Let’s go ahead and zoom in using Command-Option-Plus (+) and then switch to the Refine Edge Brush tool. Make sure the brush size is big enough to just cover the edge between the selection and the unselected area, and then go ahead and brush over the areas of the background that are showing through to refine the edges.
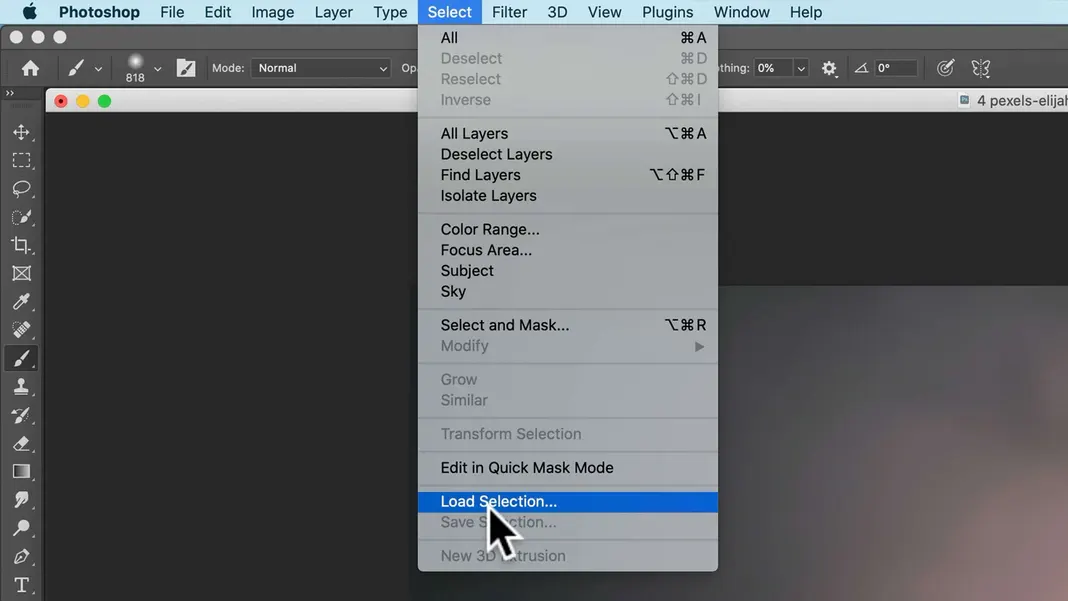
Sometimes it may be hard to see if the tool is really having an effect, but it really is. Once I have a decent selection, I’ll go ahead and save it by navigating to Select > Save Selection.
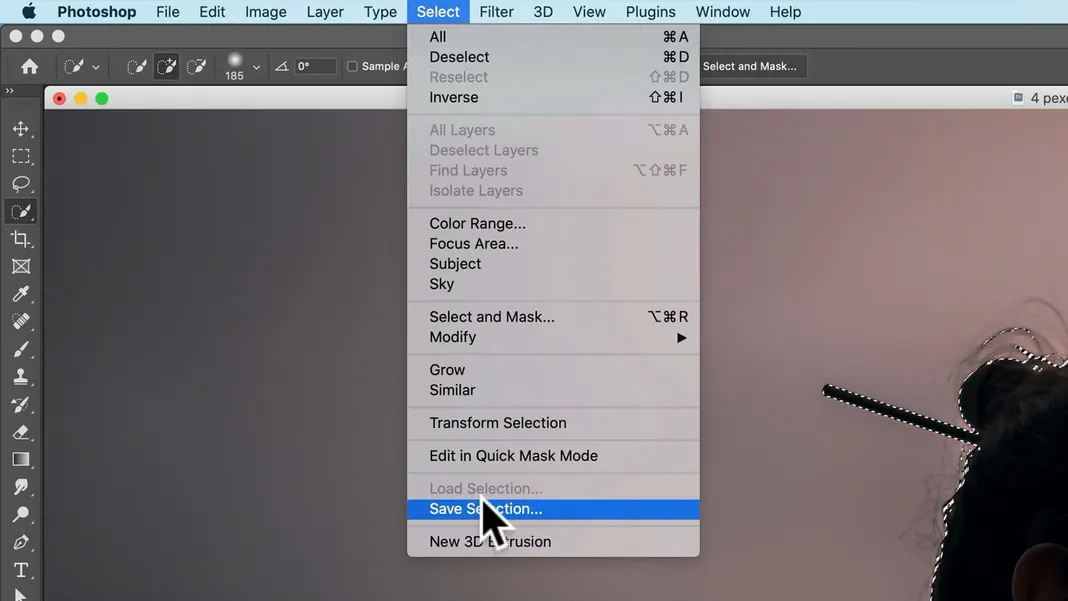
We don’t have to name the selection; by default it’ll be called Alpha 1, and it’ll show up in the Channels pane. Now we can zoom back out and deselect our selection (Command-D or Select > Deselect).
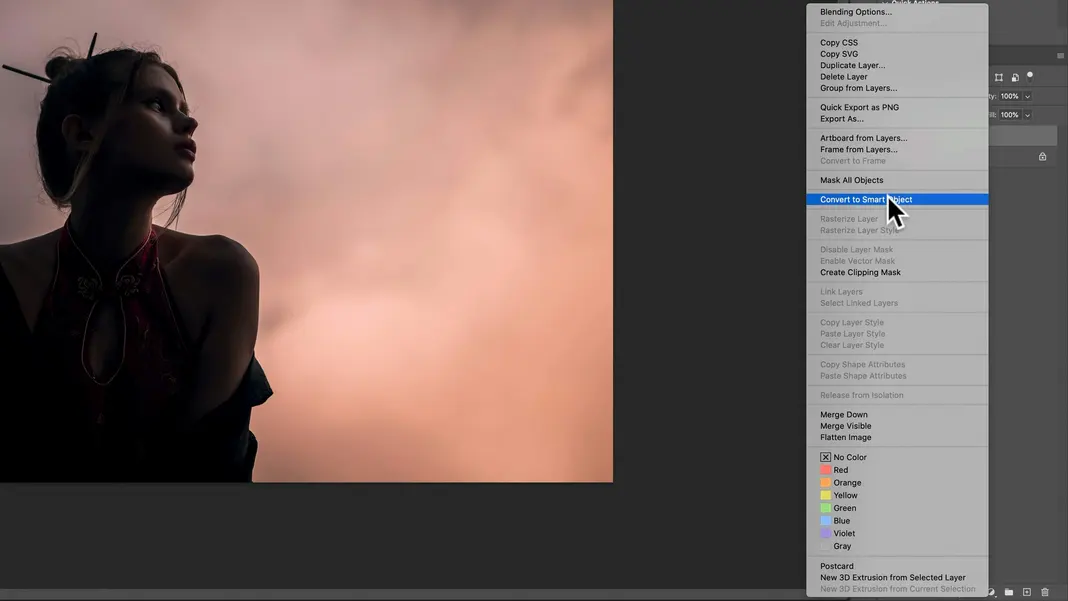
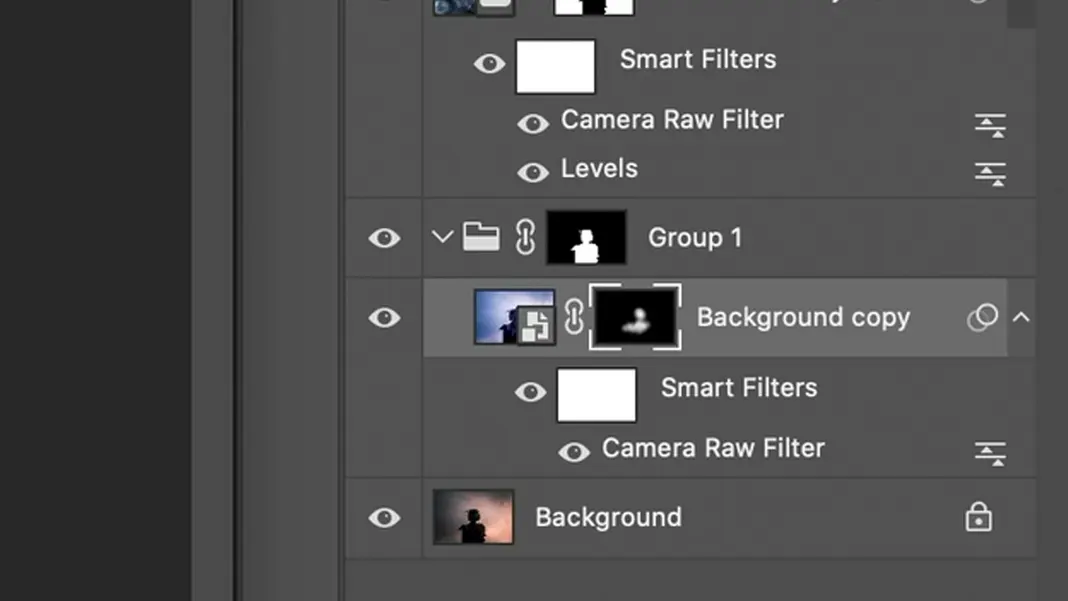
The first thing I’m going to do is duplicate our image layer here by either dragging it to the New Layer icon or selecting it and using the keyboard shortcut Command-J. Then I’ll right click the duplicate layer to convert it to a smart object.
What I’m trying to do is add a light towards the upper-right-hand corner, as you can see in the before and after, as well as add some smoke in the background. I also want some blue highlights on the woman.
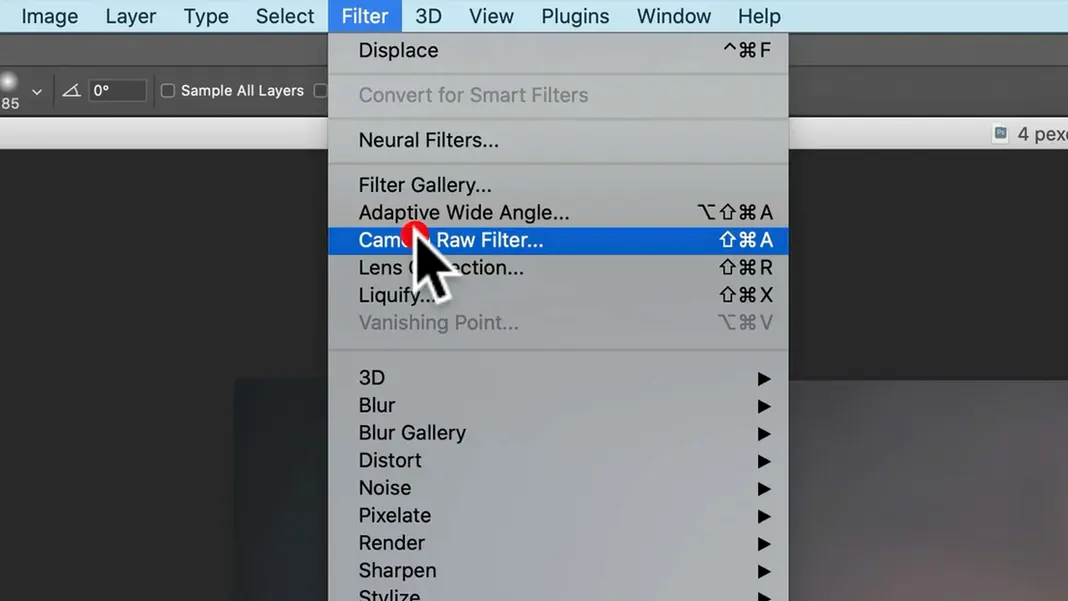
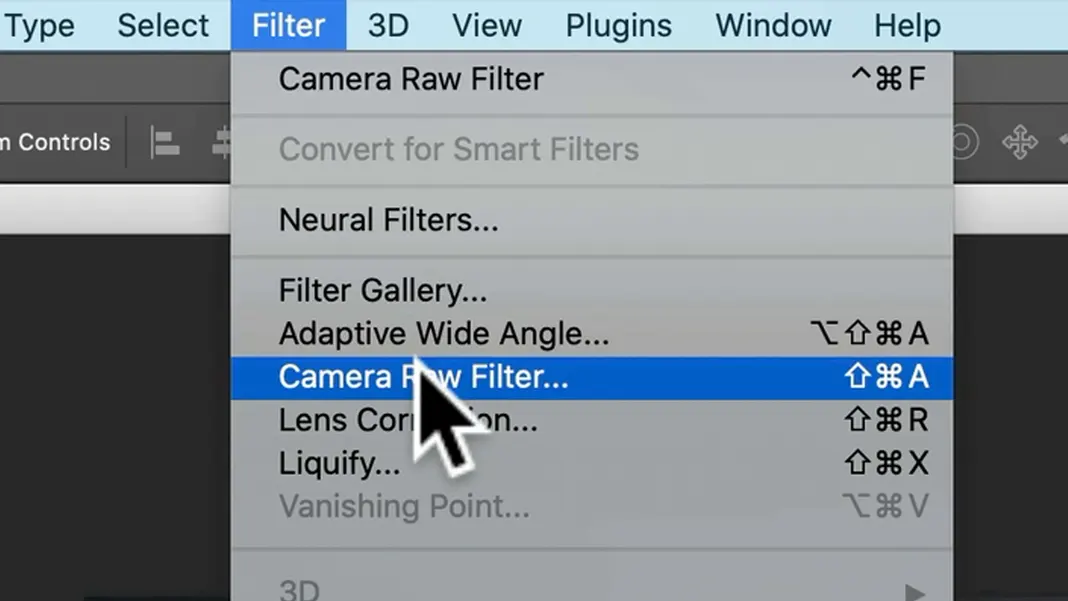
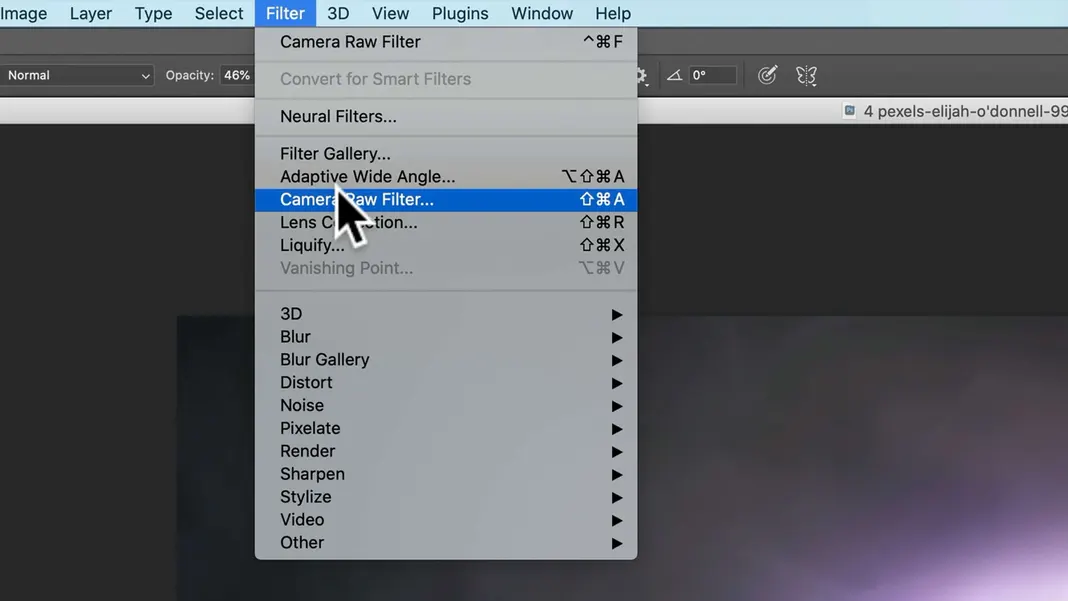
So let’s go to Filter > Camera Raw Filter (or keyboard shortcut Command-Shift-A) and do some editing there.
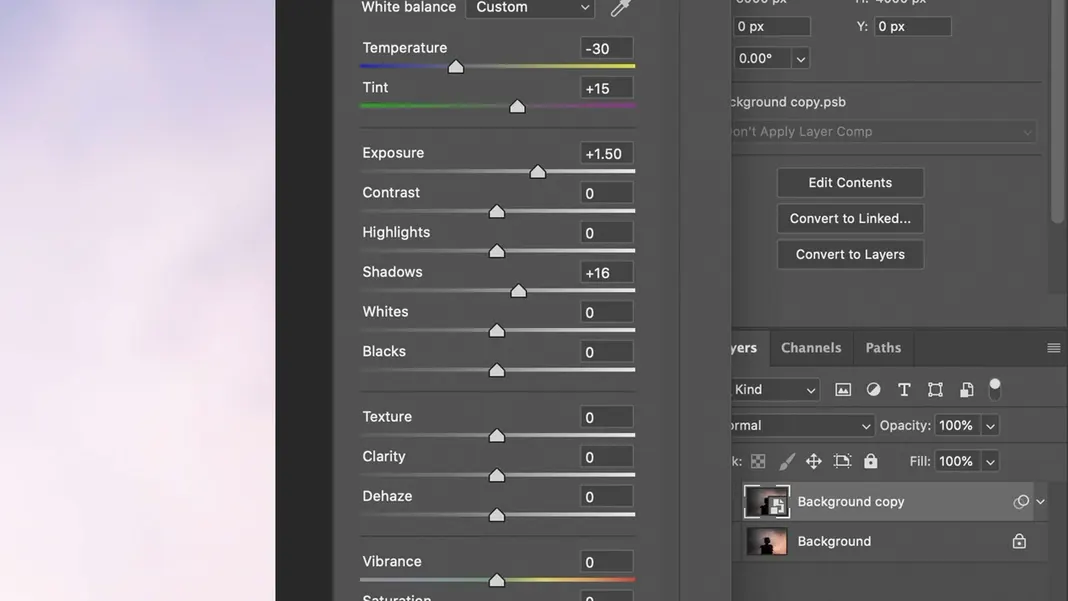
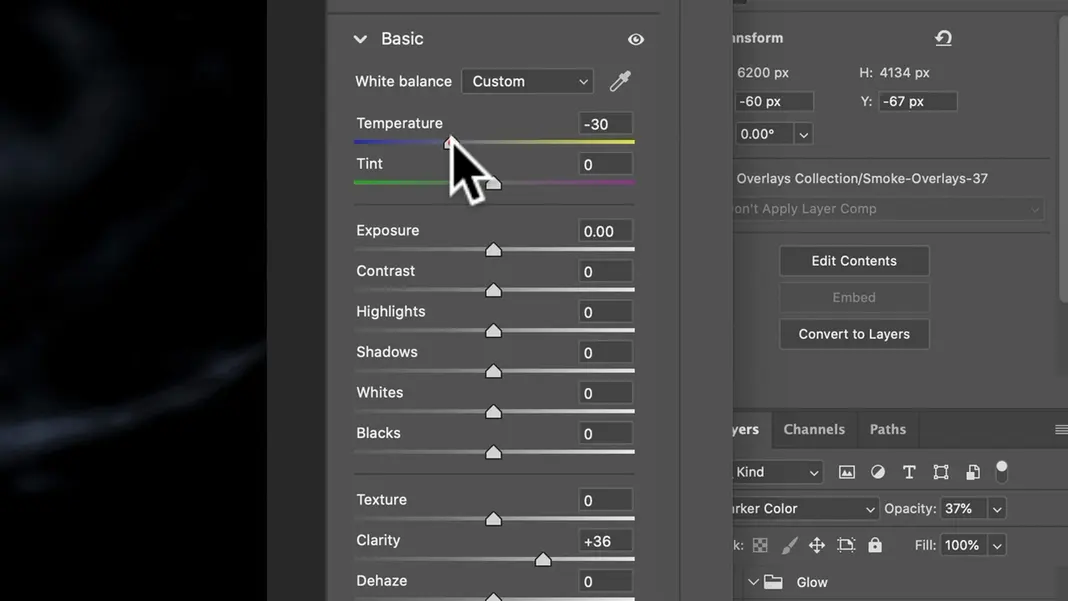
Let’s go to the basic settings. I want to cool the image considerably, so we can set the temperature to -30 and then add a little bit of magenta in the tints.
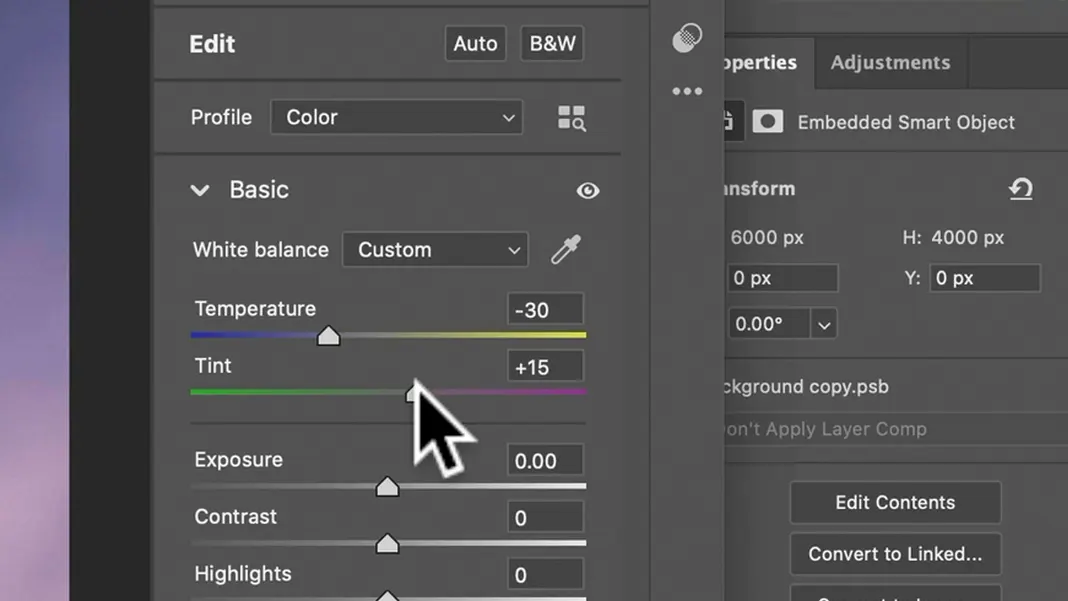
We can also open up the shadows a bit and brighten the image by raising the exposure. Remember, I’m trying to simulate a light here, so these settings are mostly to do that for her shoulders.
These settings are almost too much, but it will make sense in a second when I mask it out. Now we can hit OK with these final settings.
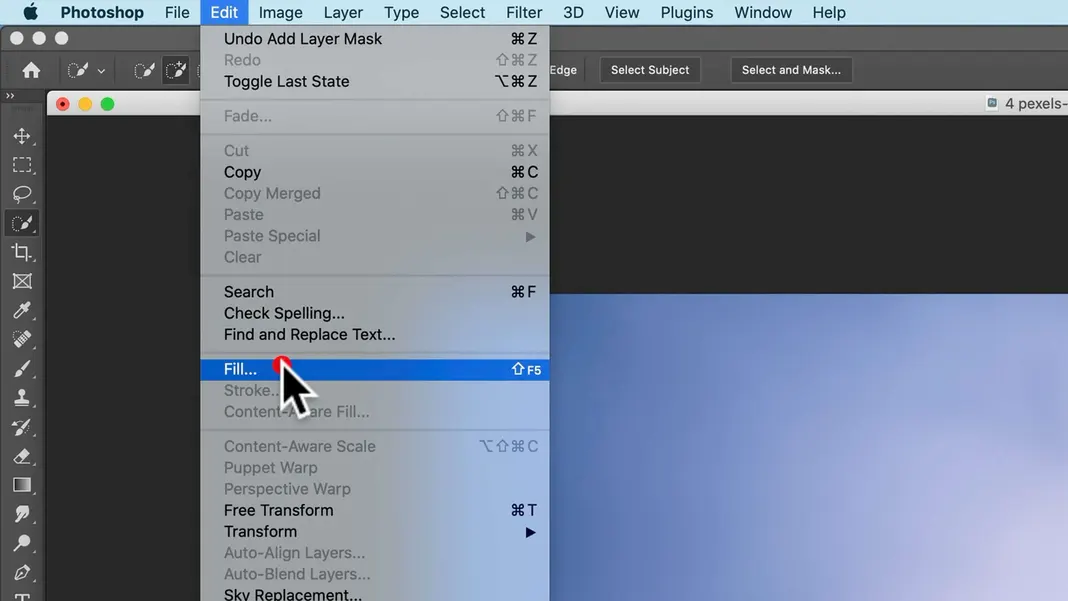
Now I’ll create a mask here using the Mask button in the bottom right. This mask is currently transparent, so I’m going to fill it with the foreground color black.
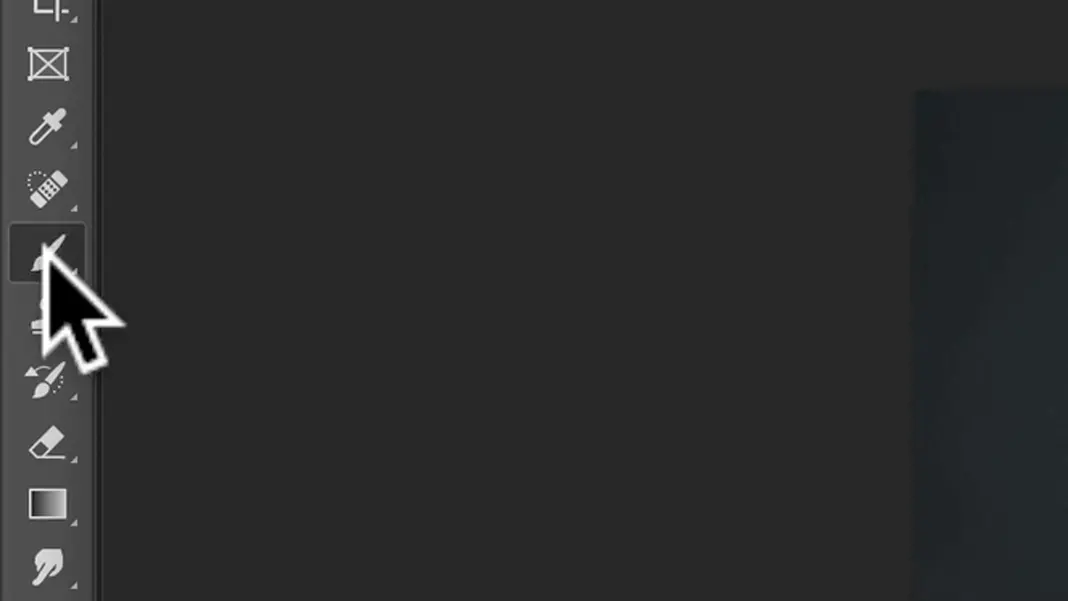
Then I’ll take the Brush tool.
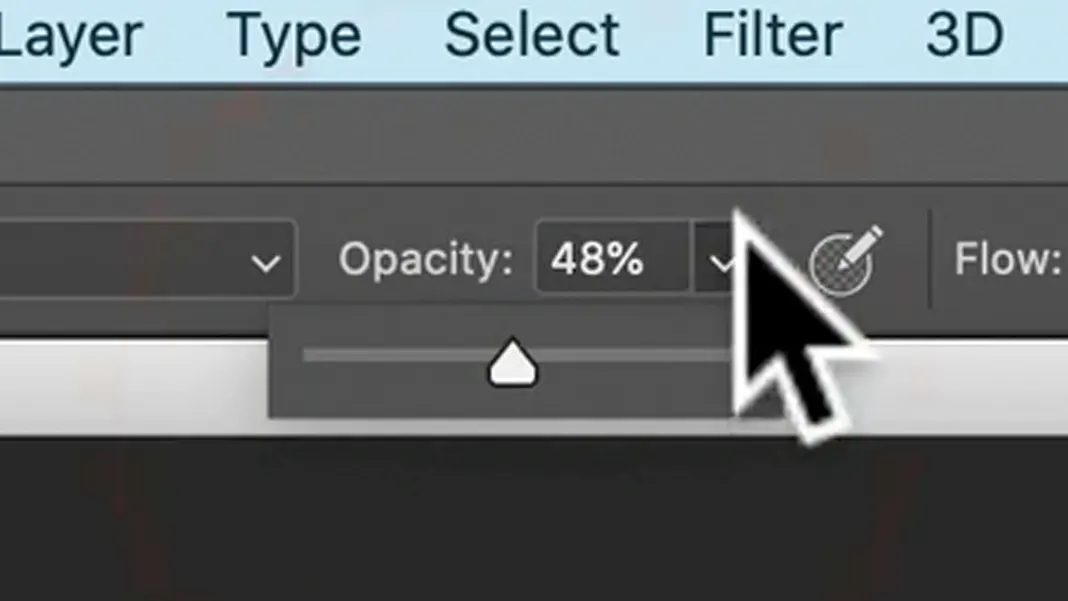
Once again, using Option-Control, make the brush much bigger and softer. Remember, size is left to right and hardness is up and down. So we’ll make the brush very soft and change the opacity to around 50%.
Since I filled my mask with black, everything is hidden, so make sure you have white set as the foreground color, and then we can go in and brush the blue highlights in over the subject’s shoulders.
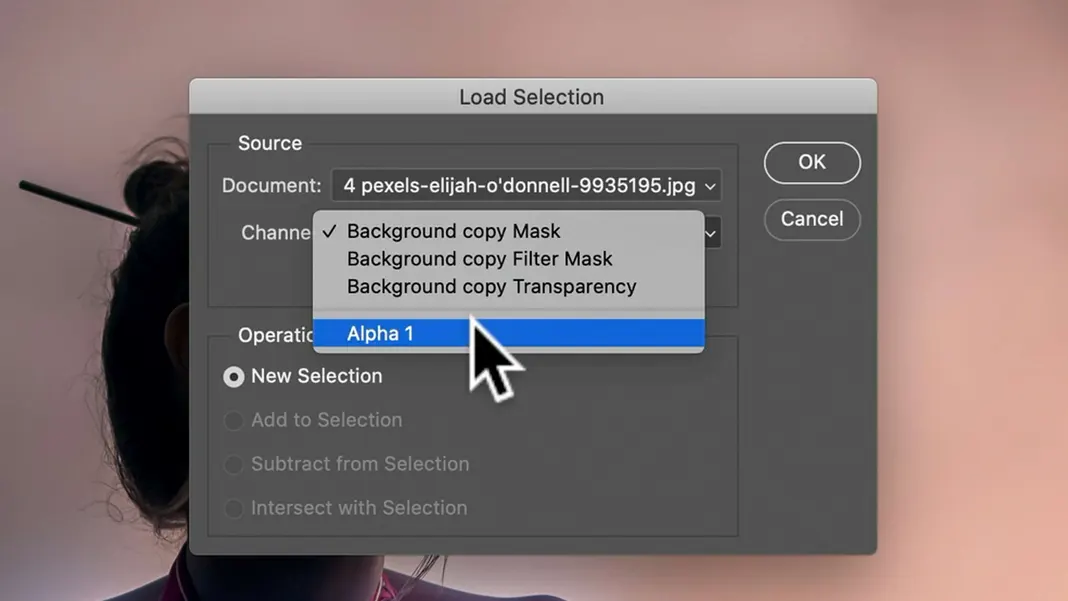
You may find that the blue lighting is being brushed in over the background as well, which we don’t want. To address this, I’ll load the selection of the subject we created earlier by going to Select > Load Selection.
Then I’ll select the Alpha 1 channel and hit OK.
Then finally we can invert that selection (Select > Inverse or Command-Shift-I), go back to the mask layer, and paint in the background with the foreground color set to black.
That will mask the blue fliter out of the background so that it’s really just being applied to her. With that done, we can deselect our selection. Note that if I selected the selection first and brushed it in I wouldn’t have had to do that in two steps, which we may come back to later.
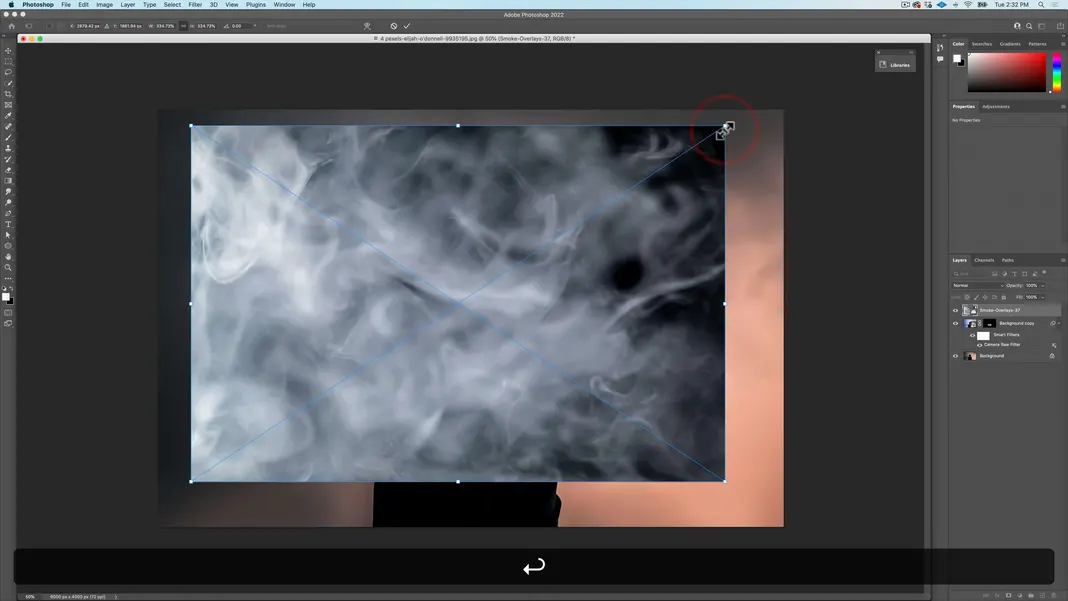
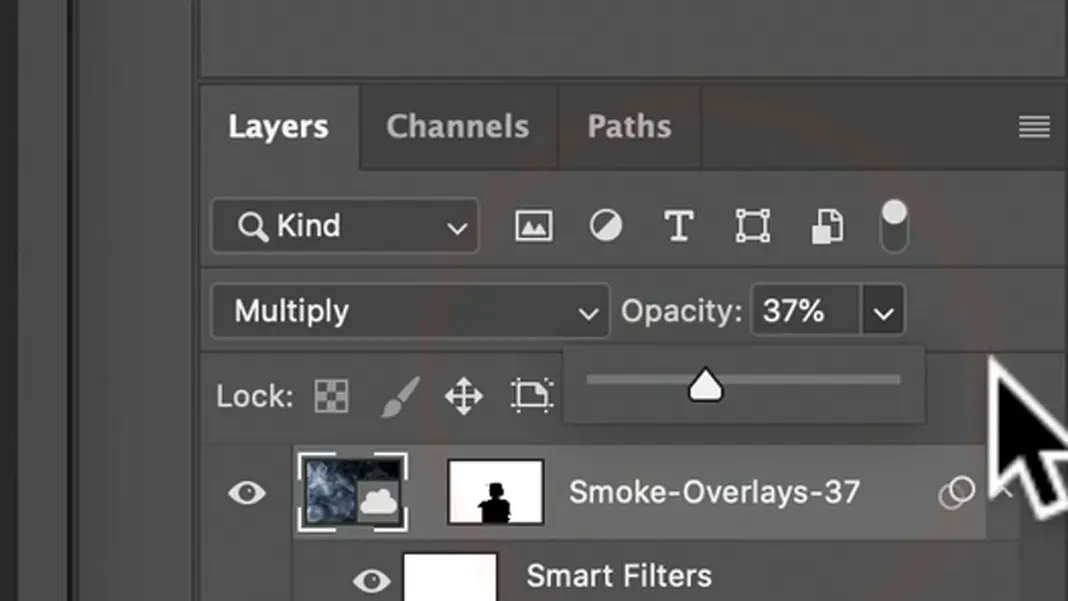
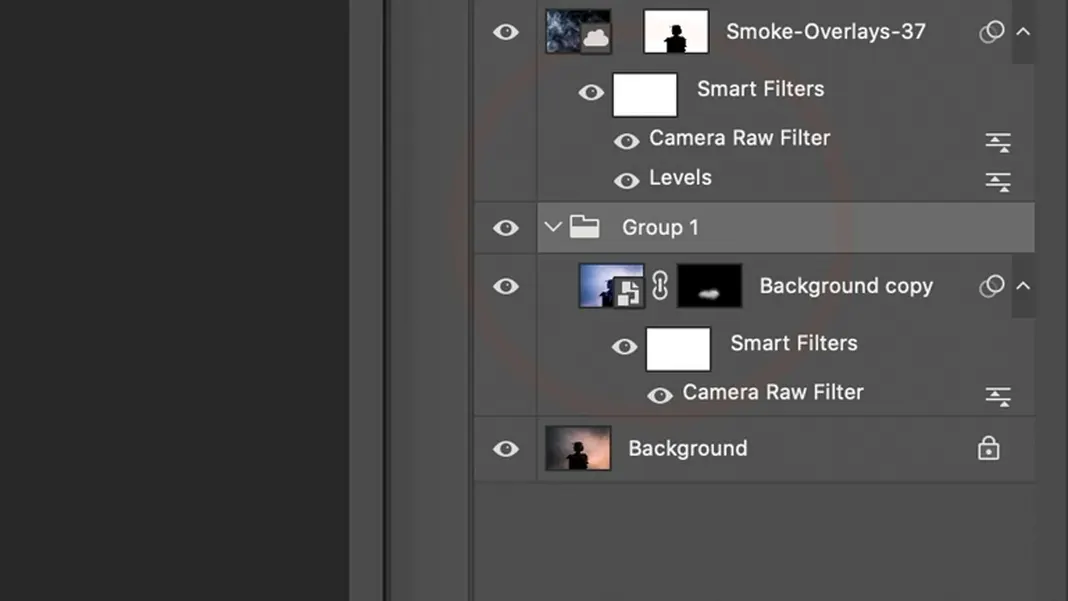
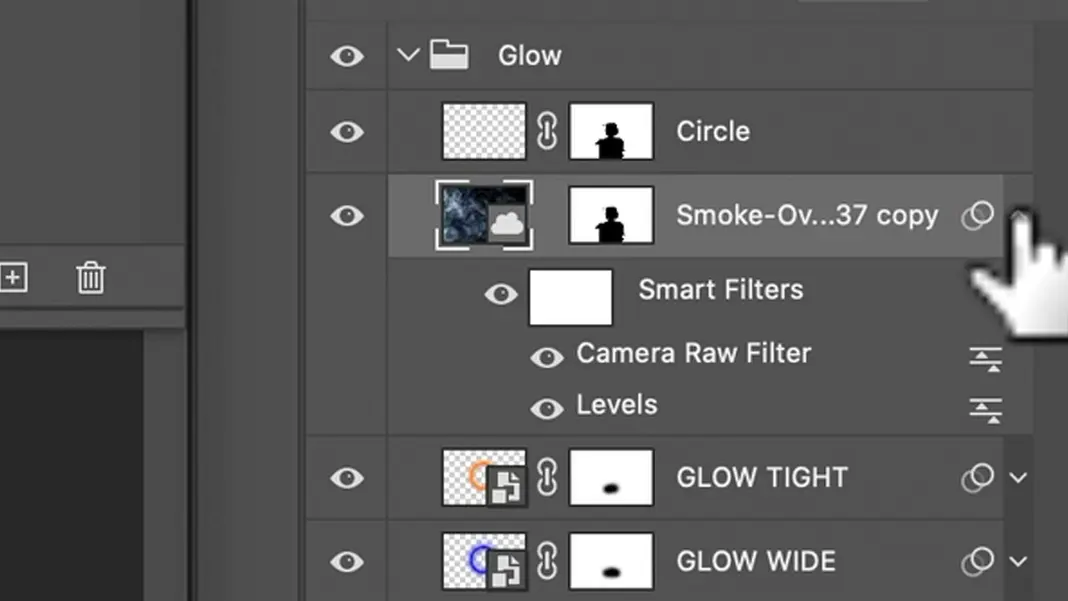
Now let’s go to our overlays in our Libraries, and we can drag and drop in the “Smoke-Overlays-37” and hit Return.
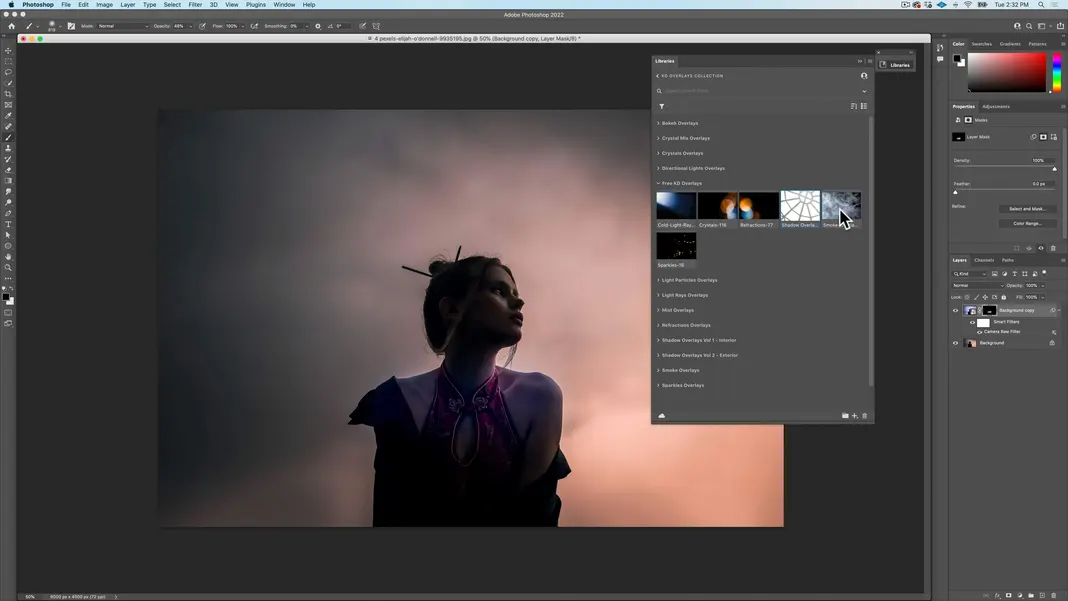
As you can see, it created a smart object of “Smoke-Overlays-37”.
Let’s go ahead and make this overlay a little bit bigger. We’ll switch to the Free Transform tool using Command-T or Edit > Free Transform and then make the overlay bigger, holding the Option key so it expands from the center.
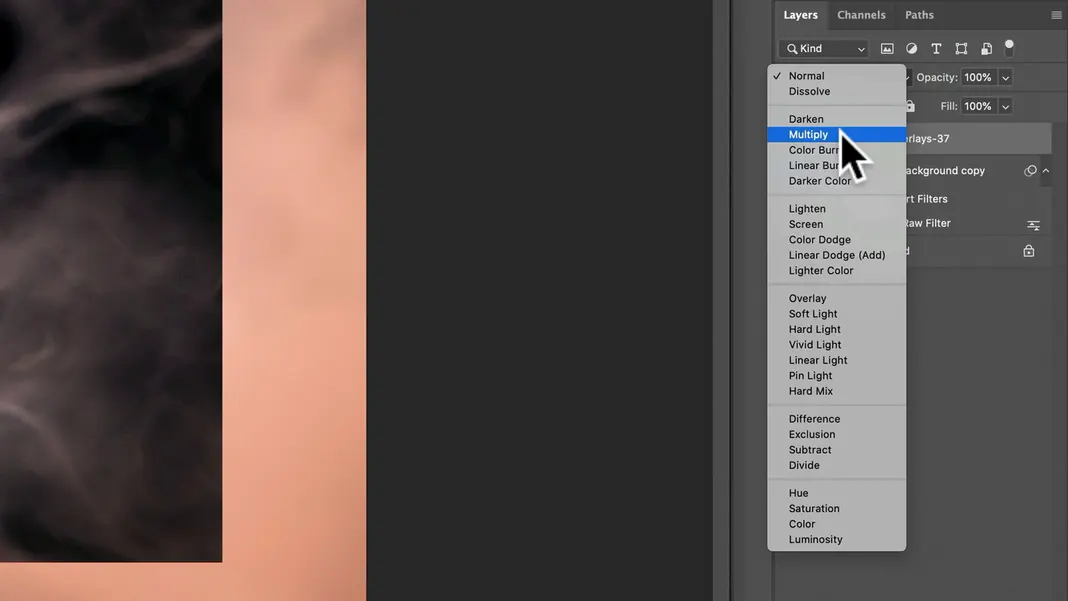
I’d like to see what I’m doing, so I’m going to put the smoke in the Multiply blending mode so that it’s just darkening.
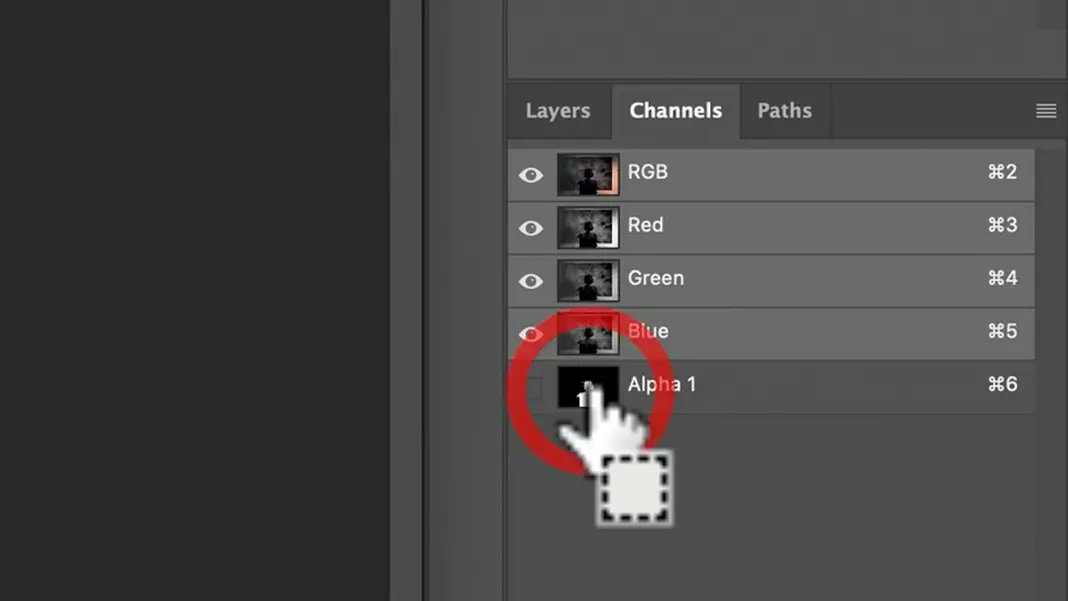
I want the smoke to be in the background and not in front of her, so I’m going to select our selection from earlier by holding Command and clicking the Alpha 1 channel as shown below, and then go back to the Layers pane.
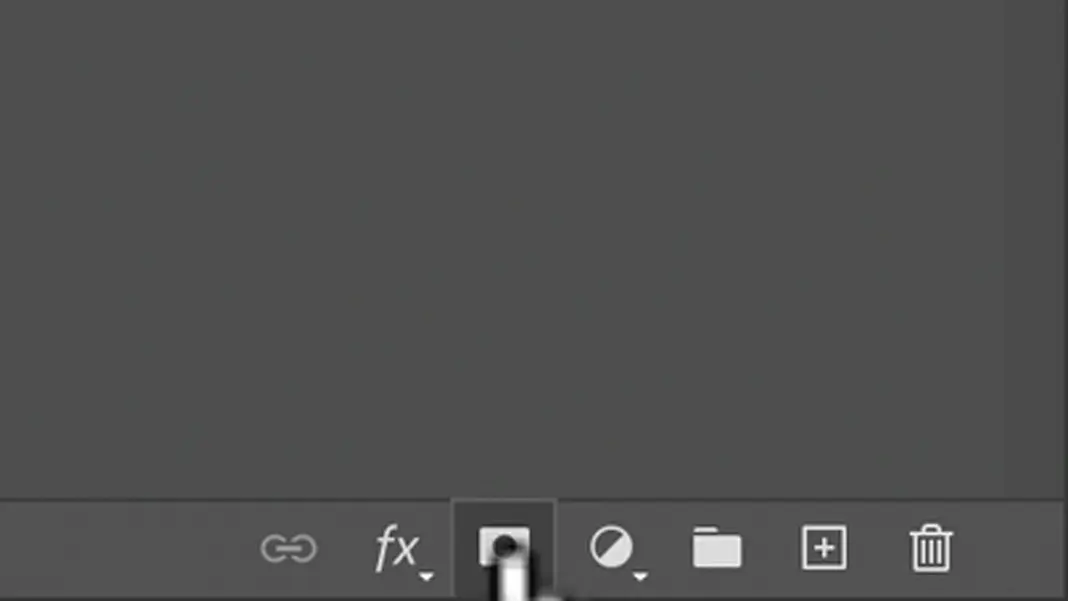
I’m going to inverse my selection (Select > Inverse or Command-Shift-I) and then click the mask button.
That is now masking the smoke overlay so that it is only being applied to the background. I’m going to unlink the overlay and the mask by clicking the chain icon next to the smoke overlay layer. This lets me manipulate the smoke independent from the mask. If they are both linked and I move the smoke, it’s going to move the mask as well. Now that I’ve unlinked them, I can move the smoke behind her.
So far, so good. Let’s go ahead and do another free transform and make the overlay bigger so that the boundaries extend past the edges of the artboard.
Now I want to show the smoke a bit better. To do this, we can go to Image > Adjustments > Levels (or Command-L) on the smart object.

Now I’ll darken the midtones considerably as shown below.
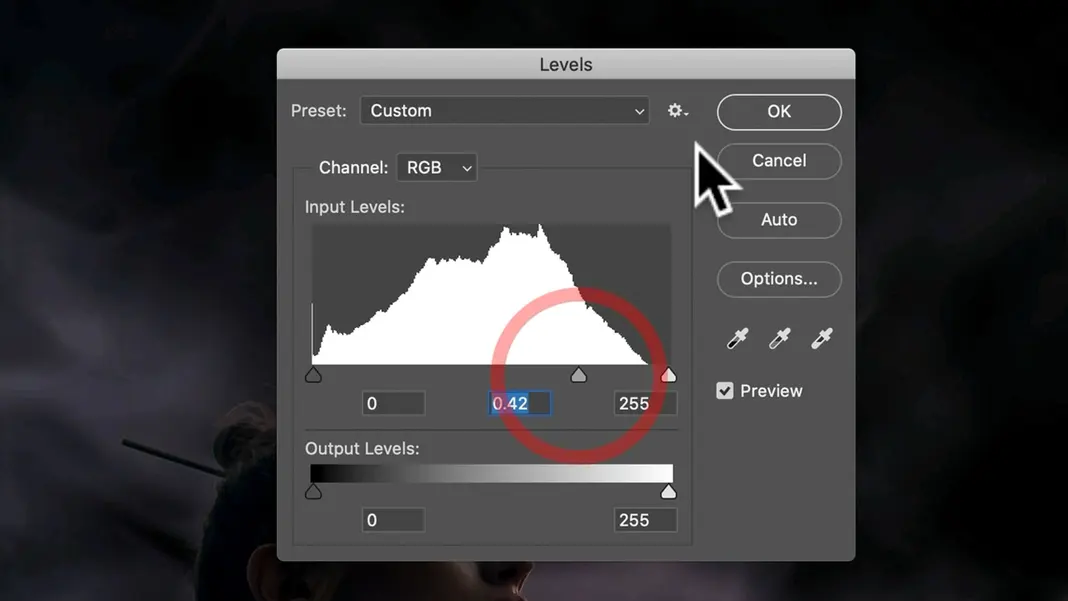
Since this is a smart object, I can simply double-click on the “Levels” adjustment layer and change it at any time if I need to, which is very convenient. It’s currently much too strong, so I’m going to lower the opacity to around 37%.
You can toggle the overlay layer on and off to see a before and after of the changes we’ve made so far. Remember, the Multiply blending mode means black is opaque and white is transparent, so the white smoke is becoming transparent and revealing the colors that are behind, while the shadow areas of the smoke are darkening the image.
We can go back into the Levels and make it even stronger if we want.

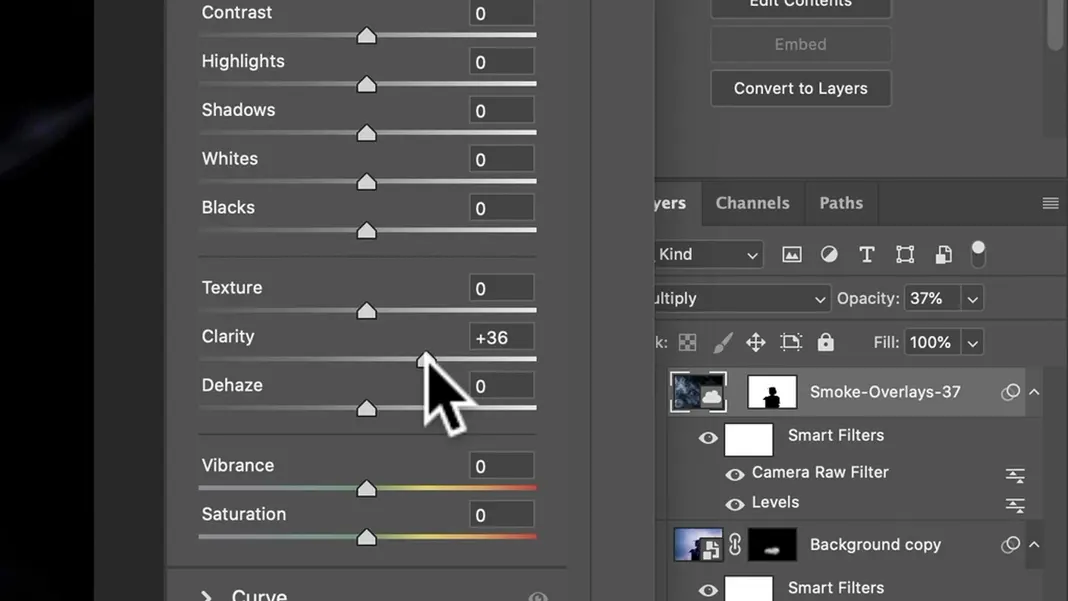
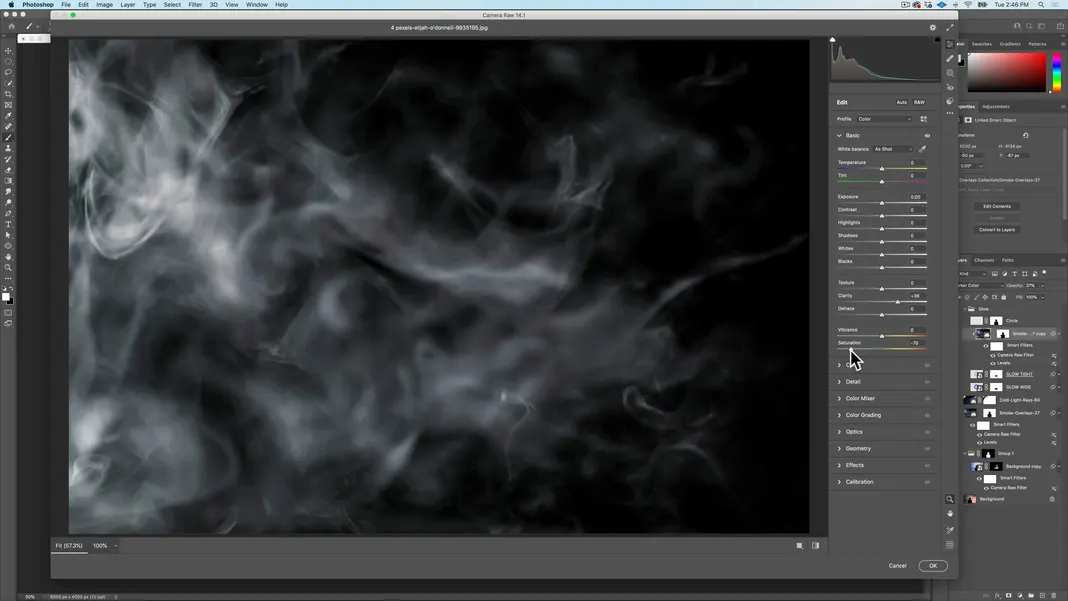
There are also other ways to accentuate the smoke if you want to do so. There’s one neat trick when using smoke and mist, which is that to accentuate it you add clarity. To do that, we’ll go into Filter > Camera Raw Filter (or press Command-Shift-A).
Here we can add clarity. Clarity is basically contrast in the midtones, so when we turn it up we get more of those wisps.
So that was the adding of the smoke.
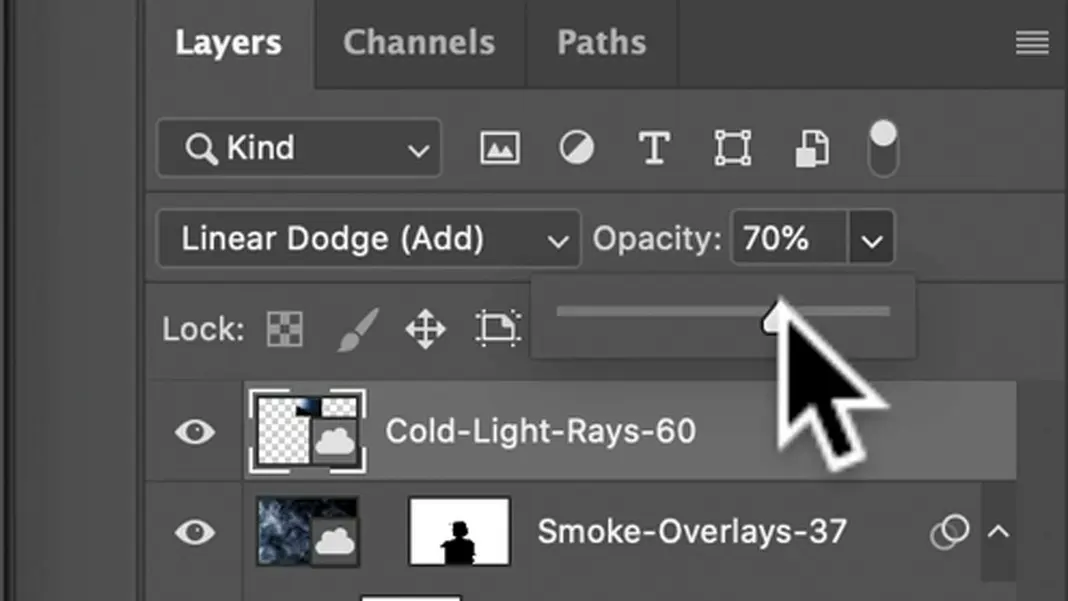
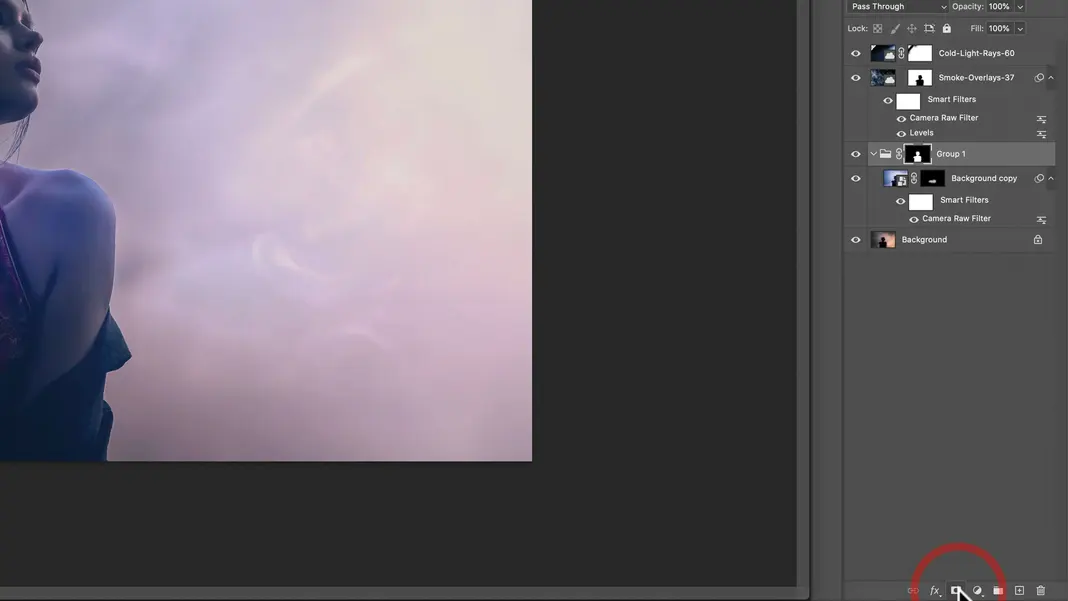
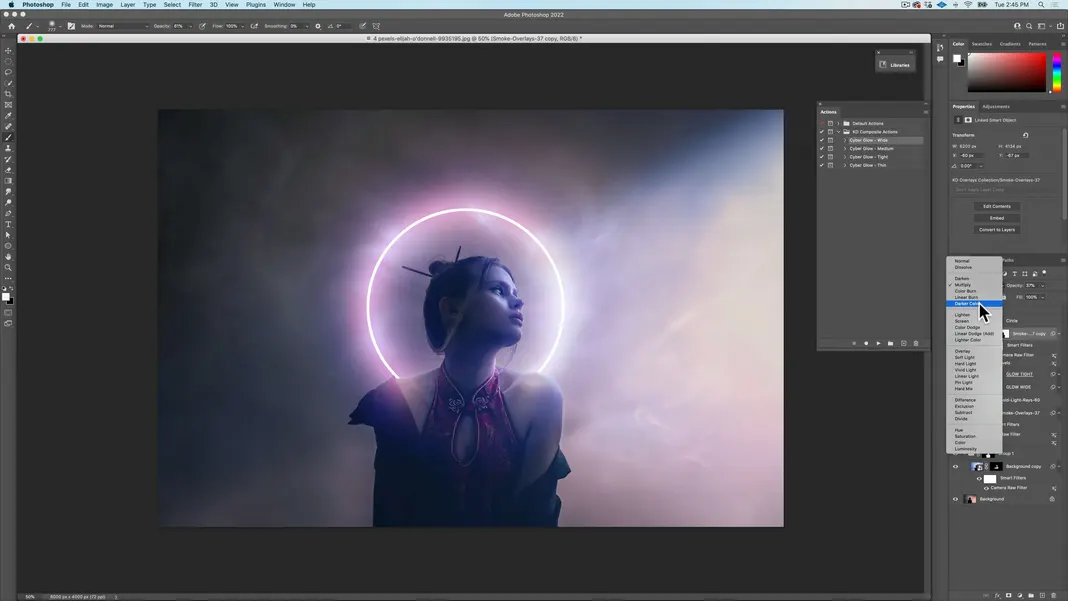
The blue light is a little off at this point, but the reason I have it blue is because I want to add the blue light overlay, so let’s go ahead and do that. Drag and drop in “Cold-Light-Rays-60” from the overlays library and hit Return.

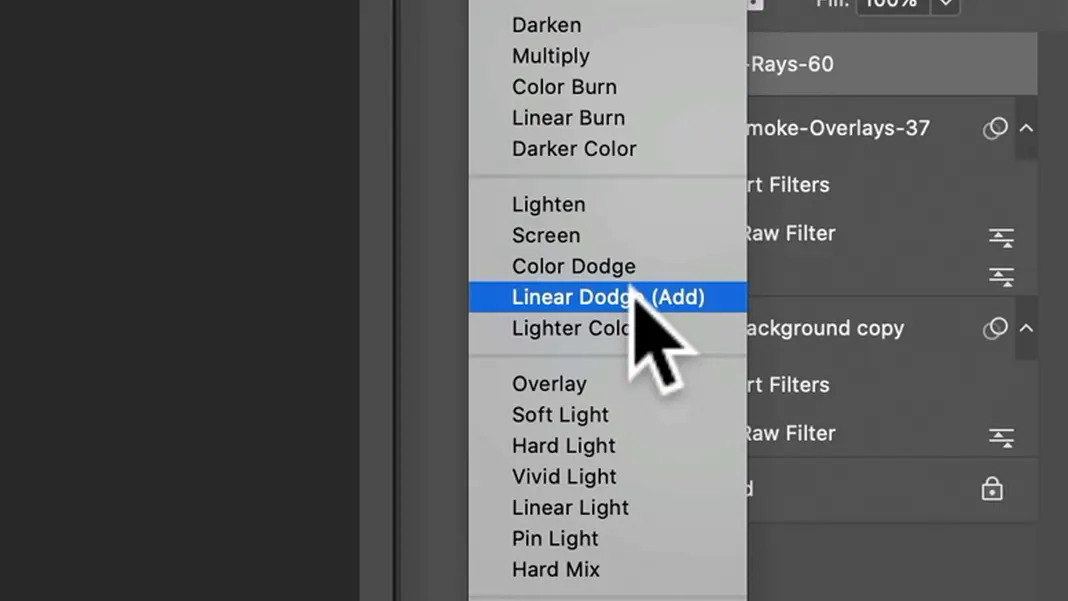
Change the blending mode to Linear Dodge.
We don’t want it to be too strong, so lower the opacity a bit.
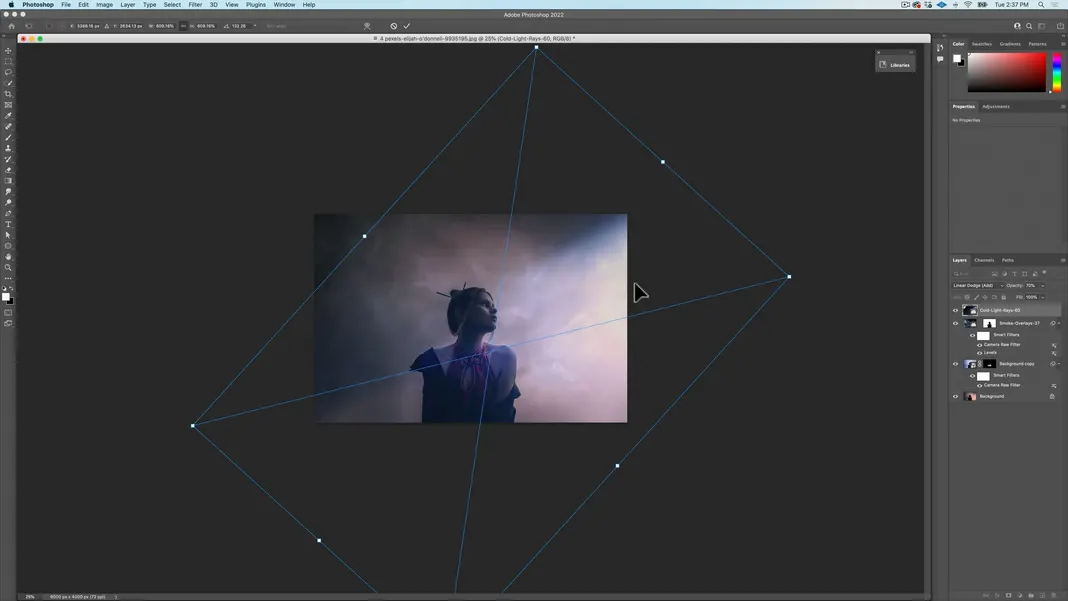
Now switch to the Free Transform tool. I want the light to come from the right side, so I’ll rotate the image so the light starts in the upper-right-hand corner and points to the lower left. Then I’ll make it bigger while holding the Option key so it expands from the center.
I’ll zoom out here as well, which I generally like to do to give myself more artboard because because my objects (such as this overlay) often go out of the bounds of my image and become harder to control. So Command-Option-Minus (-) makes the image smaller and your artboard bigger, which can be quite useful.
The light in the corner off of the image is a little too blown out, so I’ll position it as shown below so only the soft and bright light is visible.
I’ll probably have a hard line where there’s an edge of the overlay on the image, so I’ll have to fix that. For now, I’ll hit Return.
At this point, you may see the hard line where the edge of the overlay is. You may have to zoom in to see it clearly. To deal with that, I’m going to create a mask here, switch to the Brush tool, and make sure the brush is at 100% opacity.
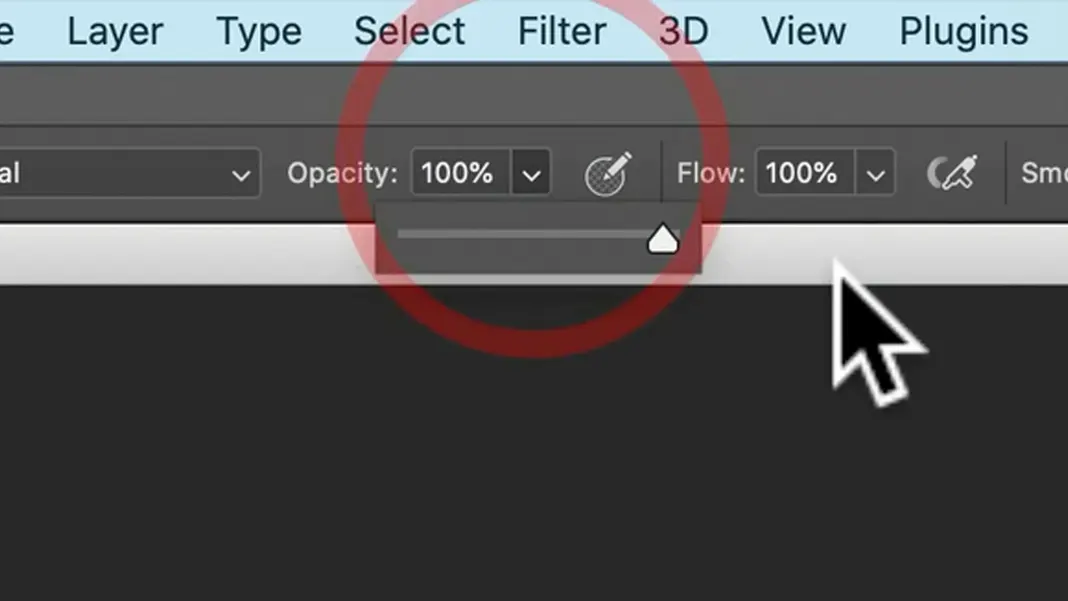
Remember, black conceals, so I’ll make sure that the foreground color is set to black and then just brush that edge out. I could have done a gradient or a bigger, softer brush to make it more subtle if I wanted.
I probably want to light up her face a little bit. If you remember the blue light camera raw filter adjustment I did on her earlier, I want to add some more of the light on her. But I already have a mask of where it’s showing or not, and I want it to only apply to her. How do I have two masks on a single layer?
So it’s a neat little trick: you create a group, you put your layer in the group, and then you create a mask in that group.
I’ll actually undo that (Command-Z because I want to load the selection that we made earlier, which you can do via Select > Load Selection > Alpha 1, or by holding Command and clicking on the Alpha 1 channel.
Once that’s selected, we can go back to the group we created and click on the Mask button.
So now, even if I brush outside of that area, it’s a mask within a mask, which is a neat little trick to keep your changes within the desired area.
I’ll set the foreground color to white now, bring my opacity down to around 25%, and make my brush a little smaller by holding Option-Control. Now I can brush over her face to add some light. I’m trying to simulate the effects of the light from the light overlay we added, so I don’t want to do too much. If I do it on the opposite side of the light instead of matching the light, it’s going to feel like the light’s wrong.
This is looking pretty good already. We can add more drama and coloring, but for now I want to add a glow, and this is using my glow actions.
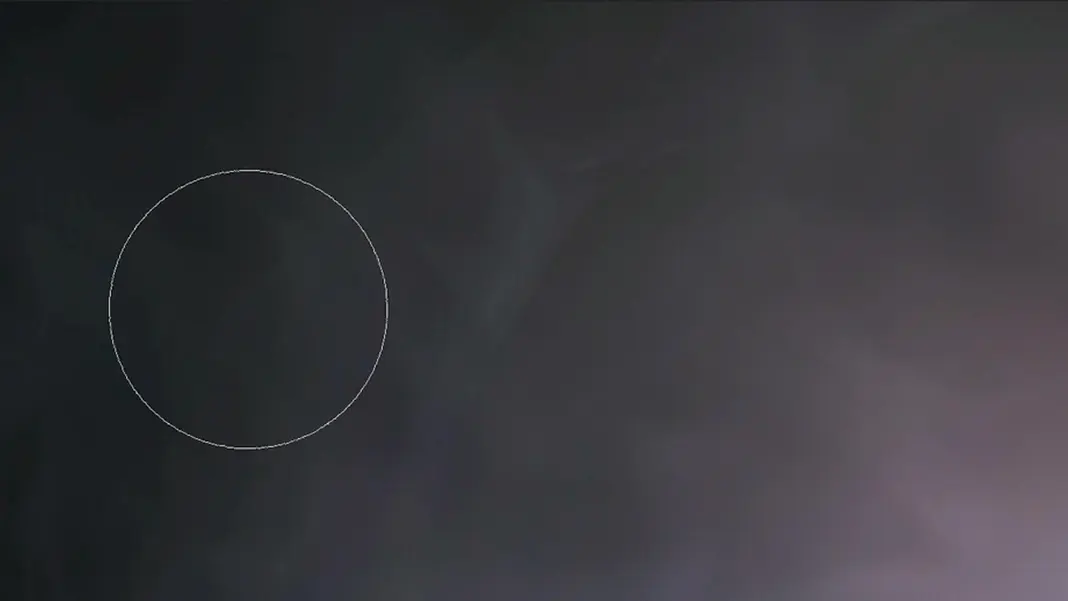
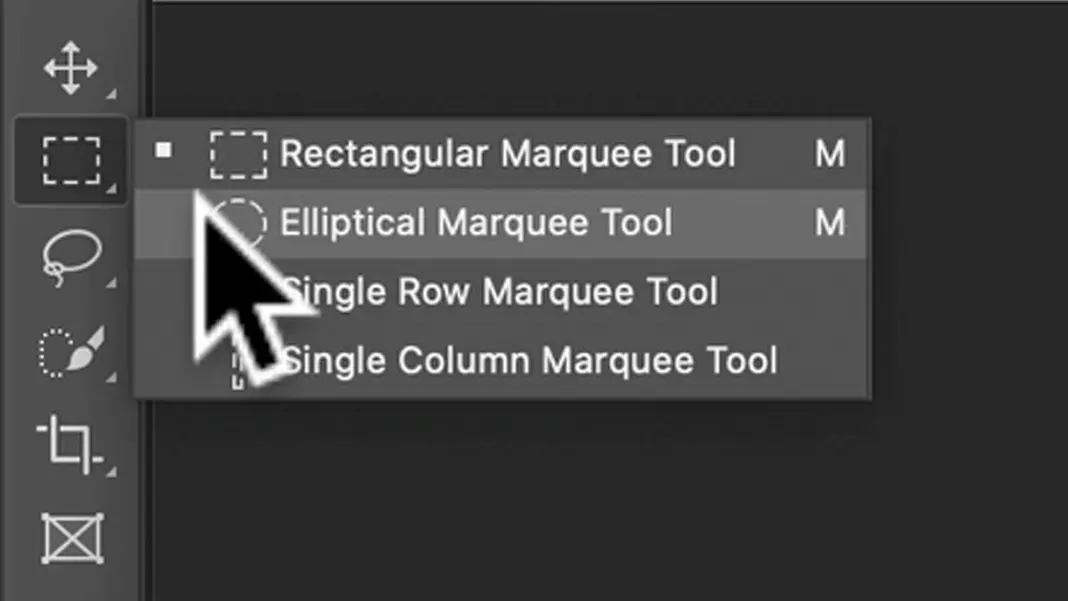
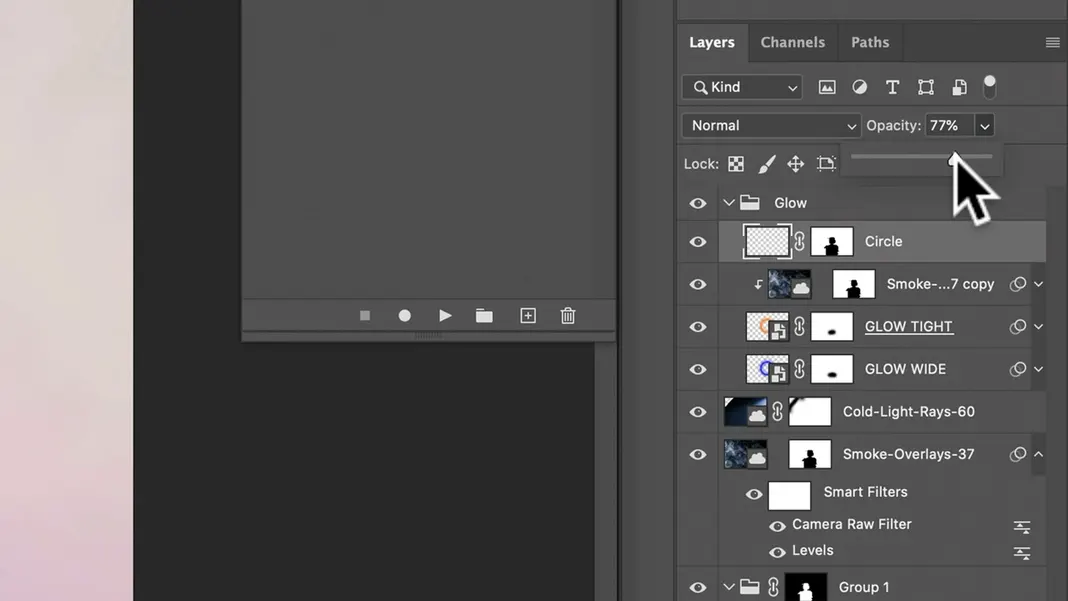
To start that, let’s go to the Cold-Light-Rays-60 layer. I’m going to create a new group here and call it “Glow”. Now switch to the Elliptical Marquee tool.
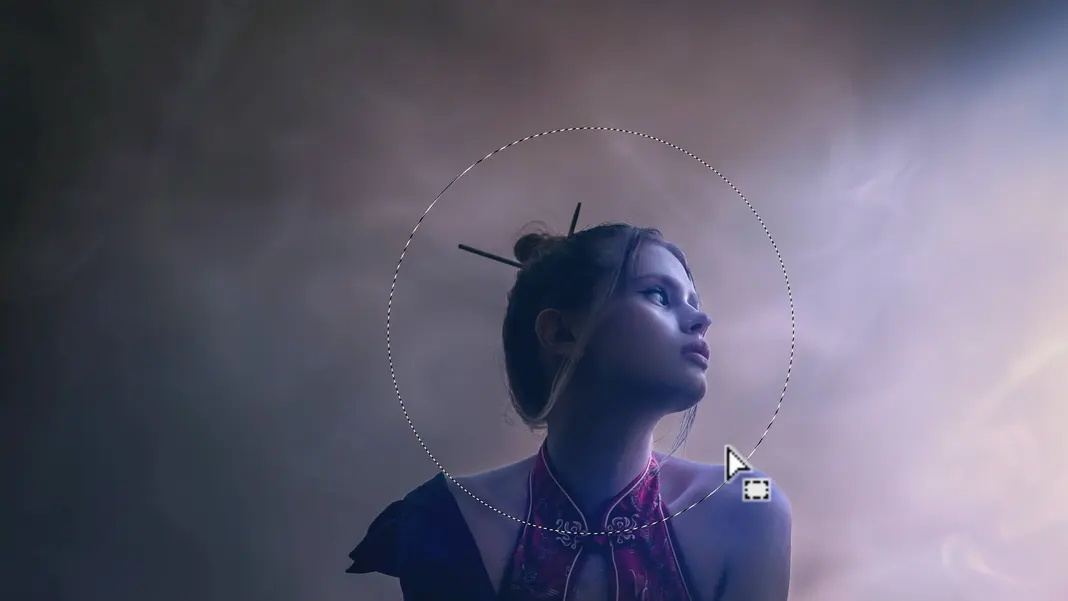
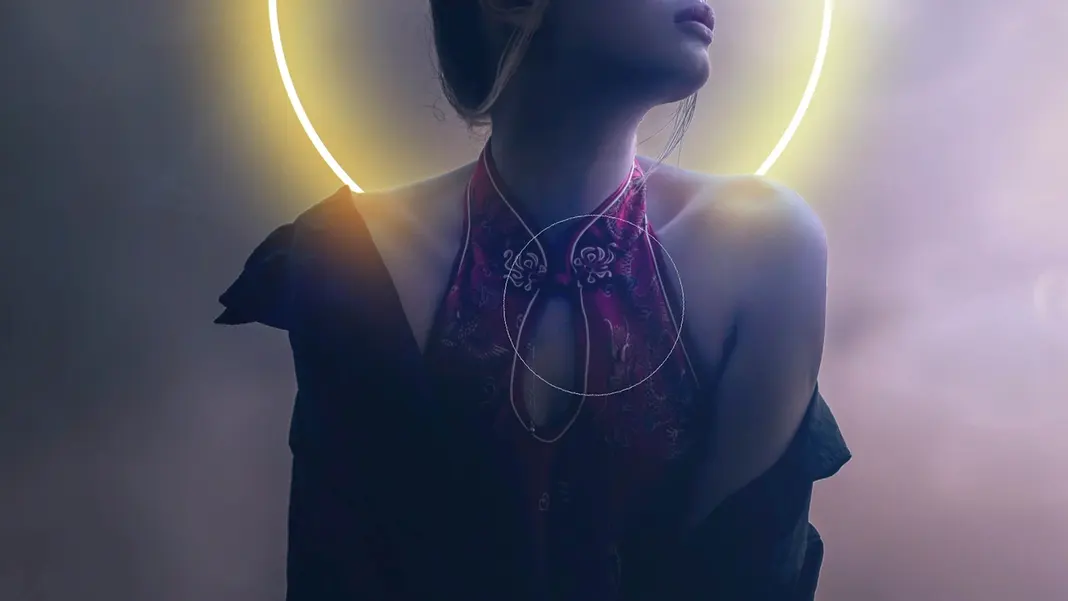
Let’s create a circle. Hold down the Alt key to grow from center, and the Shift key to constrain proportion so it’s a perfect circle. And then I’ll move it to follow the shape of her shoulder blades a little bit.
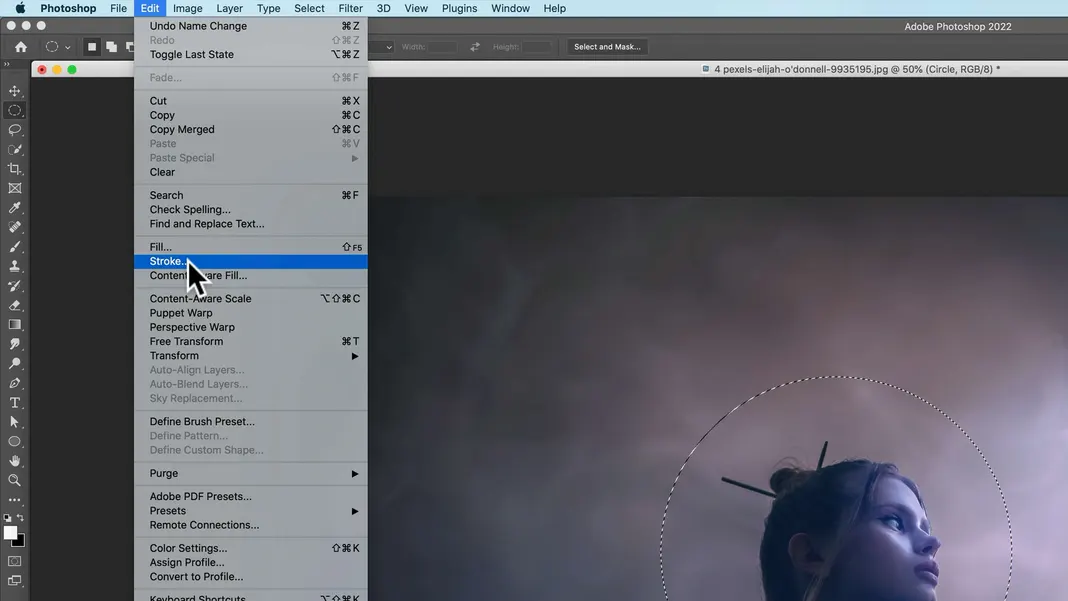
I’ll create a new layer and call it “Circle”. Make sure the foreground color is white and then go to Edit > Stroke.
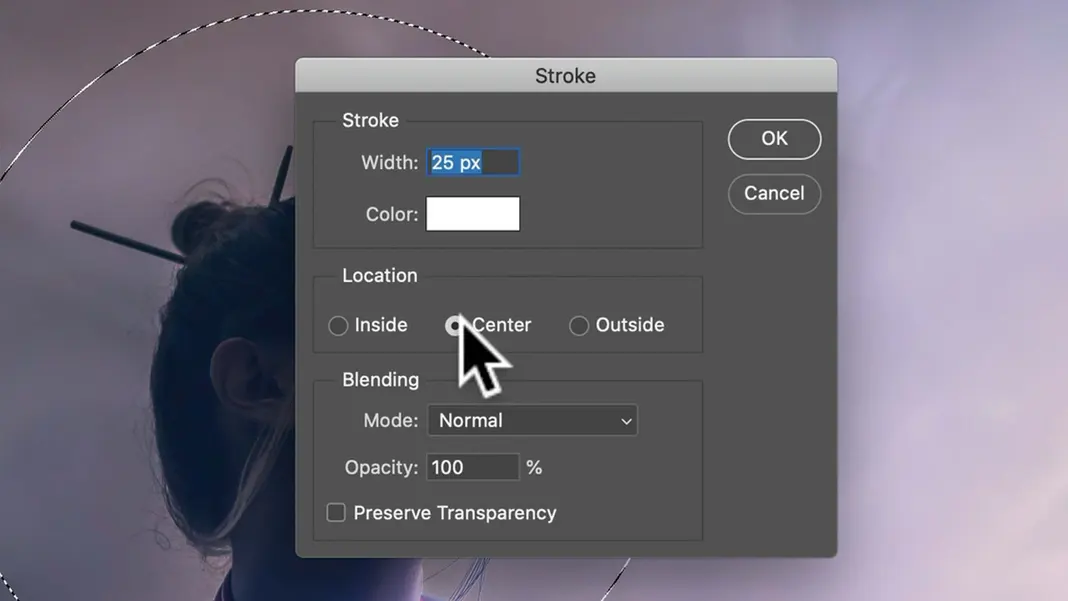
Add a 25 pixel white stroke on the center and hit OK.
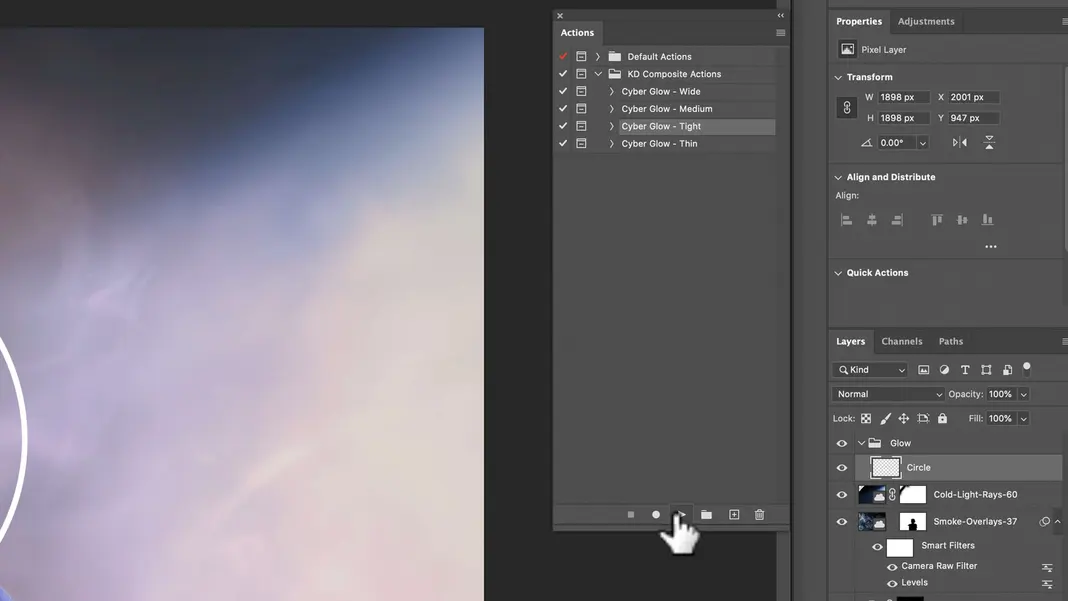
Now we can deselect our selection. Now, if you’ve gotten my glow actions, then you just double-click on the file and it’ll show up in your actions. So let’s go to Window > Actions.
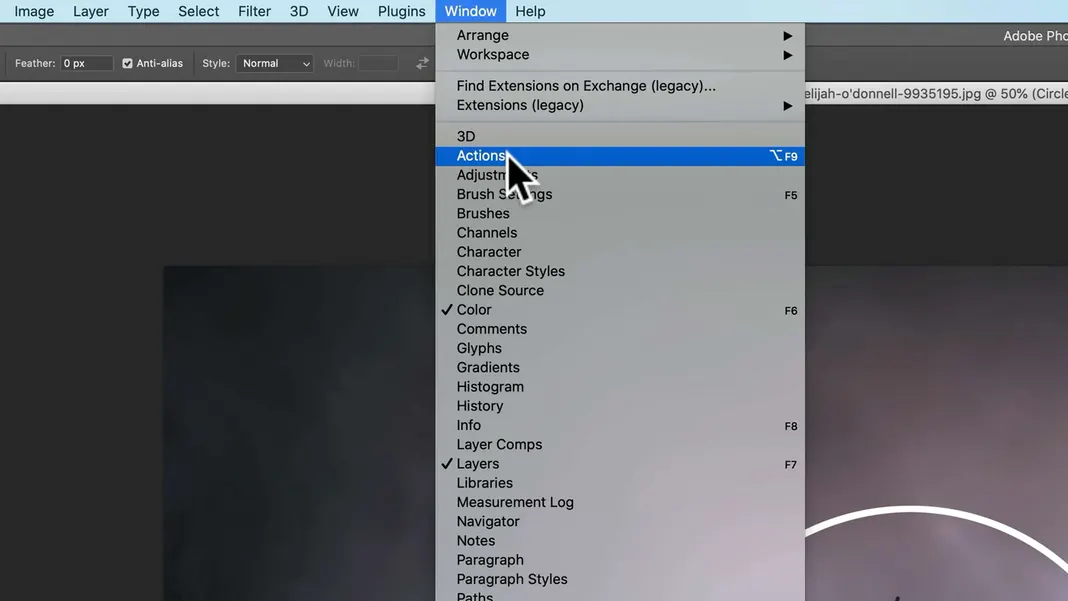
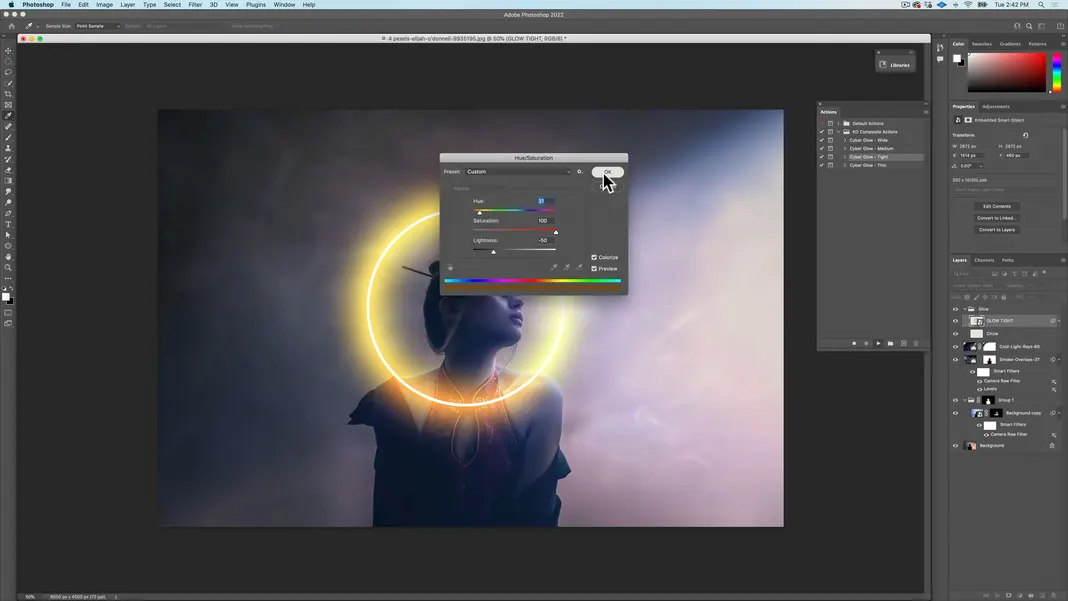
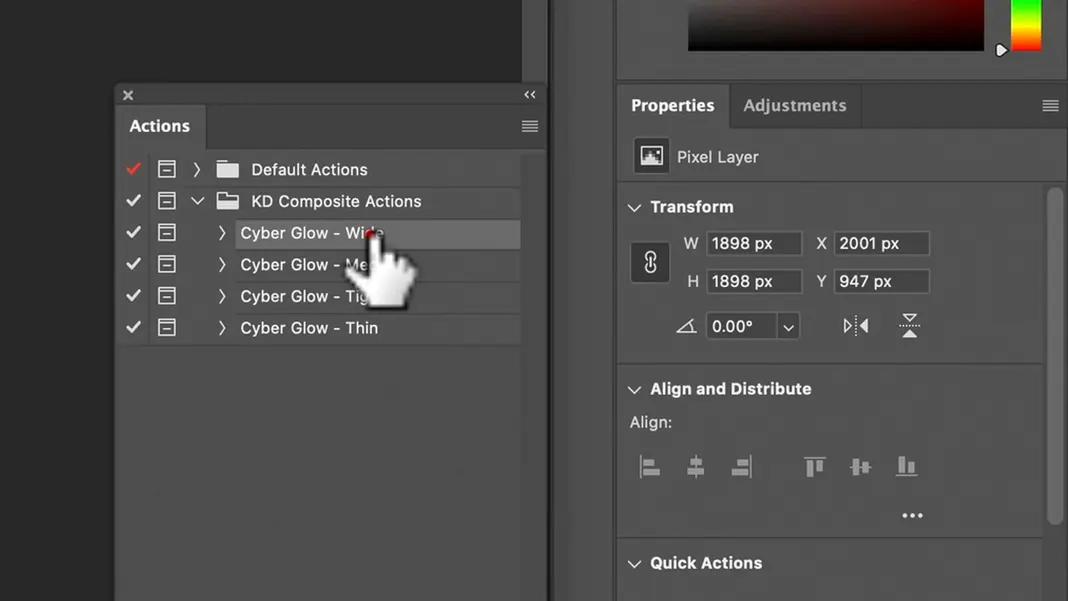
You should now see the glows. The first one I want to do is a tight glow. So, with your layer selected of whatever you want to glow, click on tight glow and hit play.
It’ll then prompt you to select the color, which you can also adjust later. In this case, I’d like a warm, orangey color, and that looks decent.
Now I want to do a second glow so that we have multiple colors in here. So I’m going to go here. And in this case I will use a wide glow.
Again, you’ll be prompted to select a hue, and I’m going to pick a blue.
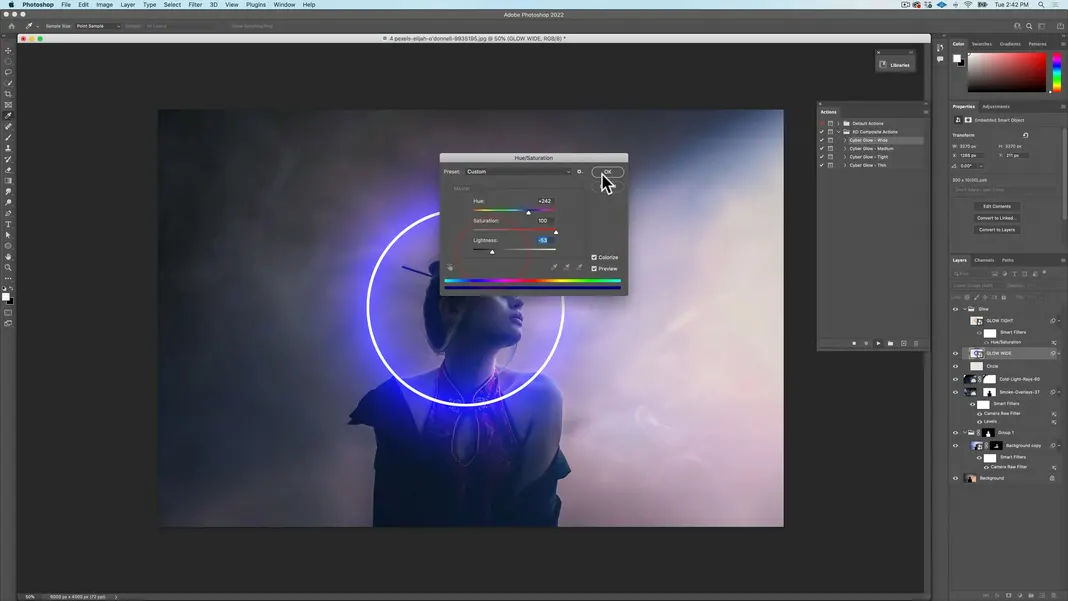
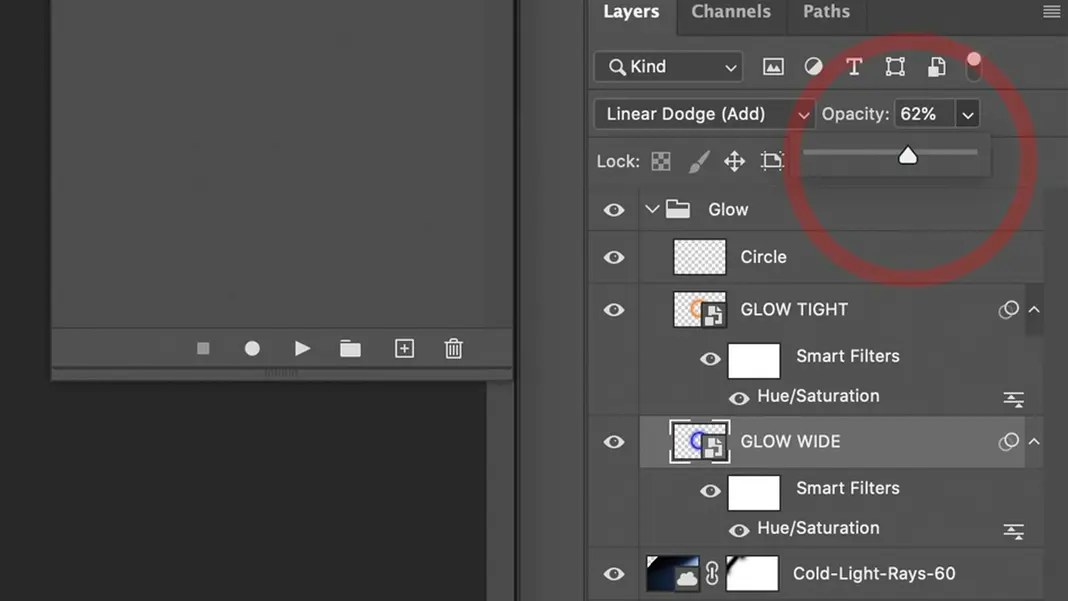
So now I have my two glows. Let’s put the circle layer at the top so it’s in front. Then the tight orange glow is next followed by the wide blue glow.
It’s currently too strong so we’re going to adjust it. Let’s lower the opacity of the warmer glow.
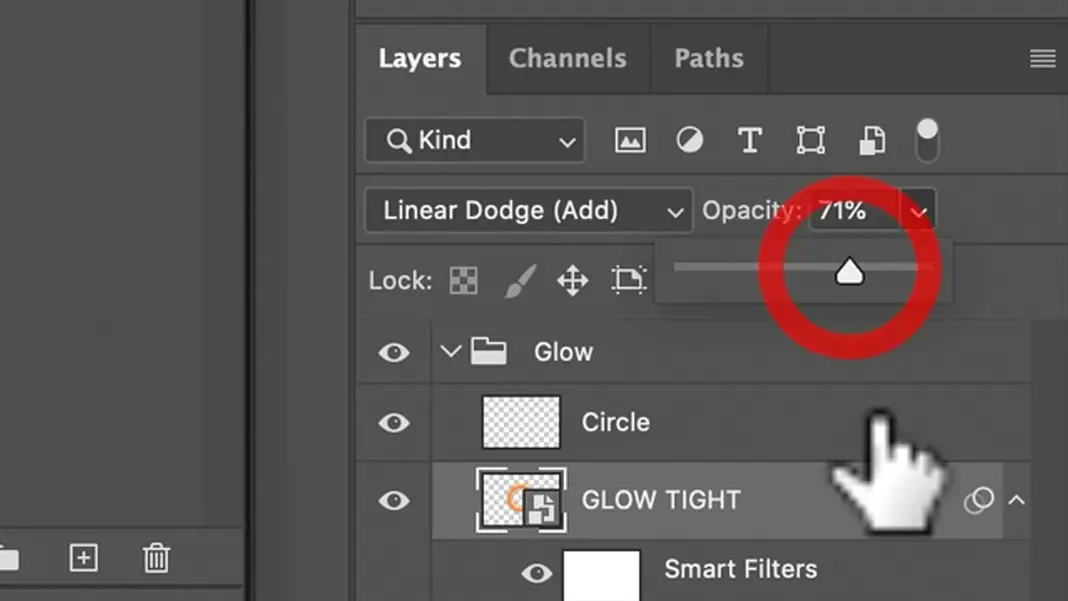
Now let’s lower the opacity of the blue glow. This gives us an effect of an orange glow in the middle that turns blue as it goes out, which is the effect I wanted to create.
We can turn up the opacity of the orange glow just a bit to make it a little stronger.
Now we can add effects to the glow. The first and most obvious one is that the glow should be mostly behind her, not on top of her. So let’s go ahead and load our selection by holding the Command key and clicking the Alpha 1 channel again.
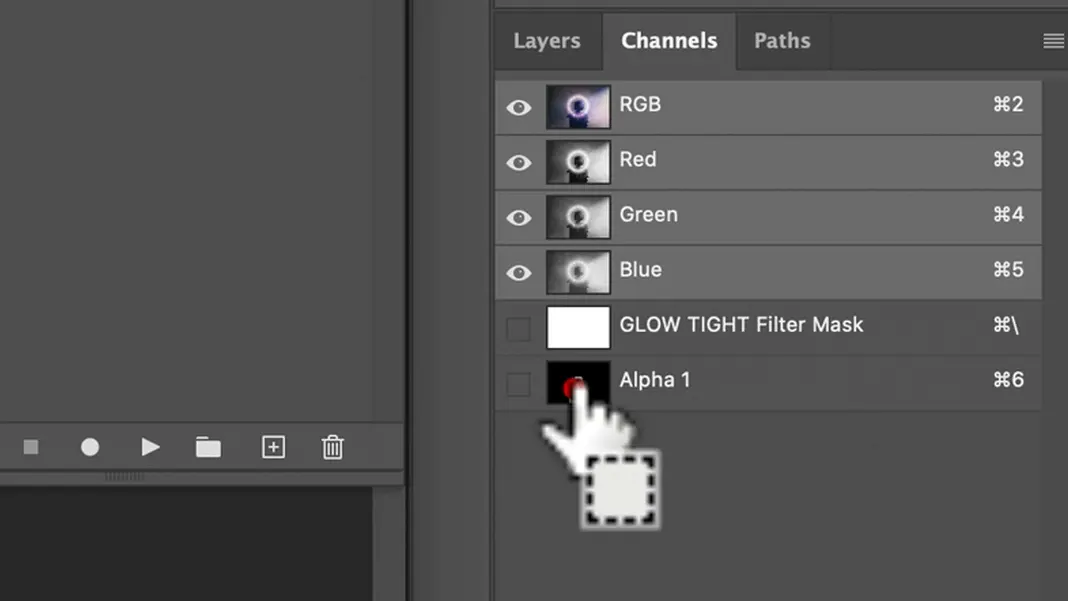
Then we’ll invert the selection (Select > Inverse or Command-Shift-I), which will make it so we are selecting the background. Finally, I’m going to select the circle layer and create a mask.
So now the circle is not in front of her. The reason I didn’t do it for all three (the circle and the two glow effects) is because I want some of the glow to come in front of her, but not all. So the glows I’m going to do manually by selecting each one and then creating a mask for it.
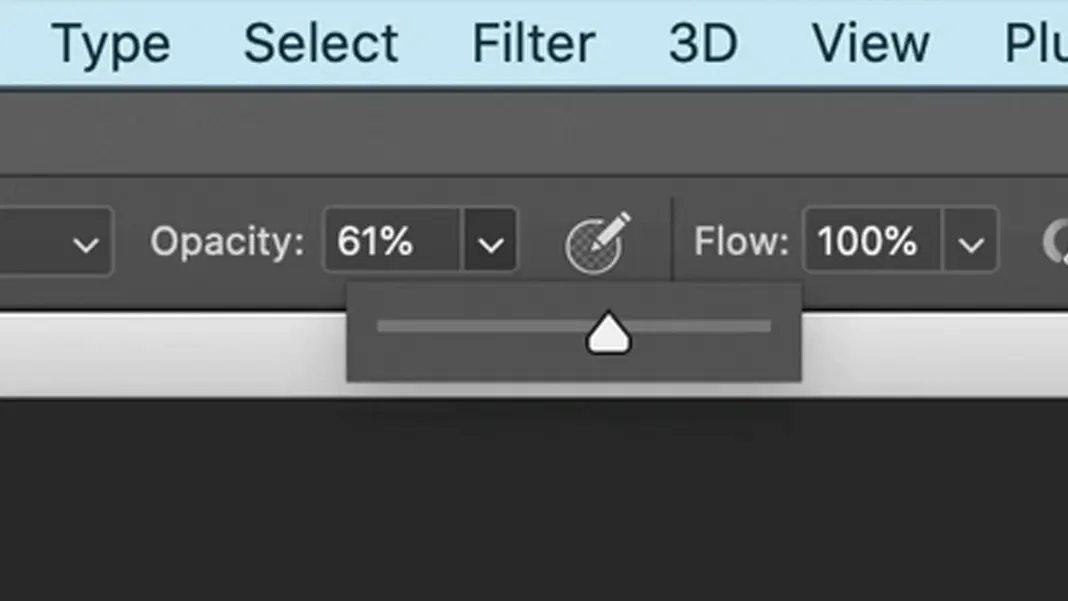
I’ll start by hiding the blue glow to just show the orange one. I’ll switch to the brush tool, make sure the foreground color is black since black conceals, and set the opacity to 61%.
Now I can just brush some of that orange glow out. I want some of it to be in front, but not too much.
We’ll do the same thing on the blue glow.
We can also play around with the smoke. Duplicate the smoke layer by dragging it down to the new layer button, and then let’s bring that on top of the orange glow.
And then by holding down the option key, hovering between the layers, and clicking, you create what’s called a clipping mask so the smoke only goes on top of the orange glow layer.
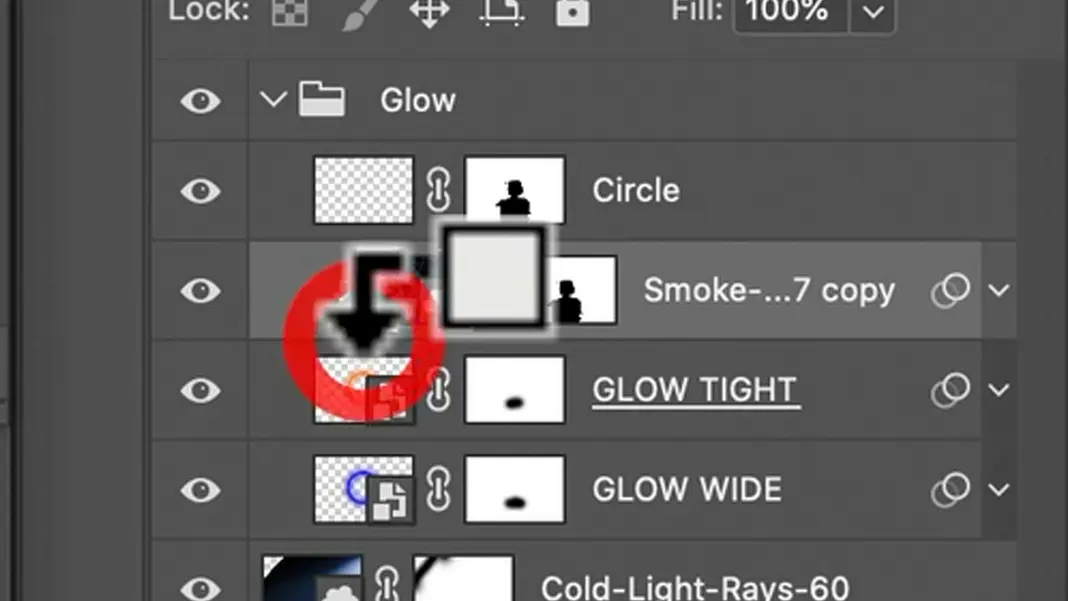
Right now, the glow is probably a little too bright and it’s in the Multiply blending mode. Let’s try a different blending mode like Darker Color. When we switch to this blending mode, you can see that it added some of that smoke into the glow, which is nice.
I think the Darker Color mode is the best we’re going to get. If the color is too strong, we can go back to our Camera Raw Filter on the smoke and turn the saturation down.
We can also turn the temperature a little bluer and see how that affects it.
It’s not bad, but it is a little too strong, in my opinion. We can raise the opacity to fix this, since in the Darker Color blending mode the higher the opacity the more it’ll darken the colors.
The glow does also look a little too uniform, so we can adjust it. First we can lower the opacity on the circle layer.
Then let’s create a new layer above the Circle layer. We can set our brush to 61% opacity, set our foreground color to white, and brush in some of the glow with manual strokes.
While this method does work, the effect is coming out too strong in my opinion. I think there’s a better way to do this, so instead let’s duplicate the tight glow layer.
If this broke the clipping mask, you can bring the smoke layer above the bottom tight glow layer, hold the Option key, and click between the layers to create that clipping mask again.
I want the new tight glow layer to be on top.
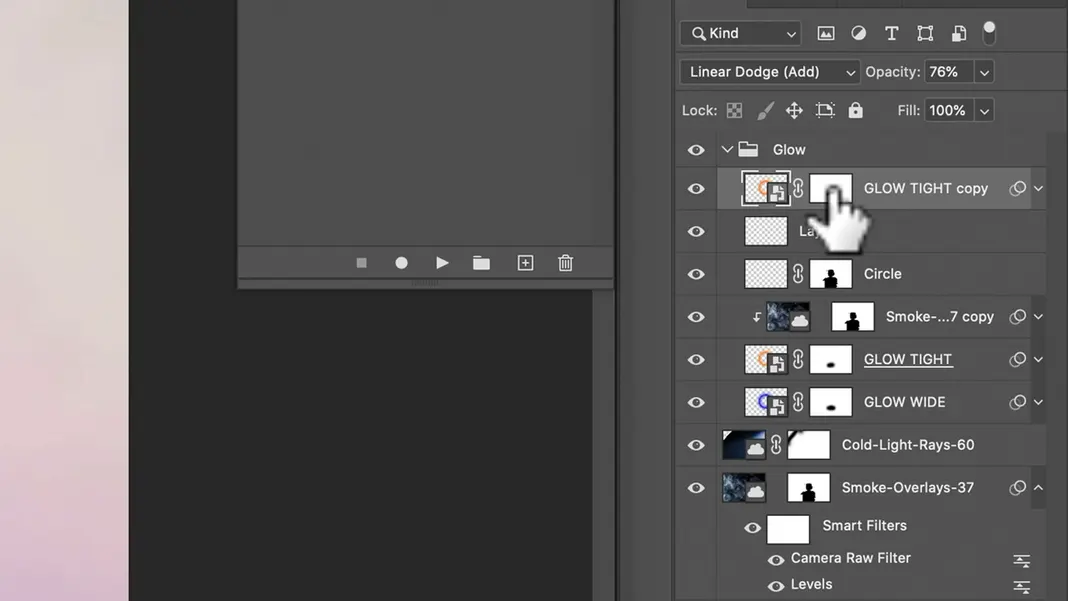
Now, I’ll hide the entire top orange glow layer by filling the mask with black. You can do this by selecting the mask, making sure black is the foreground color, going to Edit > Fill, and hit OK with Foreground Color selected.
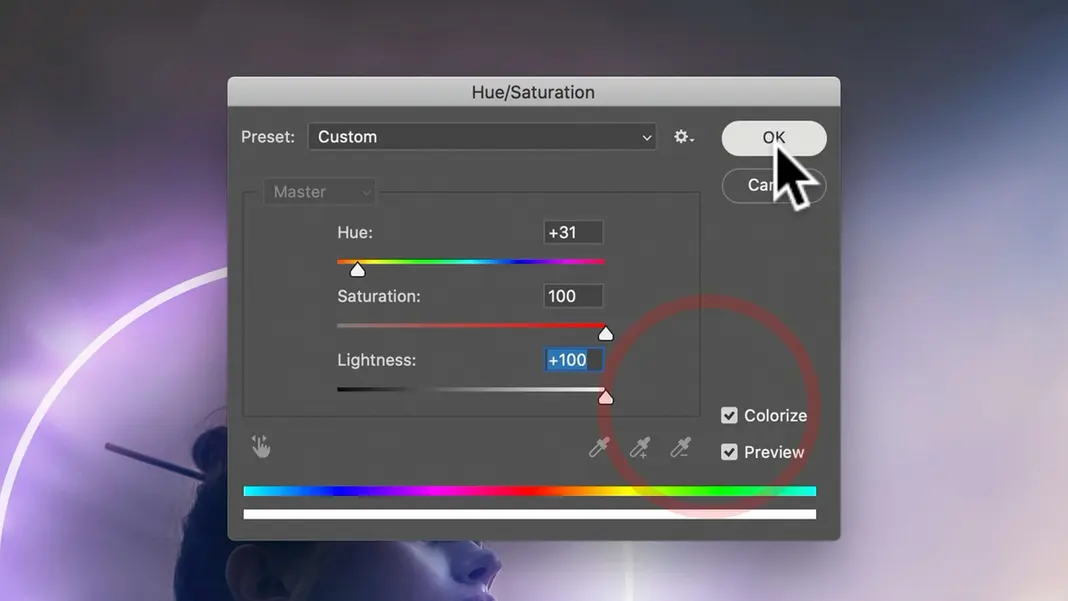
And I want to change the hue/saturation to just the pure whites. You can open these settings by expanding the top tight glow layer and double-clicking the hue/saturation smart filter.
With the hue/saturation settings open, set Lightness to +100 and click OK.
You can hide the tight glow layer with the black mask to see how strong that effect is. I’ll leave it enabled.
And then by taking the Brush tool with a white brush at an opacity around 50%, I’m going to lighten some of the right side of the glow area.
This process is basically revealing some of that extra glow we added. I wanted some extra glow on this right side because it’s the source of the light and because I didn’t want the glow to be too uniform. We can also turn the opacity on this layer up to almost 100%.
That’s pretty cool. I do feel like her face could be lit up a little more. So we can select that Background copy layer and paint in some of the mask again to lighten her face. It’s not looking bad.
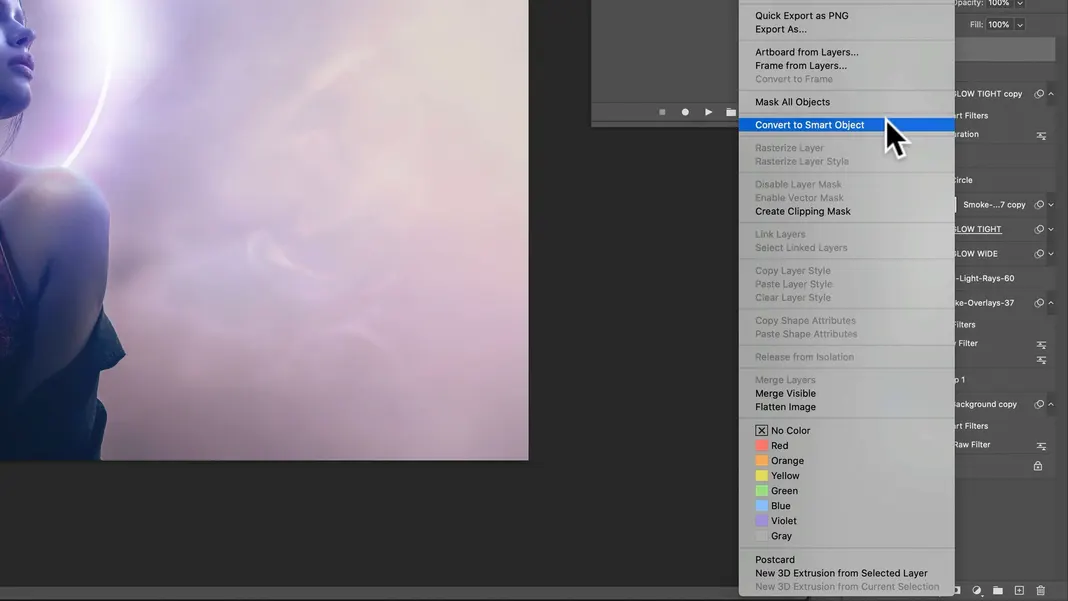
All right, I do want to do some overall corrections on this, so let’s go to the very top layer and type Command-Shift-Option-E. What that does is create a new layer of everything that’s here. If I want to affect everything at once, this is the easiest way. Right click that new layer and Convert to Smart Object.
And then let’s open up Filter > Camera Raw Filter.
Here we’ll be able to do some vignetting. We can play with the colors here a tad and see what we can get.
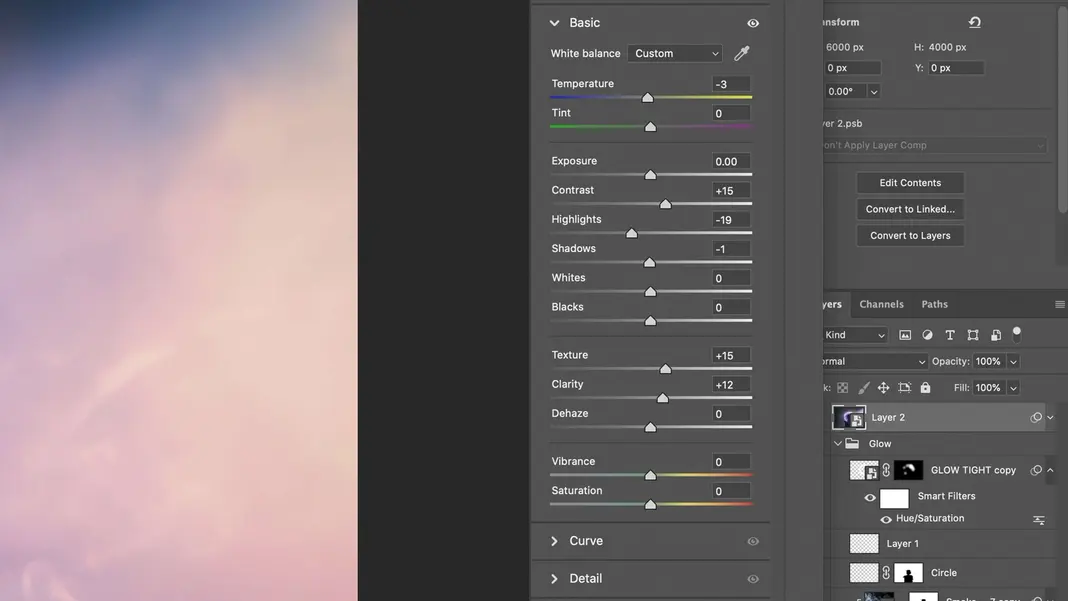
I’ll make the temperature a bit bluer, increase the contrast and lower the highlights, and raise the shadows just a bit.
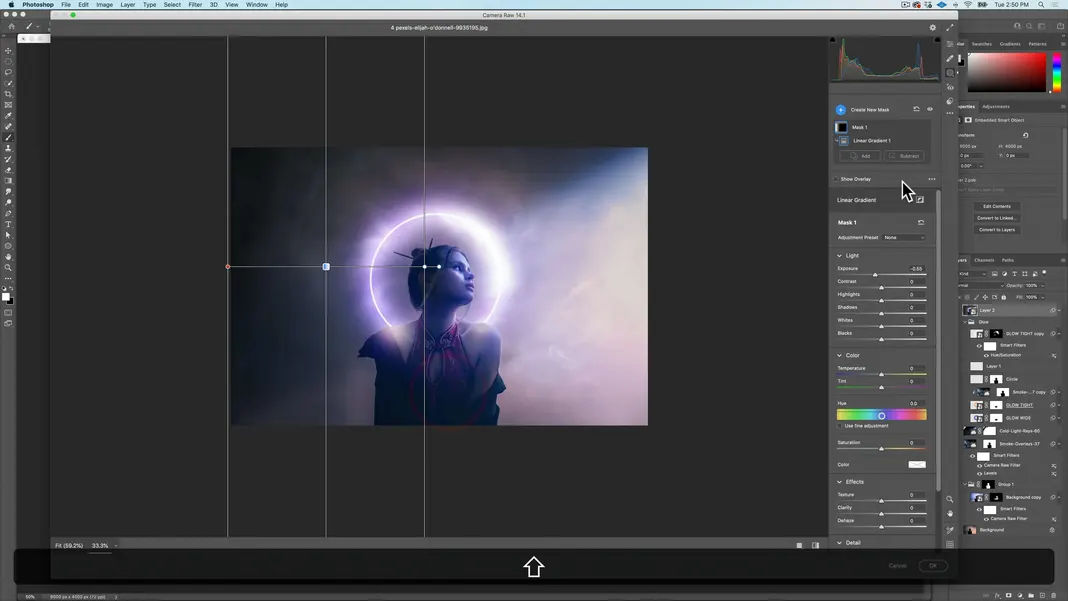
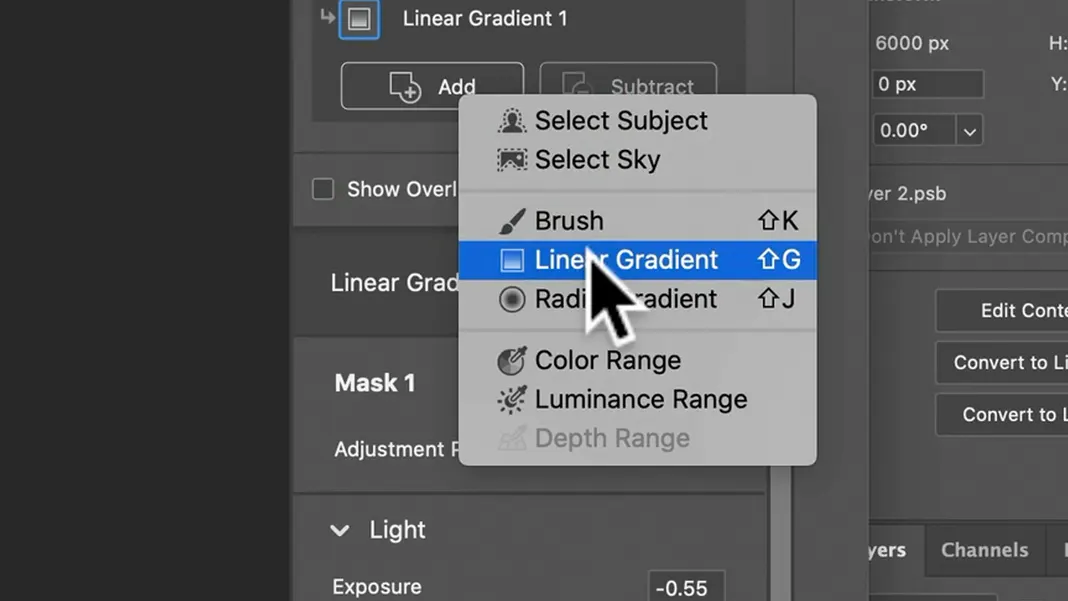
Now let’s go ahead and add our vignetting manually. I do it with linear gradients. To do this, click the masking icon and then Linear Gradient.
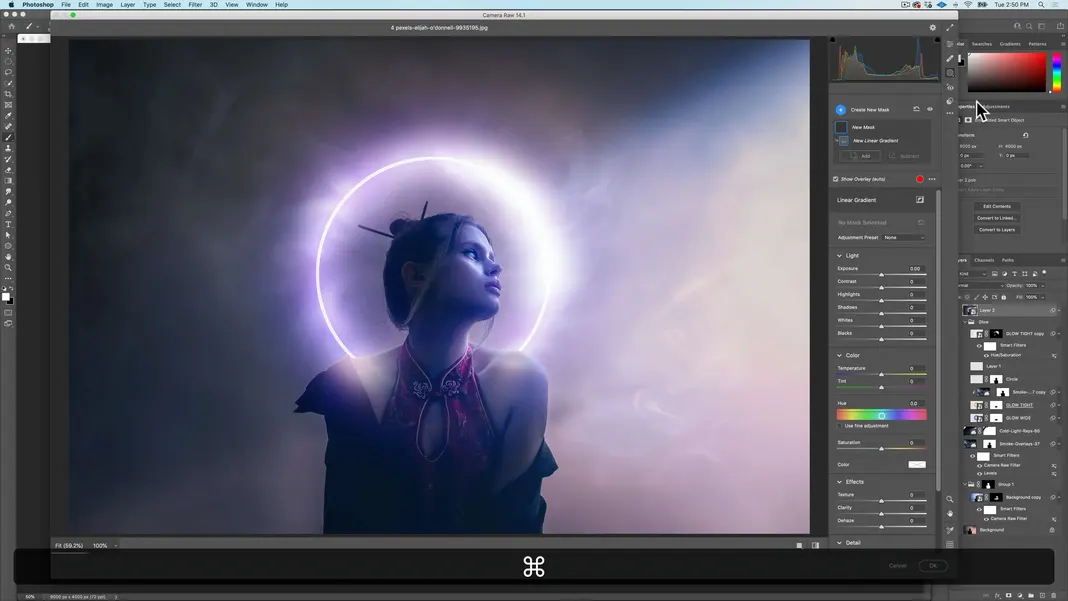
I’ll zoom out so we can see a bit better, and then I’ll create a gradient by clicking and dragging from left to right.
I don’t want to see the mask so I’ll uncheck the “Show Overlay” box, and then I’ll just lower the exposure.
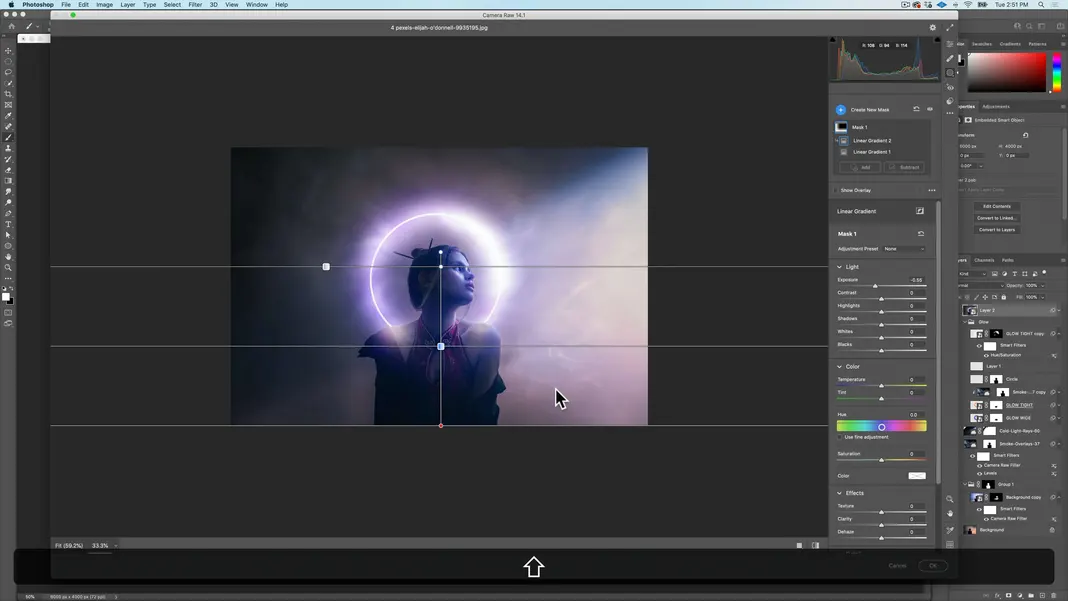
I can now create a new mask using the “Create New Mask” button. Instead I will add a linear mask using the “Add” button under “Mask 1” and selecting Linear Gradient.
Then I can click and drag from the bottom of the image up.
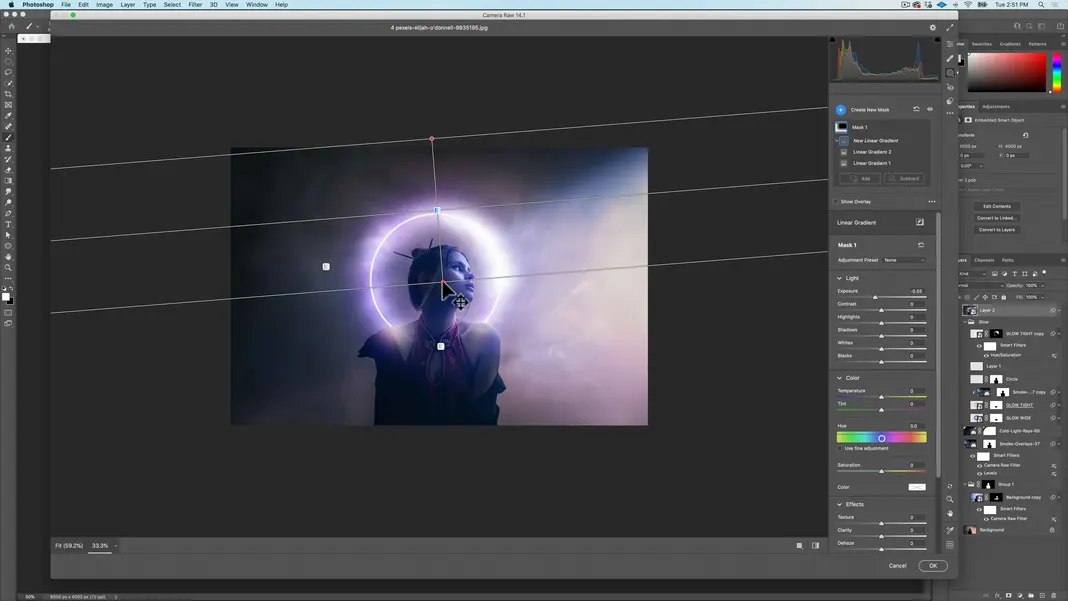
We can do the same thing again and this time add a linear gradient from the top of the image down, at a slight angle. The goal here of these adjustments it to add extra shadows.
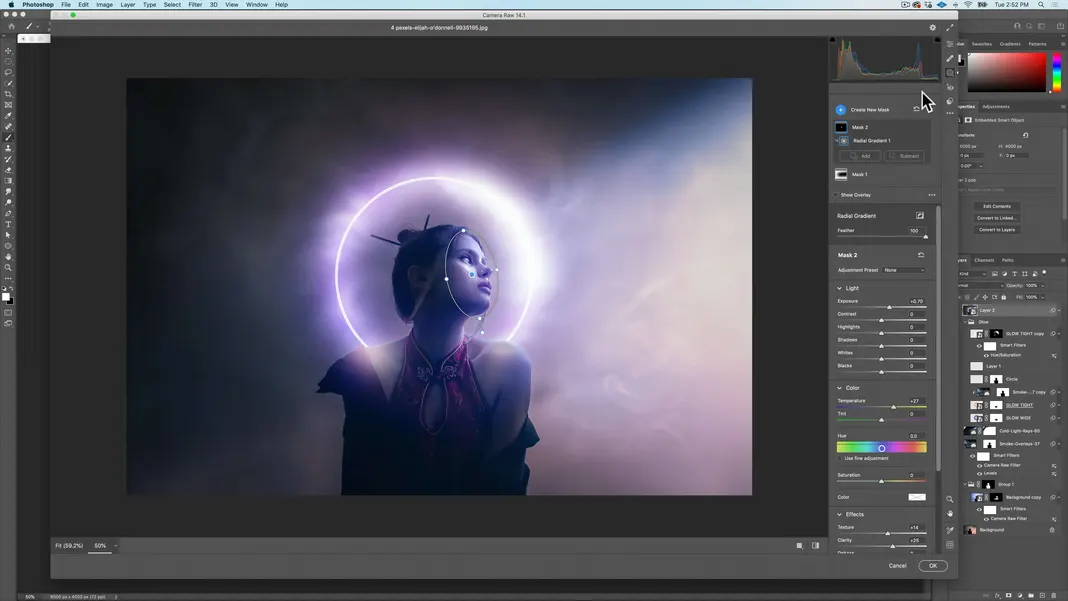
Then let’s select “Create New Mask” and create a radial gradient and put it right over her face,
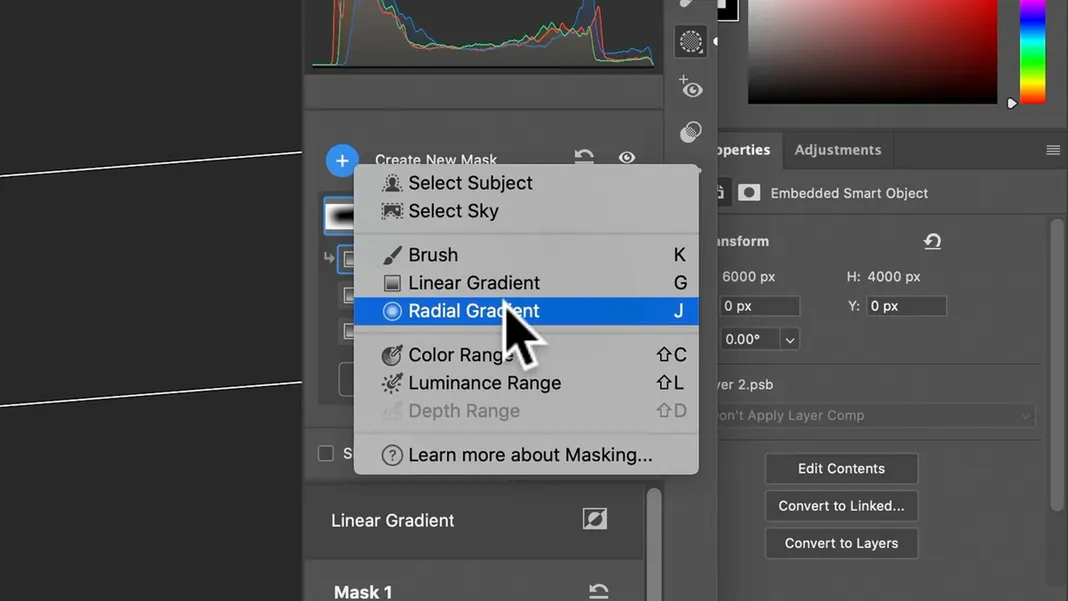
We’ll make the feather really strong so that the gradient is very soft. I’ll rotate the radial gradient a bit. Once again I’ll uncheck the “Show Overlay” option to hide the mask, and then we can lighten her up even more by raising the exposure.
I want it to look like there’s a light source in the upper-right-hand corner and like the glow itself is also lighting her face. We can add a little bit of texture and clarity, which usually adds some sharpness to the image. If we feel like the color is a little too blue, we can also bring the temperature a little warmer.
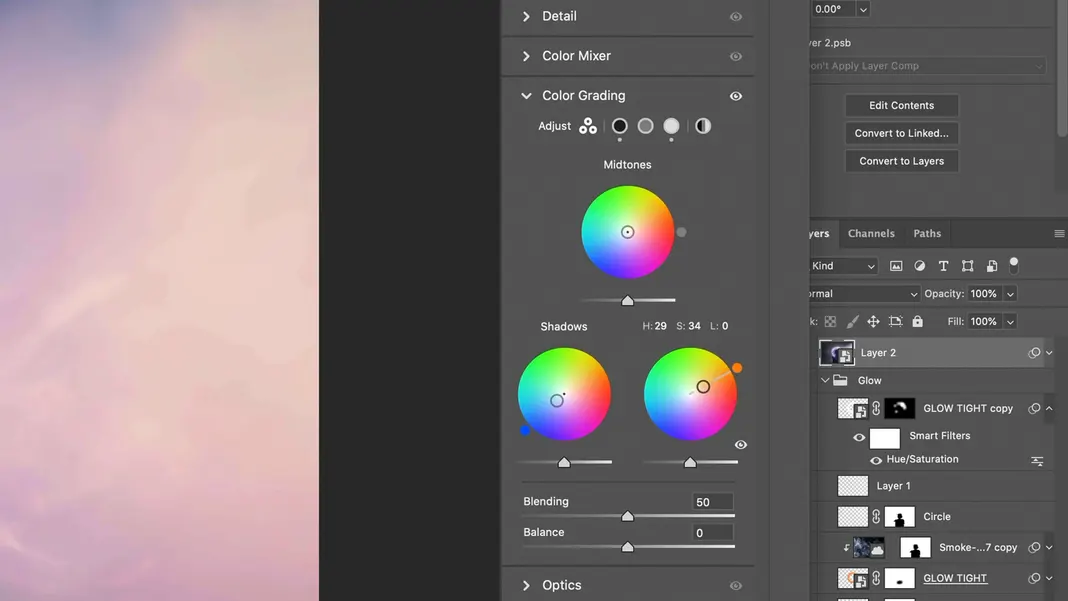
Now let’s go back to our basic correction. There’s another thing I like to do, which is that overall at the end, I want to change the color grading. So I want my highlights to be pretty warm, and my shadows to be pretty cool.
In the basic correction I also want to add some clarity overall, which will add it to the smoke as well in the background. I’ll also add a little bit of texture.
And there we go. You can toggle the top layer off and on to see the difference that those overall changes made and see that it’s a pretty dramatic transformation.
Conclusion
If you’ve been following along, you hopefully have a good handle now on how to use overlays, neural filters, depth maps, glow effects, and other special effects. You may need to practice these projects a few times, but hopefully they’ll help you feel prepared to apply these concepts to your own work. I hope you liked this tutorial and that you learned something about using overlays in Photoshop, and if you did, you can find more on my YouTube channel, so please subscribe and share with your friends.
I’ll see you all next time!