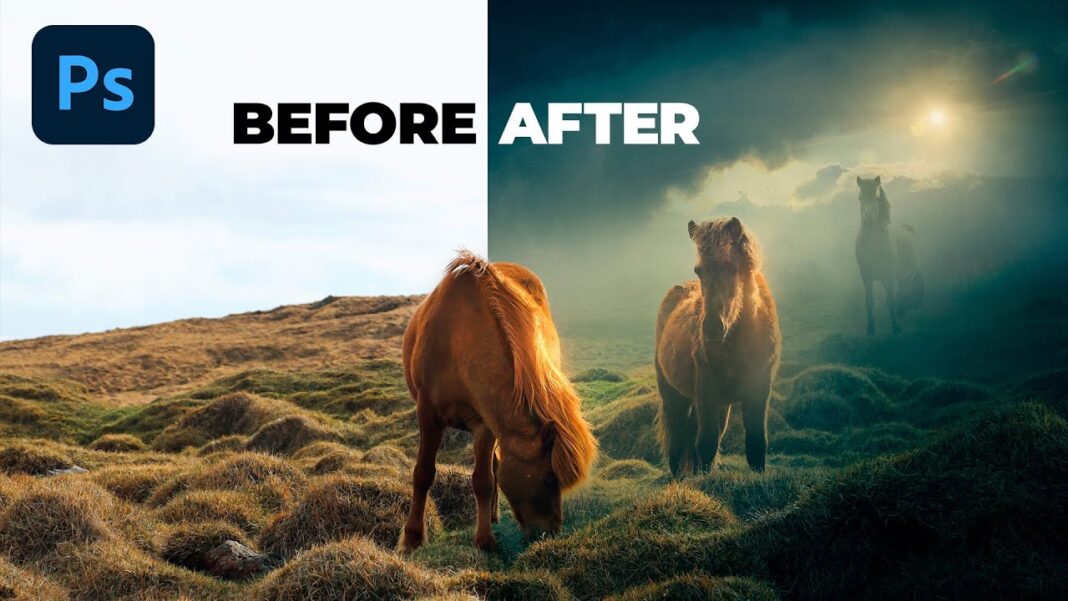
Hello, my name is Rikard and in this tutorial, I’m going to show you how to create depth in Photoshop.
To follow along, download the images from here – you can also watch the video here.
How to Create Depth in Photoshop
The common issue I see with composites are images posted in the Nucly Facebook group is that they lack three-dimensional depth. Creating three-dimensional depth in a two-dimensional image can be a challenge.
There are three primary ways to create depth in Photoshop: focal depth, atmospheric depth, and color depth.
There are other ways of creating depth as well. I have an article in my blog, Zevendesign, which covers all the ways to create depth. But in this tutorial, we’re going to be covering those three.
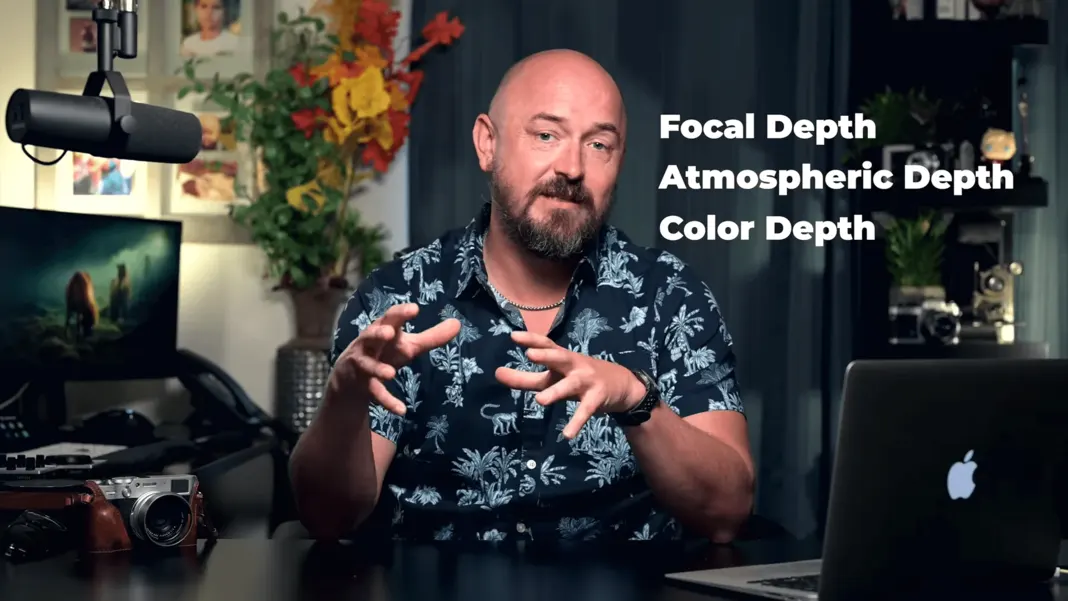
We’re going to start with an image, and then I’ll show you tips, tricks, and techniques you can use to create more depth using these three methods. If you’d like to follow along, I have included all the assets in this link. So go ahead, download those and then let’s dive into Photoshop.
How to add atmosphere aka atmospheric depth to these horses
The first thing I need to do is separate this into various layers of depth.
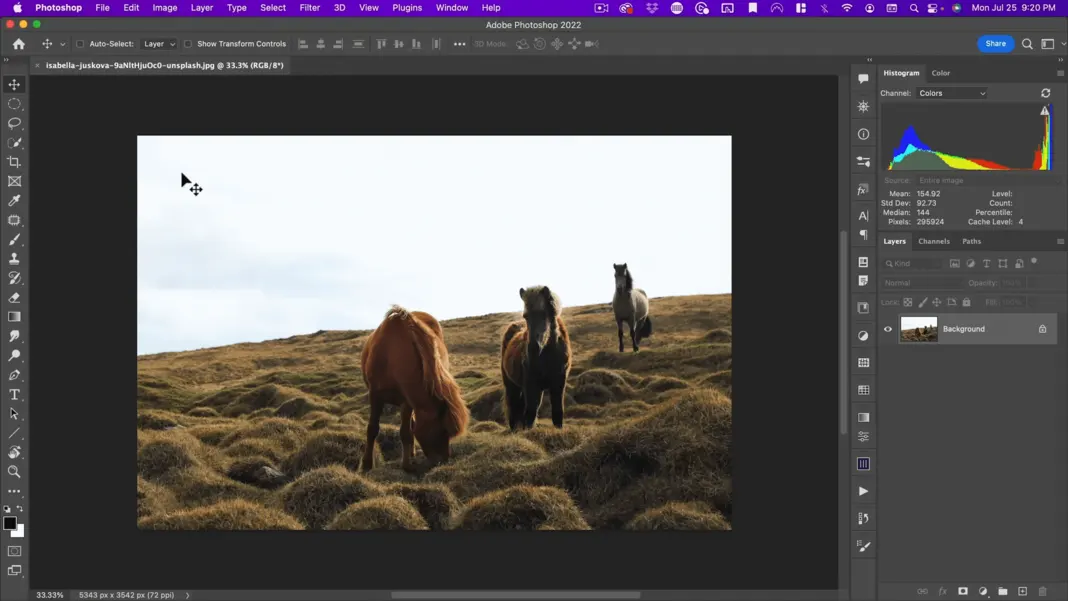
So, imagine this as a scene with three-dimensional depth going away from us and into the background of this image, and we can imagine a few of these things have their own depth.
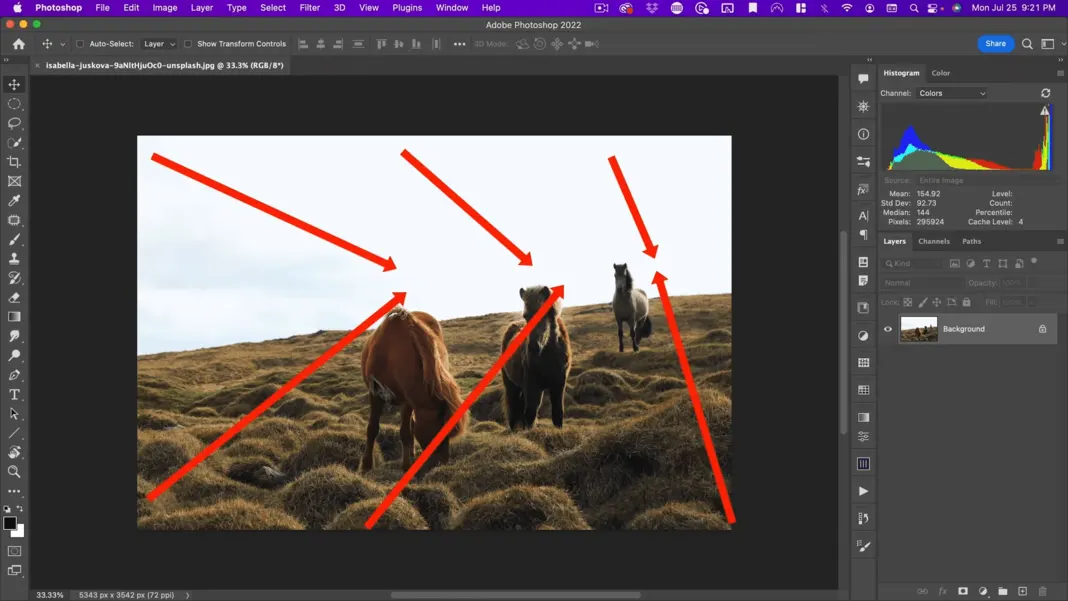
So, I select red as my first color here. And let’s just kind of imagine what this might look like.
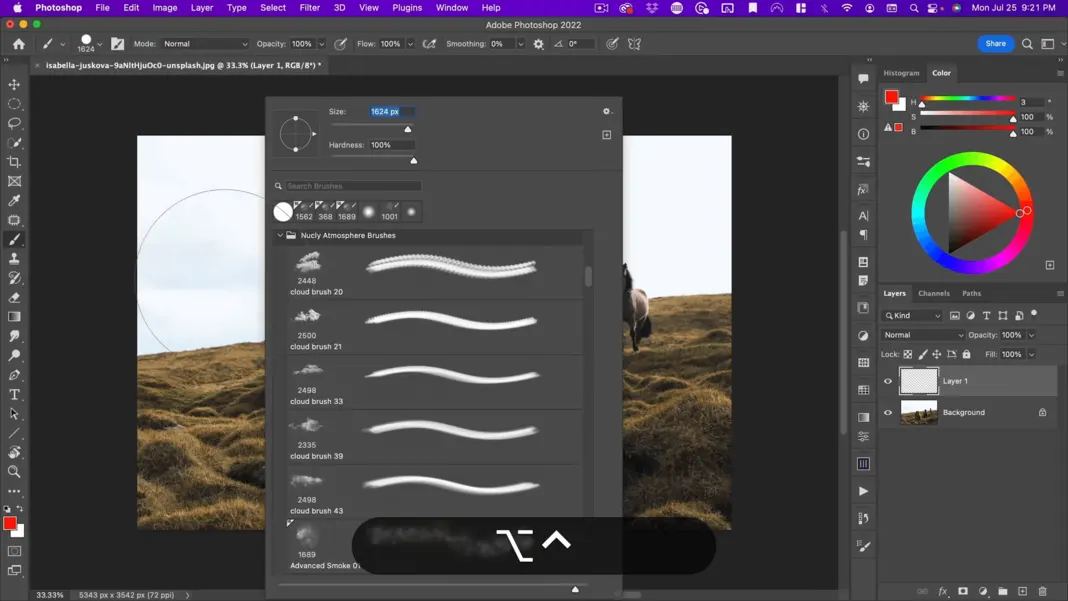
Breaking down the depth layers
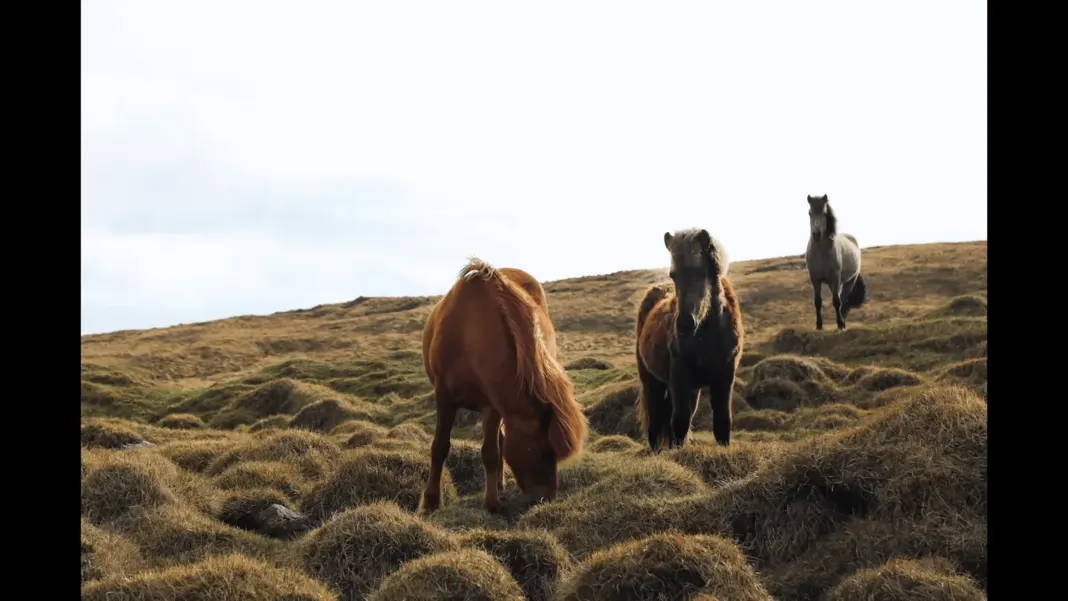
The foreground and this foreground horse would be my first layer.
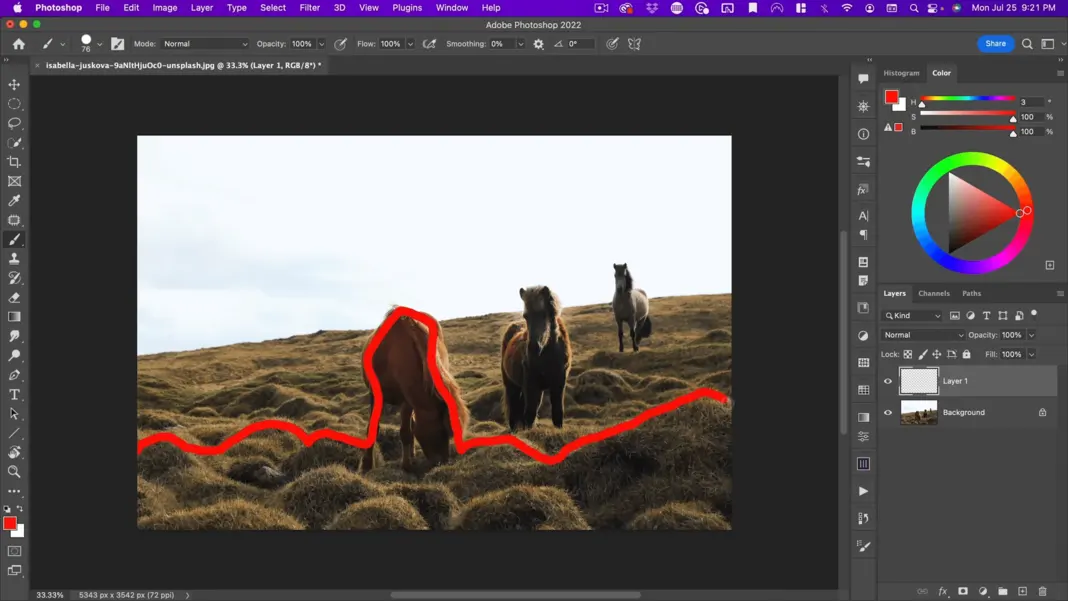
And then my next layer might be the second horse and the surrounding ground. And then my next layer might be the third horse and the little ground it is standing on. And then finally we have our background and sky.
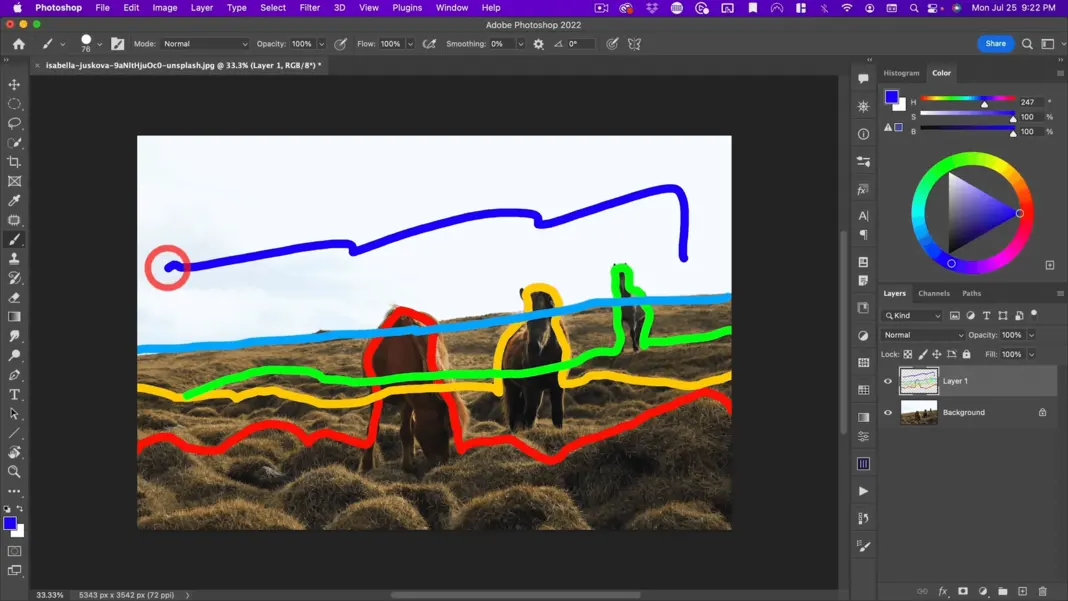
Now that we’ve assigned the various layers, I first need to cut up my image so I can add atmosphere and work independently on various parts of the image. I can do this with masks, selections, or alpha channels. There are many ways of doing this. I could even separate it into a bunch of different layers. It all depends on the type of workflow you like.
I’m going to use masks and separate this into various layers that I can then work with.
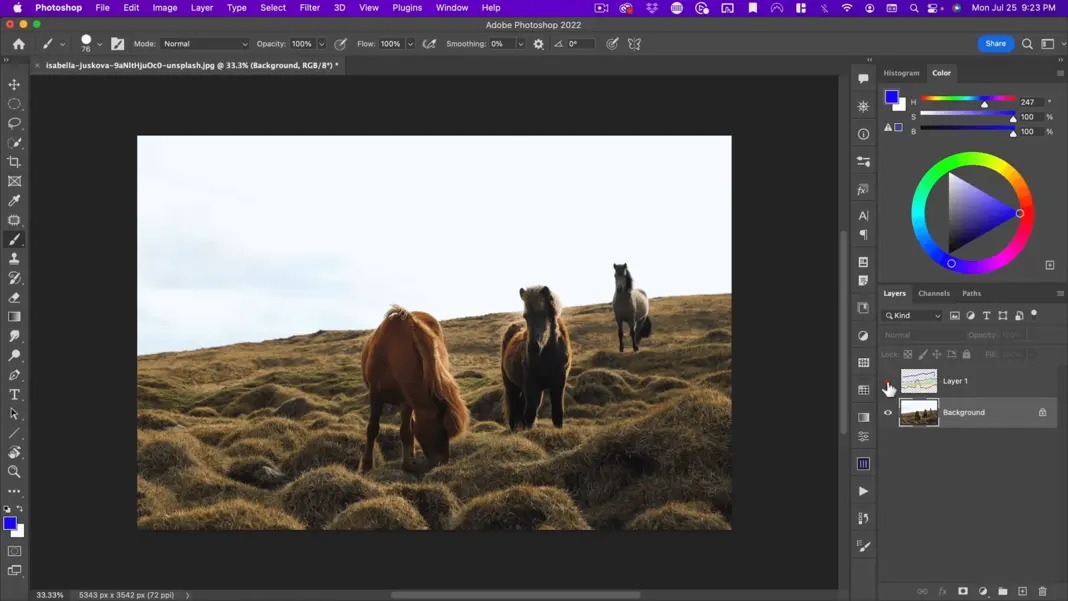
With the first layer selected, I’m going to use the Quick Mask tool and start painting and hoping that Photoshop sees some of these blocks here. Photoshop doesn’t always do a great job, but we can correct that by painting away the areas we don’t want.
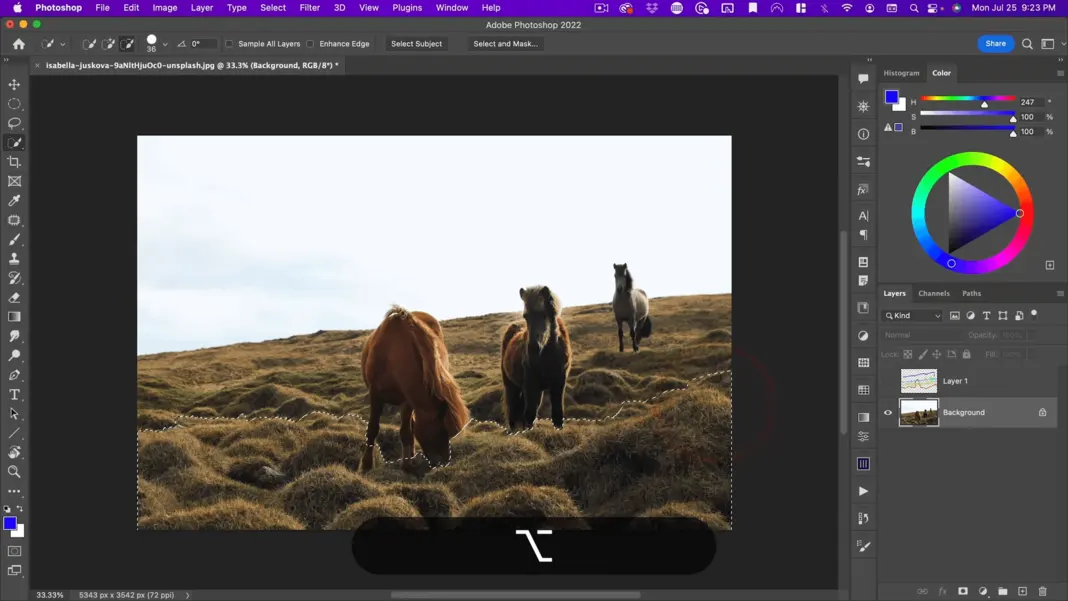
Hopefully, at some point Photoshop will start to track better with what we’re trying to achieve. With many AI selection tools in Photoshop, a lot of it is trial and error. You have to just do it and keep doing it and hope that Photoshop figures out what you’re trying to select.
You can also change the brush size. Generally, a smaller brush will focus the AI a little more and help it select better. Also, the speed at which you paint over an area will affect how much it selects.
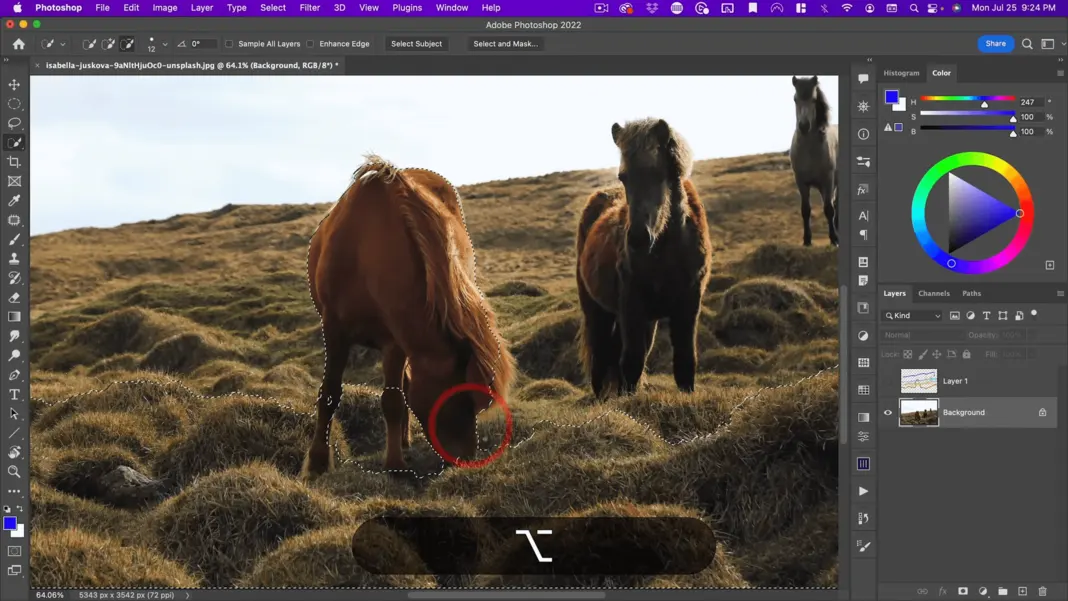
I’m going to fast forward through my process here of refining this selection. So, after I’ve done my basic selection, I’m going to dive into select and mask here and refine it further.
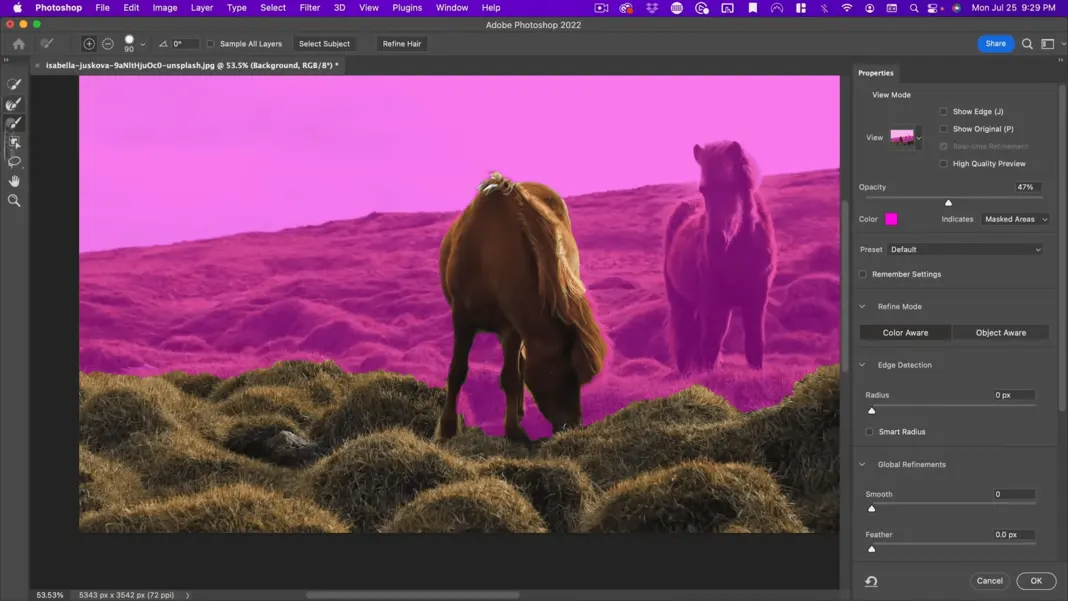
Essentially, I use the selection tools to refine the selection as much as possible. For the purpose of this tutorial, I’m not going to go overboard. But it is important to realize the more time you spend perfecting your selection, the more realistic your final composite will be.
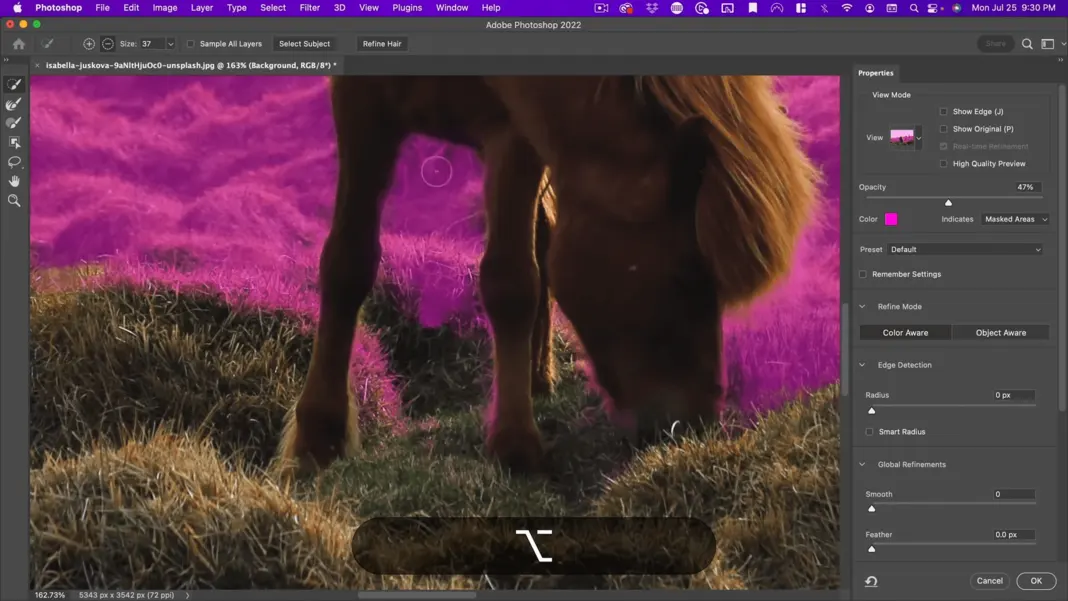
Okay, I’m pretty happy with that. I’m going to go ahead and make a copy of this. We’ll call this one foreground and let’s go ahead and add a mask to that. Next, I want to select this yellow area.
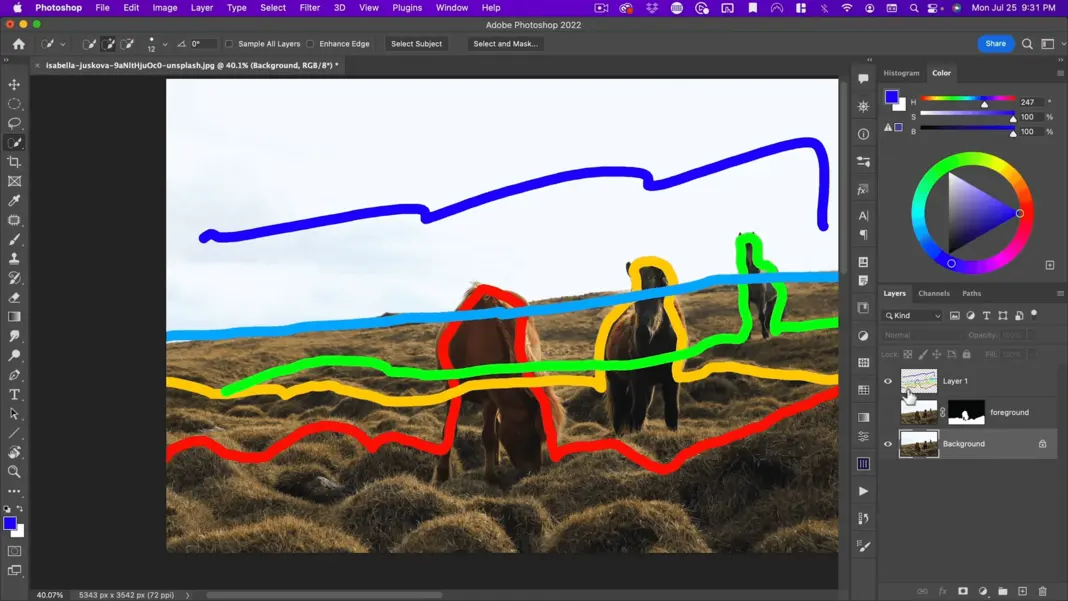
I know I want this horse to be in the quick selection. And then from the horse, I can determine the ground plane of the horse.
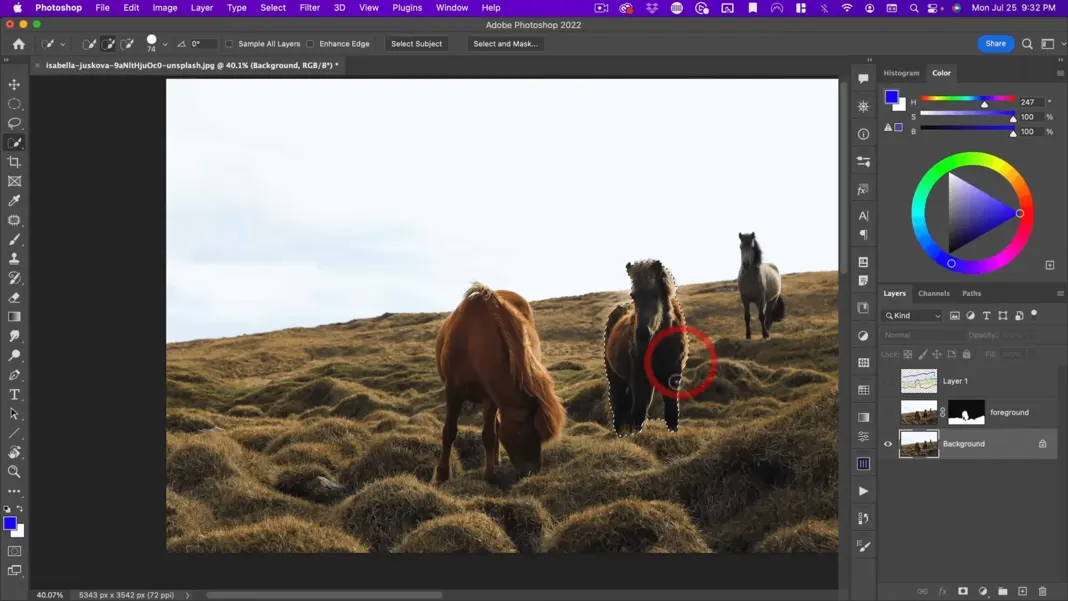
Every once in a while, remember to let go of your mouse and start clicking again. That way you can control-Z to undo smaller sections if you select more than you want to. If you try to do everything with one mouse click, then control-Z will undo the entire selection.
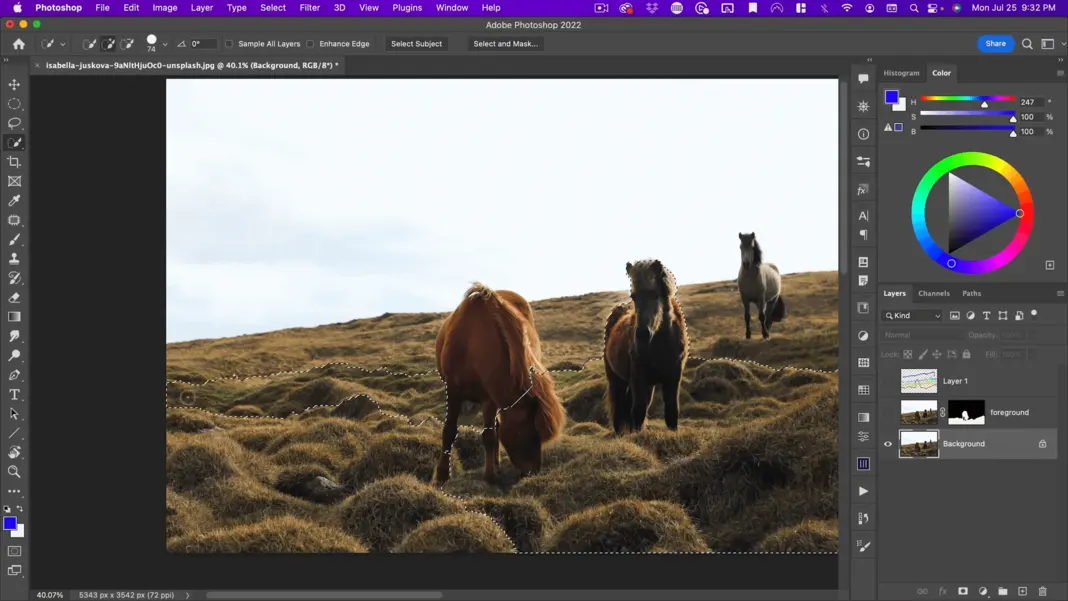
Let’s go to select and mask and I’ll just do some fine-tuning here. We’ll kind of fast-forward through this again.
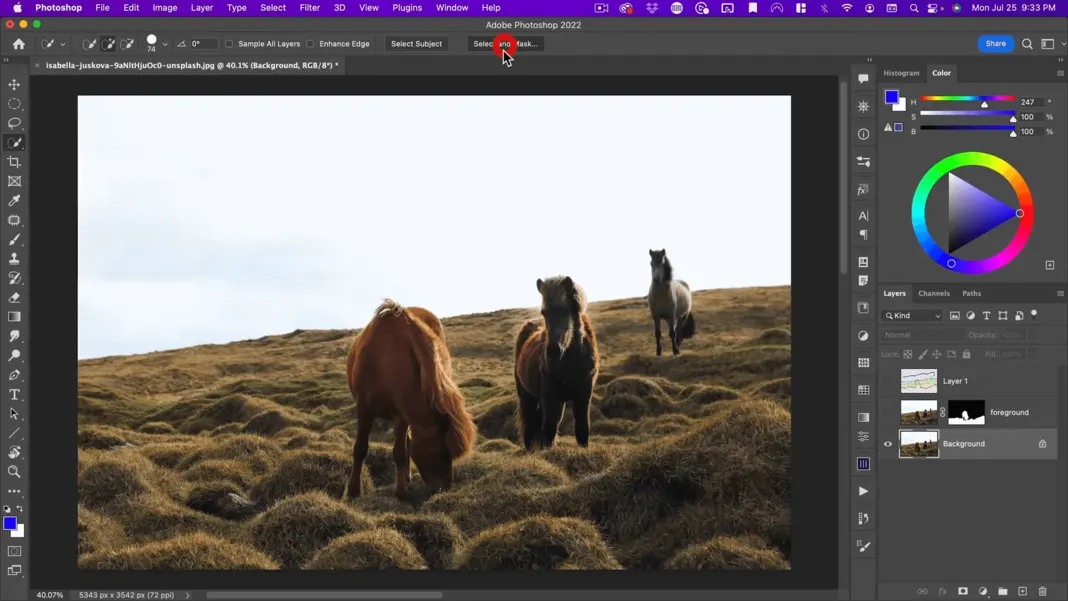
Now let’s go ahead and make another copy of this. Call this selection “mid-ground.”
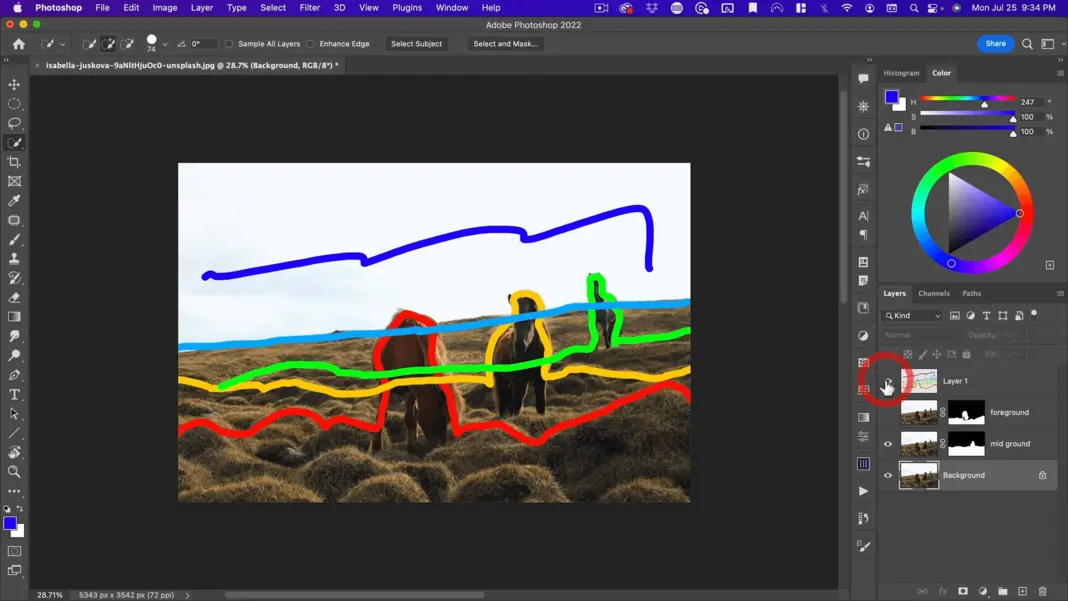
Next layer is the third horse and the little bit of the ground he’s standing on. So, let’s go back to our quick selection tool. With our background selected, I’m going to start selecting out this horse and then the ground that he’s on and we’ll dive back into select and mask do the same thing here again, to refine this selection. If I were doing this for an actual project or a client, I would spend more time on my selection. But for the purpose of this tutorial, you’re going to get a very good idea of what we’re going to do with these selections next.
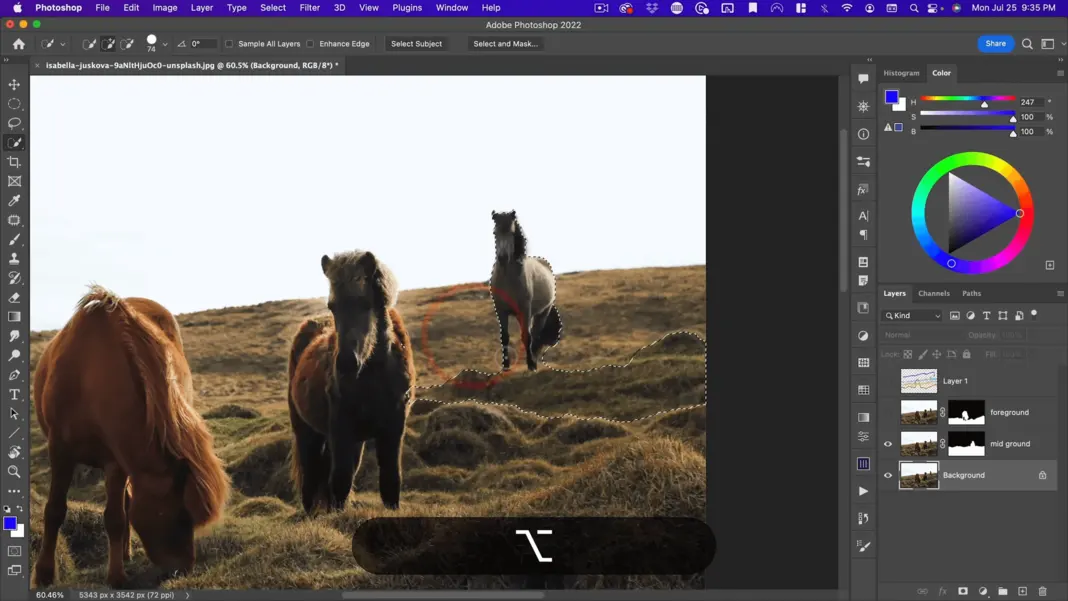
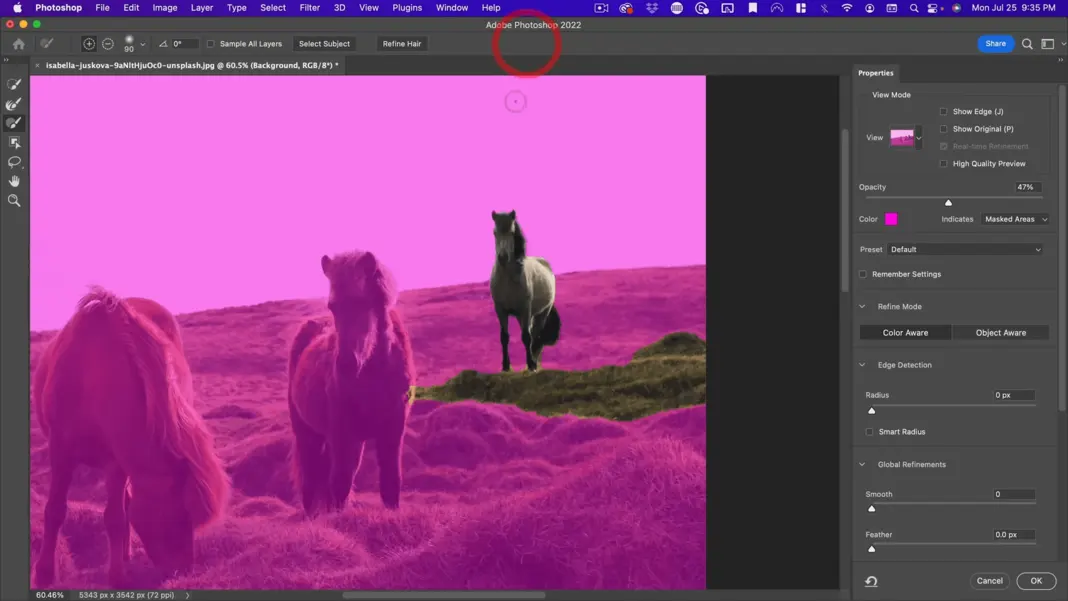
Let’s call this layer “background horse.” Then lastly, I’m going to cut out the sky and have that as an independent layer.
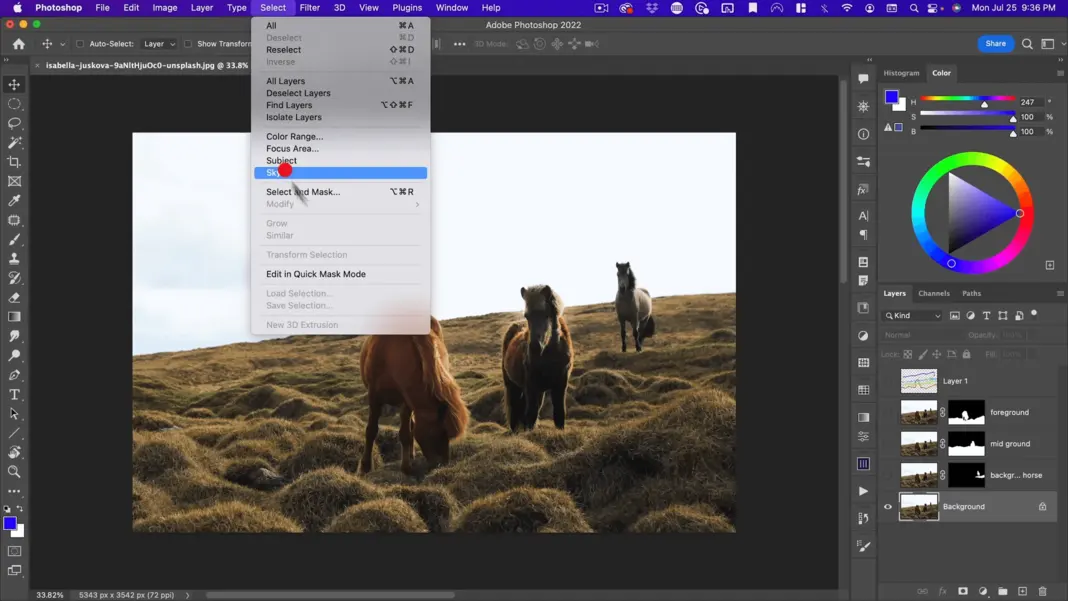
So, we can just select the sky here and then invert our selection. Call this “background.”
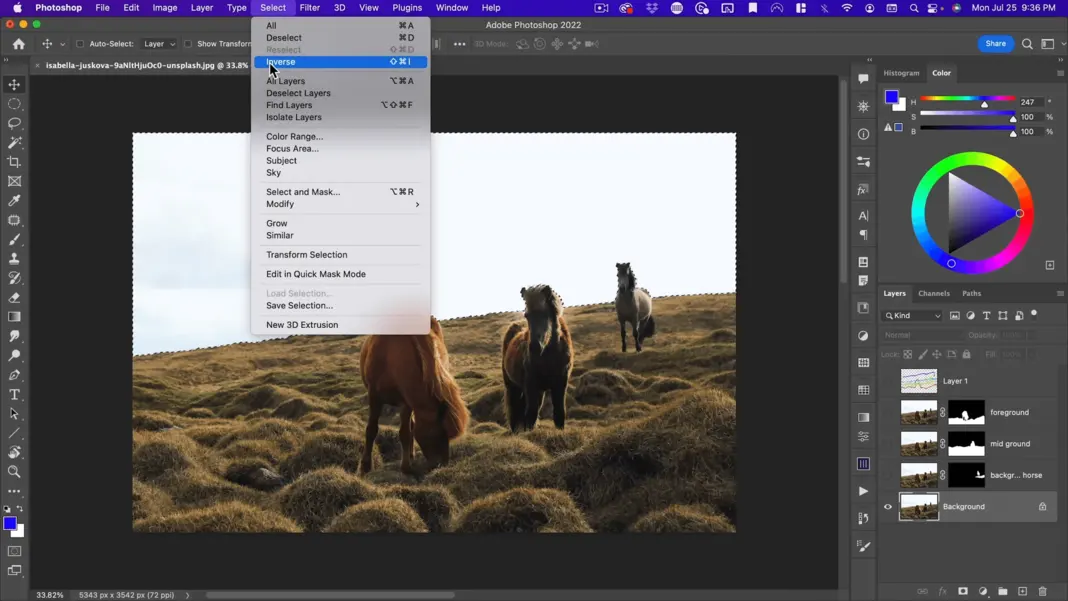
All right, now that I have all my layers, I can start building atmosphere. Essentially, I want a lot of fog in the background that lessens as it gets closer to the foreground. One easy way to do this is to create a fog layer. To do that, select a color from the photo, such as the shadow color of this horse right here.
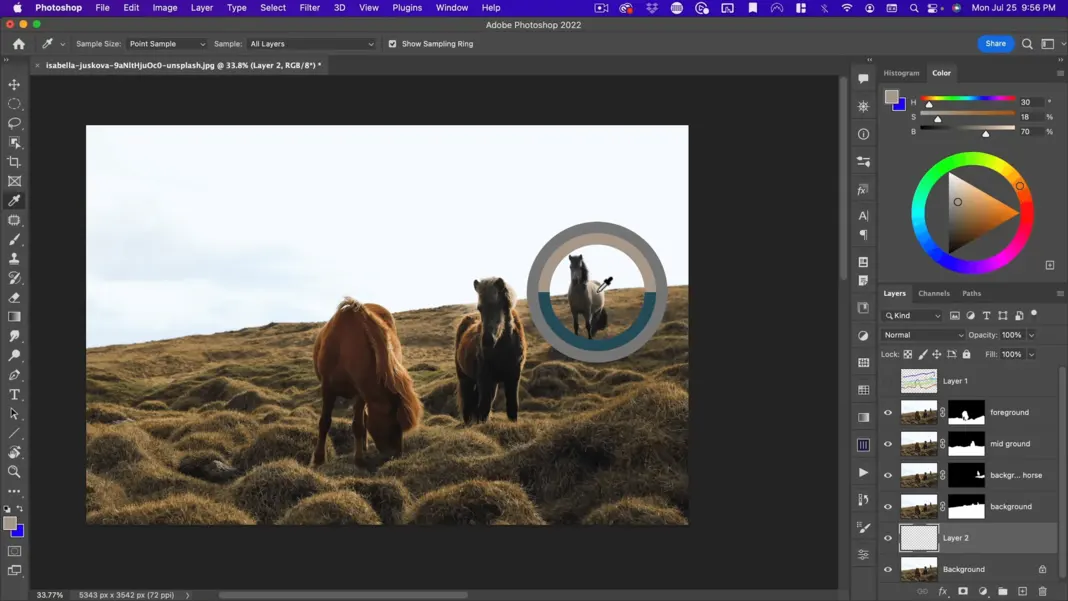
Then, make a full layer with that color and call it “fog.”
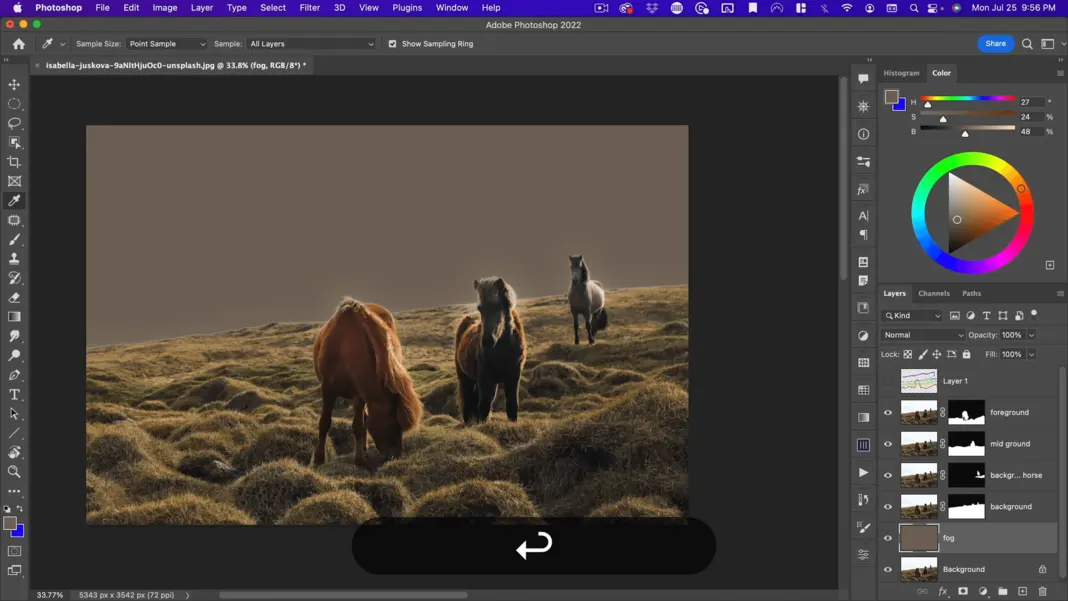
I’m going to desaturate this fog layer a little bit, around -60. I’m also going to cut the opacity of this at 25 and then I’m going to make a copy in between each layer.
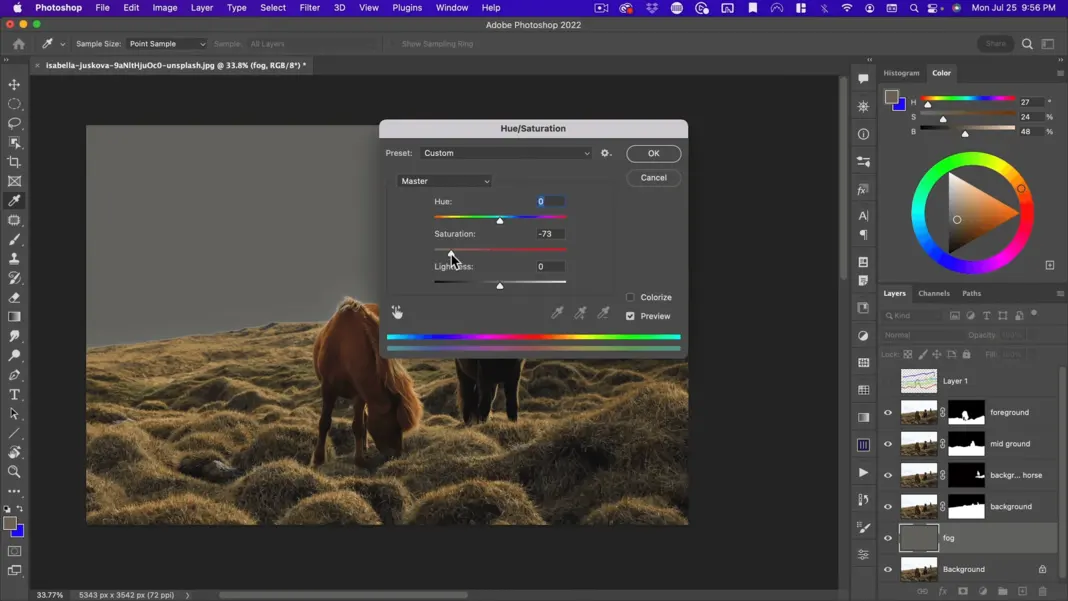
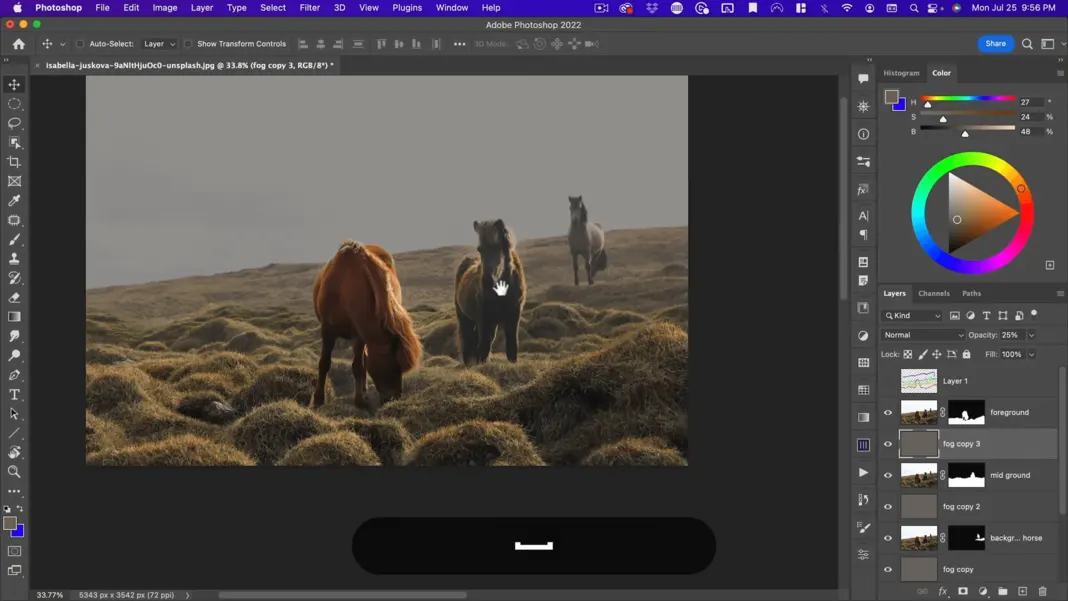
So here you can see kind of what that’s doing. Now, select all the fog layers and see what happens when you turn up the opacity. As you turn it up, you can see that it’s getting stronger and stronger to the point where the backgrounds almost disappear at 65%. You can also see there is no fog in the foreground.
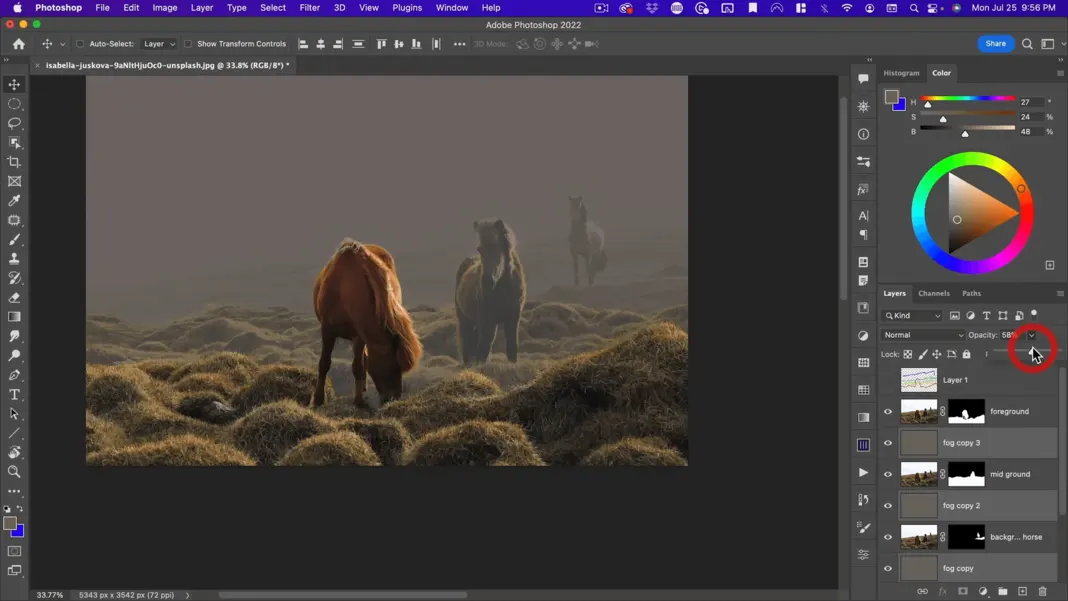
So, this gives you an idea of how thick you want the fog and how you can adjust it based on the depth of the image. Already we’ve created more depth just by cutting up the image into these various layers. I think opacity around 33% is good.
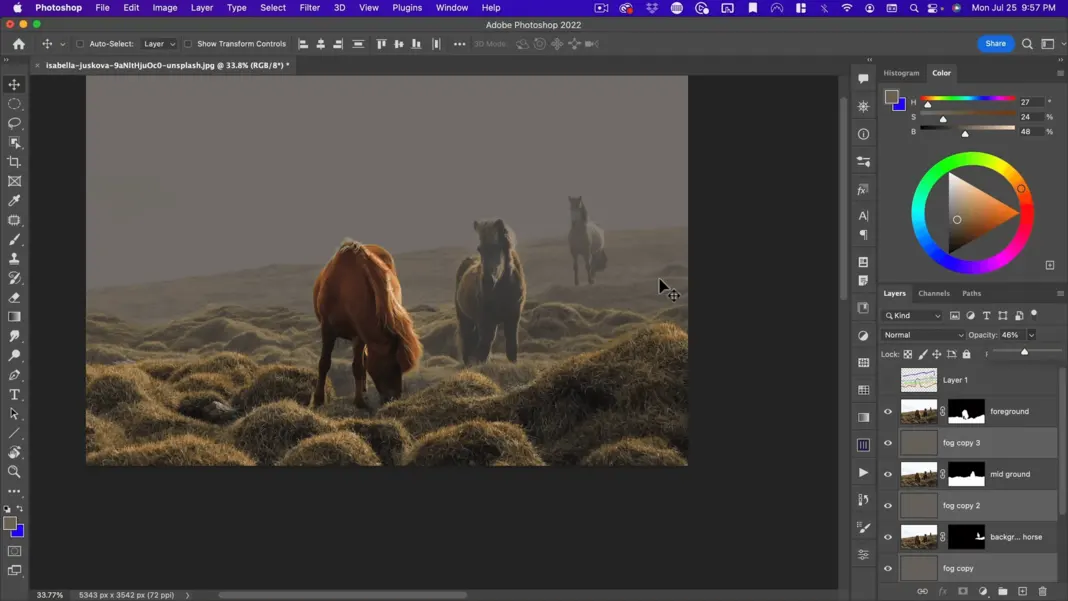
But there are a few other things that I want to do. I want to add some depth to the sky because it’s pretty flat. I also want to add some depth with our lighting and color, although those are all secondary to the atmosphere. Adding the atmosphere is going to do the most to create depth in your image.
Sky Replacement
So, starting with our lighting, let’s go ahead and adjust our sky to give it more texture and depth. First, for the sky, I’m going to replace my background here and I’m going to go to Edit > Sky Replacement.
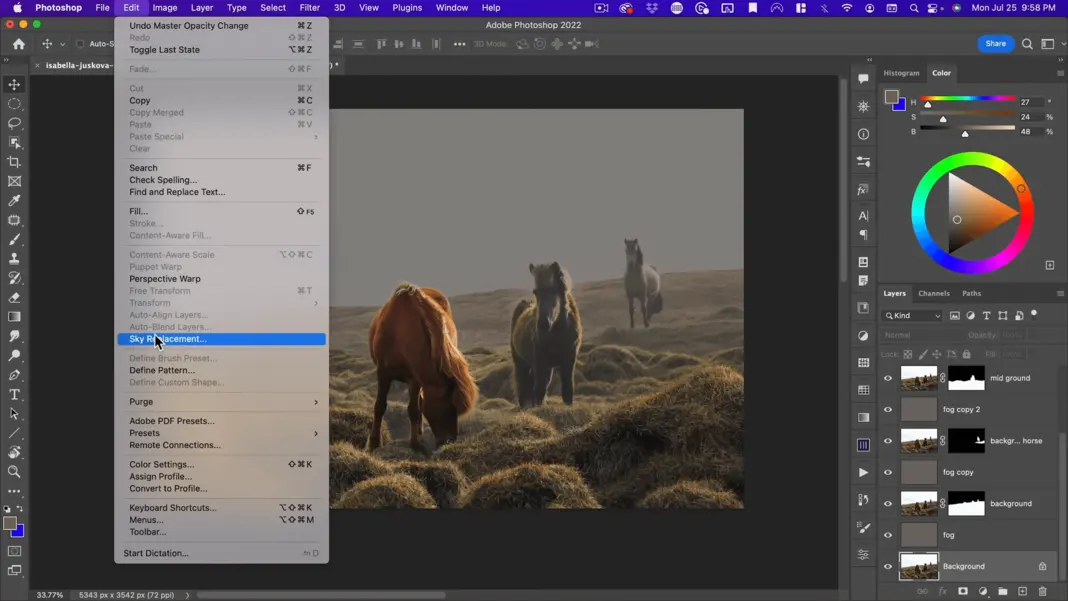
And then go to spectacular.
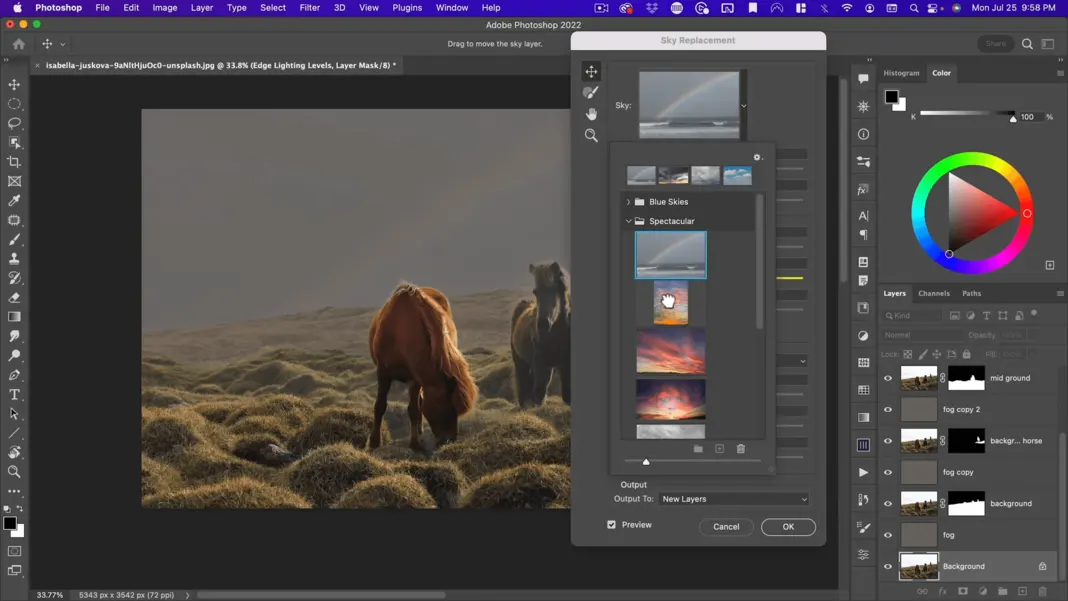
You’ll see a bunch of skies in there. The problem with a lot of these more colorful ones is they just don’t work with a foggy environment. Right? So, for a foggy environment, we want something subtle. I’m going to use this one because it has this kind of nice contrast here and implies where the sunlight hitting this horse would be coming from.
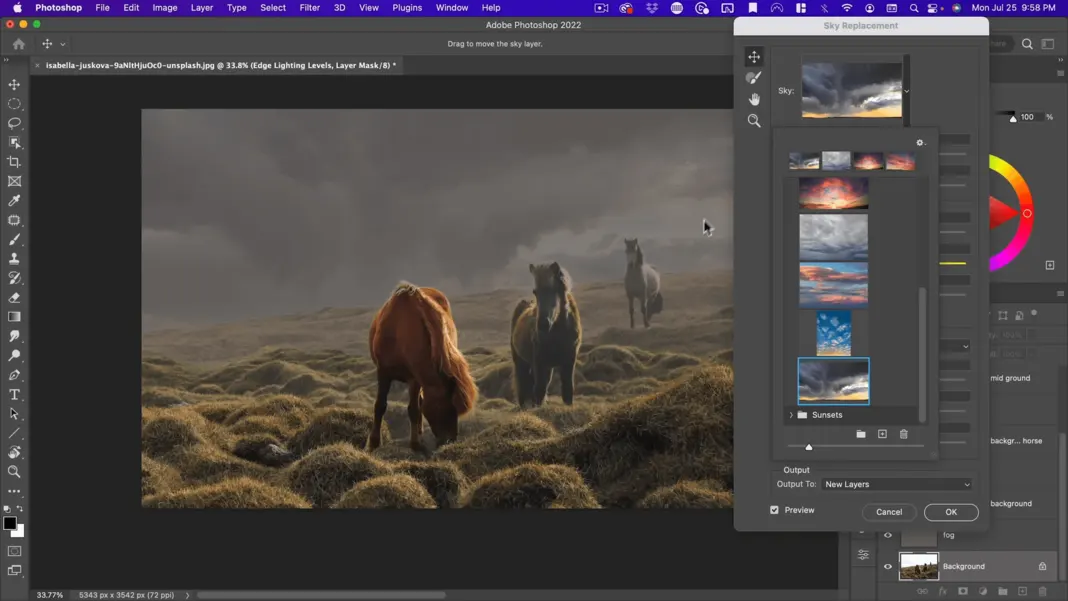
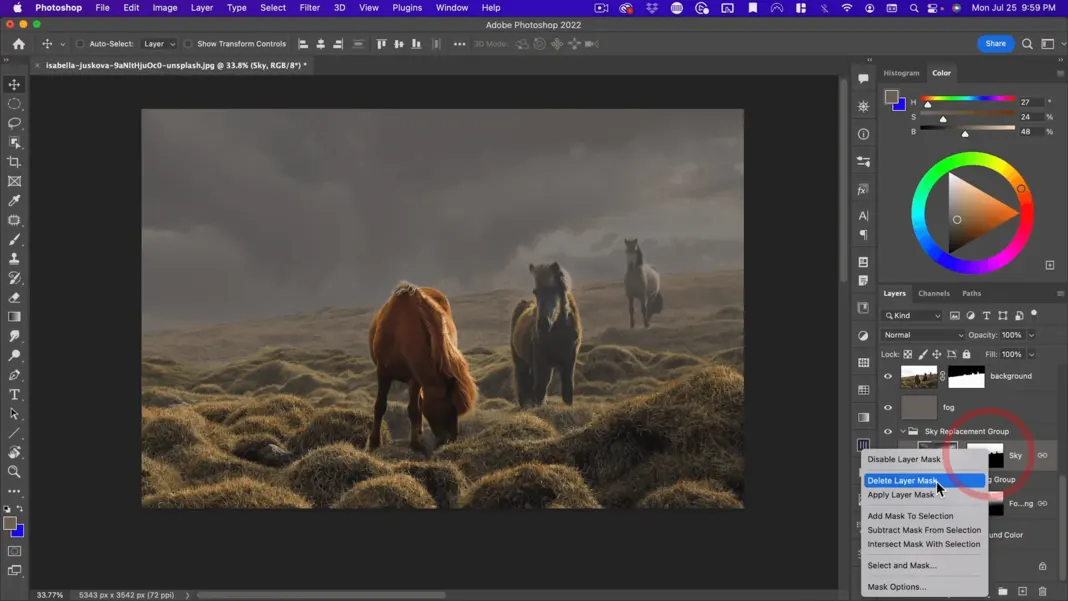
Go ahead, select your sky replacement, and then hit okay. I don’t need all these various layers, so I’m just going to delete the layer mask on the sky itself, drag it out of the group, and then throw the group away.
Adding a Fog Layer – Linear Gradient
Next, I want you to see this kind of strange halo line here. One easy solution when you have a horizon line like this is to make a linear gradient, a reflected linear gradient that goes away from either side of this.
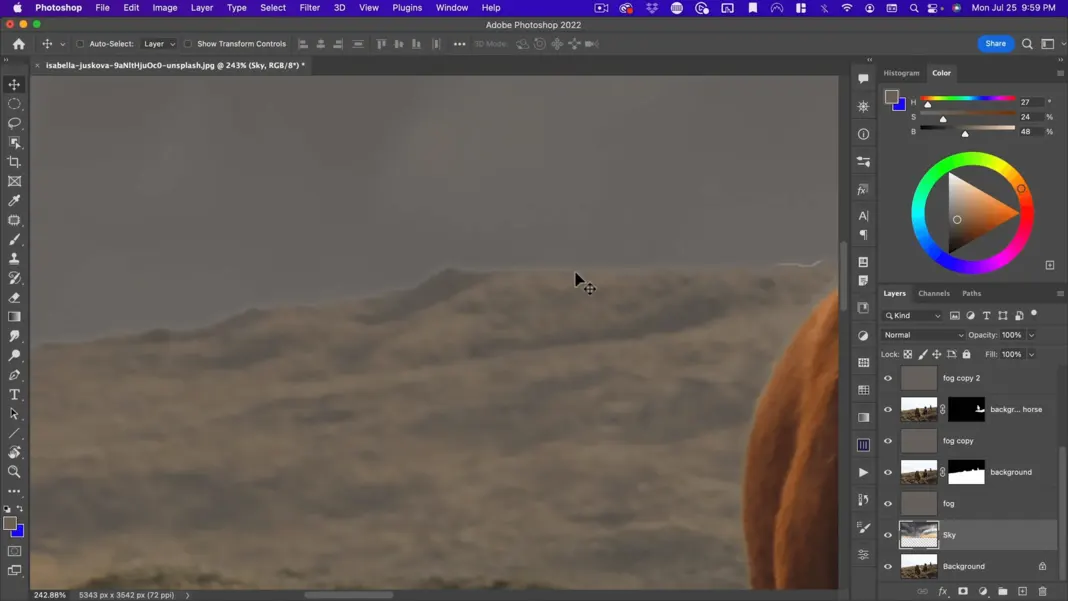
So, make a new layer here. We’ll call this “ground fog.” I’m going to take my fog color and make it lighter and less saturated.
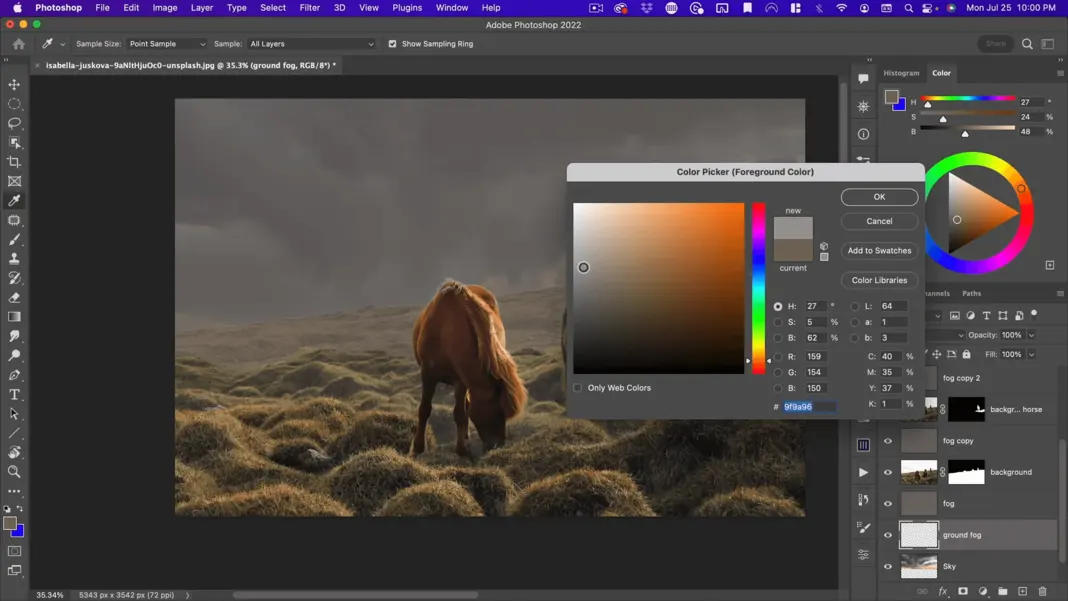
Holding shift, I’m going to go up about an inch and drag this above the background layer here.
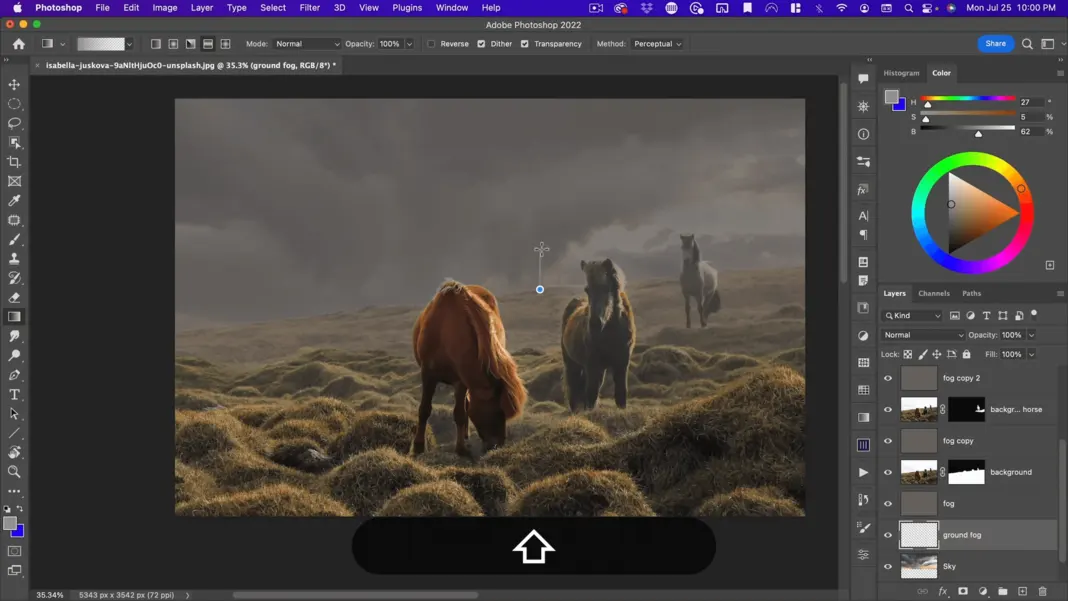
I will make it white just so I can see it a bit better.
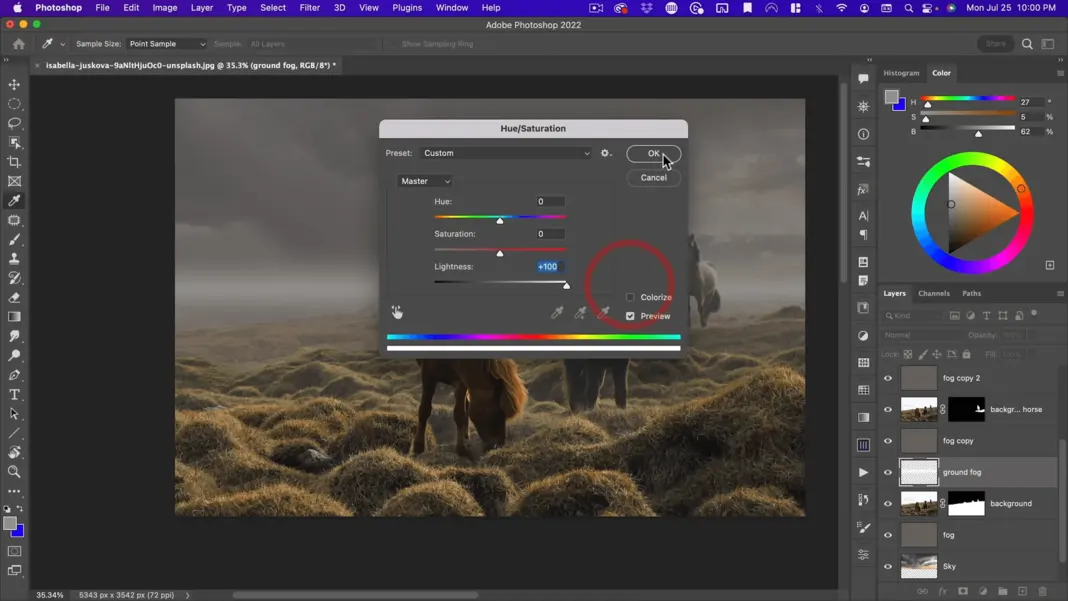
And then if I do Command + t, I can drag this and line it up to where my mountain is. The intent here is it rides along the horizon and makes the horizon disappear into the sky.
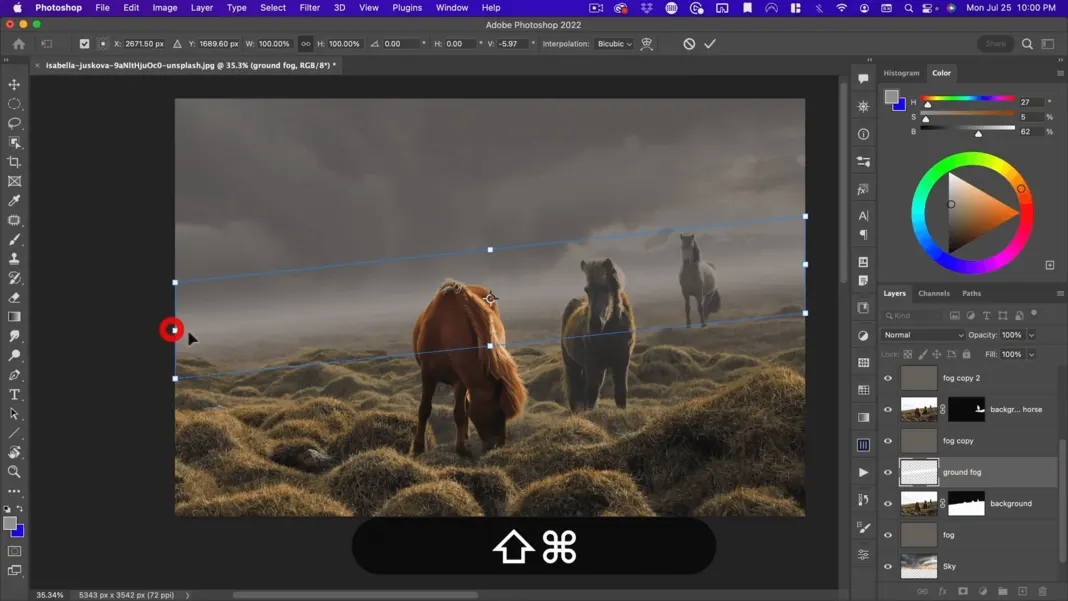
Next, I want to take this, make a copy of it, and call this “ground fog blurred.” Go to Blur > Gaussian Blur and blur this quite a bit.
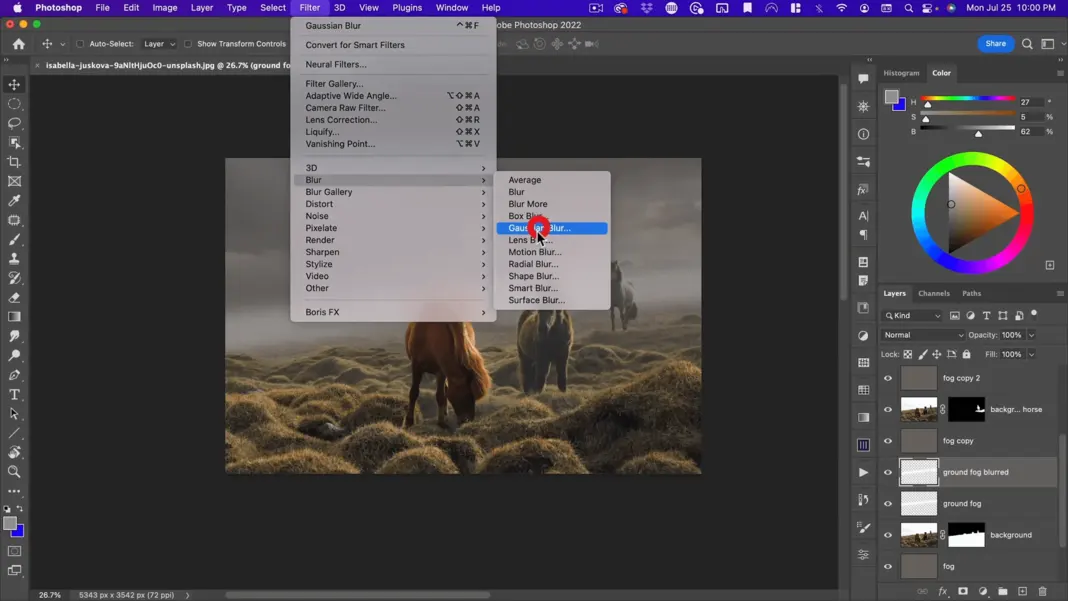
So, let’s do 150 and you can see what that’s doing. It’s adding a distant fog, and because it’s behind all these layers, we’re not adding more fog in front.
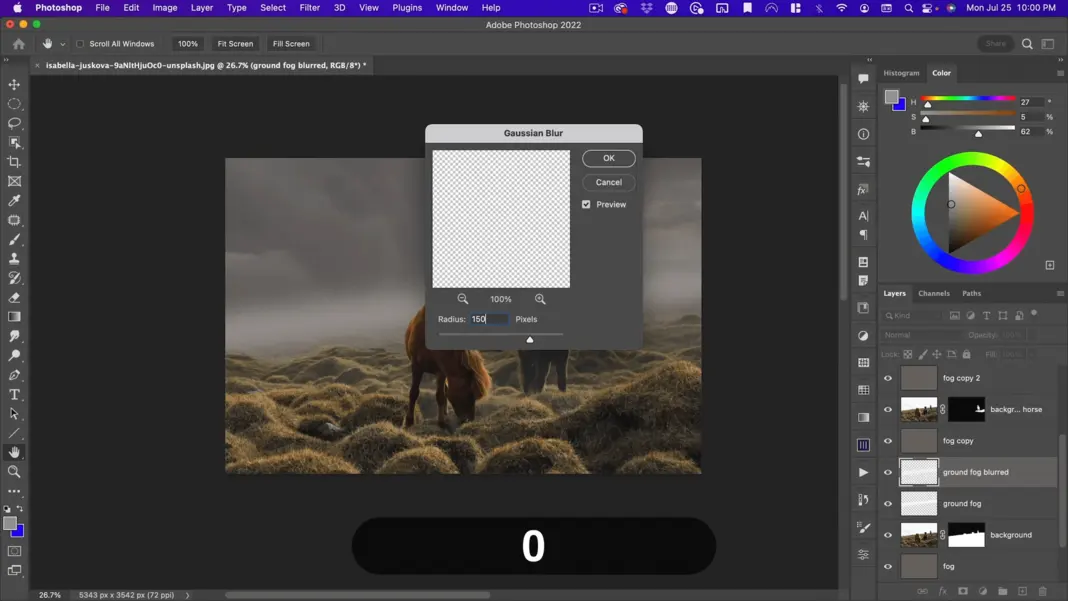
Next, I want to clear some of the fog away from the sky area where the sun is peaking in. So, I’m going to make a marquee selection and then go down to Transform Selection. Make sure you’re just selecting the selection to transform.
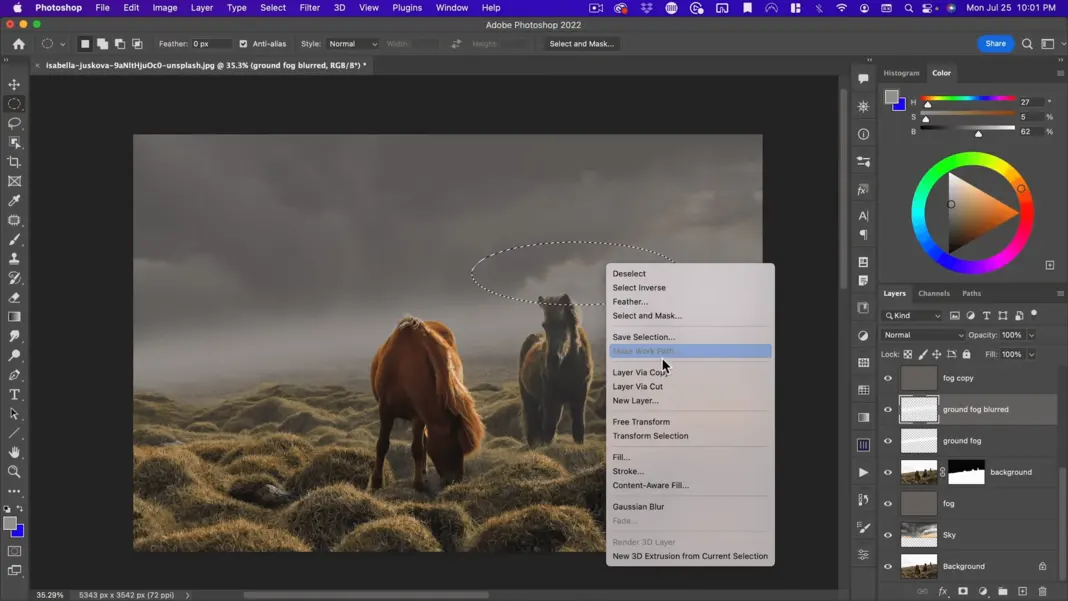
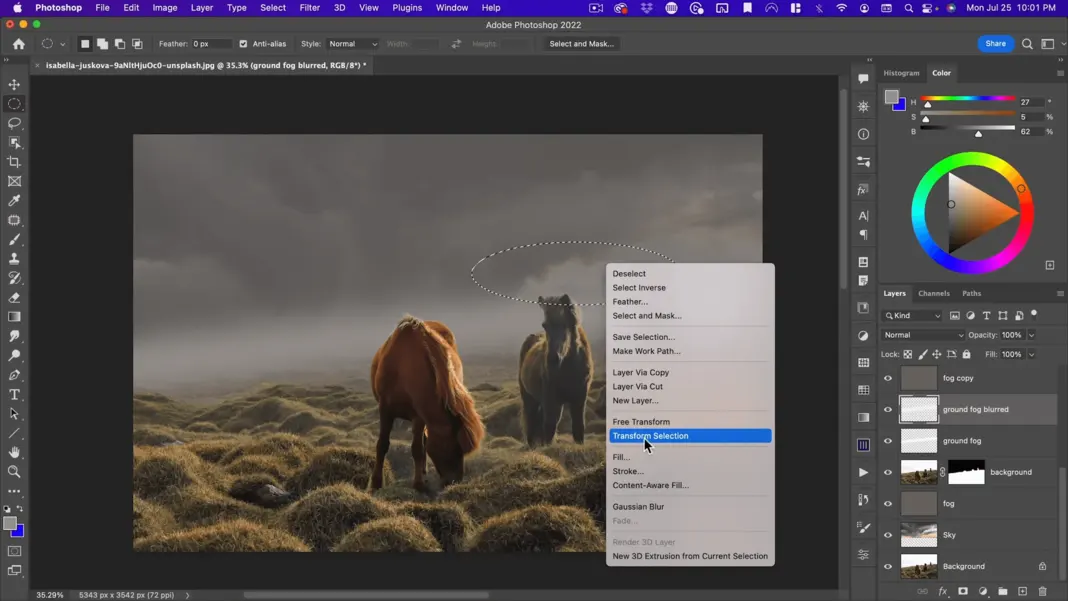
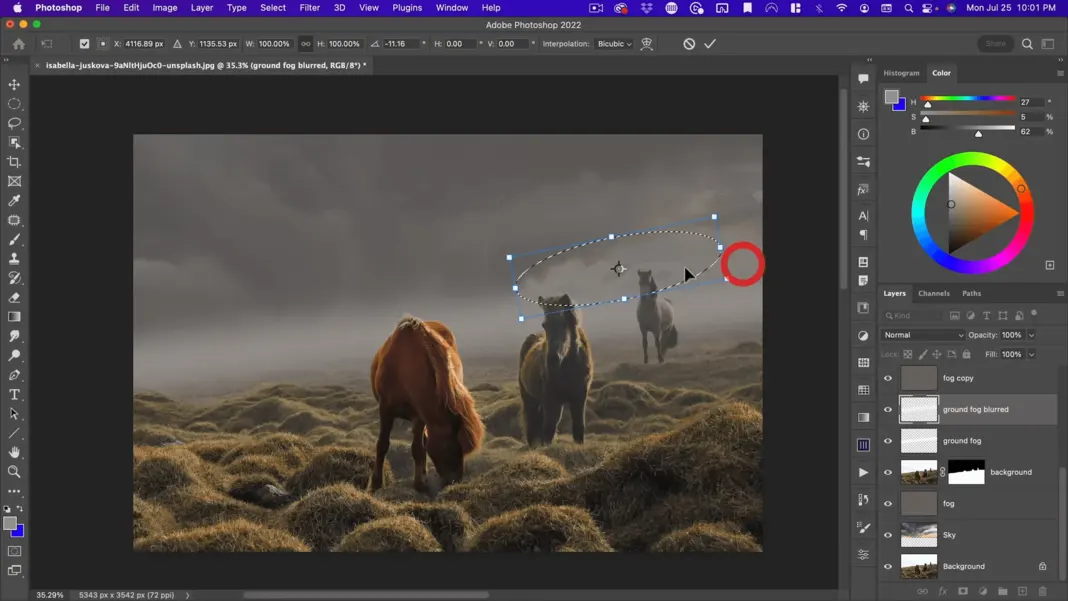
With my first fog layer selected, I’m going to hold down Option and click on the mask. Then I double-click on the mask, it will bring up my mask properties and I can add about a 200-pixel feather to that.
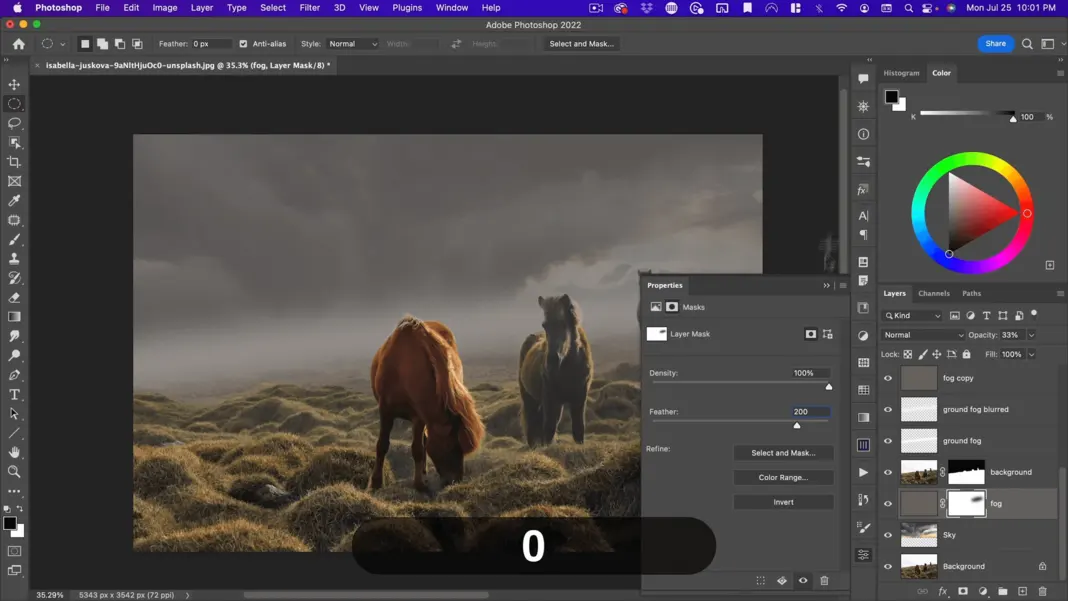
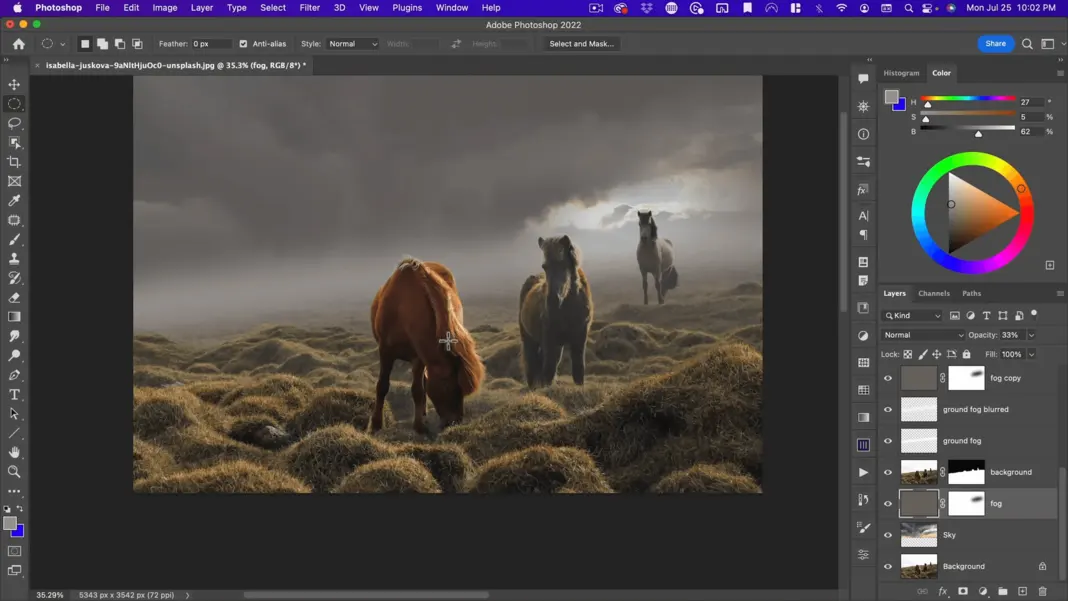
Now I can hold down Option and Command and drag this up to my other fog layers. I think that looks pretty good.
The other thing I might want to do is add more sky texture. There are various ways I could do that, but I think the easiest is to hold down Option, drag this to the top of my image, and then hold down Option again, add a mask, and then use a really big, soft brush.
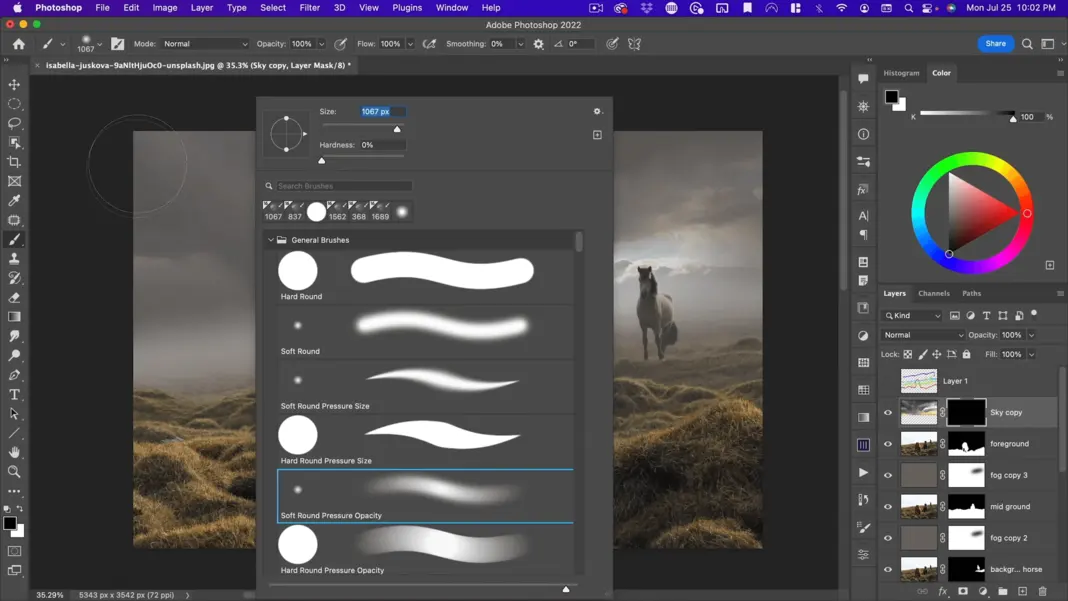
Paint the sky up around here.
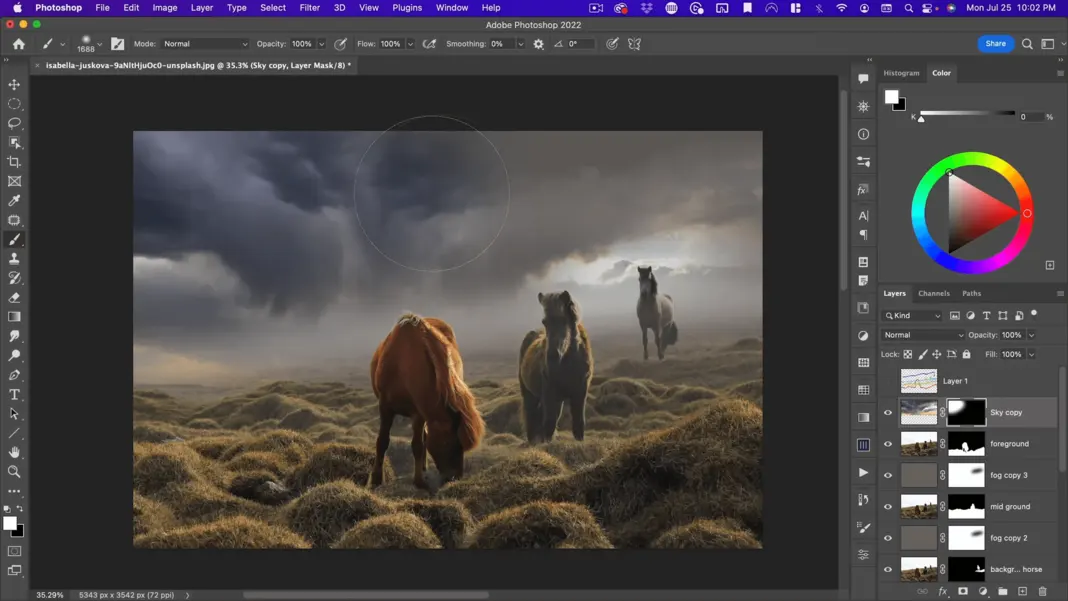
Then take the field down and make it more subtle, about 40%.
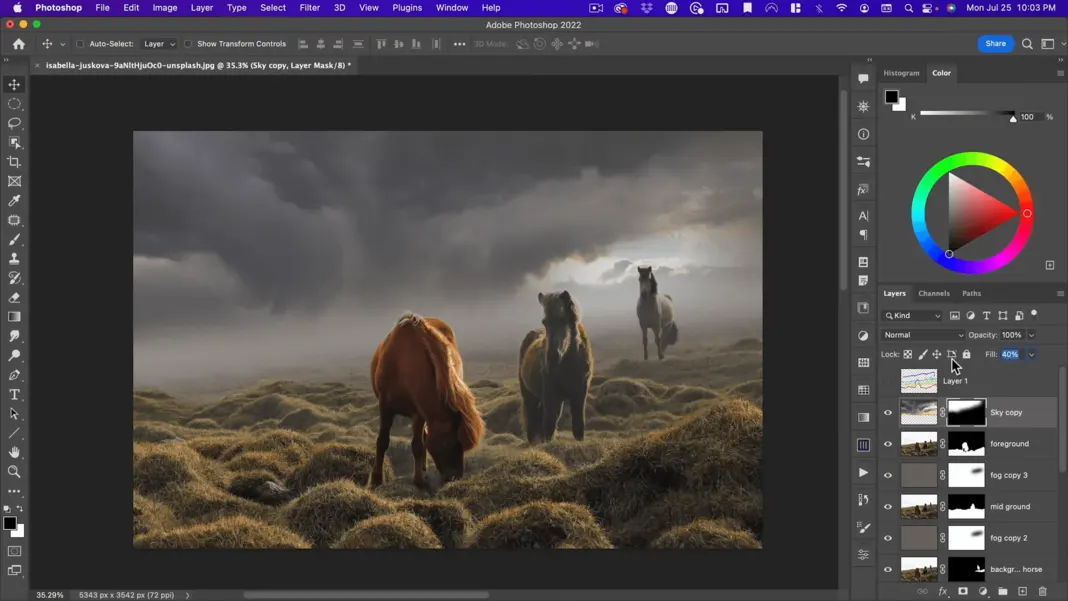
So now we have a sky with some depth. We also have some nice fog and atmosphere. The next thing I want to do is bring in our lighting. So, when we work with lighting, generally our foreground is going to be higher contrast and our background is going to be lower contrast. So, I want more highlights in the foreground and stronger shadows in the backgrounds.
I want the shadows and the lit areas to be closer together in color. The way I’m going to do that is by making the whole image a little bit darker and then making the areas where I want my light to be hitting a little bit lighter.
So, let’s go ahead and add the curves. I’m going to bring down the entire top of the curve, making everything a bit darker. And then I’m also going to bring down the middle just a little bit. So, something like this.
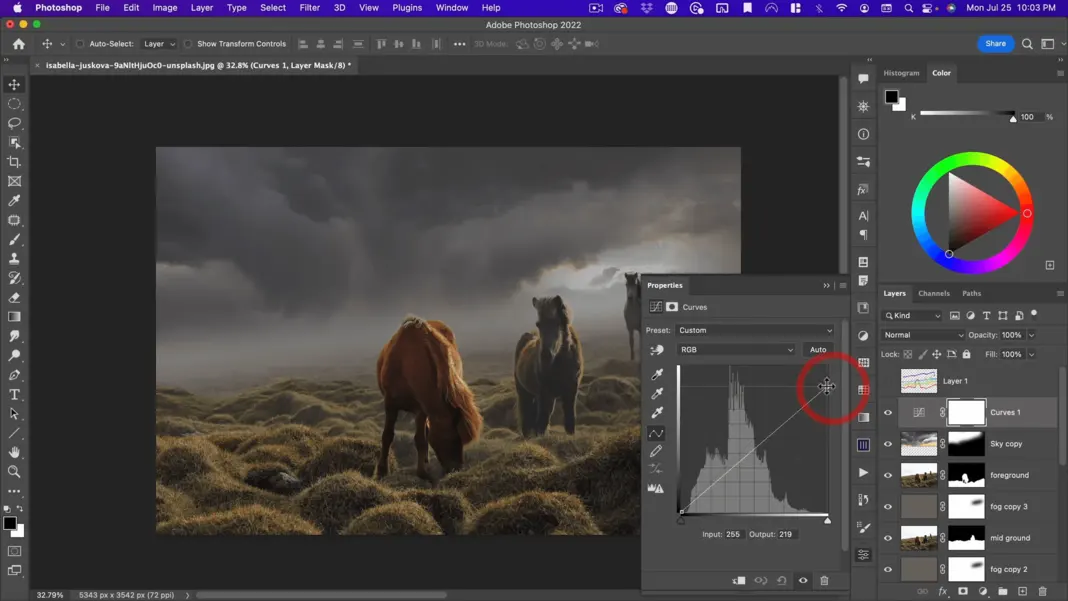
Let’s go ahead and minimize that. And then I’m going to go with a large brush again and take down my flow to about 20%.
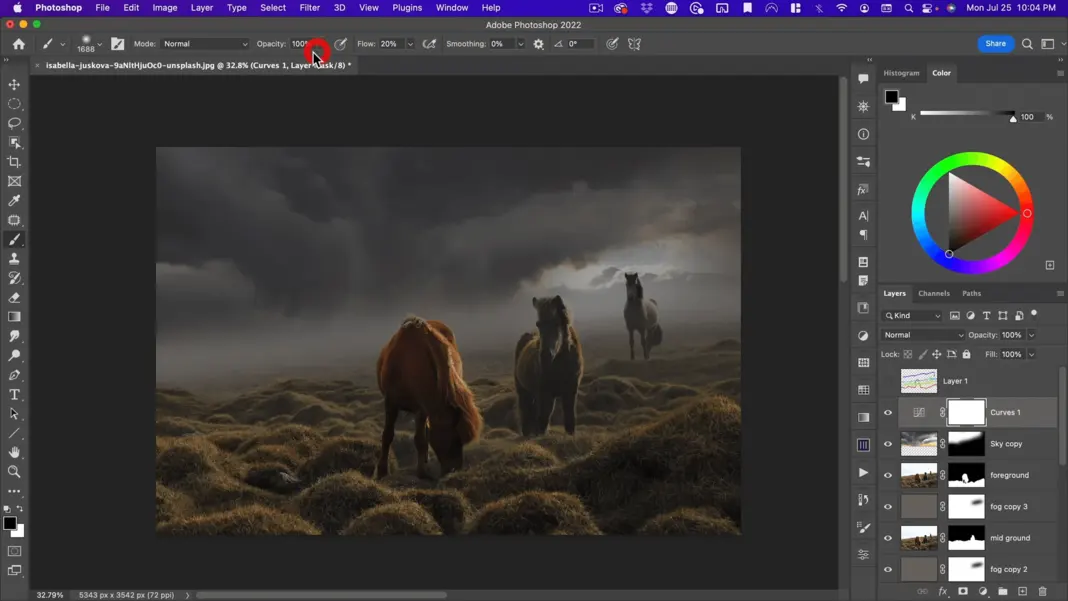
Paint with a black mask where you want the light to shine in and be careful to avoid the rest of the image.
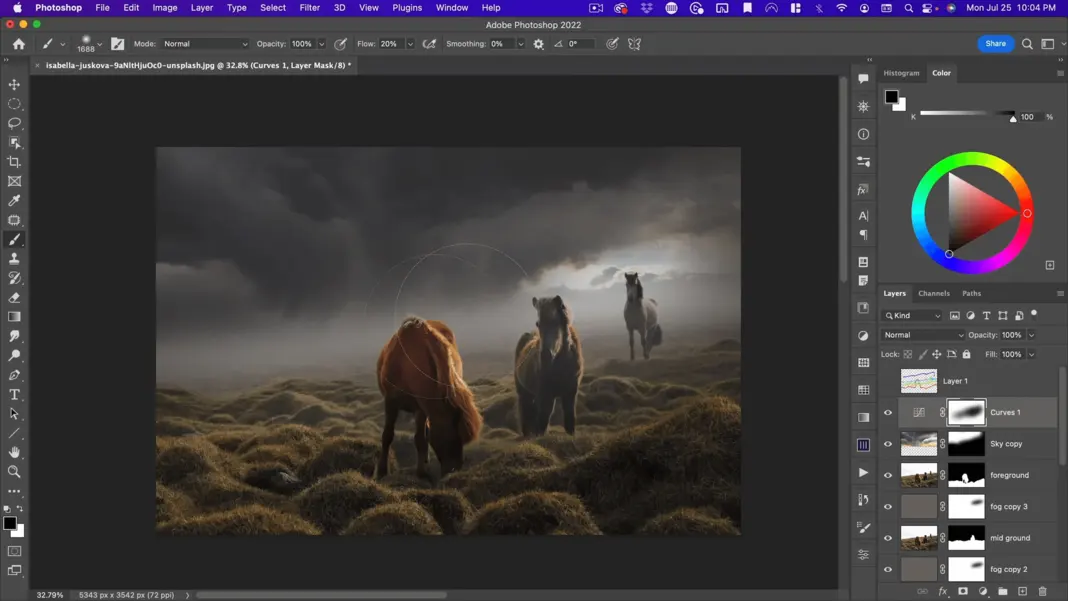
So, there you go. Now you can see we’ve created this vignette around our image, so that’s pretty nice.
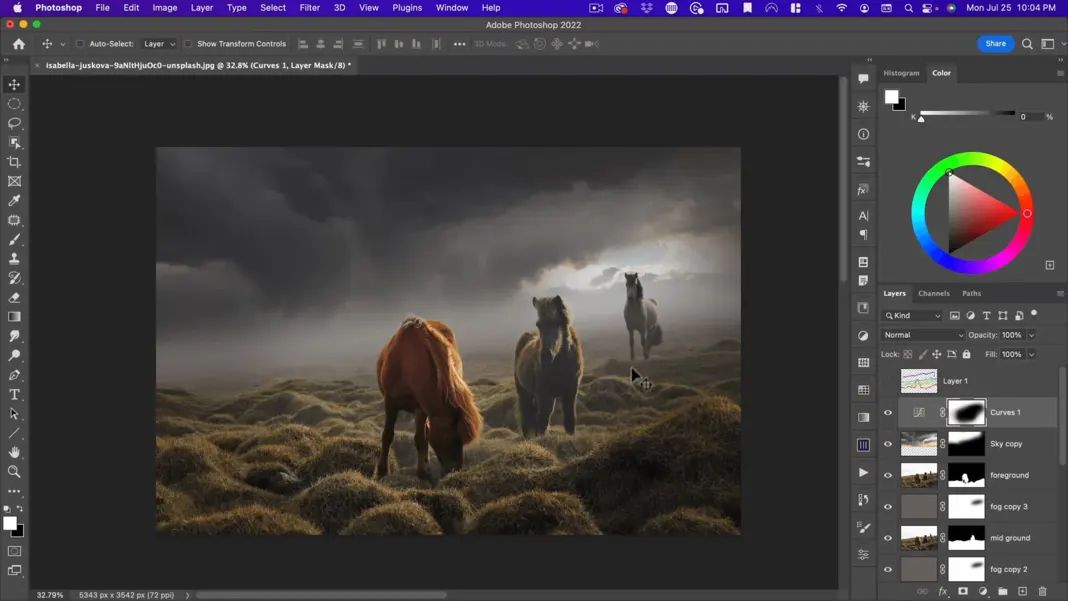
But the third horse just feels a little bit too omnipresent. To fix this, I’m going to add another fog layer called “painted fog.” For this, I’m going to use my atmosphere brush. Right-click and go to my Nucly atmosphere brushes. I’ve got these fog brushes and I’ll include a link to the one I use, but these are great for adding atmosphere. They look a lot more realistic than just using a soft brush. So, I will go ahead and use fog 02.
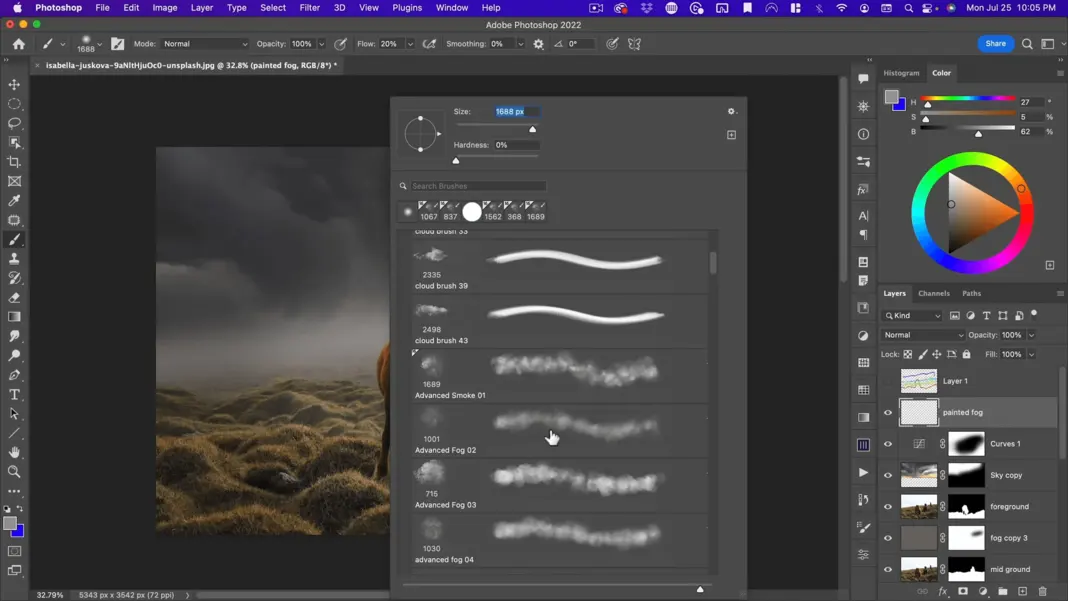
And what I want to do is select this background color here and then start painting.
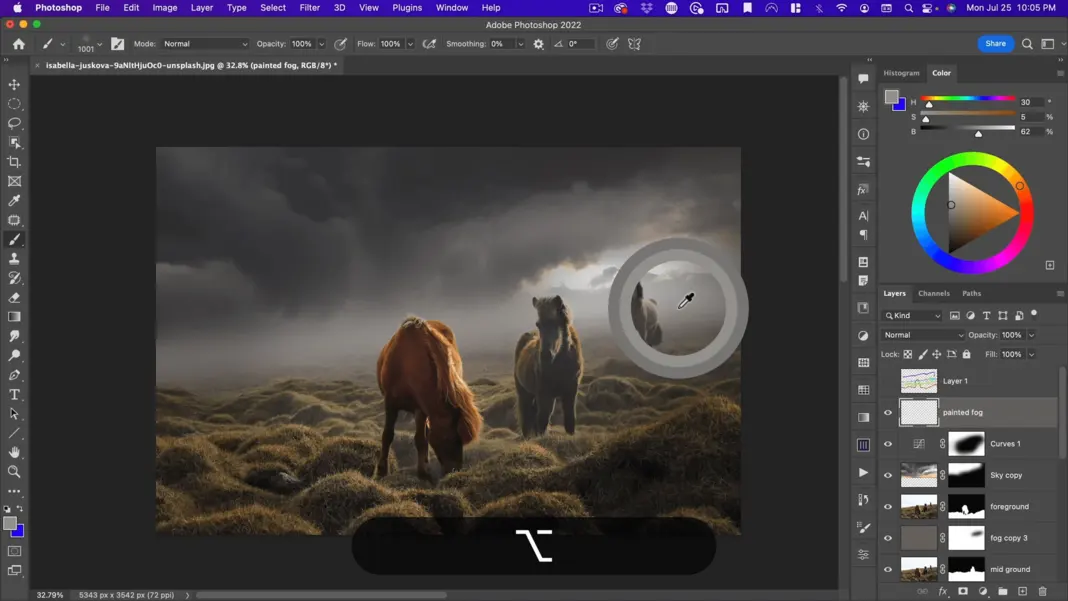
I’m going to paint quite a lot because I want this fog to match up with the colors already in this background.
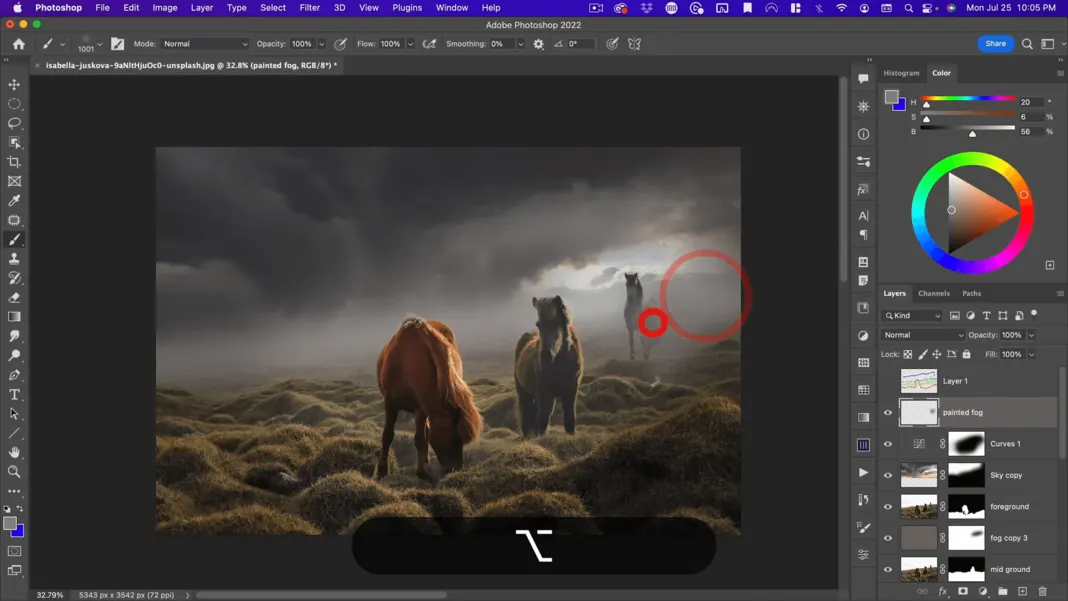
By painting with this color, we make it look like it’s kind of fading into that background. It is also a nice way to break up the plain gradients here, and make it look a little more natural.
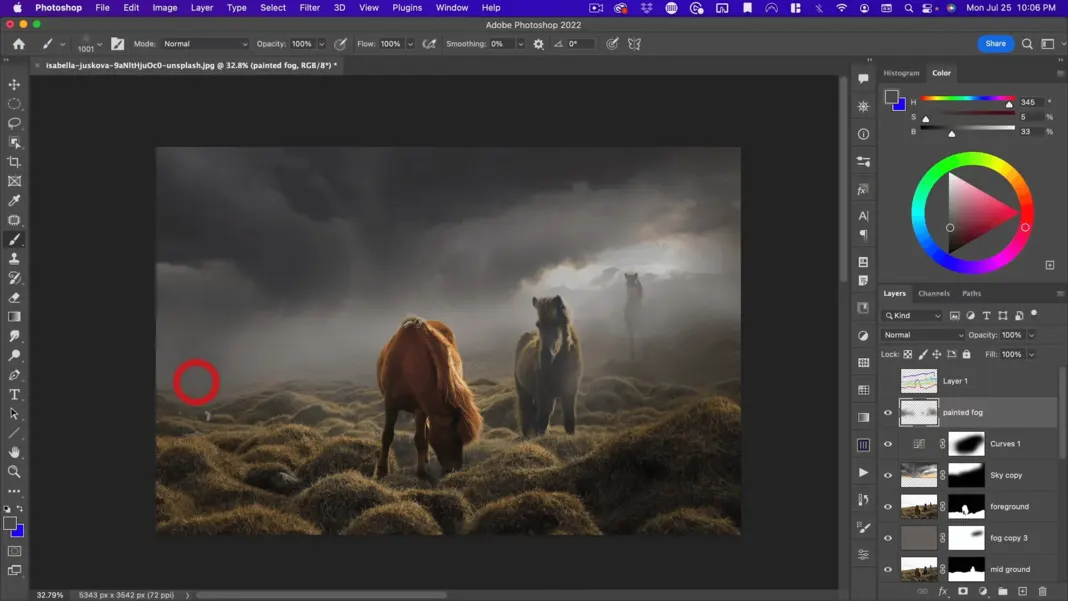
That’s probably a little too strong. Take it down just enough to see the horse is still there.
Using Color Depth
And then the next thing I want to do is use color to add even more depth to our image. Now with color depth, remember your background will have cooler colors and your foreground will have warmer colors. That’s the very simplistic definition of color depth.
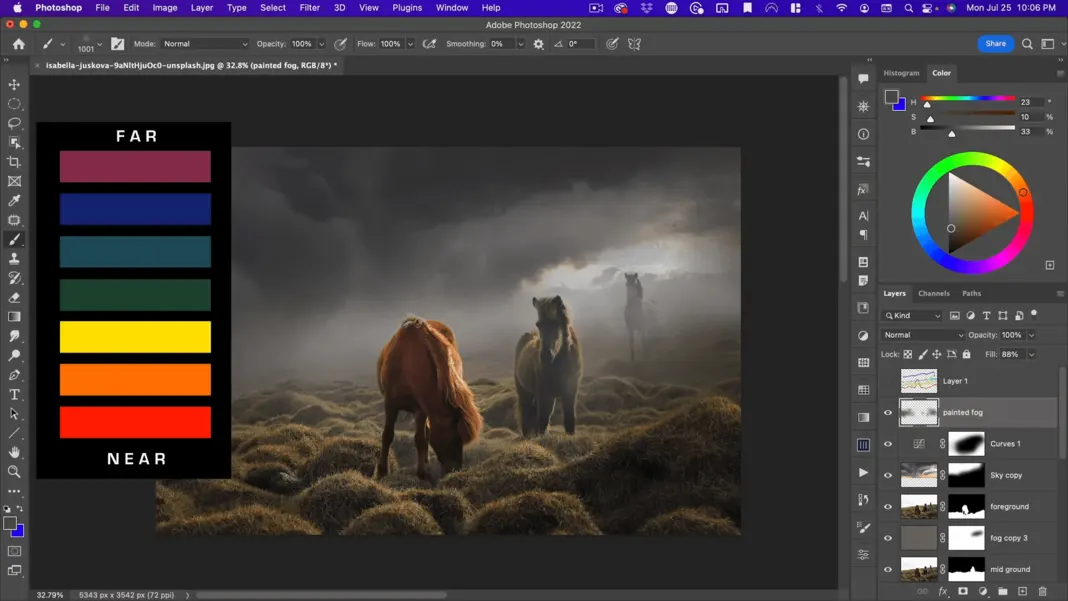
I wrote an article on color depth, but generally, you want your warm colors in the foreground and you want your cooler colors in the background. So, let’s go ahead and add a curves layer.
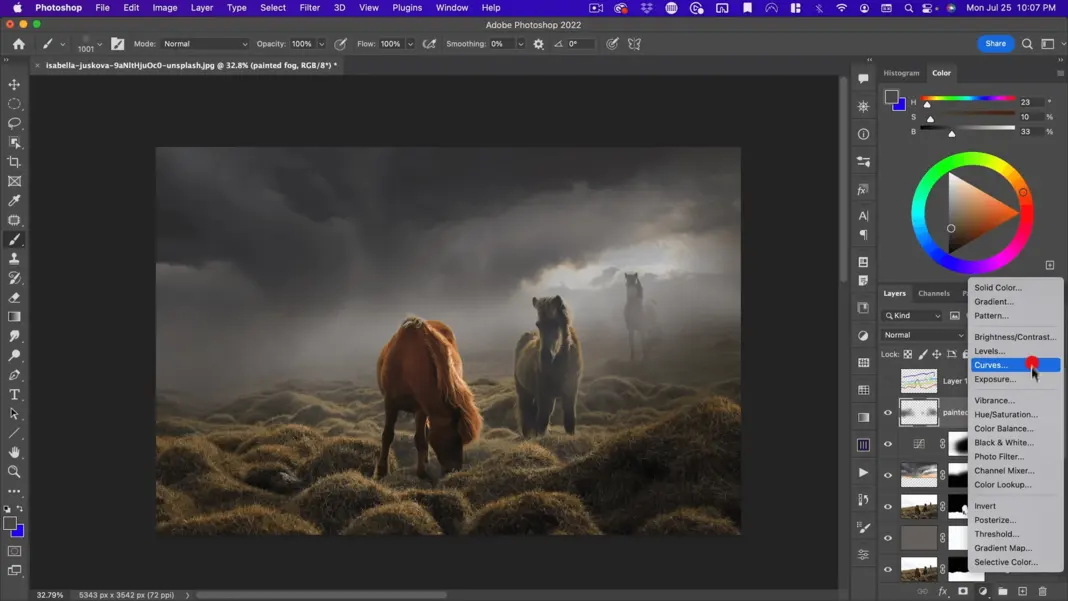
I’m going to go to my reds and the opposite of that is cyan.
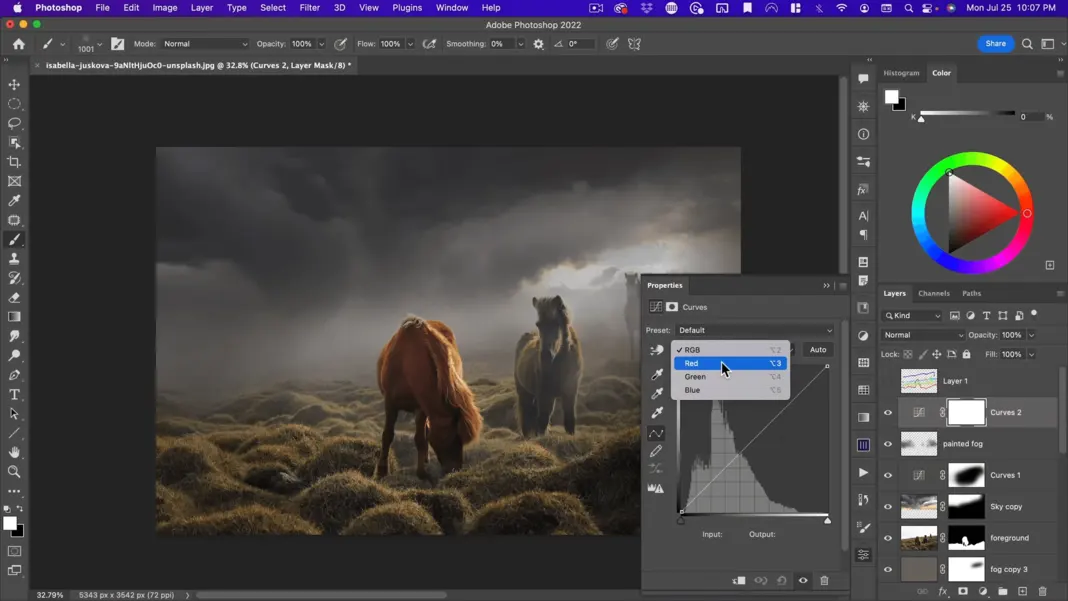
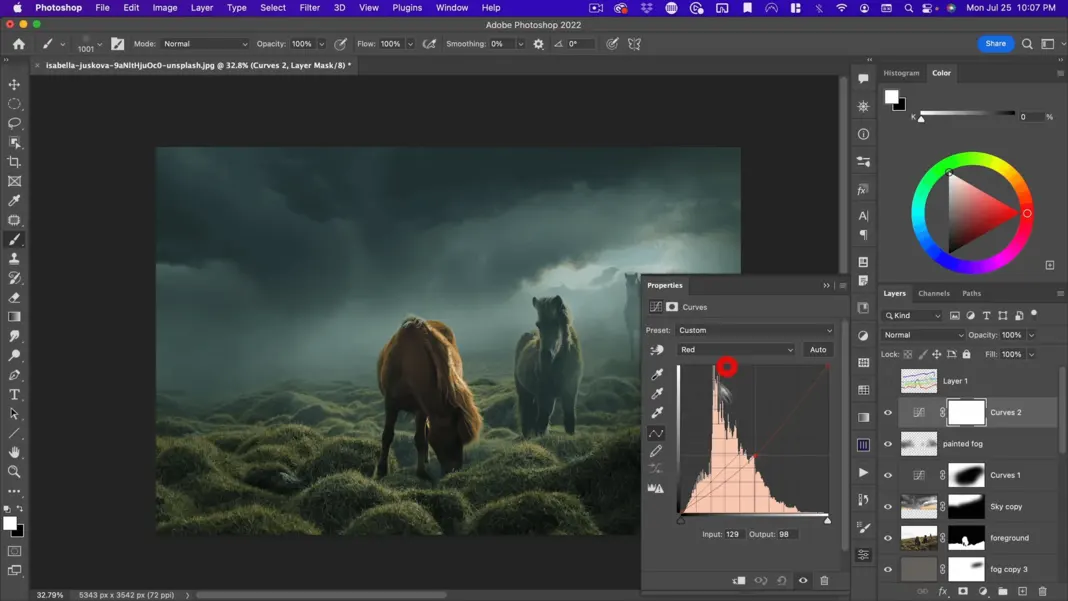
Just start adding some cyan to the whole image. That’s going to give my whole image a cool look.
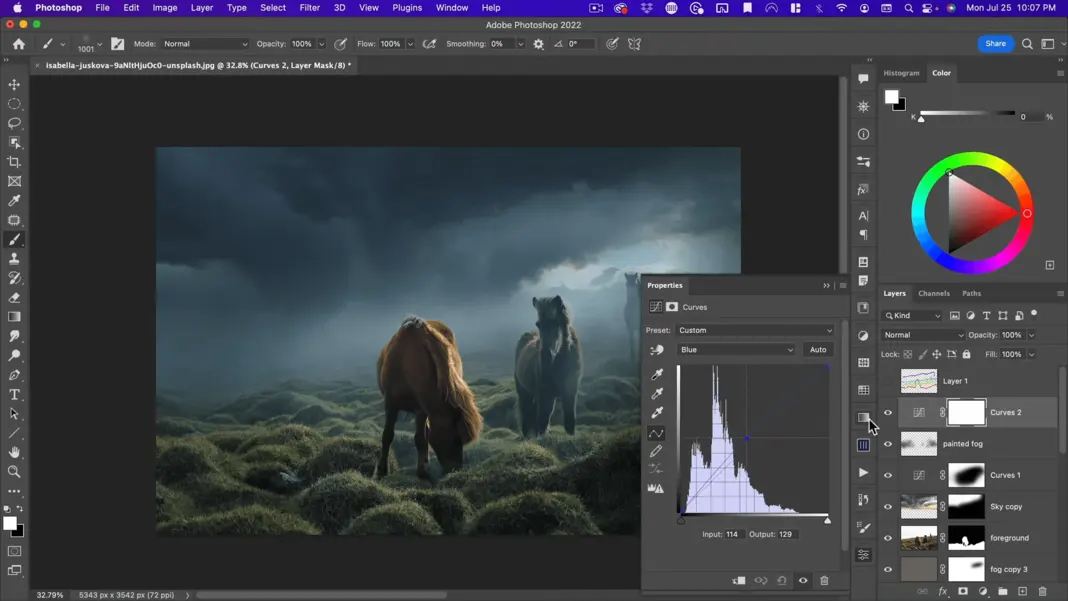
Next, I want to take my foreground and cut it out of this mask, so the foreground stays nice and warm.
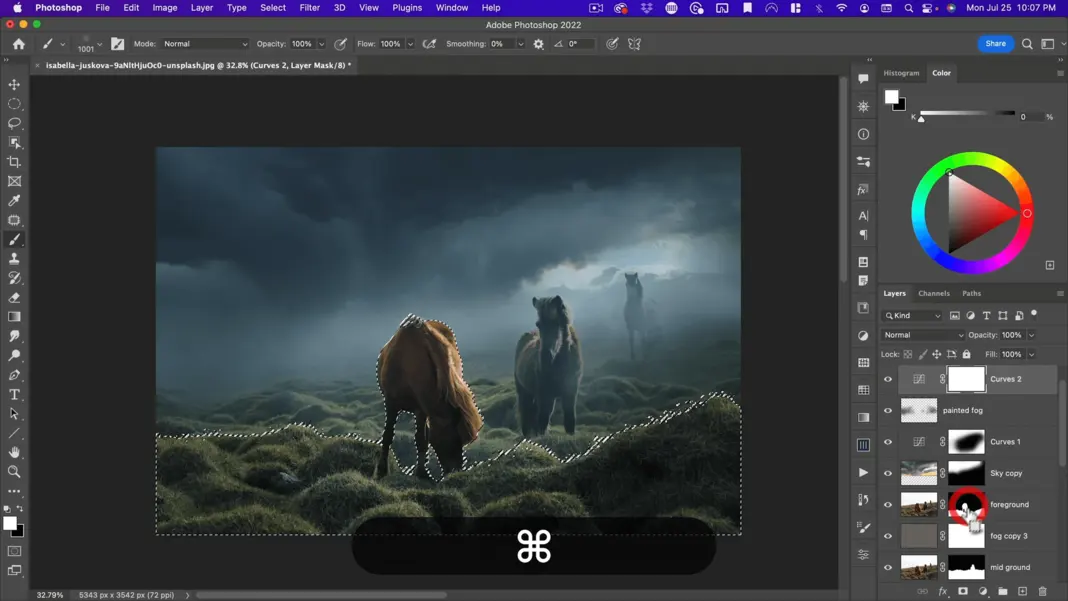
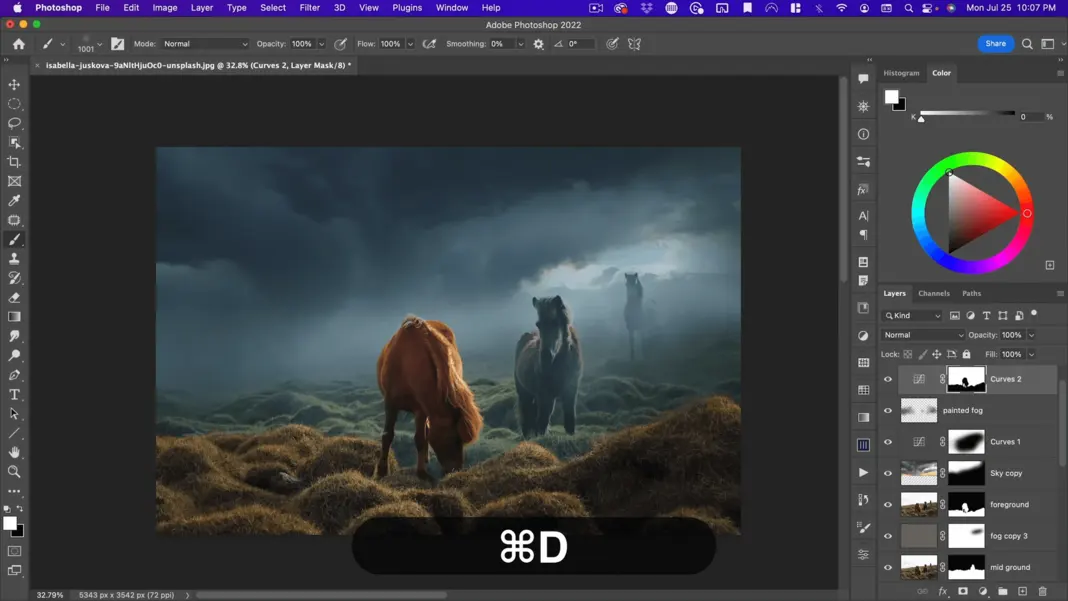
I think it’s a little too much here, but I do like the horse being warm. So, I’m going to go on a linear gradient with white and add in the color gray everywhere except for where the horse is.
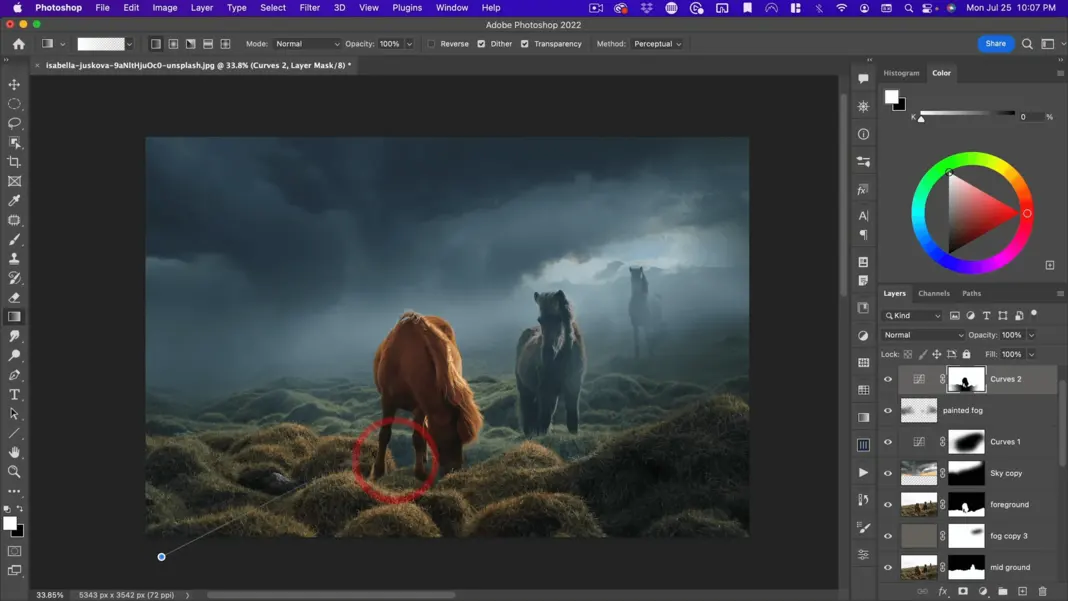
I think that looks pretty good. I also think we need a little bit of that warmth on the horse. So, I’m going to select the middle ground.
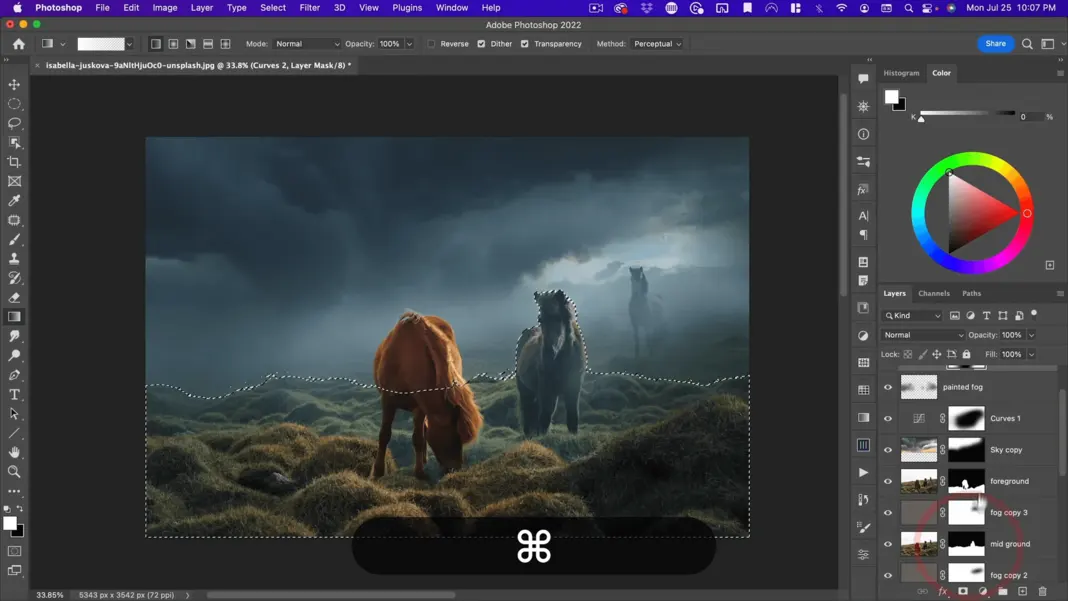
Then, with a black brush, paint a little bit of the color back into this horse.
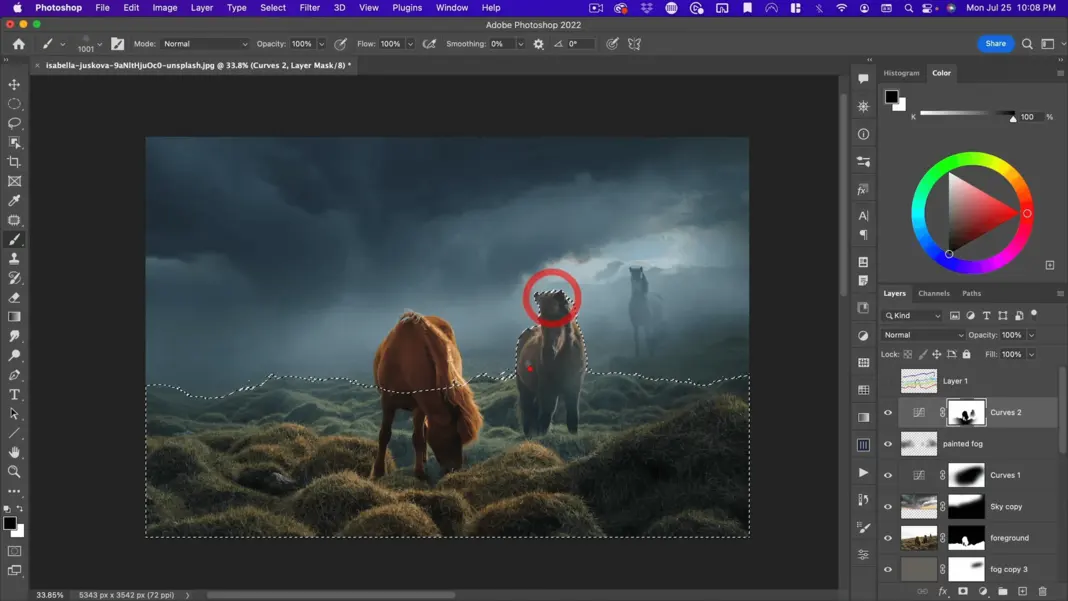
So now we’ve got our warm hitting in the foreground. The next thing I want to do before my final step is to add a flare into the sky. If you have any element that crosses from your background through to your foreground, it will help sell the image and the depth of your image.
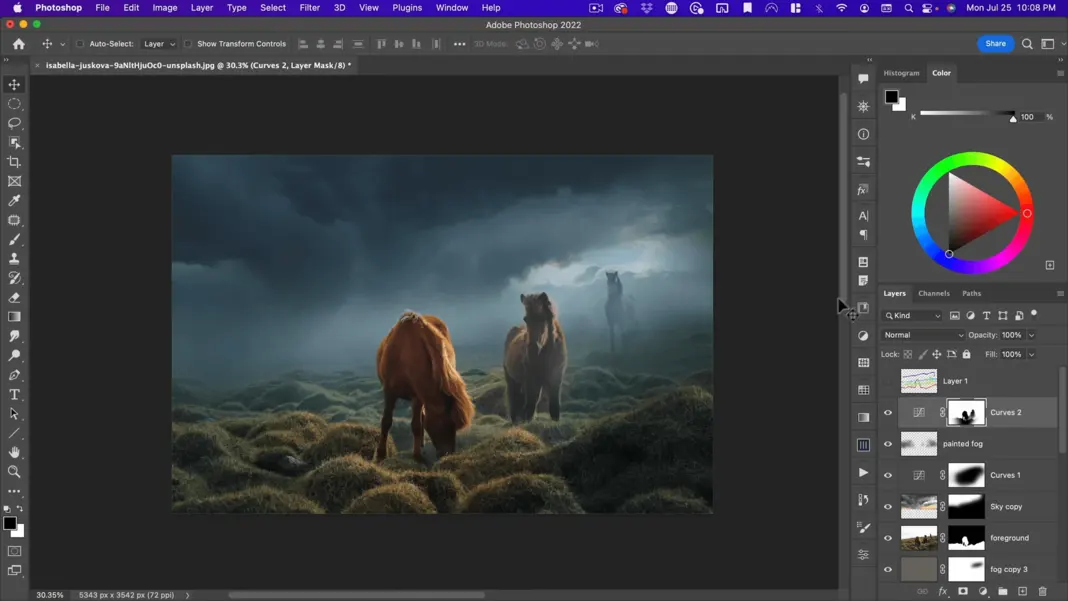
Go to the flare library and grab a simplistic-looking one. Choose one that looks photorealistic and not overdone. I’ll include this flare in the assets as well.
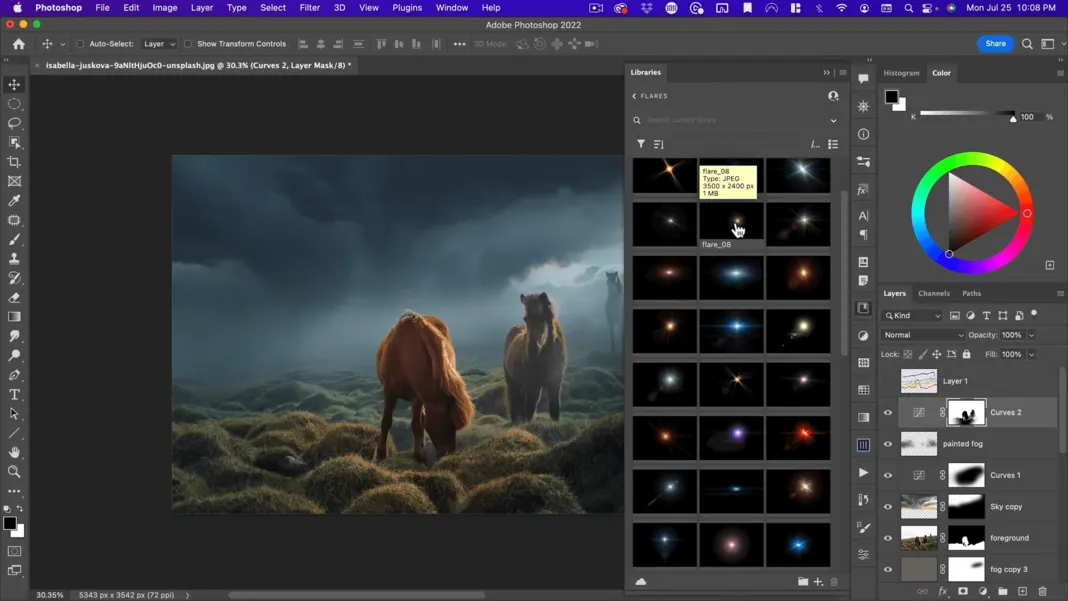
Next, make the flare bigger.
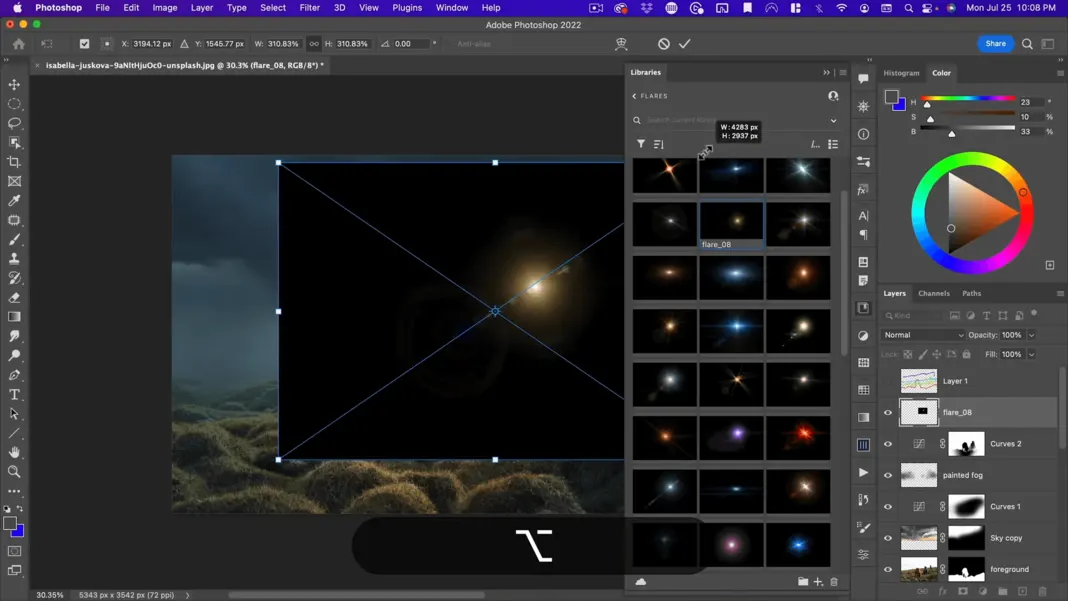
Line up the flare with where the sun is shining in the background sky there. Because it’s got these nice little light ray elements that go in front, it just helps the illusion that this is a photo rather than a composite.
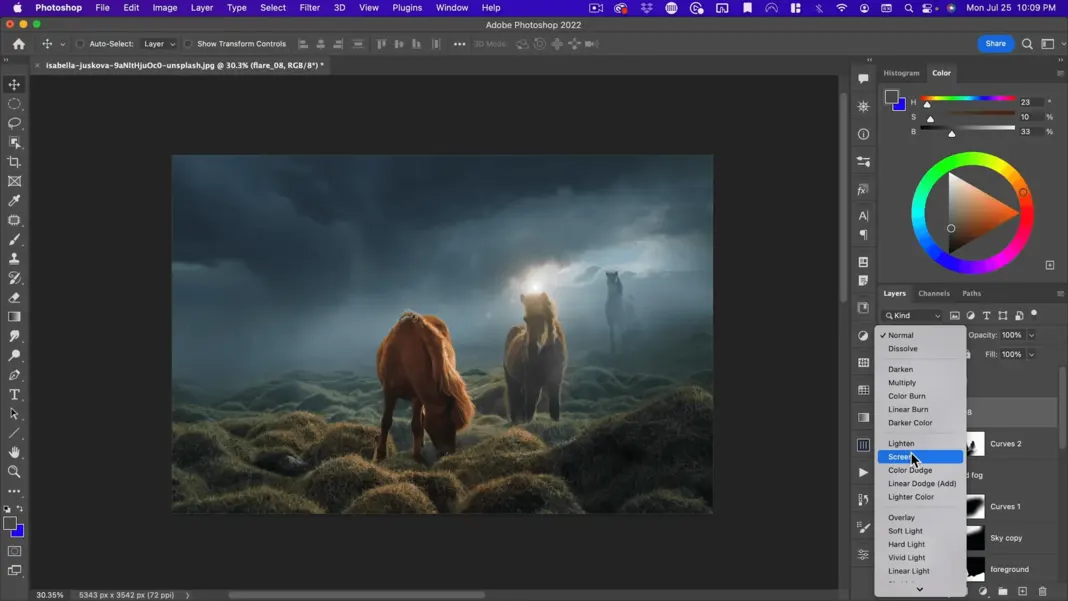
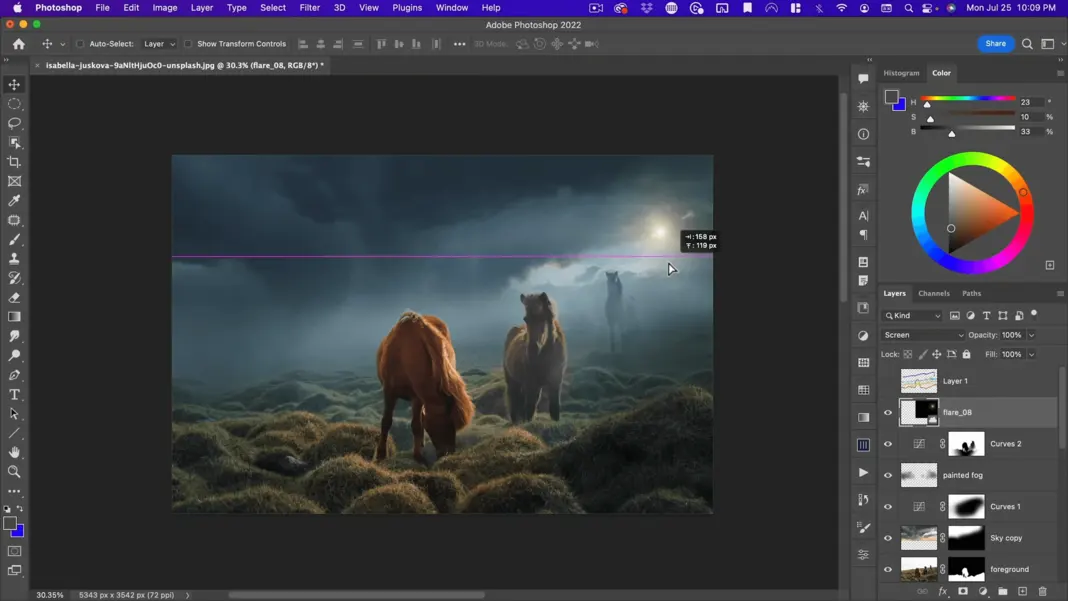
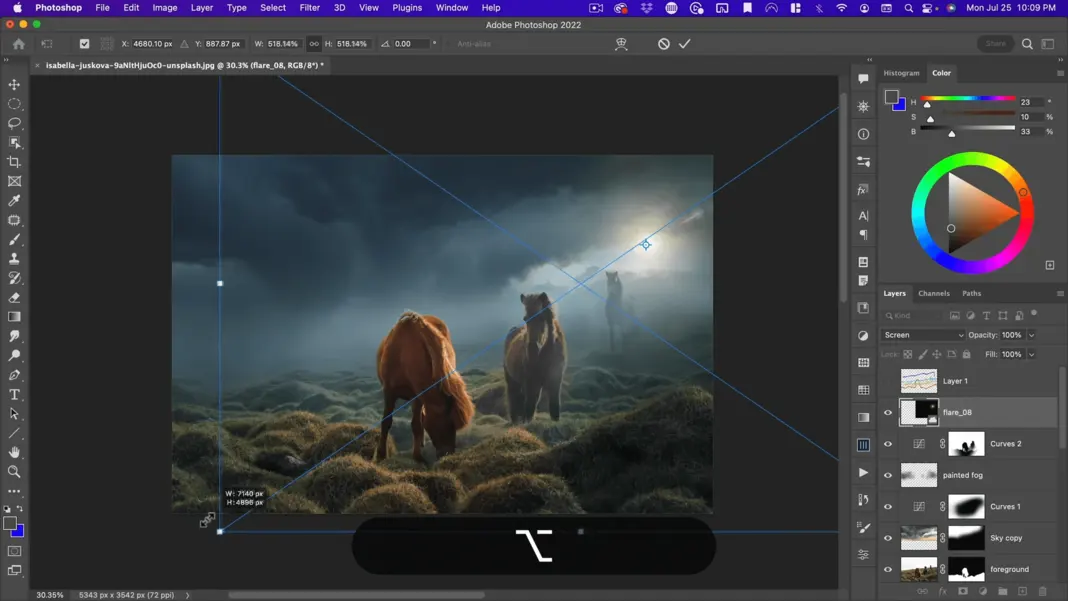
Now you can see this has some single-pixel lines. I’m not crazy about this. I’m just going to gauge and blur those out until I don’t see the strong lines anymore.
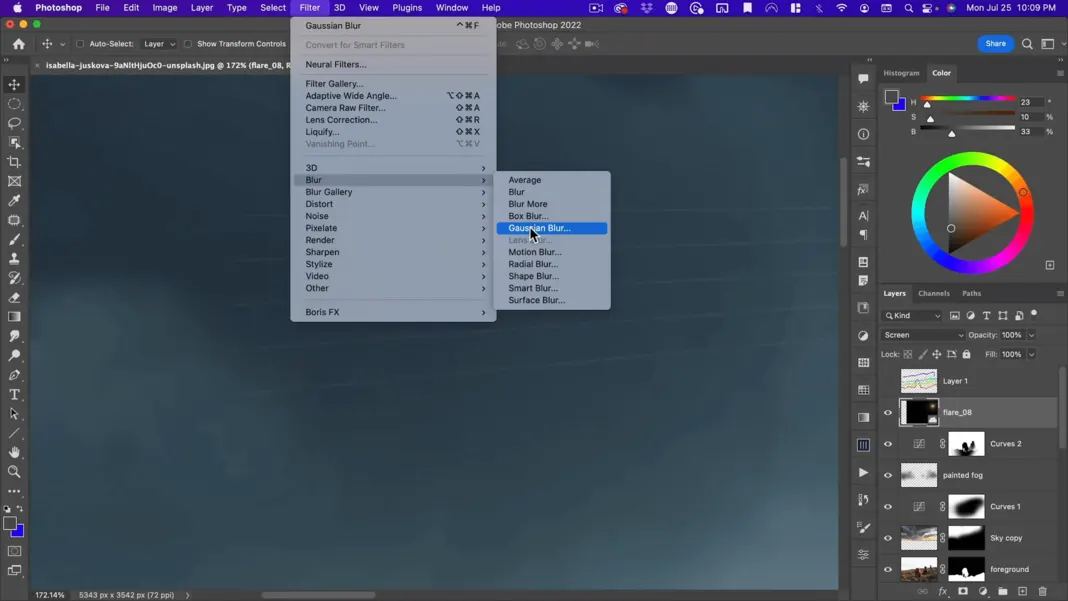
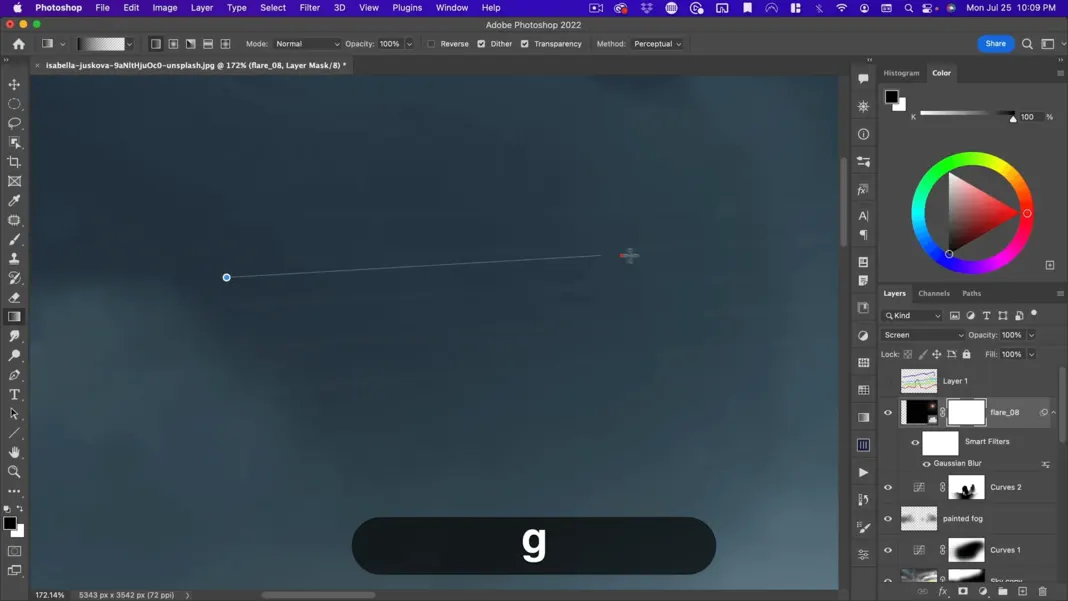
So around 4.5. And then I’m also going to add a mask and just paint or feather out the edge. So, there I’m pretty happy with that.
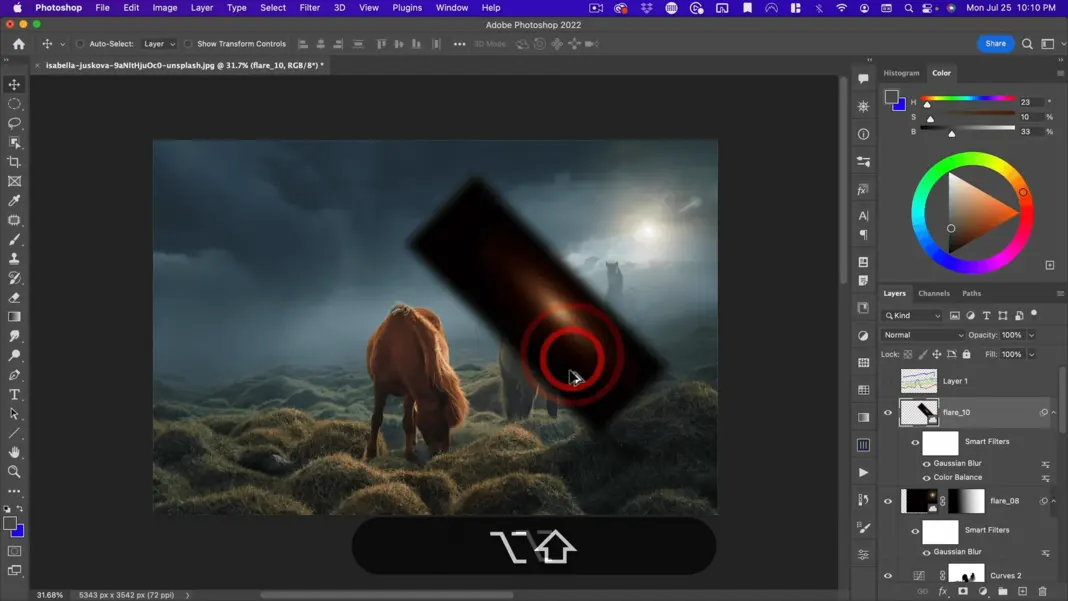
The last thing I might do is make another flare very blurred to create this shot of light where the sun is hitting the horse. So, let’s go back to flares. I’m going to use flare 10.
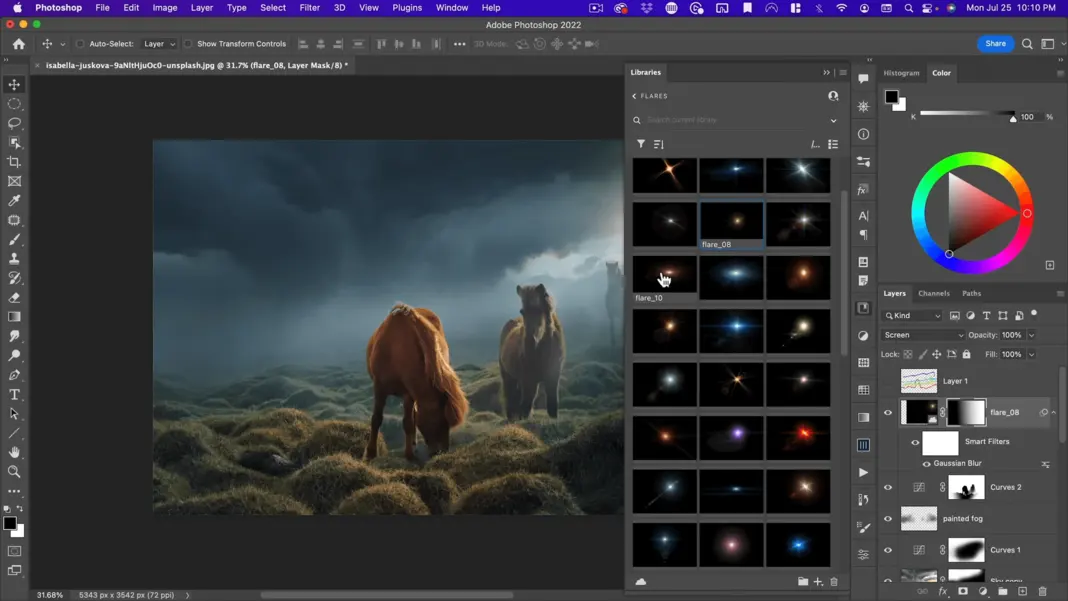
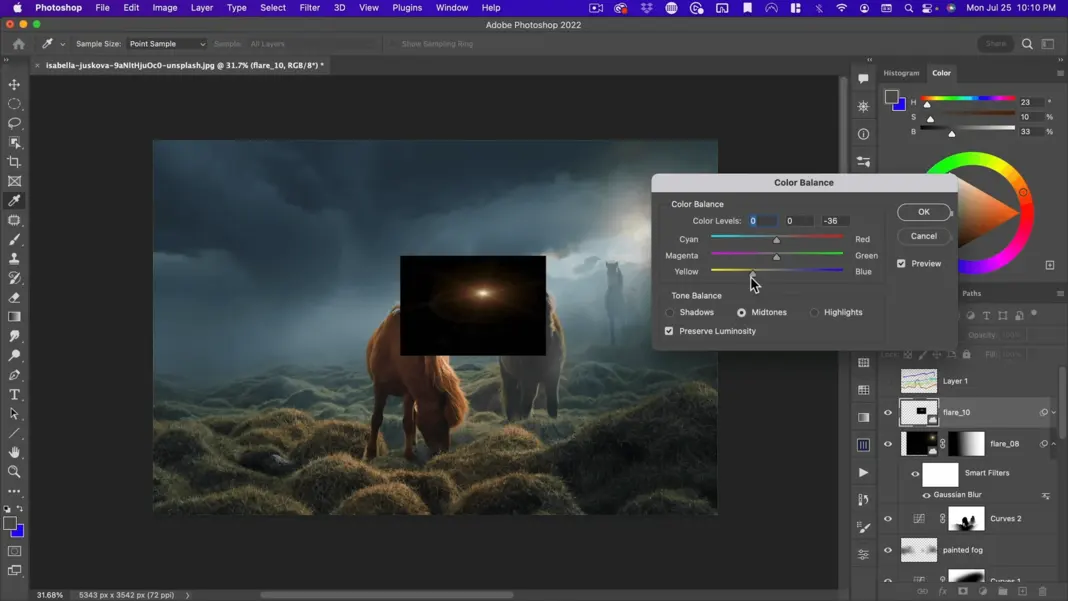
You can make the flare more yellow by hitting Command + B from a color balance. In my mid-tones and highlights, I’m going to add some yellow. In the shadows, add some reds.
Then we’re going to go ahead and gauge and blur this.
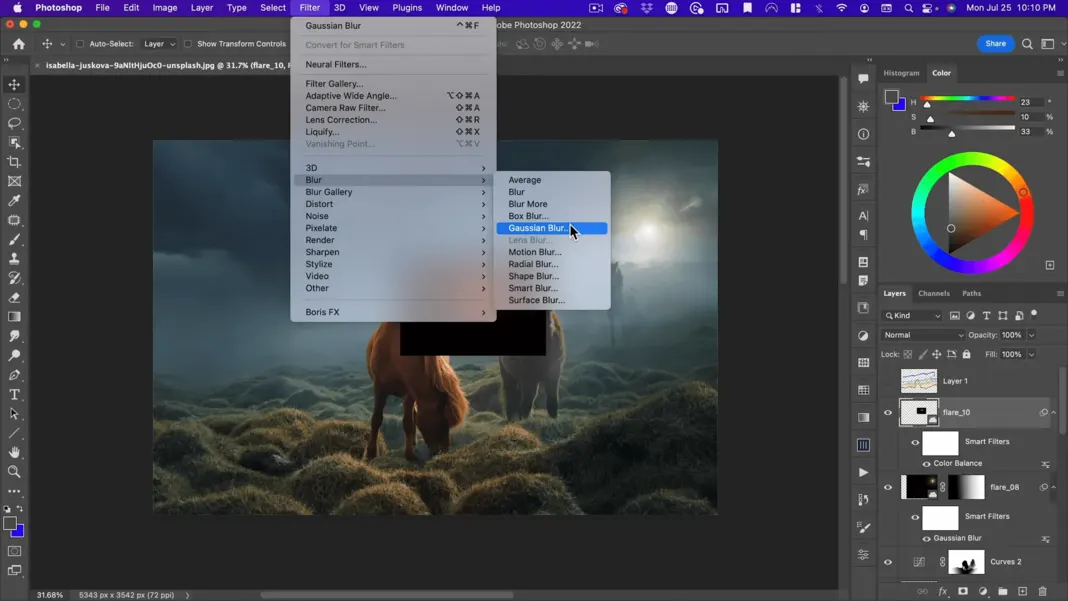
Here we want to gauge blur it so it doesn’t even look like a flare anymore. It is just going to be a hit of light.
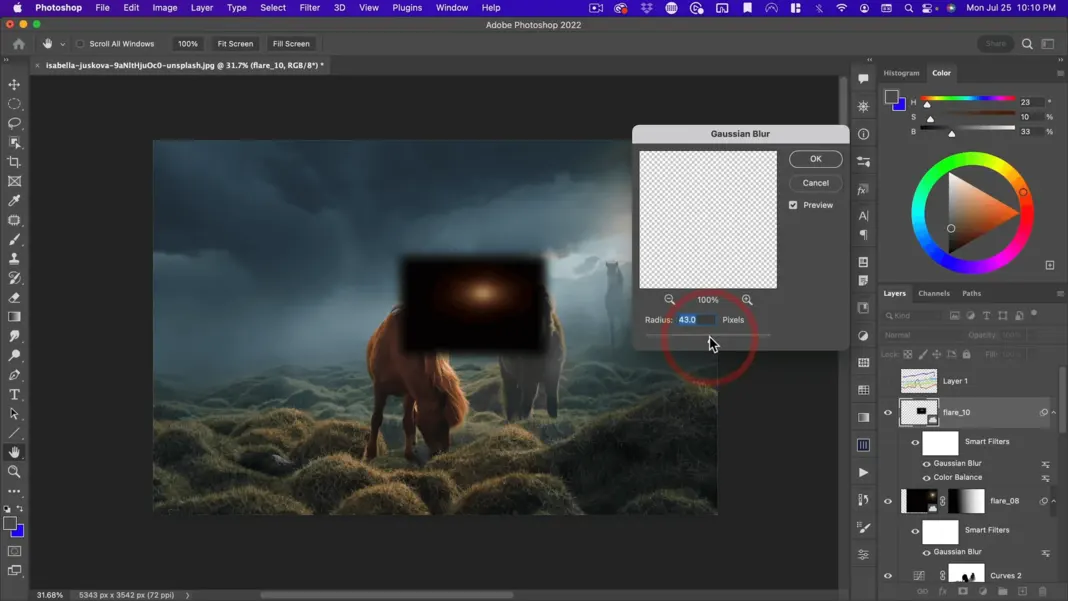
So, line it up with the horse’s mane and get something like this.
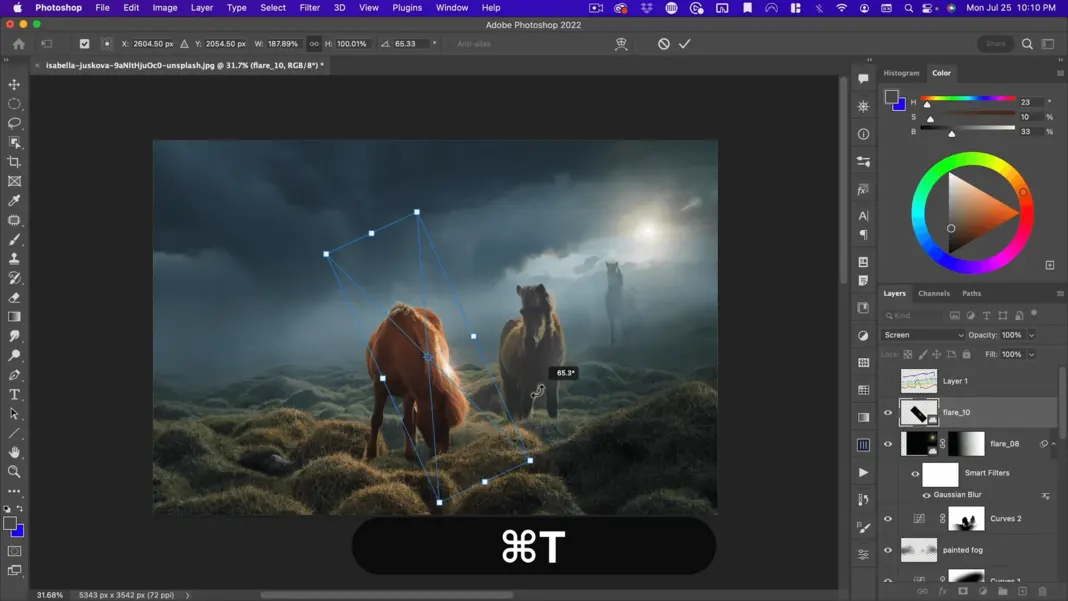
From there, I chose to make it a bit smaller and do a curve to make it a little bit more contrasty.
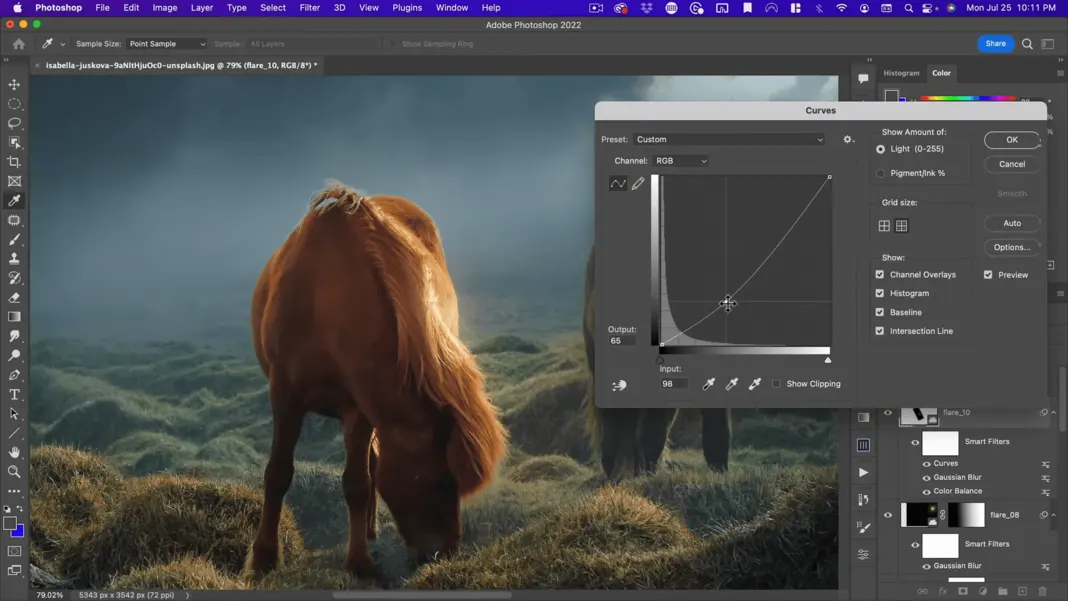
Add a little bit of a highlight on the horses.
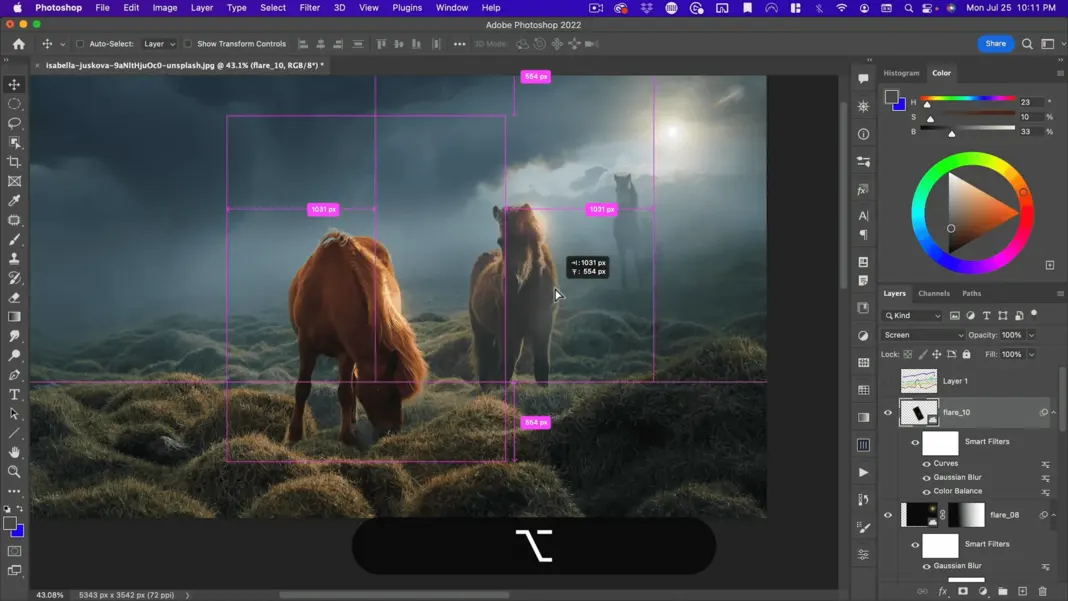
Okay, so there you go. Now we are getting some nice hits of light.
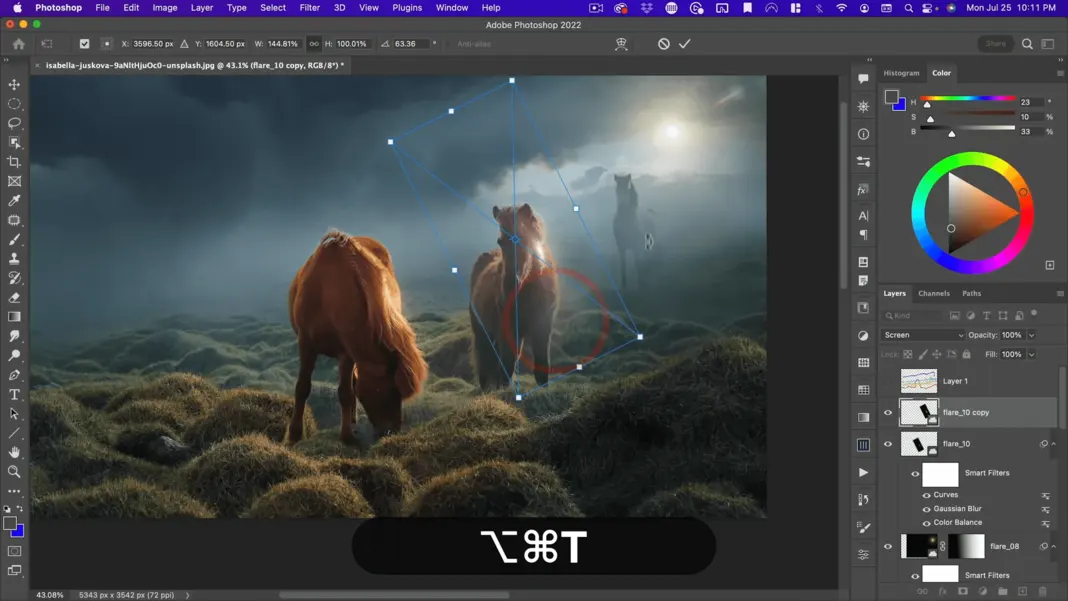
The last thing I want to do is run this whole image through the Camera filter. To do that, I’m going to make a final merged layer and hit Shift + Option + Command + E. It’s going to put everything into one layer. This is a nice trick.
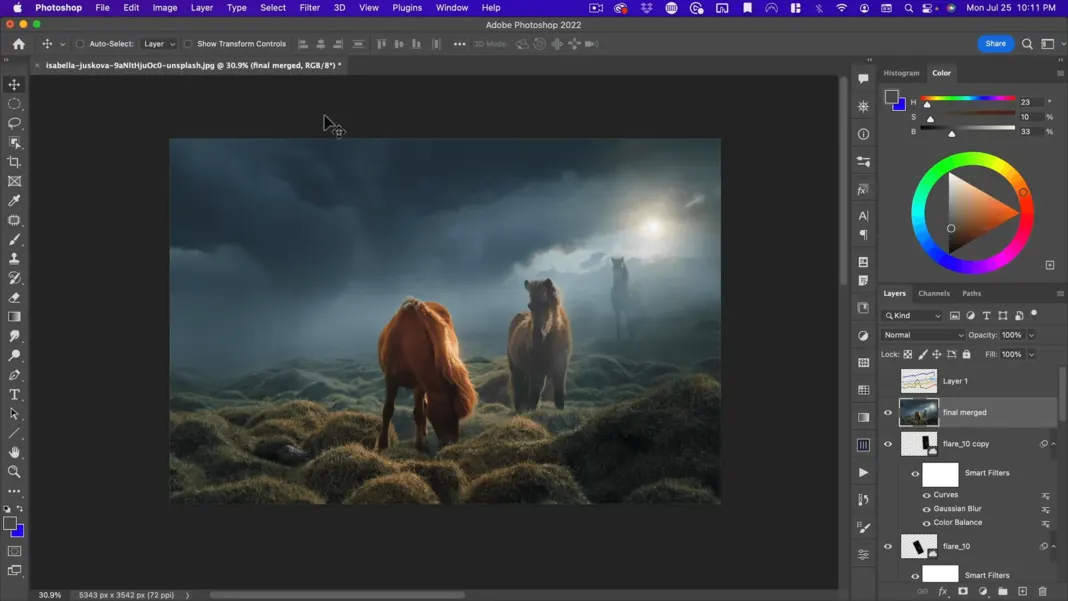
If you’re making a composite or doing a bunch of Photoshop changes to an image and want it to look more photographed, just run it through the Camera filter again.
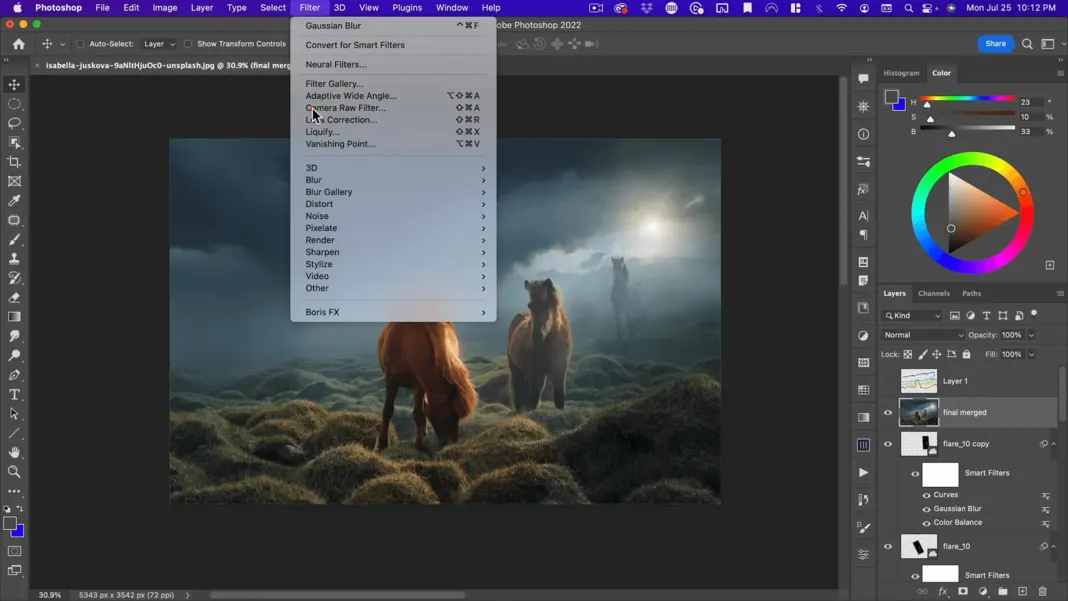
Now I’m going to make some small adjustments. Give it more warmth, make it a little bit greener, maybe increase the exposure a tiny bit, add a little bit of contrast, take down the highlights, bring up the shadows, and add a bit of clarity. Then, in Details, we can add a little bit of sharpening and under effects. This is a great little tool to bring the whole image together even if it’s almost not visible. Just know that it is doing a lot of work to pull your image together.
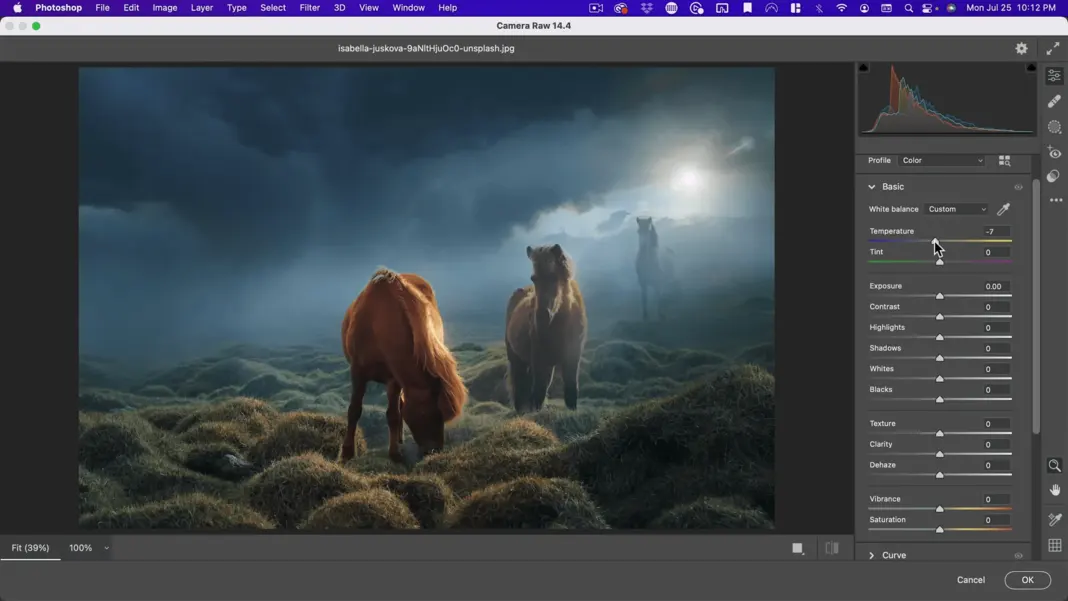
Next, I’m also going to add a little bit of vignette and color grading to add a little bit of blue to the shadows and gold to the highlights.
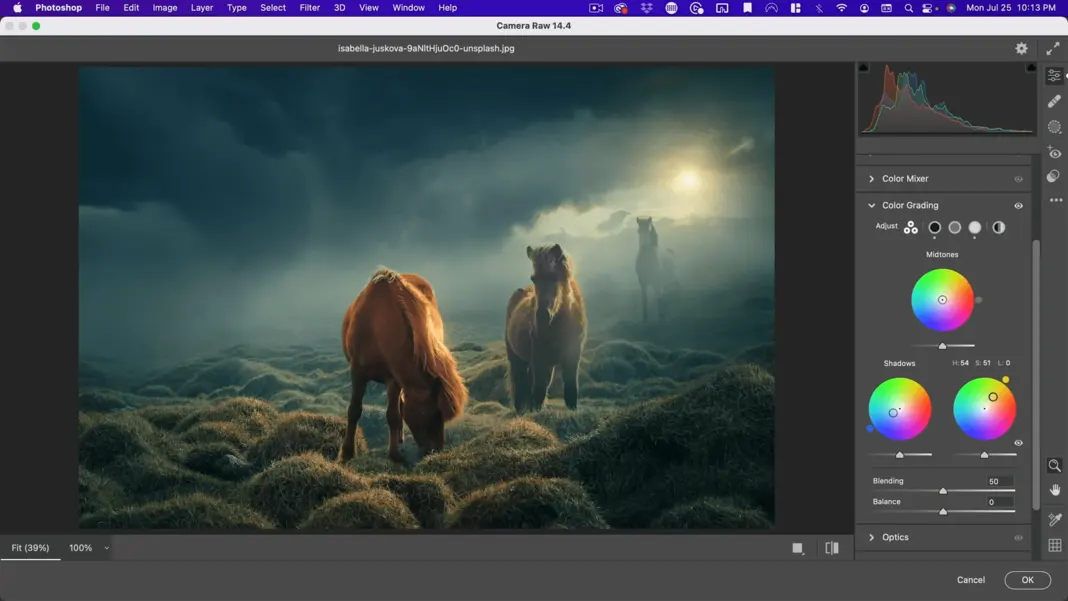
And then finally under my masks, I’m going to add a radial gradient as a strong vignette over the whole image.
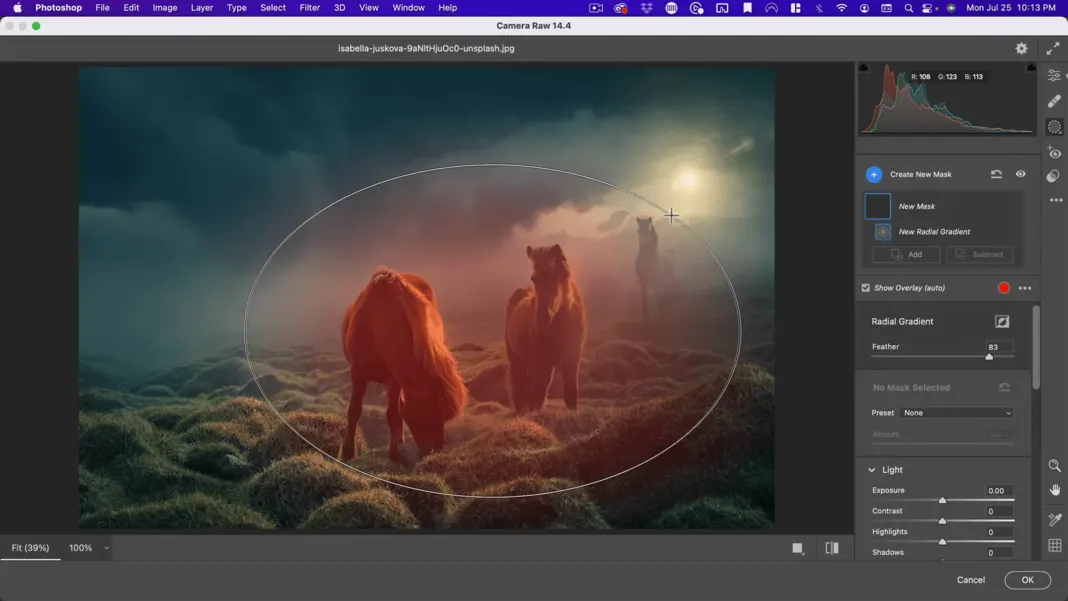
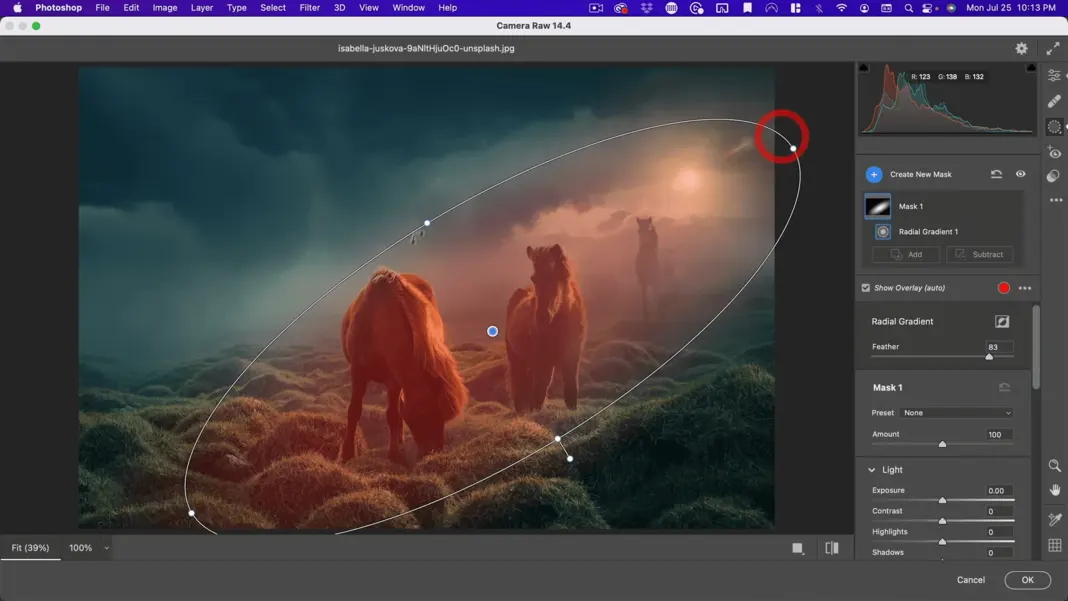
I start in the dirt where this lighting is and end near the horse. And then I want to invert it.
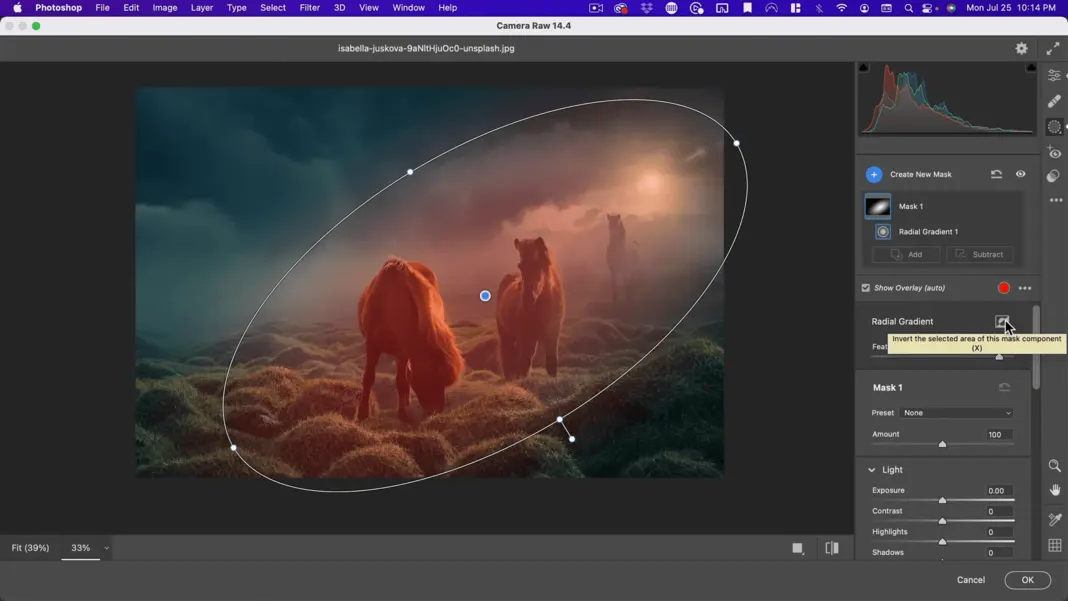
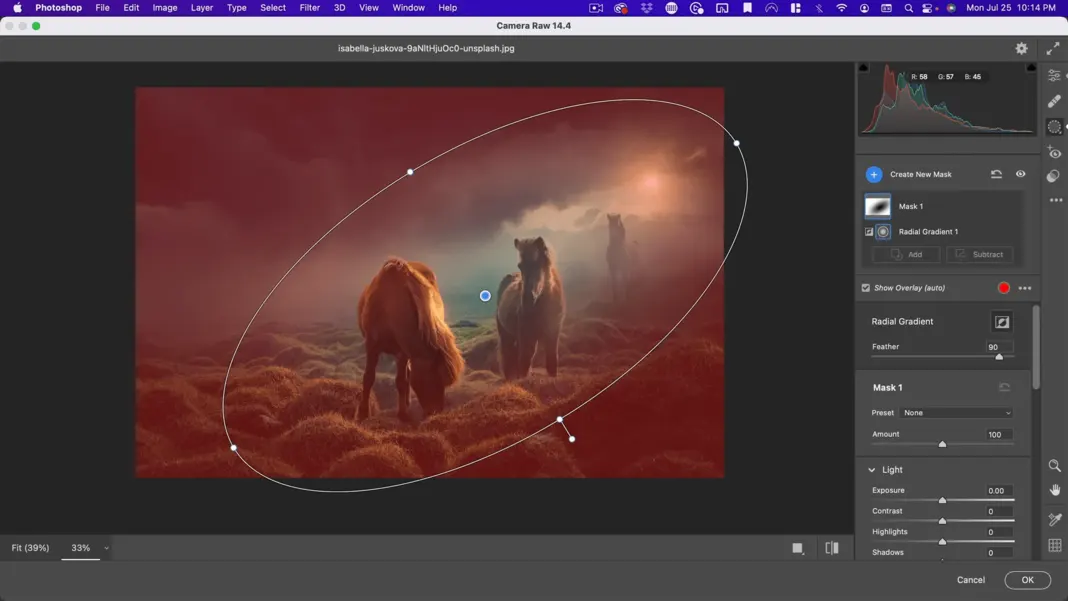
Then I want to take down the exposure to create more visual depth.
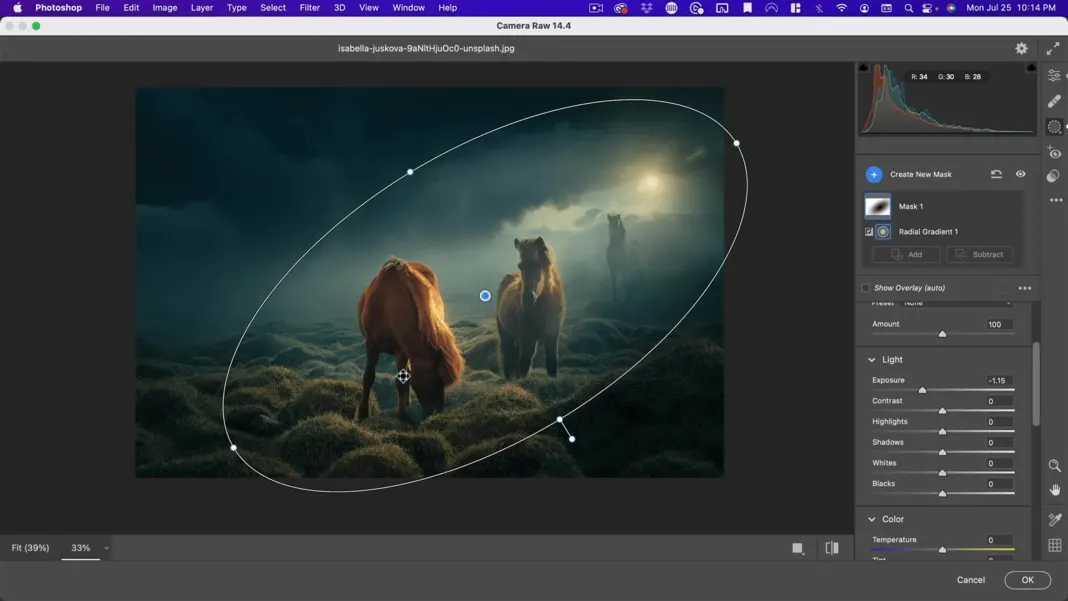
So, I’m also going to take the temperature down a little bit. Again, I’m adding a little bit more blues to my shadows and then I’m going to duplicate this and invert the mask and create a new mask.
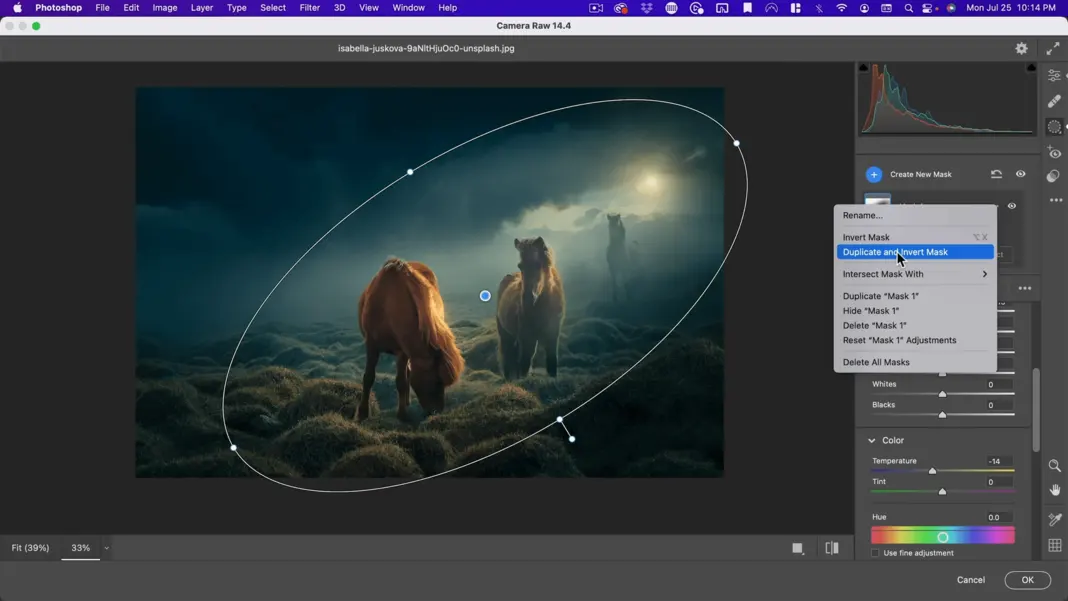
But this mask is selecting the opposite part of what the other mask was. So, with this mask, I can actually turn the temperature up, make it a little bit warmer in this area, and then maybe even take up some of my shadows in this area, to get more detail out of this horse right here.
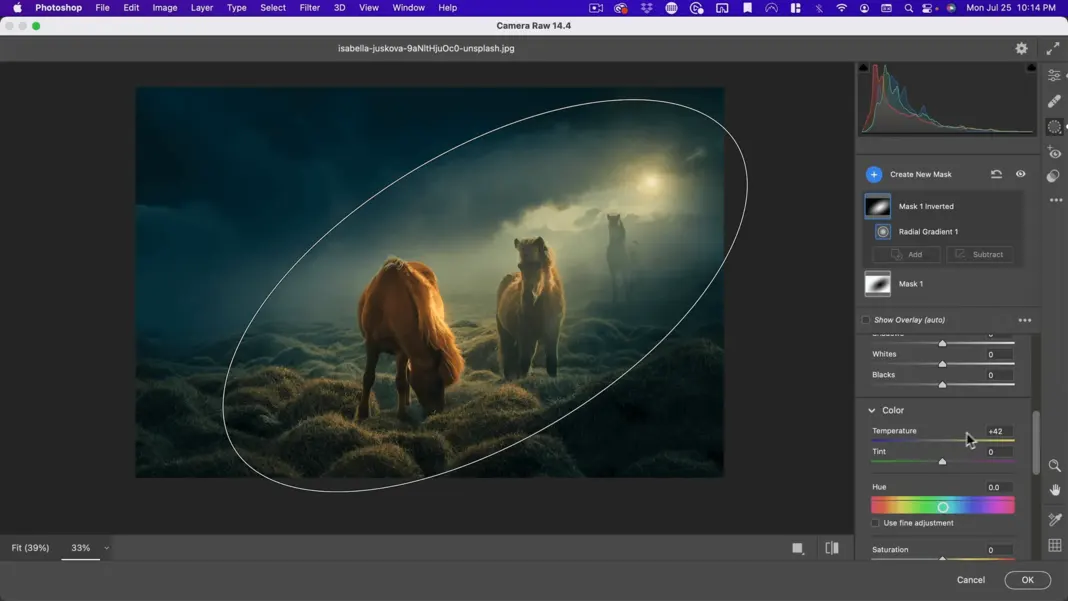
So, something like that. All right. Let’s hit escape. And there you can see it. I’m pretty happy with that.
Before:
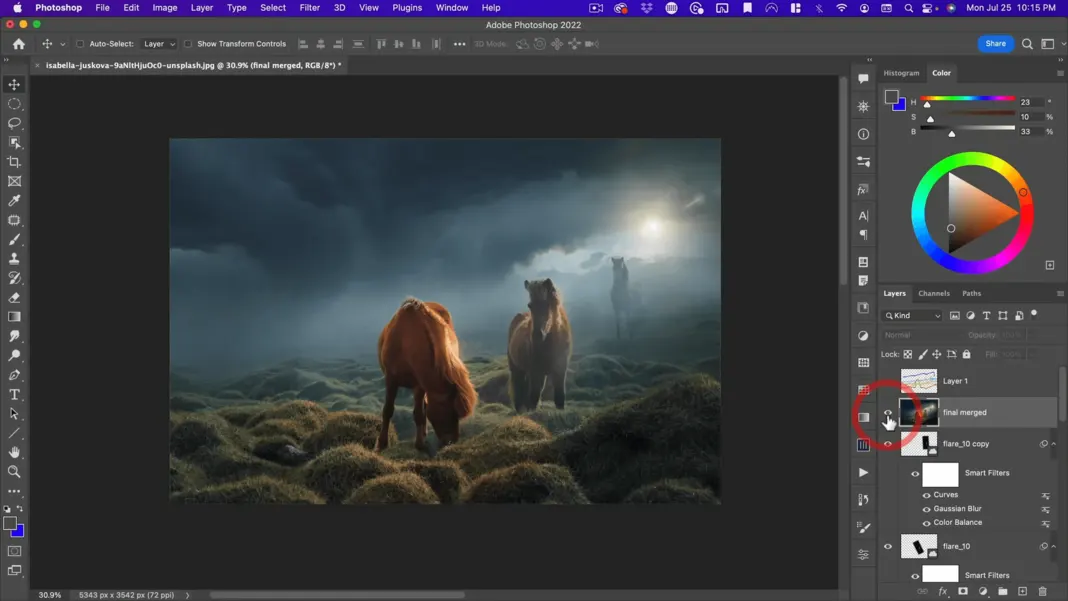
After:
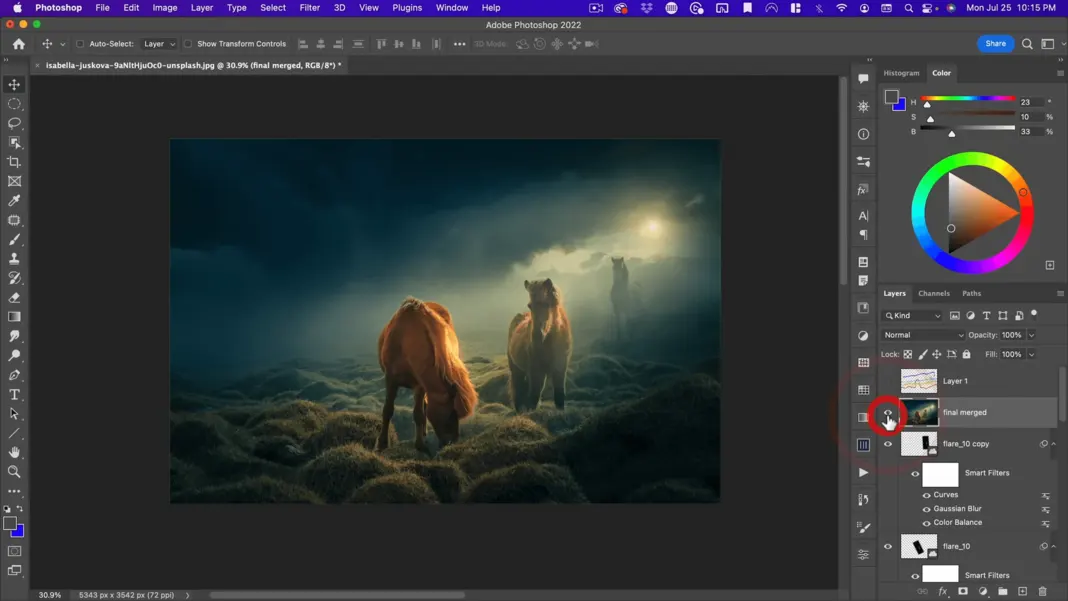
There you can see the before and the after on the whole image. So, without depth and then with a lot of depth added in Photoshop.
Before:
After:
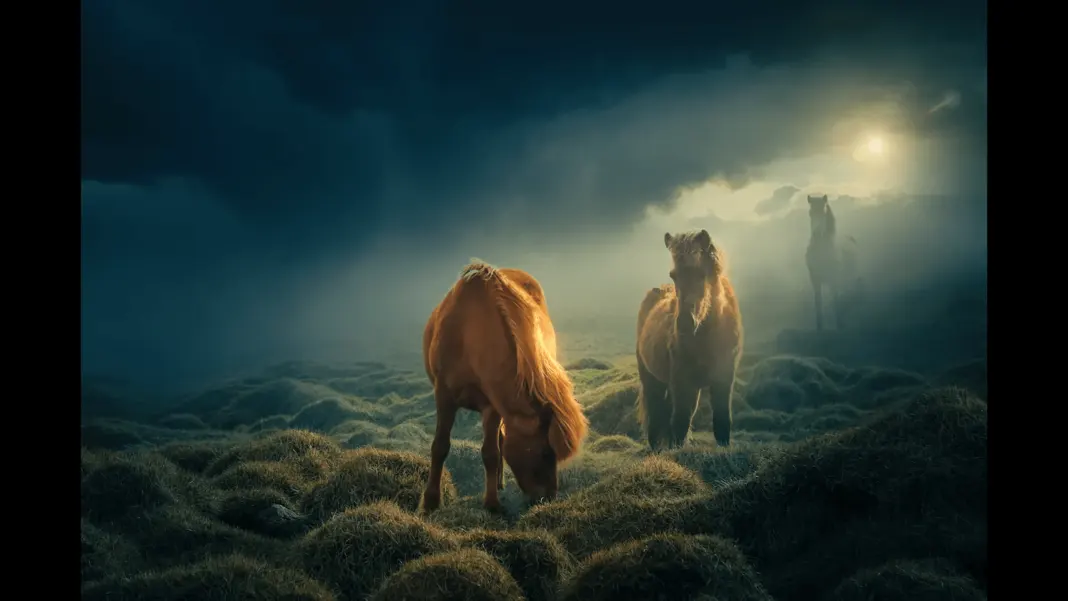
Adding Depth to Girl in a Canyon Shot
All right, for this next one, this is a photo I took of a model in Eaton Canyon.
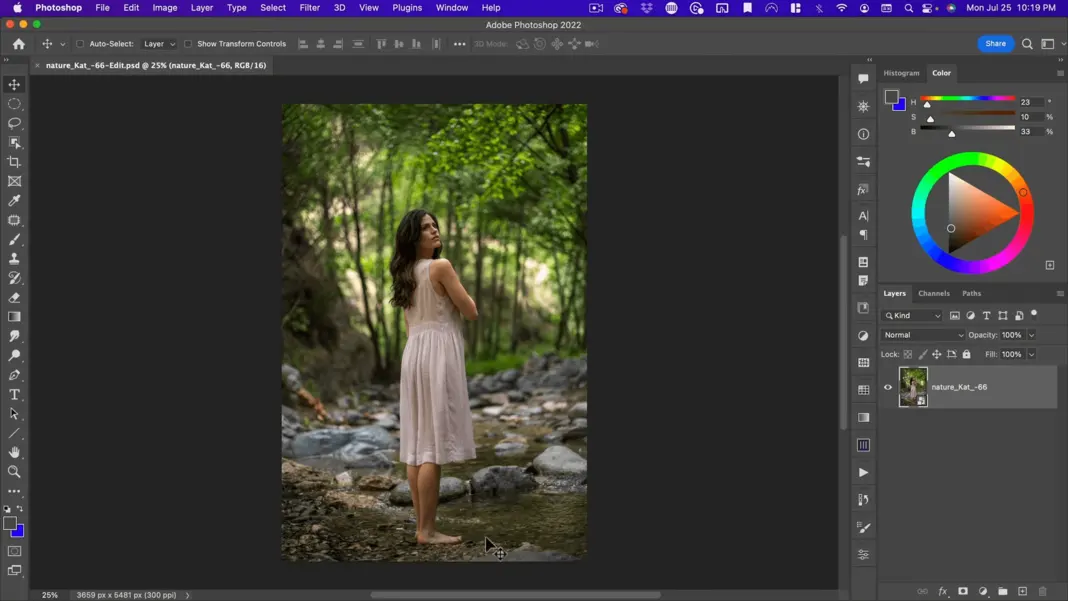
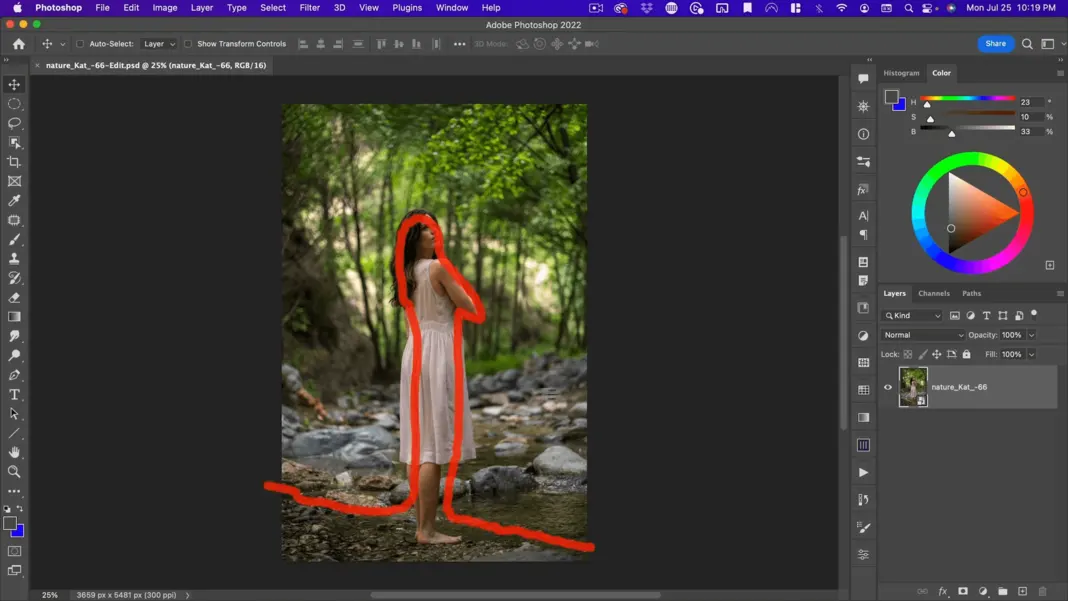
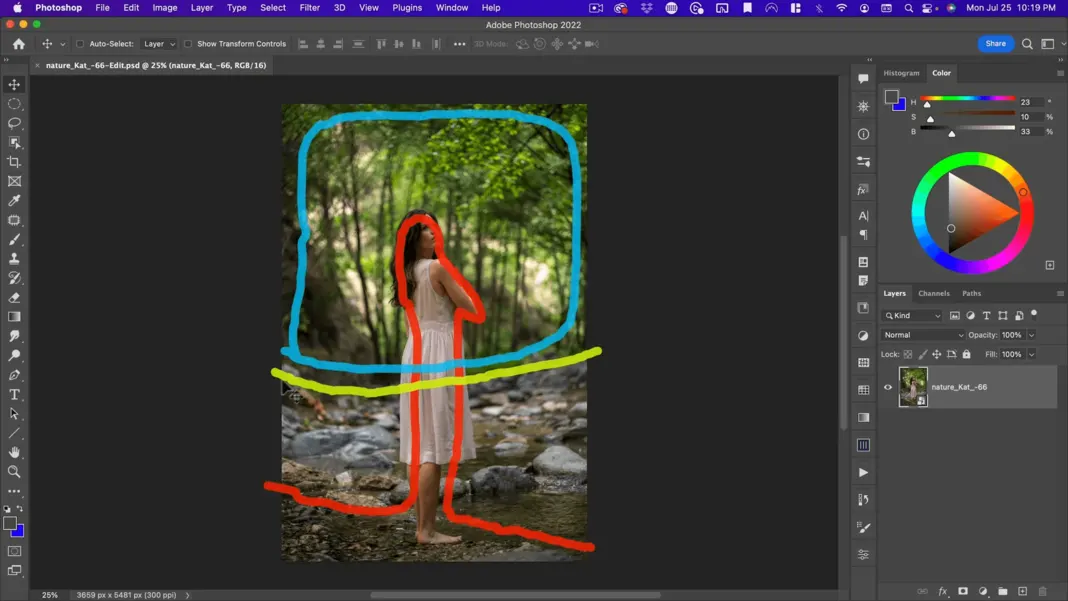
The model and the ground she is standing on is the foreground, the rocks are the middle ground, and then the trees are the background.
How to add focal depth / depth of field
For this one, I want to use focal depth rather than atmosphere to create depth. Rather than adding fog, we’re going to blur the background and then add an element to our foreground that goes in and out of focus. Focal depth or shallow depth of field is a great way of creating depth.
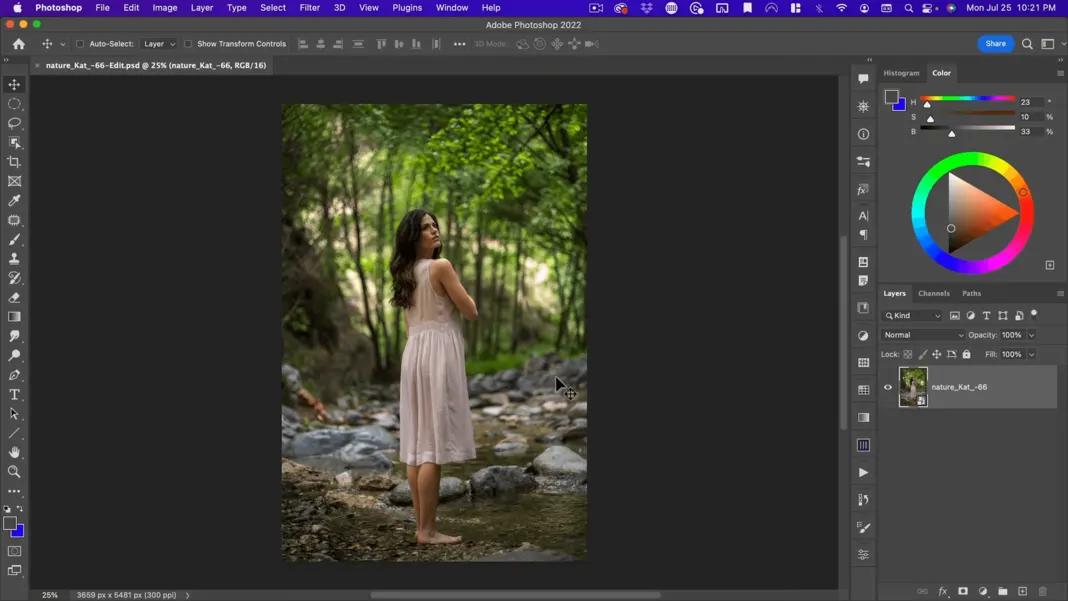
I tend not to use this technique for large landscapes or multi-subject composites. With depth of field, you’re implying a lot about the way the photo was taken, meaning it needed a large f stop in a lot of light. But generally, shallow depth of field works great with portraits, whether they’re close up or semi-close up. It doesn’t work well for sci-fi, large scene composites, or landscapes.
Using the Object Selection Tool
For this, we’re going to use shallow depth of field. Like in our last tutorial, we must first separate her from the background. But in this case, I will use the Object Selection Tool.
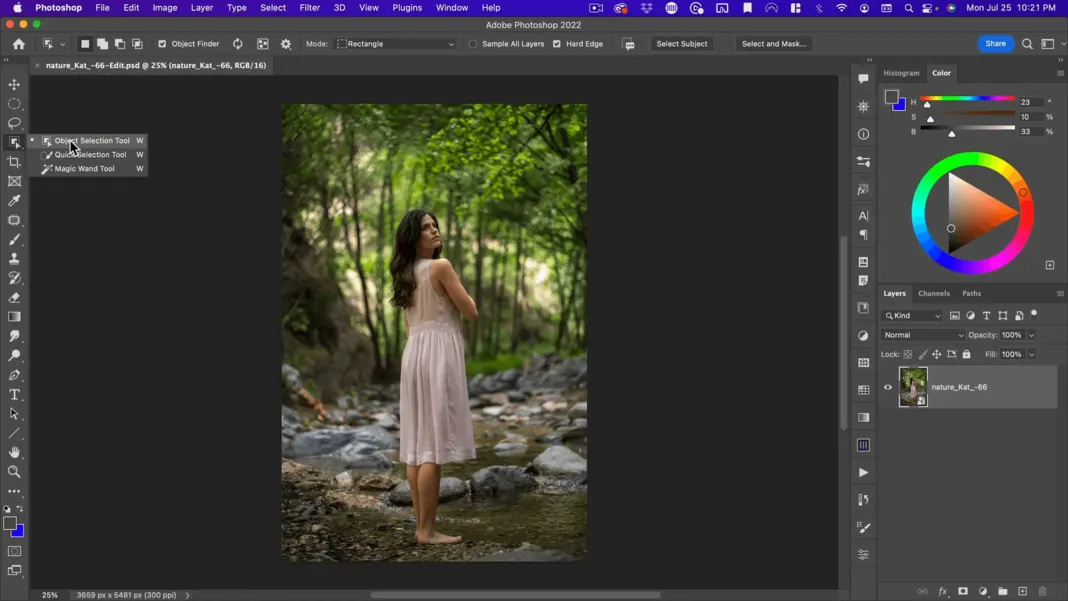
Using that tool, click on her and she becomes blue.
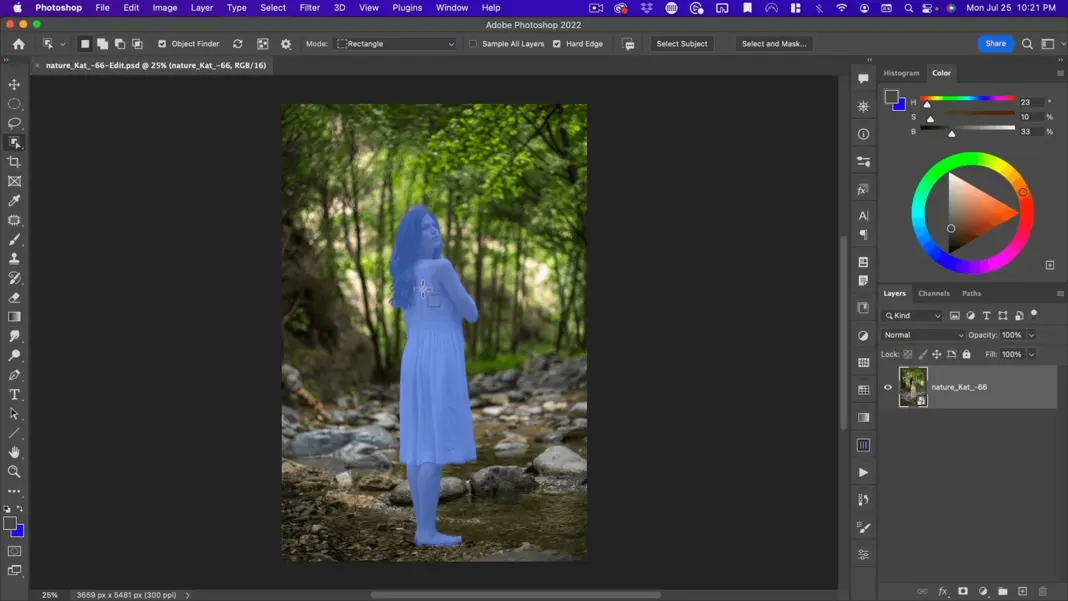
That shows us what Photoshop perceives as the object to select.
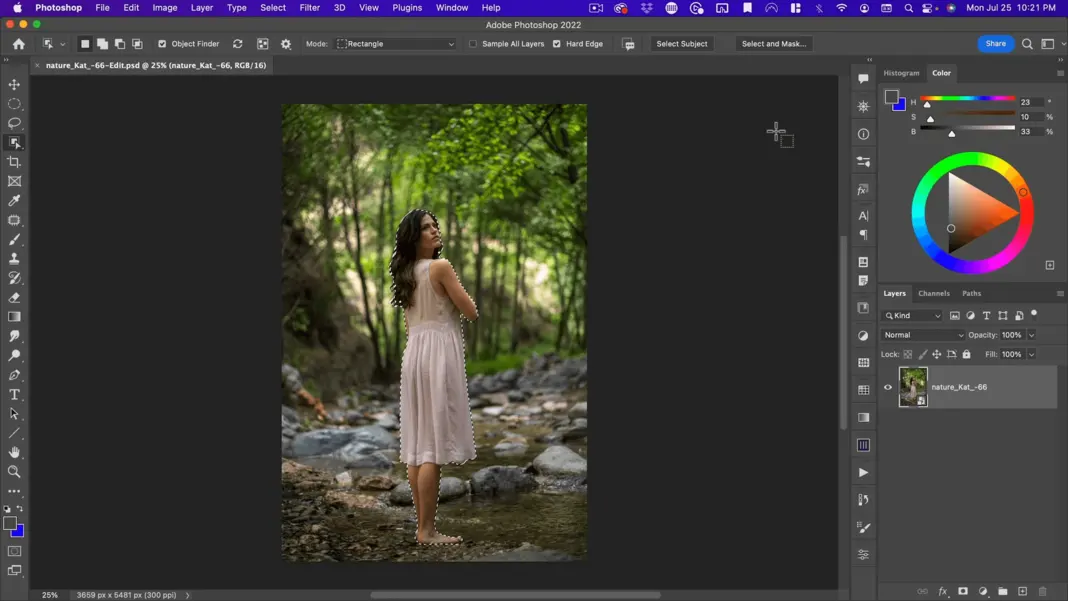
So, there you go, it selected her.
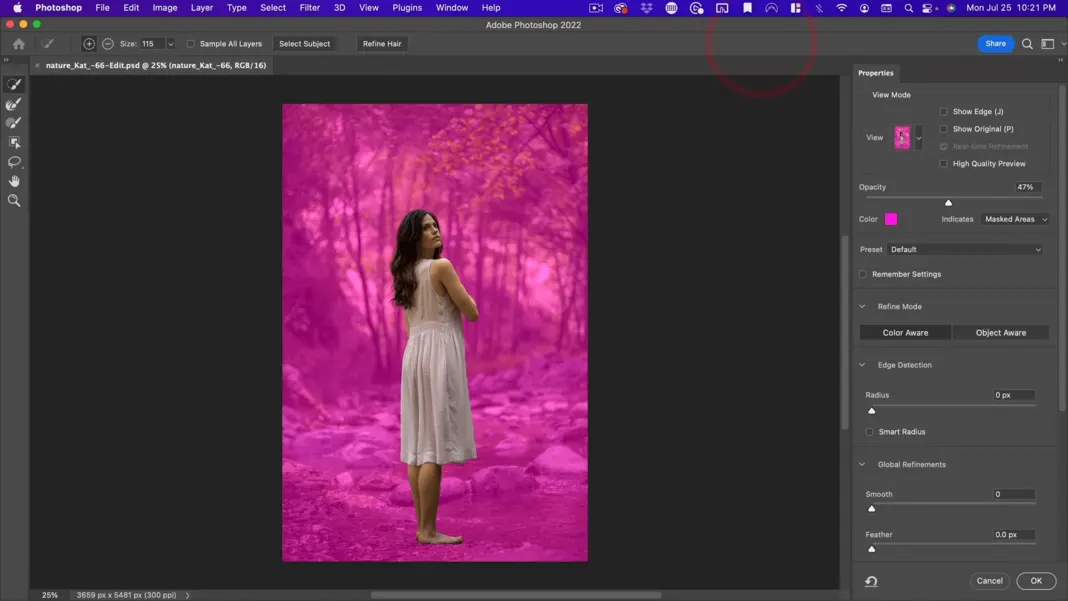
Using Select and Mask
We go to Select and Mask. It’s actually done a really good job for the purposes of this tutorial; I’m not going to do anything but maybe add some edge detection and then hit OK.
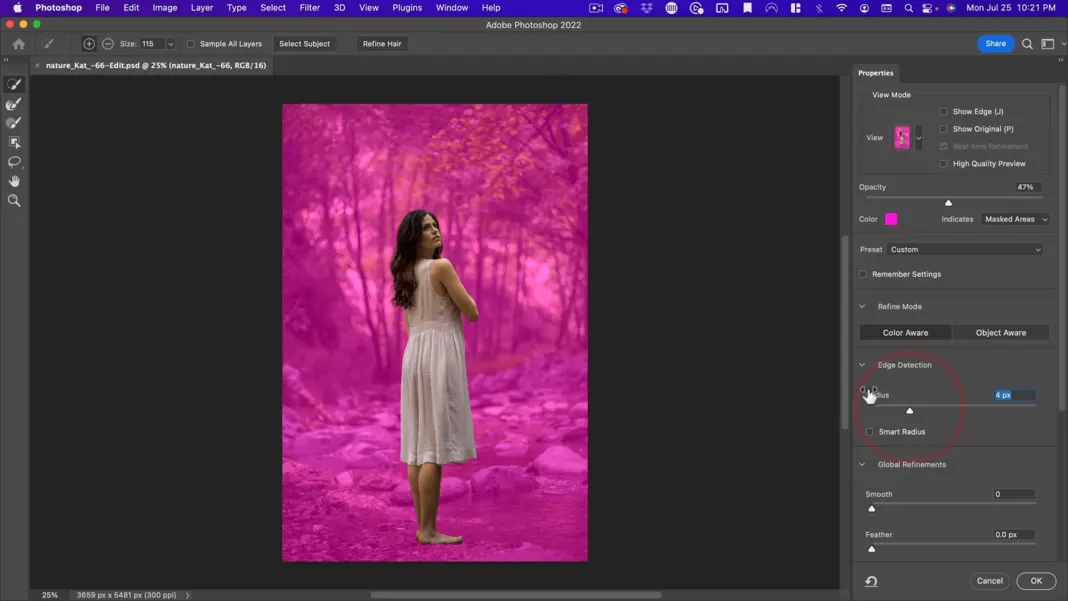
All right, then we’re going to add a Mask. Make a copy of that layer, add a mask, and call this “subject.” Now we want to blur the background. The problem is if I just go ahead and start blurring, we’re going to get a halo effect around her.
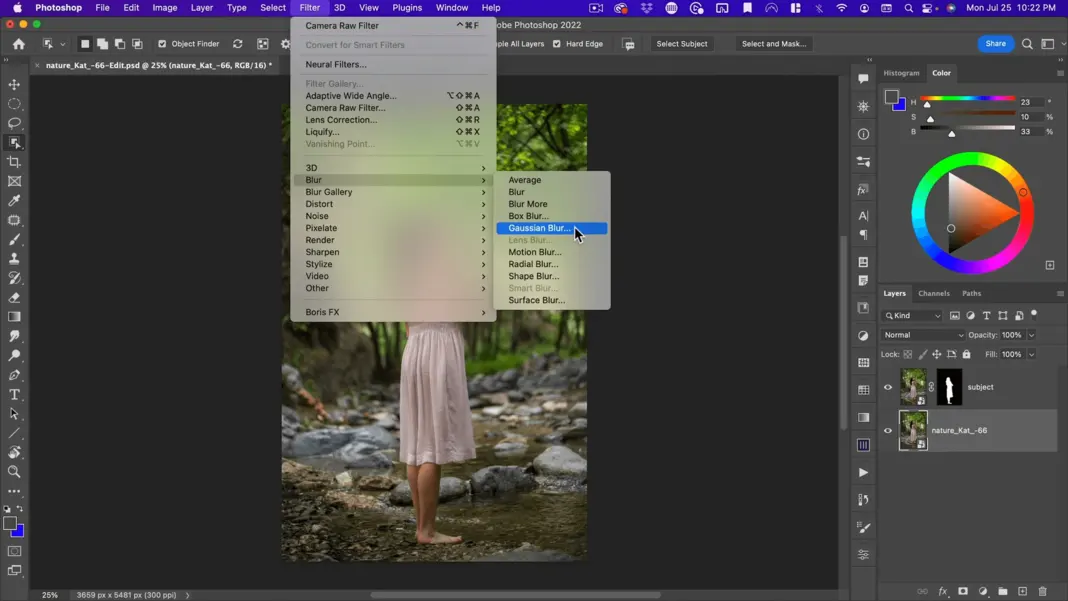
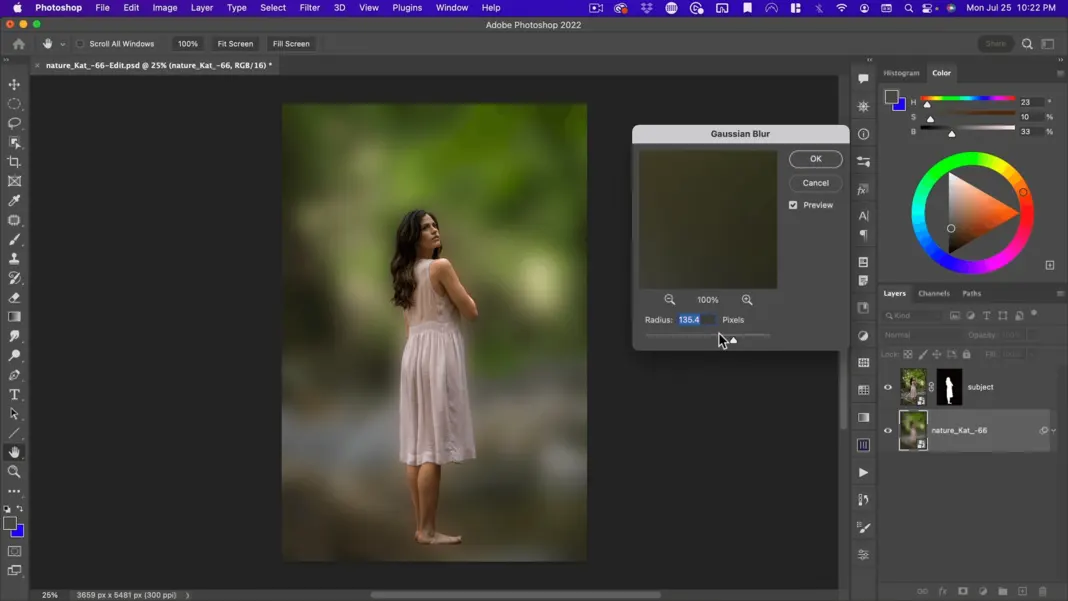
And that’s because she’s still in this background. So, as we’re blurring her, she’s also blurring. It just doesn’t look right. So, the first thing we have to do is get rid of her. So how do we do that? Well, first, we need to make this a layer. So, I’m going to go ahead and make one more copy. I’ll call this bottom layer “original.”
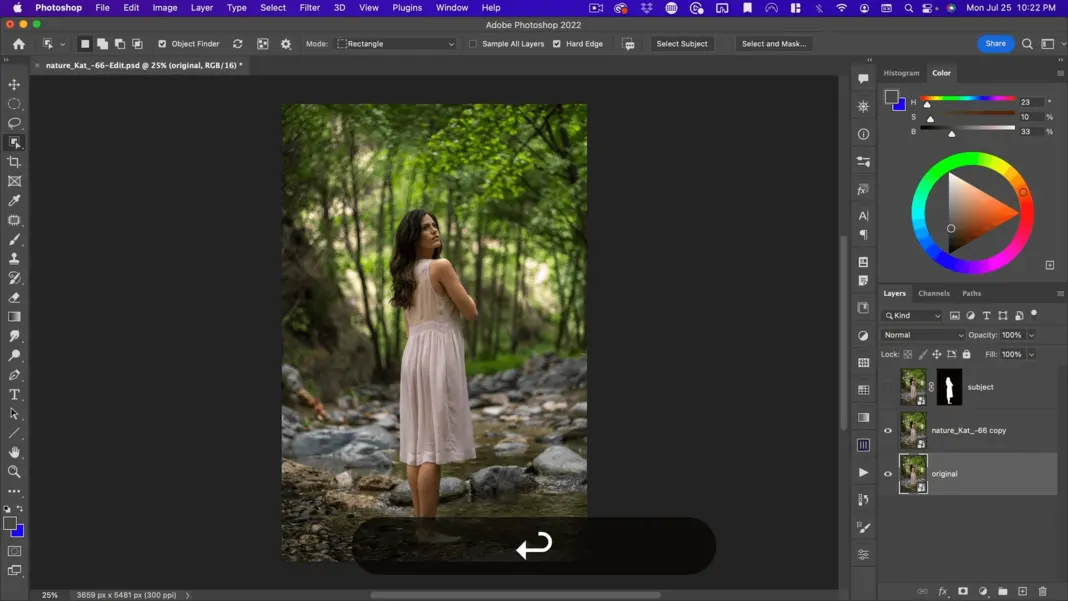
Removing the model from the background
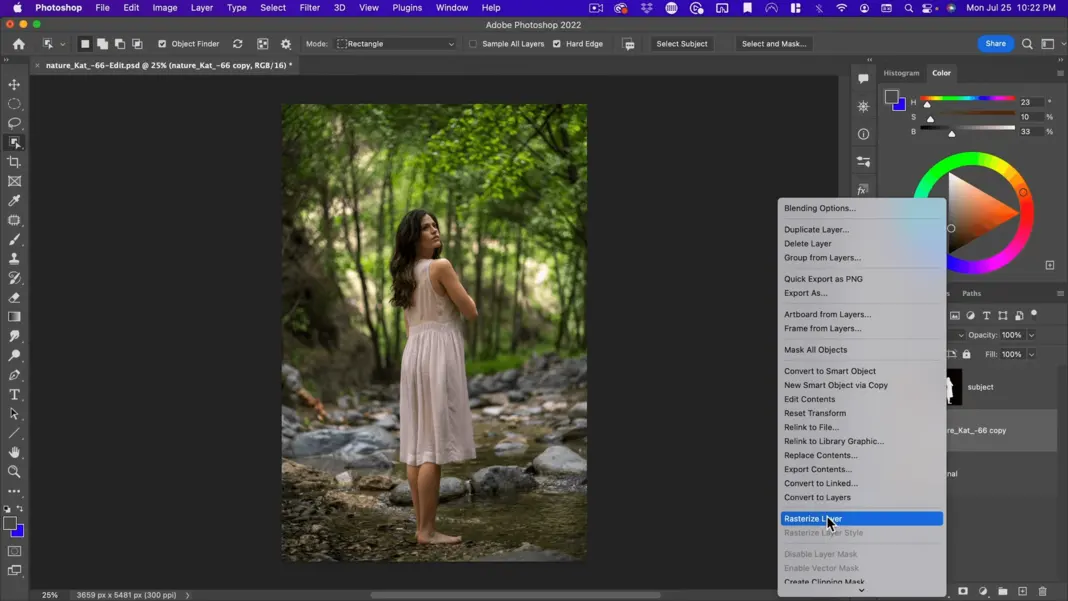
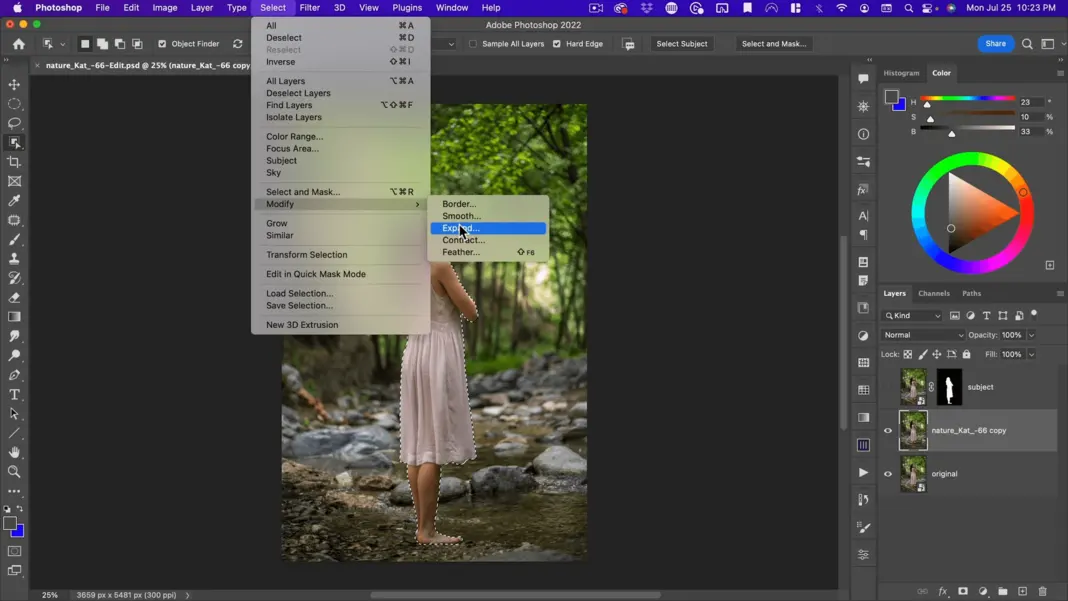
And then on this layer here, I’m going to Rasterize it. So, I’m going to go down here and click on Rasterize Layer, and then I’m going to select her. We will go to Select > Modify, and we will expand our selection by 20 pixels.
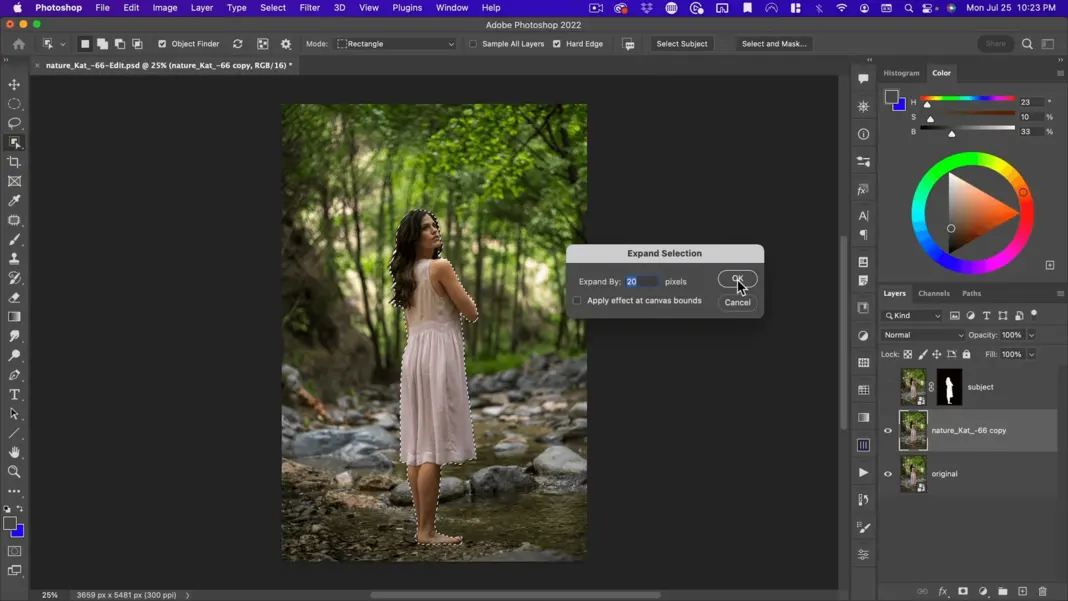
Using the Content-Aware Fill Trick
You can see now that we’ve gone out from where she was and selected the rest of the image. Now from here, I can go to Edit > Content Aware Fill.
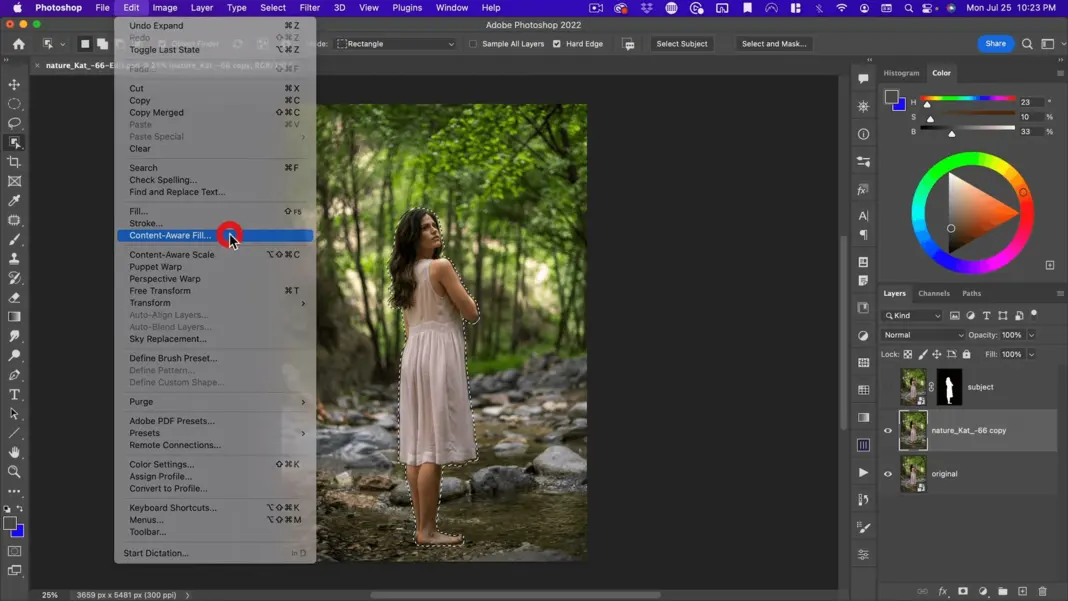
It looks good at the bottom but doesn’t look great from the top. So, there are a few ways we could resolve this.
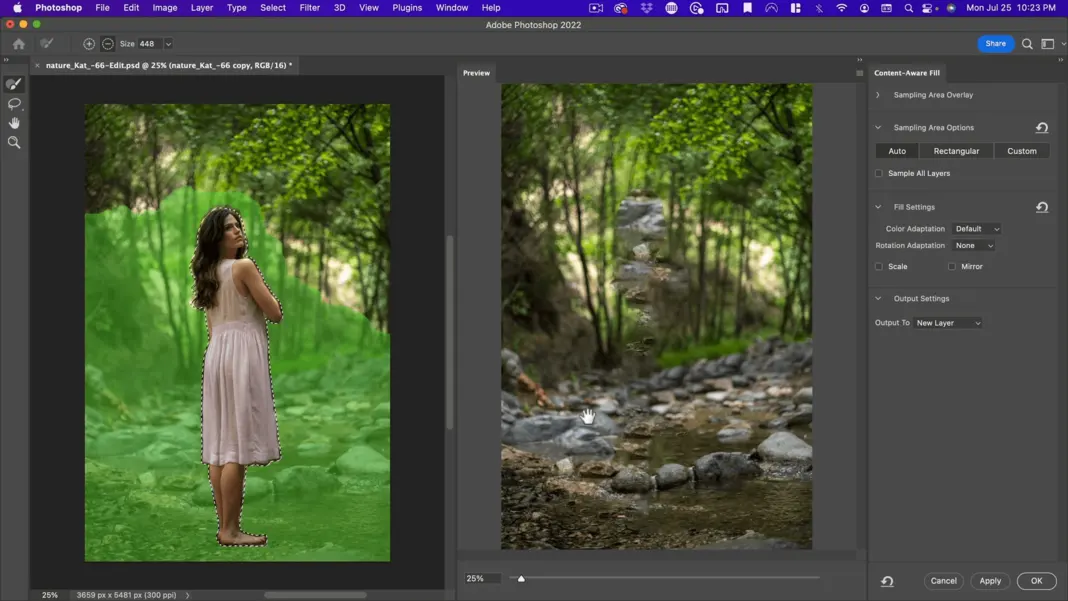
I could try to paint out some of the stuff that I don’t like.
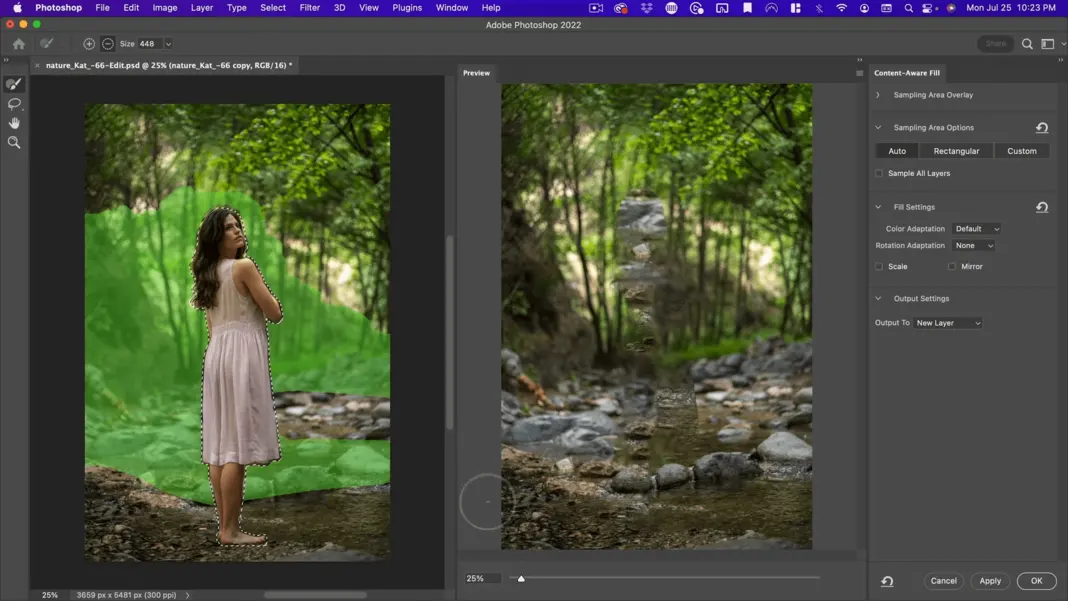
Using the Patch Tool Trick
I decided I don’t like this. Instead, another trick you can try is the Patch tool.
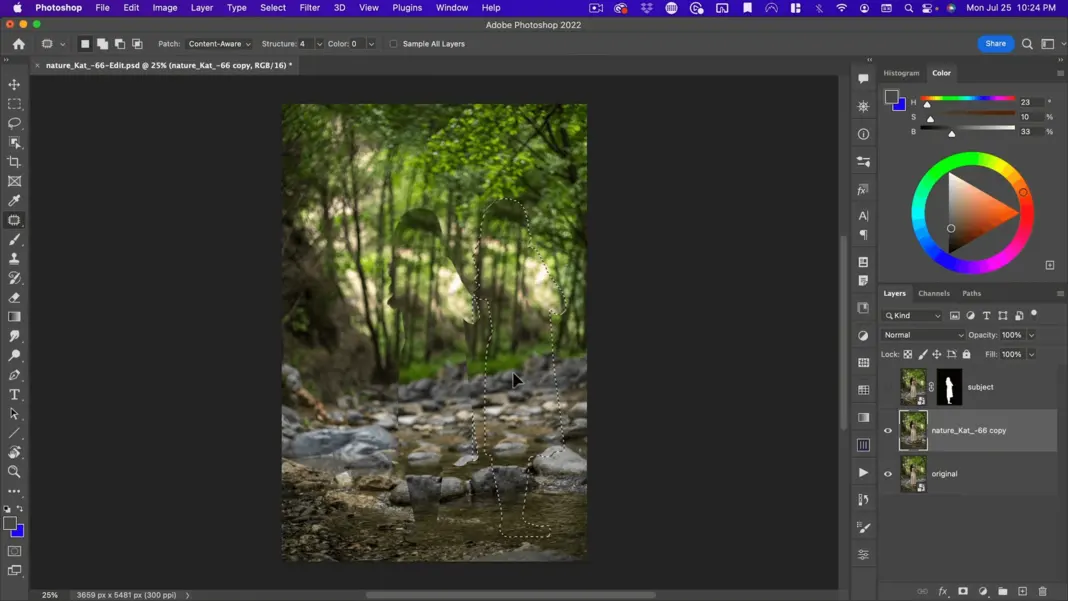
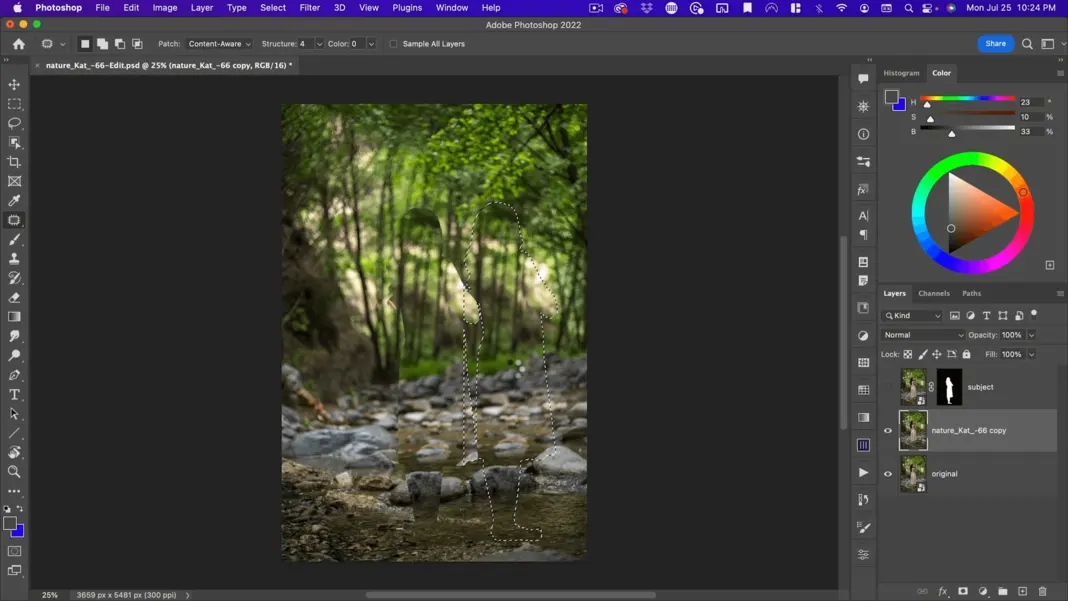
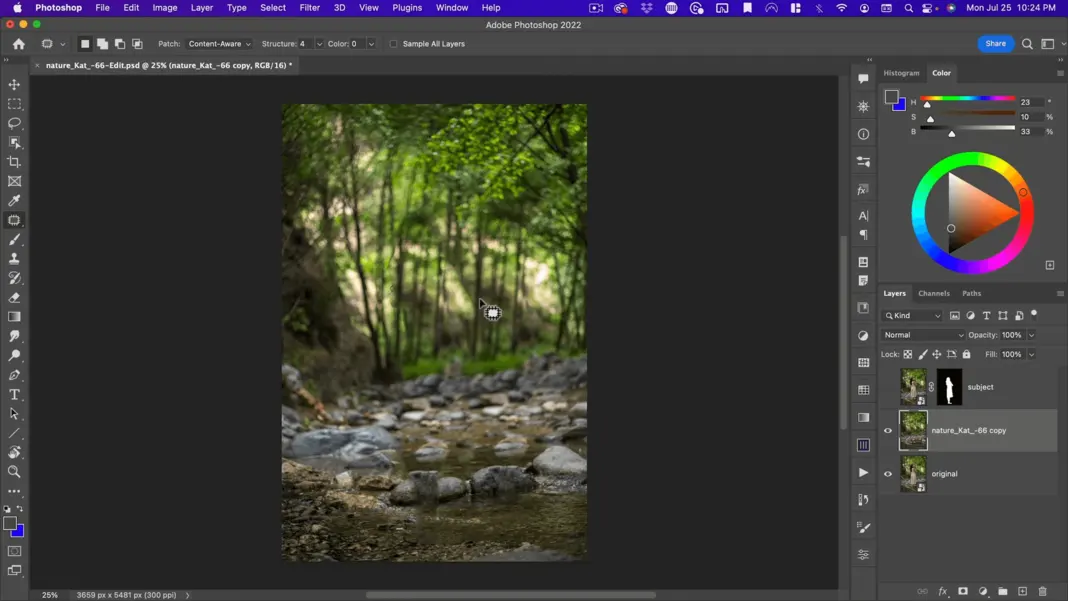
You can see that’s done a much better job.
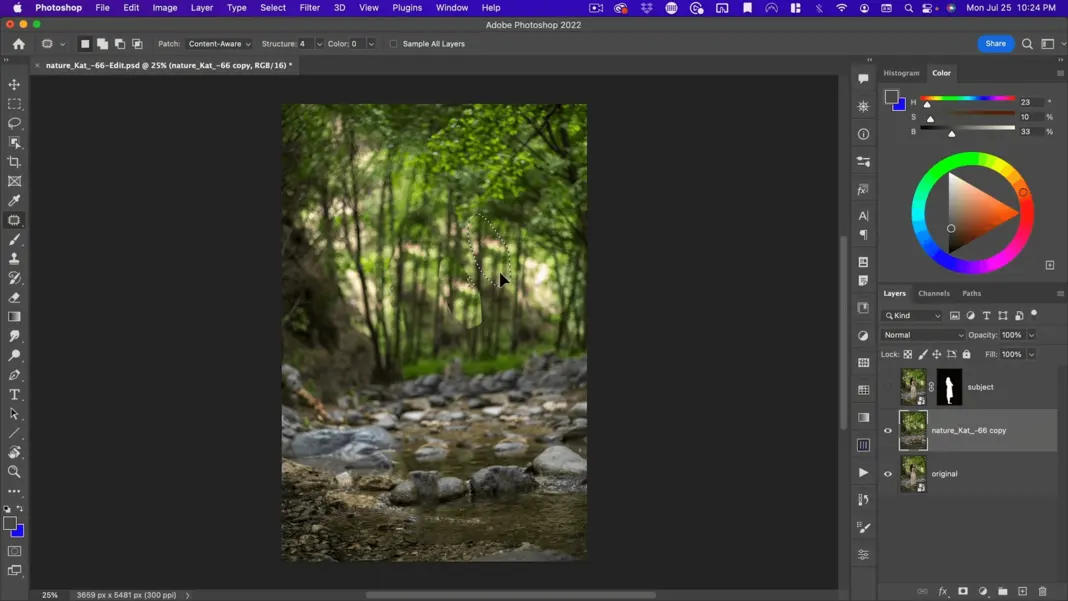
Creating the Shallow depth of field blur
And you can also try normal, which uses the same kind of pixel information but tries to make the make it look the same color as the area that you’re copying from. Now I realize we’re going to be blurring the hell out of this. So, it really doesn’t matter if things don’t look perfect. The primary thing we want is to get her out of the background so that when we blur it, you can’t tell she’s being blurred with it. So there you go. And we’re going to call this background. And for this I’m going to use the Blur Gallery > Tilt Shift > Blur.
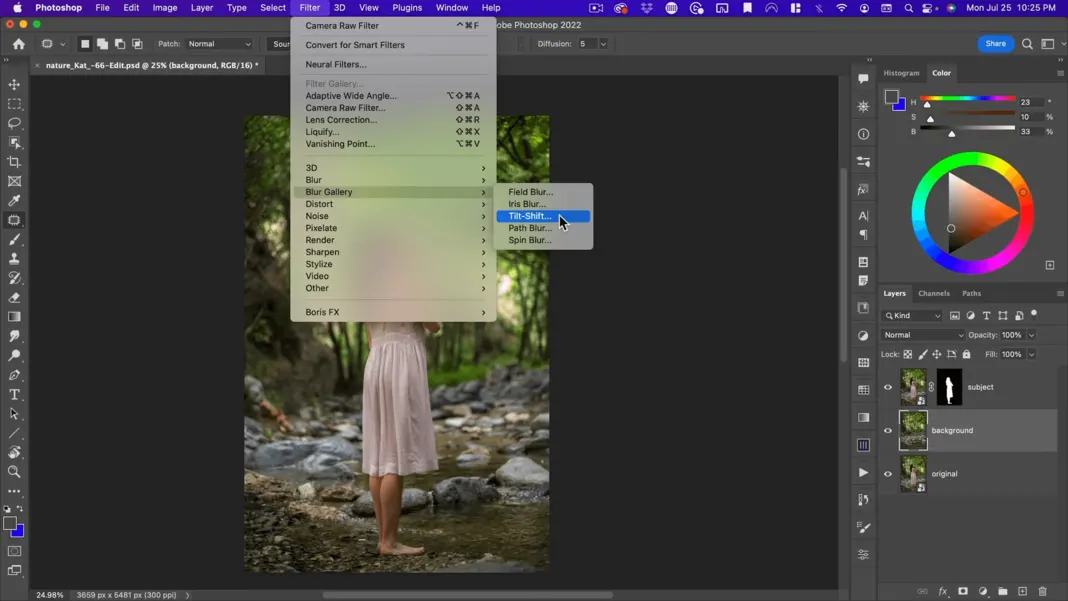
And with this, this point here is going to be in focus. I’m going to put that where her feet are.
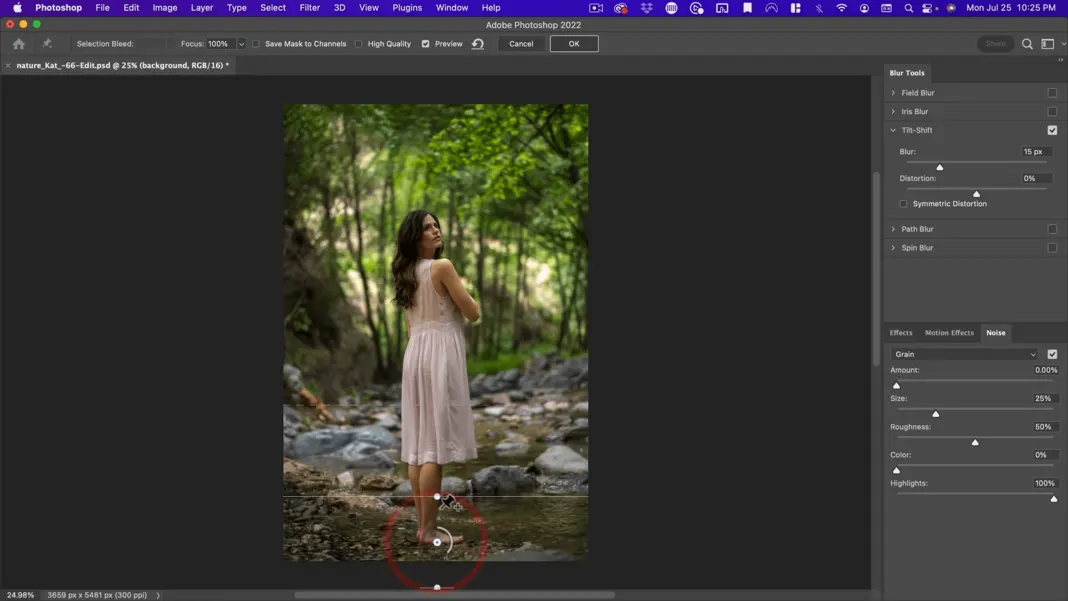
And then anything before this big dot here will stay as it is. So, all this will be unaffected by the blur up to here and then up to this dotted line is kind of the transition between blurred and unblurred.
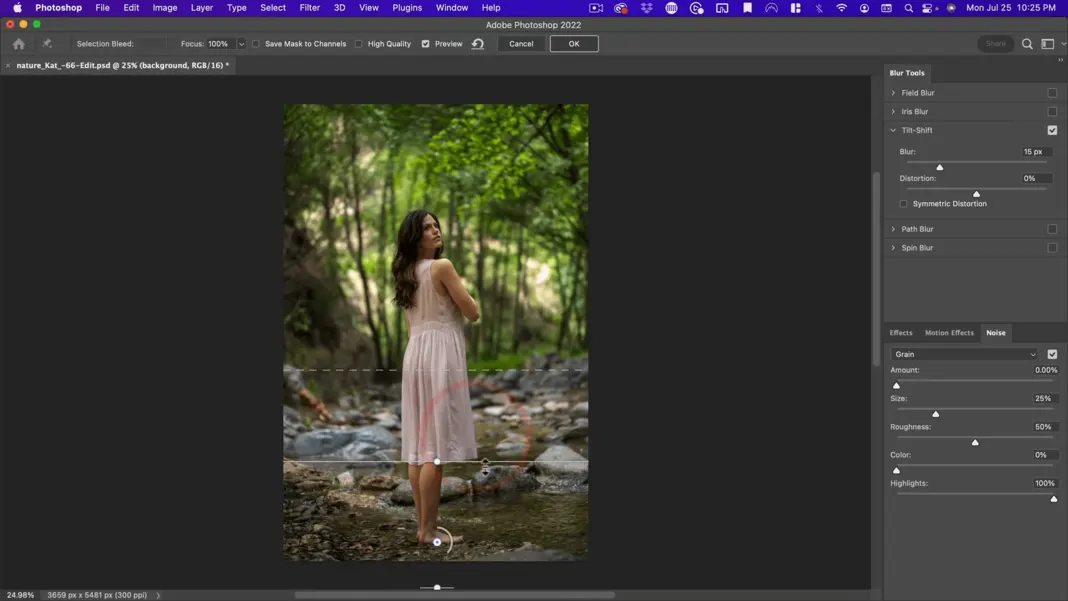
And then everything past the dotted line will have the full blur effect.
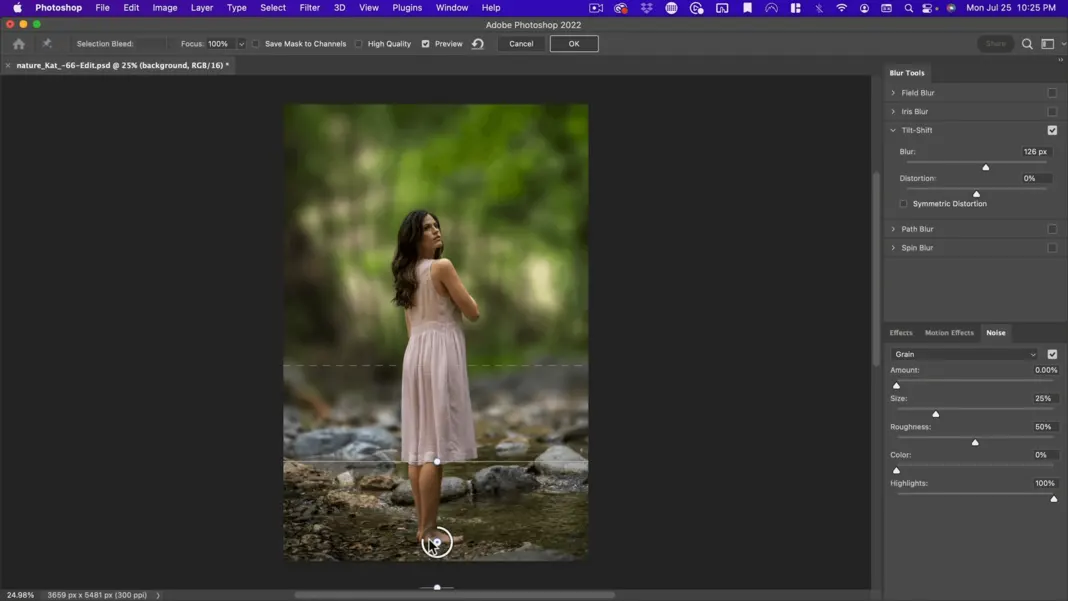
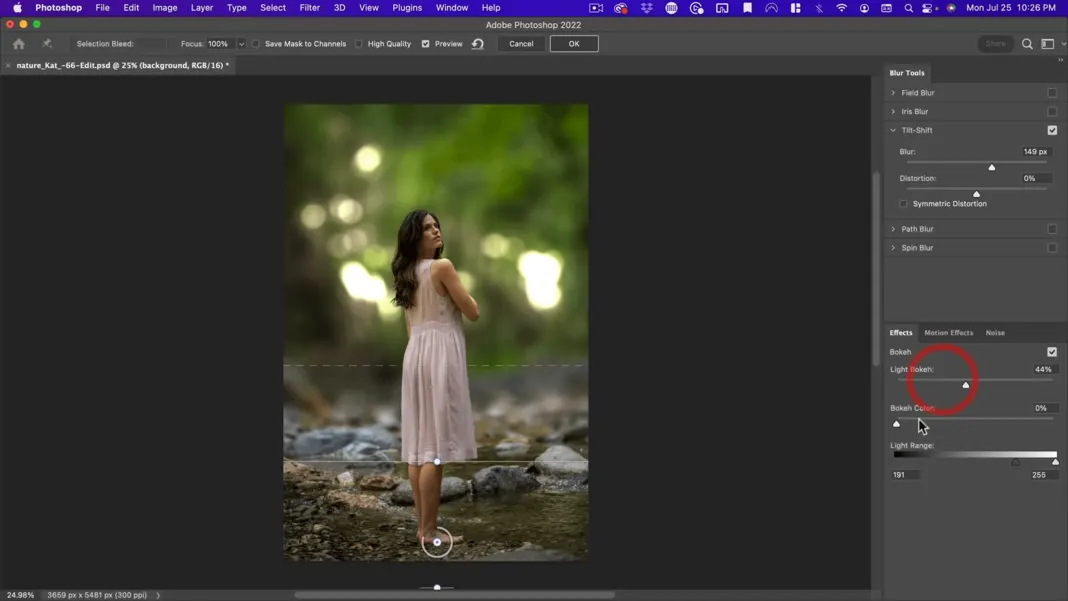
So, if we wanted some light back, we could add that here, we could change our bouquet color or how much color is in it.
We can also add noise, but I’m going to be adding noise to the whole image at the end.
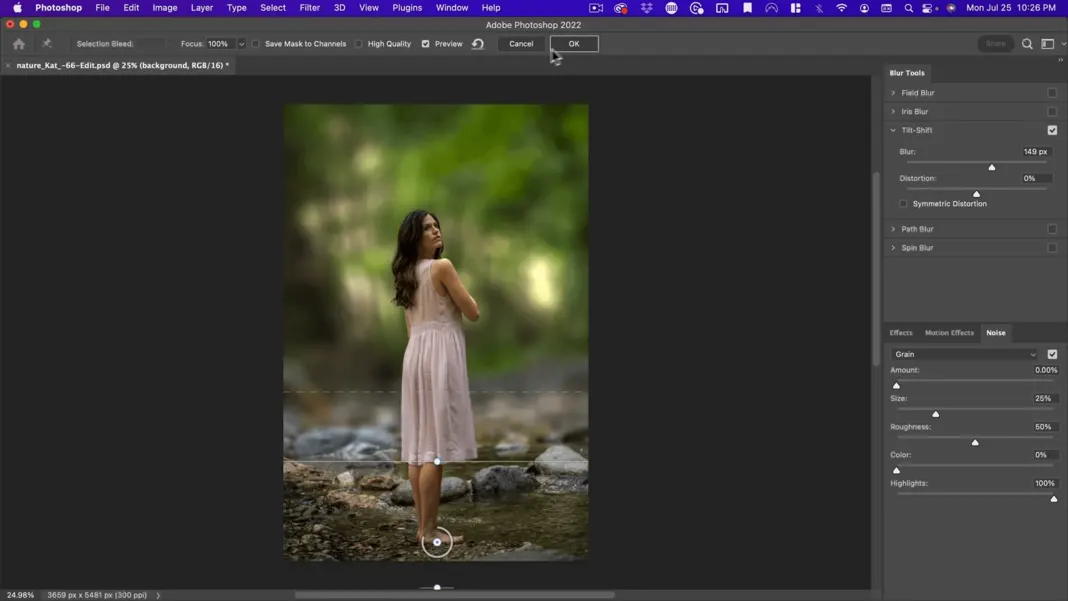
So right away, we obviously have more depth in our image, although now looks like the photo was taken with a very shallow depth of field.
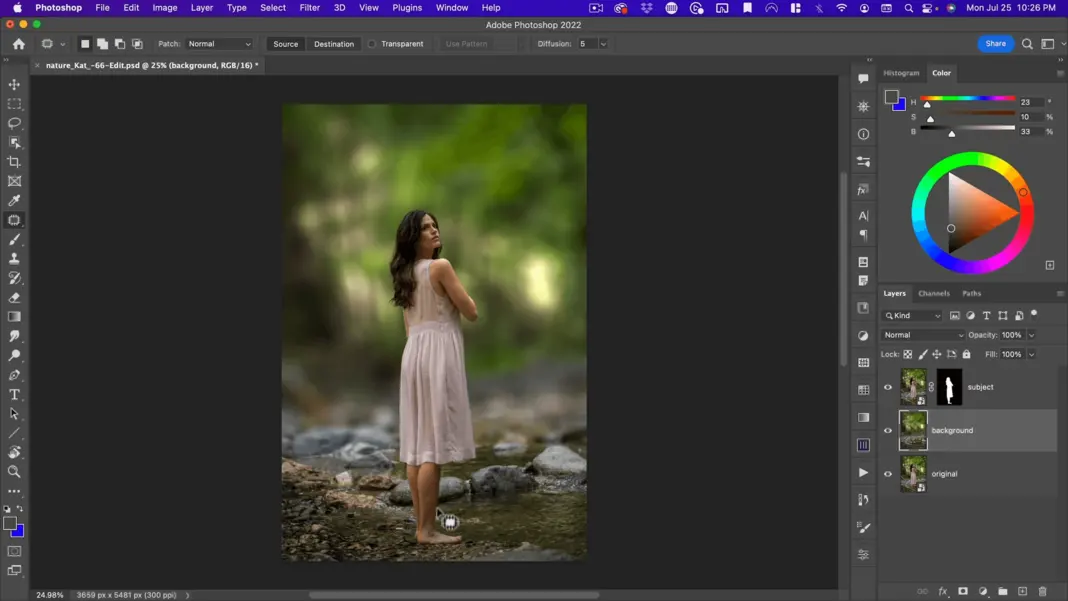
So, from here, what do we want to do? Well, there’s a few things we want to add.
Adding foreground elements
So, we have some rocks here, but it just isn’t enough. So, for this one, I’m going to use some green leaves. The nice thing about falling leaves is you’re going to have some in focus closer to the camera and then others farther away and not in focus. So, I’m going to grab one from the assets.
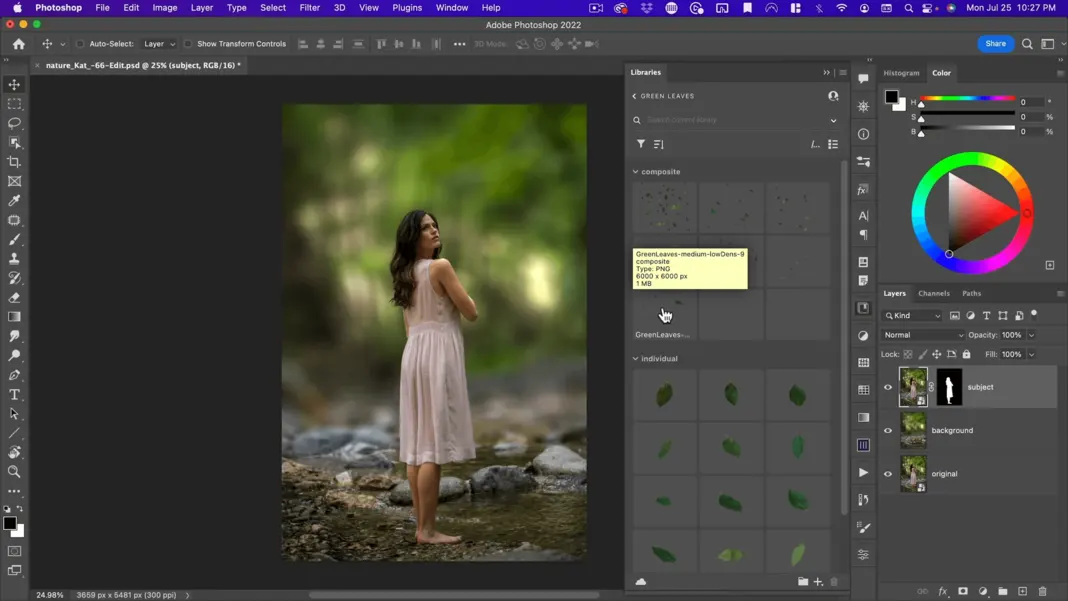
So, there you go.
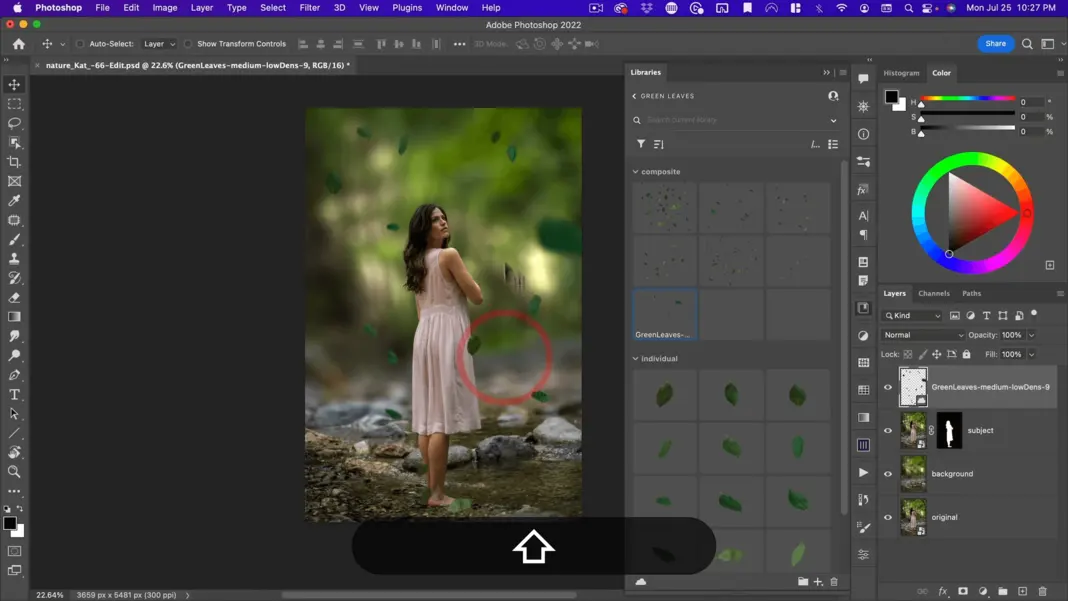
And then I’m going to grab this one that has a bunch of small leaves.
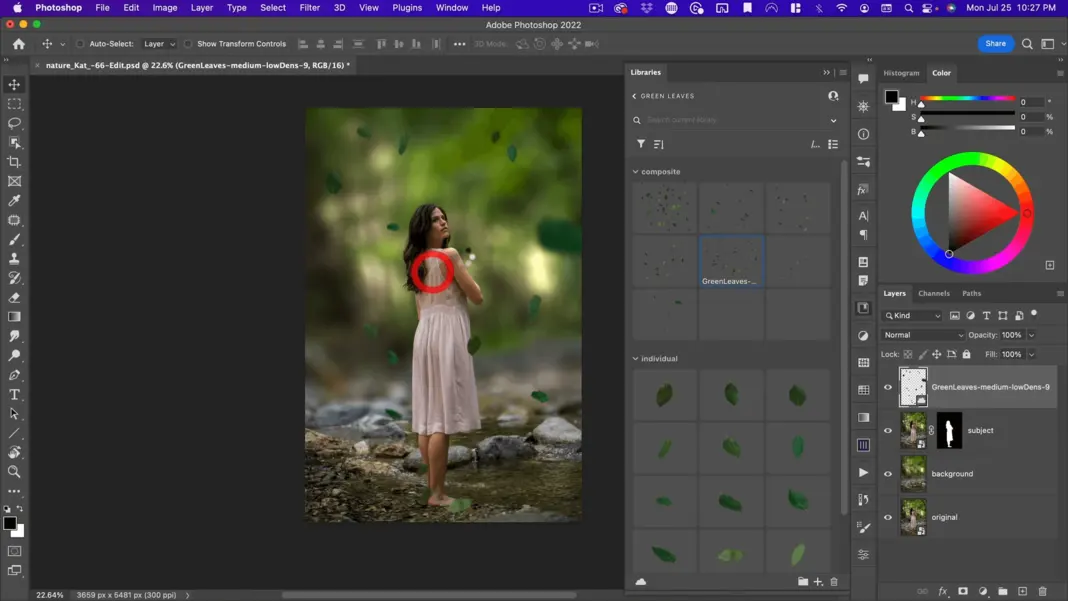
I put this kind of in the background, so this one will go behind her. Next, I want to blur it.
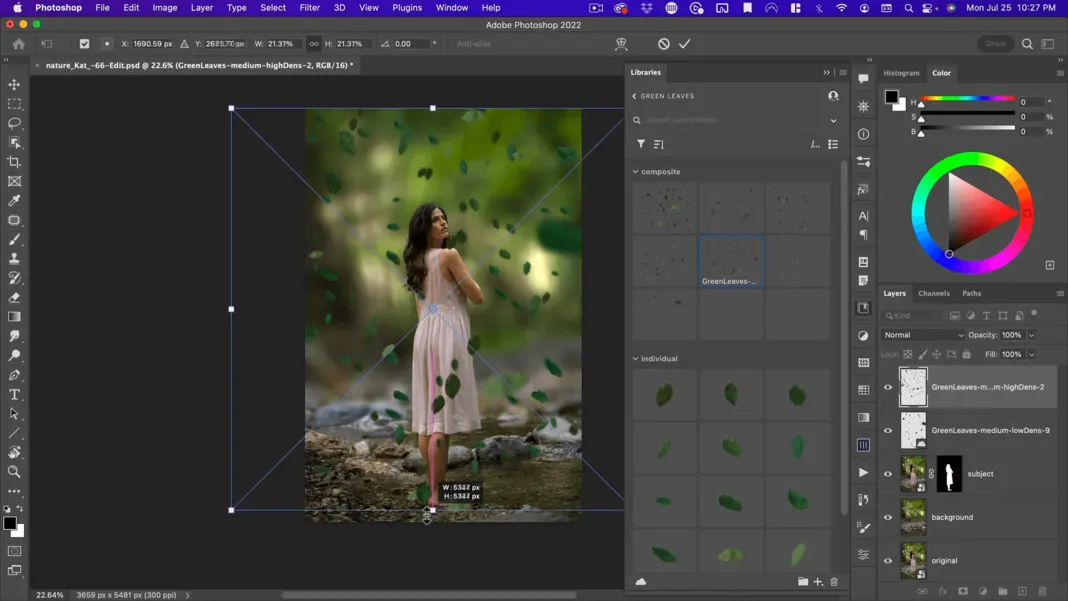
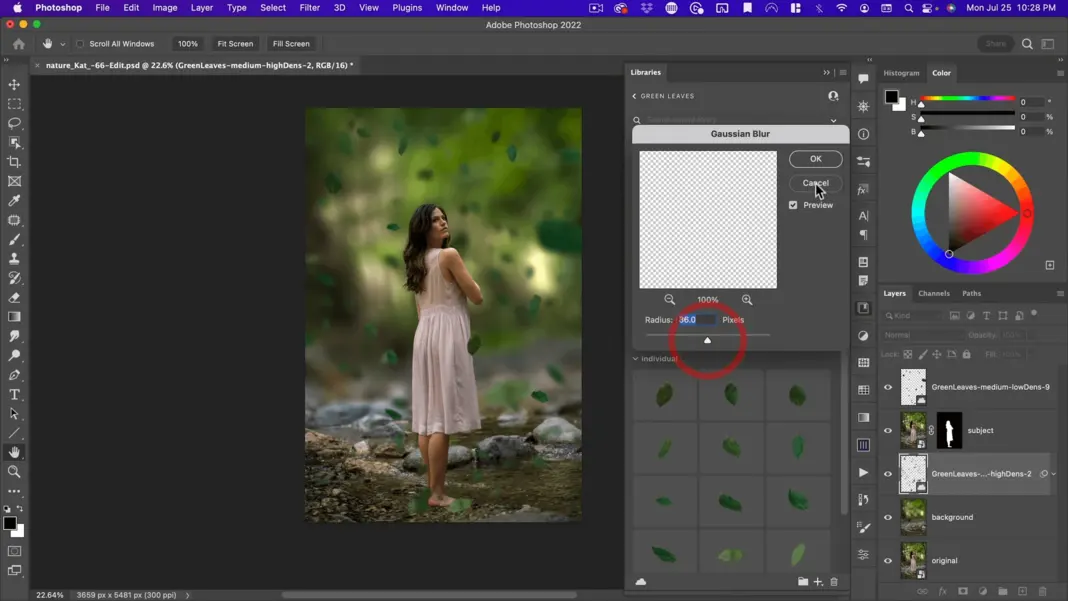
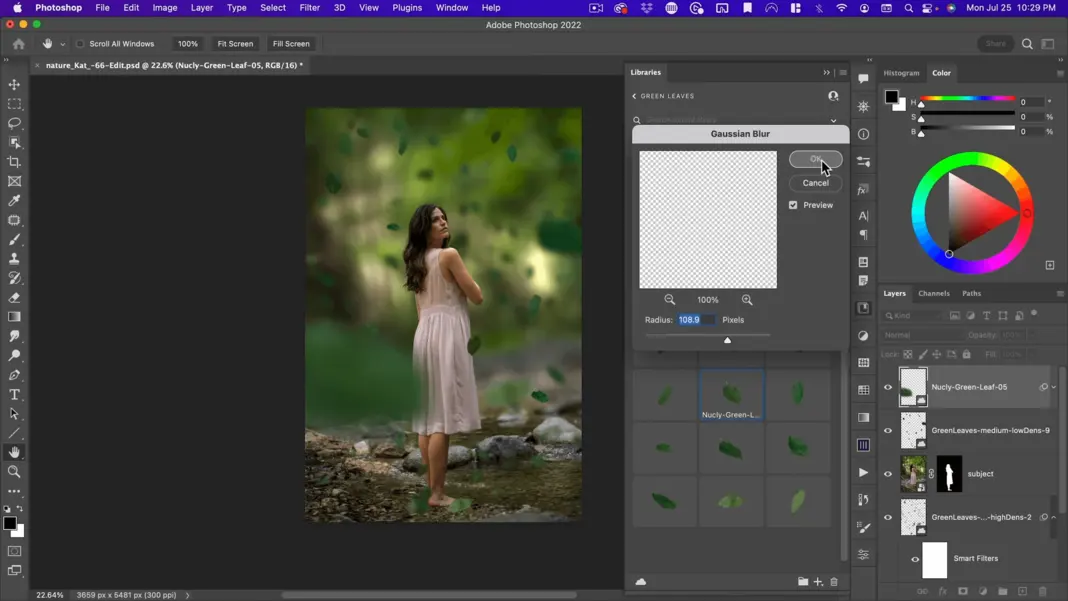
So, I’m going to go to Blur and I’m just going to use a Gaussian blur.
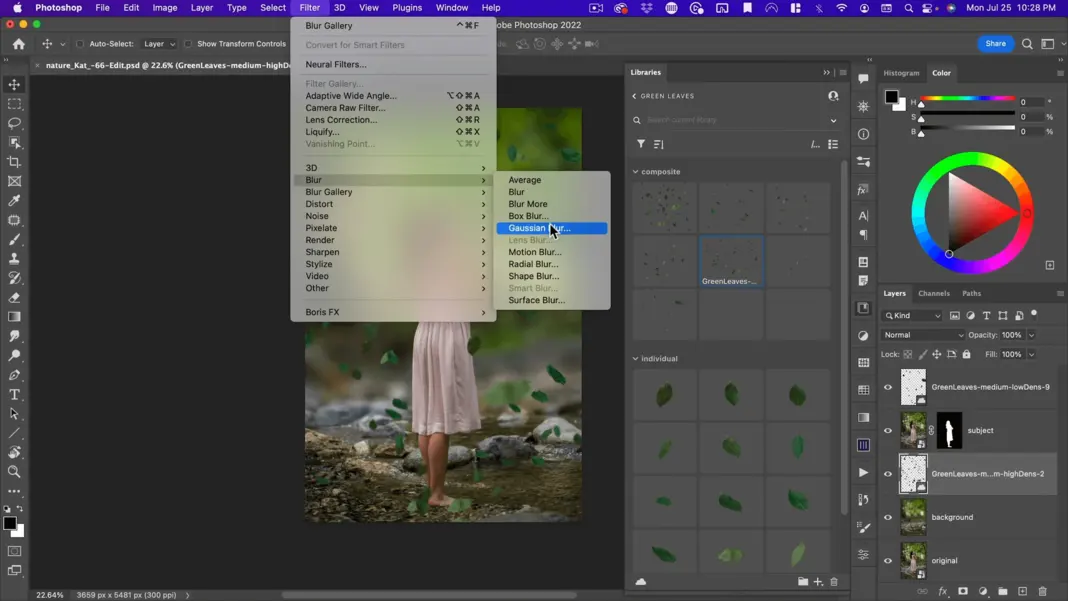
These are going to be leaves that are falling in the background. You can see they have a much more blue green color than the background.
Rather than changing my leaves, I’m going to change the background to be a little bit more blue-green. But before we do that, let’s finish putting in the rest of our leaves. So there are good leaves falling around her, but to really sell the depth of field, I want a few leaves in the foreground that are very out of focus, but very large.
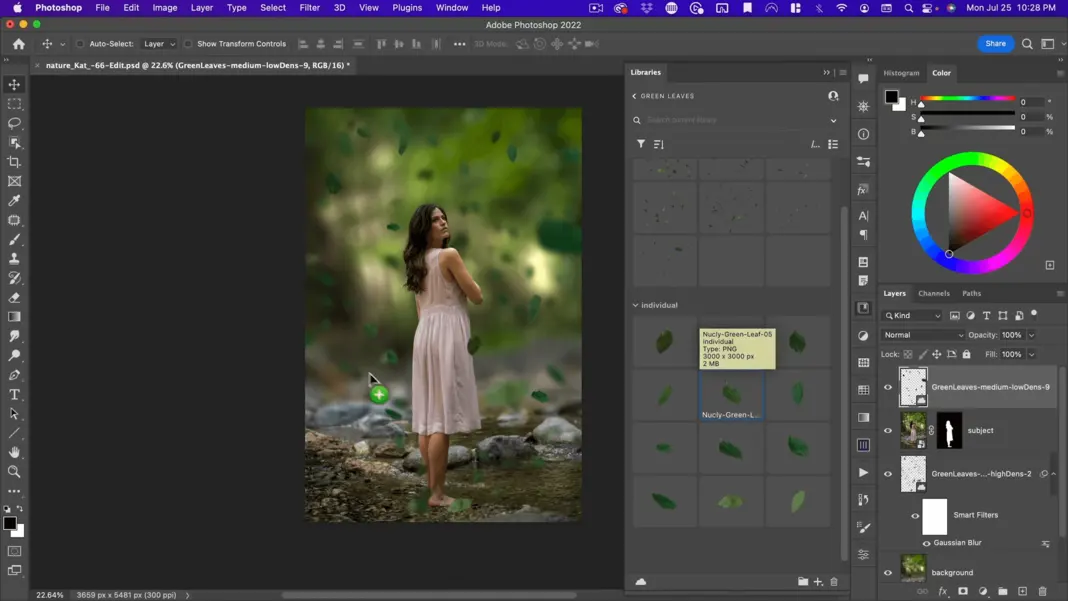
Adding a foreground element to sell the illusion
So, I’m going to go ahead and take this one.
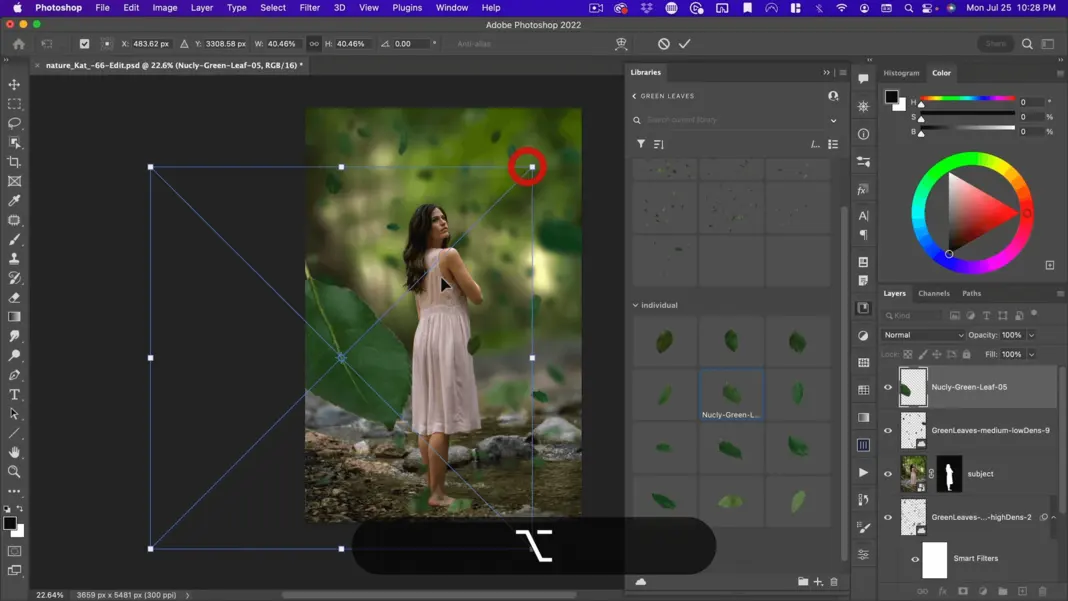
And I also want these to kind of cross into her. Any time you have foreground and background elements cross over each other, it just helps to sell the illusion that this was all taken by a camera.
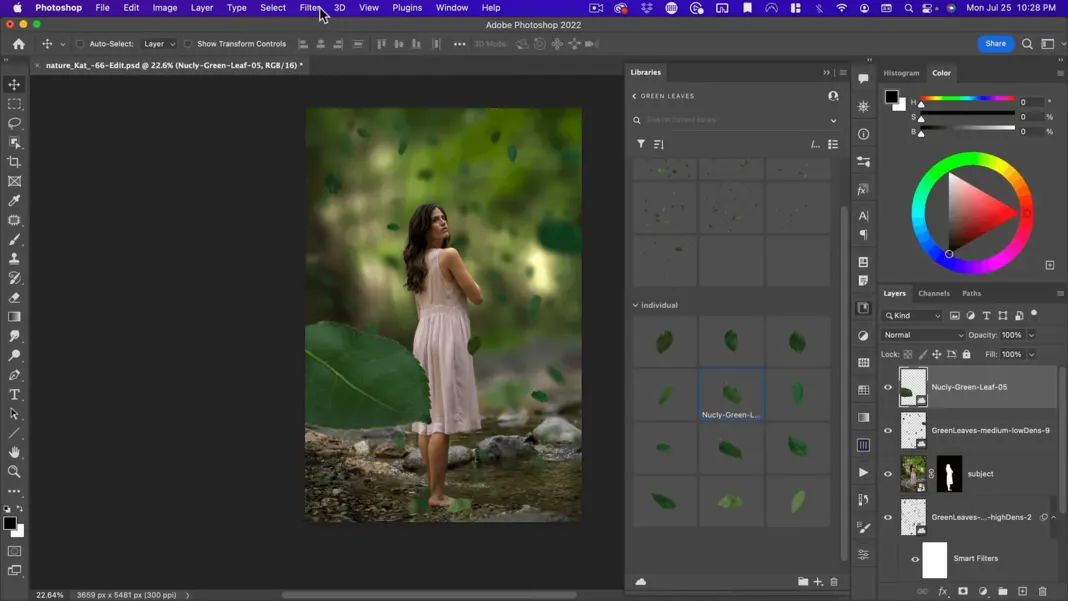
So, let’s go to Gaussian Blur and set it to 108 pixels.
Then maybe do another one and repeat that Gaussian blur on there.
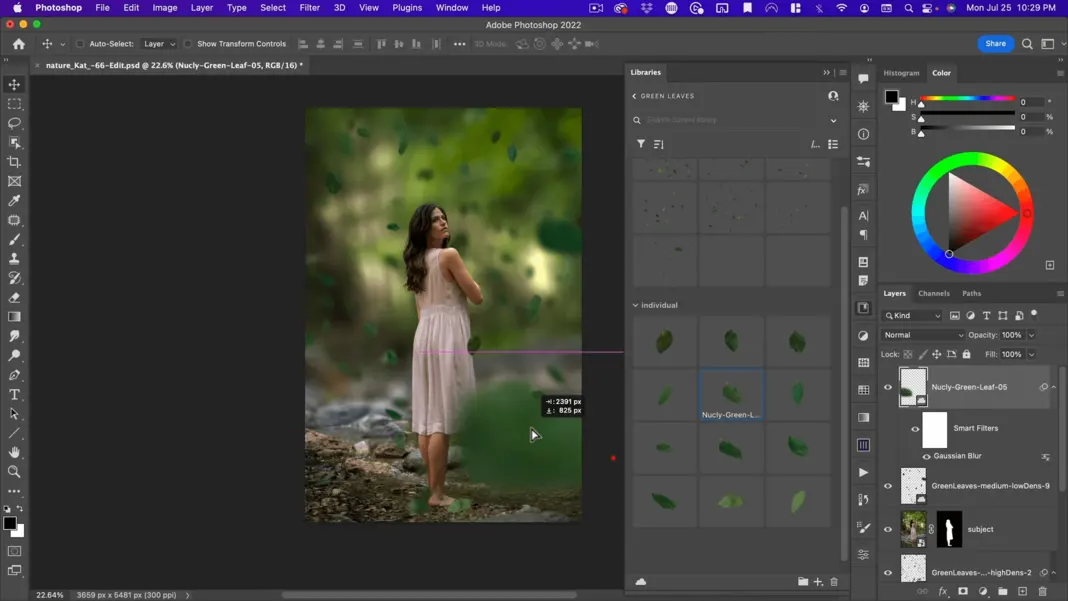
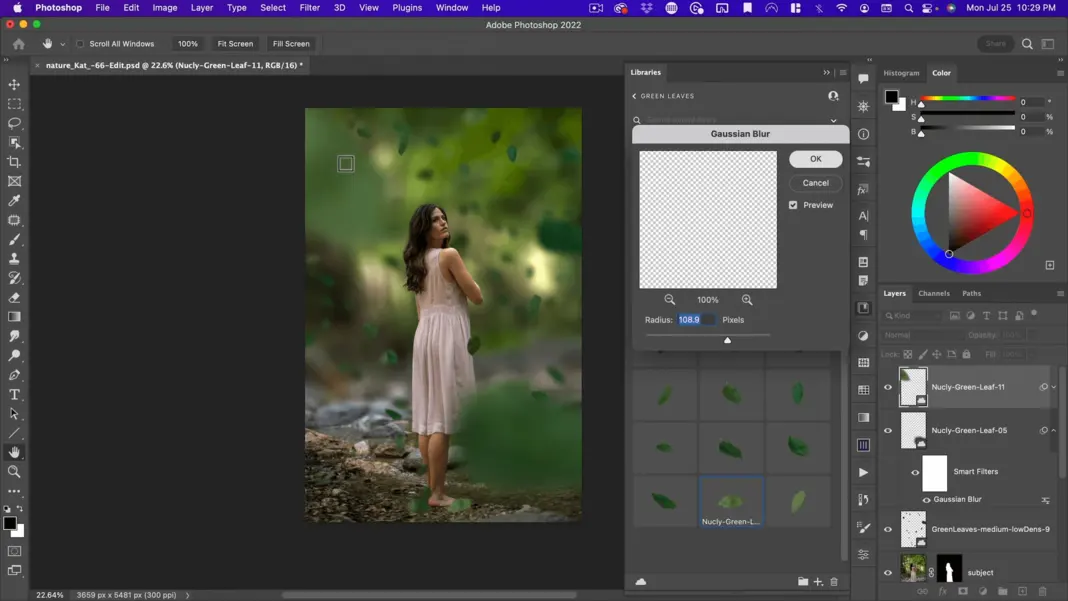
So now we have our elements in place.
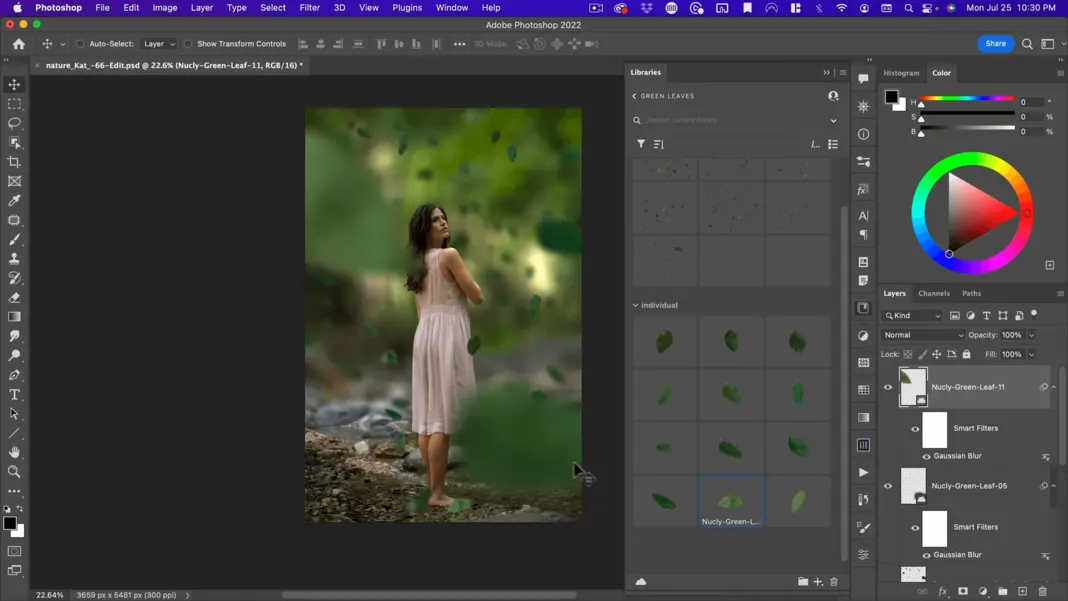
Adding lighting to create Color Depth
The next thing we’re going to do, similar to our last image, is we’re going to use lighting and color to help create depth. So, for our lighting, we have an implied light source. So, let’s go ahead and add a layer there. I’m going to call this “lighting” and I’m going to use a black and white gradient that’s radial.
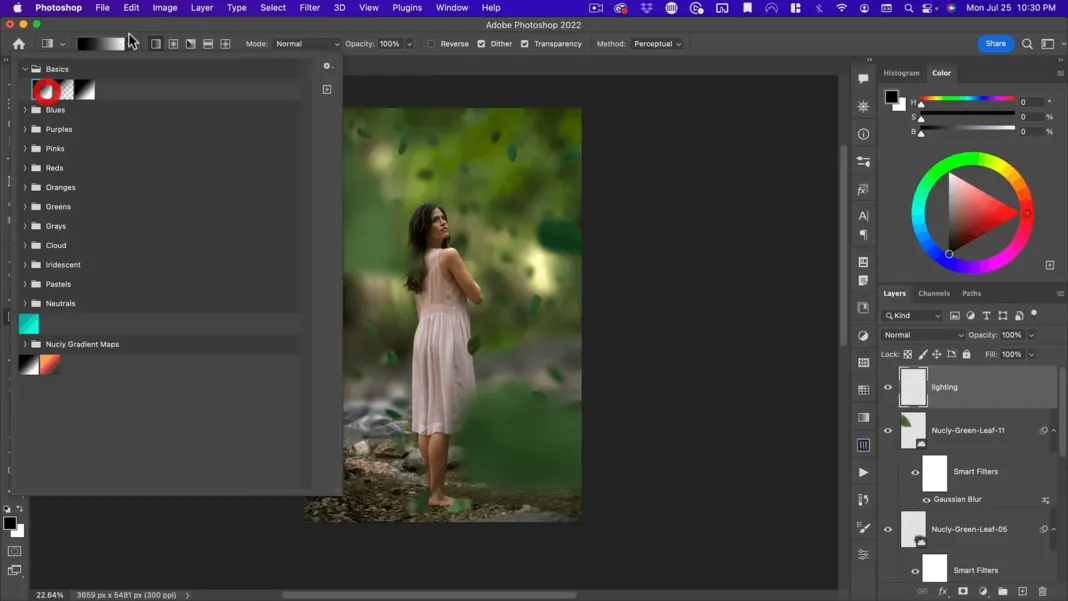
So, I want it to go from white to black.
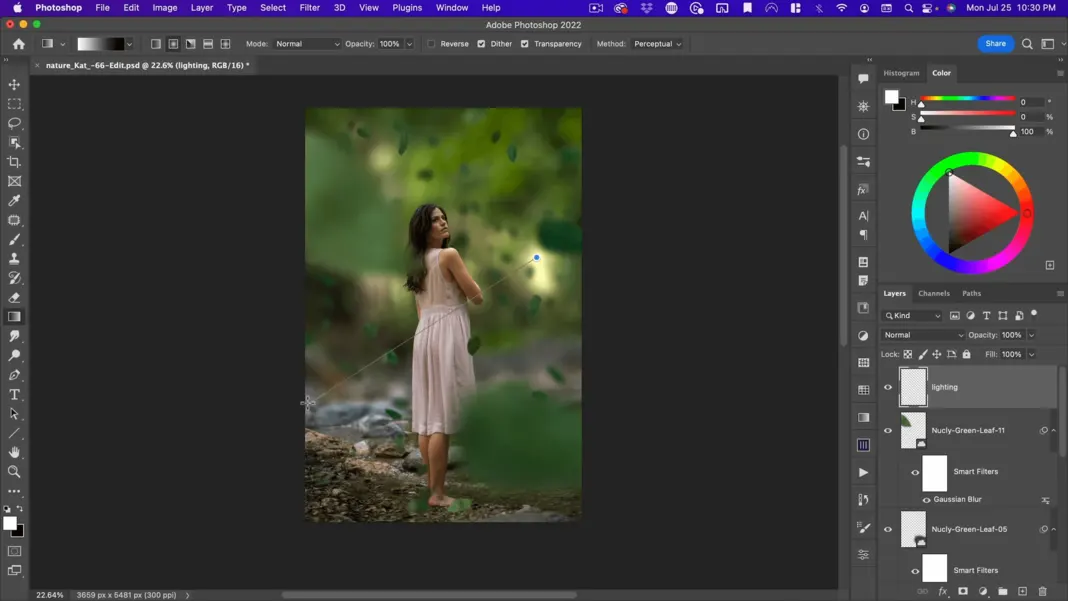
I’m going to go like this.
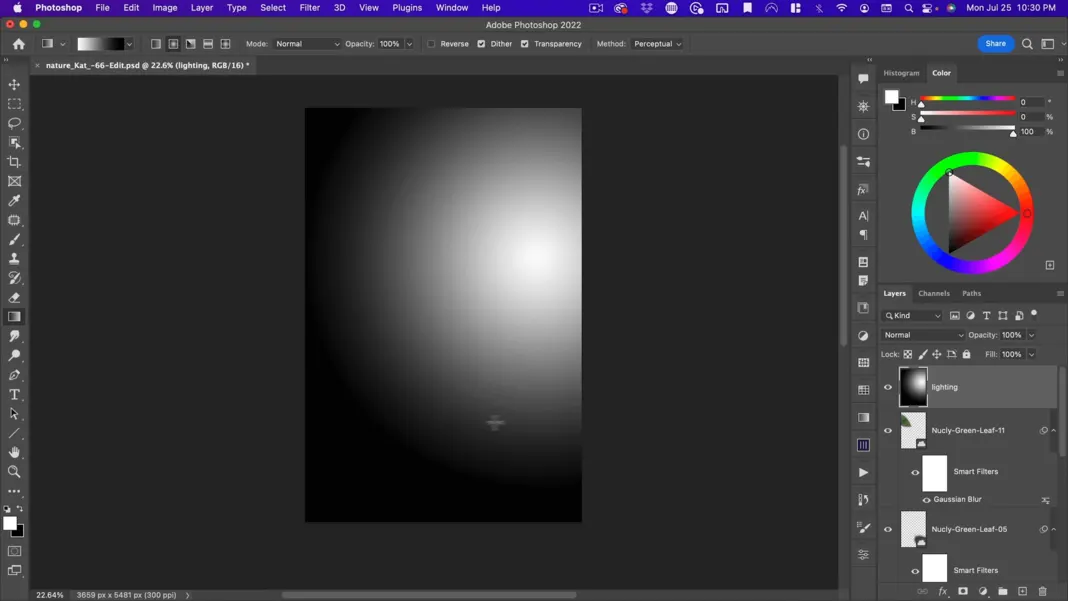
I’m going to create kind of this radial lighting gradient and I’m going to put this on soft light.
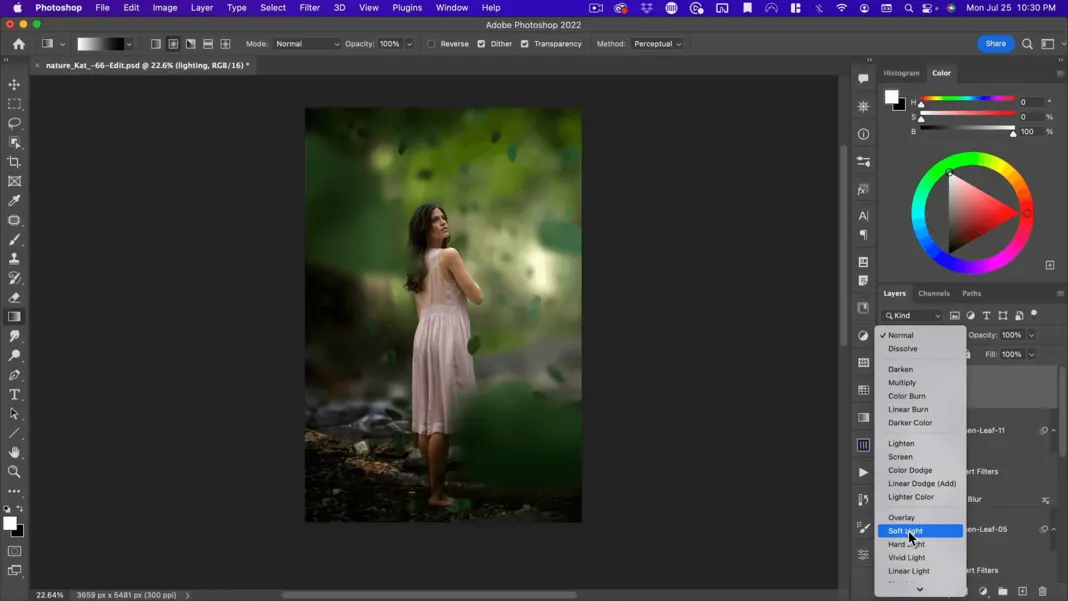
You’re going to see that kind of pushes all of our image toward this light source. And I’m going to take down the strength of that quite a bit to 40%, just enough to influence our colors that way.
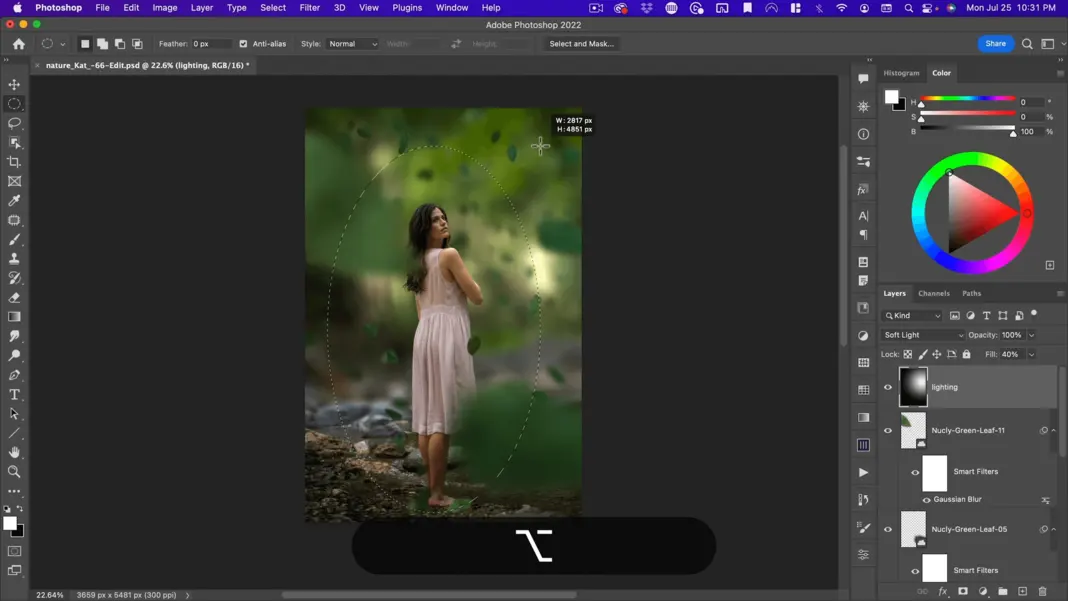
Next, I’m going to add a large vignette on the whole image. But rather than a centered vignette, it’s going to go like this.
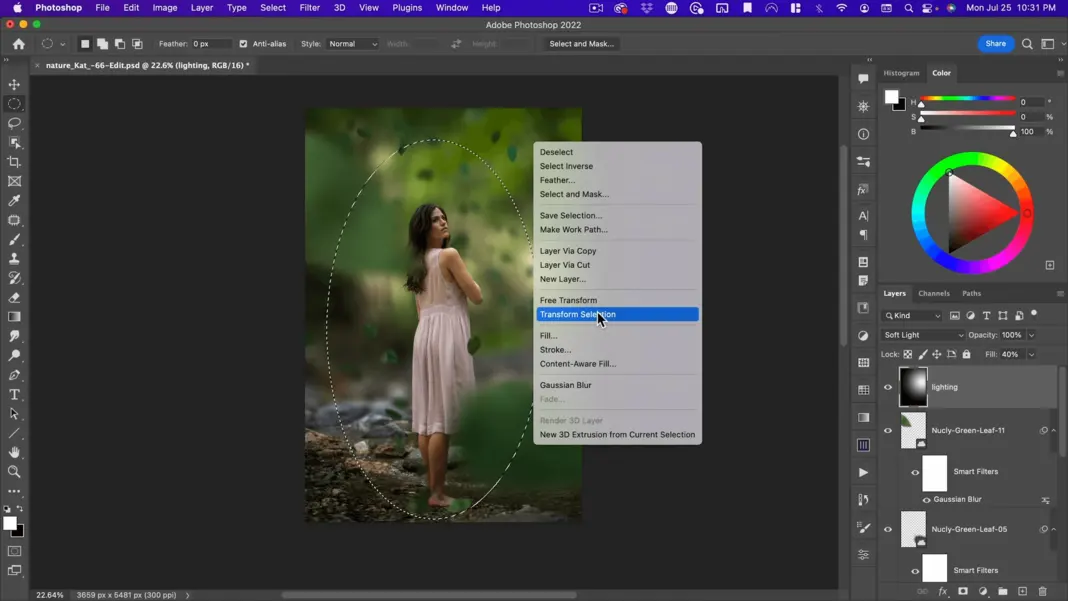
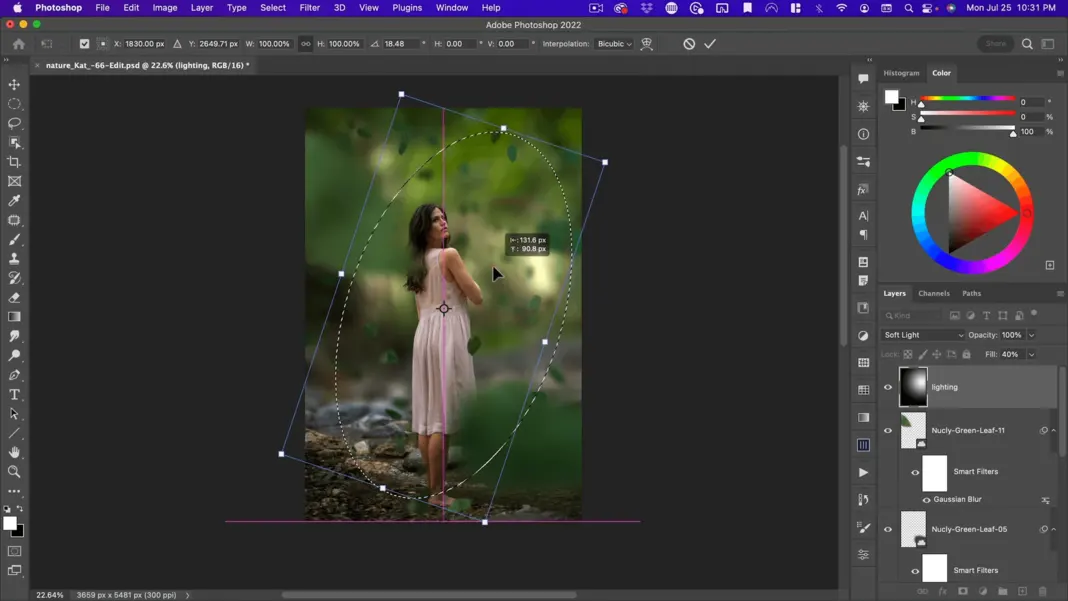
And then I’m going to use that, start making a curve.
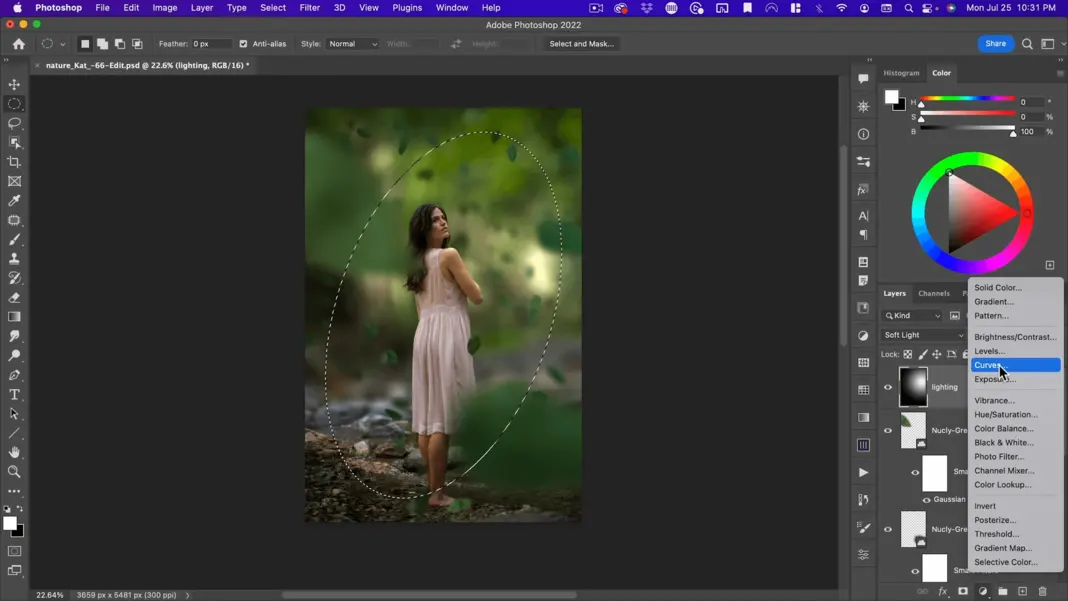
I’m going to make it darker and then go to mask properties here, bring up the feather and invert it.
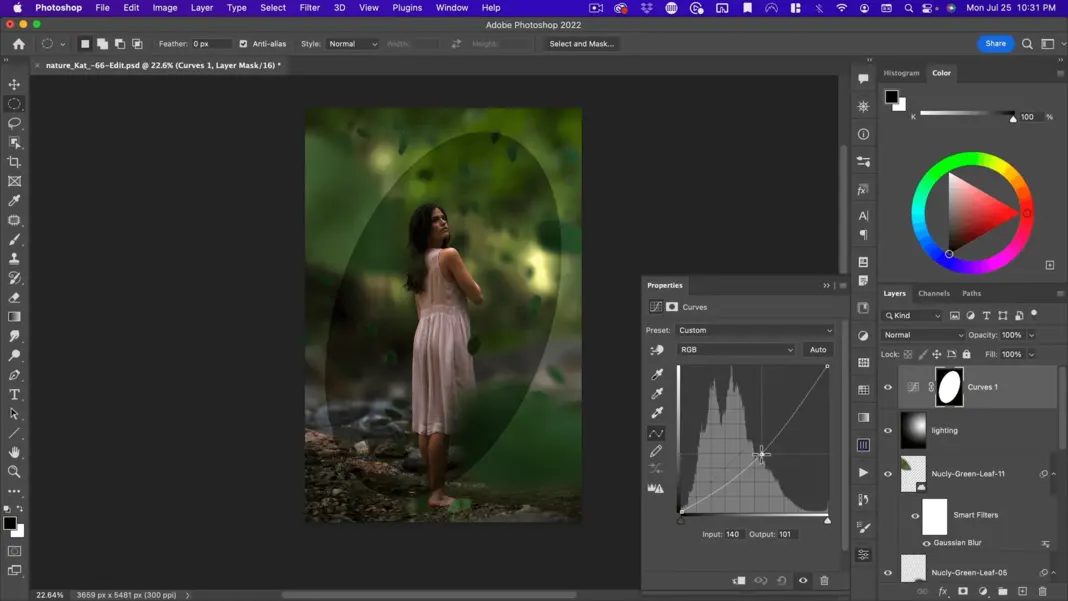
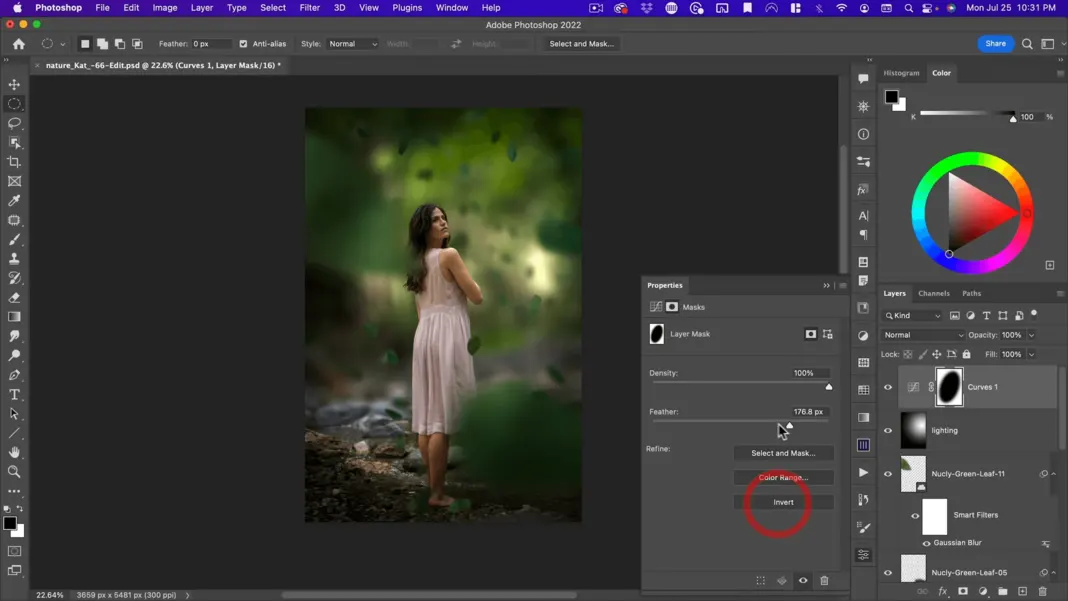
And then this will act as a nice vignette like this. And here I’m going to go to my Reds and bring them down.
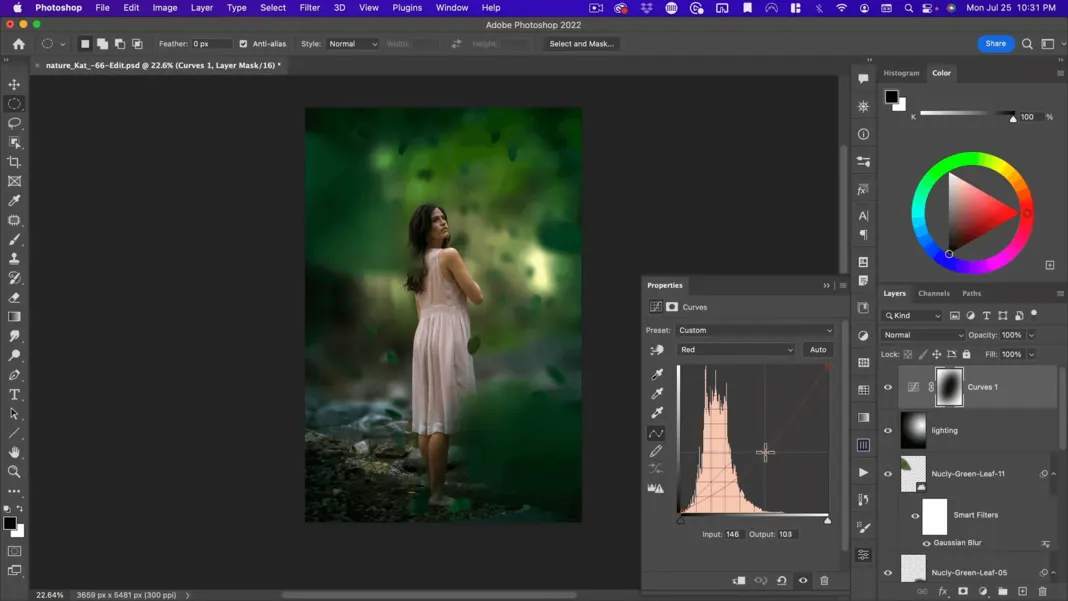
Go to the blues and bring that up a little bit.
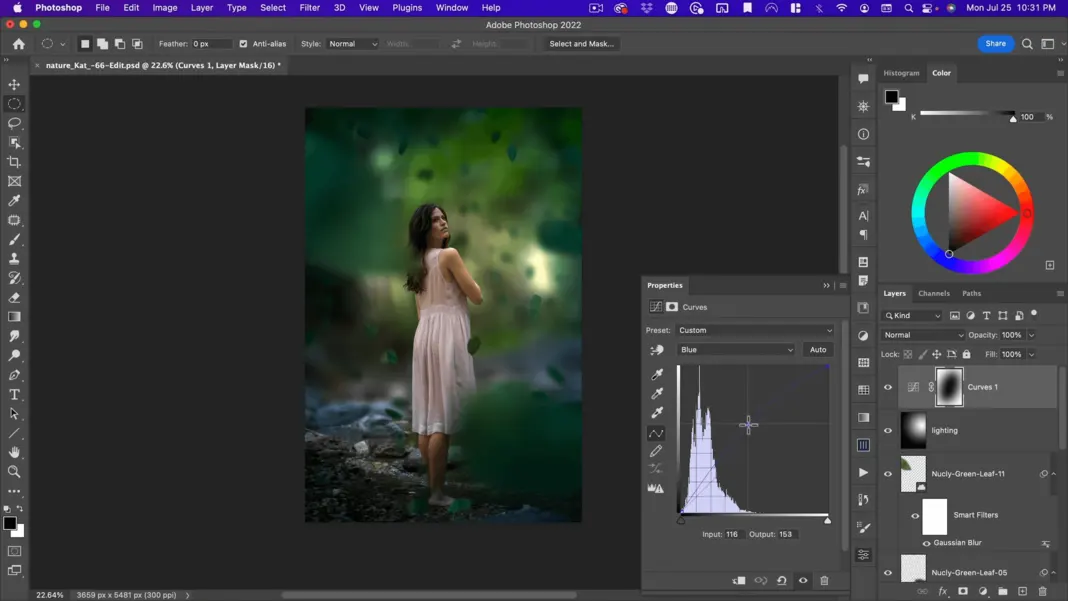
And then for this one, I want to bring it behind my two big leaves. I like the fact that this green leaf is showing more in the foreground.
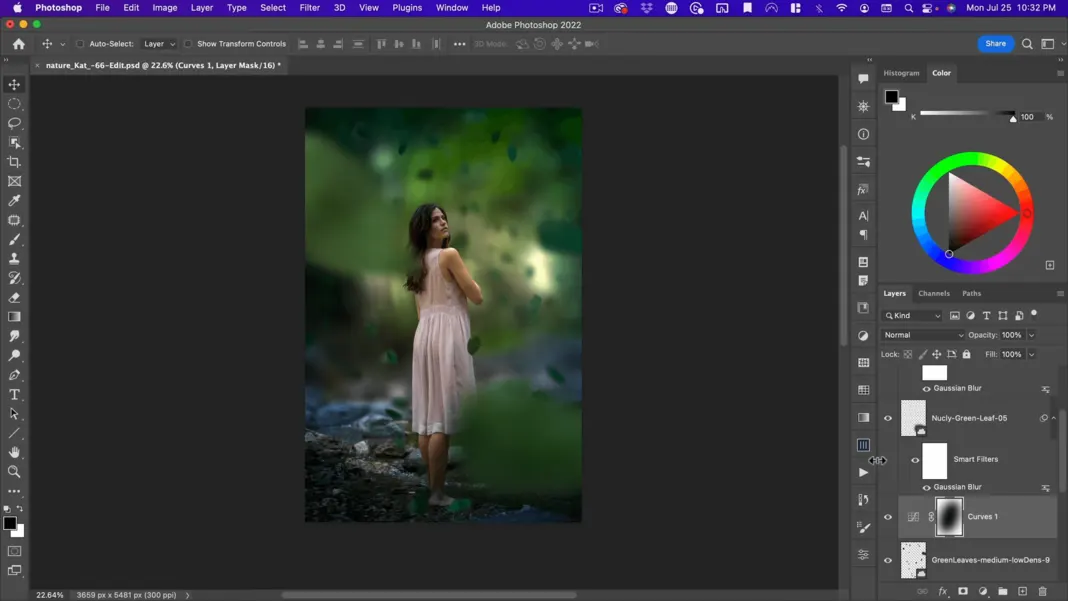
But It’s a little too much. So, I could put this on 50% capacity, hold down Option, and then drag it to the top. So now with two of them at 50%, they’re kind of doing the same effect, but only 50% on these two leaves. Okay. So pretty much what I want to do there, I do think I need maybe one or two larger leaves here.
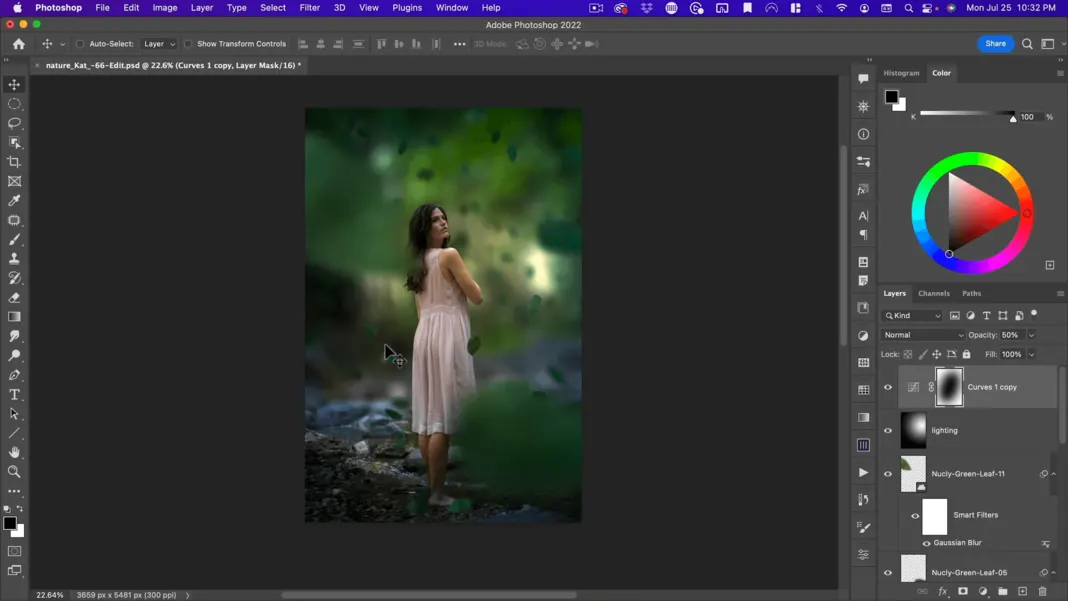
I can copy one, make it a bit smaller, turn the angle of it—something like this.
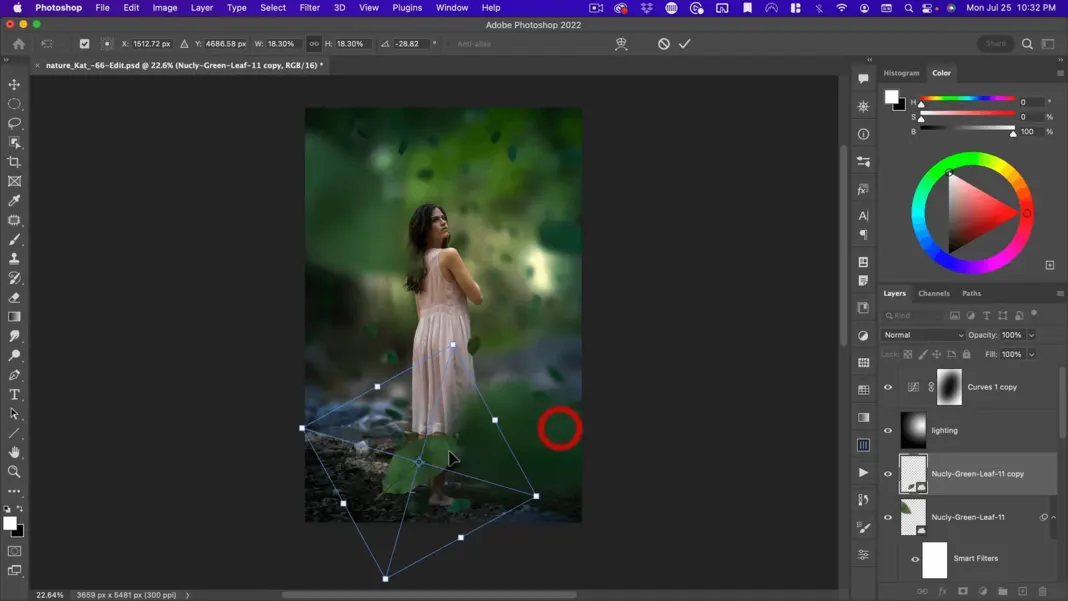
And I’ll take the Gaussian blur down a bit because it is closer to her, something like this:
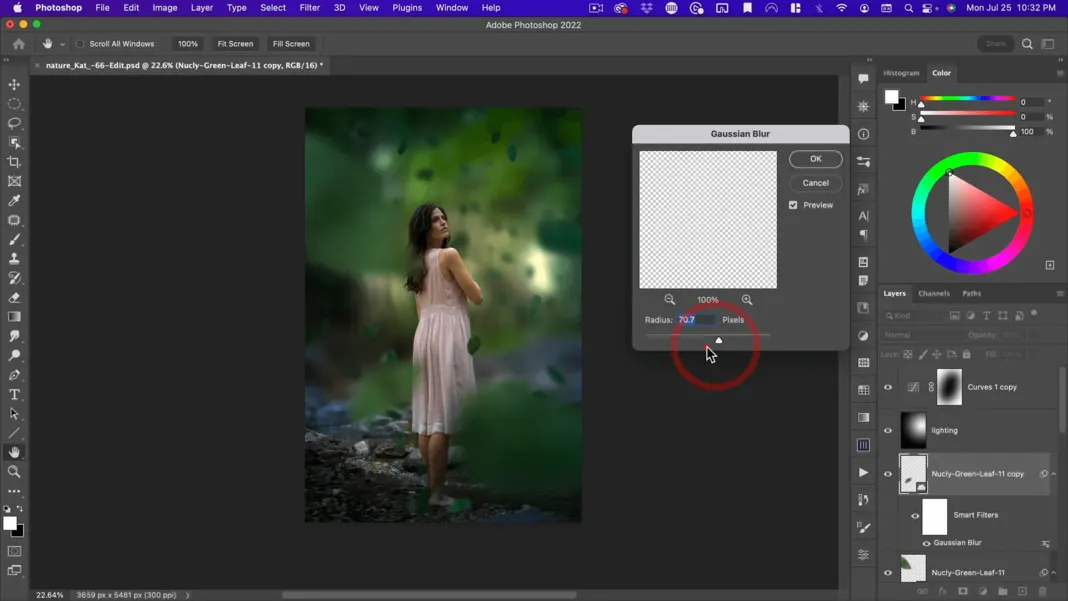
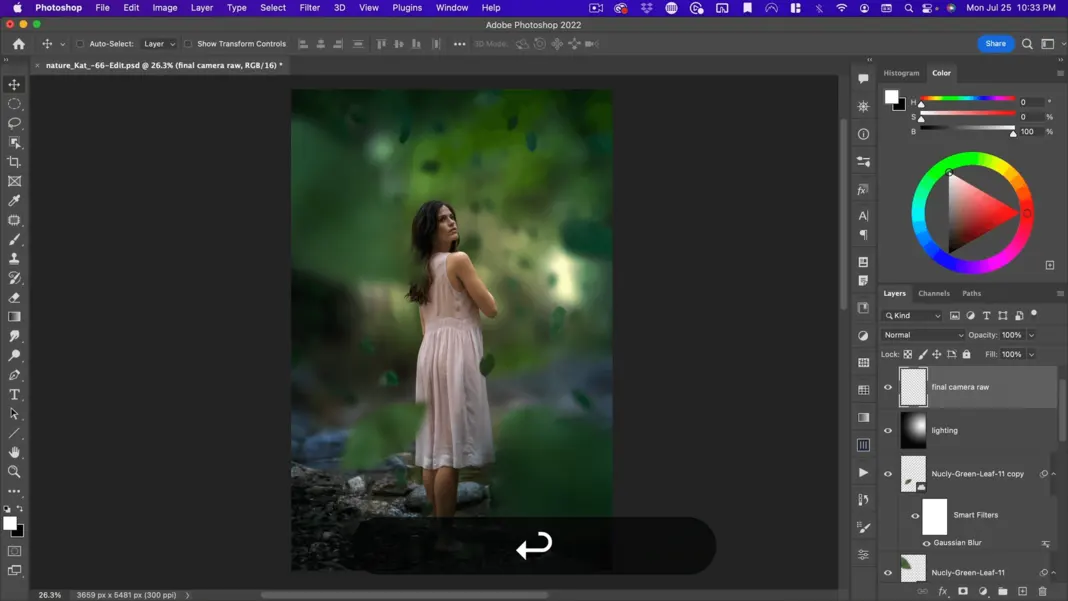
So, you get this impression that we’re shooting through the leaves at her. So, I’m pretty happy with that.
The last thing I want to do here is the same trick I did before: our final Camera layer. Hit Shift + Option + Command +E, convert this to a smart object, and then go to Camera Filter.
How to add warmth to the image
And here I’m going to do similar tricks that I did with the last one. I like it overall a little bit warmer. So, I’m going to just make it a tiny bit warmer, maybe increase the contrast a tiny bit, bring up the shadows a tiny bit, and add a little bit of clarity.
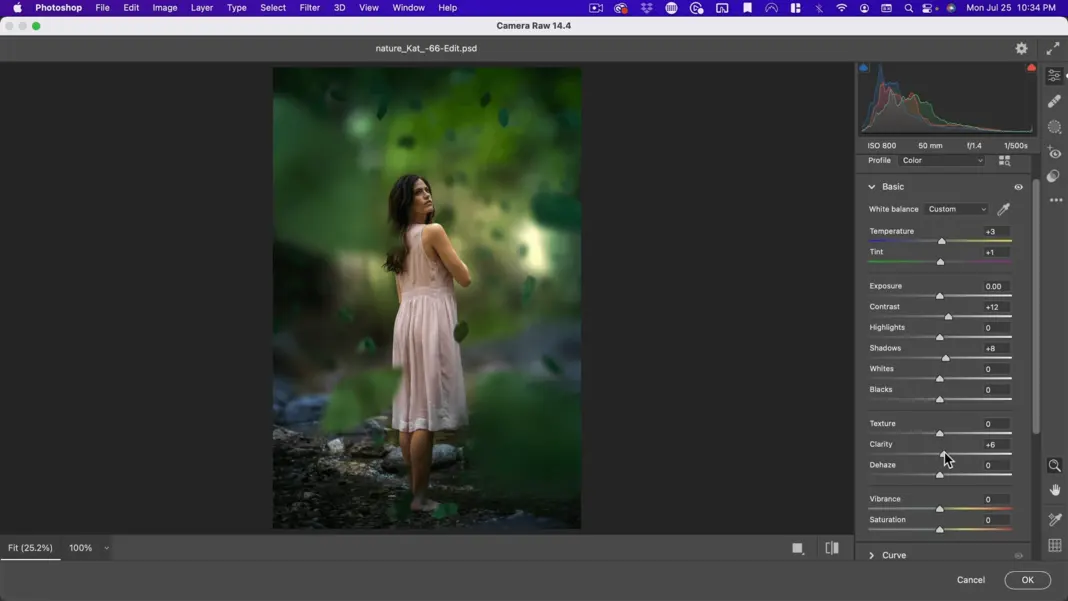
And then under the color grading, add a little bit of blue color to our shadows, and a golden green lime color to our highlights. Let’s see how that looks.
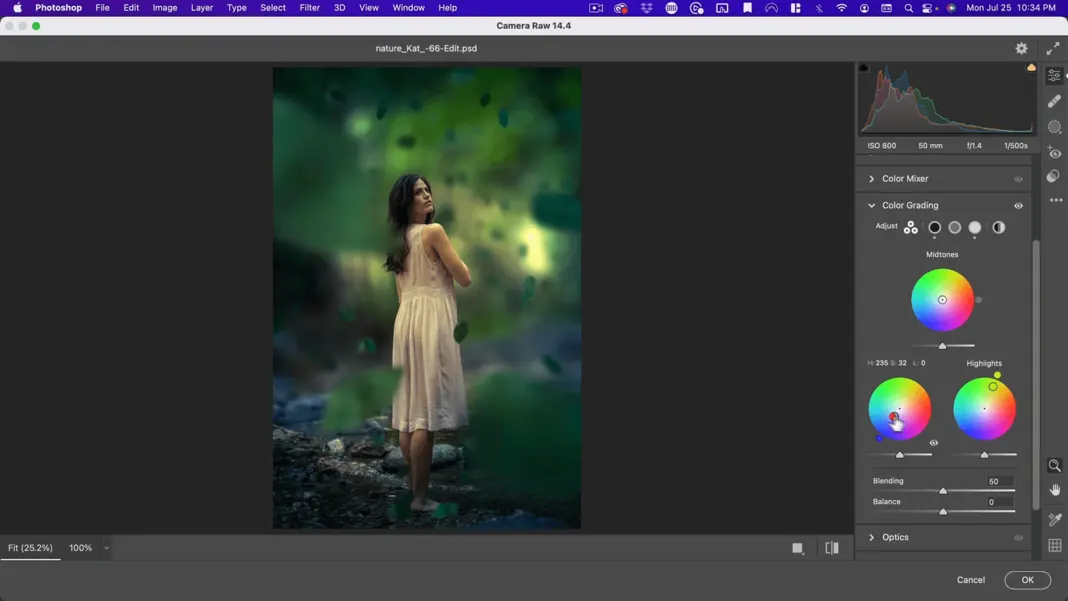
And then under effects, I want to add a little bit of green and a little bit of vignetting.
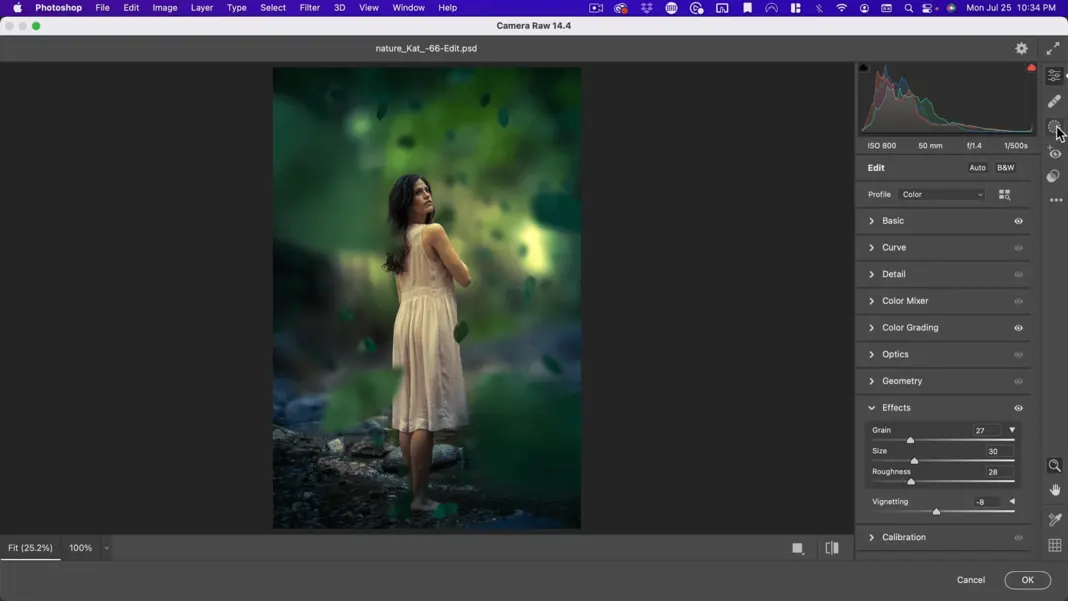
Rather than doing the Vignetting here, I’m actually going to use a radio gradient again. It just gives me more control.
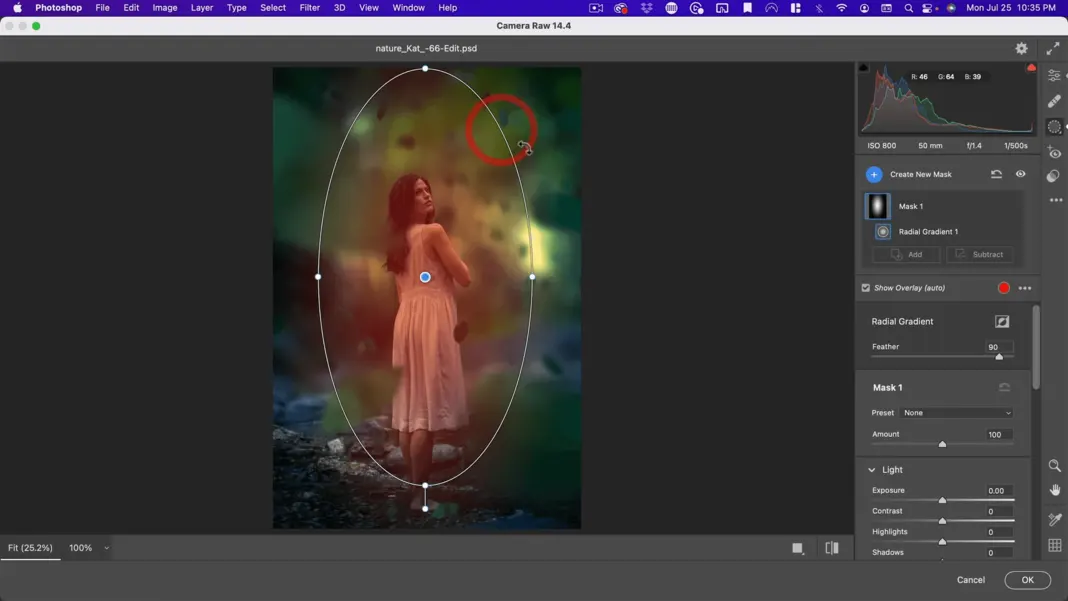
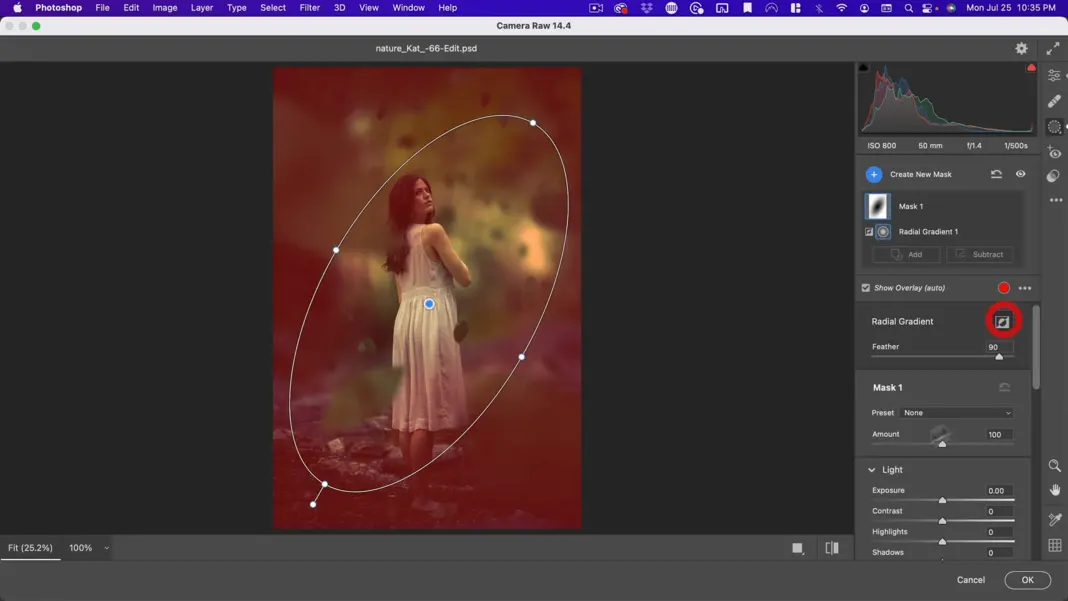
So, something like this, when I invert this, let’s take down the exposure a bit and then we’ll make a duplicate with the inverted mask and maybe take the temperature up a little bit on this one, maybe even add a little bit of red.
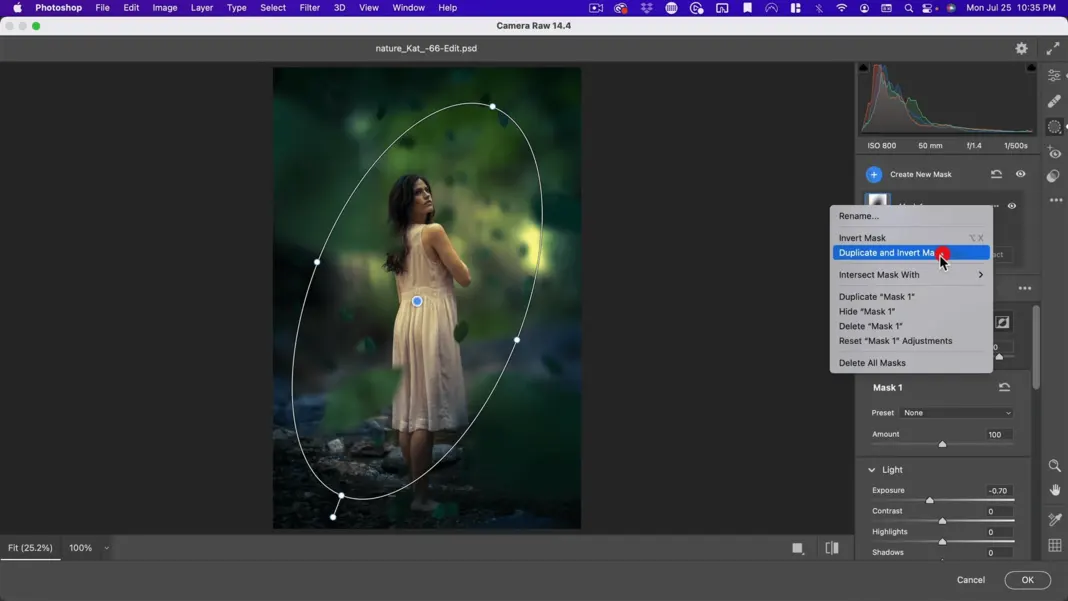
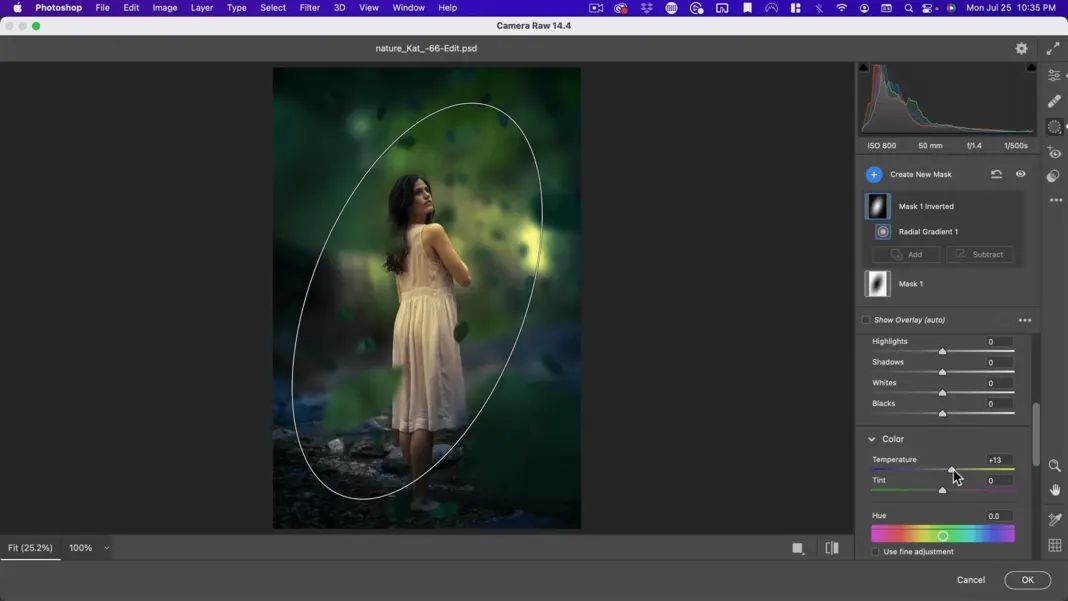
And then finally I’ll go to my curves, just go to the blue channel, bring up the bottom and take down the top.
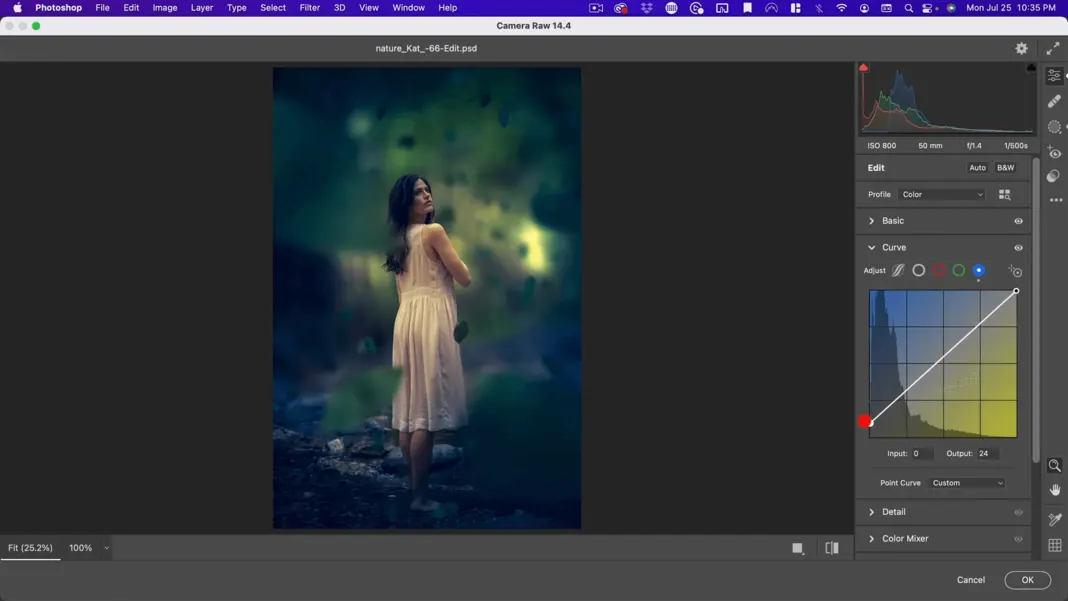
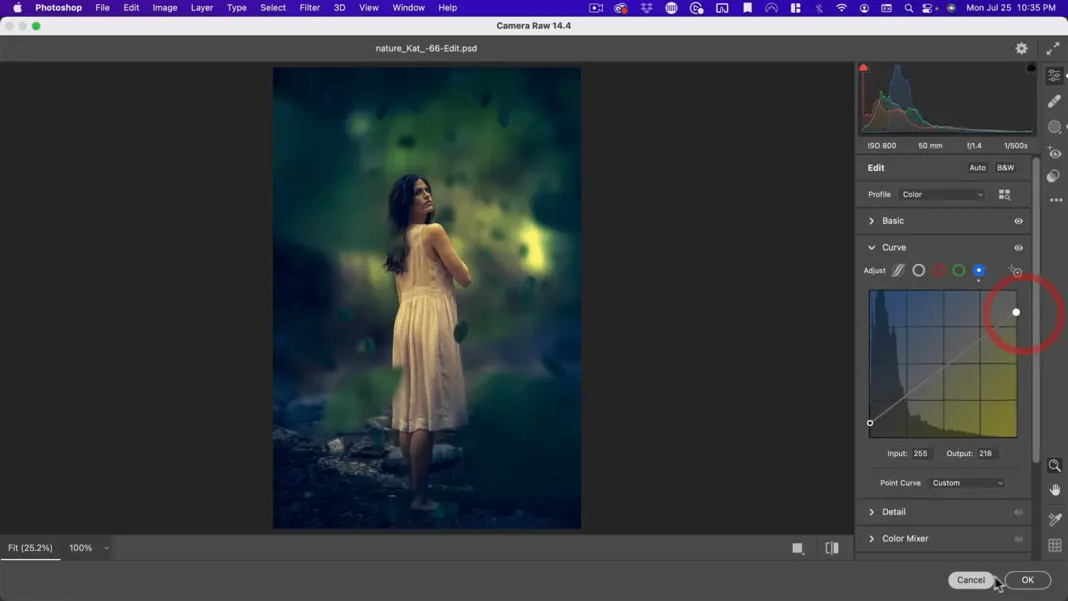
Okay. And there you go. I’m pretty happy with that. And here you can see the before and the after. You can see how this feels like it has more depth, and feels more like we have a separate background, even though it’s all blurred and out of focus.
Before:
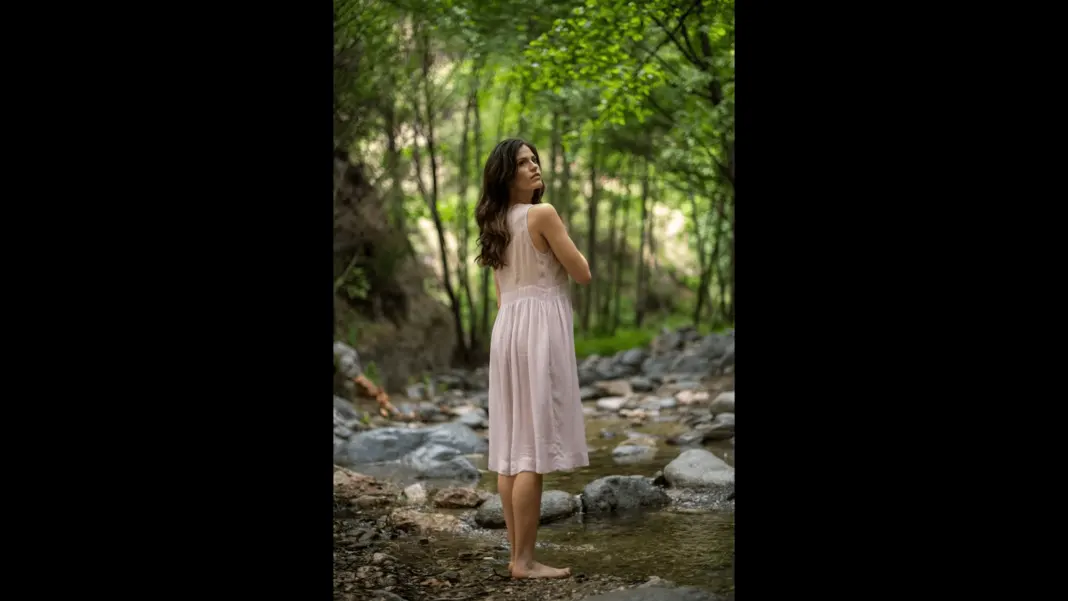
After:
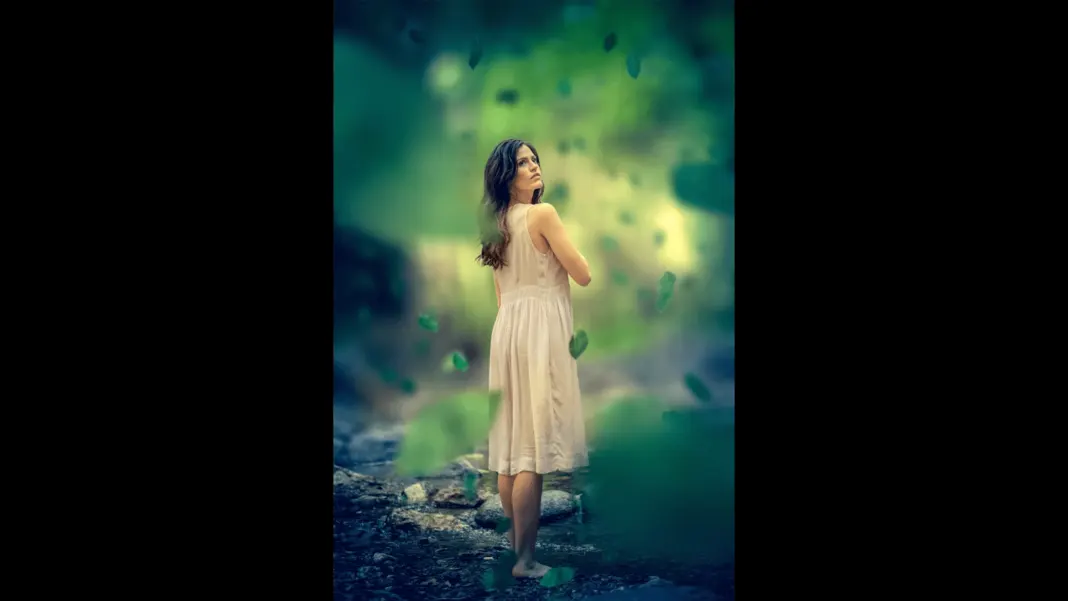
We have a few elements coming in the front and leaves at her plane that are in focus and then go out of focus. We’ve just created this kind of like image where she’s in the middle and we have depth happening on either side of her. But we’re using a shallow depth of field rather than atmosphere to create our depth.

How do add focal depth and atmosphere to this Landscape
Okay, open this last one. This is another image I got from Unsplash by Simon English.
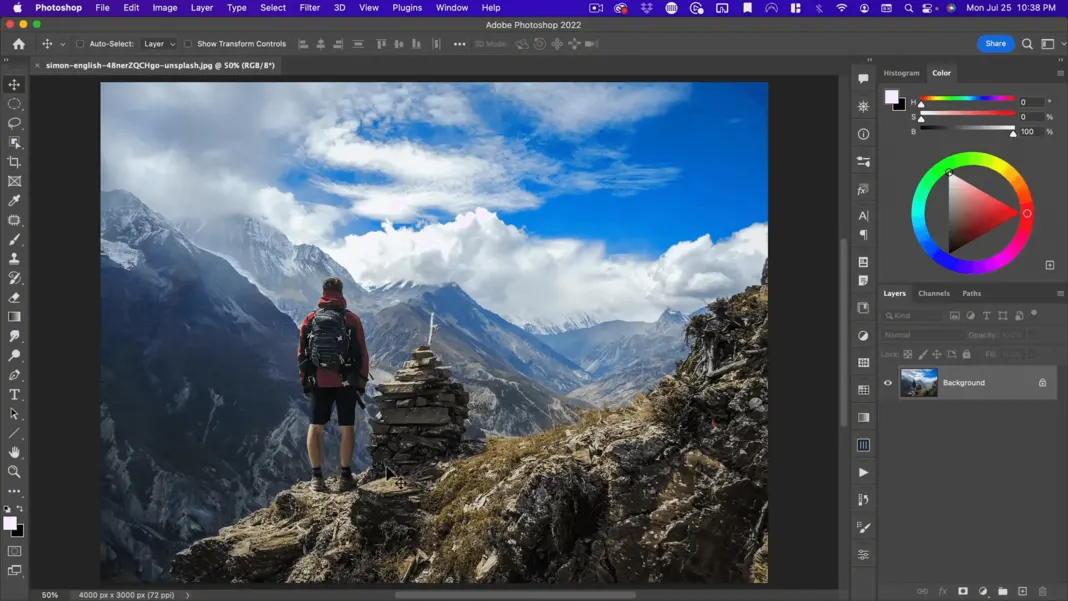
Here I want to look at how we can apply the principle of adding atmosphere and focal depth to a single image and touch on another cool trick you can use for depth of field in Photoshop. So, first things first, we’re going to do a similar thing we did for our first image, separating this into various layers.
1st Step Separation of layers
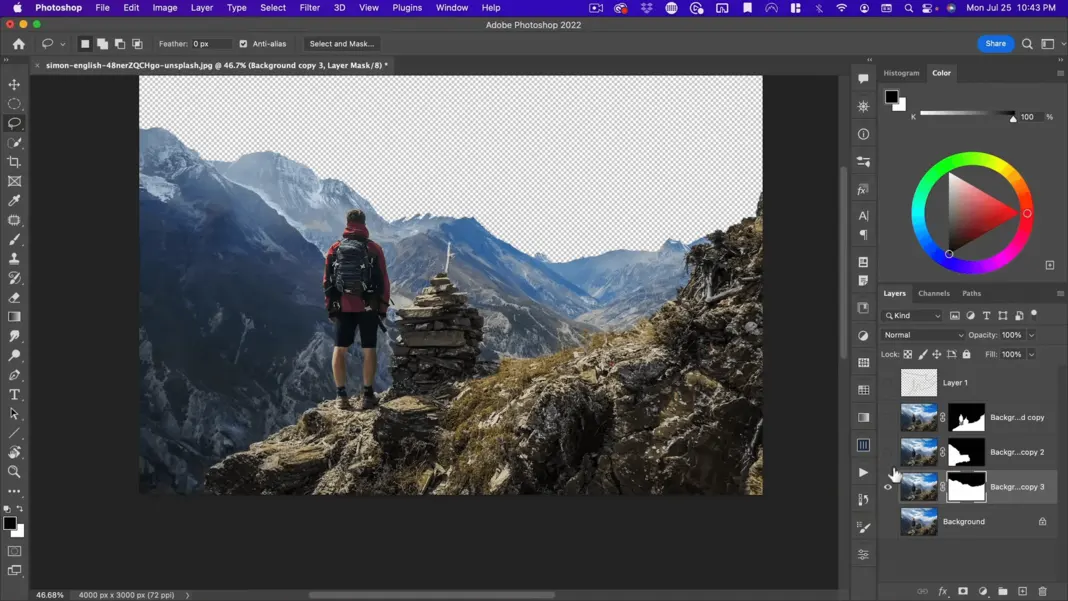
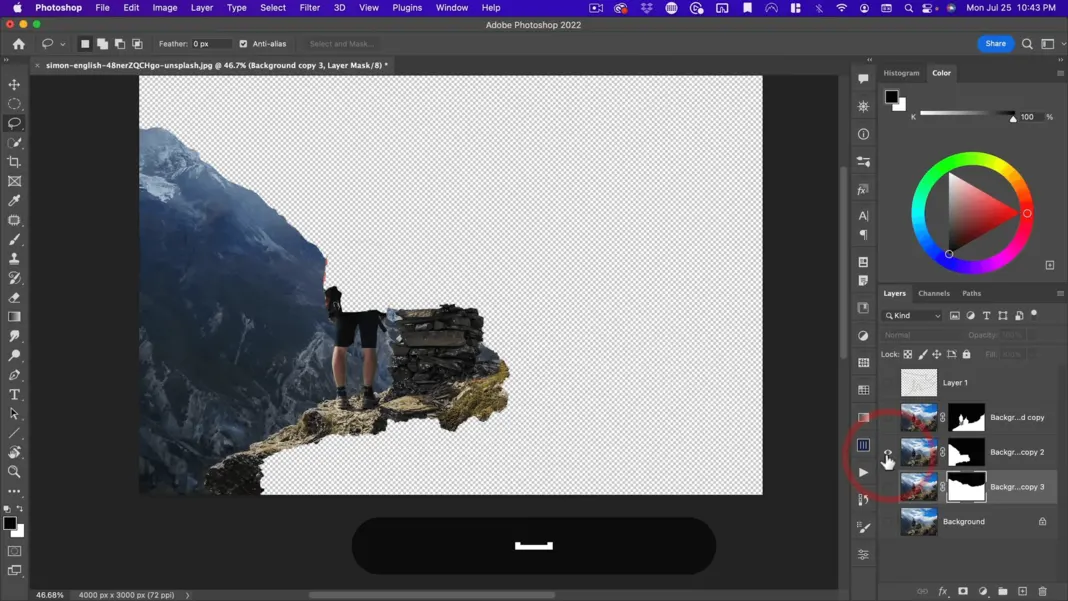
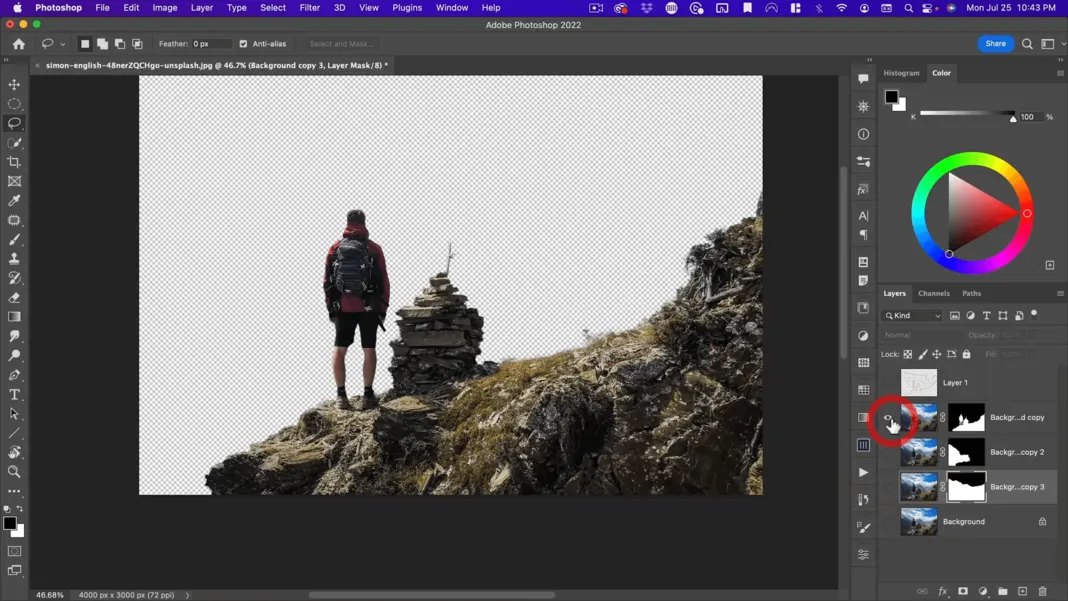
Our foreground is the rocks and hiker, our next layer is this first mountain, then the second mountain, and finally the sky.
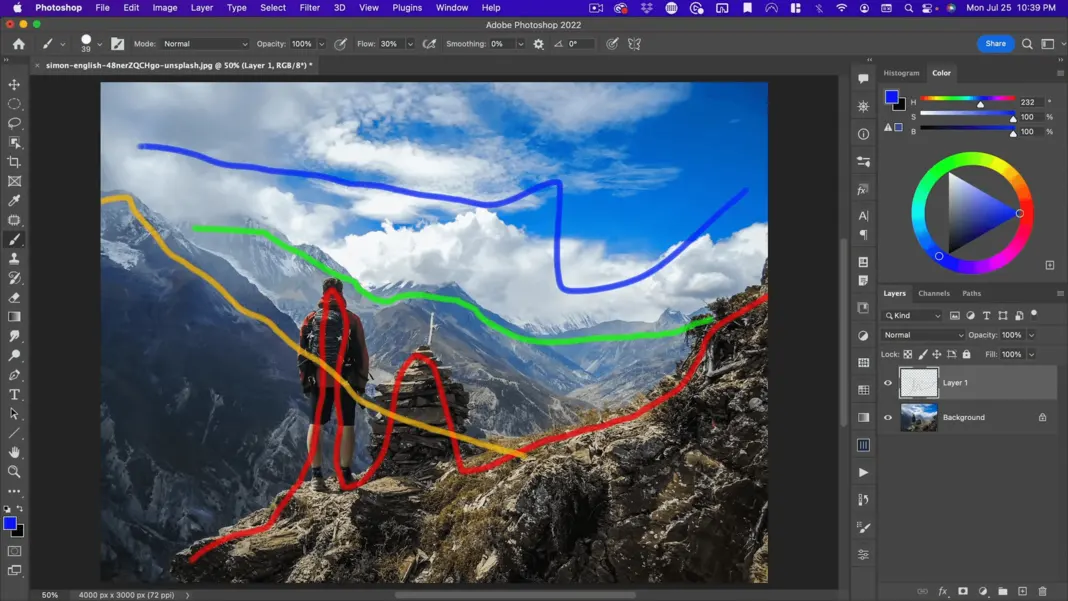
The first thing we’re going to do is separate our image into these layers before we do anything else. That will give us the groundwork that we need to add depth. Now, I’ve already shown you how you do this, so I’m going to skip through this quickly and just do it using the quick selection tool.
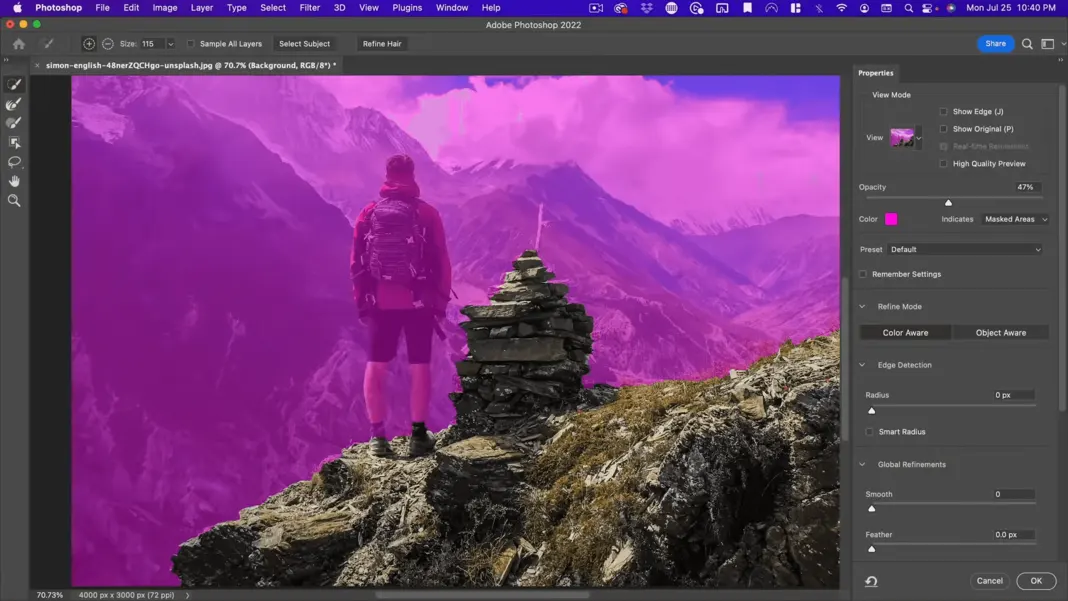
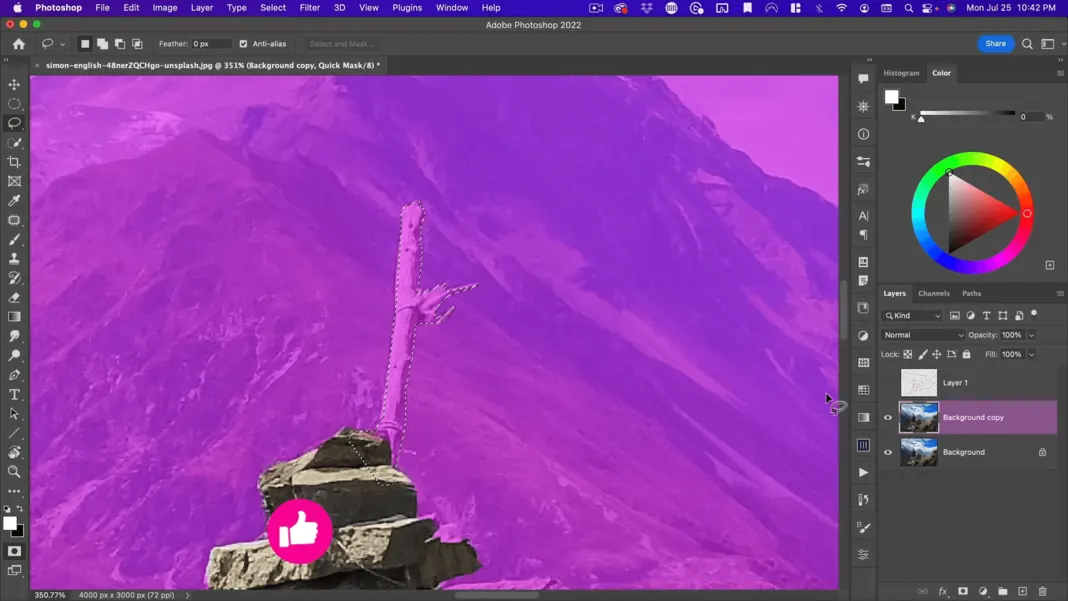
So, we now have our basic layers that are going to go in here.
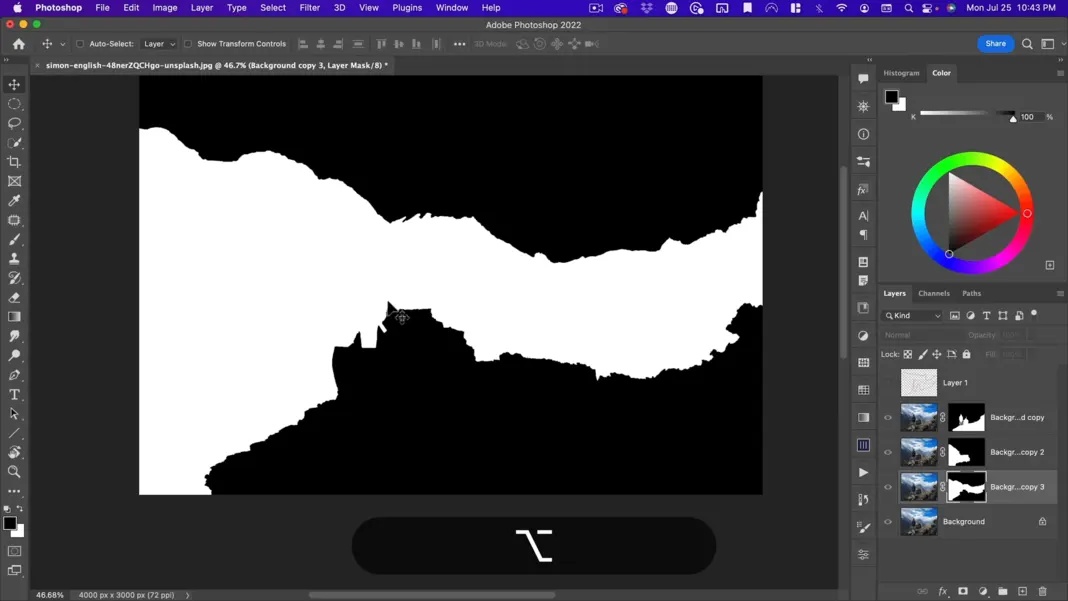
I want each one to be self-contained.
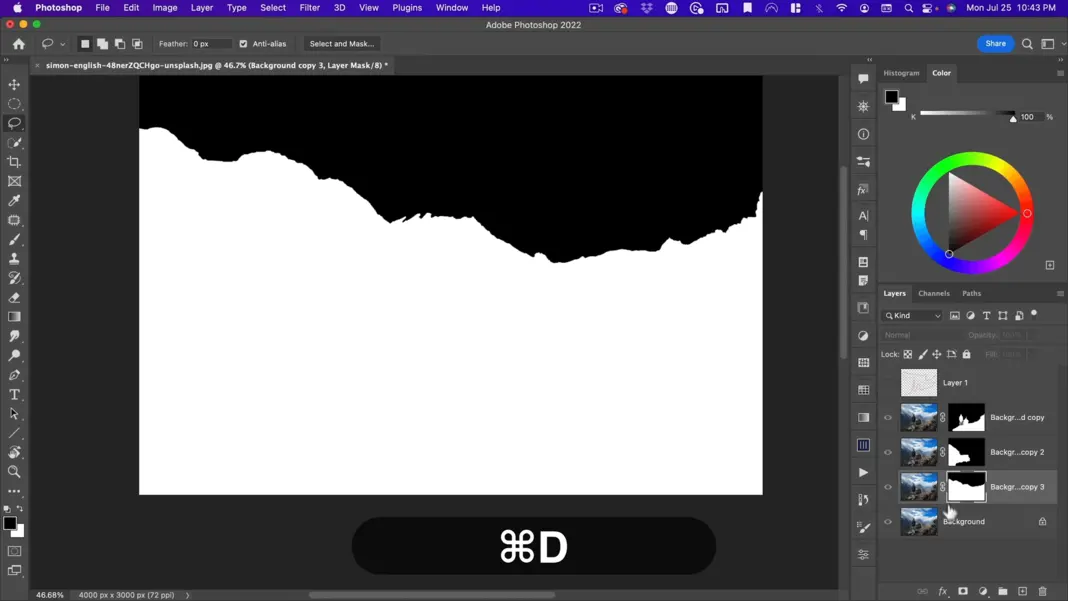
So, there is our background, our middle ground, and our foreground.
2nd Step add a fog layer
And the first thing we’ll do here is add our fog layers. So, I will sample this kind of cloud color here.
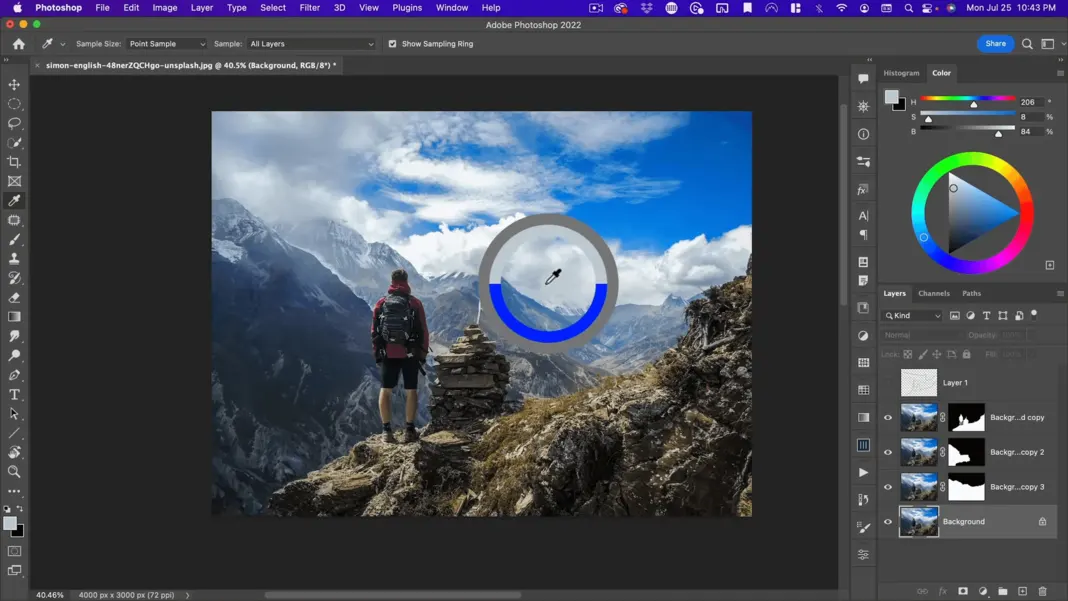
Select the darkest part of this cloud here.
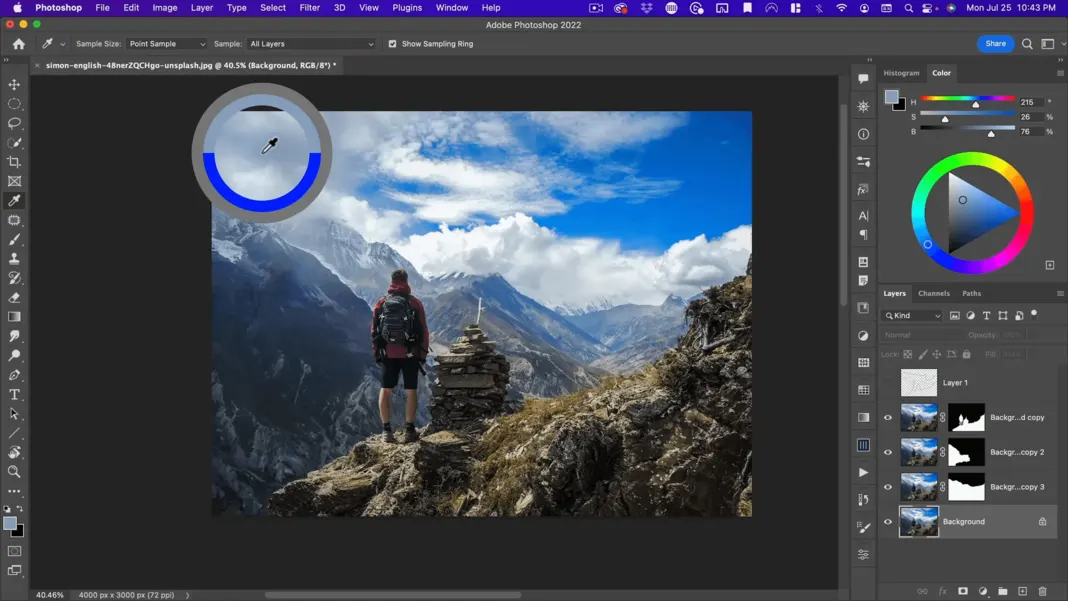
All right. We’re going to call this our fog layer and we’re going to put one in between each of these and then just take down the opacity on these.
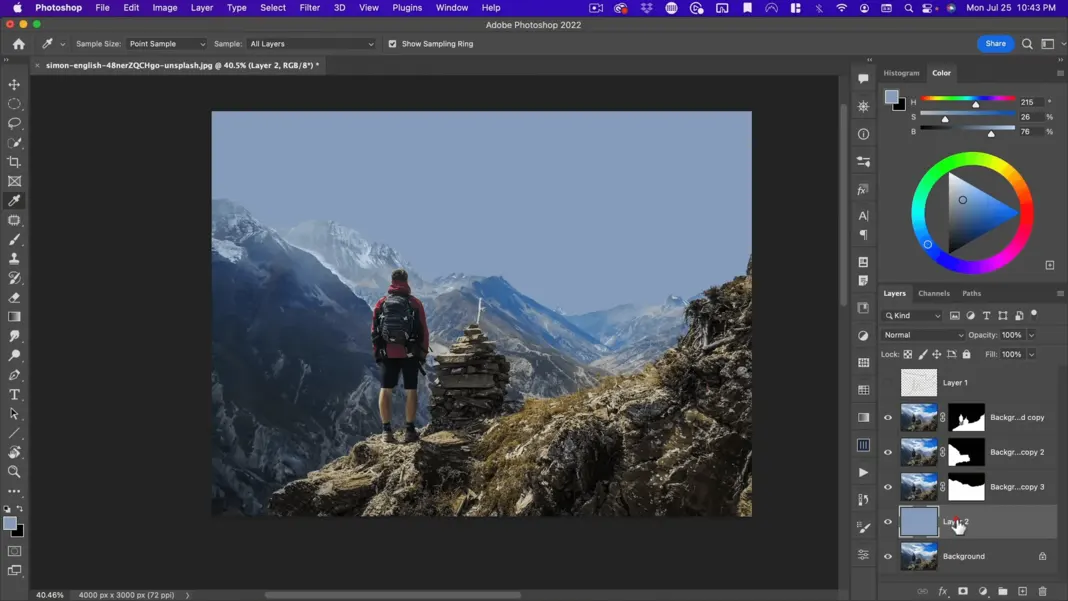
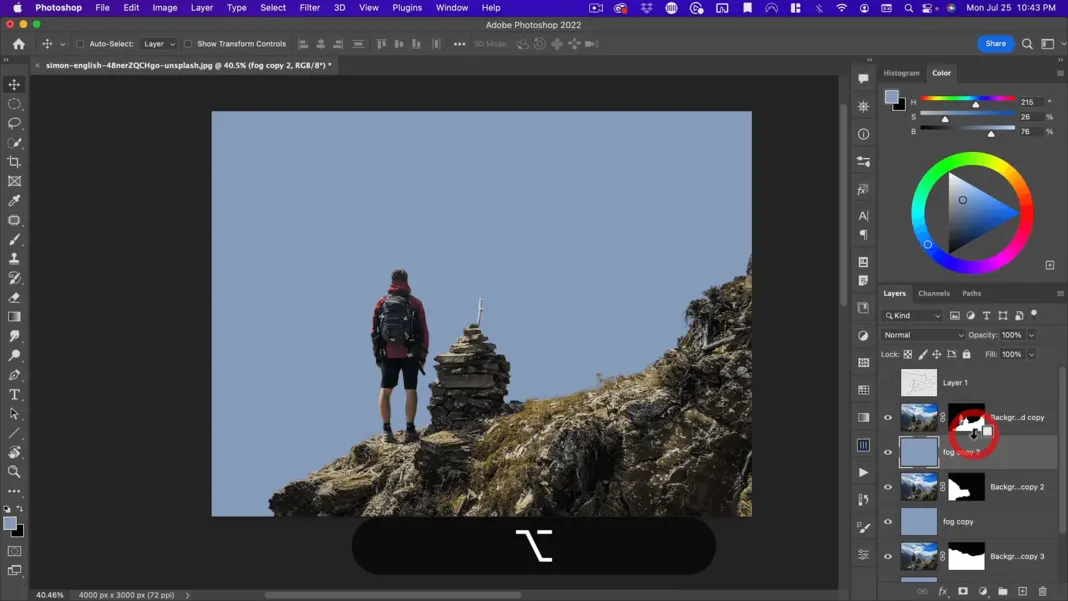
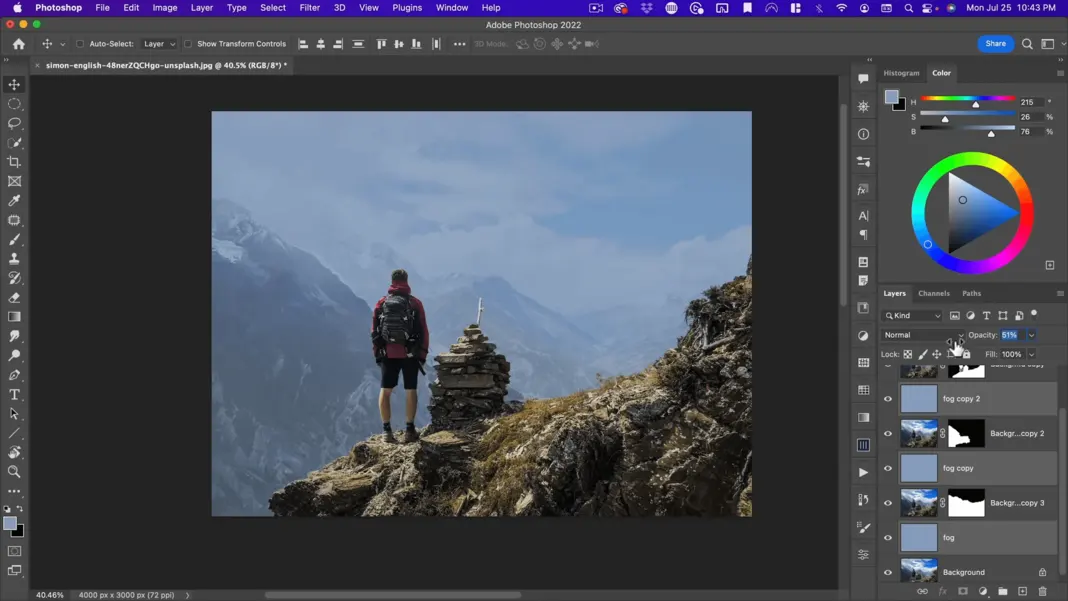
And here you can kind of control how much you want or don’t want. And obviously, it is stacking up. So, if I have an opacity of 30 by the time it’s reached here, it’s quite a bit more than 30 because these copies sit on top of everything.
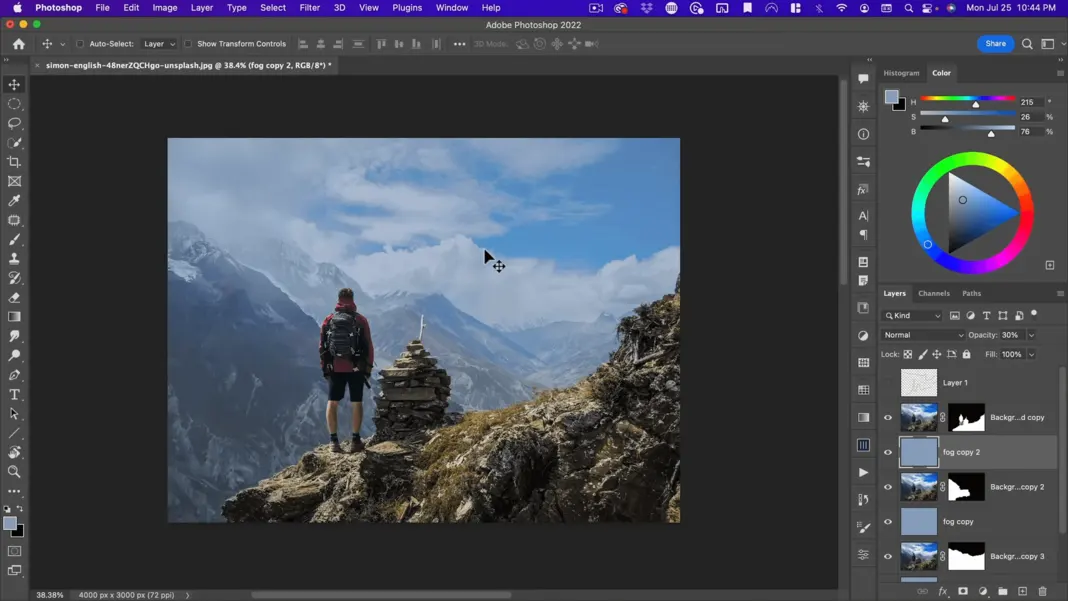
So, we’ve now added some atmospheric depth—relatively straightforward. But the other thing I want to show you here is a cool trick for creating depth of field. So, in this case, the entire photo is in focus. And for a landscape scene or even a composed landscape scene like this, especially where you have an interesting sky, it doesn’t make sense to add shallow depth of field because you’re going to lose the nice part of your image.
Another Cool Trick to add Depth of Field
However, I do want to show you a cool trick to add depth of field. So, in this case, let’s say we did want to add depth of field to this. Maybe we’d make it darker. Not such a bright, sunshiny day. Give it more of a moody look where having depth of field would make more sense.
So, let’s go ahead. And the first thing we’ll do is create a depth mask. I’m going to call this depth mask. I’m just going to Command-click on the mask to select that.
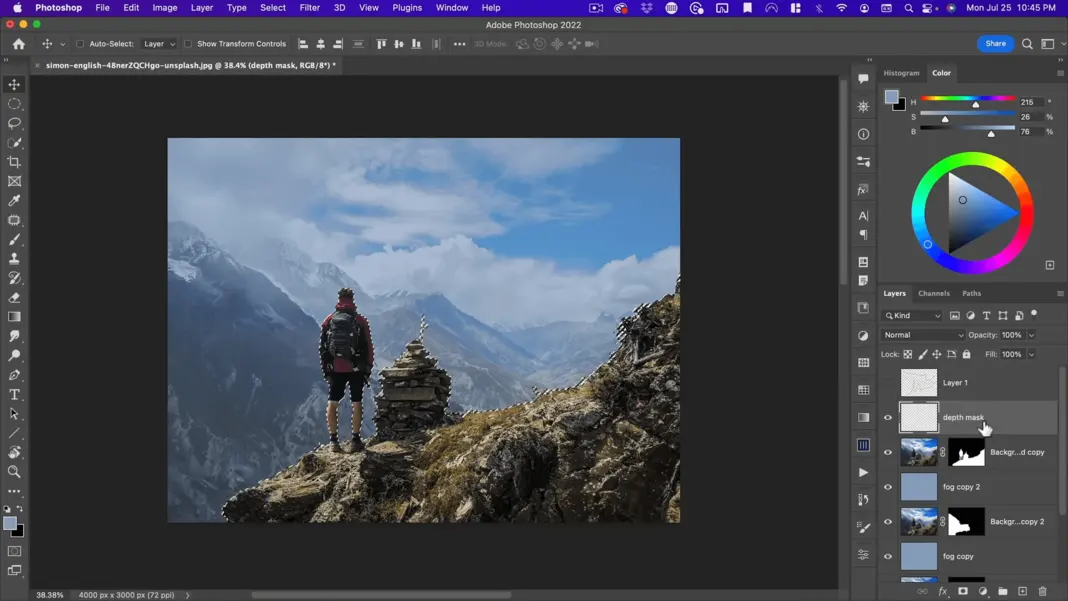
I’m going to fill this with black, which will be the start of our depth mask.
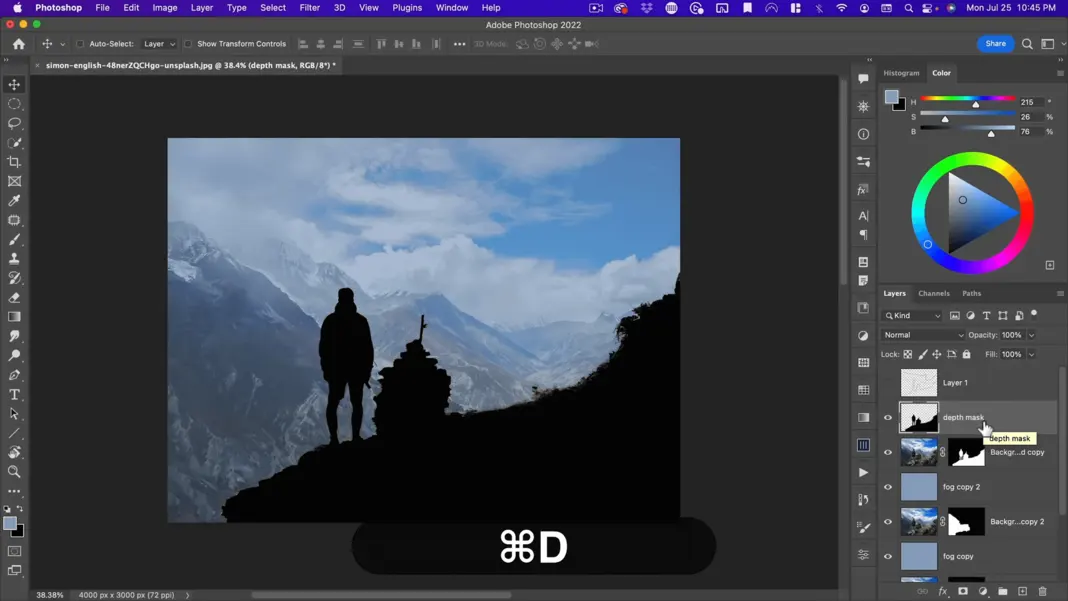
Next, I’m going to select this part and I’m going to make a layer below this.
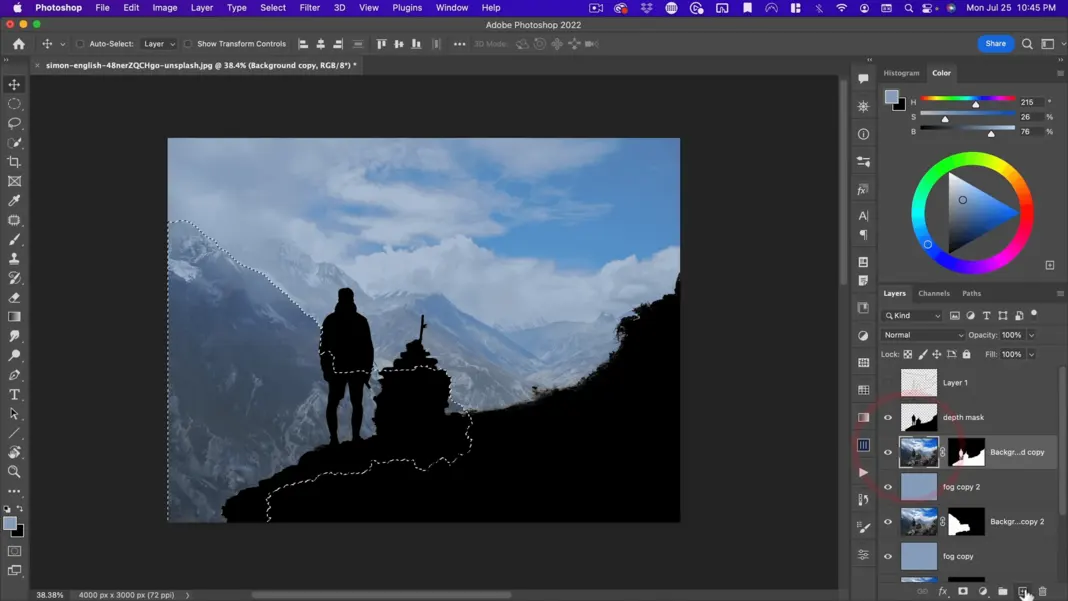
And for this, I don’t want it to be black.
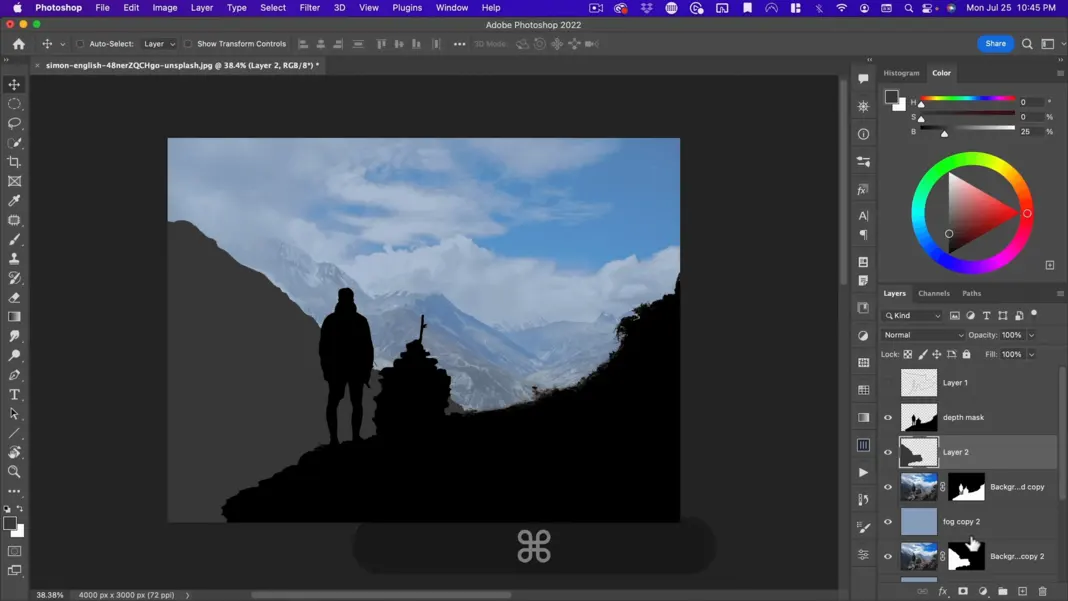
I’m going to fill this and then I’m going to select this kind of middle ground here, and make another layer. For this one, I want the color to be about 50%.
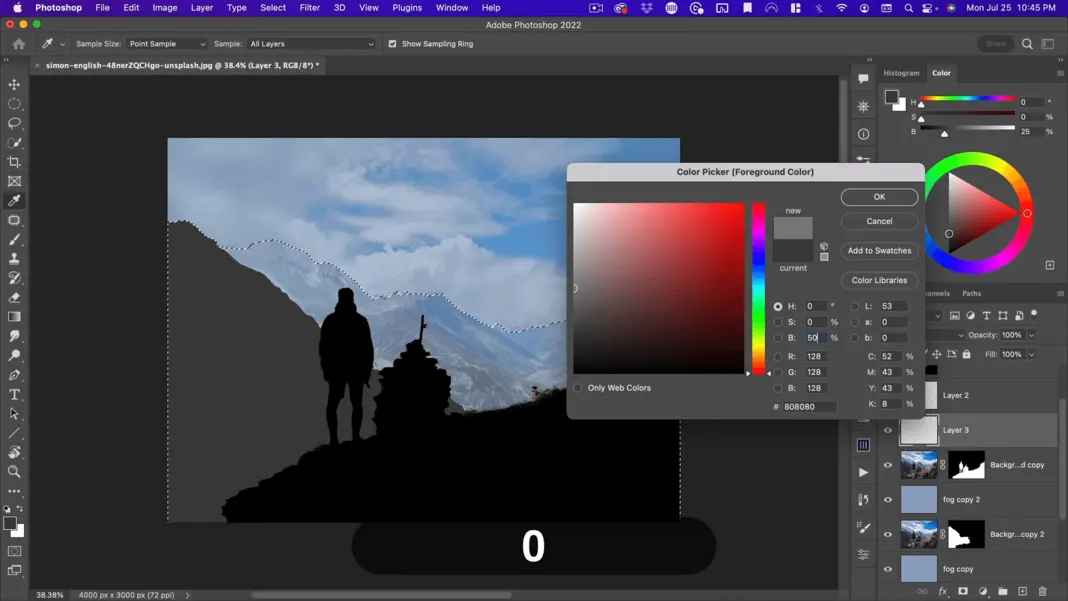
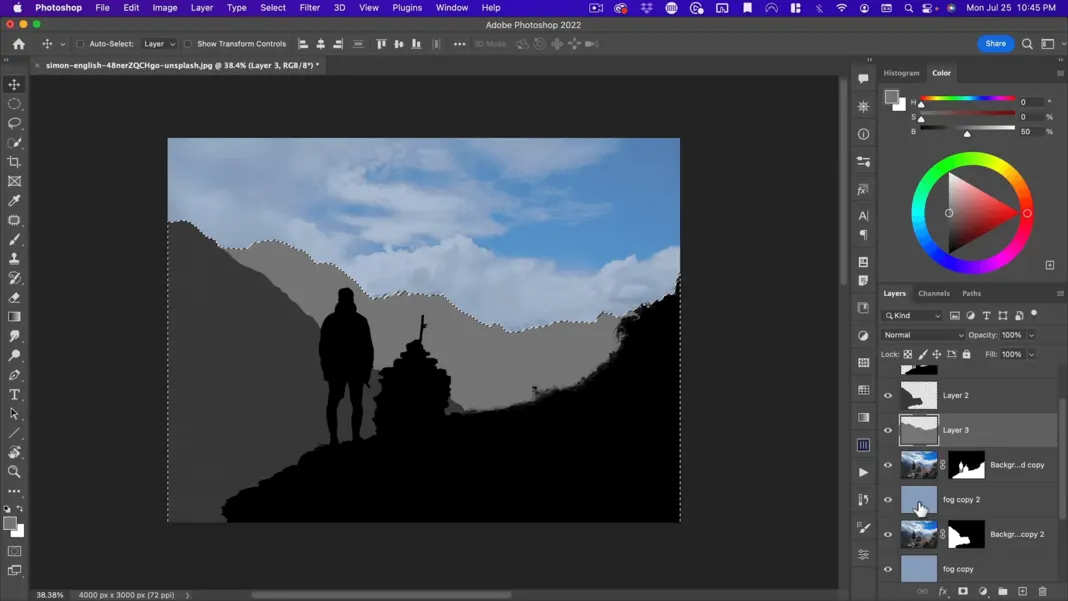
And then finally, the background is going to be white.
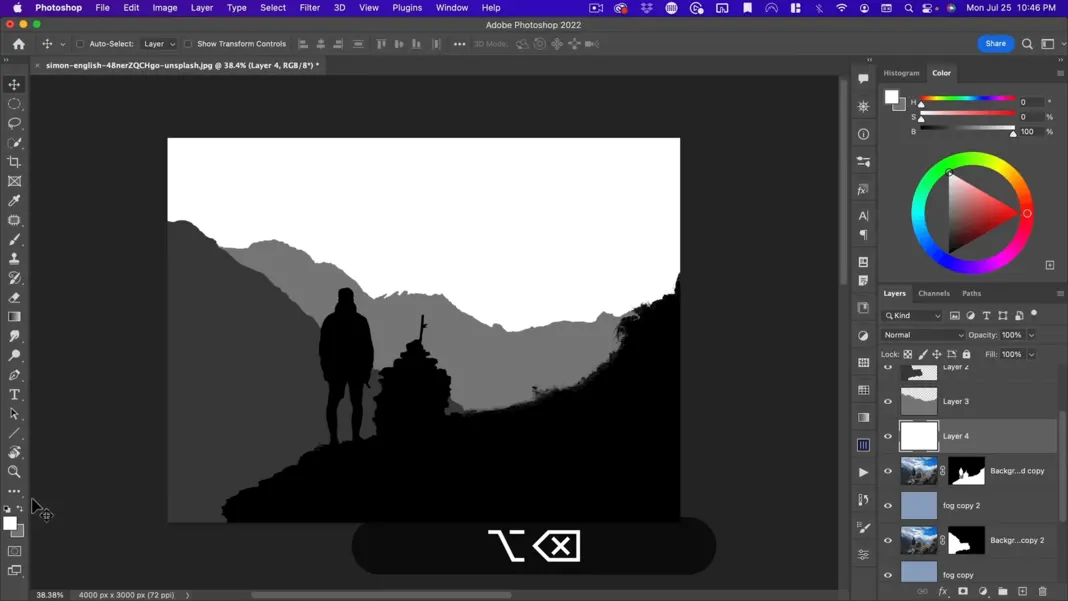
So here you can see how we have these levels of depth and we’re going to use these to create depth of field. Because these two mounds are much closer to this background than him, they should be a bit lighter.
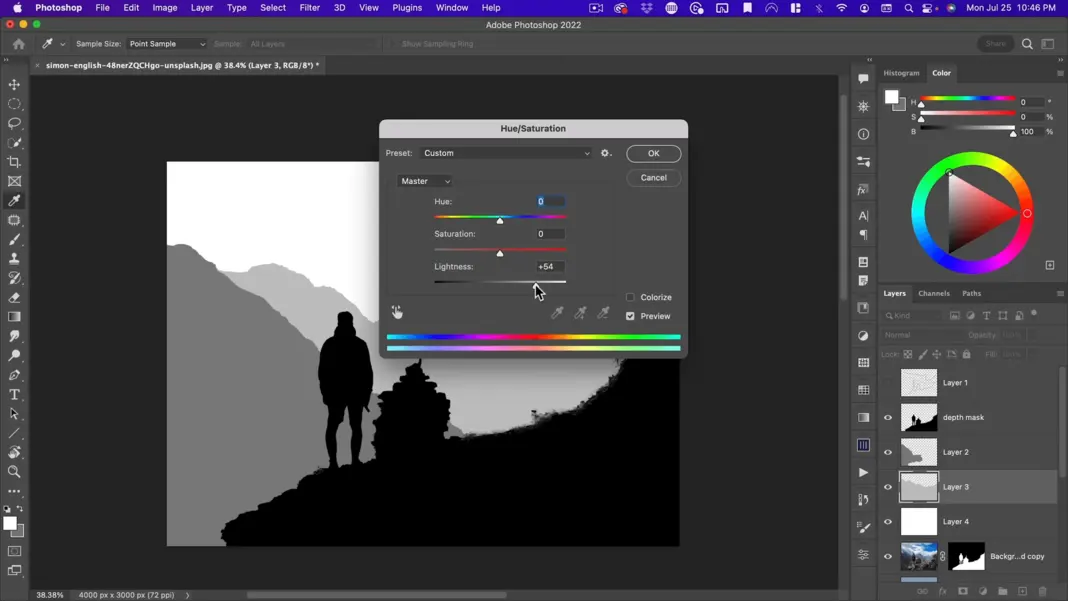
So, let’s go ahead and make this guy a little bit lighter by bringing up the hue saturation. Then finally, I want the very foreground to be blurred as well. So, I’m going to push this so it’s not black.
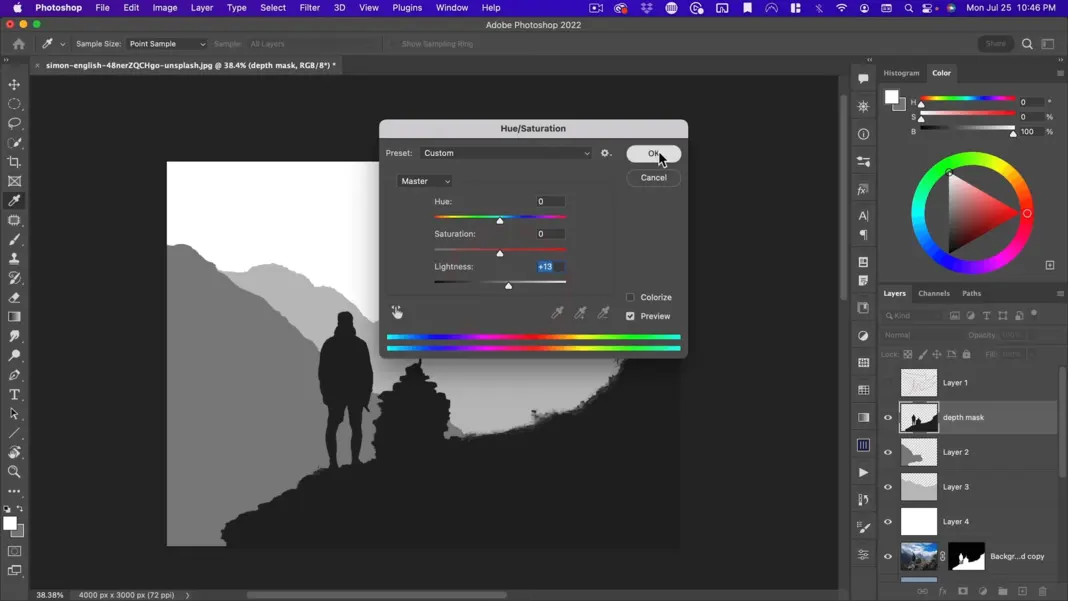
And then above this, we’ll do a black layer and I’m going to link this to this so that it doesn’t go past this.
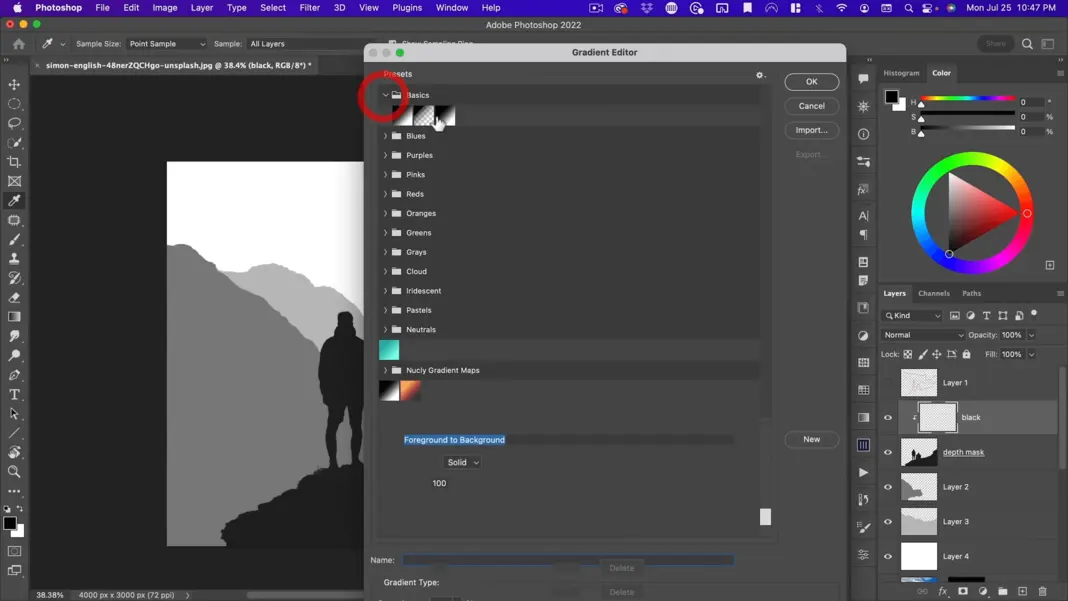
And then with a black foreground color, I’m going to select the foreground to transparent, make sure I’m on linear, and then just go up from the sides and make the foreground darker.
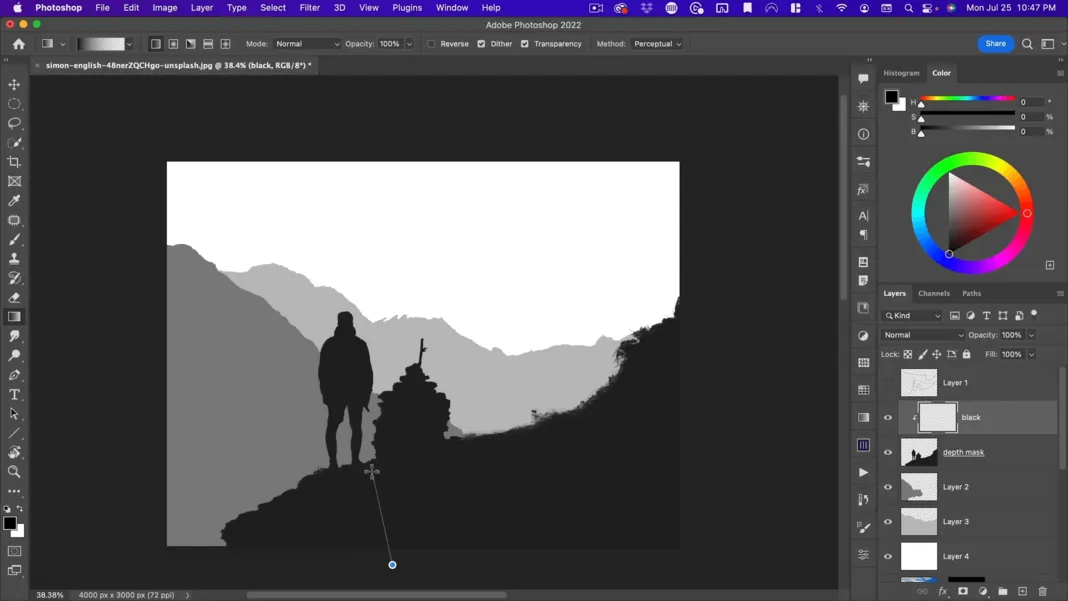
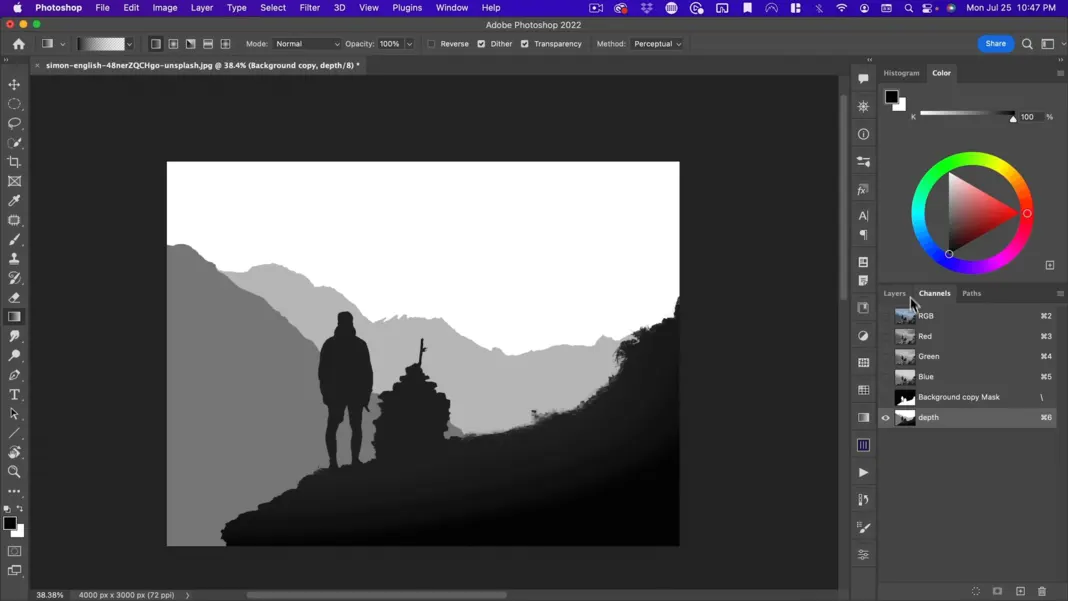
Then I’m going to take all these layers, smash them together with Command + E and call this “depth.”
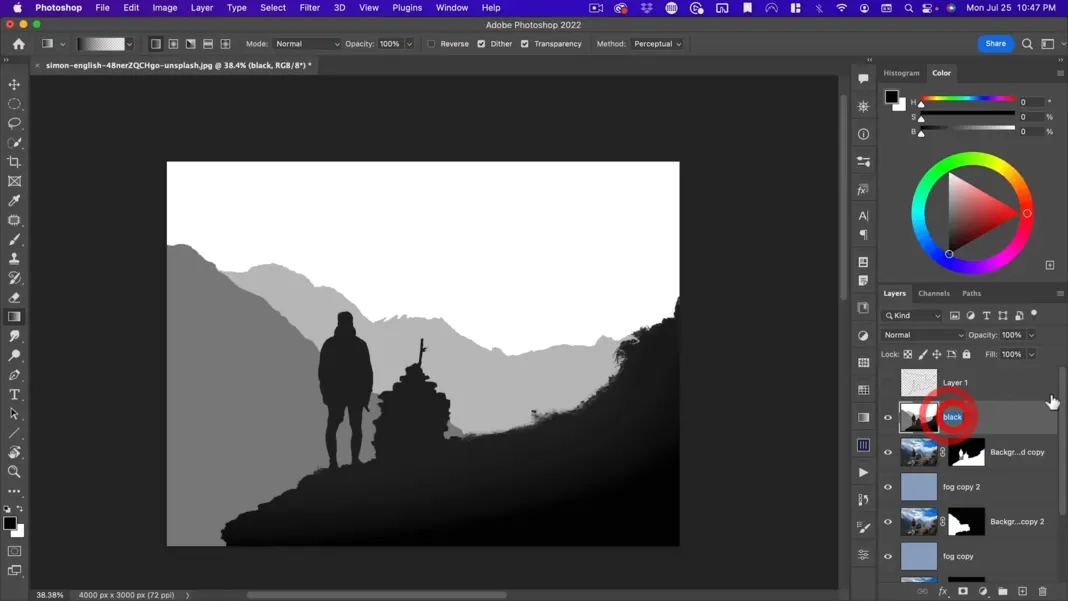
I’m going to hit Command + A, Command + C, and then I’m going to throw this away. And then here I’m going to add a channel and then do Command + V and we’ll call this “depth.”
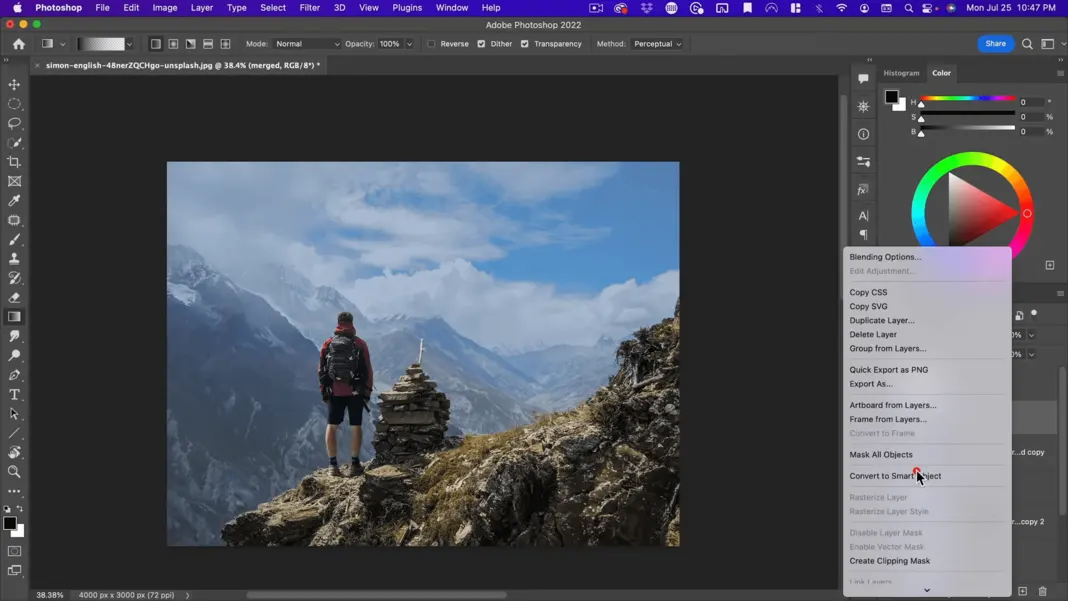
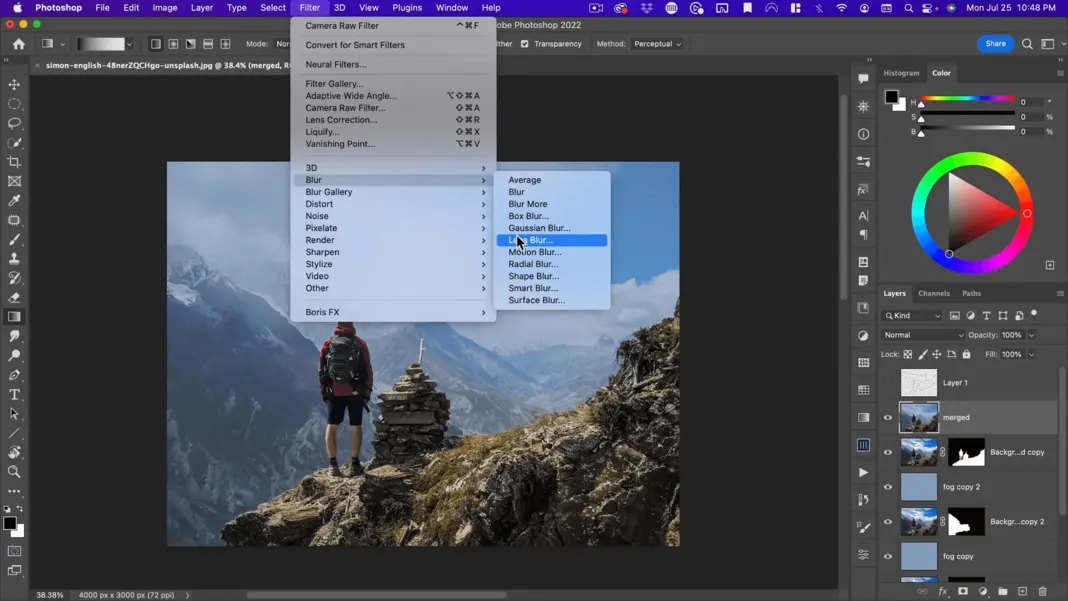
Now add a layer at the very top. I’m going to call this “merged.” We’re going to do Shift + Option + Command + E, and then on this merge layer, I’m going to convert it to a smart object and then I’m going to go to Filter Blur and use Lens Blur.
Adding the Lens Blur
Lens Blur does not work on a smart object. So, we’re going to have to not make that a smart object.
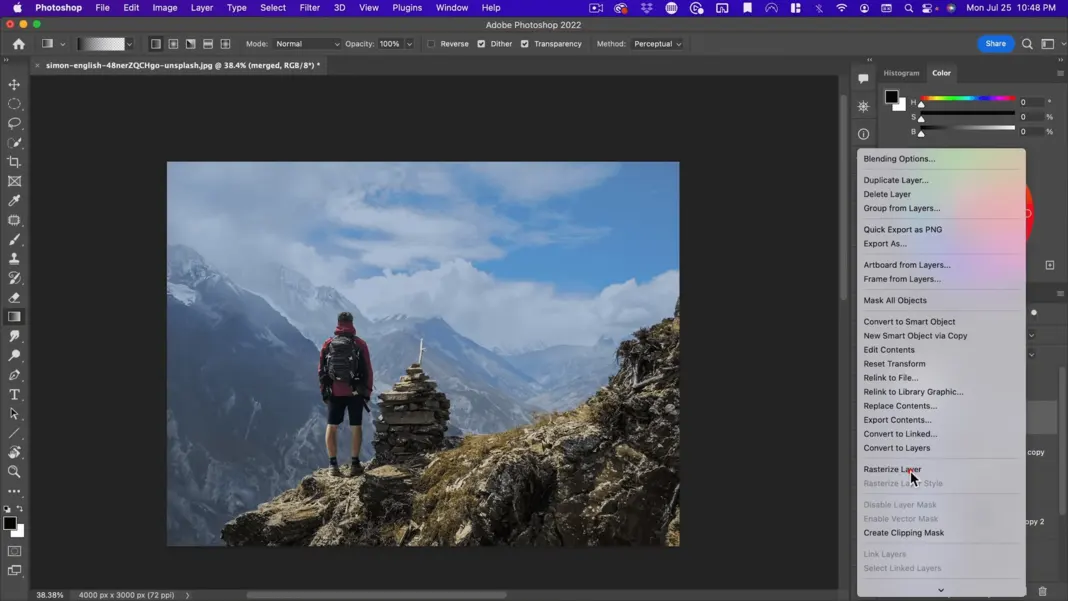
And then let’s go back to Lens Blur. So, there you go.
And this is probably what you’re going to see or something similar. You probably won’t have a bunch of noise on there. So, you might see something like this.
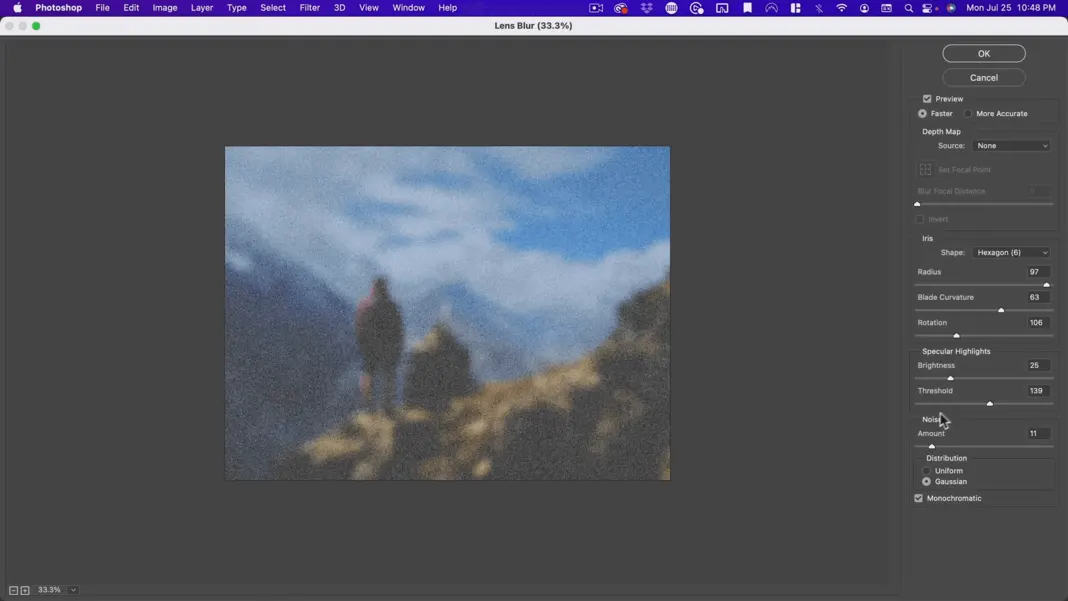
This actually looks much more like a camera lens blur than Gaussian Blur does, but putting all that aside, the beauty of this is here in our depth map. So, I’m going to select Depth and now it’s using this depth map.
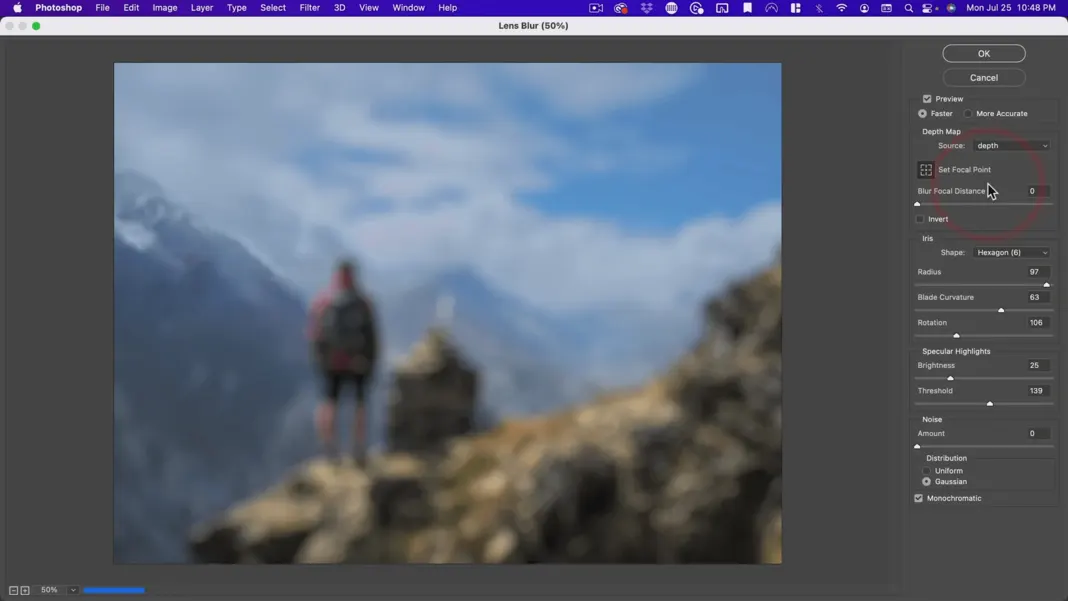
And with this set focal point, if I click on where his head is, it will make the subject in focus. And then everything else based on the depth map is going to go more and more out of focus.
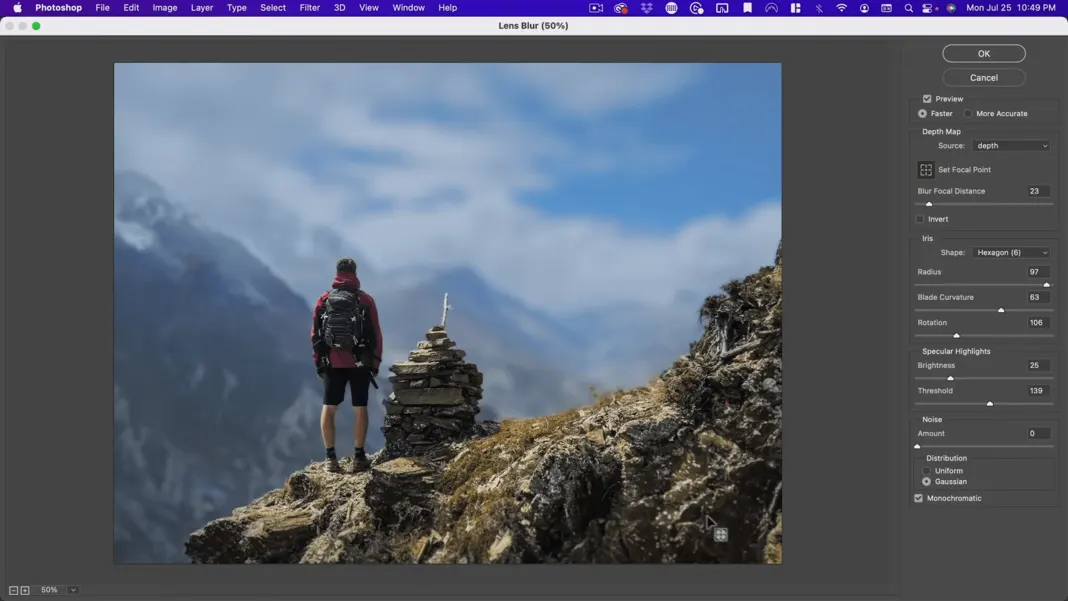
So here you can see our foreground is a little bit out of focus. He’s in focus and then our background is out of focus. Now you can adjust how out of focus it is with the radius. So, if you want just a little bit of depth of field or if you want a whole bunch, you can also adjust the blade curvature that’s going to affect the way the bokeh looks and you can even affect the rotation. These are pretty subtle. You’re not going to see big changes working with these, but you will see a lot with the radius here.
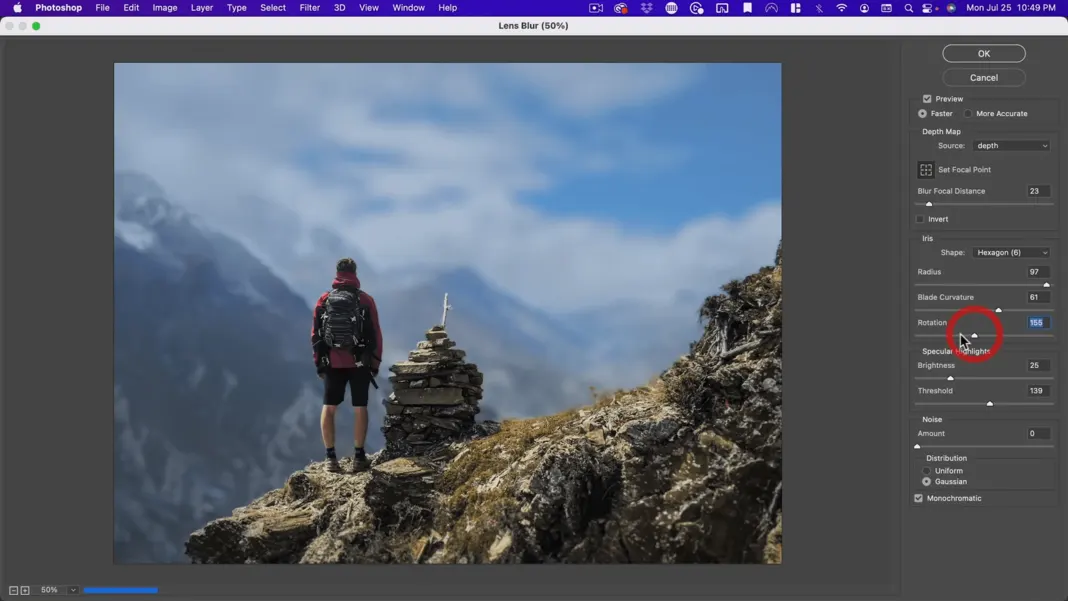
So, if you want your bouquet to be milkier or what have you, you have these to work with. Now hexagon is the default. I’m going to leave it on that and if I want, I can add a little bit of noise, but I’m going to be adding noise with camera.
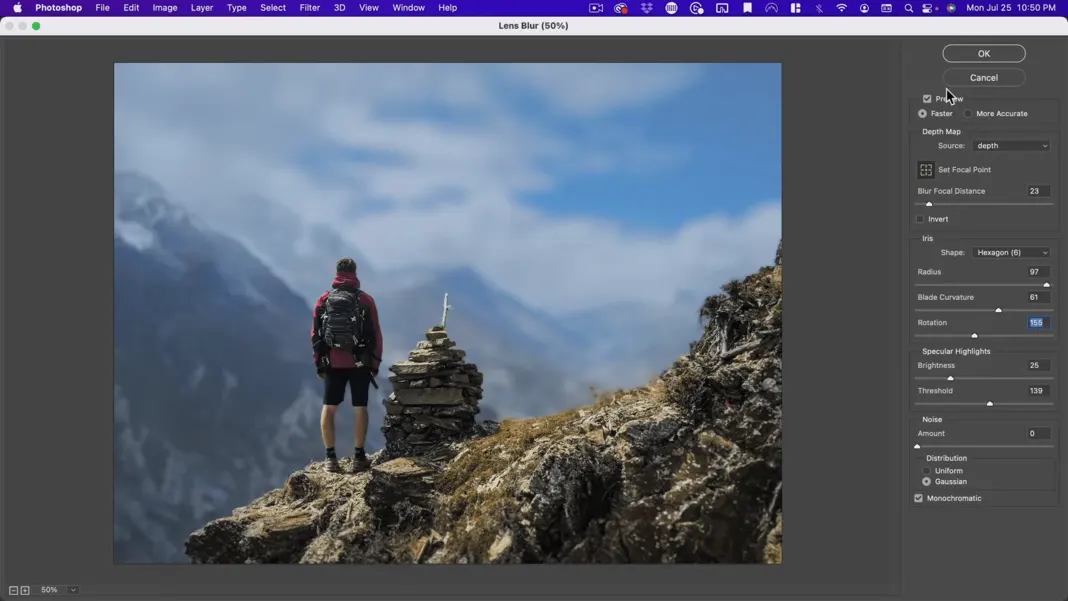
So, there you go. I’ve added some nice depth of field and did it without having to fill in the previous layers or do anything like that. I could have done it on my original image, but I needed to first create these various layers to create my depth map. Okay, so now with this merge, I am going to convert it back to a smart object and then I’m going to go to my camera and give it its final touches.
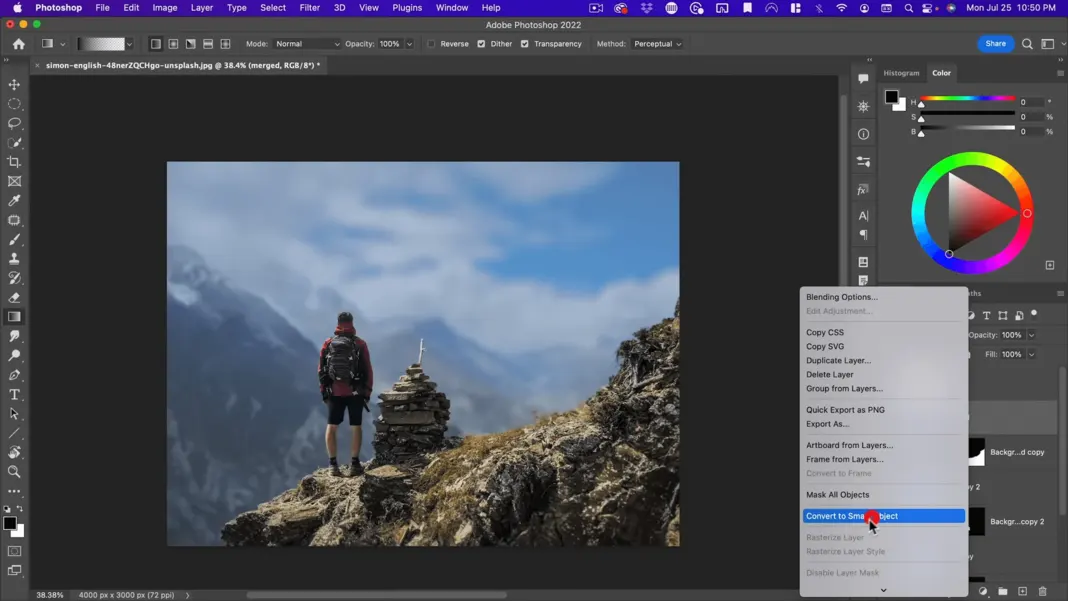
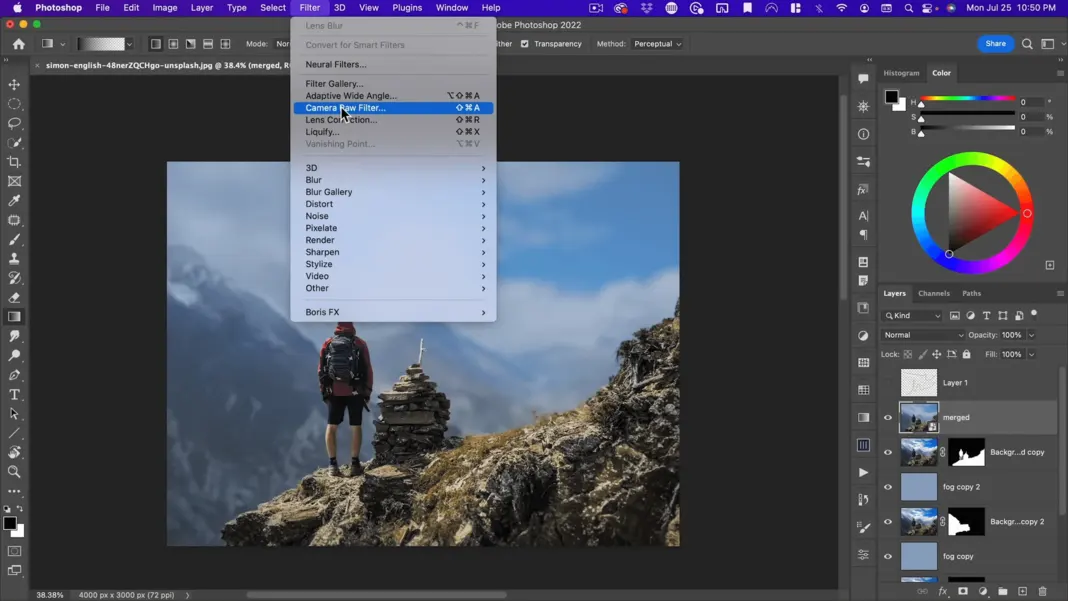
Now, because this is a shallow depth-of-field shot, it doesn’t make sense for it to be a bright, sunny day just because of the way cameras work. On a bright, sunny day, you’ll have difficulty getting a shallow depth of field. So, let’s go into our color mixer here. I want to go under saturation and take the saturation down on the blues. And right away it’s going to start looking more like a kind of gloomy day.
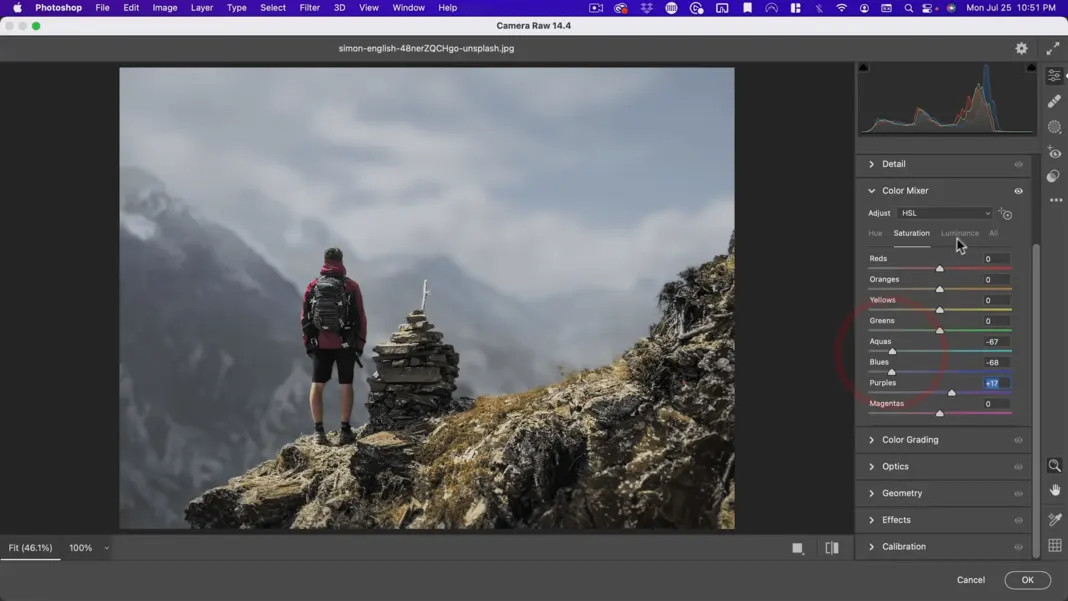
I might even go to the luminance and take those down a bit. And then also under saturation, I’m going to pump up the saturation of this red here. I’m going to make that look a little sexier and also make it stand out a little bit more.
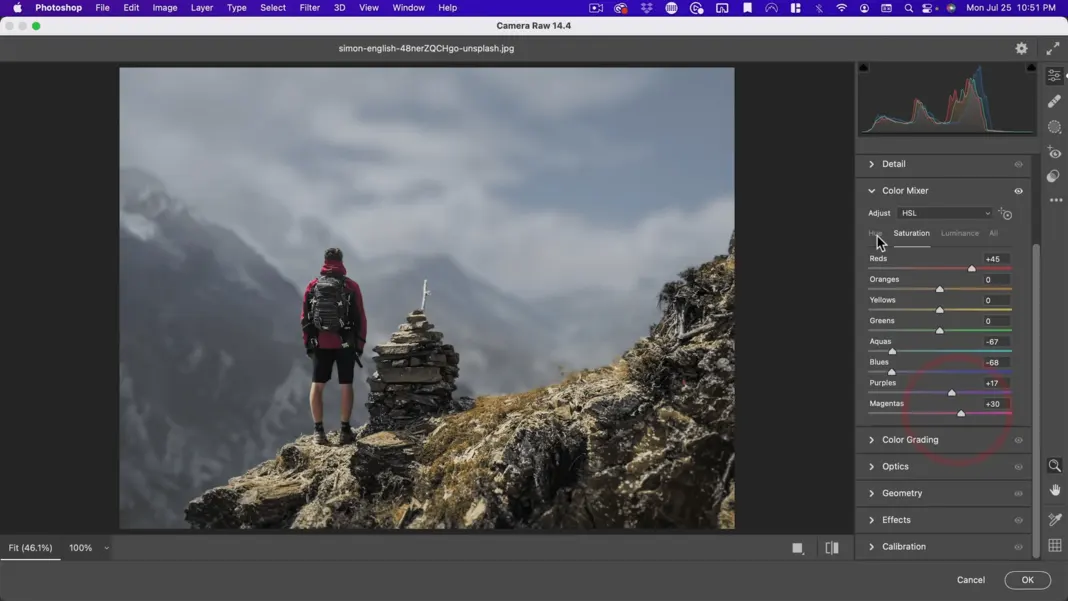
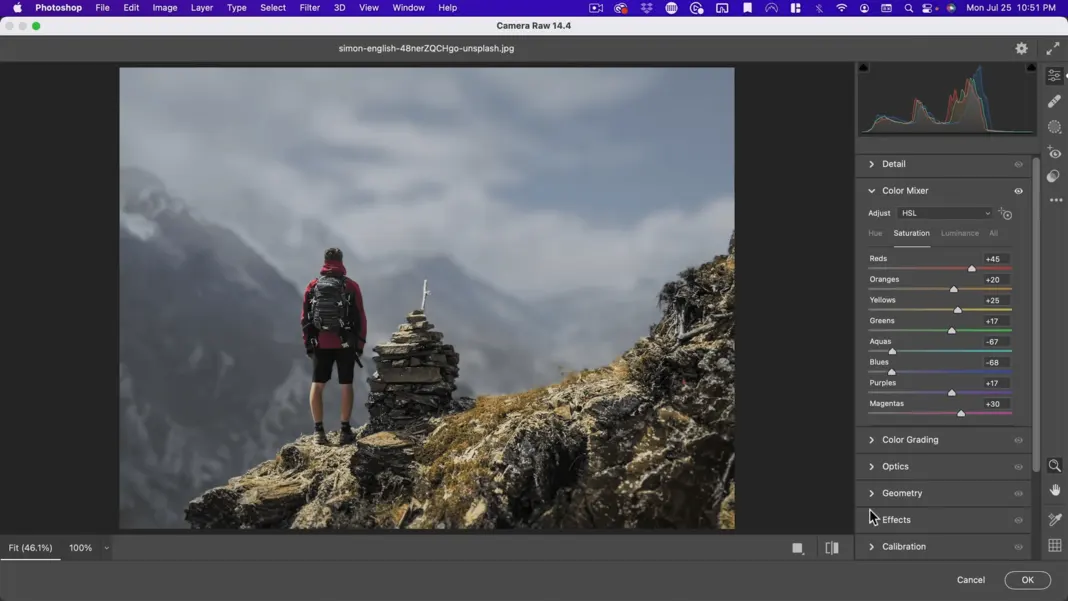
And then maybe the green here might look cool if that’s a little more saturated. So, something like that. And then the other thing I want to do here is I want to go to effects, add some nice grain, and then add some more intentional lighting.
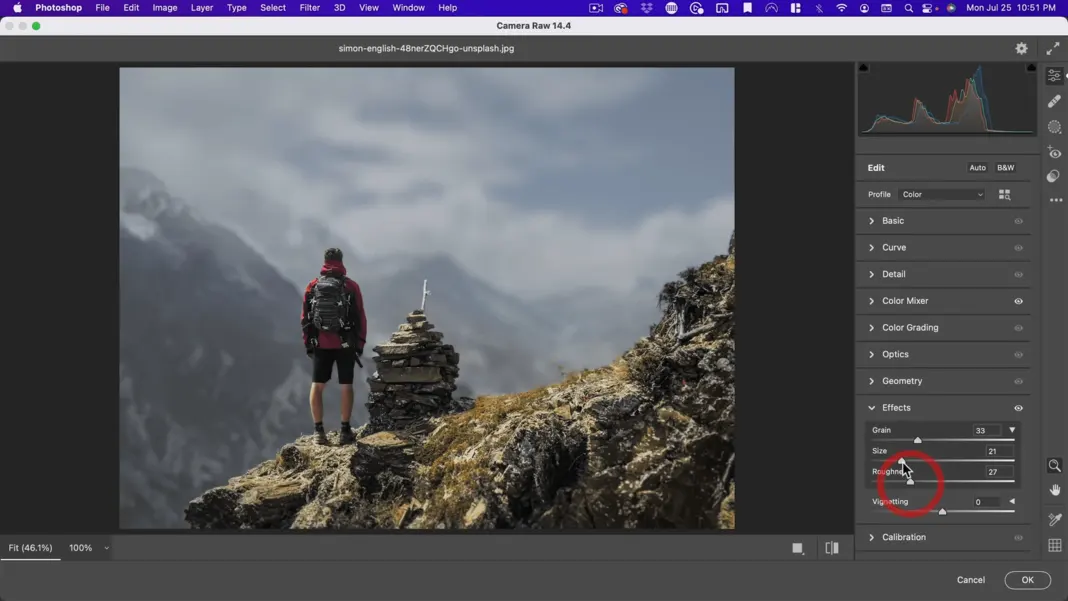
So here he seems to be in some sunlight. So, I’m going to assume that there was maybe a break in the clouds just in this section. So, let’s go ahead and add a radio gradient. We’ll make it look like the sun is shining right there and everything else is going to be darker.
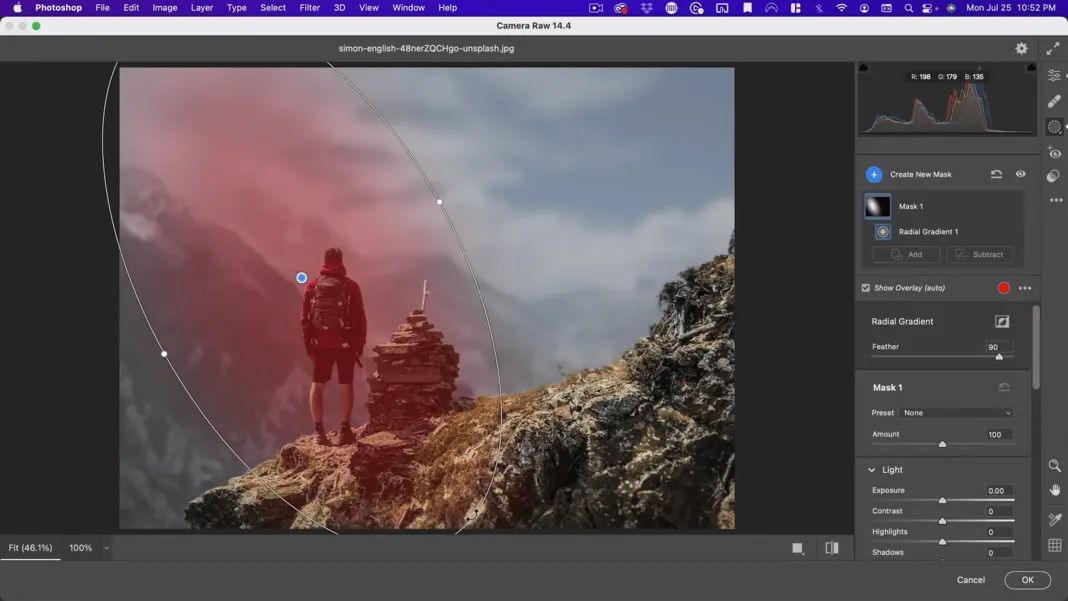
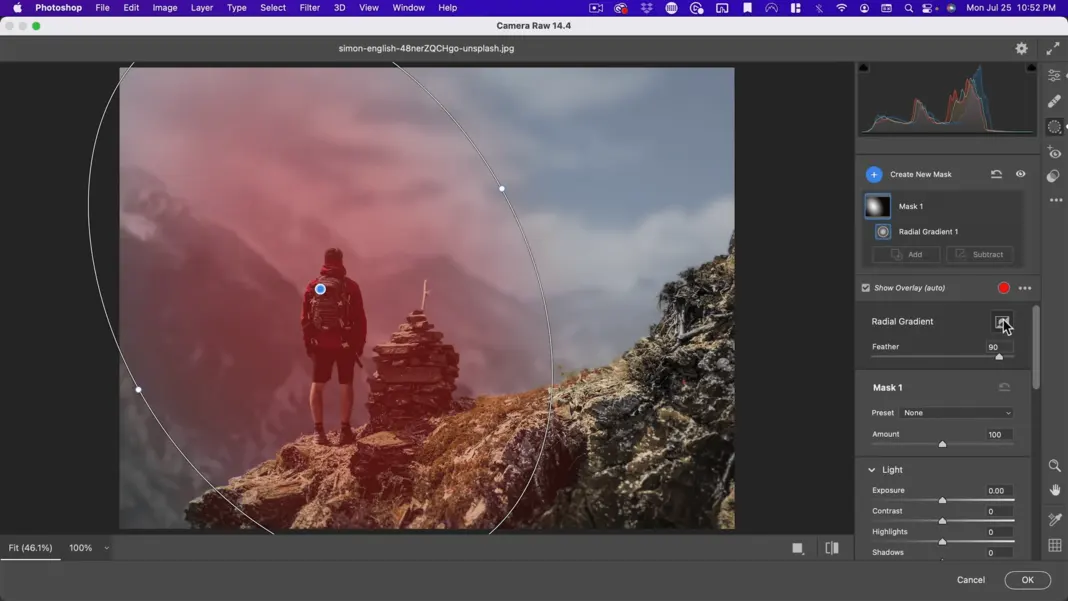
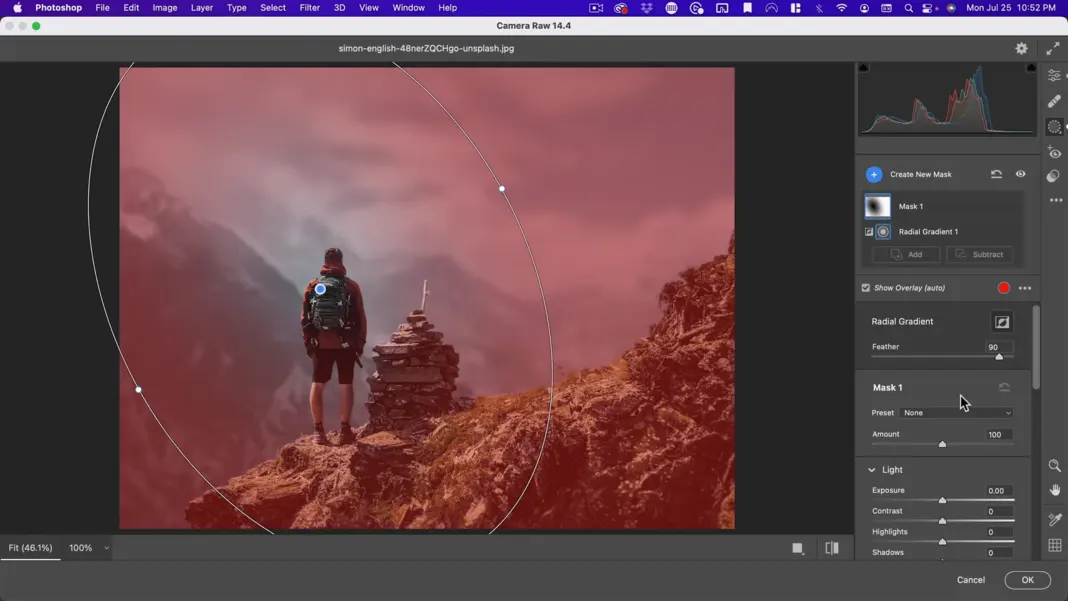
I’m going to go ahead, invert this with this little button here and scroll down, take my exposure down, take my temperature and make it bluer.
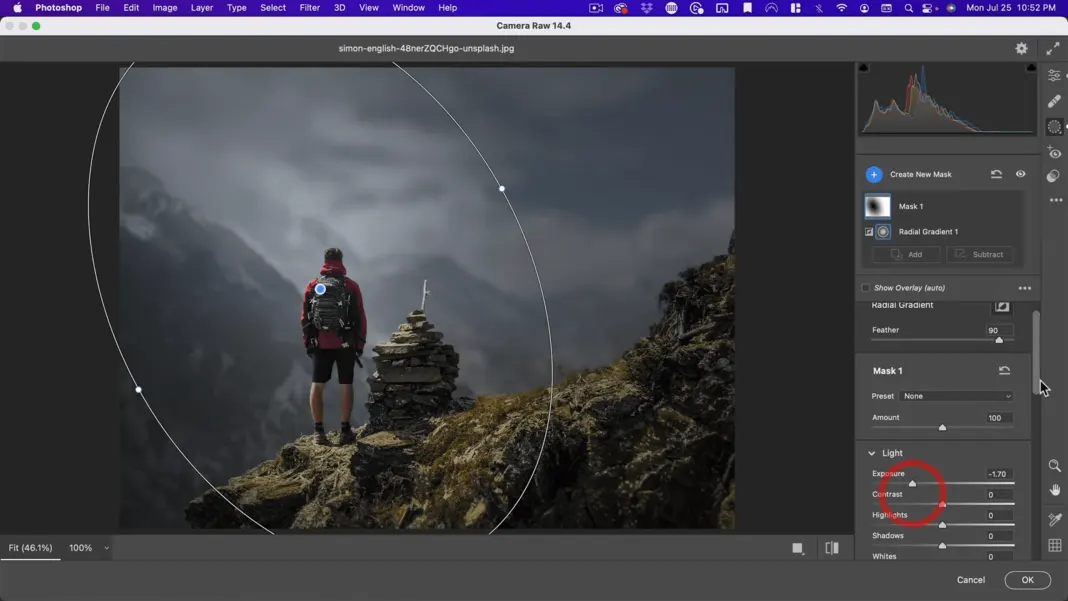
Could even add a bit of color here. So maybe something kind of in this cyan range, but not so saturated.
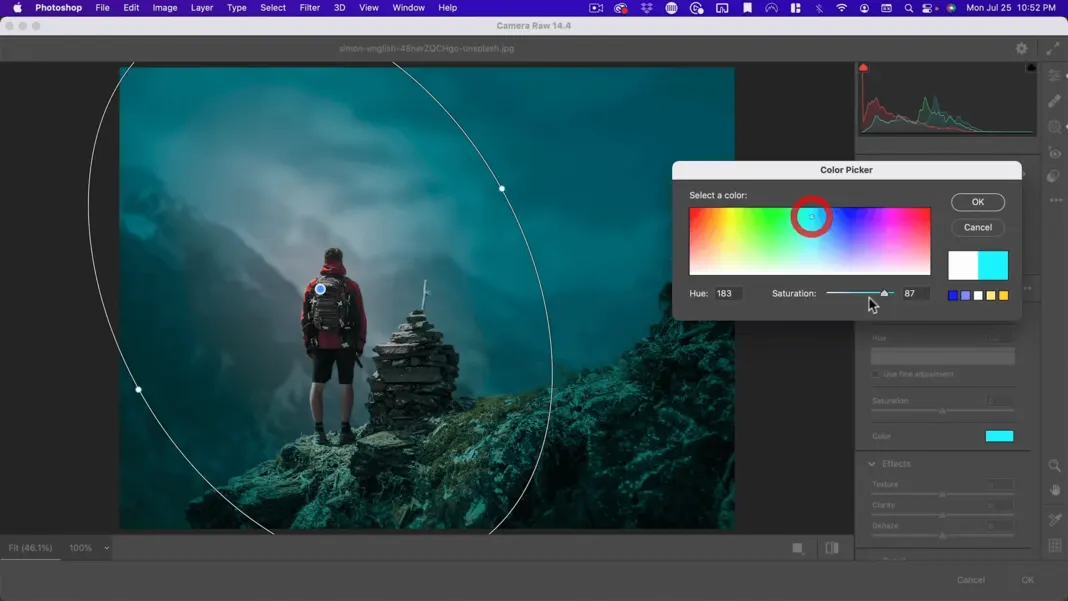
Okay, that looks pretty darn good. And then I’m going to go up here and I want to do the duplicate and invert mask.
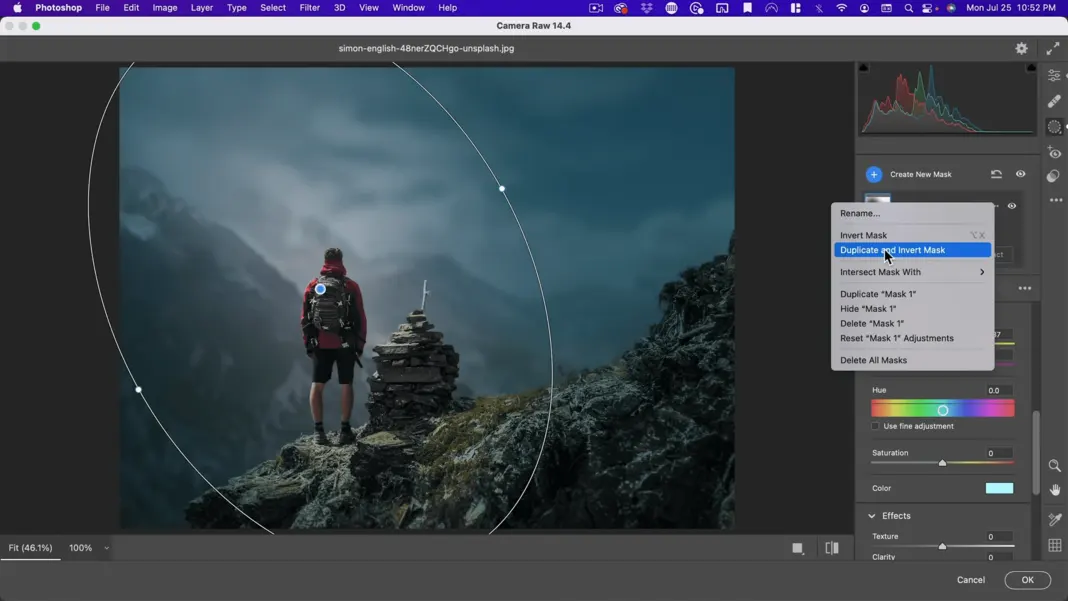
And with this one, I’m just going to bring that temperature up a bit and then maybe also bring up the exposure a tiny bit and the shadows, so something like that.
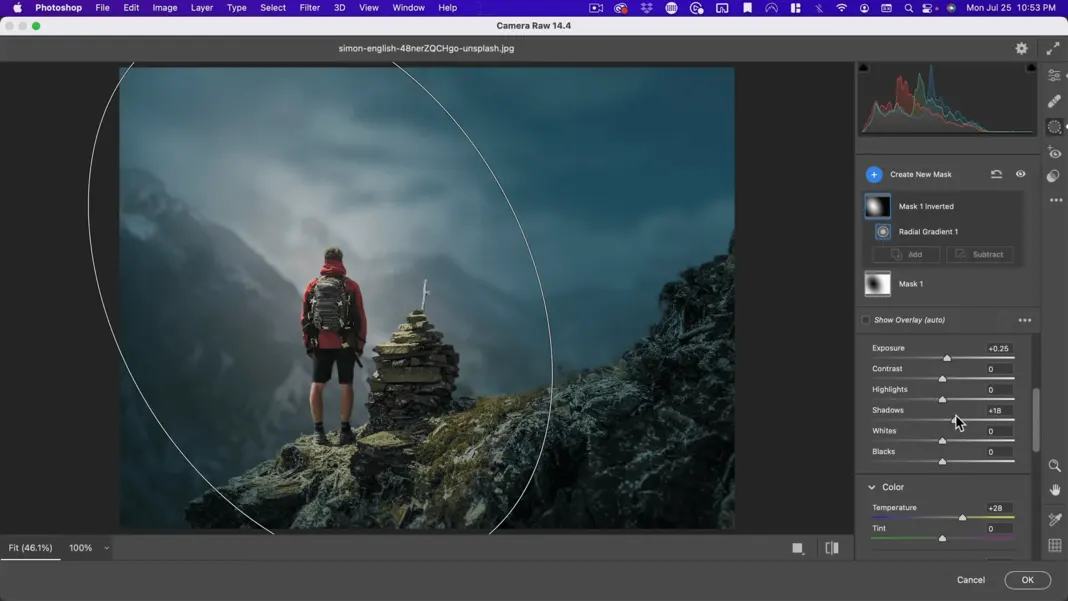
I think I will add a little more grain to this one and a little bit of vignetting.
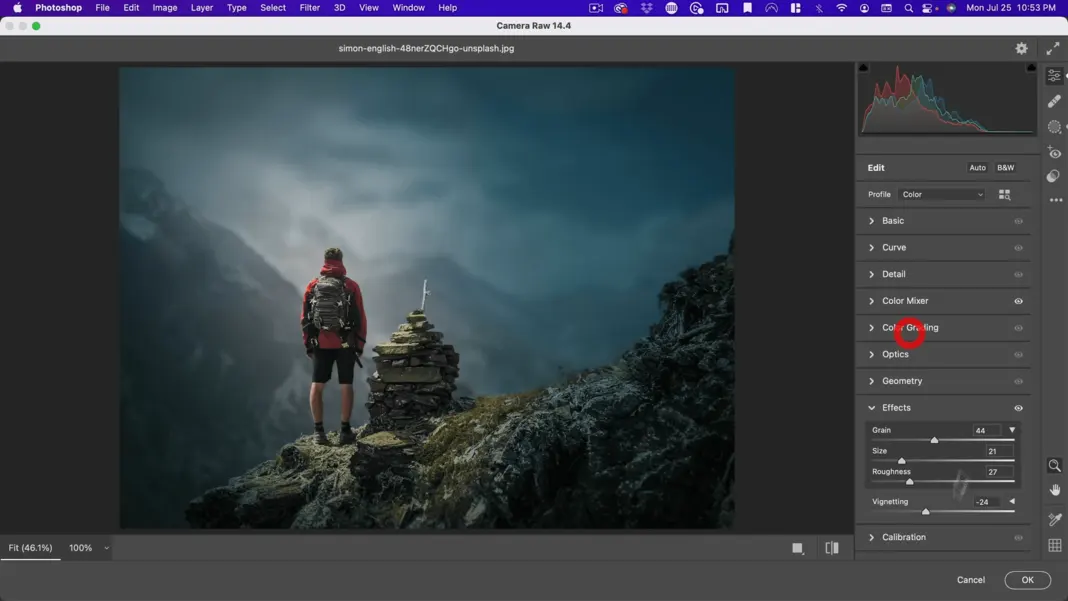
So, something like this. I do think this mask has too much color going in there. So, I’m going to go ahead and just get rid of this and I think that looks better.
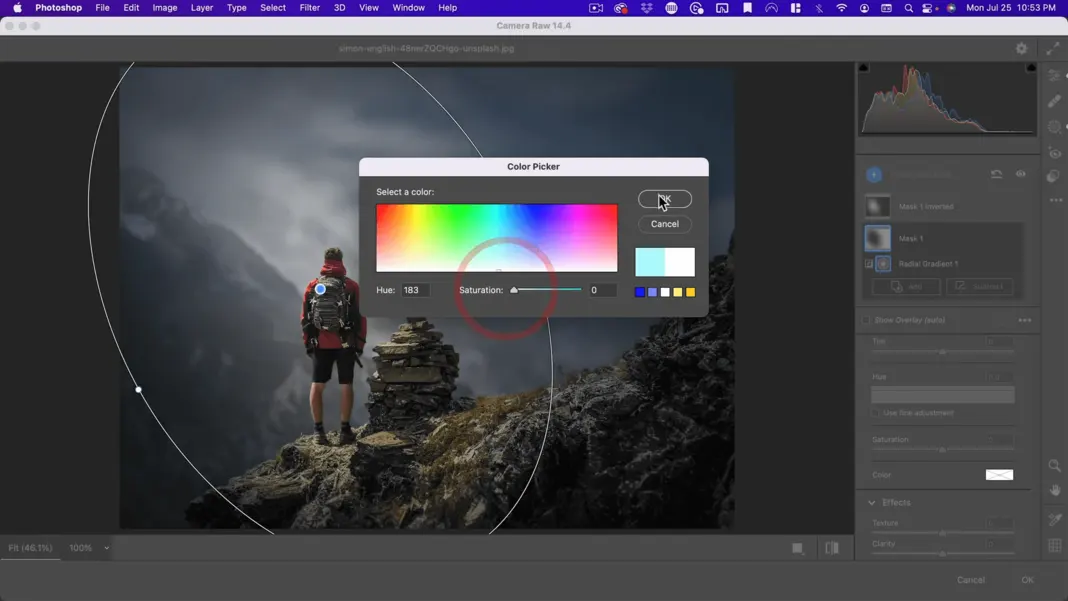
And then finally under color grading, I’m just going to add a little bit.
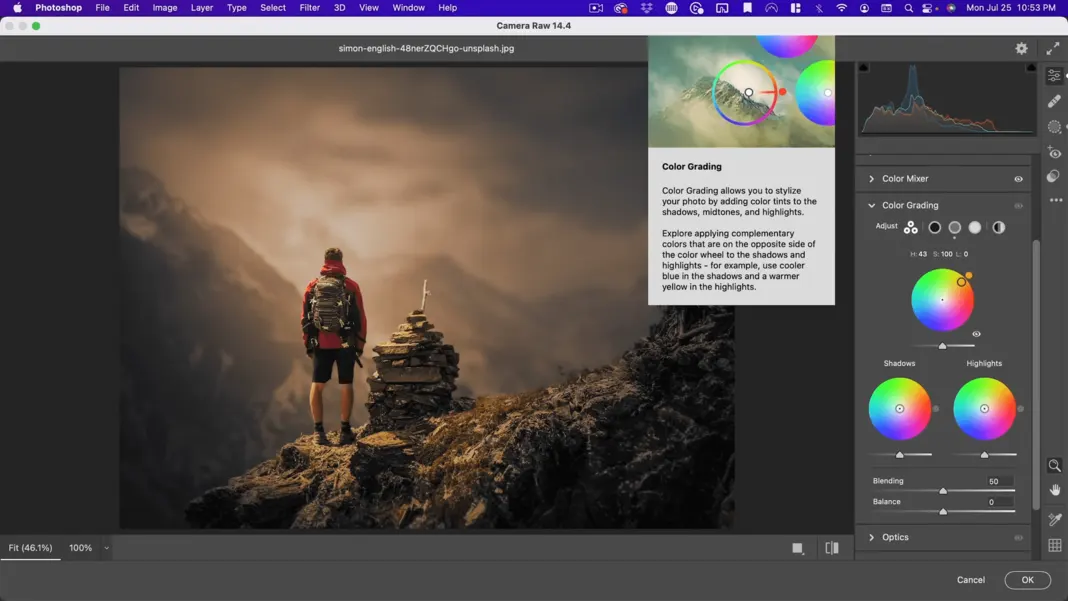
So, this is adding kind of a color to the whole thing. And I do think having a bit of that warm tone across the whole thing helps compensate with a little bit of cyan in the shadows and then gold in the highlights.
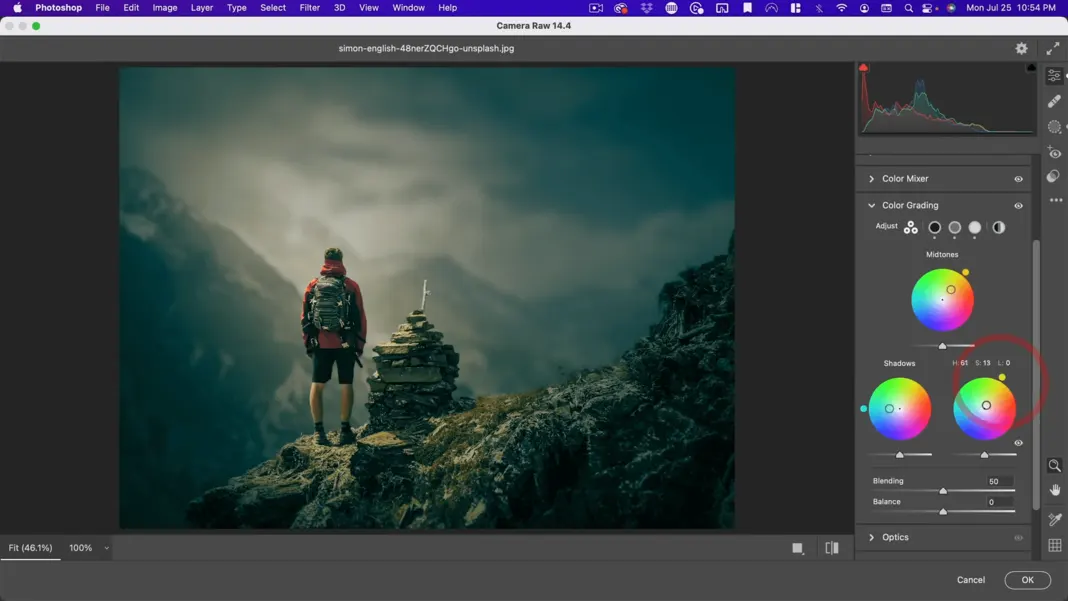
Now, these are all artistic decisions. They don’t really affect the depth as long as there are warmer colors in the foreground and cooler colors in the background.
So here you can see our before and our after.
Before:
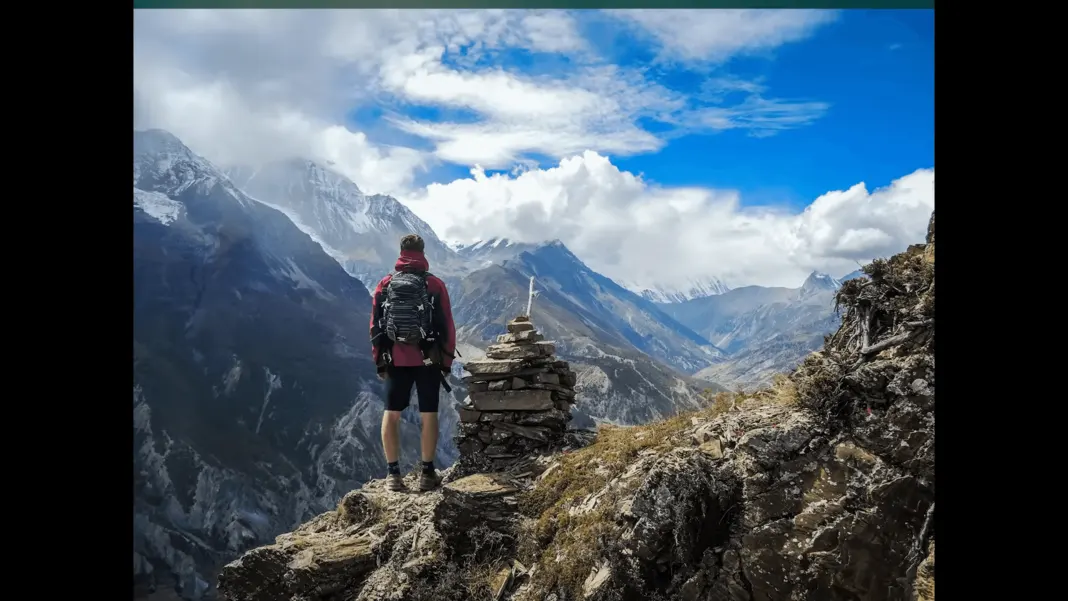
After:
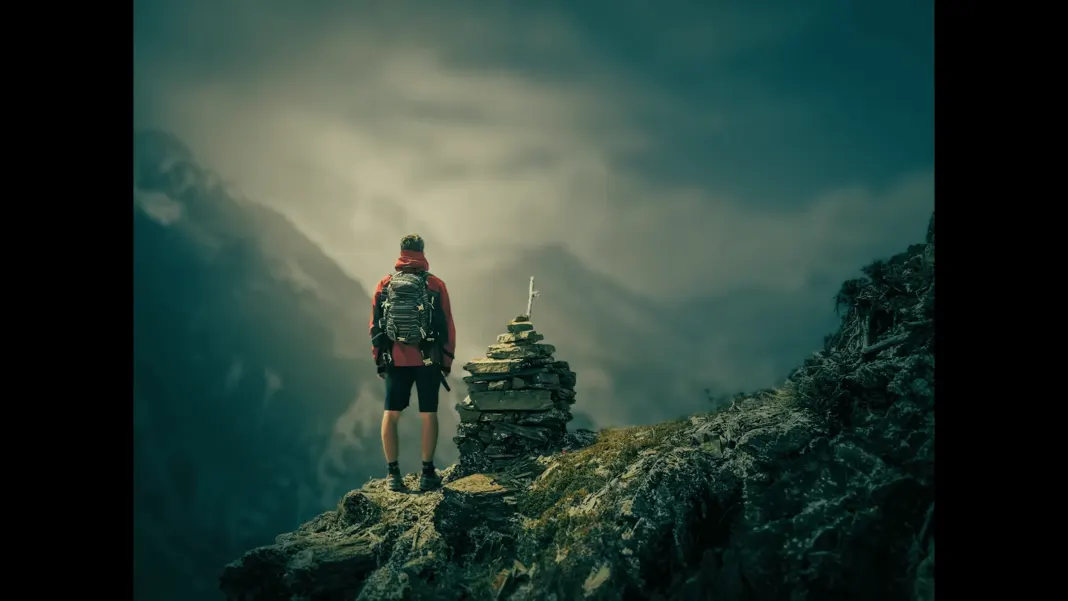
And this one, we’ve created more depth using shallow depth of field and atmosphere. Although for a situation like this, you do run the risk of it looking like a miniature, which is what happens when you use shallow depth of field on a really expansive scene.
So, there you have it. Those are some tips, tricks, techniques, and methods you can use to create more depth in your images in Photoshop. Now, if you want to learn even more about creating atmospheric depth, I have a course called Creating Atmosphere in Photoshop. It is a five-hour course with many more lessons and various techniques and methods for Creating Atmosphere in Photoshop. Also, I have included a link to my full flares pack which I showed in this tutorial, and my leaves overlays pack, which you also saw a glimpse of in this tutorial. Please subscribe to my channel. Leave a comment. I do try to read them all and there are some other tutorials to check out. I will see you next time.

