
In this Photoshop tutorial, I’ll teach you some basics of photo manipulation and compositing, and I’ll also show you my workflow to creatively blend two images in Photoshop to create dramatic composites in the style that’s popular on Instagram. If you want the files used in this tutorial to follow along step-by-step, click below.
This post has been adapted from the following YouTube tutorial. Watch the video or just follow the steps as outlined below.
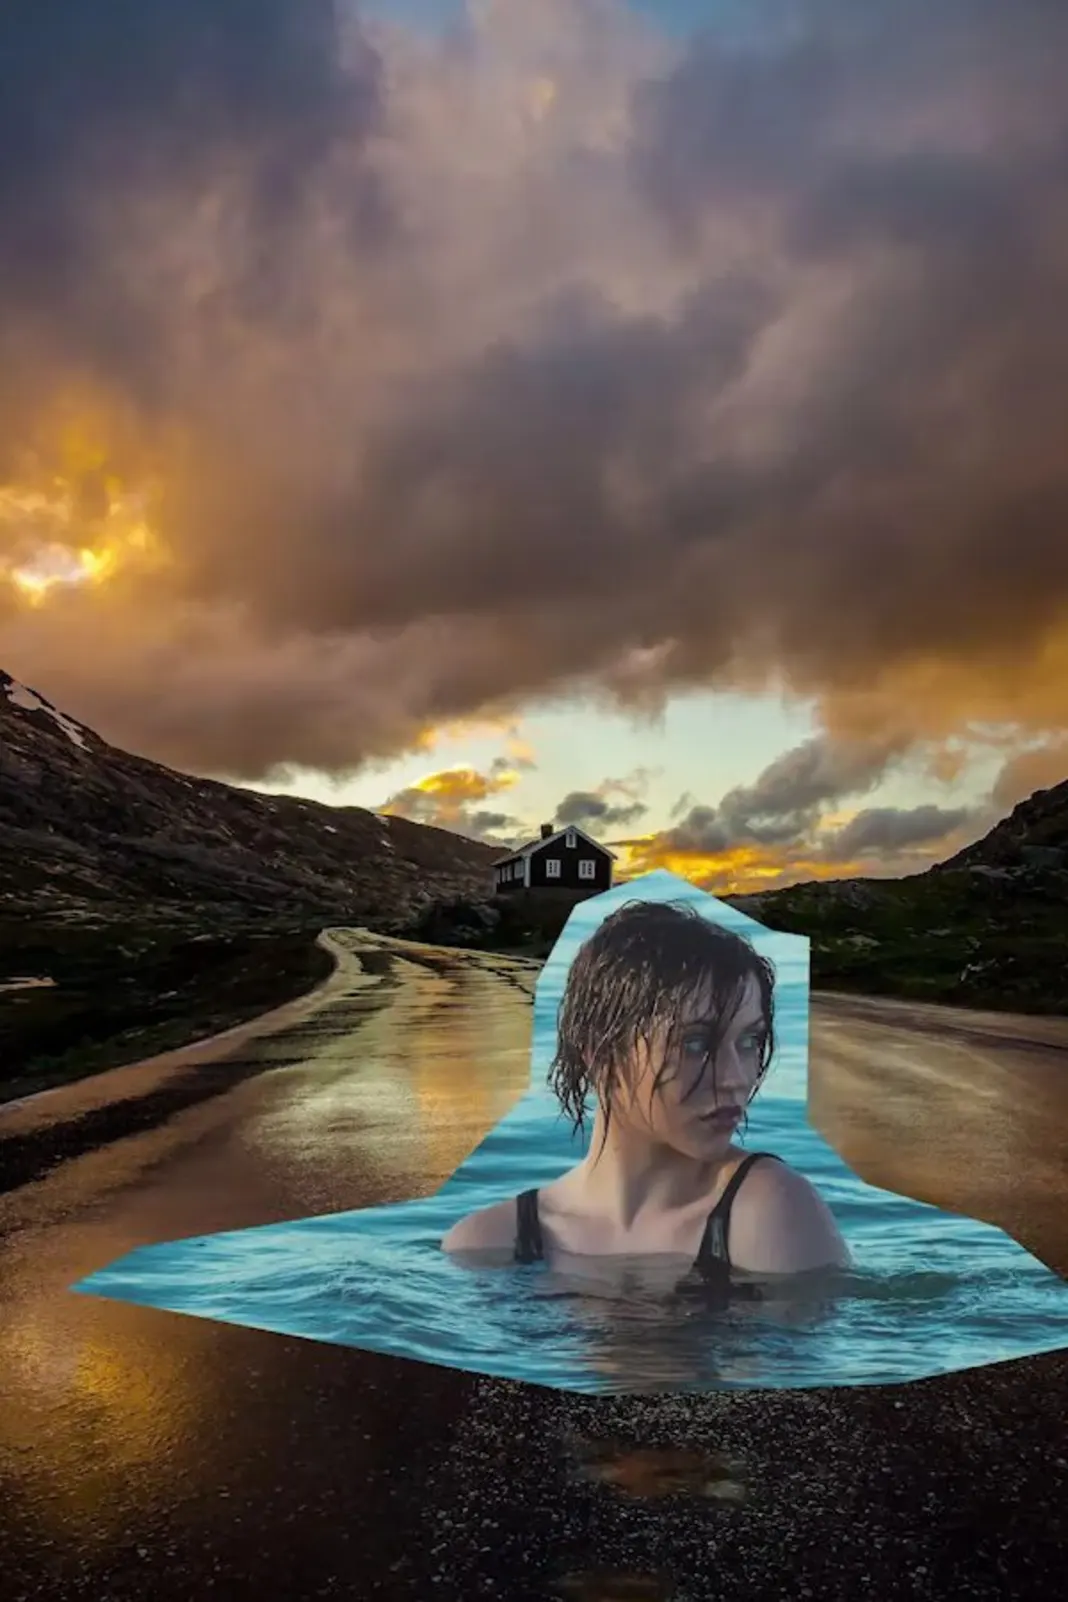
Here are the images we will be starting with and blending:
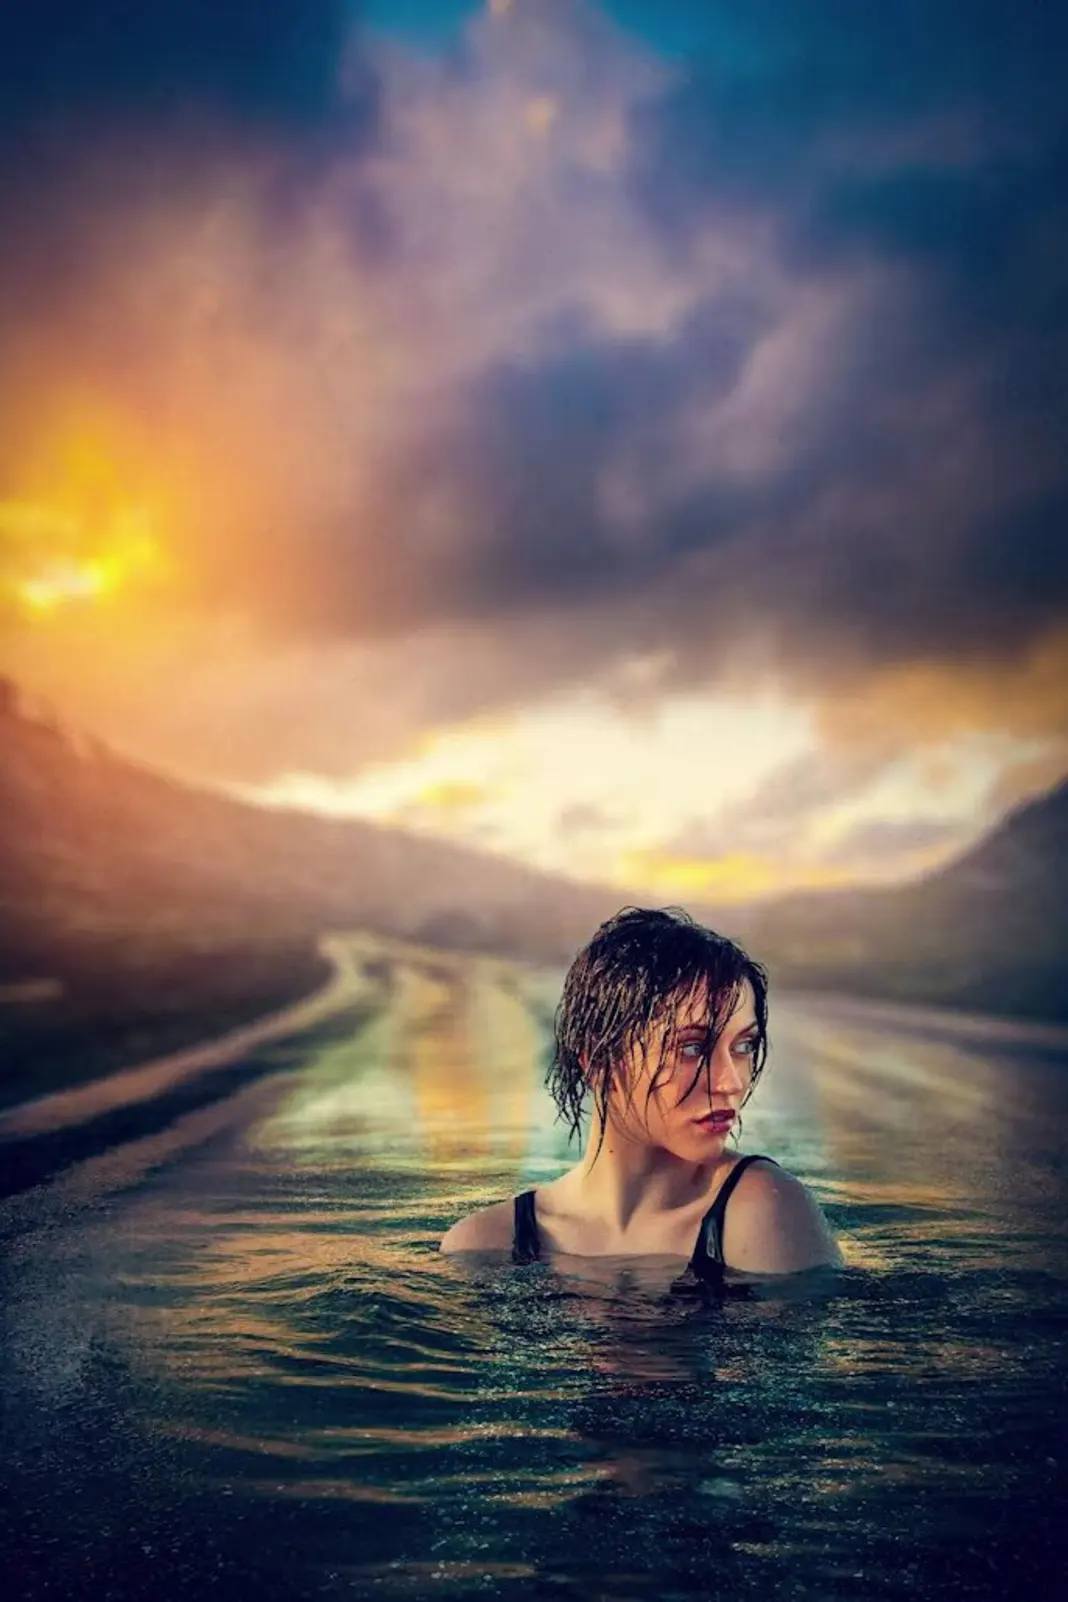
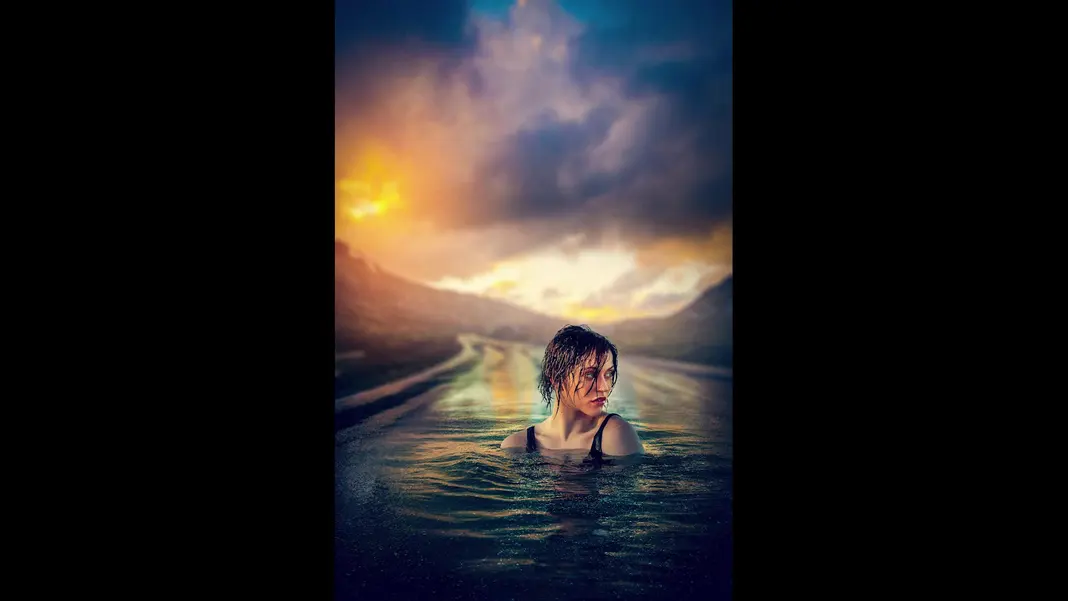
And here is the final result we will be achieving:
At a high level, the process we will be following to get this result is:
- Remove the background house.
- Remove the hotspot in the water.
- Insert the woman.
- Adjust the colors.
- Adjust the water.
- Add the fog.
- Intensify the hotspot in the sky.
- Add the depth of field effect.
- Brighten the woman’s face.
- Perform the final grade.
We’re packing a lot of techniques into this short tutorial, so let’s get started!
Step 1: Remove the background house.
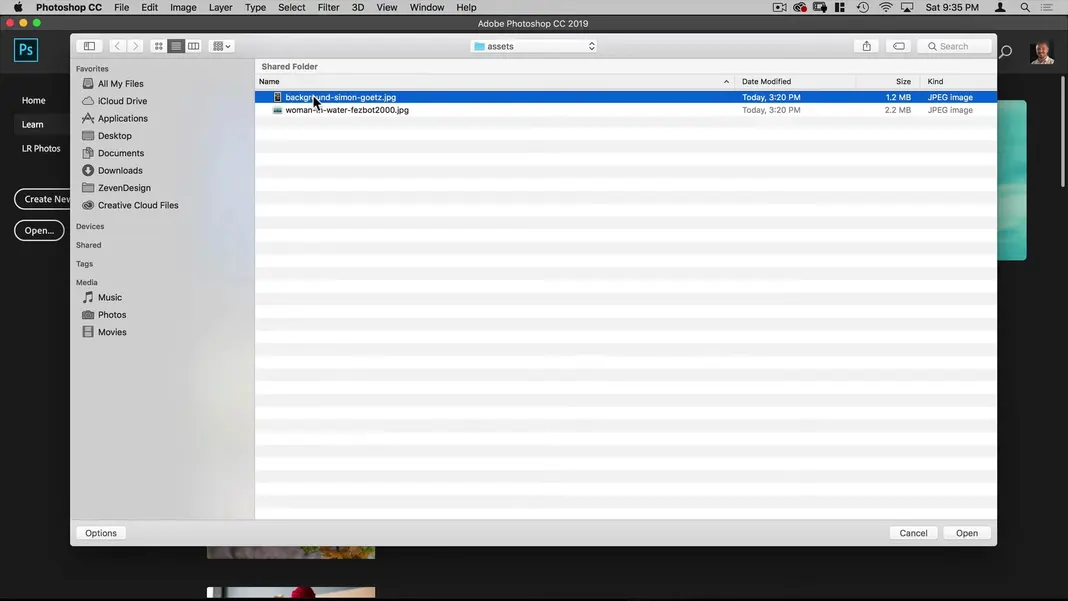
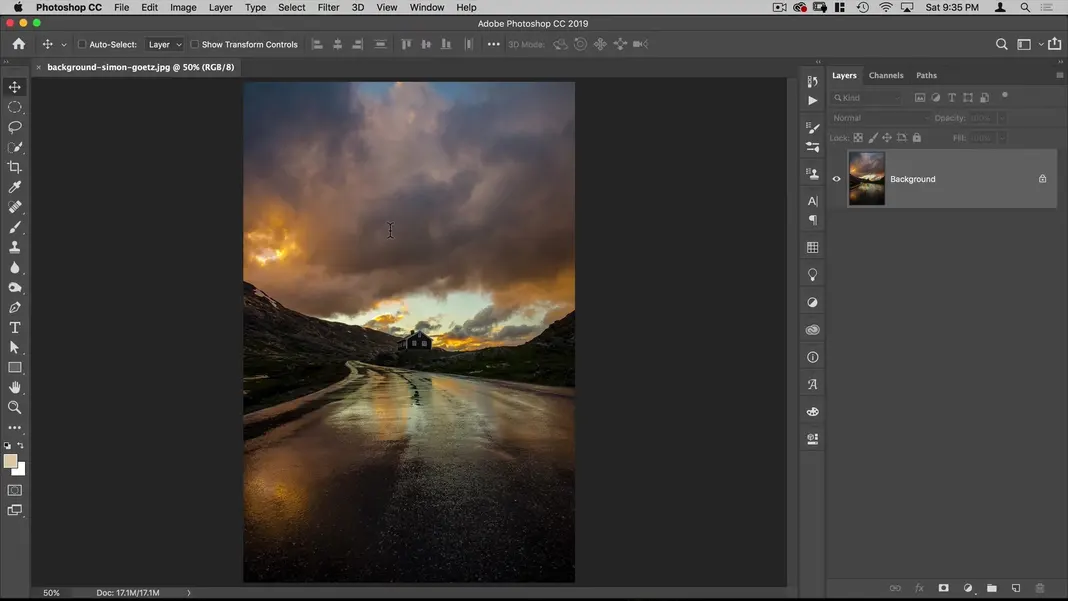
First, let’s open the background image in Photoshop by navigating to File > Open and opening the file “background-simon-goetz.jpg”.
We should now see this image.
We don’t want the house in this image to be present in our final result, so let’s remove it. To do this, make a rough selection around the house using the Lasso tool.
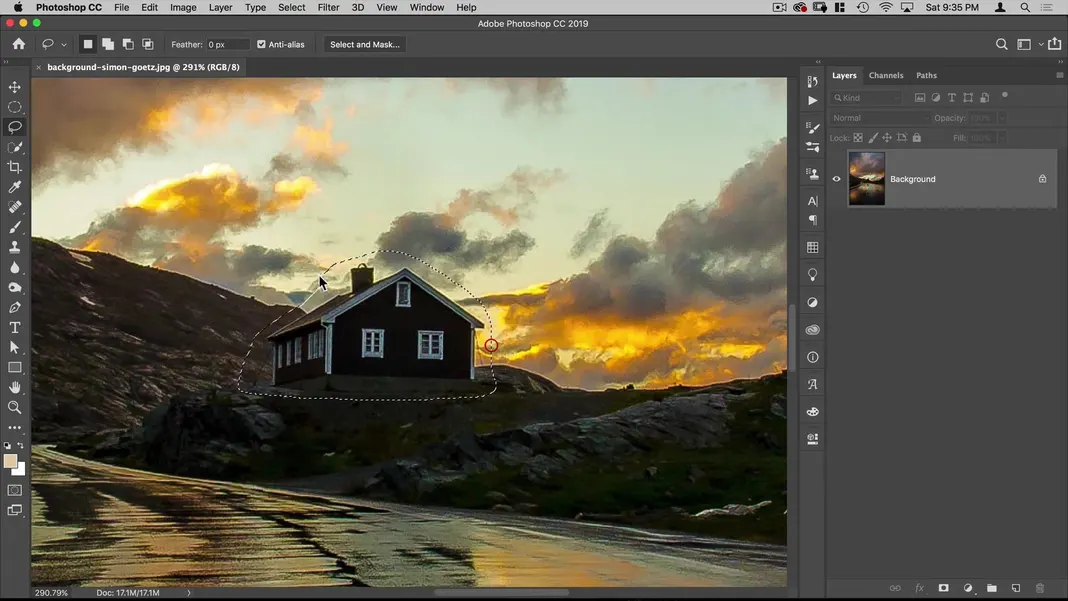
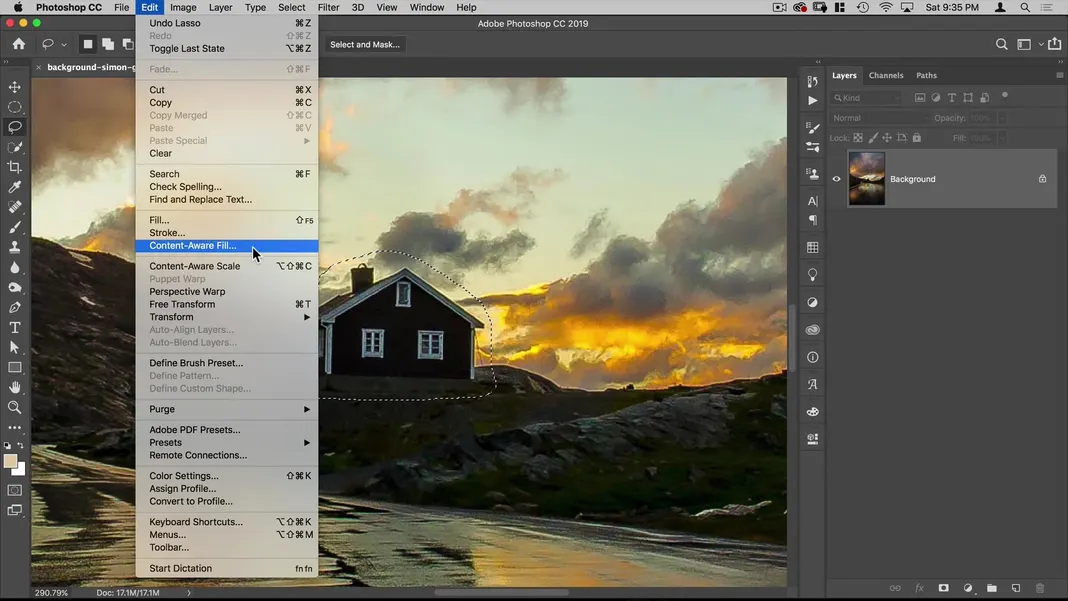
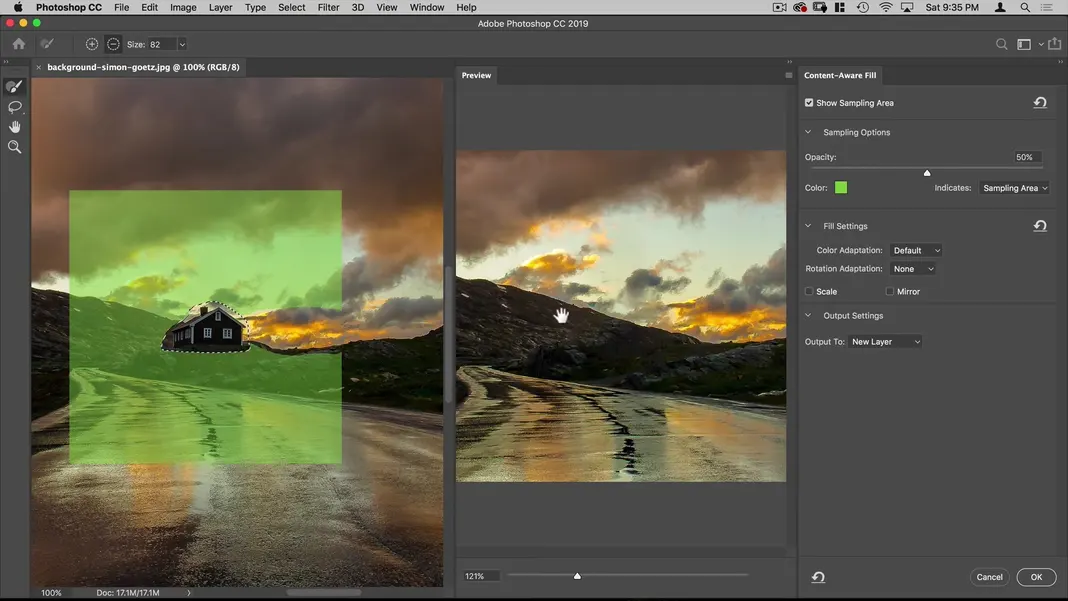
Then select Edit > Content-Aware Fill to have Photoshop make its best attempt at cutting out the house and filling that area seamlessly.
You should see something like this.
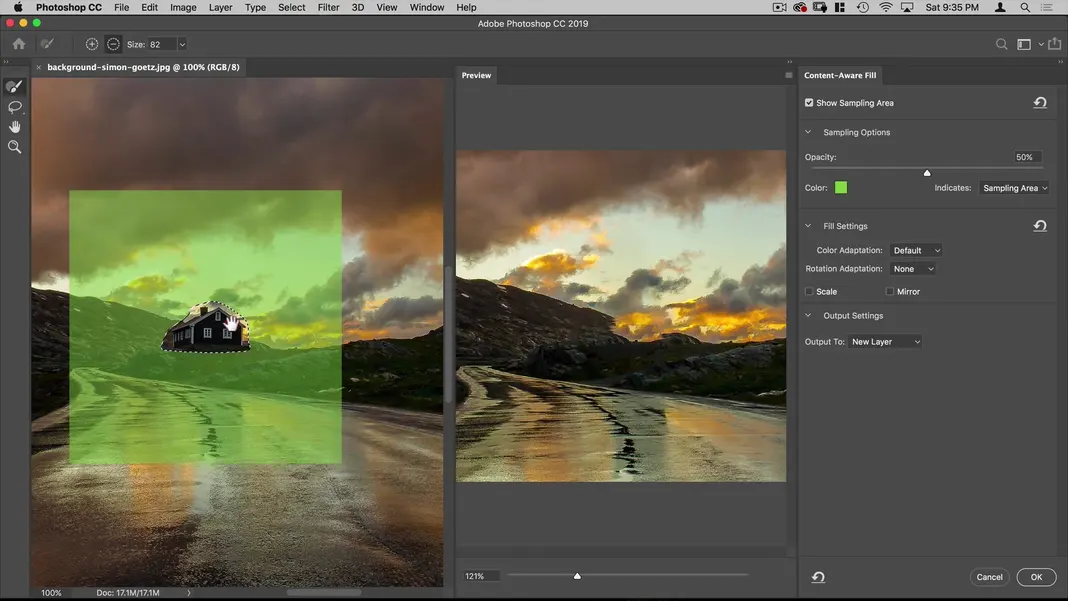
It looks like the content-aware fill algorithm is using the orange background clouds to fill in the area formerly containing the house, and I don’t think it looks great. To resolve that issue, let’s erase that part of the sky from its selection. We should now see something like this, which looks much more organic and seamless.
Hit OK and go to Select > Deselect to deselect our selection.
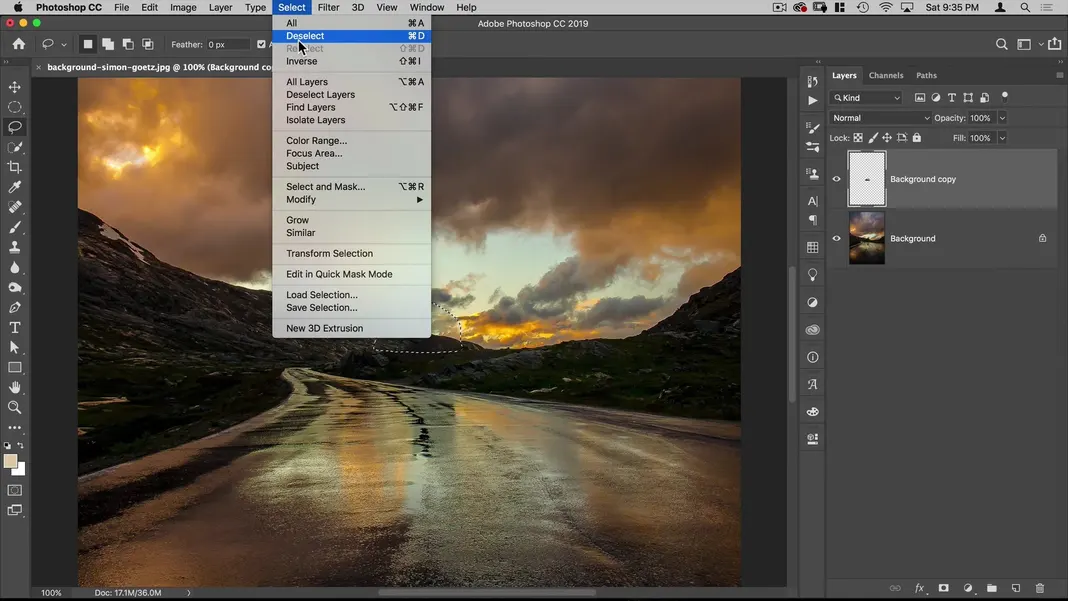
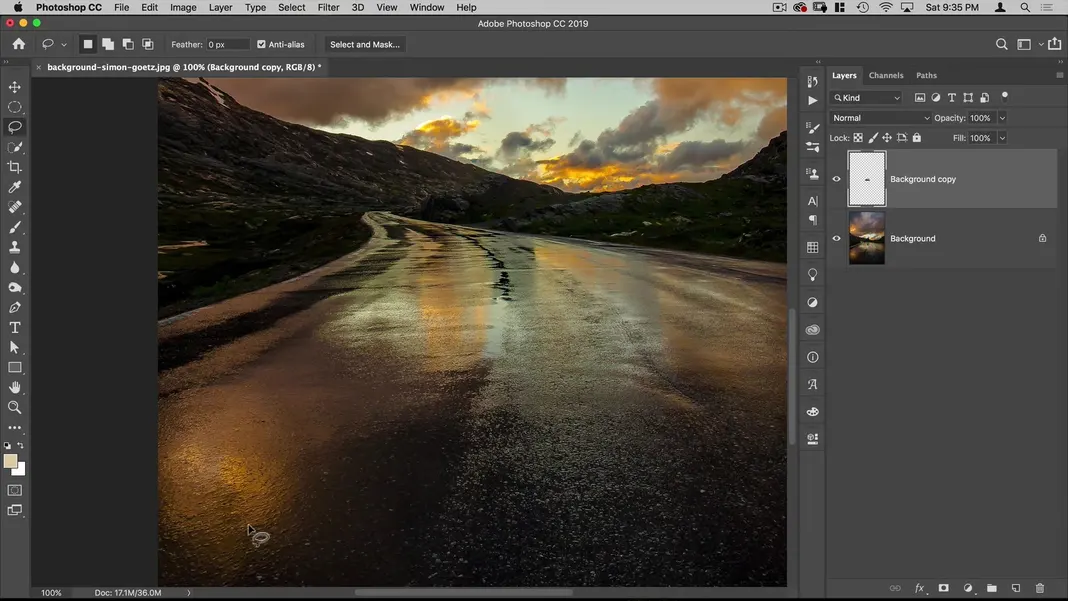
Now we can move on to the next step.
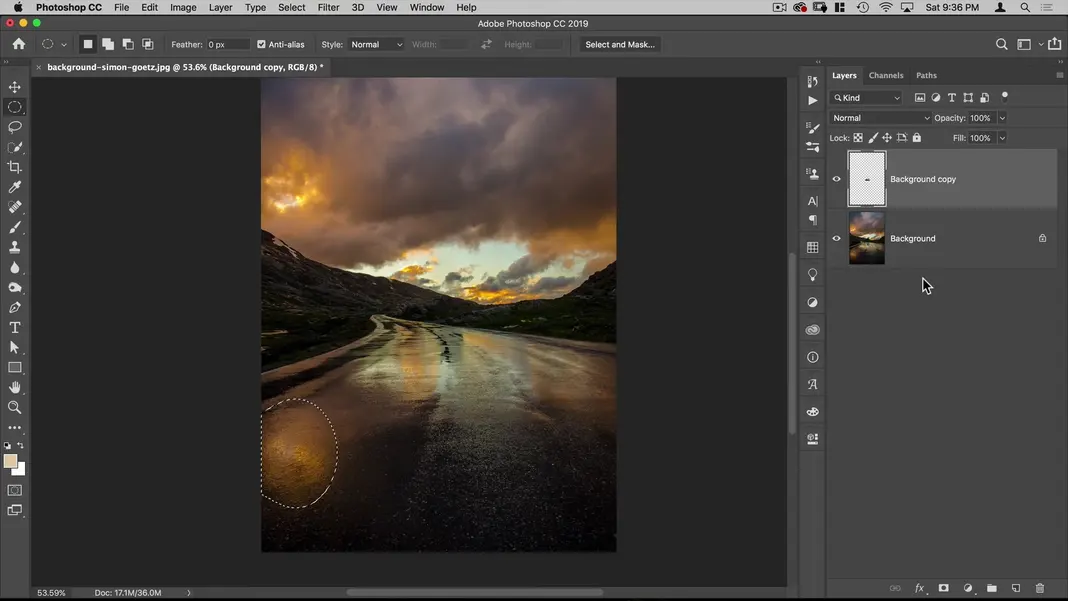
Step 2: Remove the hotspot in the water.
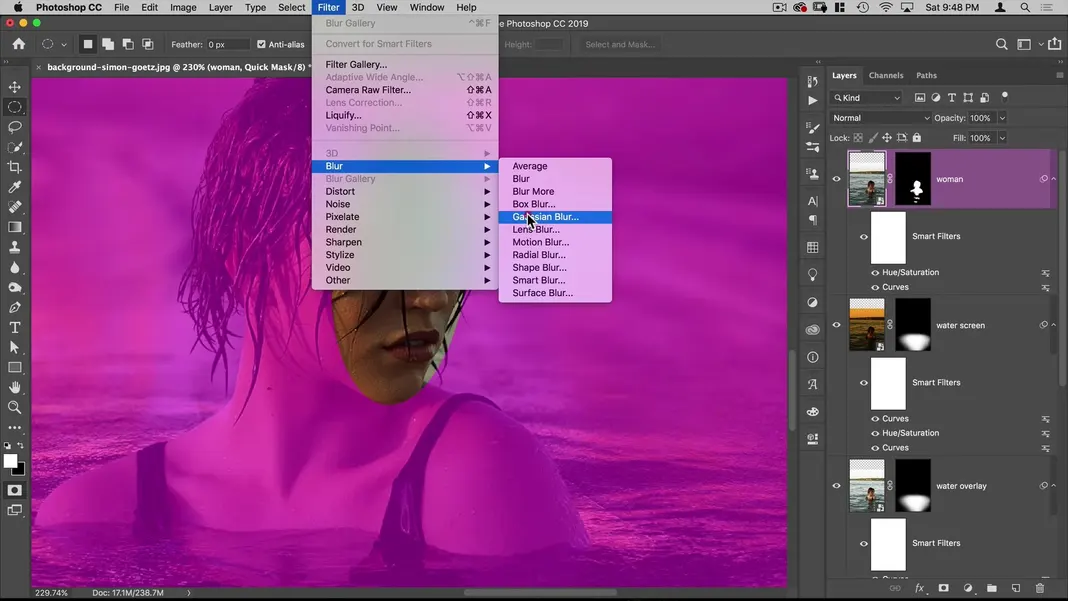
The next thing we want to do is get rid of this bright orange hotspot in the bottom-left corner of the background image.
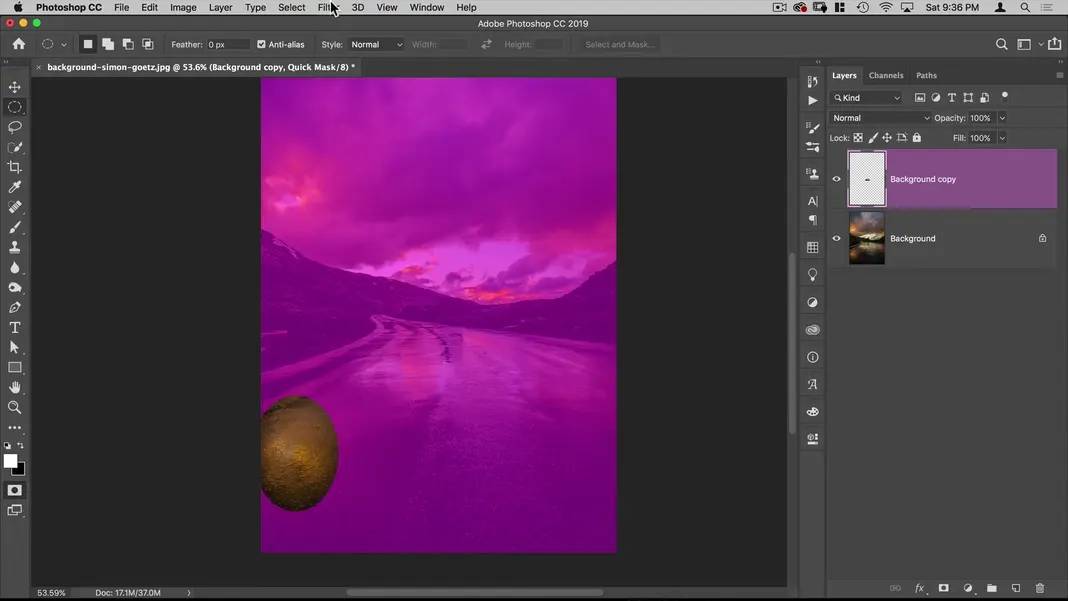
While it is a natural reflection of the orange sunlight from the upper-left corner of the image, it draws attention to itself and will likely distract from the woman as the main subject when we add her to the image, so making it more muted will get us a better final result. To do this, let’s use our Elliptical Marquee tool to select the hotspot.

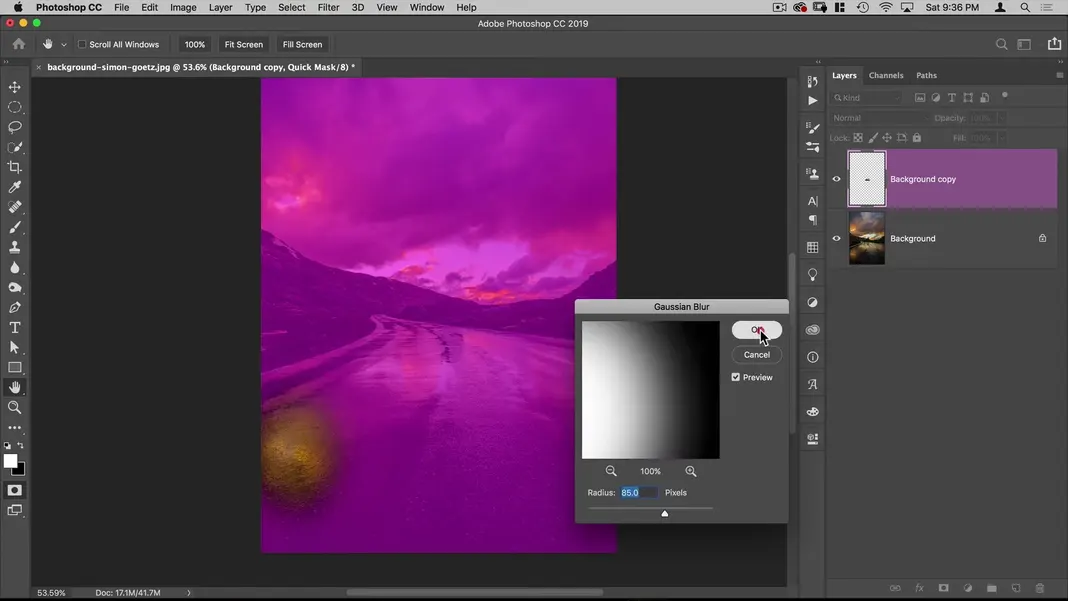
This is a hard-edged selection, so let’s feather the selection. To do this, hit Q to put us in quick mask mode.
Then we can easily navigate to Filter > Blur > Gaussian Blur to blur the edge of our selection.

Set the radius to something like 85 pixels and hit OK.
Hit Q again to leave quick mask mode and transfer that information back into our selection.
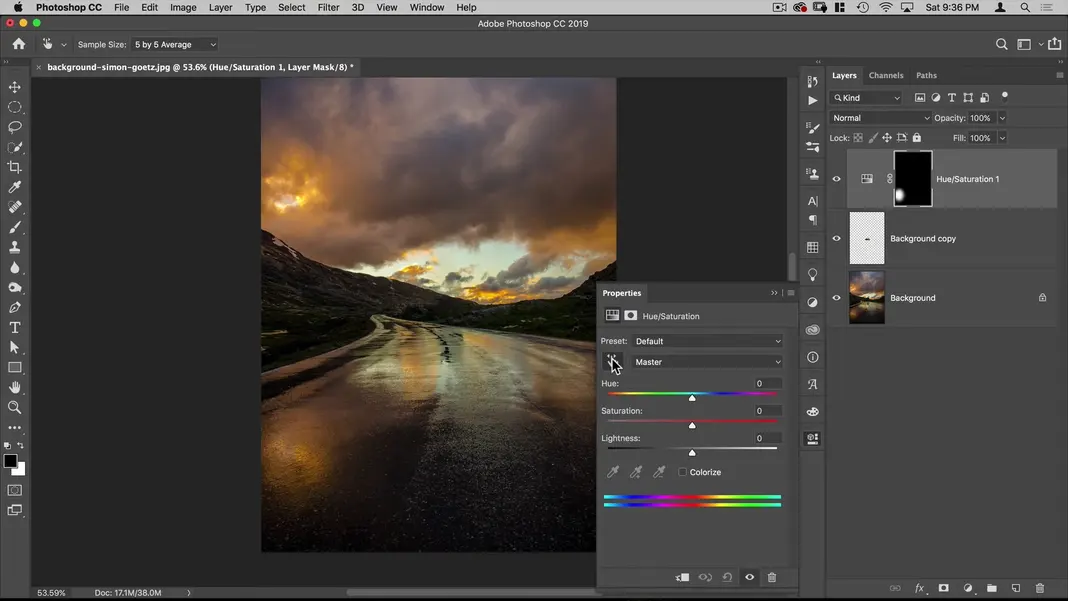
Add a Hue/Saturation adjustment to the selection.
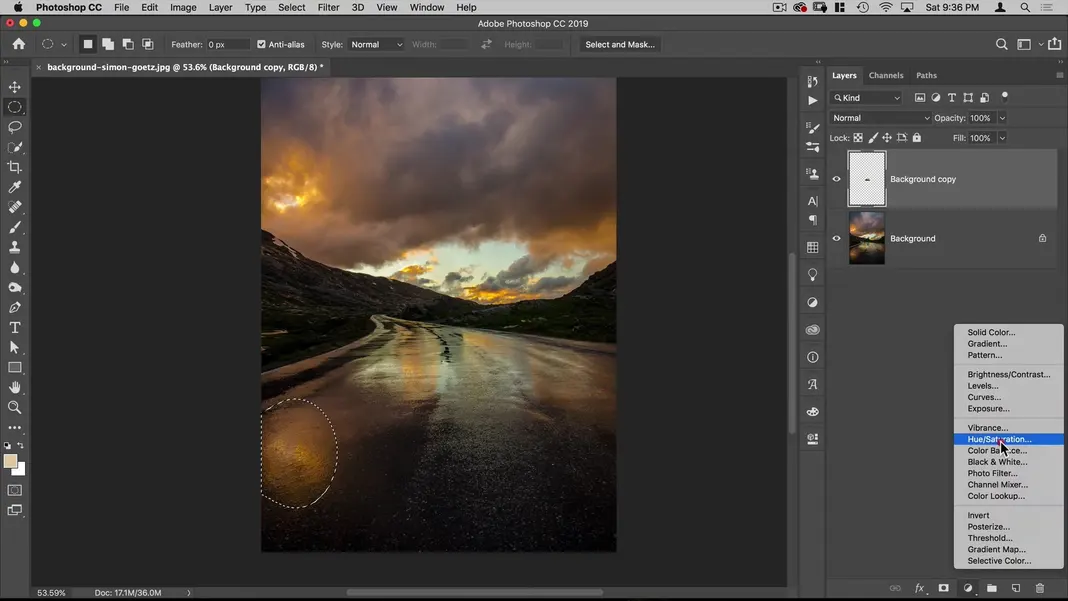
Note that when you add an adjustment layer with a selection, Photoshop will turn that into your mask. Select the On-Image Adjustment tool (the hand icon).
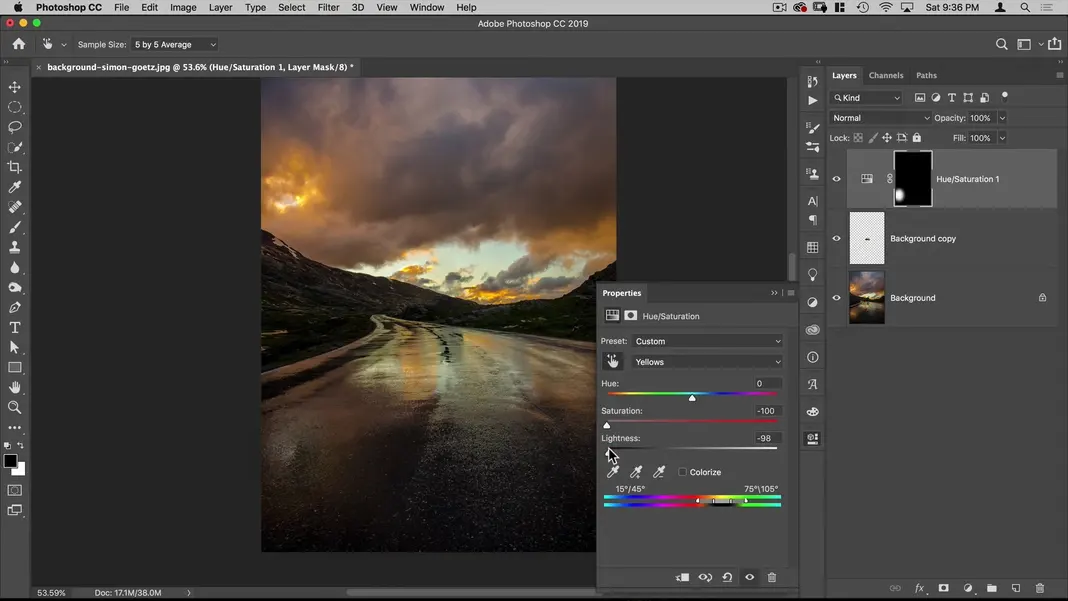
Then select the yellow color in our hotspot and hold and drag to the left to desaturate the color in that area.


Finally, we can drag our lightness slider to the left as well.
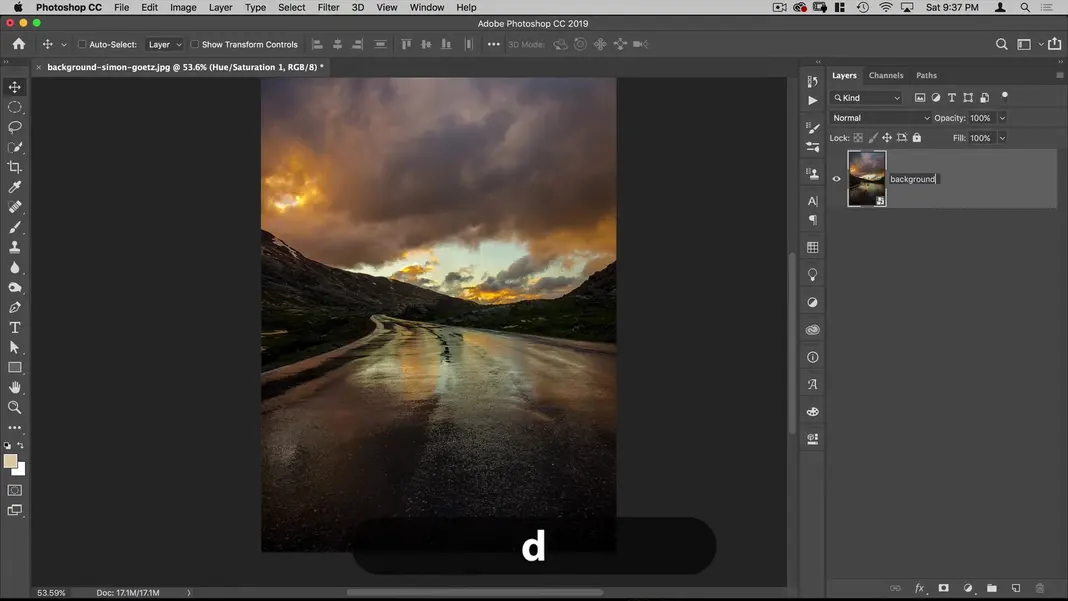
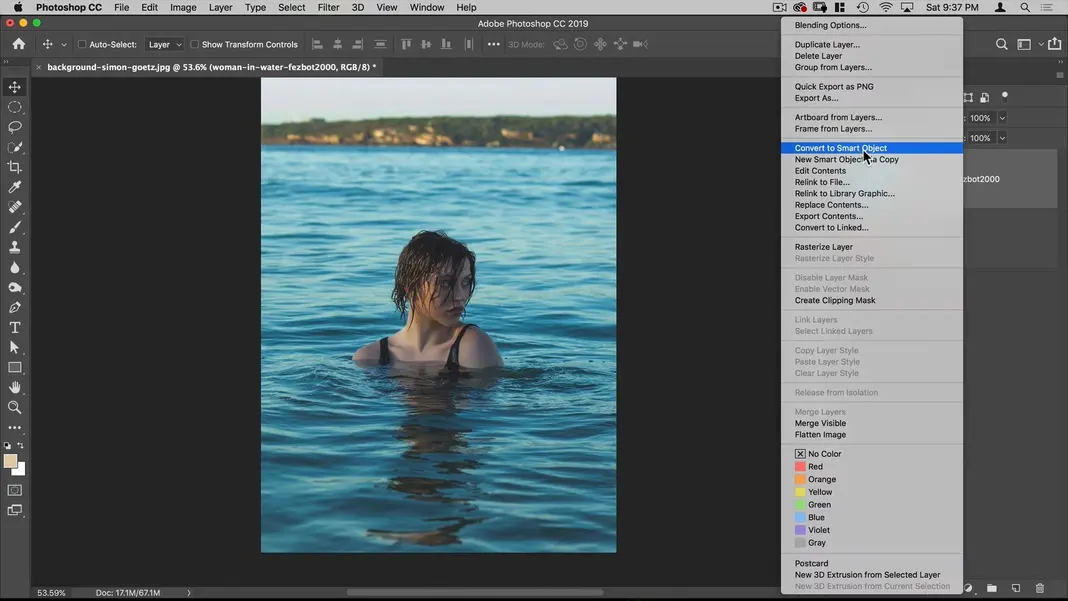
Let’s finish off by selecting our three layers, right-clicking, and selecting Convert to Smart Object.
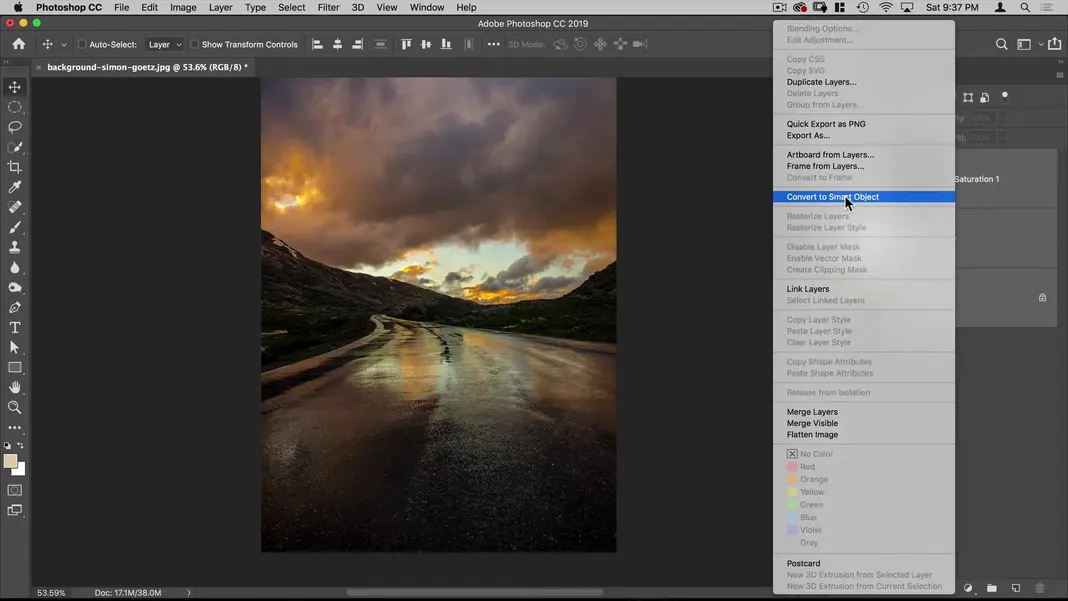
We can call the resulting layer “background”.
Now that our background is in order, let’s insert our image of the main subject—the woman.
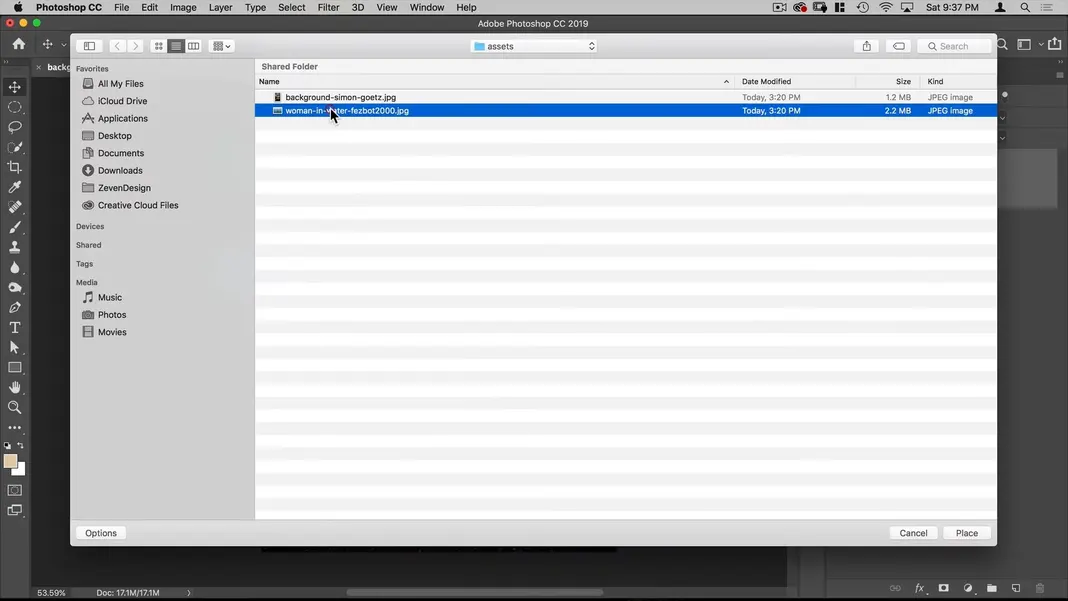
Step 3: Insert the woman.
Navigate to File > Place Embedded and place the file “woman-in-water-fezbot2000.jpg”.
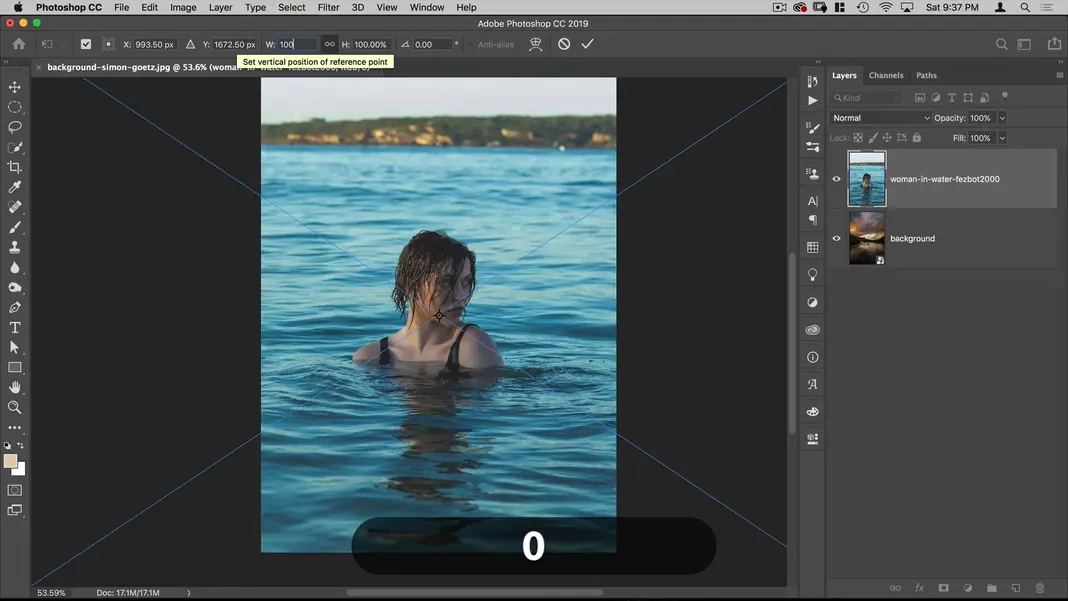
You should see something like this.

Click the link icon to preserve proportions and then set the image to 100% width and height.
Then right-click the layer containing the image of the woman and convert it to a smart object.
We can name this layer “woman” to keep ourselves organized.
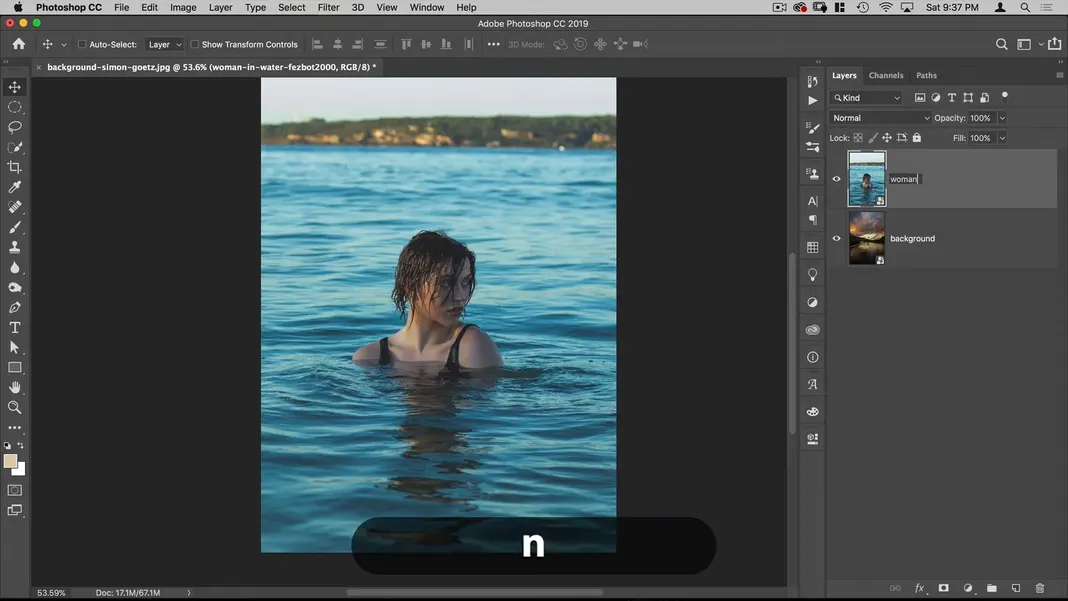
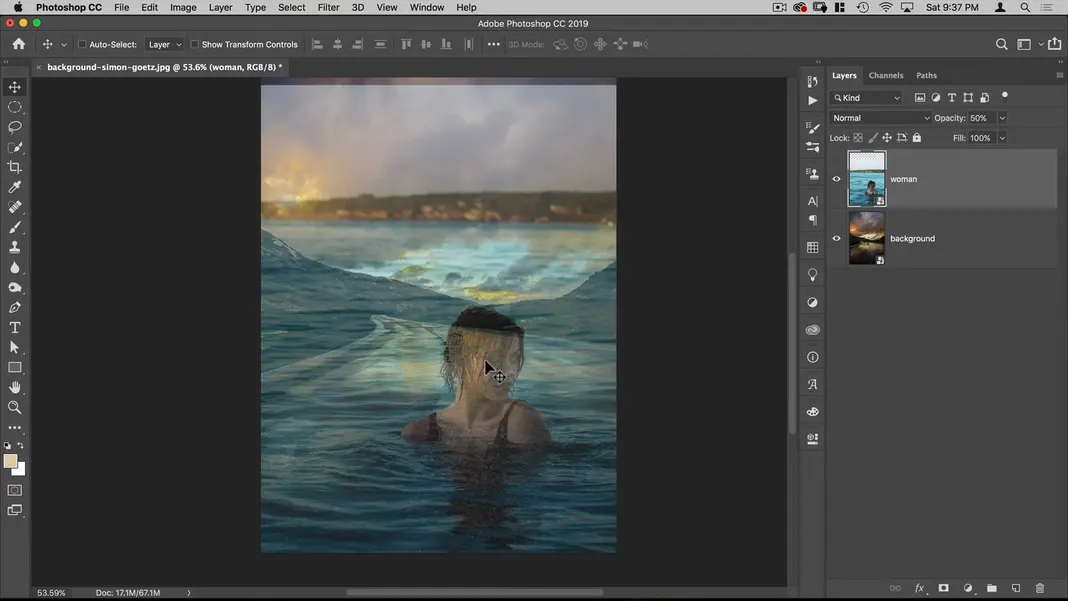
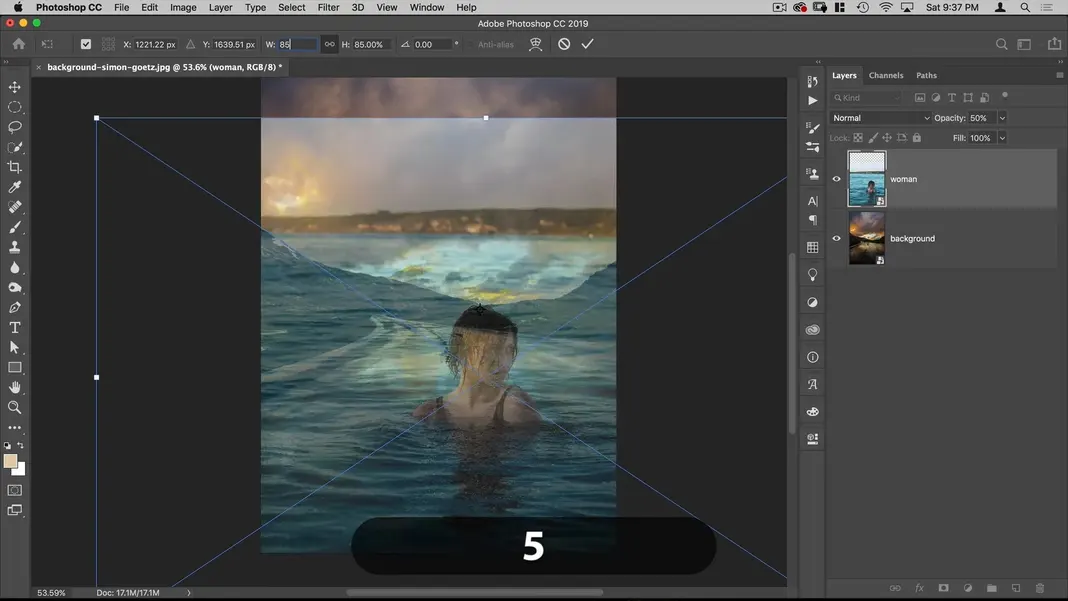
Let’s change the opacity to 50% so we can see the woman and the background image at the same time.
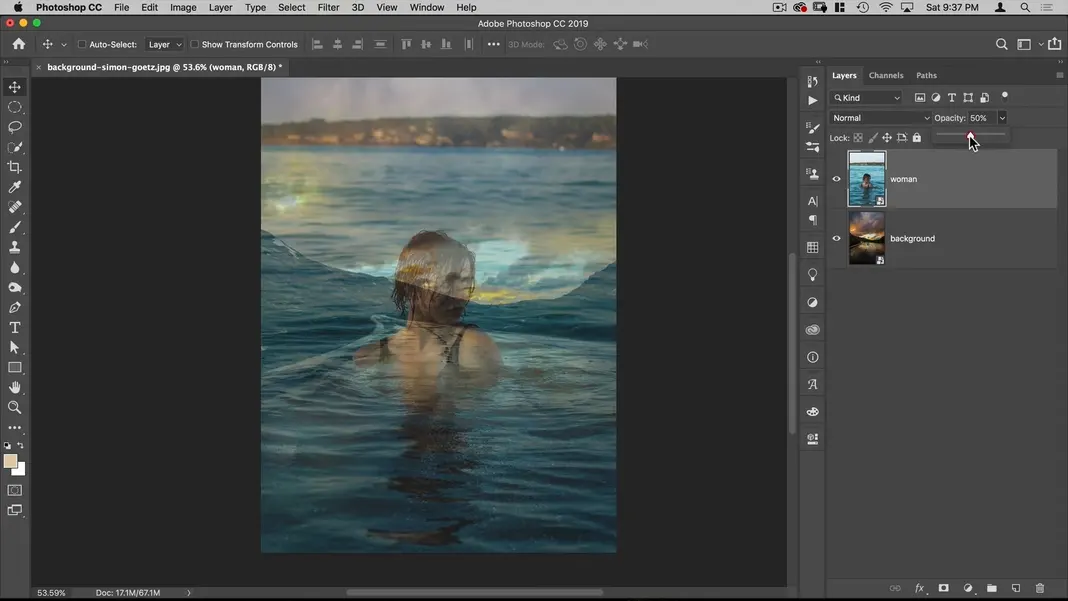
For composition purposes, I’d like to place the woman so that her head is meeting or intersecting the V in the mountains in the background.
Then I’ll hit Command + T to enter Free Transform mode, move the anchor point to that V, and set the scale to 85% so the image is a proportional size.
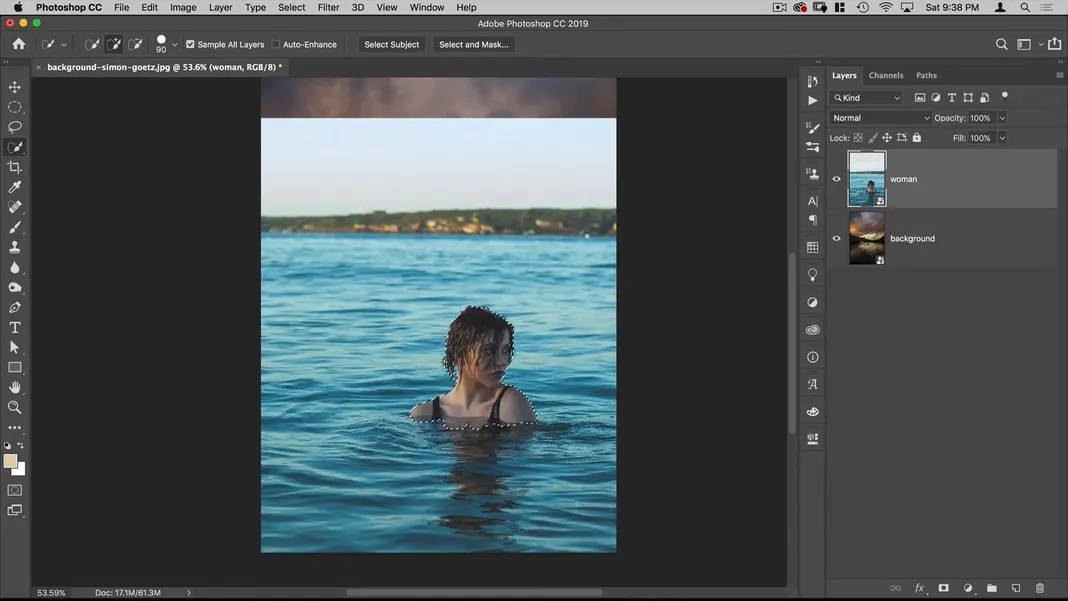
We can now go back to 100% opacity, select the Quick Selection tool, and click Select Subject. This will prompt Photoshop to do its best to select the subject from our image.

You should get something like this as your resulting selection.
Click Select and Mask and you should see the following.
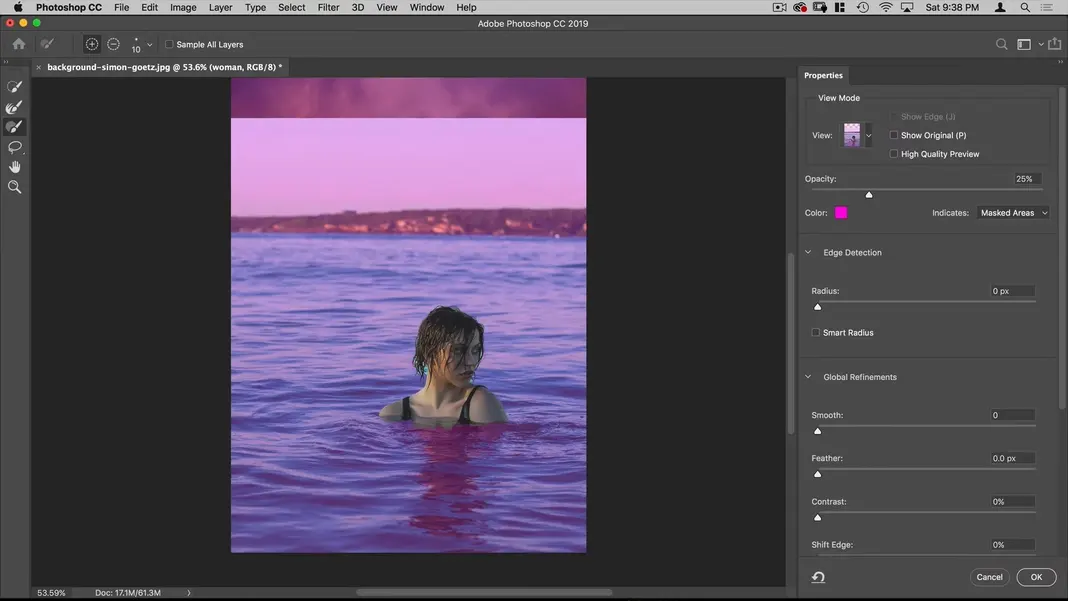
Let’s refine the edge on this selection. Select the Refine Edge brush and paint around the edge of our subject—focusing especially on her hair, where the most gaps are present. With this brush, you want to paint about halfway between your selection and what you don’t want selected.

We can also use the normal Selection brush and paint in spots that Photoshop has missed.
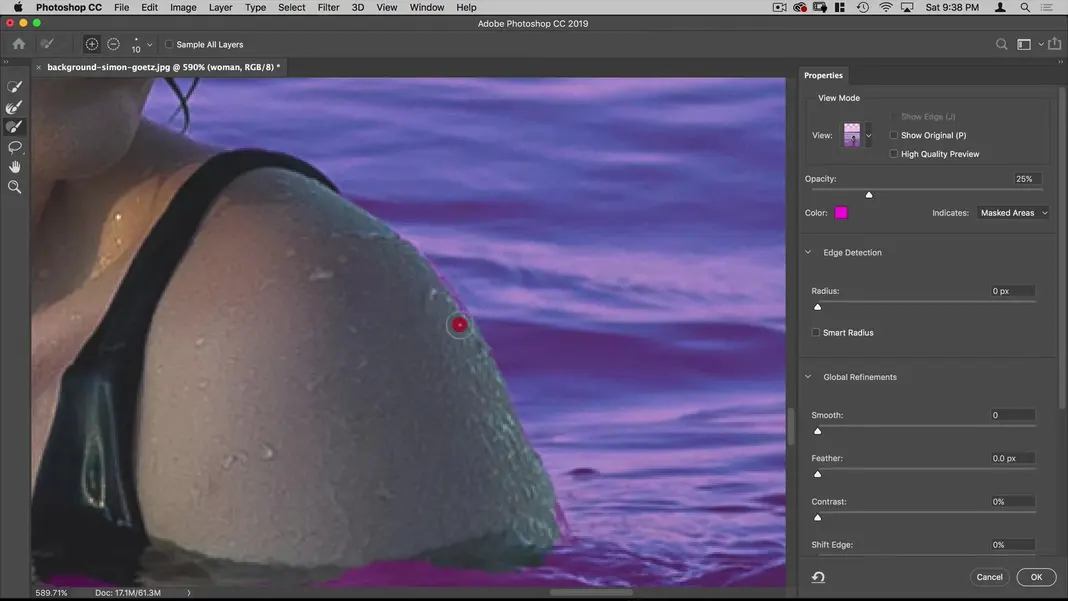
I’ll also make my brush bigger and paint in the woman’s reflection in the water so that reflection also gets added to the background image.

Finally, I’ll enable the Smart Radius option in the edge detection settings, set the radius to 3 pixels, and hit OK.

With the resulting selection, we can add a mask by hitting the mask button.
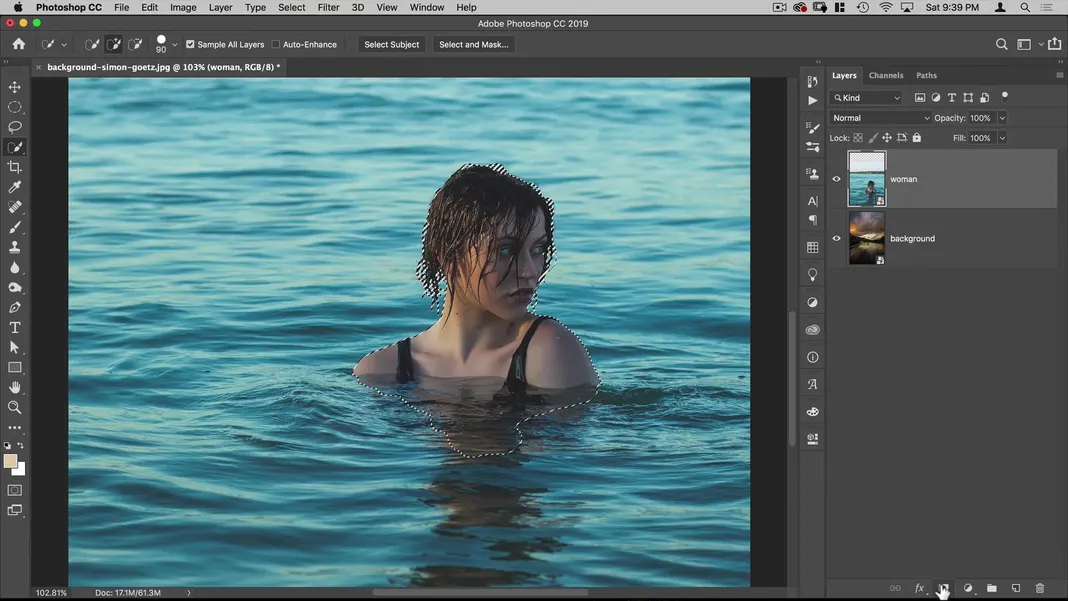
The result should look something like the following.
With the woman inserted into our image, let’s move onto the next step.
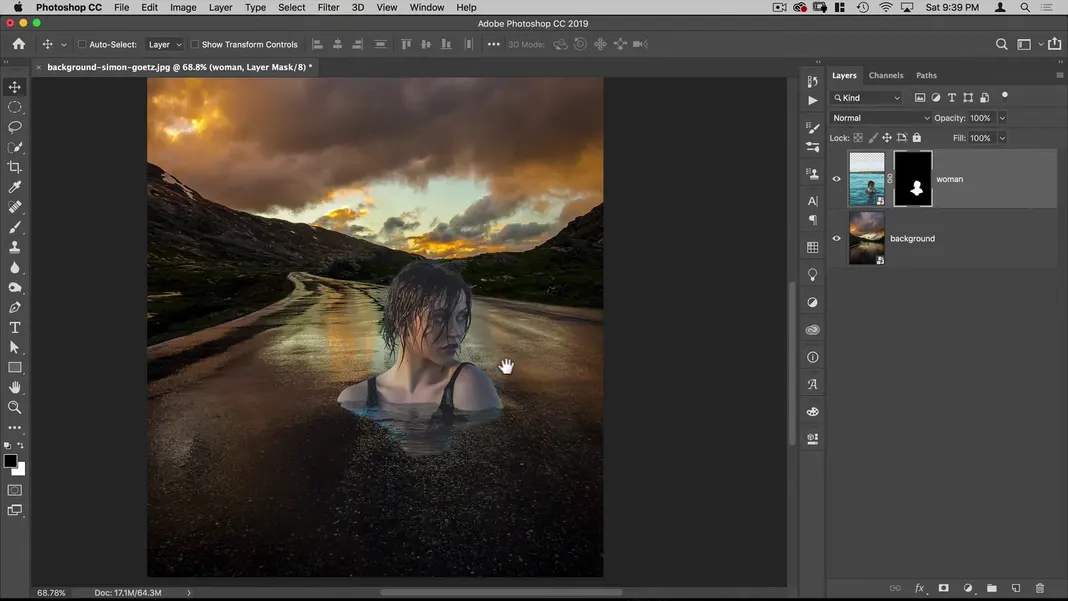
Step 4: Adjust the colors.
Although our subject has been added to the background image, she currently sticks out. Her black points, white points, and light areas all don’t properly match the background image, so we’ll need to adjust the curves to resolve this issue. With the woman layer selected, navigate to Image > Adjustments > Curves.

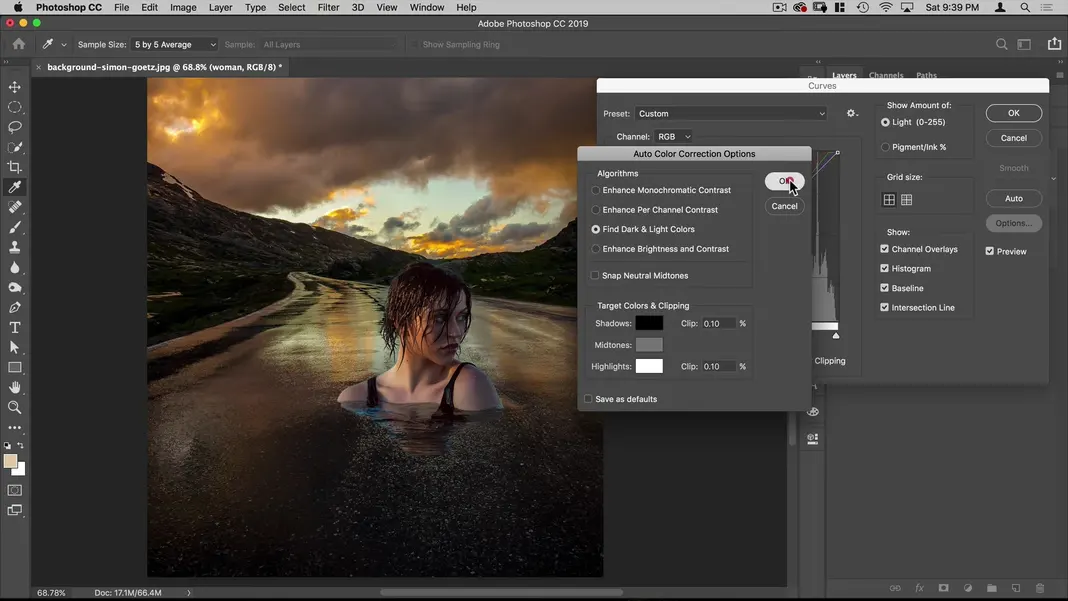
The Auto curves option will try to correct the curve without fixing the black point or white point, which you can see in our case isn’t really accomplishing the result we want.
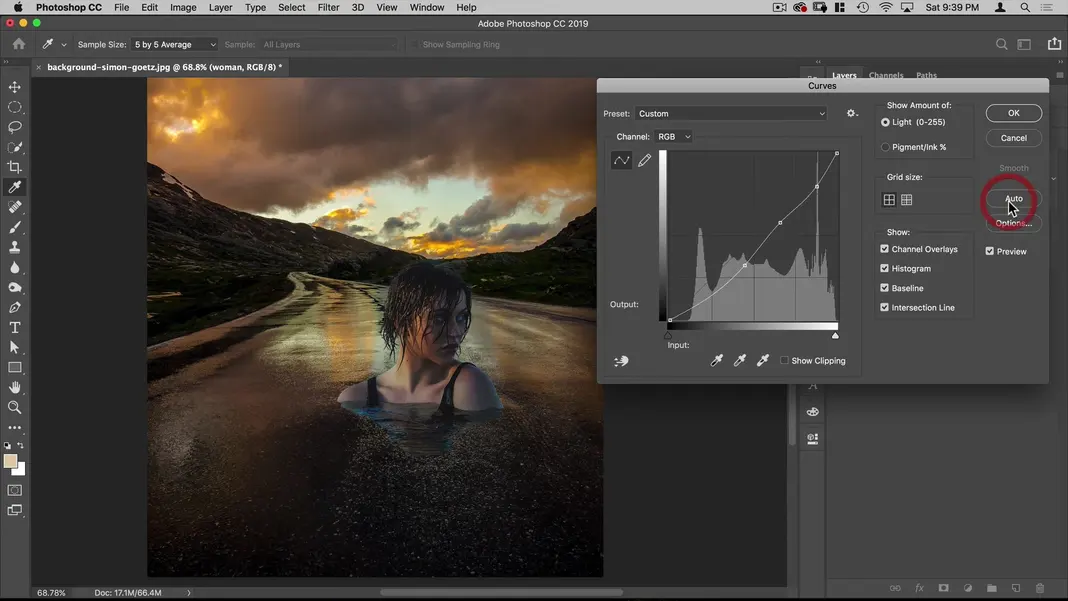
To get a more helpful result, select Options and enable the Find Dark & Light Colors option. This is already looking better as the subject isn’t darkened too much and is matching the background better. Hit OK.
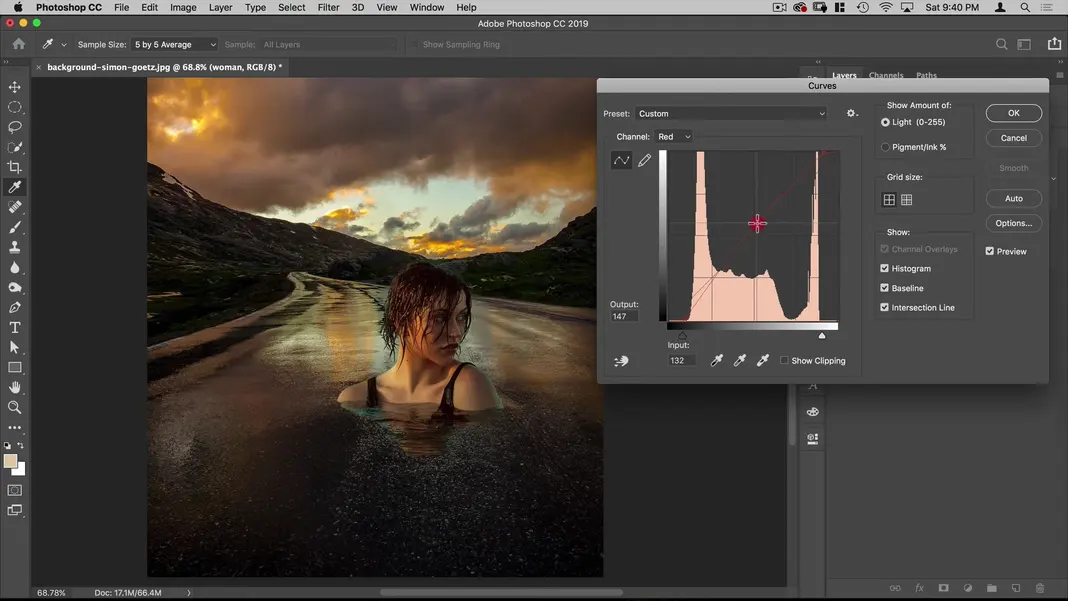
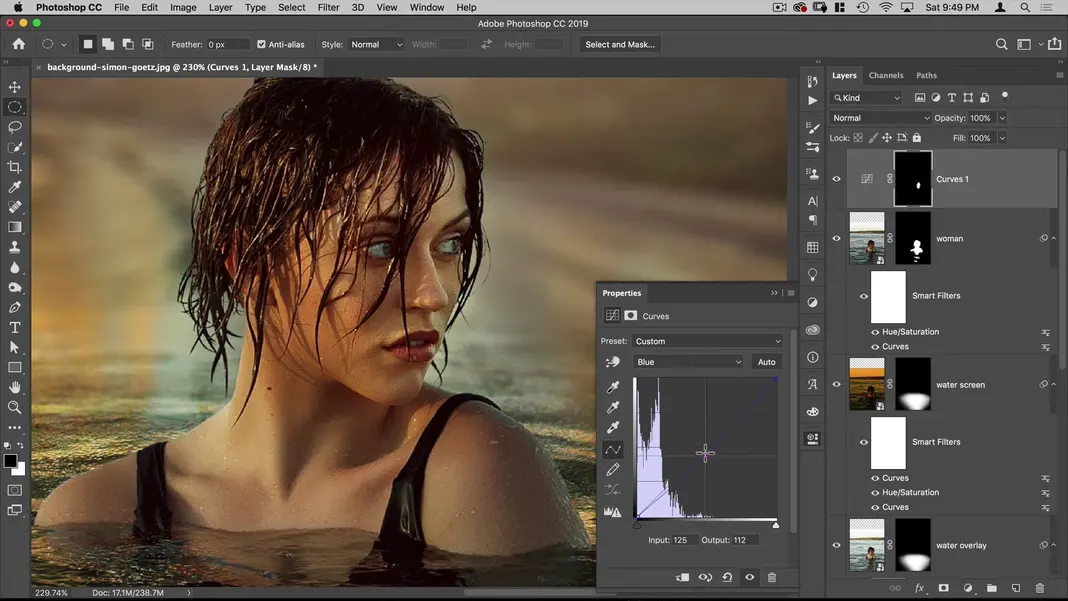
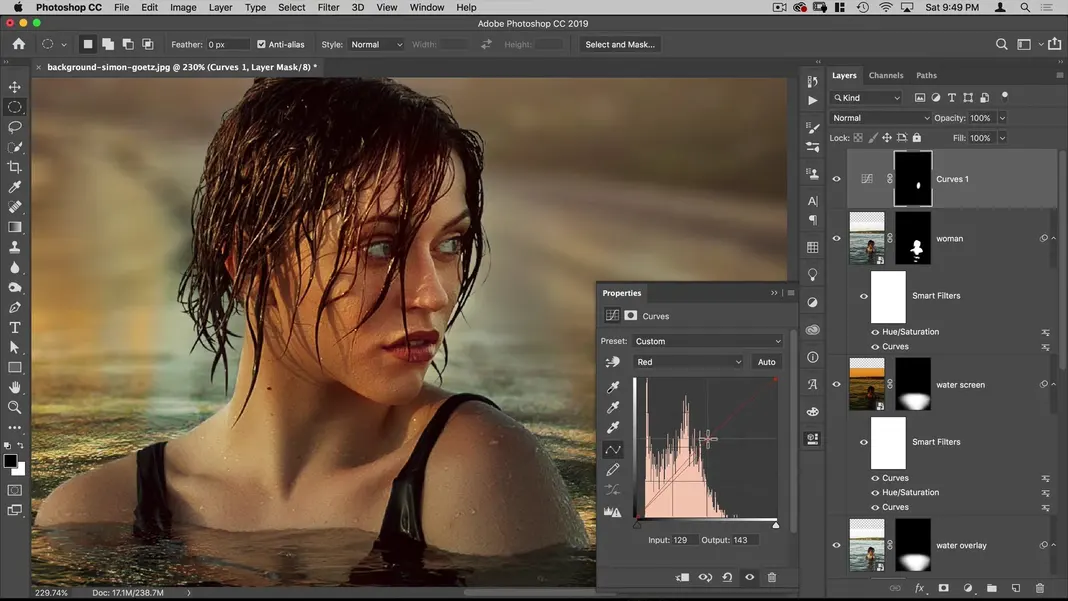
Next, we want to adjust the individual channels to correct the colors. Bring down the blue channel to introduce more yellow to the subject.
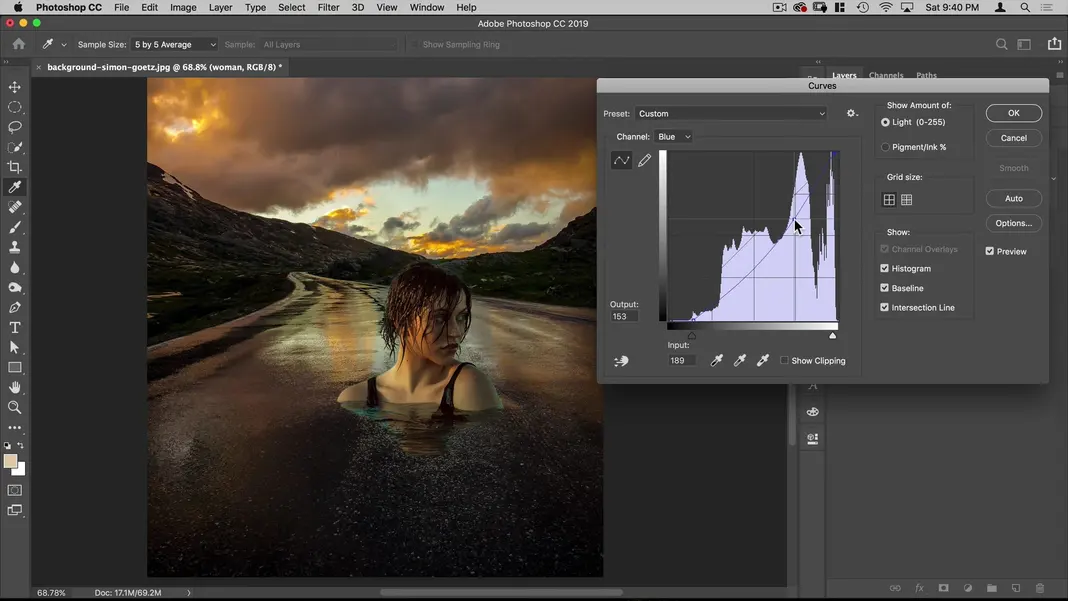
Bring the red channel up as well to add just a bit of red. You can see that the highlight on the subject’s neck is now matching the golden color of the light in the sky.
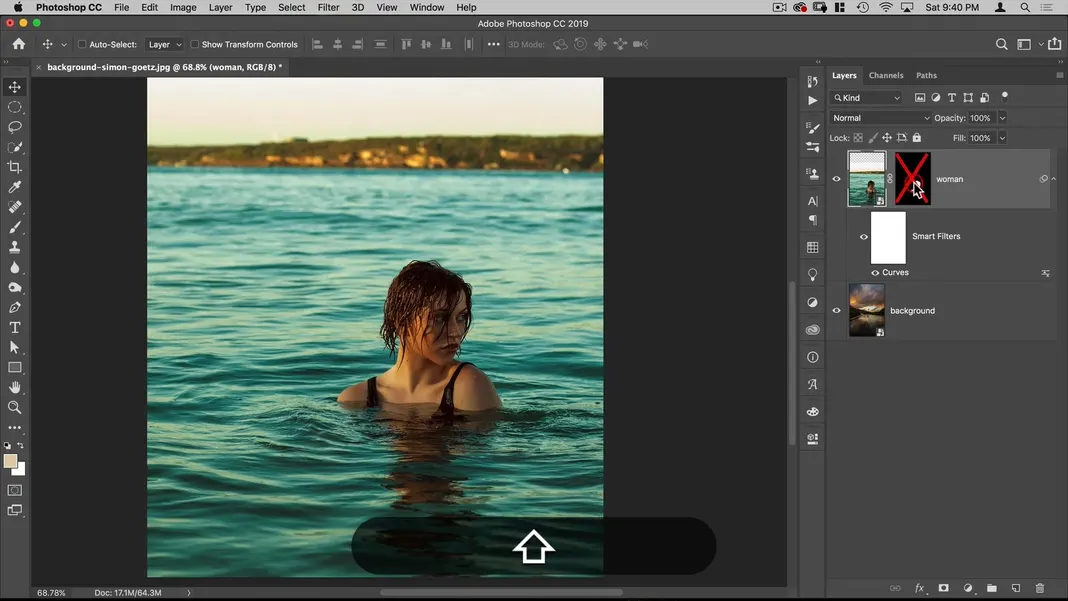
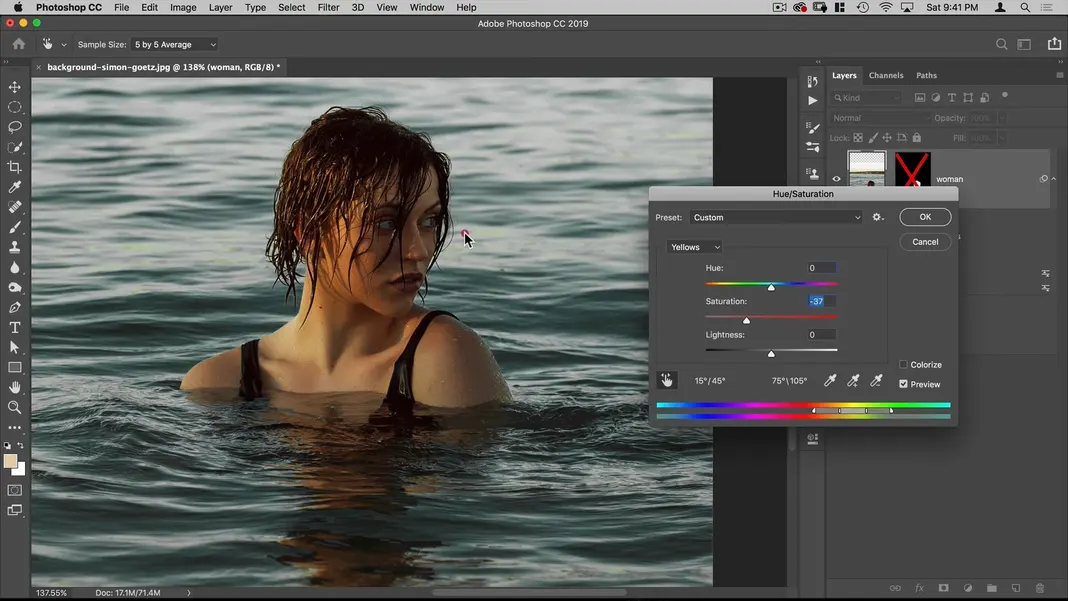
We’ve now successfully adjusted the curves to match the colors and values of the subject to the background, but her eyes and the water surrounding her still has a blue cast; let’s work on removing that now. To start, hold Shift and click the woman layer to turn off the mask.
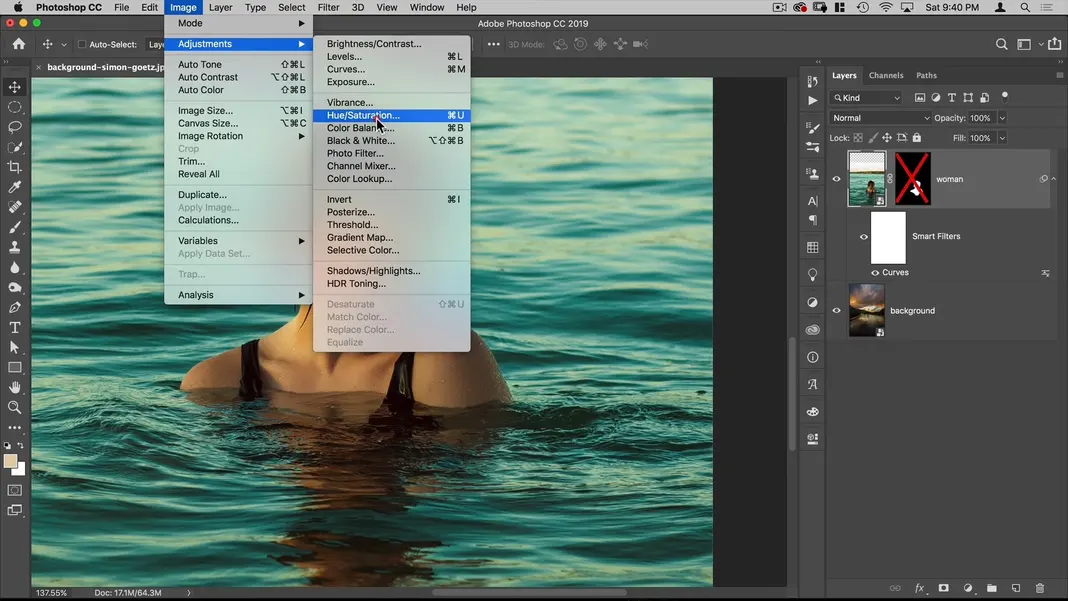
Now navigate to Image > Adjustments > Hue/Saturation. We’ll be doing something similar to the correction we made to the hotspot in step 2.
Select the On-Image Adjustment tool (the hand icon), select an area that has the blue cast we want to correct, and hold and drag the cursor to the left to reduce the saturation.
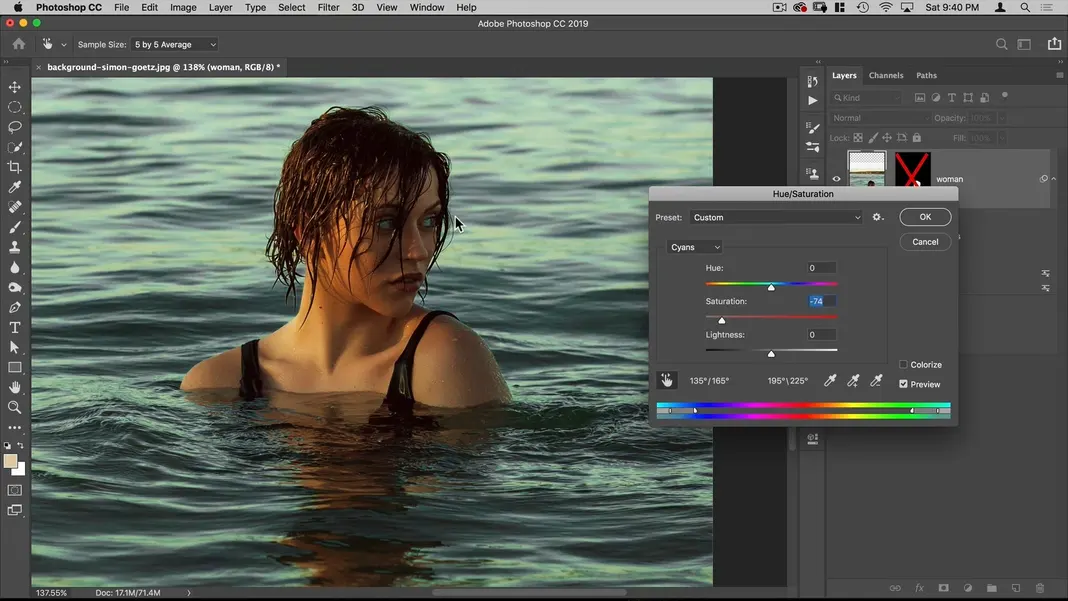
We’ll actually want to correct the lighter areas even further, so select one of the light blue areas from the water and repeat this same process for that light blue color.
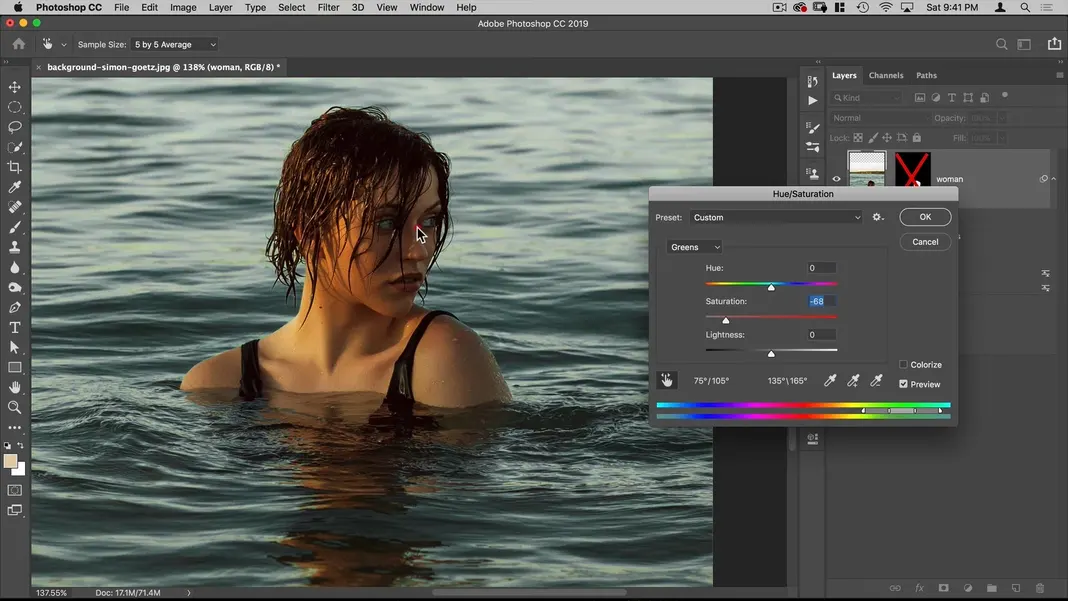
Repeat this process as needed with the various shades of blue present in the image.

After four total rounds of correction, I’ve ended up with this adjusted image. You can see that the whites of the woman’s eyes no longer have a blue cast to them, which is exactly what we wanted. You can toggle the Preview checkbox on and off to see the before and after of these changes. Once you are satisfied, hit OK.
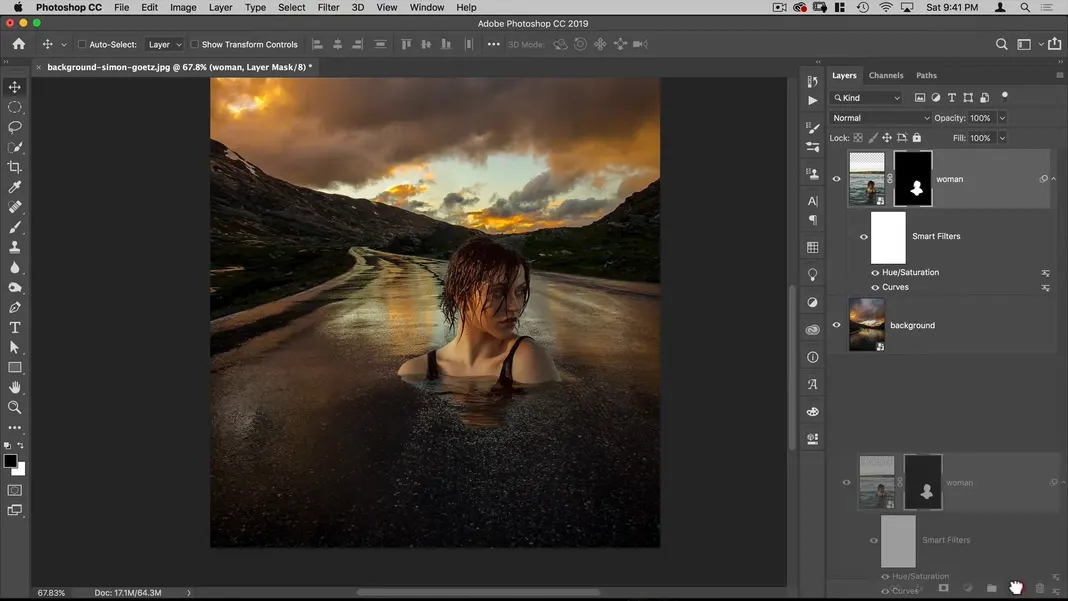
If we now go back to our composite image, we can see how the woman fits into the background with these changes in place.

Hopefully you agree that she fits in much more naturally now than she did before those blue cast corrections.
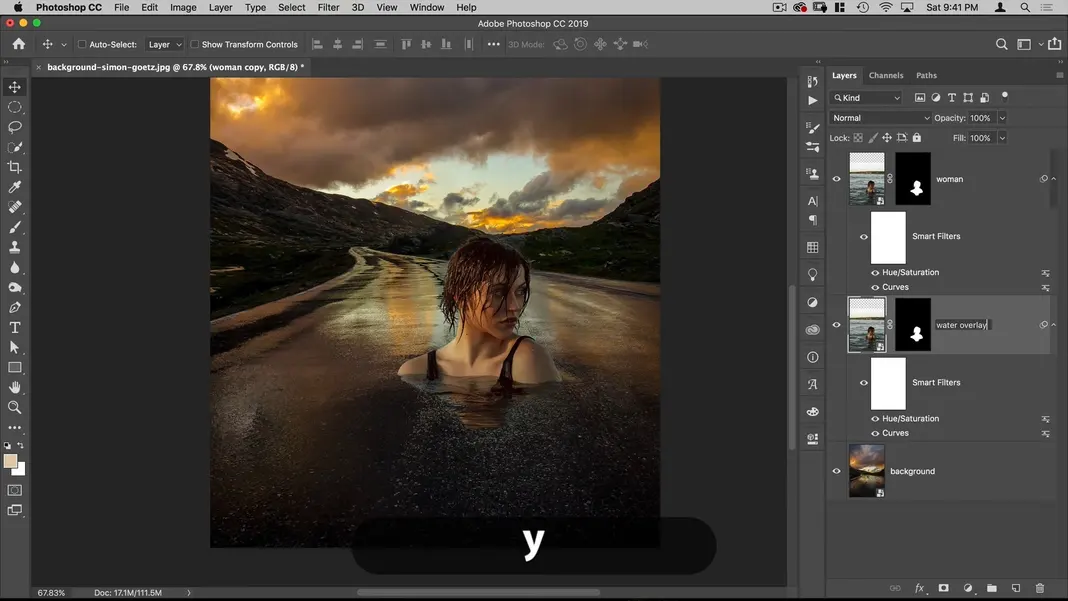
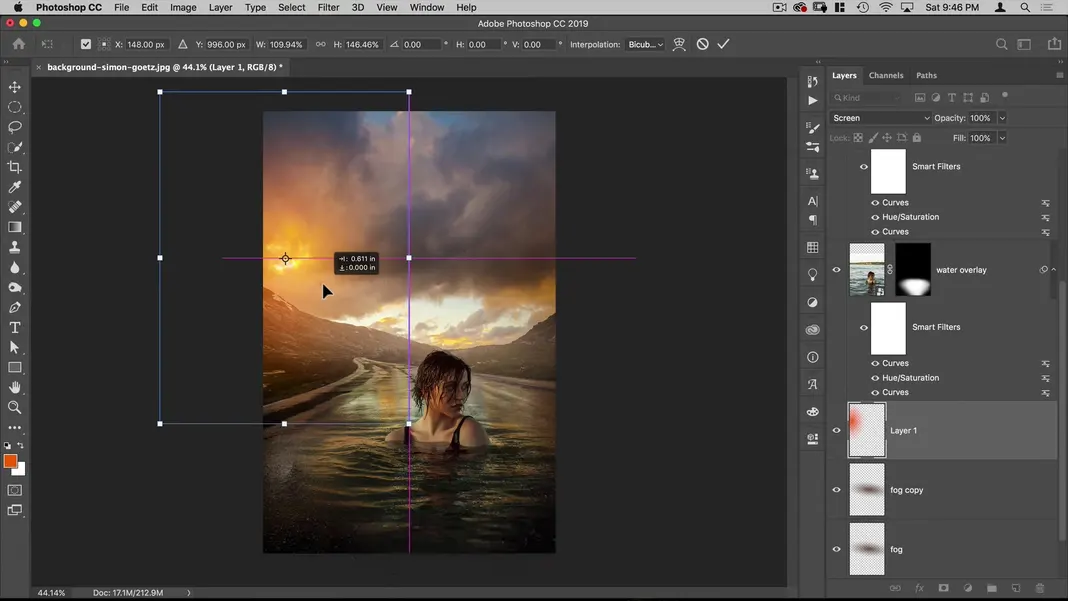
Step 5: Adjust the water.
Now let’s duplicate the woman layer by dragging it to to the New Layer icon at the bottom of the layers panel.
Drag the resulting layer to the bottom and name it water overlay.
Select the mask on this layer, open the Brush tool, and select a soft round brush.
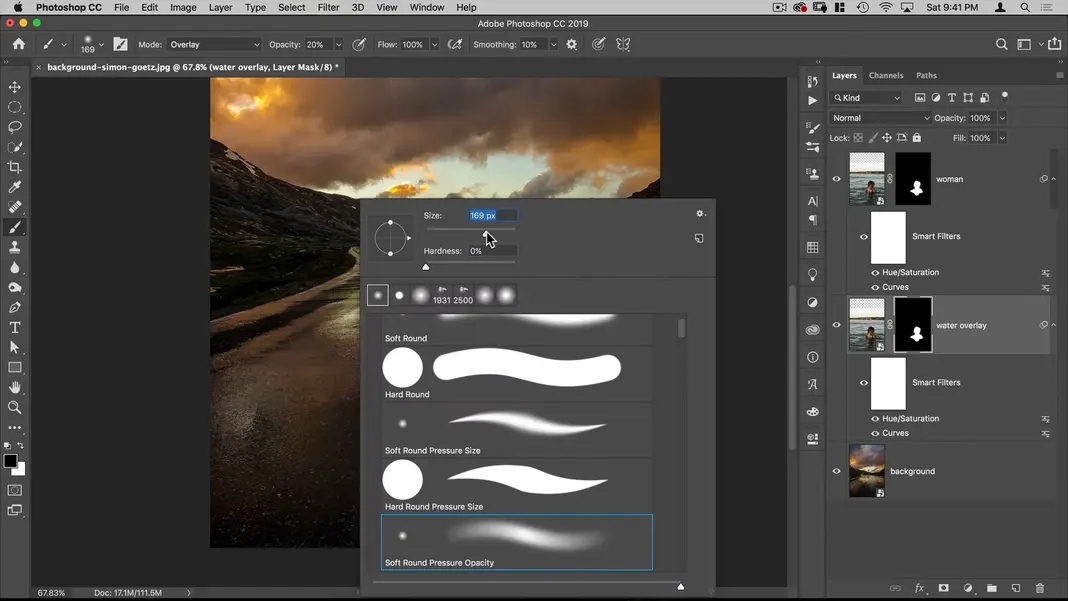
Change the size of this brush to be quite large.

Make sure the opacity is set to 100% and the mode is set to Normal, and then paint in the image around the woman to bring in the water texture from her original surroundings.
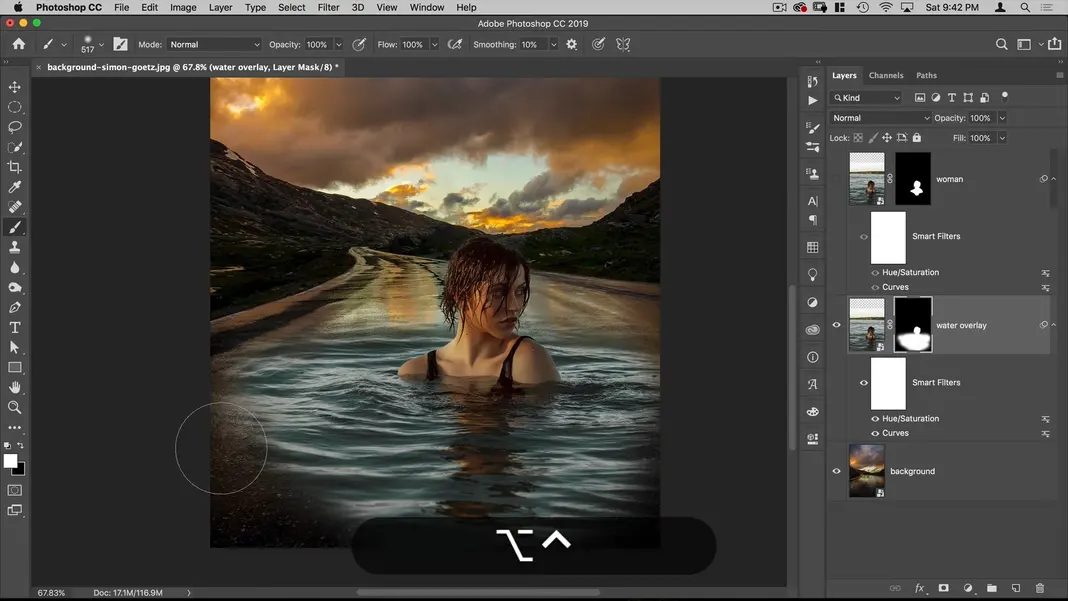
In this example we’ve likely brought in too much of the water surrounding her, so we can correct this by making the brush even larger, switching the foreground color to black, and then painting around the edges to blend the water overlay into the water texture from the background image.
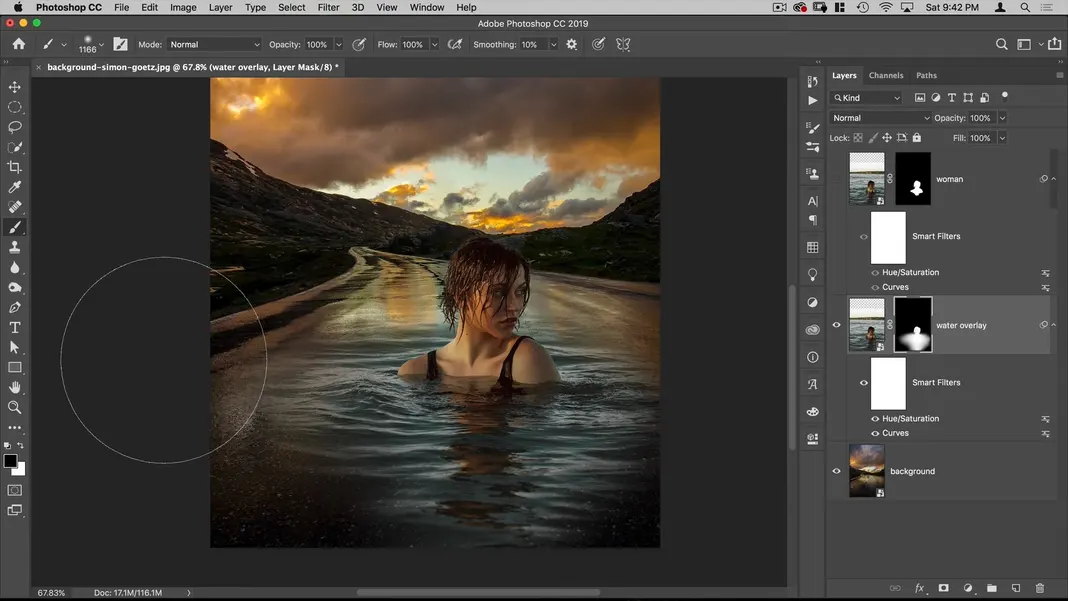
You can switch back and forth between the white and black foreground colors as needed to emphasize or tone down the effect as desired. We also don’t need the woman’s head on this layer since we are just using this layer for the water overlay and she is already fully present on the woman layer, so we can erase that part as well. My final result looks something like this.
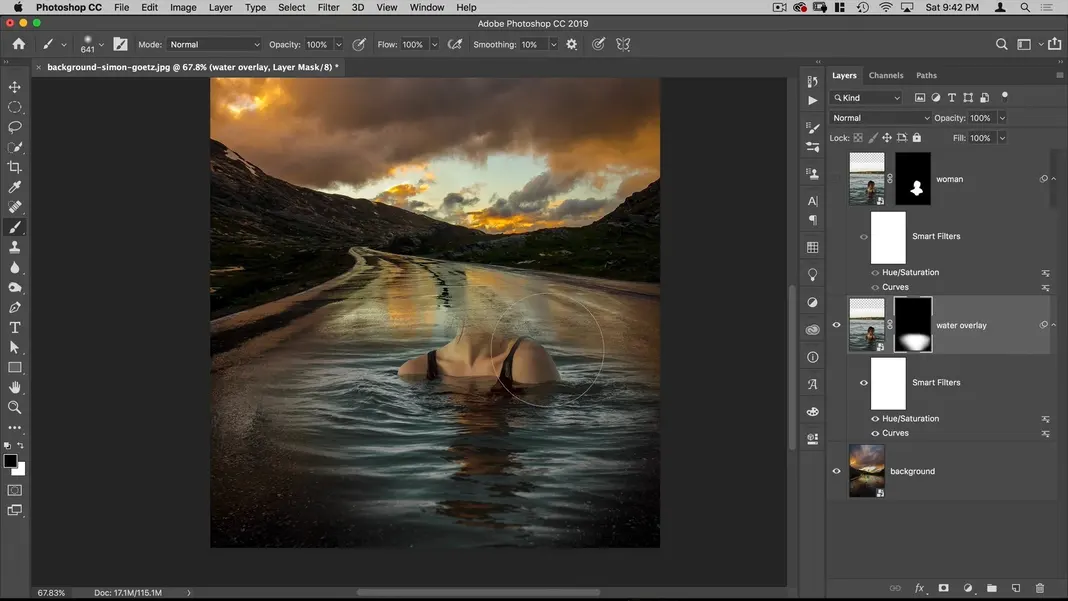
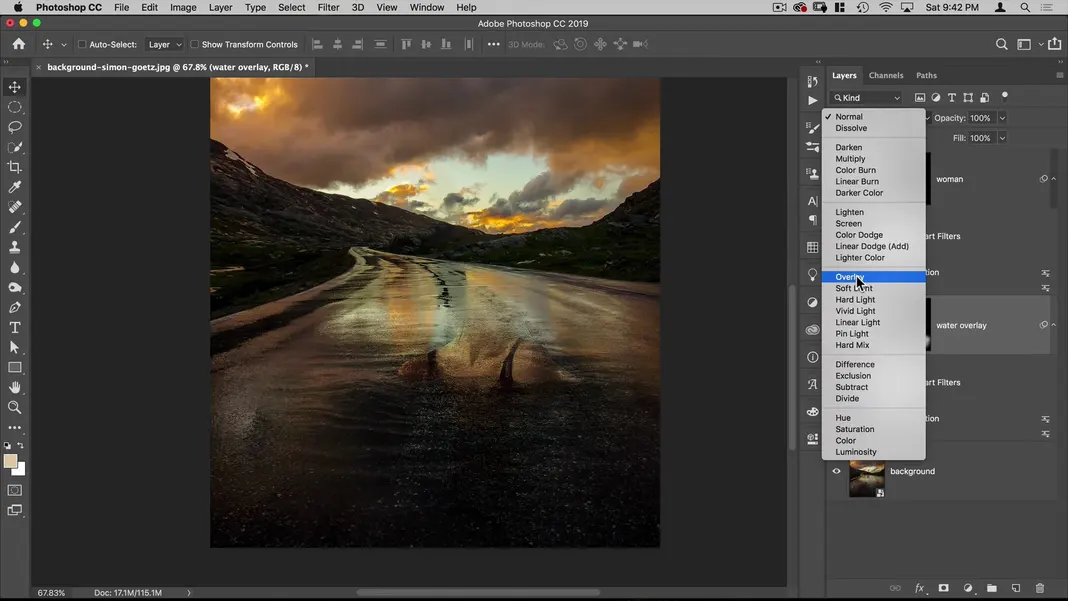
Set this layer to be an Overlay layer.
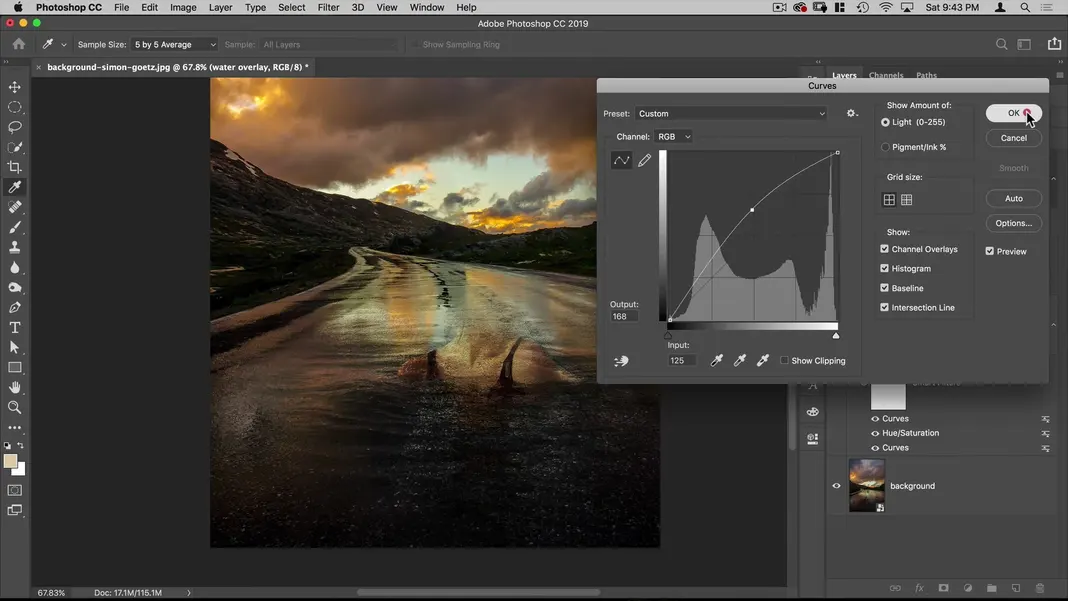
It does look a little dark at the moment, so let’s make it a bit brighter. Navigate to Image > Adjustments > Curves to add another Curves adjustment.

Edit the Curves adjustment to make the image brighter as shown; then hit OK.
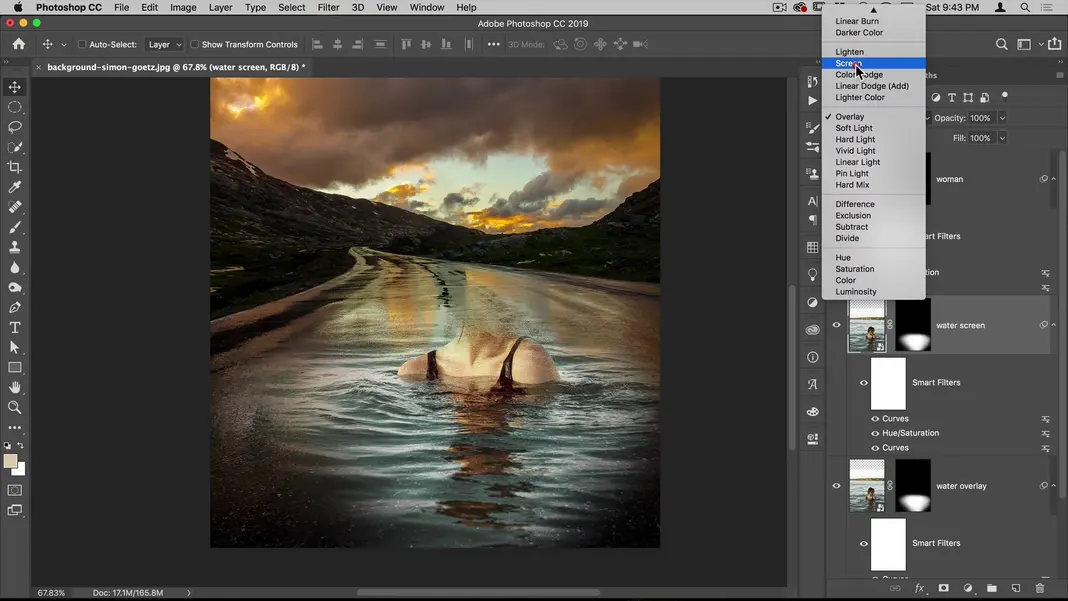
We also need to create a water screen layer, so make a copy of the water overlay layer by dragging it to the New Layer icon at the bottom of the layers panel.

We can name this layer water screen and then set it to be a Screen layer.
With all of our layers turned on, here is what this looks like currently.
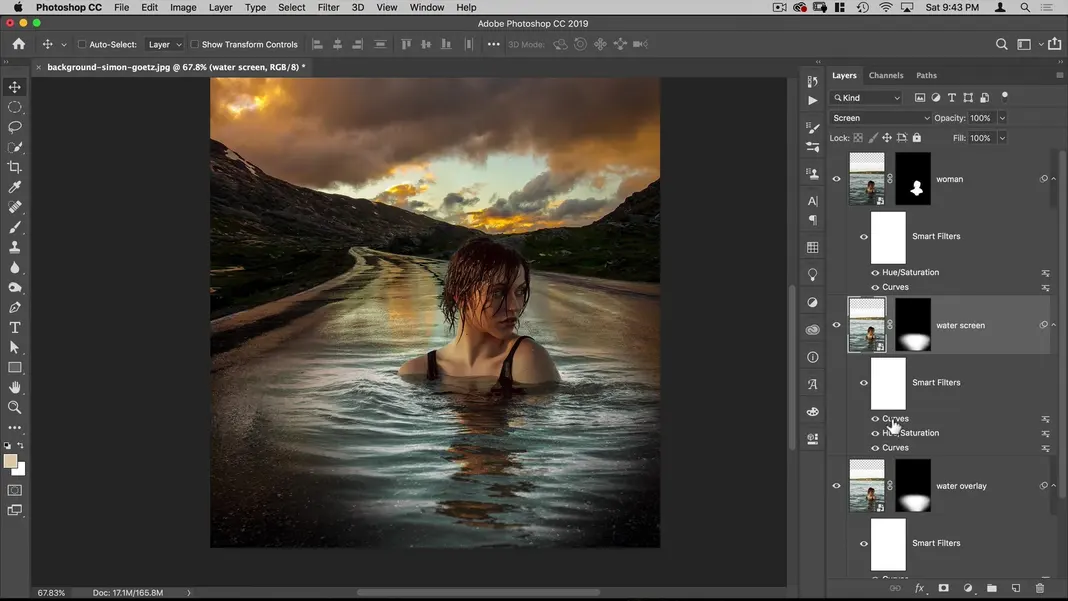
Our water screen effect is definitely too strong currently, so let’s finetune it. Open the Curves adjustment on the screen layer by double-clicking it. We can then hold Option to turn the Cancel button into a Reset button; click Reset.
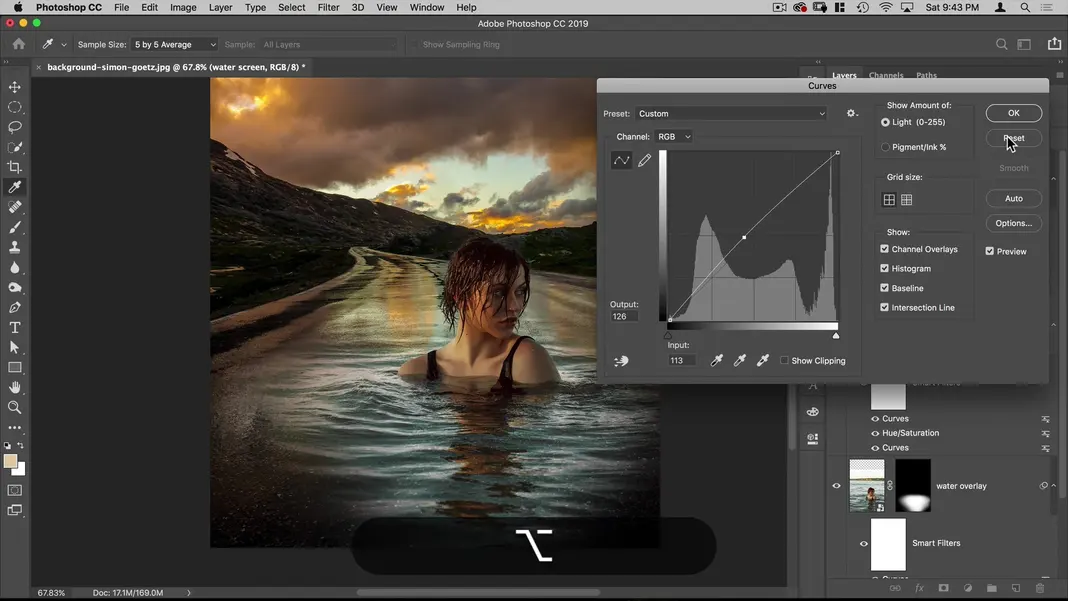
I’ll bring down the darks on this curve so that it matches some of the darker areas of the water in the background.
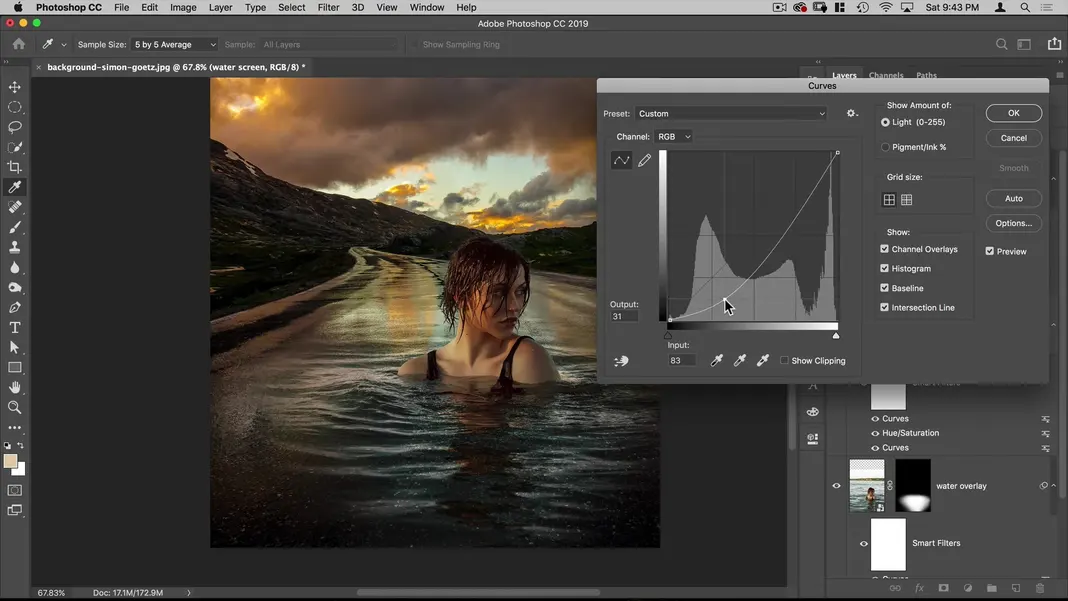
This is matching the background well, but I want the golden cast from the sunlight to carry over to the water we’ve added, so let’s bring the top of the blue channel down to a little further down than halfway to add some orange.

Let’s also bring down the top of the green channel a bit to add some magenta—just enough to match that golden color from the background image. Once done, hit OK.
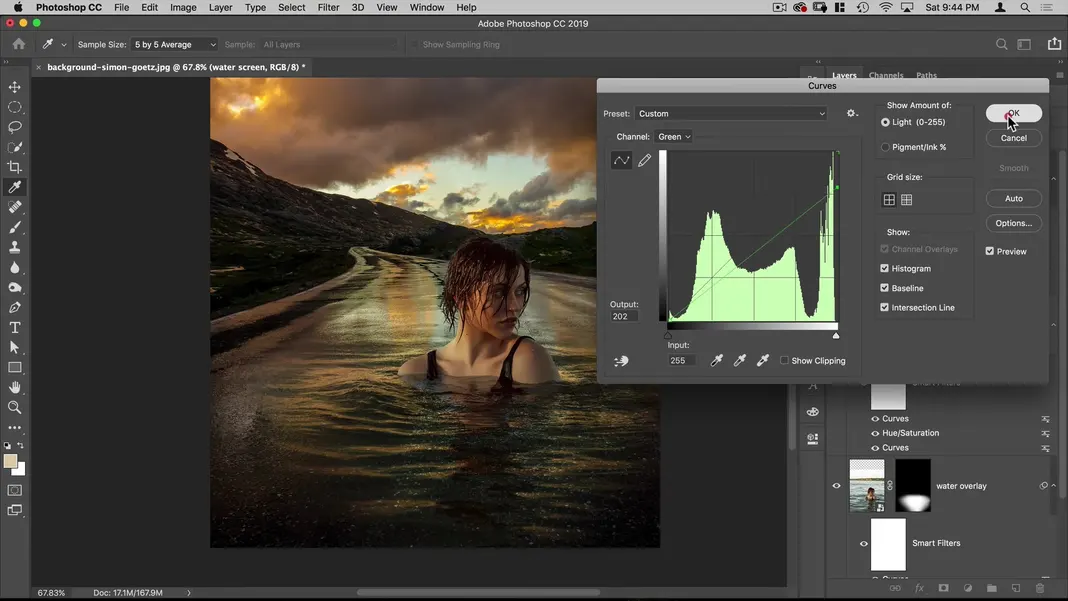
I like the way this is looking, but there is still some unwanted blue in the water around our subject. To correct this, we can go into our mask on the woman layer with a black brush and paint out some of those blues, and also use a white brush to paint in some of the woman’s reflection. My final result looks like this.

With our water overlay and screen in place and looking good, let’s move on to the next step.
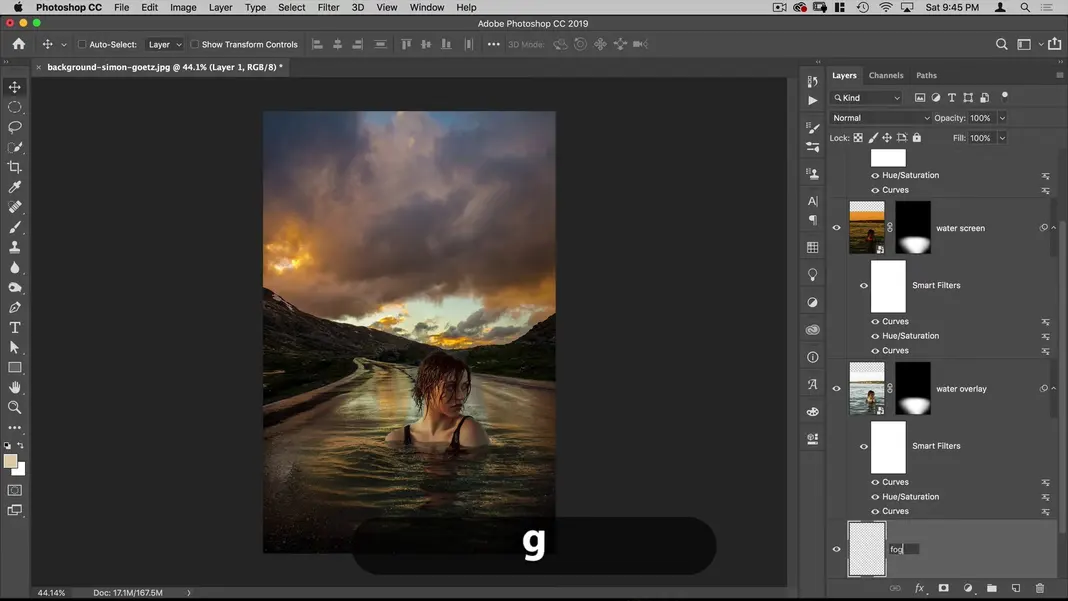
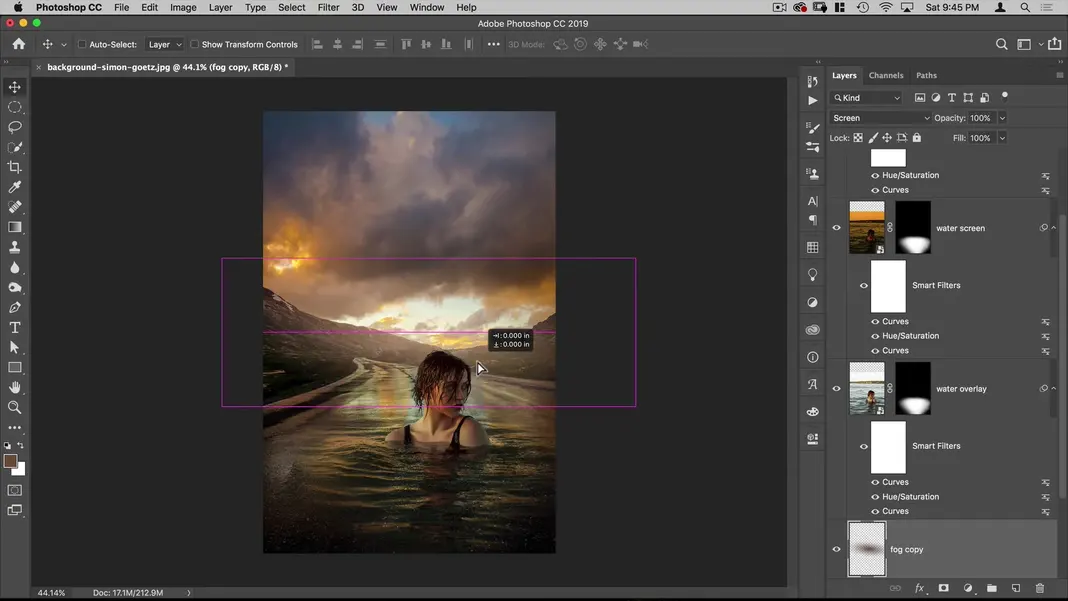
Step 6: Add the fog.
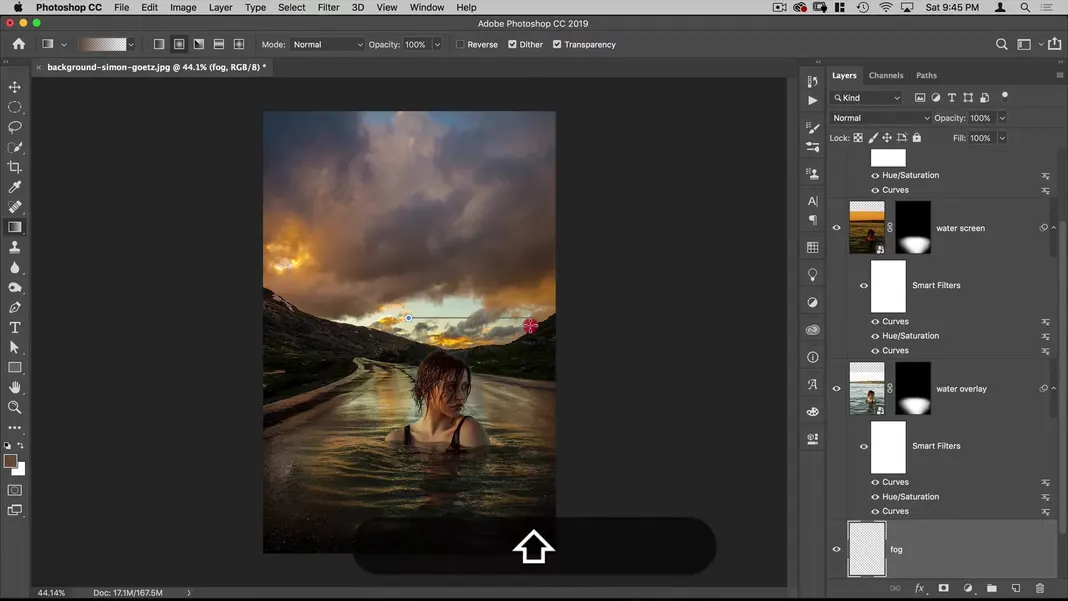
The next thing we want to do is add some fog to the background to separate the woman from the black mountains behind her head. Select the background layer and click the New Layer icon to add a layer above it. Let’s name this layer fog.
Hit G on the keyboard to select the Gradient tool. Make sure you have the Radial Gradient tool selected in the top toolbar, and then select this brownish color from the background clouds.

Using the Radial Gradient tool, go out from the center to near the right edge, as shown in the image.
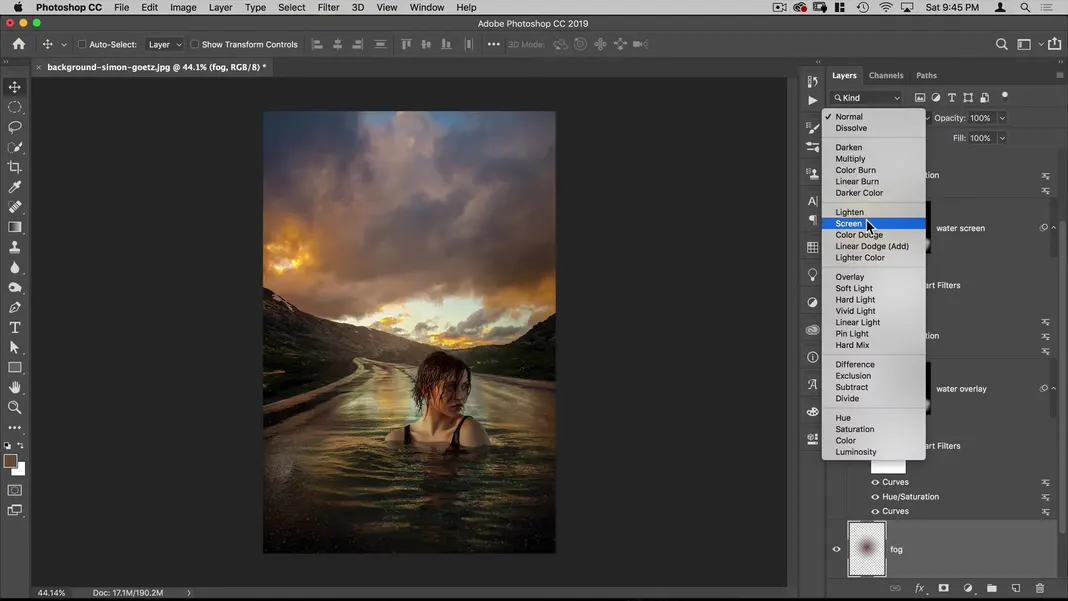
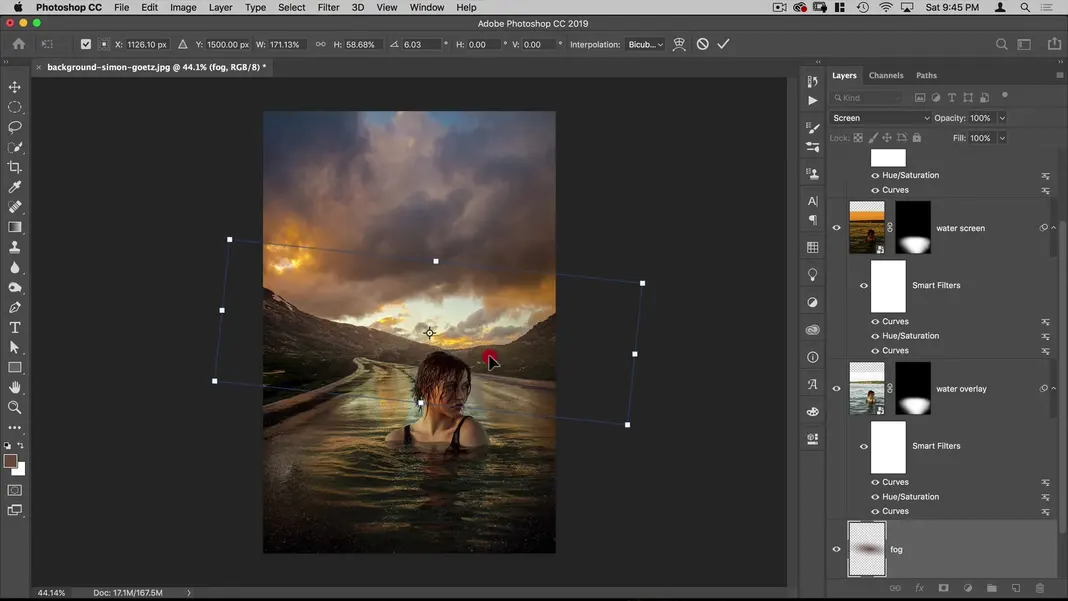
Set this to a Screen layer.
I’ll then use Command + T to switch to the Transform tool, and I’ll transform the gradient so it is placed like this.
To make the effect a little stronger, I’ll create a duplicate of the fog layer by dragging it to the New Layer icon. Then I’ll move it so it’s positioned as shown below.
These are subtle changes, but they add a lot of separation between the woman’s dark hair and the dark mountains in the background; if you look just behind the woman’s head, the contrast is much clearer now, which is exactly what we wanted.
Step 7: Intensify the hotspot in the sky.
Now I’d like to intensify the orange hotspot in the sky. To do this, I’ll create a new layer and select a color just like we did in the last step, only this time I’ll choose this bright red orange color.
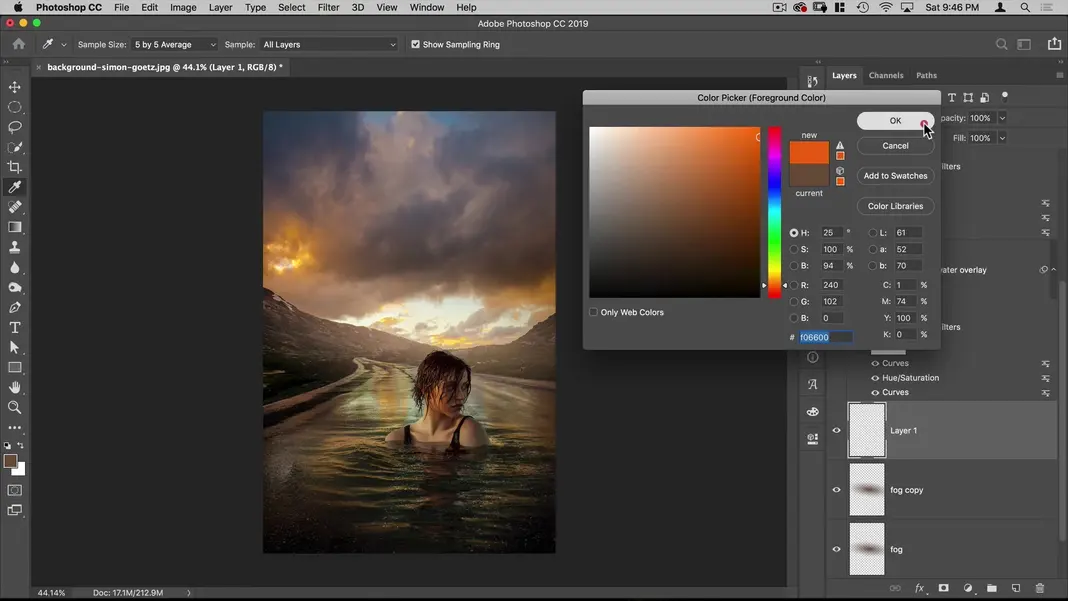
I’ll select the Gradient tool and create another radial gradient.
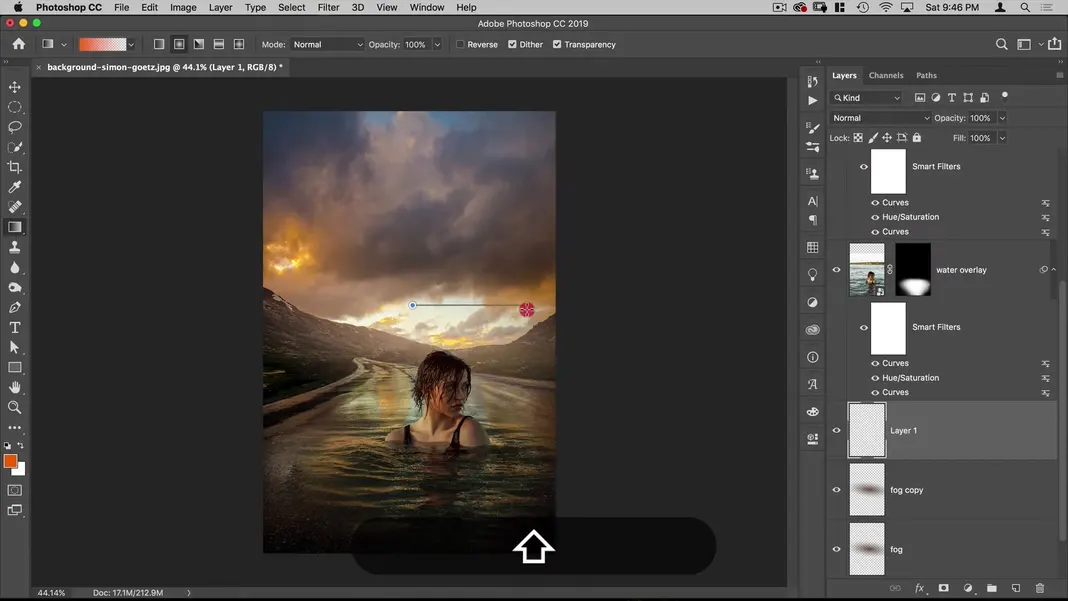
We can position the gradient we’ve created over the hotspot we are trying to intensify.

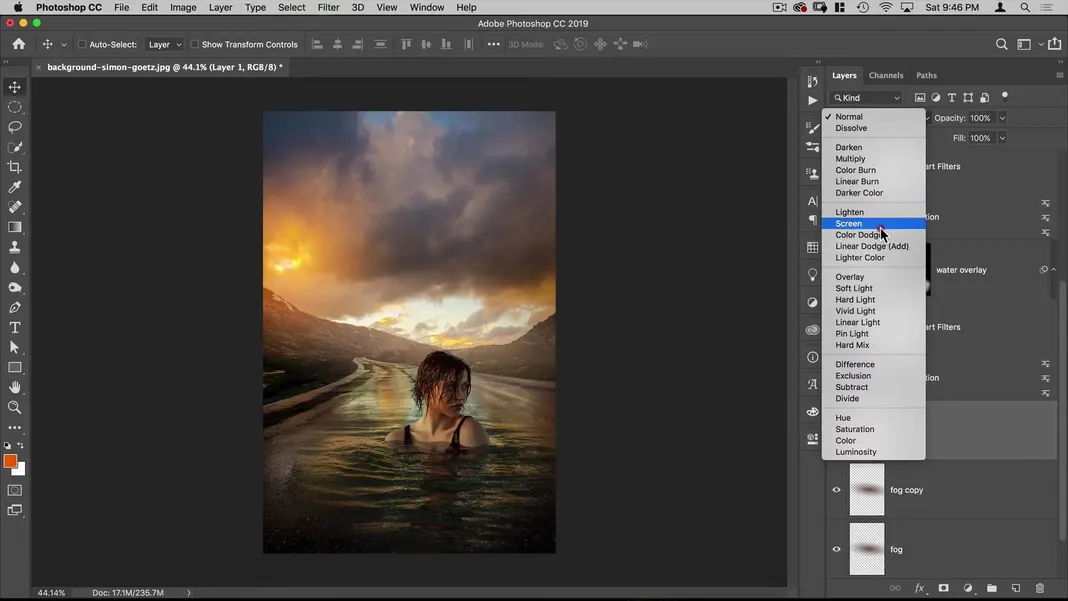
Then we can change this layer we’ve created into another Screen layer.
I’ll then use Command + T to switch to the Transform tool, and I’ll transform the gradient so it is sized and placed like this.
With the hotspot in the sky sufficiently intensified, we can move on to the next step.
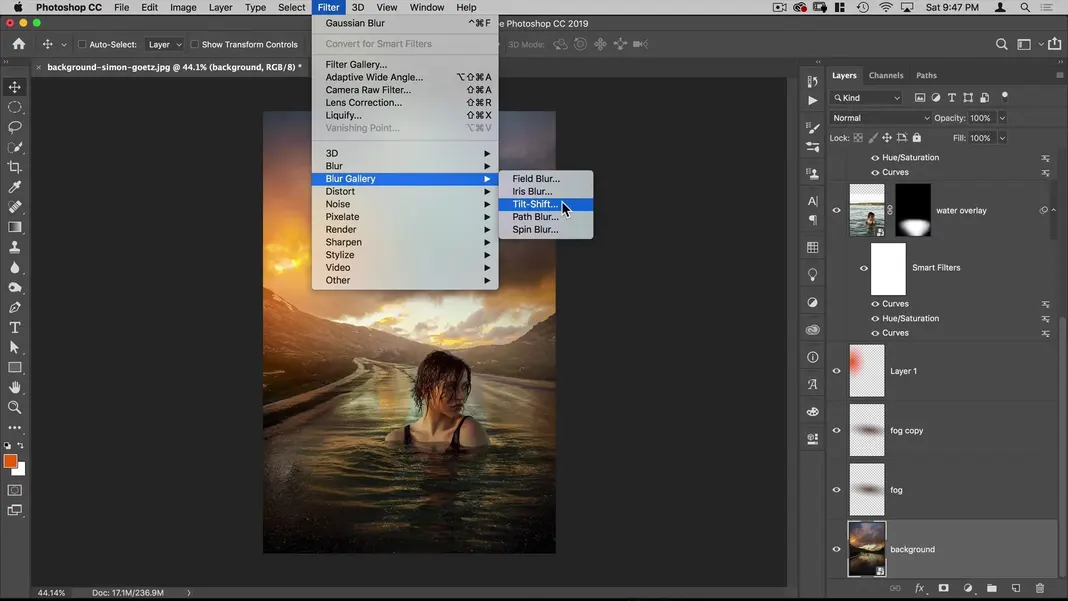
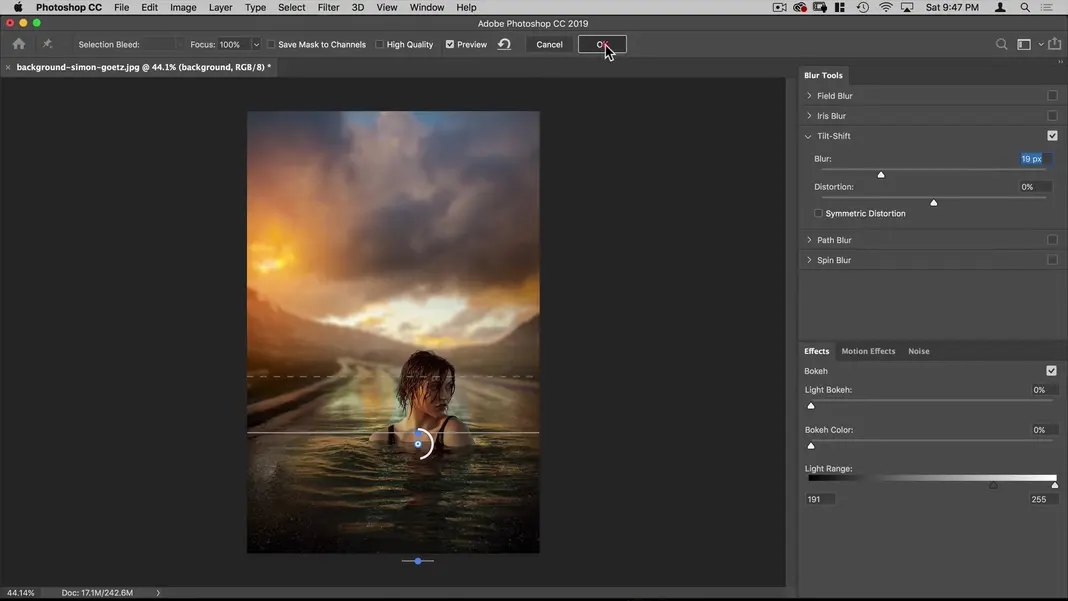
Step 8: Add the depth of field effect.
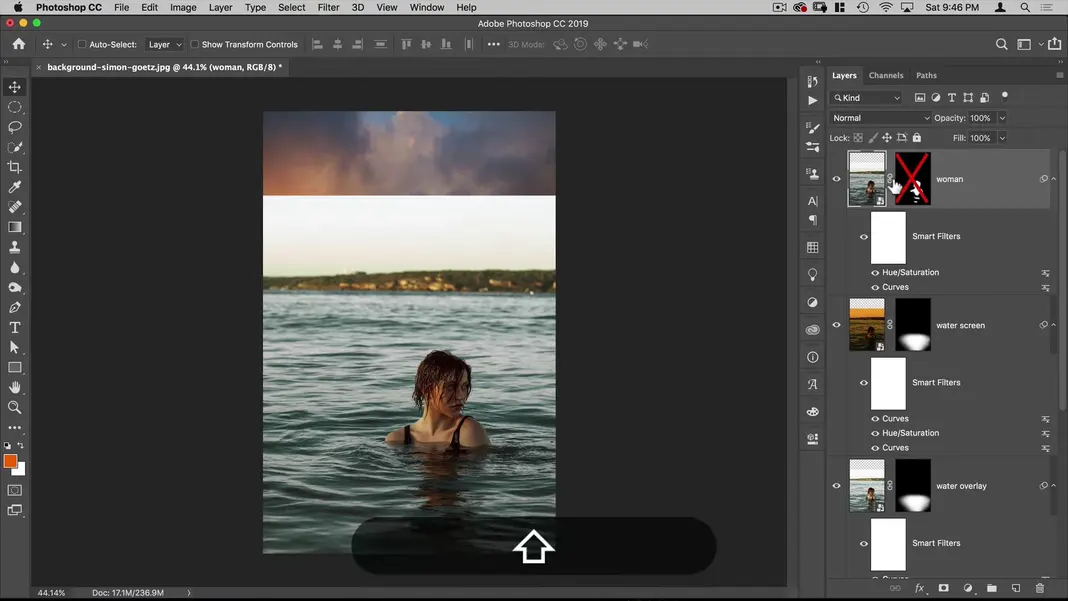
If we turn off the mask on the woman layer, we can see that the background of the original image containing the woman has a depth of field effect on it; the background goes out of focus the farther away it extends from the woman, and this blurring effect begins almost immediately behind the woman.
I would like the background of our image to have that same depth of field effect. To accomplish this, select the background layer and navigate to Filter > Blur Gallery > Tilt-Shift.
You should now see this interface.
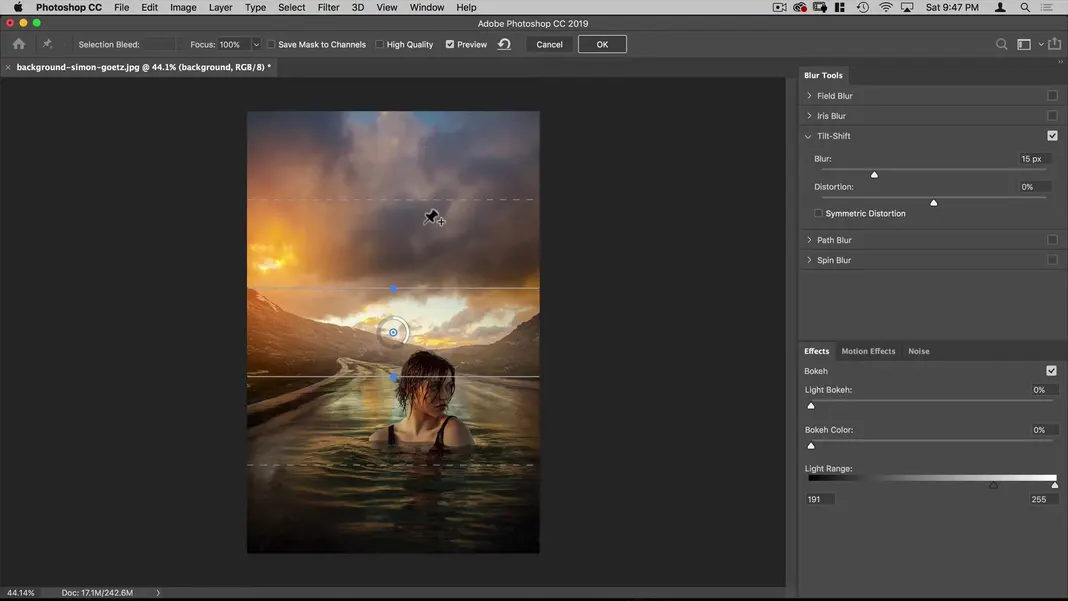
The way tilt-shift works is that everything between the solid lines in the middle is in focus; between the solid lines and the adjacent dotted lines is a transition gradient where the image is going increasingly out of focus; and everything from the dotted lines out has the maximum blur effect. We want everything in front of the woman to be in focus, and we want the blur to start being noticeable around where the woman’s mouth is. To get that effect, I’ll drag the bottom solid line below the bottom edge of the image, the top solid line around the woman’s shoulders, and the visible dotted line just above the woman’s eyes. Then I’ll adjust the blur strength to something around 15–20 pixels and hit OK.
My result looks like this.

This is looking great, but the woman’s face is getting lost in the shadows a bit now. Let’s brighten her face in the next step.
Step 9: Brighten the woman’s face.
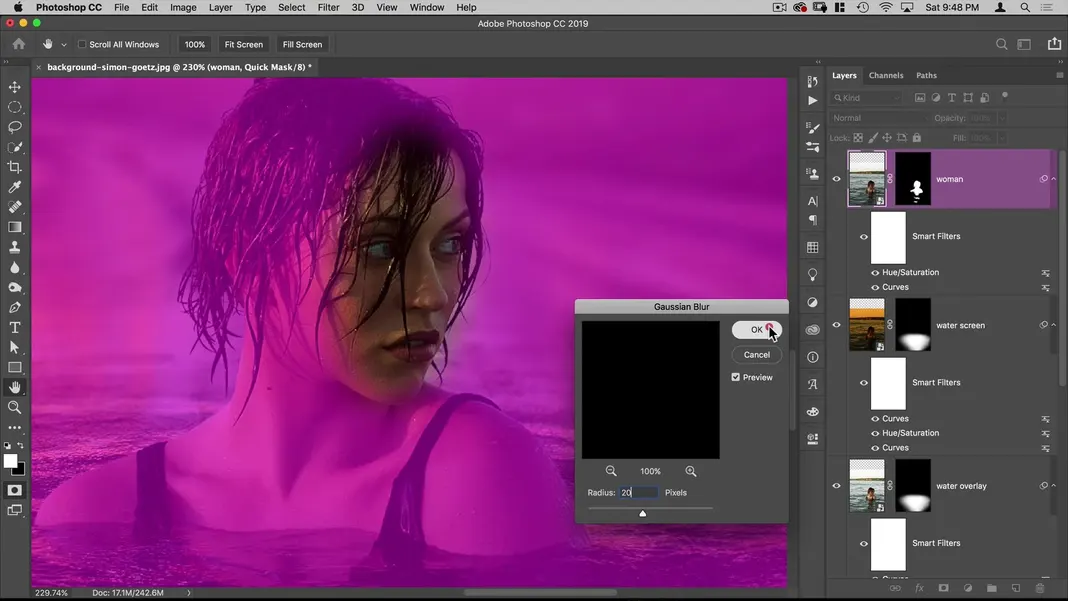
To brighten the woman’s face, start by switching to the Elliptical Marquee tool. Hold down Option and create an ellipse around her face to select it, just like we did when we removed the hotspot in the water in step 2.
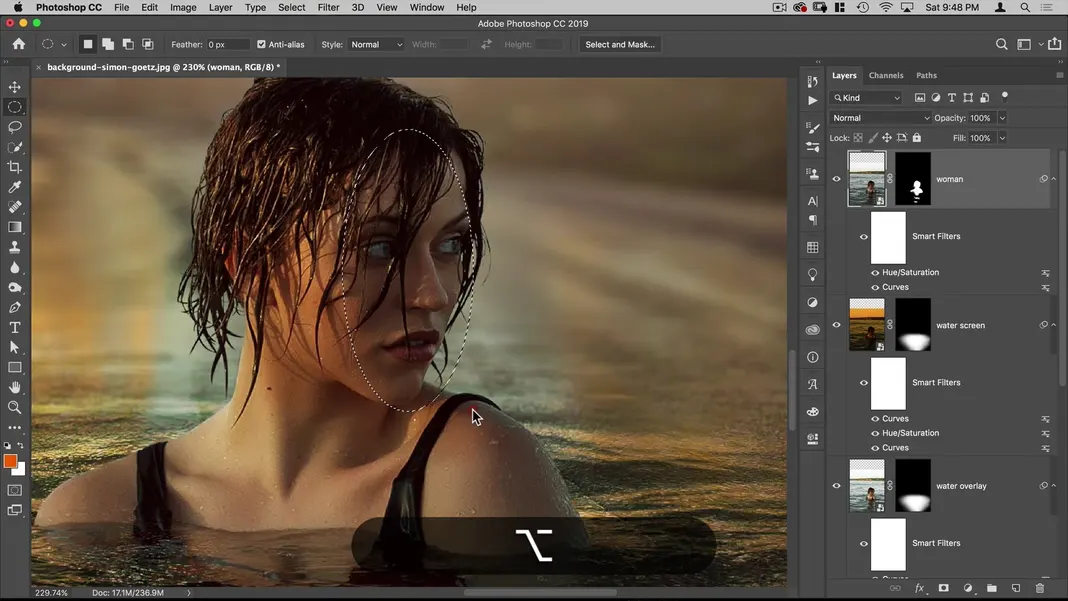
Then right-click on this selection and hit Transform Selection. (If you receive a pop-up message about Smart Filters, you can just hit OK.)
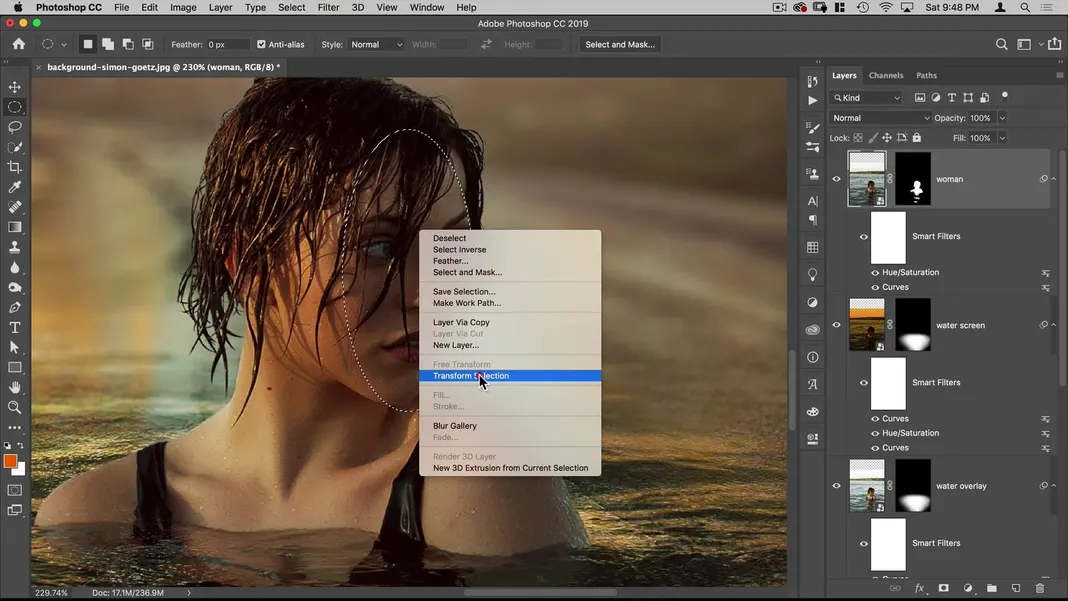
Transform the selection so that it perfectly fits around the subject’s face. My version of this selection transformation looks as follows.

Like before, we’ve created a hard-edged selection, so let’s feather the selection. To do this, hit Q to put us in quick mask mode.
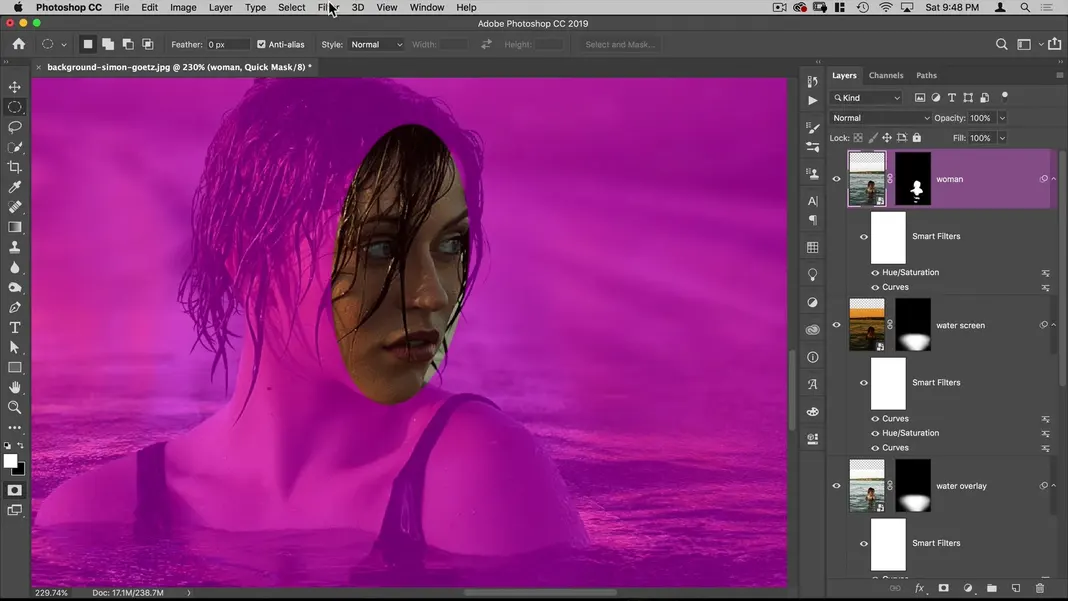
Navigate to Filter > Blur > Gaussian Blur.
Set the blur radius to around 20 pixels and hit OK.
Hit Q again to leave quick mask mode, and add a Curves adjustment to the layer.
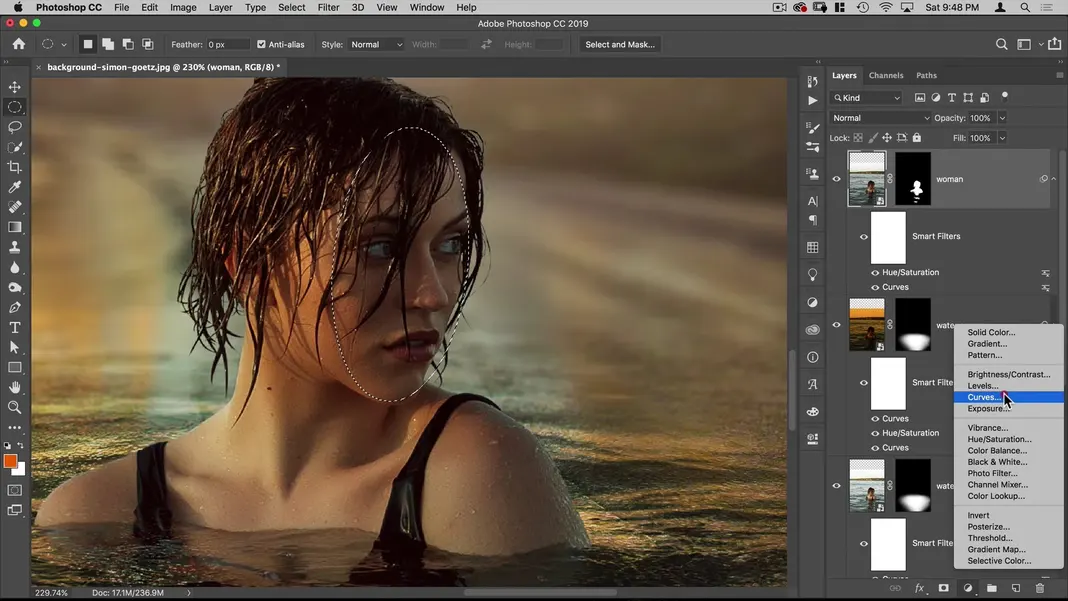
Since we have a selection, it will add that adjustment to our mask. Bring the curve up to brighten the woman’s face.
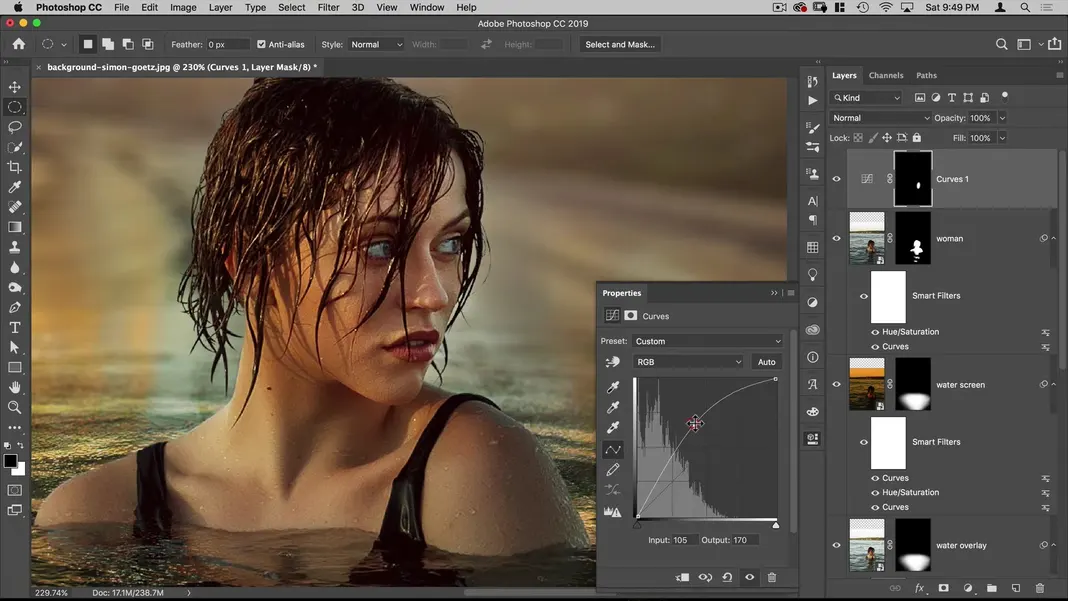
We can also try to add some yellow to this selection to match the golden cast we have throughout the rest of the image. Bring down the blue channel curve just a bit to add some orange.
Then bring up the red channel a bit.
Again, the goal is to match the golden cast from the sun on the water and the woman’s neck and shoulders. Here is what the image is looking like with those changes made.
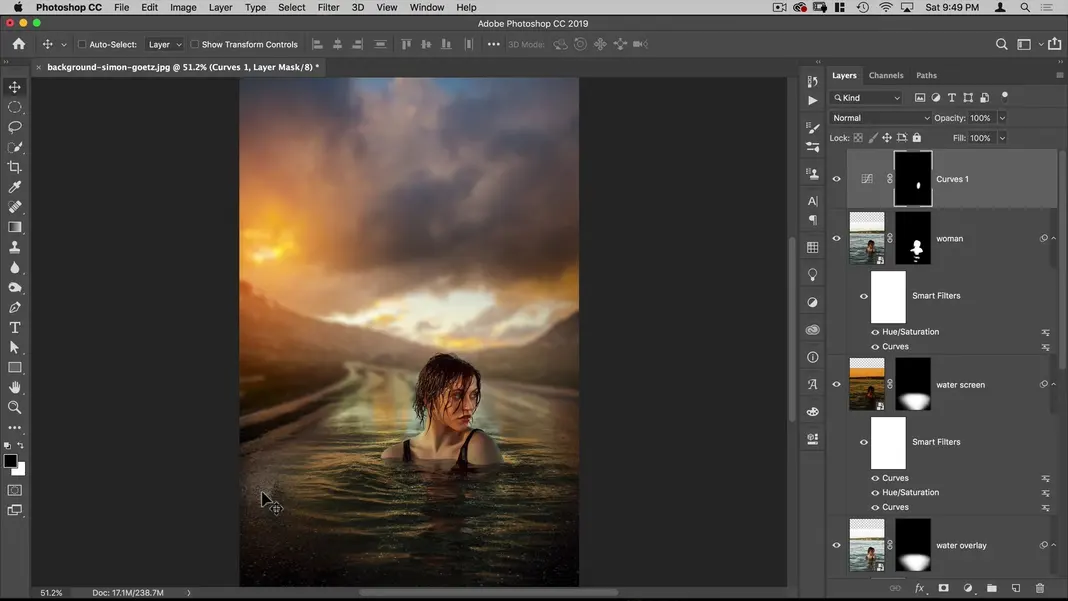
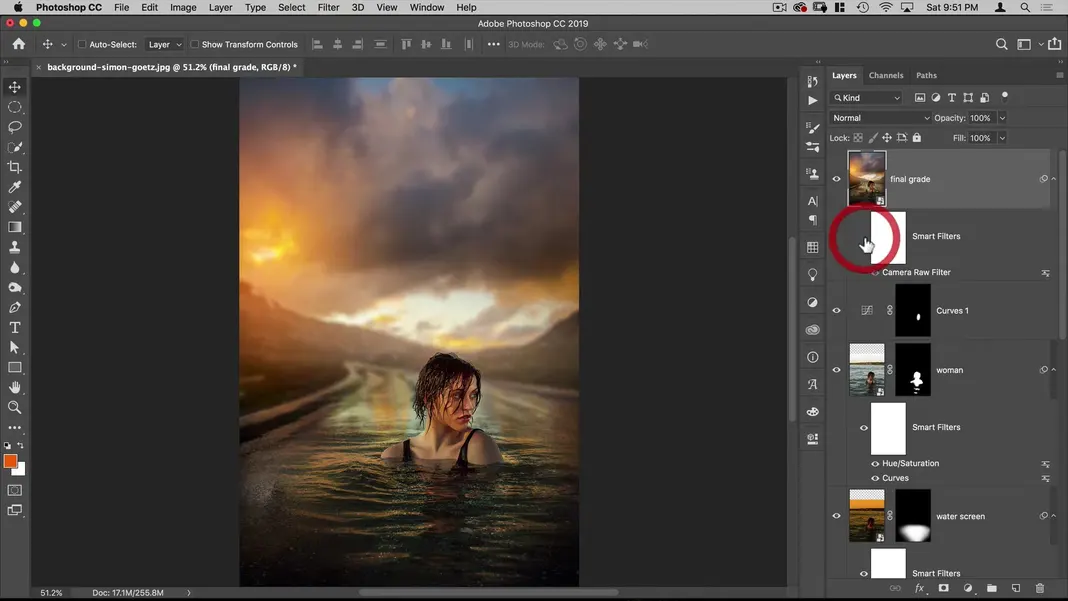
Step 10: Perform the final grade.
The last thing I’d like to do is perform a final color grade over the whole image. Let’s create a new layer and name it final grade.
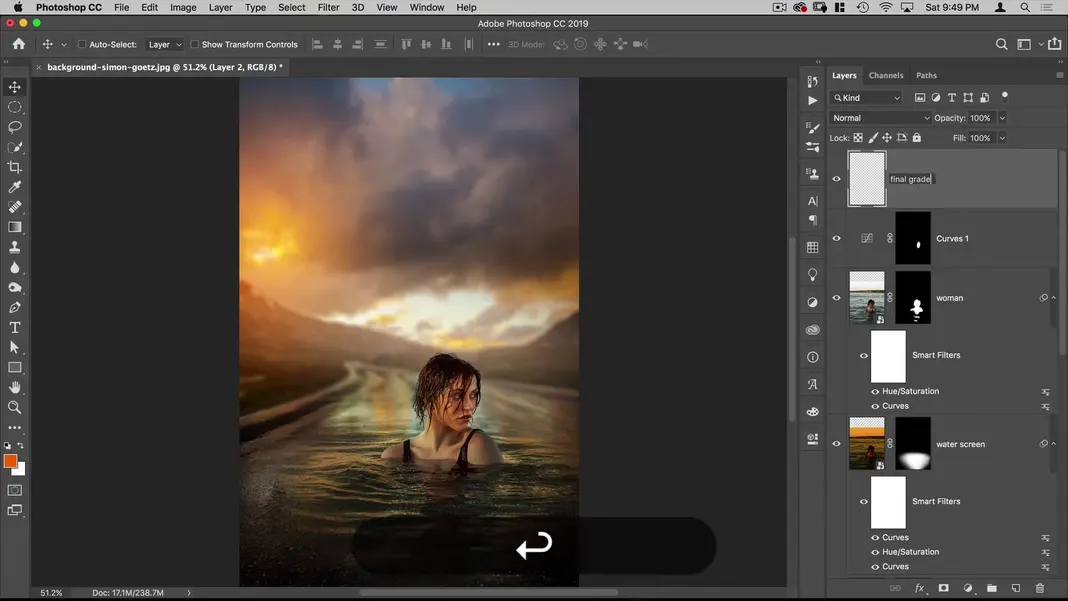
We want a copy of all of the existing layers in our empty final grade layer; to accomplish this, we can hit Shift + Option + Command + E.
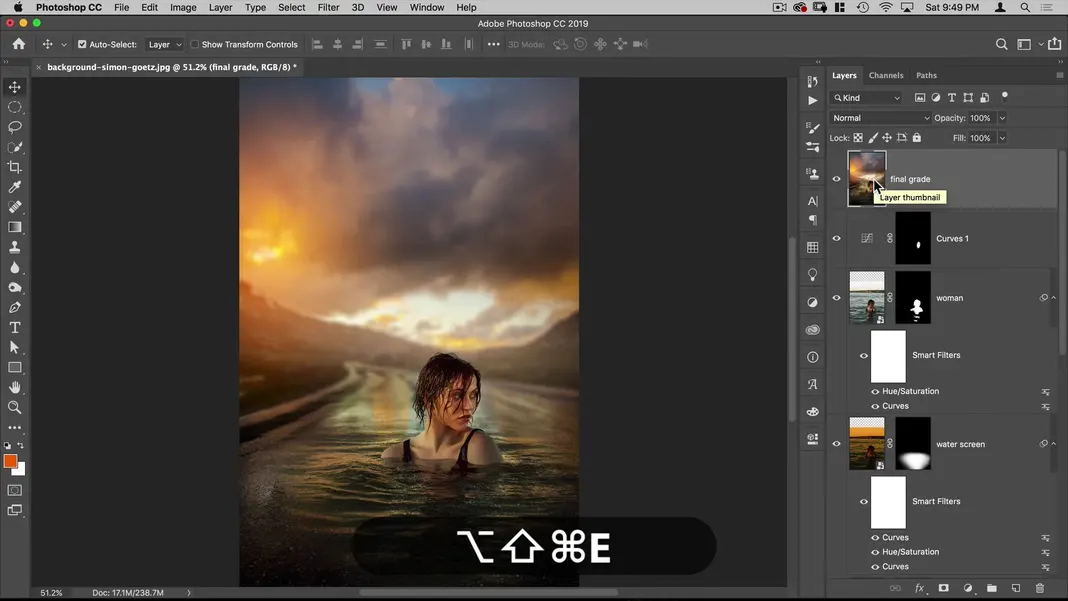
Now that everything is on one layer, we can right-click the final grade layer and Convert to Smart Object.
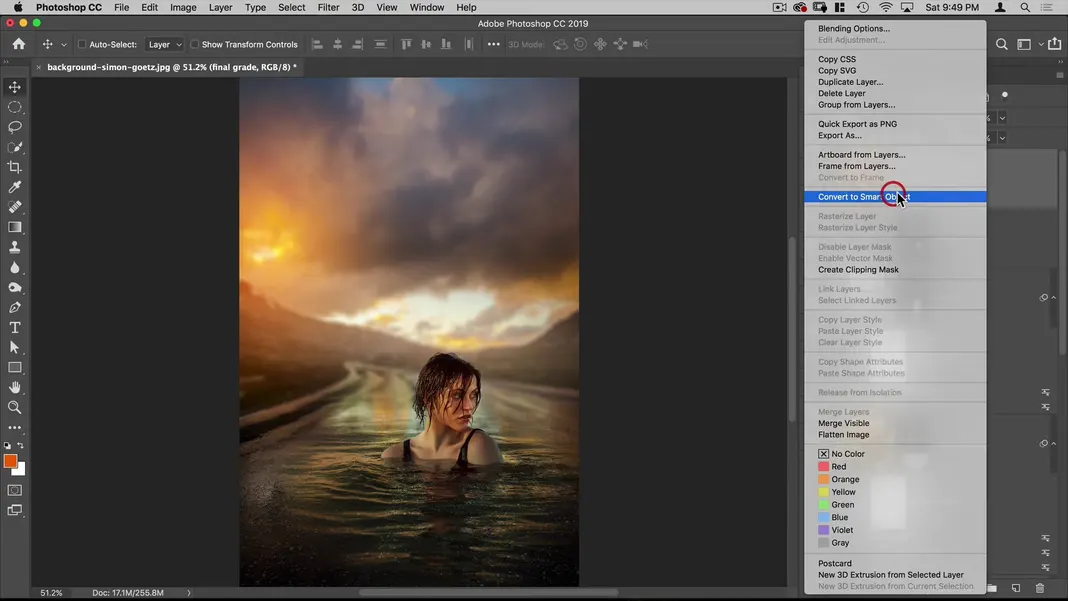
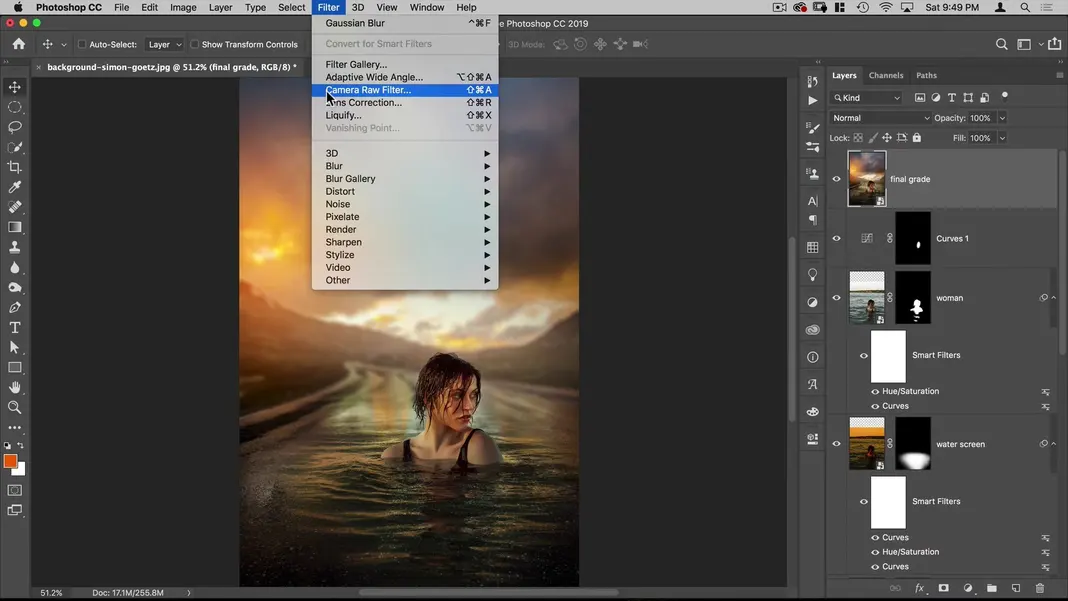
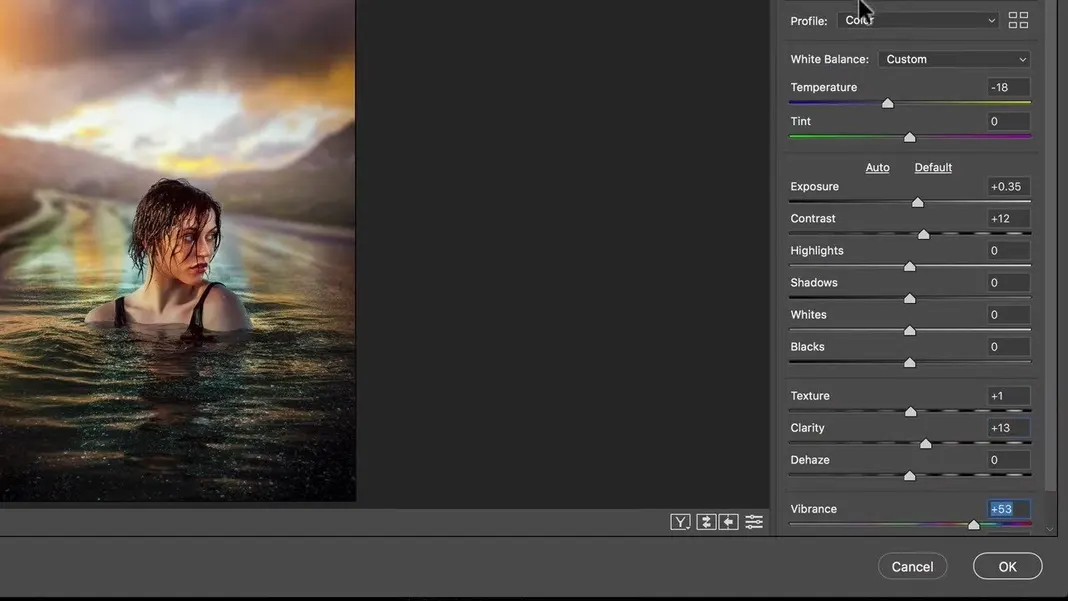
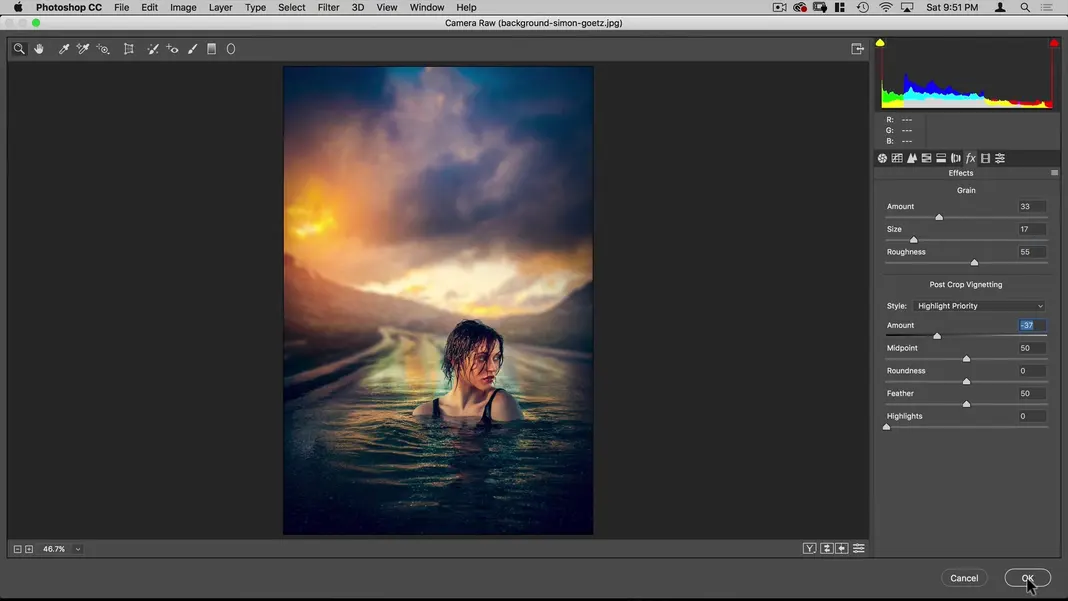
The reason I have converted this layer to a smart object is so that I can use any filters I add to it and just transfer it over if I want to. To that end, I will navigate to Filter > Camera Raw Filter.
The resulting filter interface should look like this.
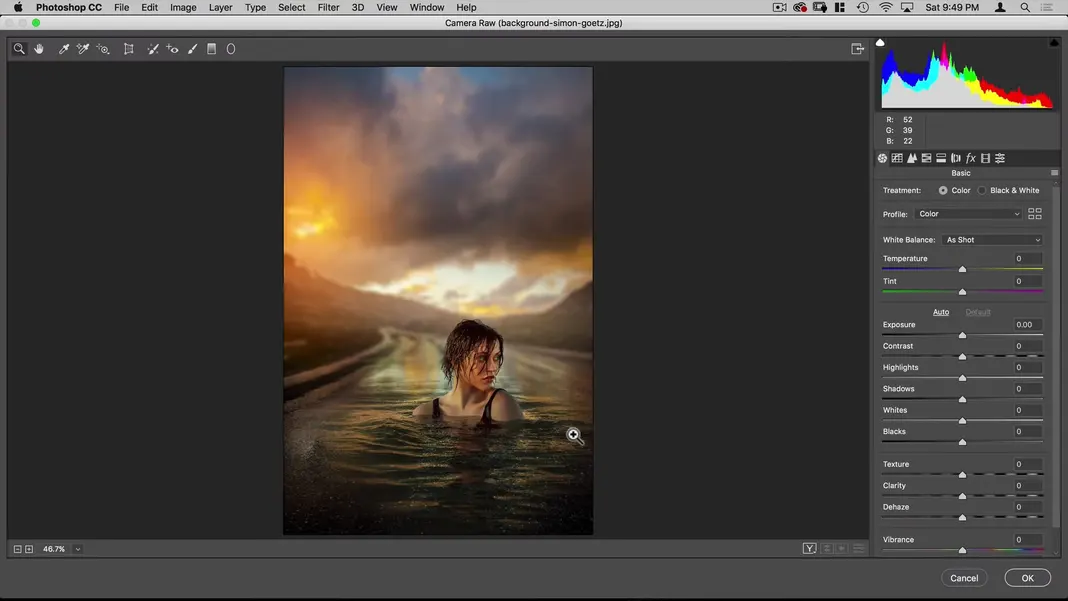
In this camera raw filter, I will turn down the overall temperature and turn up the exposure, contrast, texture, clarity, and vibrance to give the overall picture more a painted look.
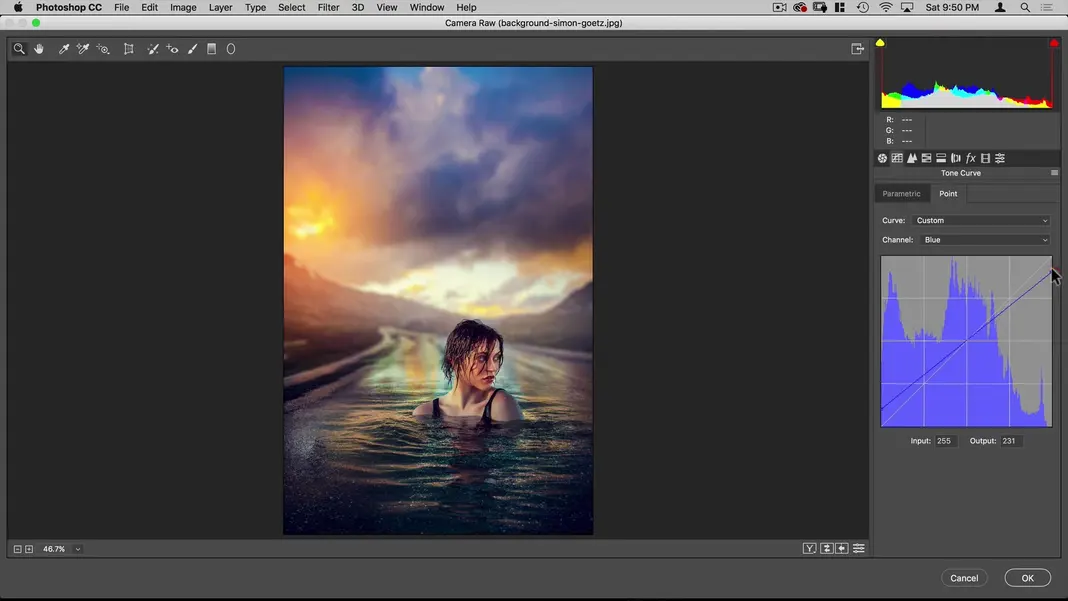
In that same filter, we can switch to the tone curve panel. Make sure we’re in Point mode so that we can split the RGB channels, and then modify the blue channel to bring up the darks and bring down the lights.
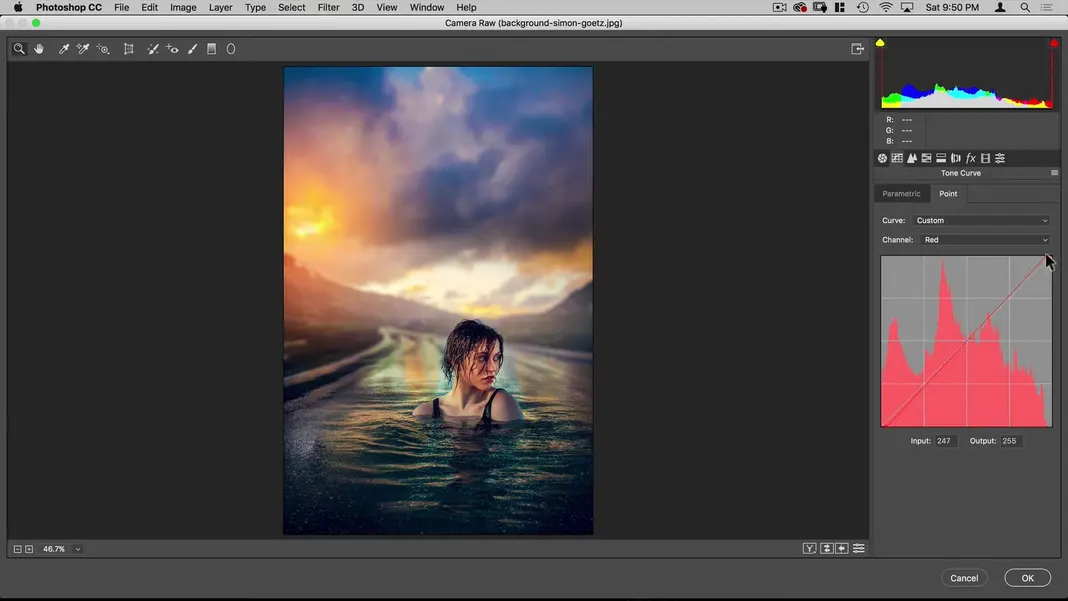
Then on the red channel, we can bring in the bottom and the top corners a bit as well.
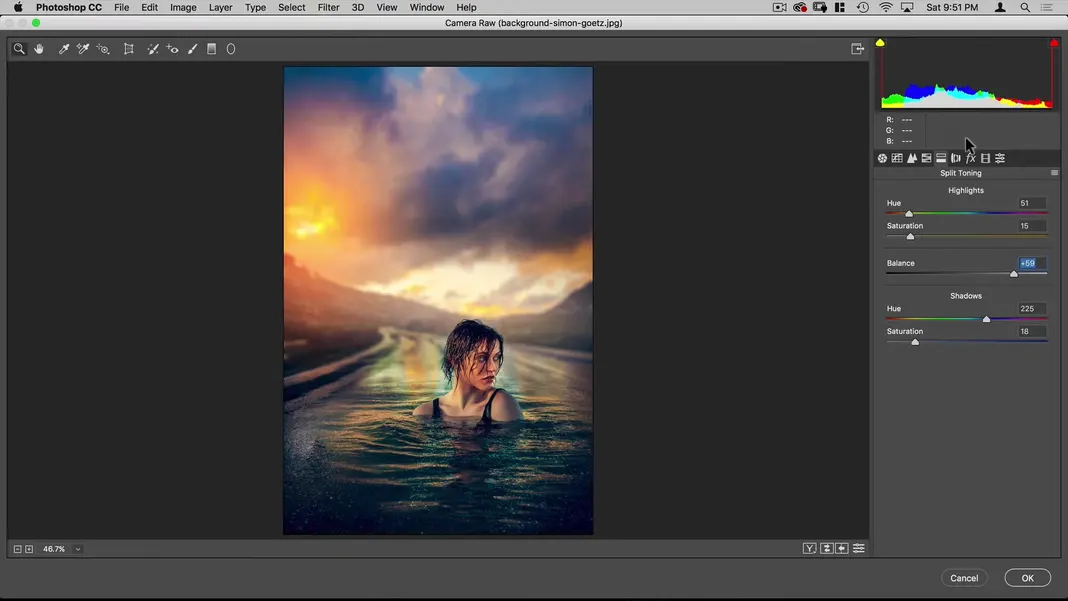
Next I’ll go to the split toning panel and add some gold into the highlights and some blue into the shadows. I’ll also push the shadow balance so that we’re getting a little more of that gold color.
Finally, in the effects panel, I’ll add some grain and some post crop vignetting, dialing in the exact settings to taste. Once that’s done, I’ll hit OK.
Here’s another look at what the image looked like before we applied these smart filters.
And here’s what it looks like after.

Those filters give the whole image a nice final grade to bring it all together and really bring it to life. And now at last, here’s our final result isolated.
I hope this tutorial gave you a thorough look at how to creatively blend and composite two images together in Photoshop. If you learned something today and would like to see more Photoshop tutorials, you can find more on my YouTube channel, so please subscribe and share with your friends.
I’ll see you all next time!