
In this Lightroom tutorial, I’m going to show you how to use the old “dodge and burn” trick on urban landscape images to turn an unassuming photograph into a dramatic showstopper! If you want the files used in this tutorial to follow along step-by-step, click below.
This post has been adapted from the following YouTube tutorial. Watch the video or just follow the steps as outlined below.
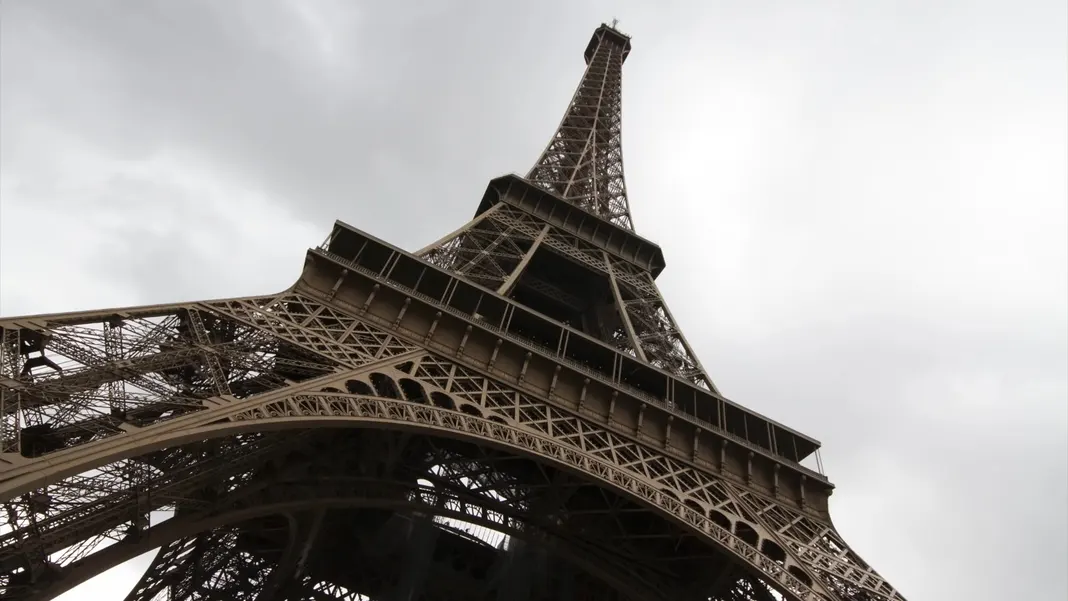
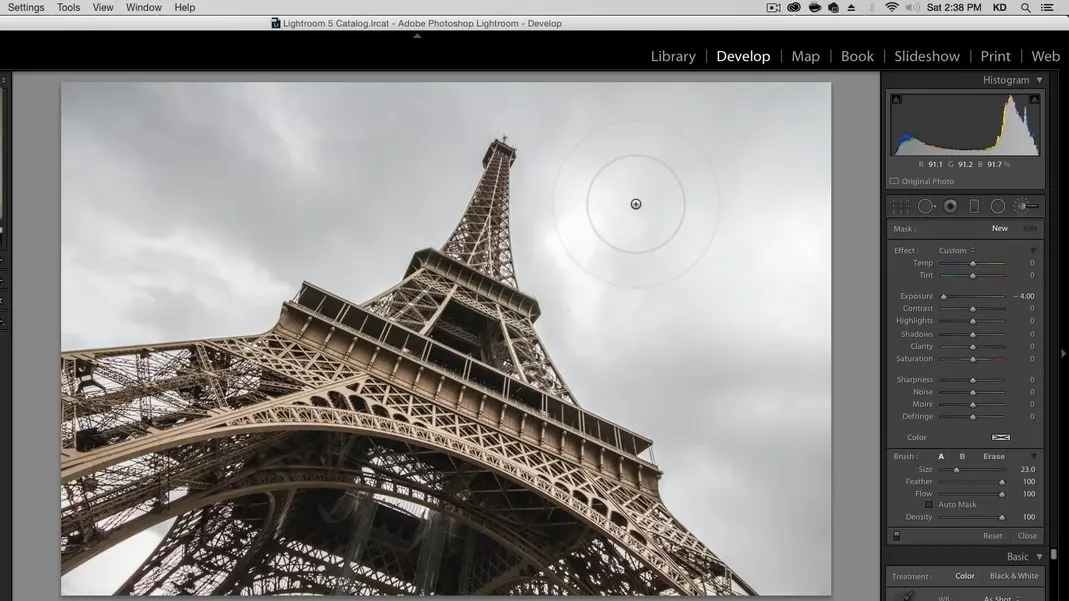
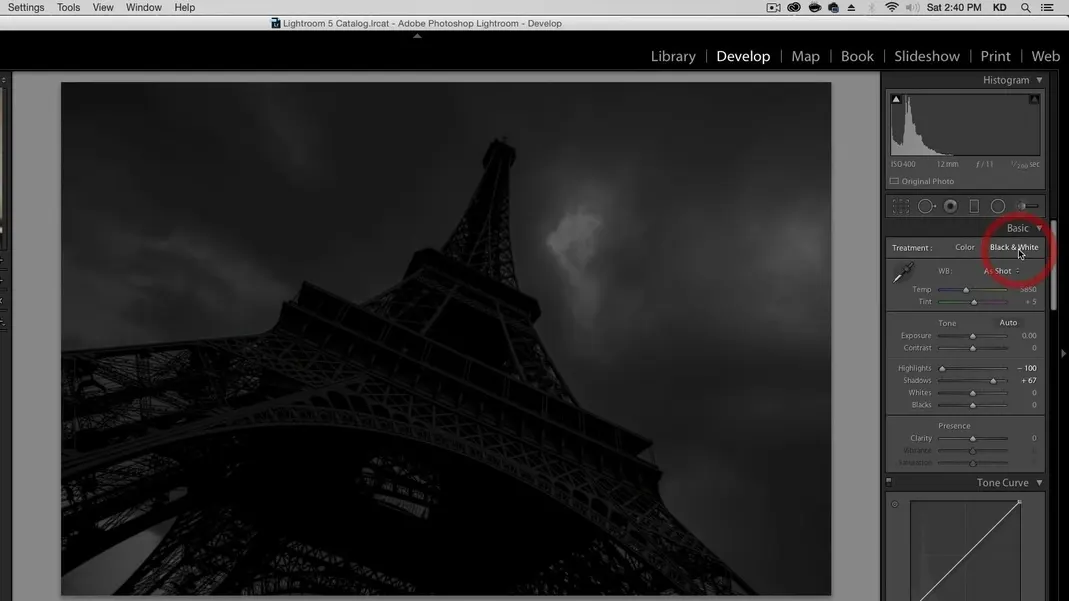
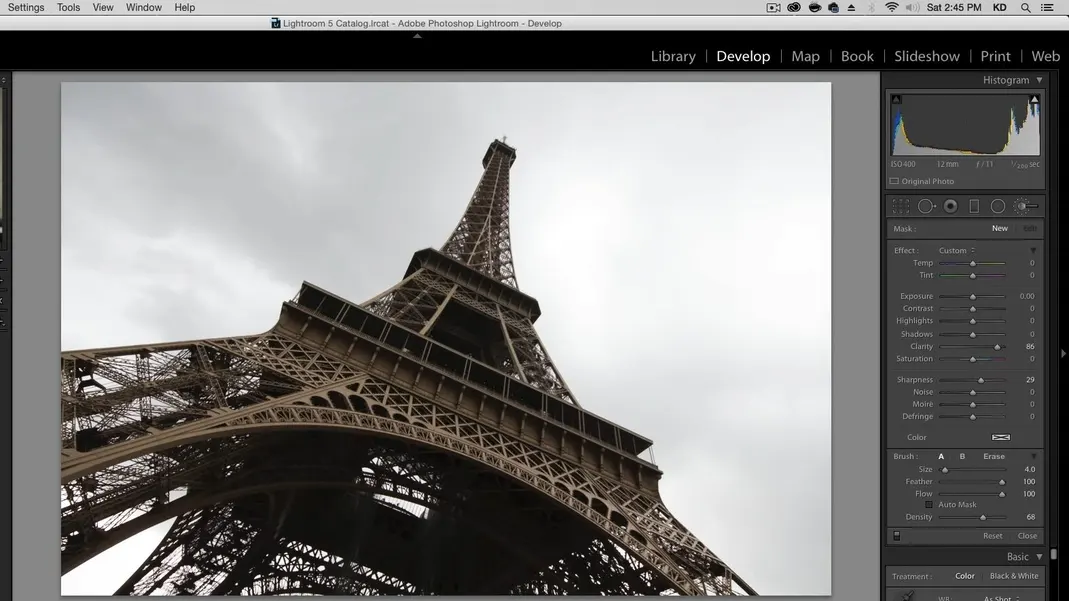
Now, let’s talk about how to dodge and burn urban landscape photos to black and white. Here’s the “Before” image we’ll be working with today:
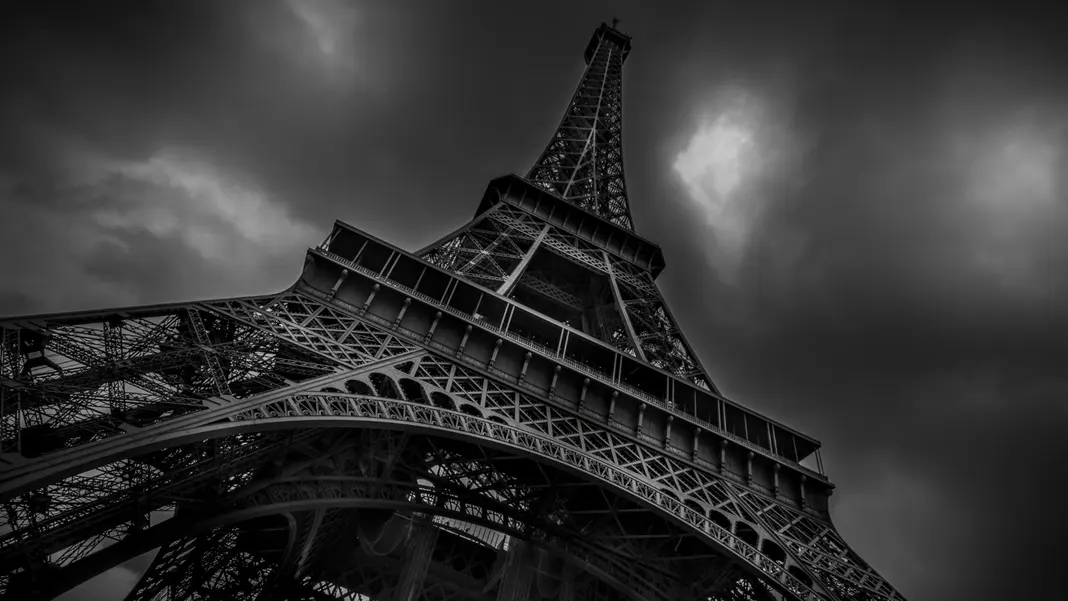
And here is the “After”:
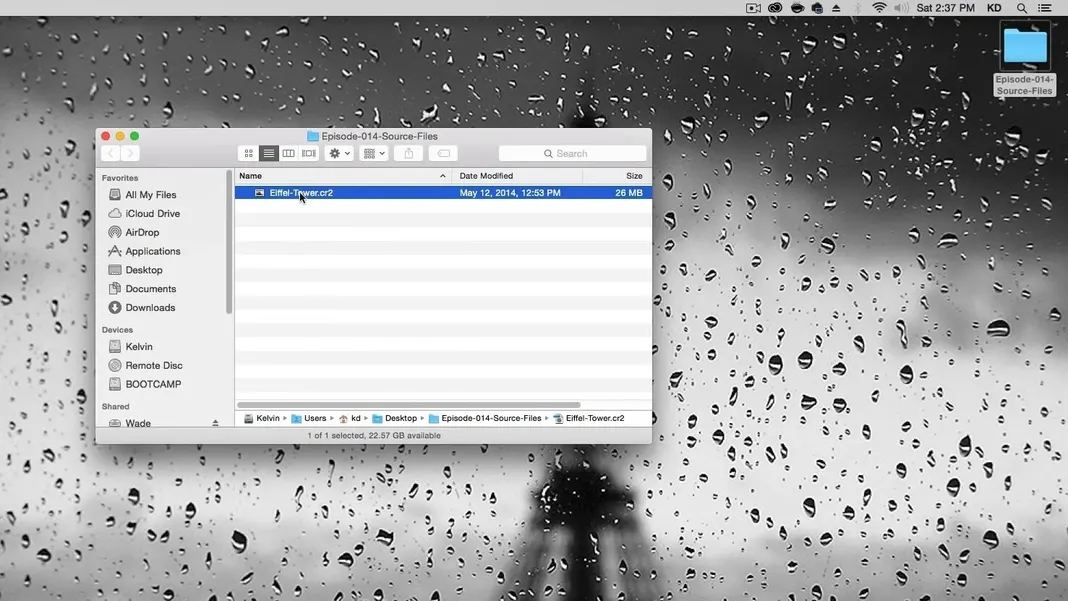
To get started, once you have downloaded the source files we will be working with today, you can navigate to the “Episode-014-Source-Files” folder and import the “Eiffel-Tower.cr2” file into Lightroom.
The first thing we’ll do within the Develop module in Lightroom is bring down the highlights and bring up the shadows.
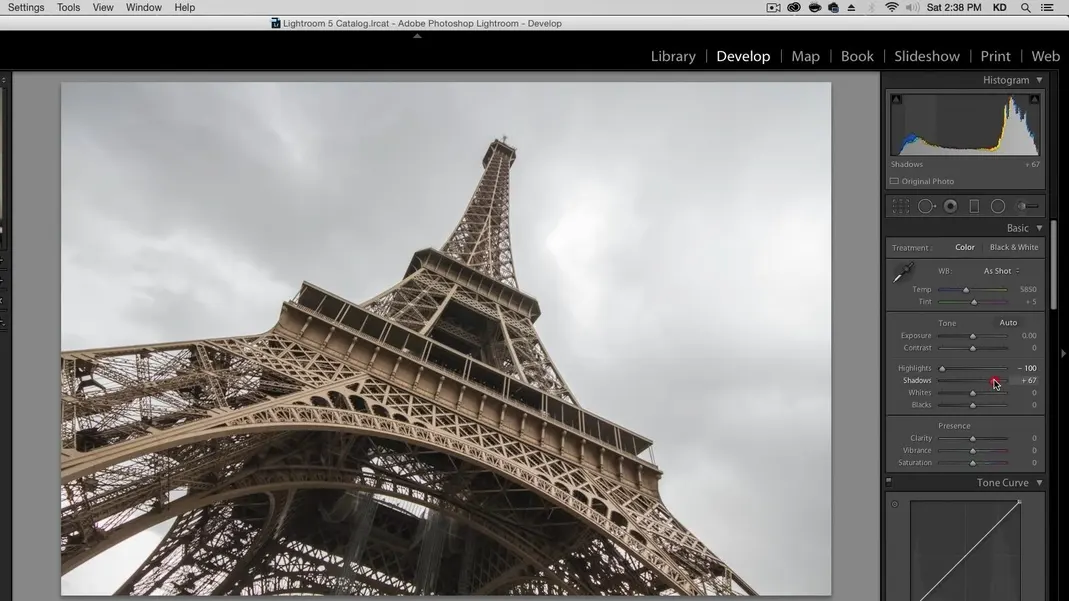
I don’t want to bring the shadows up too much—we want to keep some of the contrast in the picture—so this should do fine. Next let’s also subtly bring up the clarity some.

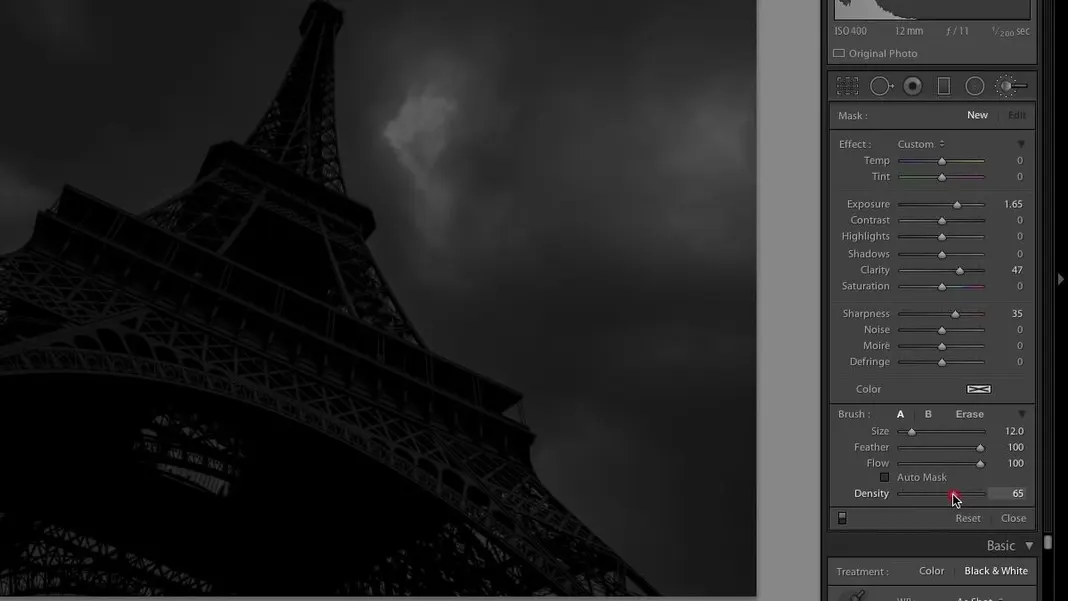
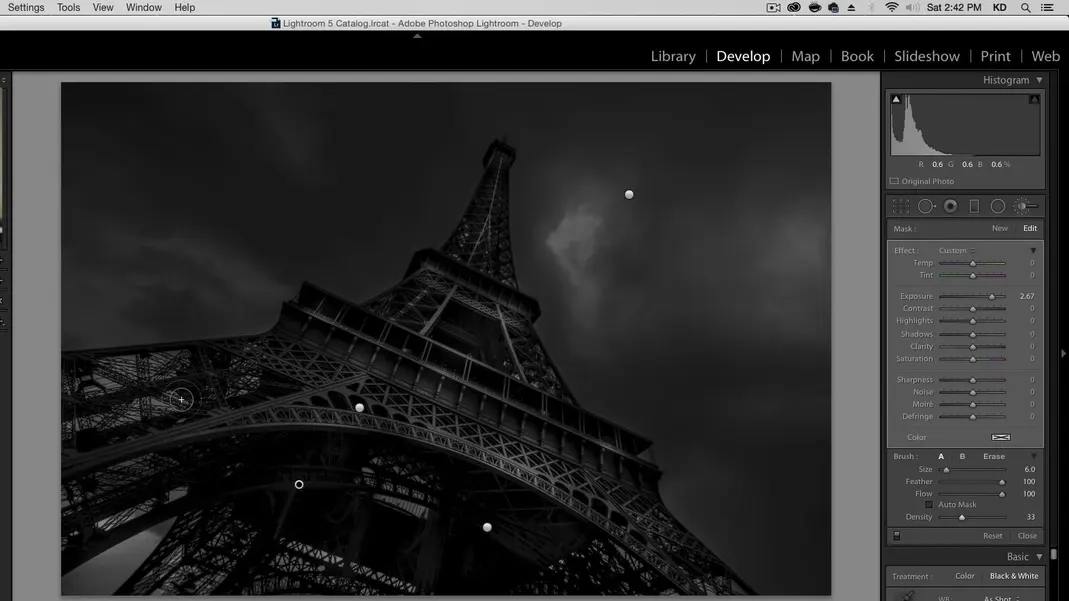
Next, create a brush. Click the Adjustment Brush tool, bring the exposure down to -4.00, and bring the density up to 100.
Scroll to increase the size of the brush and then fill in the entire image. We should end up with something like the below result.
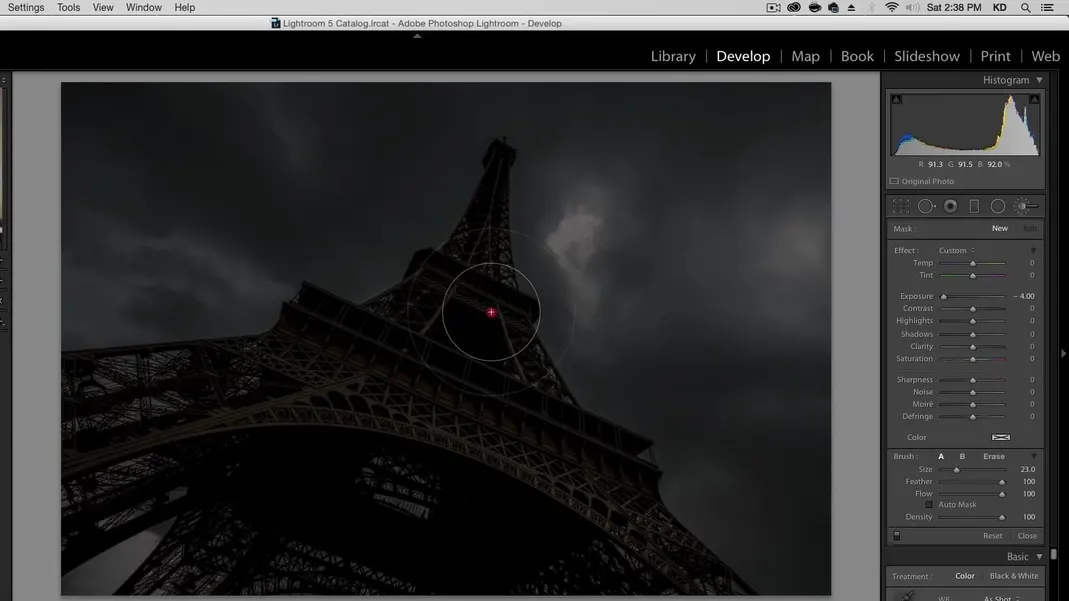
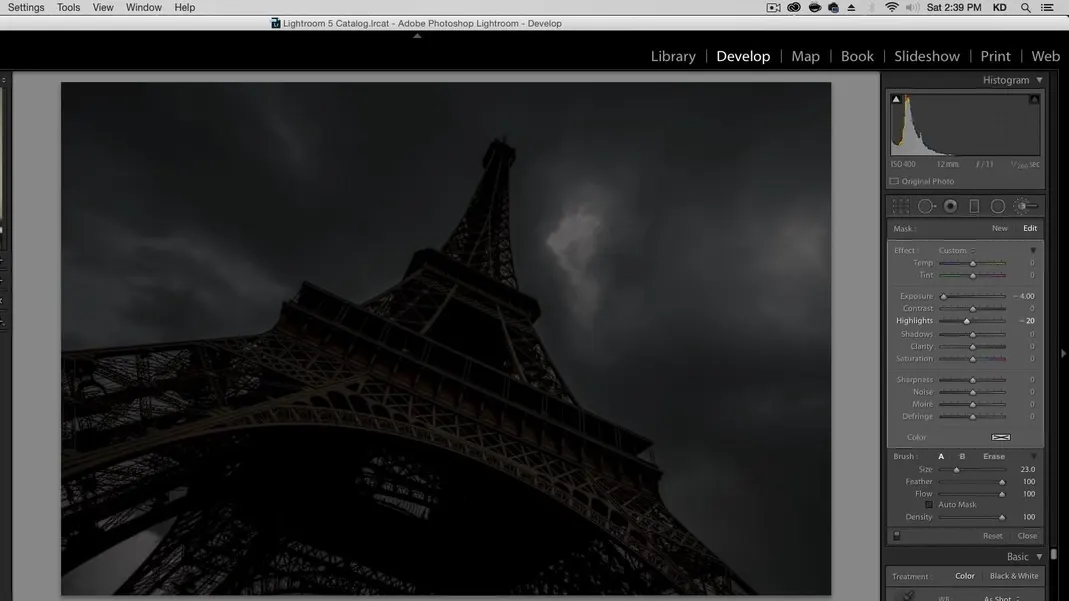
We’re using a brush to do this so that if we want to down the considerable exposure-lowering effect this has in some spots, we’ll be able to do so. Also, note that we were actually able to bring a lot of detail into what previously looked like a completely blown out sky, which is great. To bring in a bit more detail, I’ll reduce the highlights property on this brush to -20.
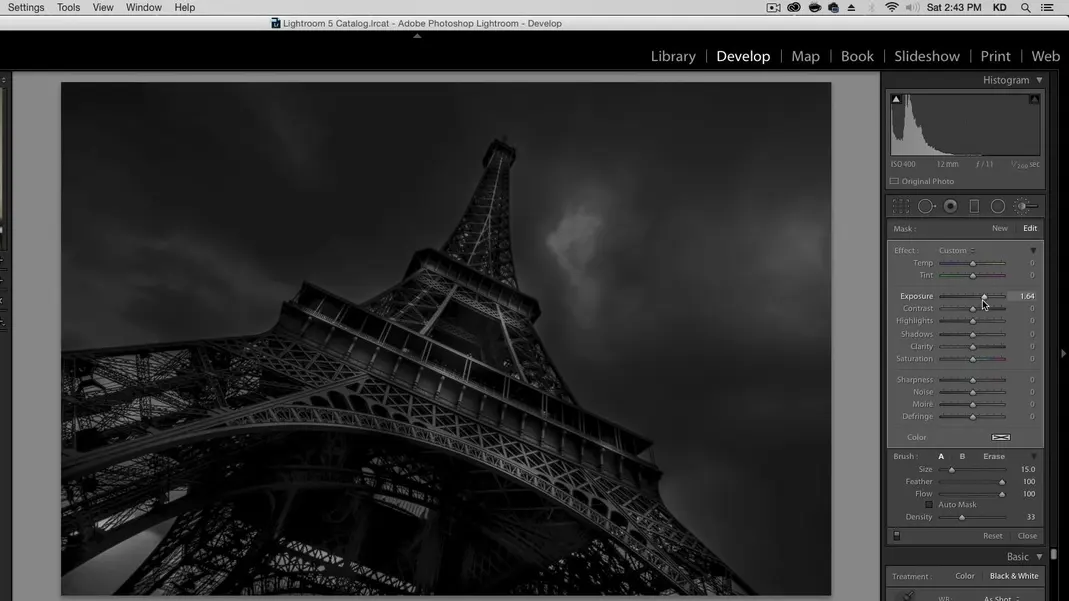
One thing you may notice is that the tower has a bit of a faint glowing outline circling the whole thing; increasing the clarity property has a tendency to do that, so let’s bring the clarity on the overall image back down to 0. We’ll modify the clarity on a brush level instead. I like to darken the whole canvas as much as I will need to and then decide where I would like to bring light back in, so it’s okay if the image looks too dark right now.
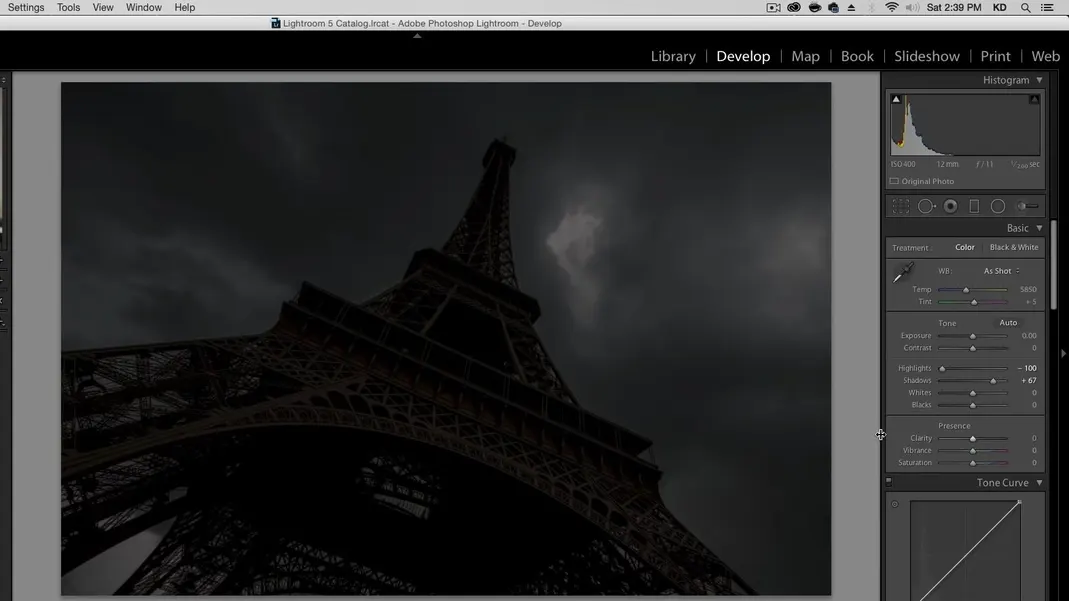
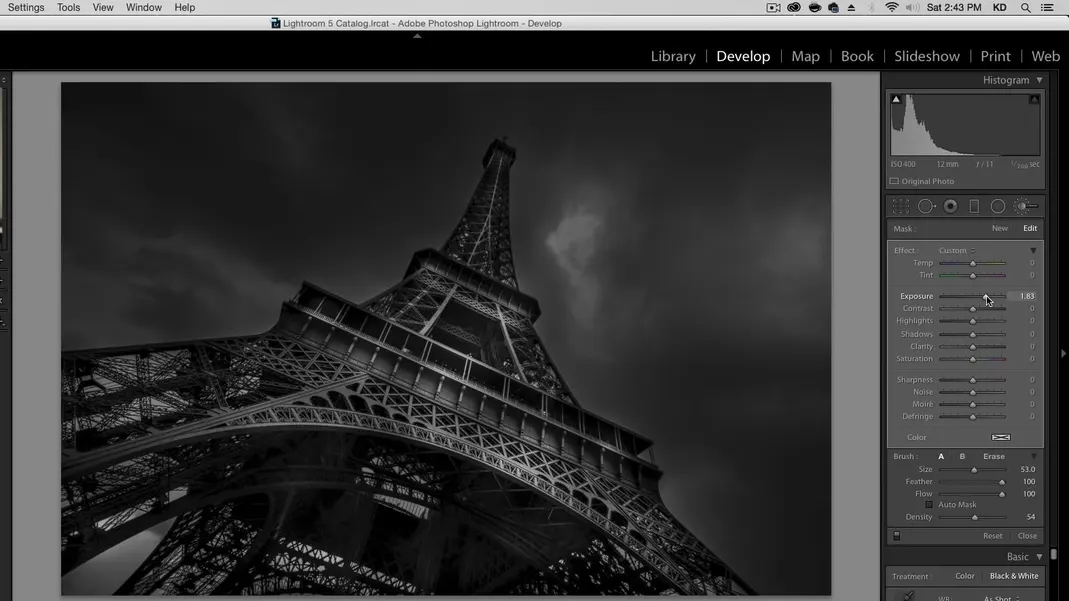
Click on Black & White to automatically attribute Lightroom’s default black and white settings.
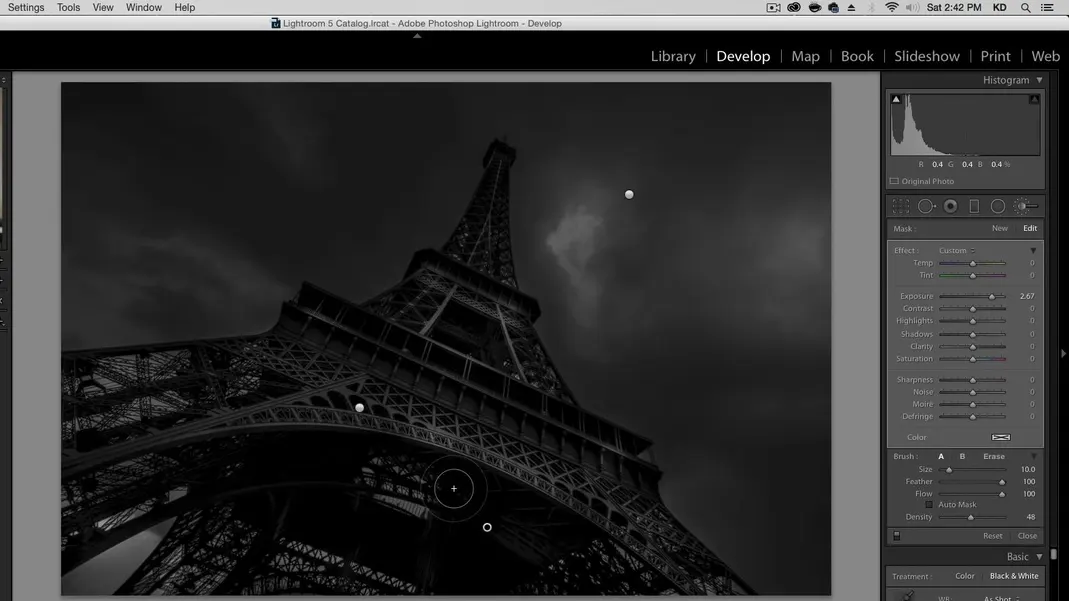
Go back to the Adjustment Brush tool and select New to create a new brush. Slightly increase the exposure, sharpness, and clarity. I will also decrease the density by a bit; if I were using a tablet then the density would be sensitive to the amount of pressure I used, but since I am using a computer and a mouse I need to manually adjust it through the setting.
I’ll now paint in the tower itself to raise the exposure, sharpness, and clarity on the areas that I’d like to bring some light back in. Since I have increased the clarity on this brush, I’ll stay away from the edges of the tower and keep to the inside to avoid creating the halo effect we saw earlier. After painting in the tower, my image looks like this.

Let’s now create another new brush by clicking the Adjustment Brush tool and selecting New. For this one, we don’t want any of the sharpness or clarity—just higher exposure. We can also decrease the density further to make the brush softer.

We can use this brush to target some of the darkest spots of the tower to bring back in some detail, such as the underside of the tower that looks almost black, and some of the ledges and corners of the tower that are in shadow.
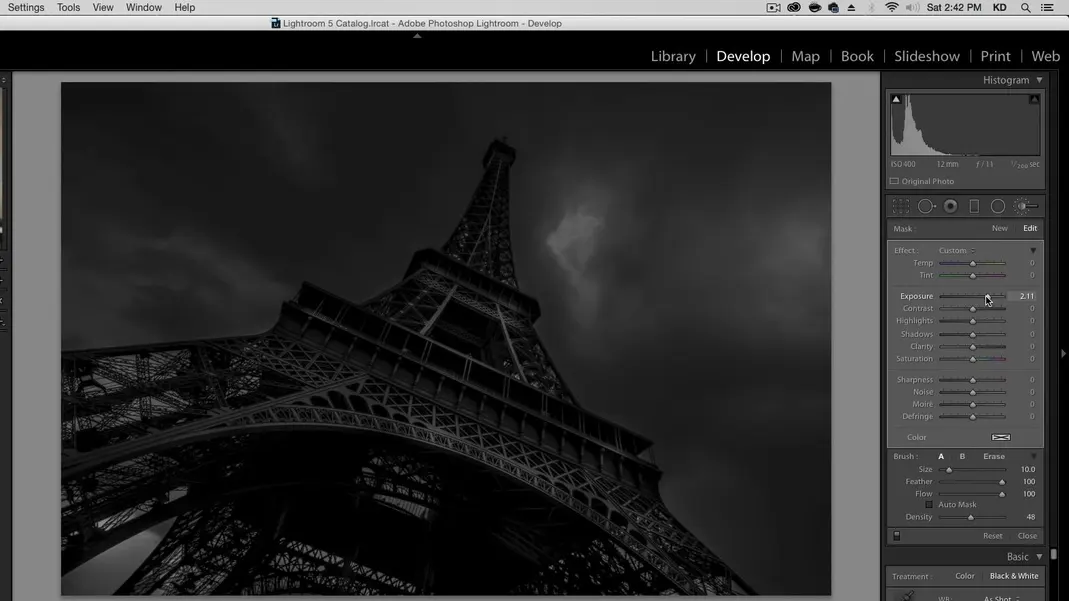
You can adjust the exposure on this brush after making these changes as well to get your desired effect. I like to make these changes in layers, so I’ll adjust the exposure so the effect of this one layer of brushstrokes isn’t so heavy.
Let’s create another new brush with similar settings and continue painting in sections of the tower. The goal here is to increase the complexity of the light in our photo, because that makes the photo more interesting.
I’ll create another new brush with slightly softer exposure and go in to create larger, softer light sources throughout the image, resulting in something like this.
Time for another new brush, this time with even softer exposure. For this one, I will make the brush huge and put in one large light source right in the middle of the image.

With a couple more brushstrokes to either side of this point and an adjustment of the exposure, I end up with this result.
One more new brush, this time with no exposure but increased sharpness, clarity (more clarity than sharpness), and density.
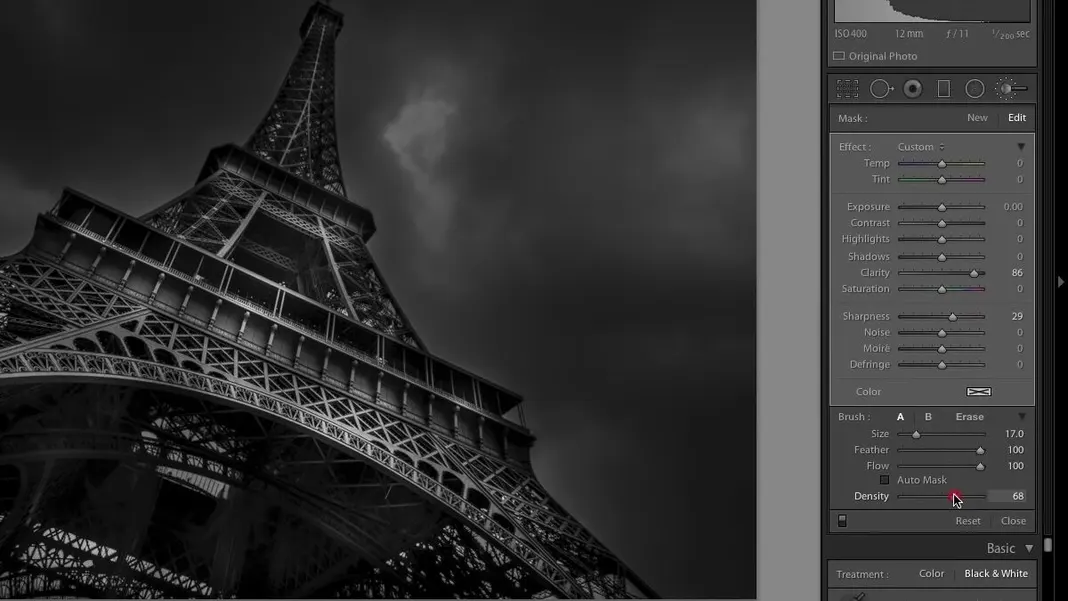
I’ll use this brush to paint in just the front of the tower to give it a sharp steel texture and separate it from the back, which almost gives the image a shallow depth of field look. Remember, since this brush has a high clarity setting, be careful to avoid the edges of the tower so we don’t introduce the glowing effect.
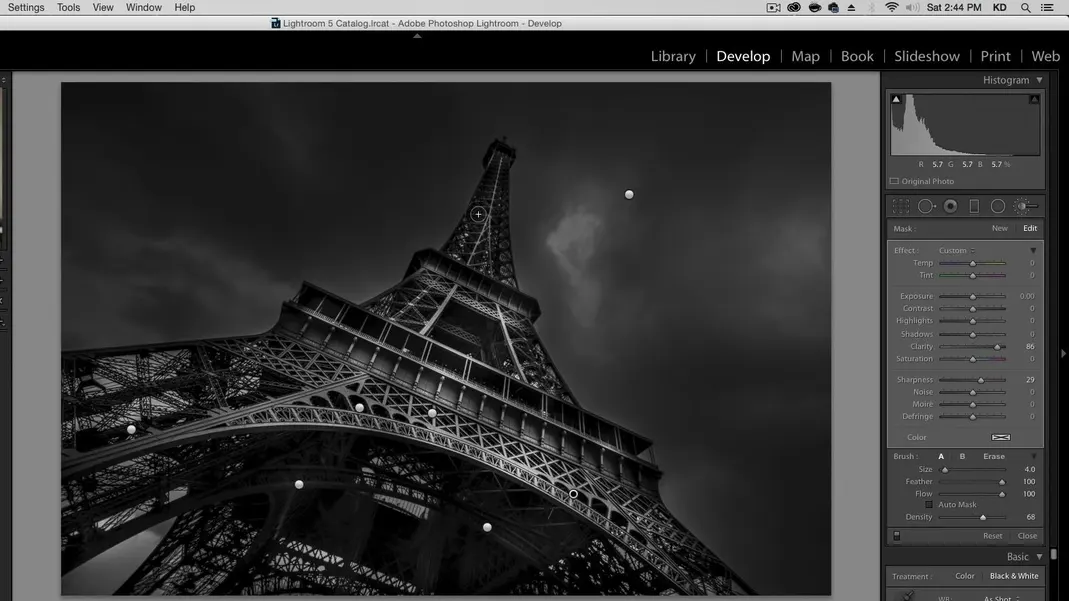
I’m liking how this is looking. It can be easy to lose track of the changes we’ve made, so let’s look at a before and after of our changes so far. Here’s our before.
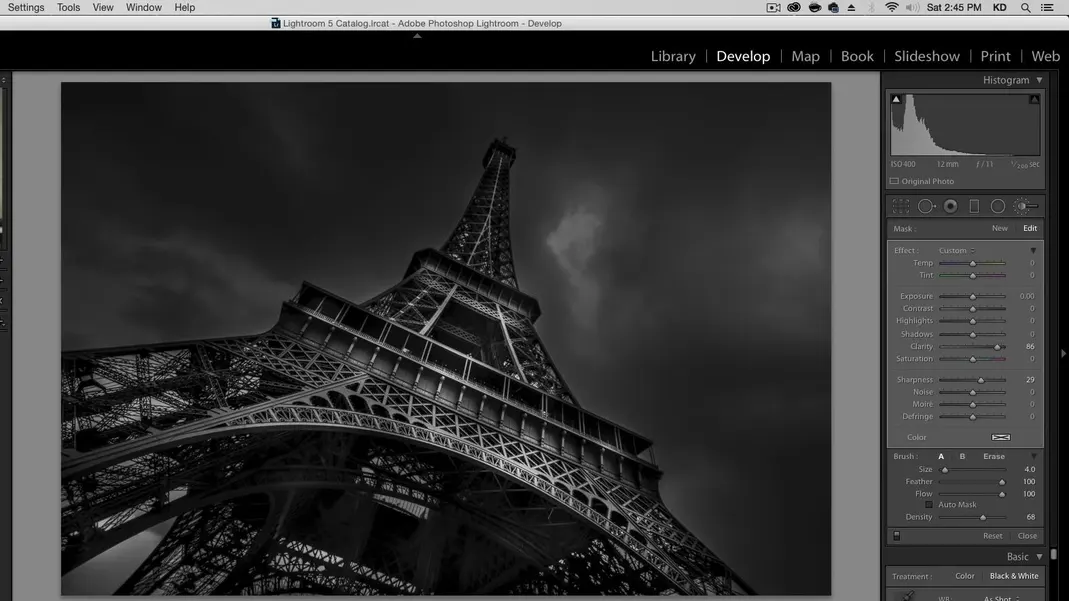
And here’s our after.
Hopefully you agree that this is looking great. The trick is to darken the entire image and slowly introduce layers of light exactly where we want them. In fact, I think there are a few places, especially on the underside of the tower, that should be darker than they look right now. We can easily correct this by using the negative brush. First, select the adjustment brush pin for the brushstrokes we want to edit. A red overlay showing the brushstrokes for that brush should appear.
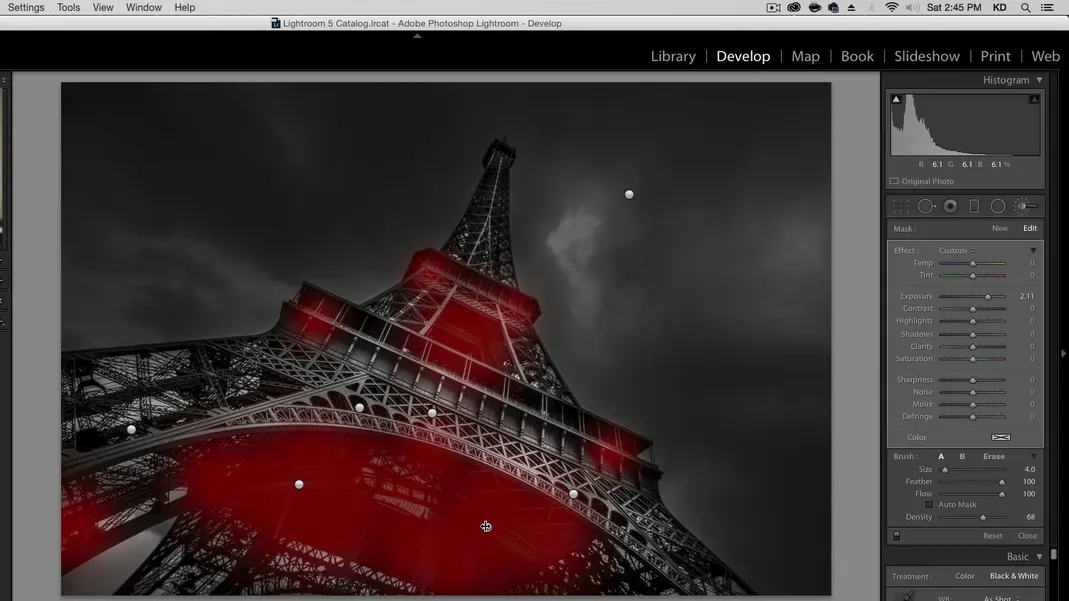
Hold the Alt key to use the negative brush, and brush in the areas we want to darken to remove some of the lightening effect we’ve added. I’ll focus my changes for this brush on the underside of the tower.

I’ll do the same with the other adjustment brush pin on the underside of the tower.
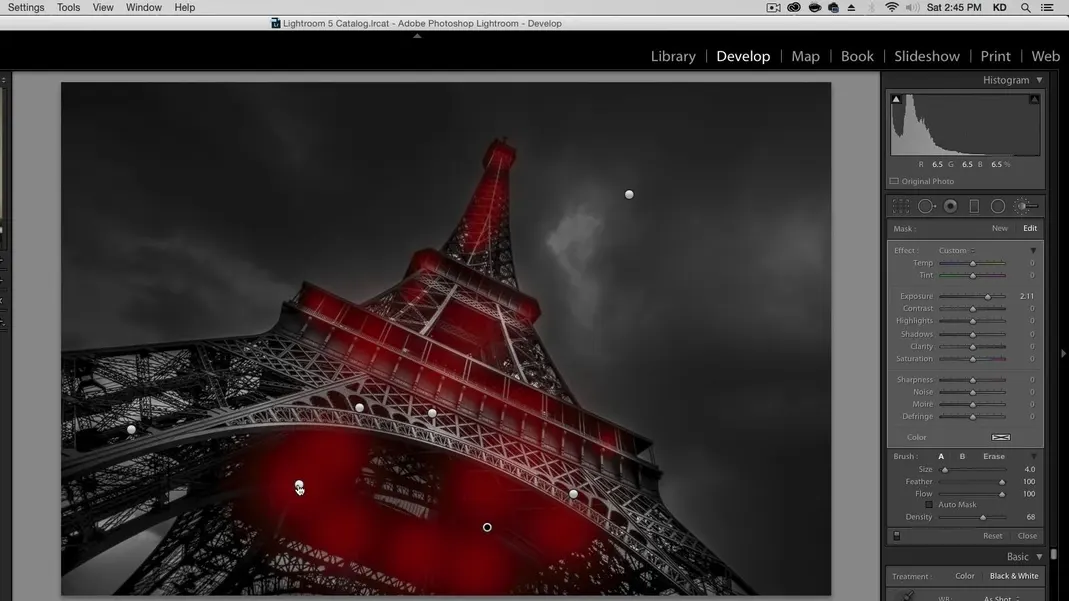
After our final brushstrokes, here’s how our image looks.
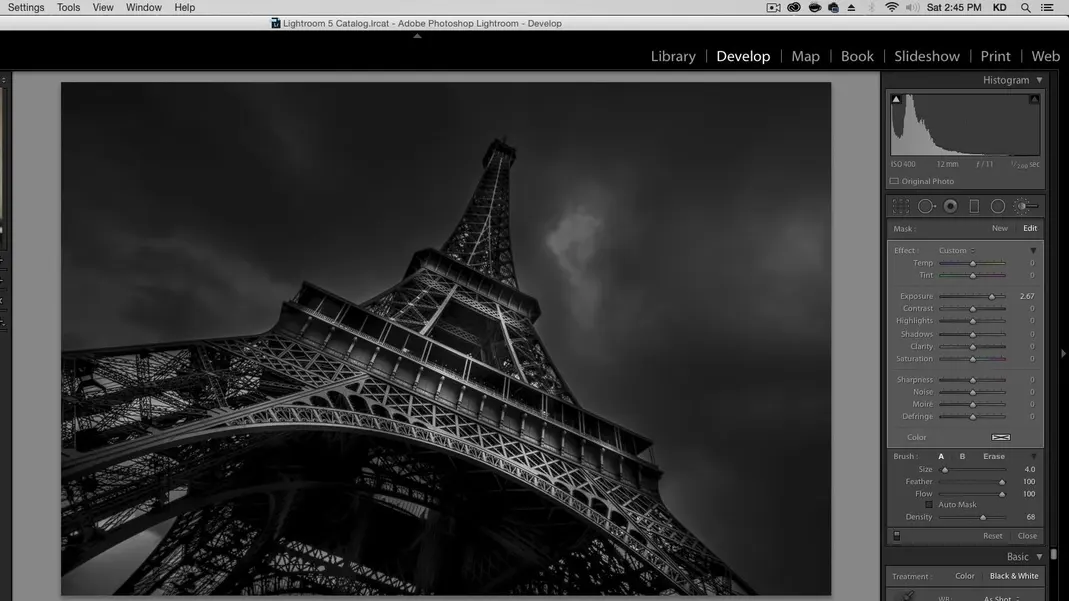
And that’s it! As a reminder, here’s where we started.
And here’s our final result!
Hopefully this gave you a good look at how to get the dodge and burn effect on an urban landscape photo to get a more interesting picture. The trick is to darken the image and build up layers of lightness and clarity in gradients, and then go back and tone down any overedited sections. If you learned something about dodge and burning here and would like to see more Lightroom and Photoshop tutorials, you can find more on my YouTube channel, so please subscribe and share with your friends.
I’ll see you all next time!