
In this tutorial I cover how overcome a handful of common problems people face in their photography journey, whether they’ve just started out or maybe have been at it for a few years. I’m going to break down these problems one by one, explaining the most likely cause, and how to overcome common Landscape Photography problems.
If you want to learn more on composition get my free Masterclass.
Problem #1: Loss of Detail in the Image, Particularly in the Sky
Cause:
The cause of this is basically the image being overexposed, and the most likely reason is if you’re shooting in either auto mode or aperture priority. The camera is most likely metering for the darker tones, not really considering the sky, and when it takes the exposure, the sky becomes overexposed.
Solution:
- Learn Manual Mode and the Exposure Triangle: This can be a great way to understand how to expose the image while keeping in mind the highlights in the sky. You can either look this up on YouTube or check out some tutorials to learn manual mode step by step.
- Use Exposure Compensation: Adjust the exposure compensation to prevent overexposure of the sky while staying in auto mode.
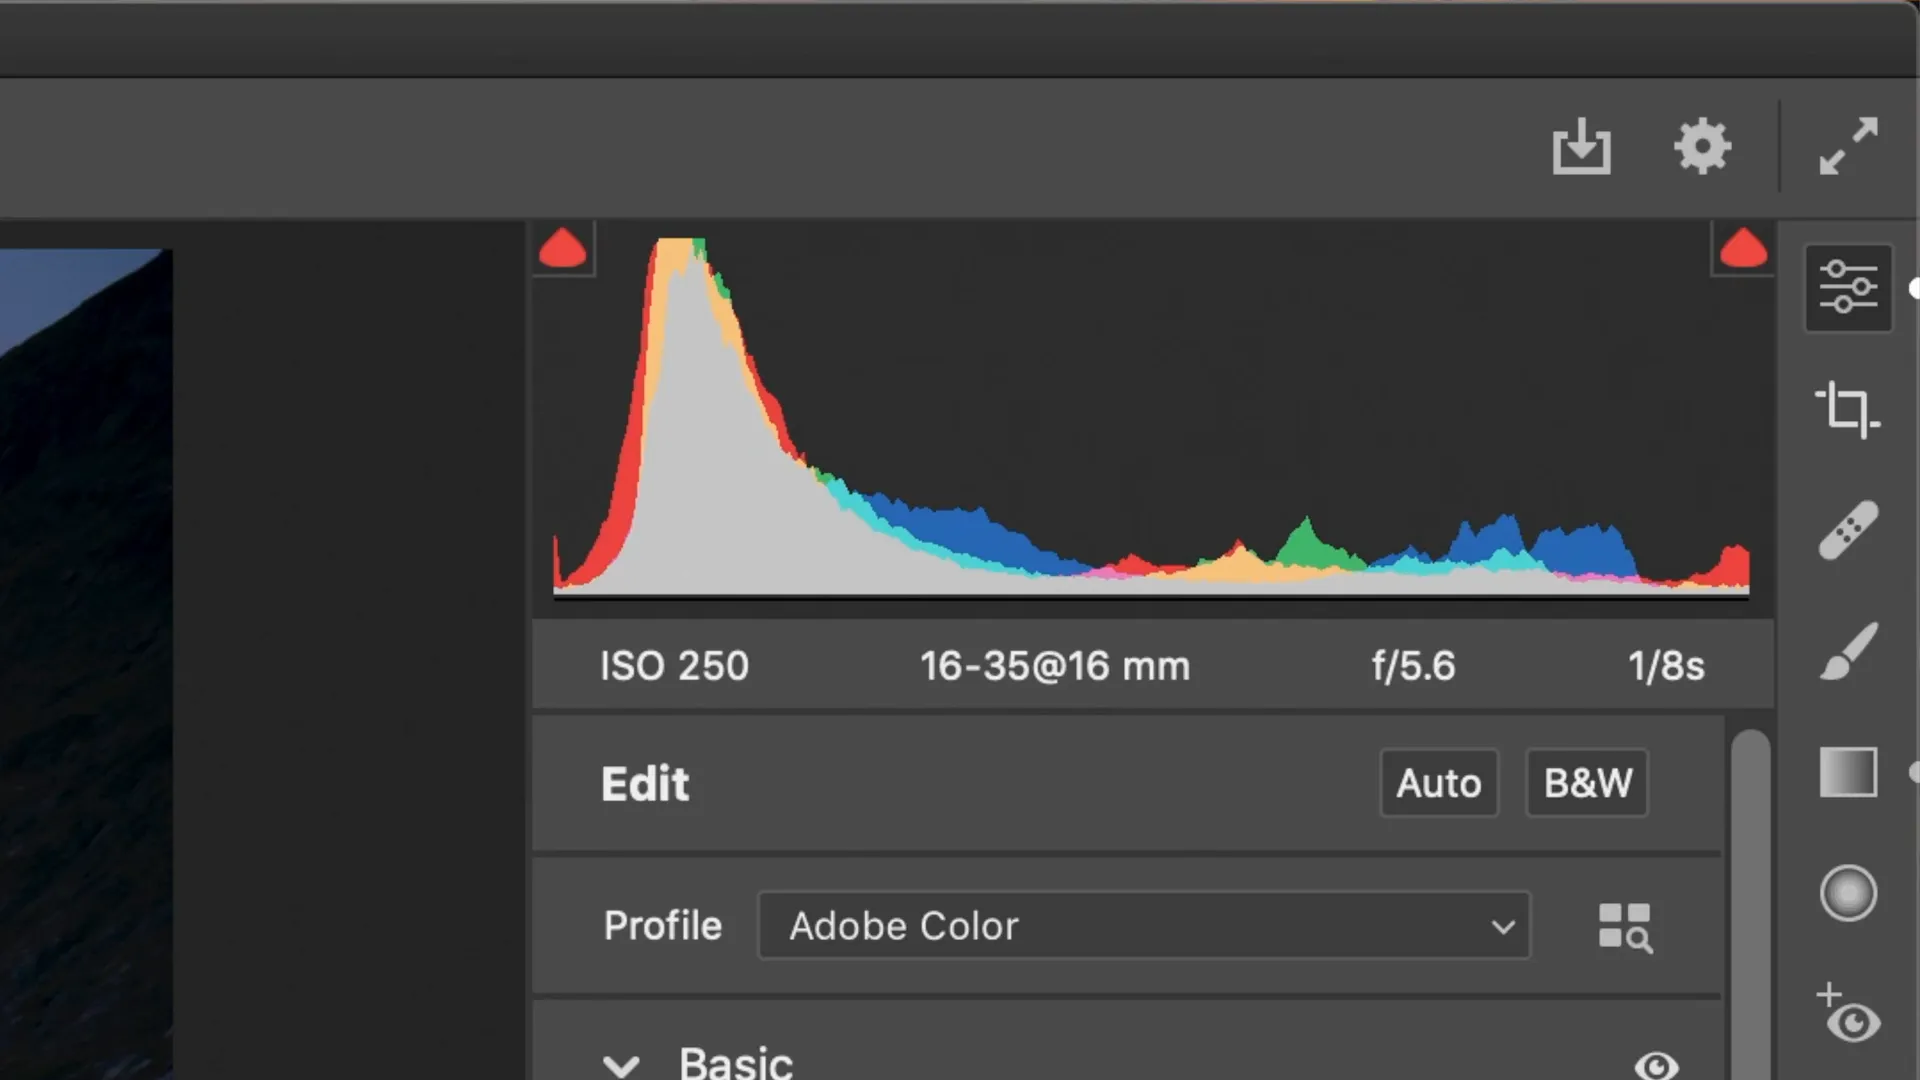
- Use the Histogram: The histogram is basically a graph that shows the amount of data or detail captured in your image. The left side represents shadows and the right side represents highlights. Aim to get your data within the graph, and when possible, err on the side of caution with highlights, as shadows are typically easier to recover in post-processing.
Problem #2: Unsharp Images or Fuzziness
Cause:
The primary cause of this issue is shooting handheld in auto mode, with the camera choosing a shutter speed that is too slow, resulting in blurry images due to hand vibrations. Other factors could be a shallow f-stop or a high ISO.

Solution:
- Use a Tripod: Using a tripod when shooting outside of broad daylight can help improve image sharpness.
- Learn Manual Mode: As mentioned earlier, understanding manual mode will allow you to control shutter speed, ISO, and f-stop, leading to sharper images.
Problem #3: Basic Images Lacking Depth
Cause:
One primary reason is lens choice. Most beginners use a mid-range zoom lens like a 24-70mm, which may not be ideal for capturing depth in landscape photography.
Solution:
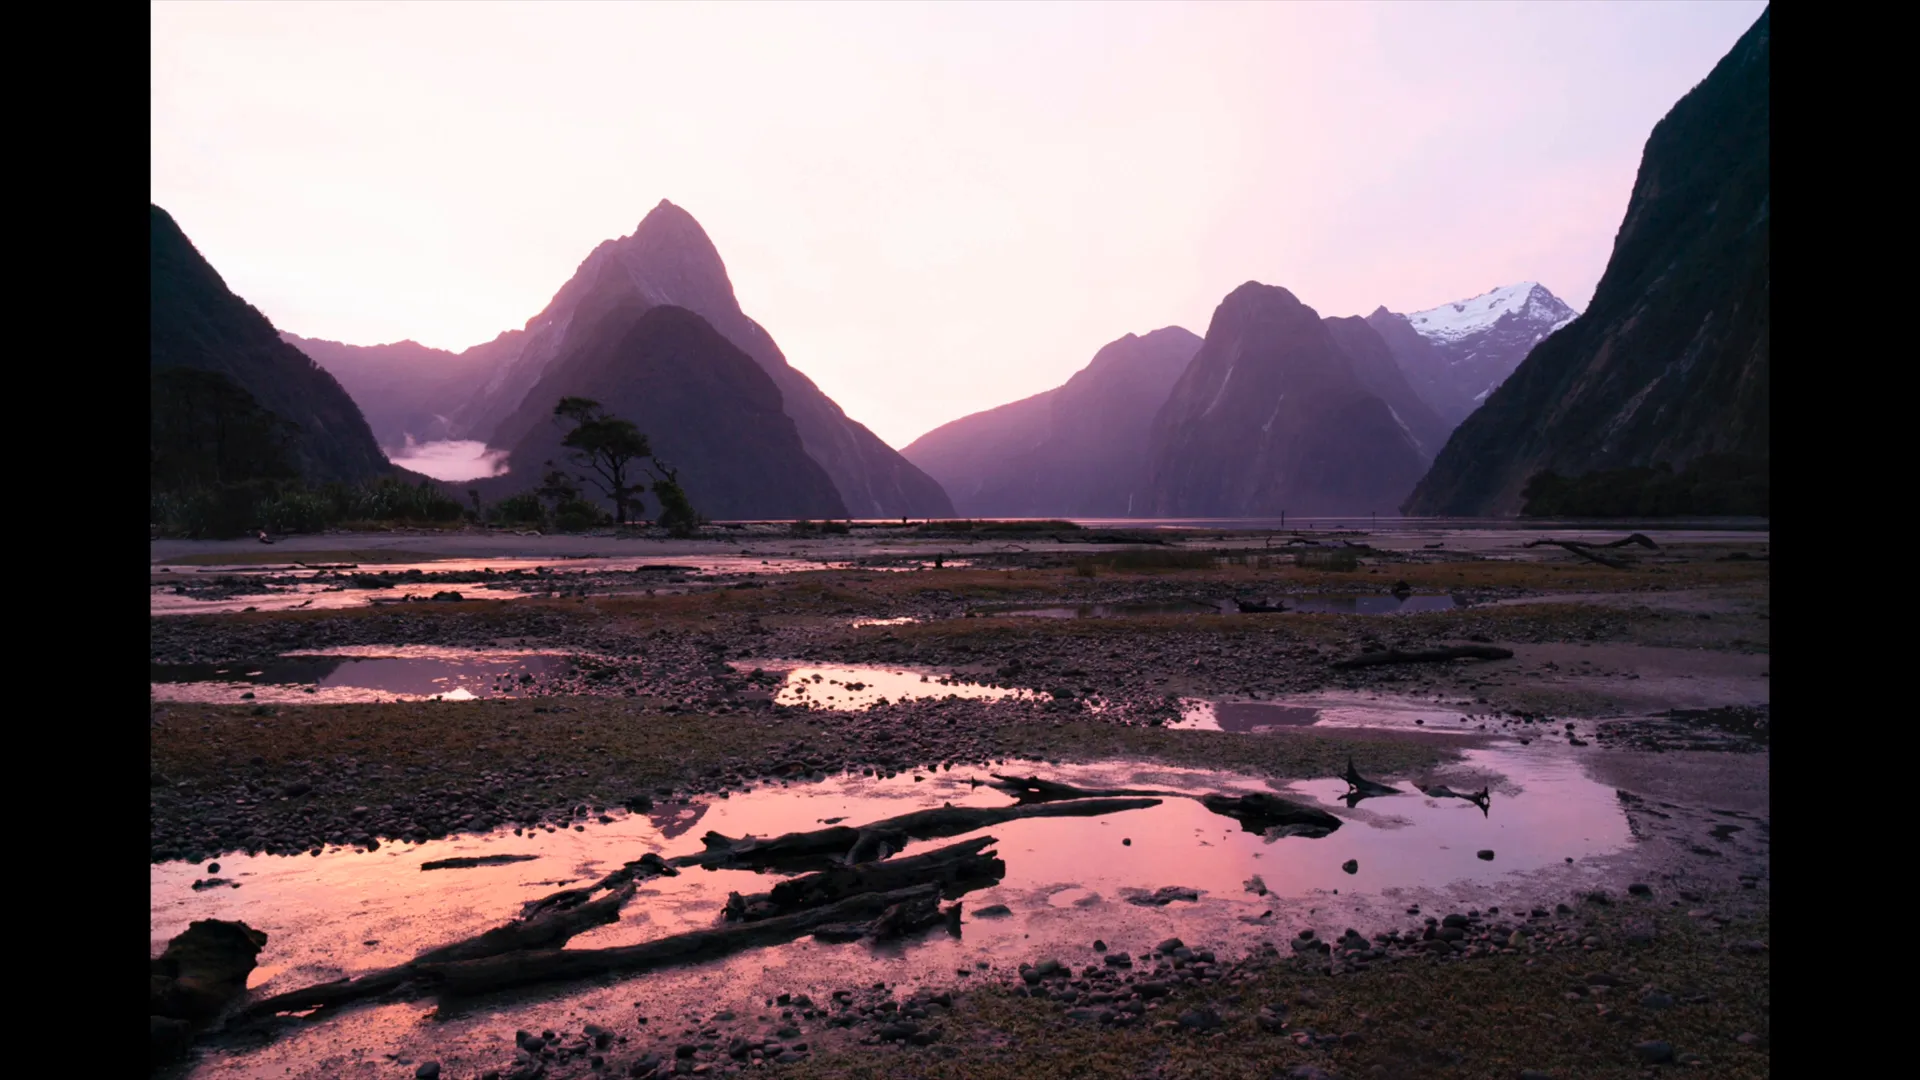
Invest in an ultra-wide lens such as a 16-35mm to incorporate more foreground details and create more depth in your images.
Problem #4: Images Appear Flat and Lack Depth
Cause:
Not shooting in the best light conditions can cause images to appear flat and lack depth.
Solution:
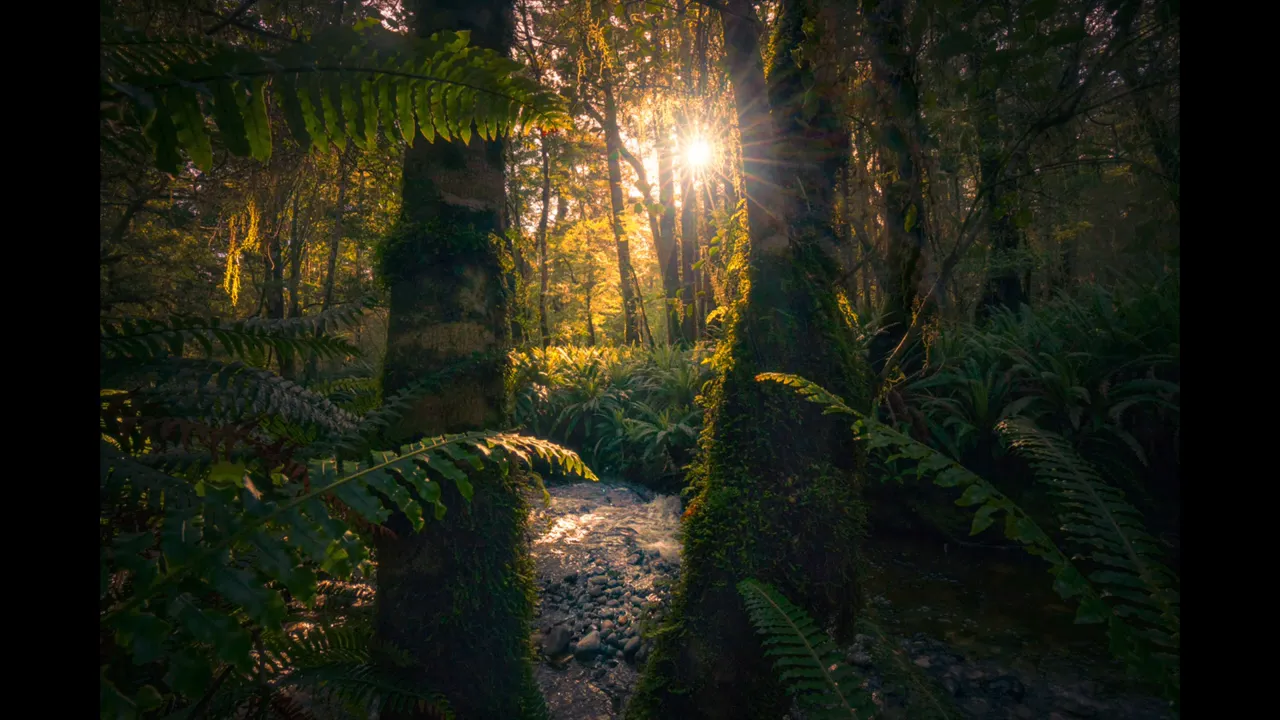
Pay attention to the light on the landscape during the golden hour. Capture the interaction between light and shadow on your subject to create more depth in your images.
Problem #5: Unhappiness With Image on the Camera Screen
Cause:
Not being able to get the image exposed correctly on the back of the camera screen due to the dynamic range of the scene.

Solution:
Trust the histogram rather than the camera screen. As long as you have captured enough data, you should be able to process the image later to achieve the desired result.

In summary, understanding the exposure triangle better, using manual mode, and referencing histograms can greatly improve your landscape photography skills. Pay attention to lens choice, light conditions, and trust the histogram instead of the camera screen for accurate representations of your images.
If you want to learn more in-depth, check out my Free Introduction to Landscape Composition course and explore the available master classes and tutorials to take your photography to a whole new level. Thanks for stopping by!
If you liked this article about How to Overcome Common Landscape Photography Problems, check out 6 IMPORTANT Composition Tips for BETTER PHOTOS .