
It’s time to ditch the old black-and-white editing method! I am William Patino and I will show you how to edit black-and-white photos using just 10 simple steps. The purpose of this blog is to share with you some simple yet effective techniques for enhancing black-and-white images in Lightroom. Watch the video by clicking here or just following the steps outlined below.
Now I’m going to show you how to create a dramatic black & white landscape edit in lightroom.
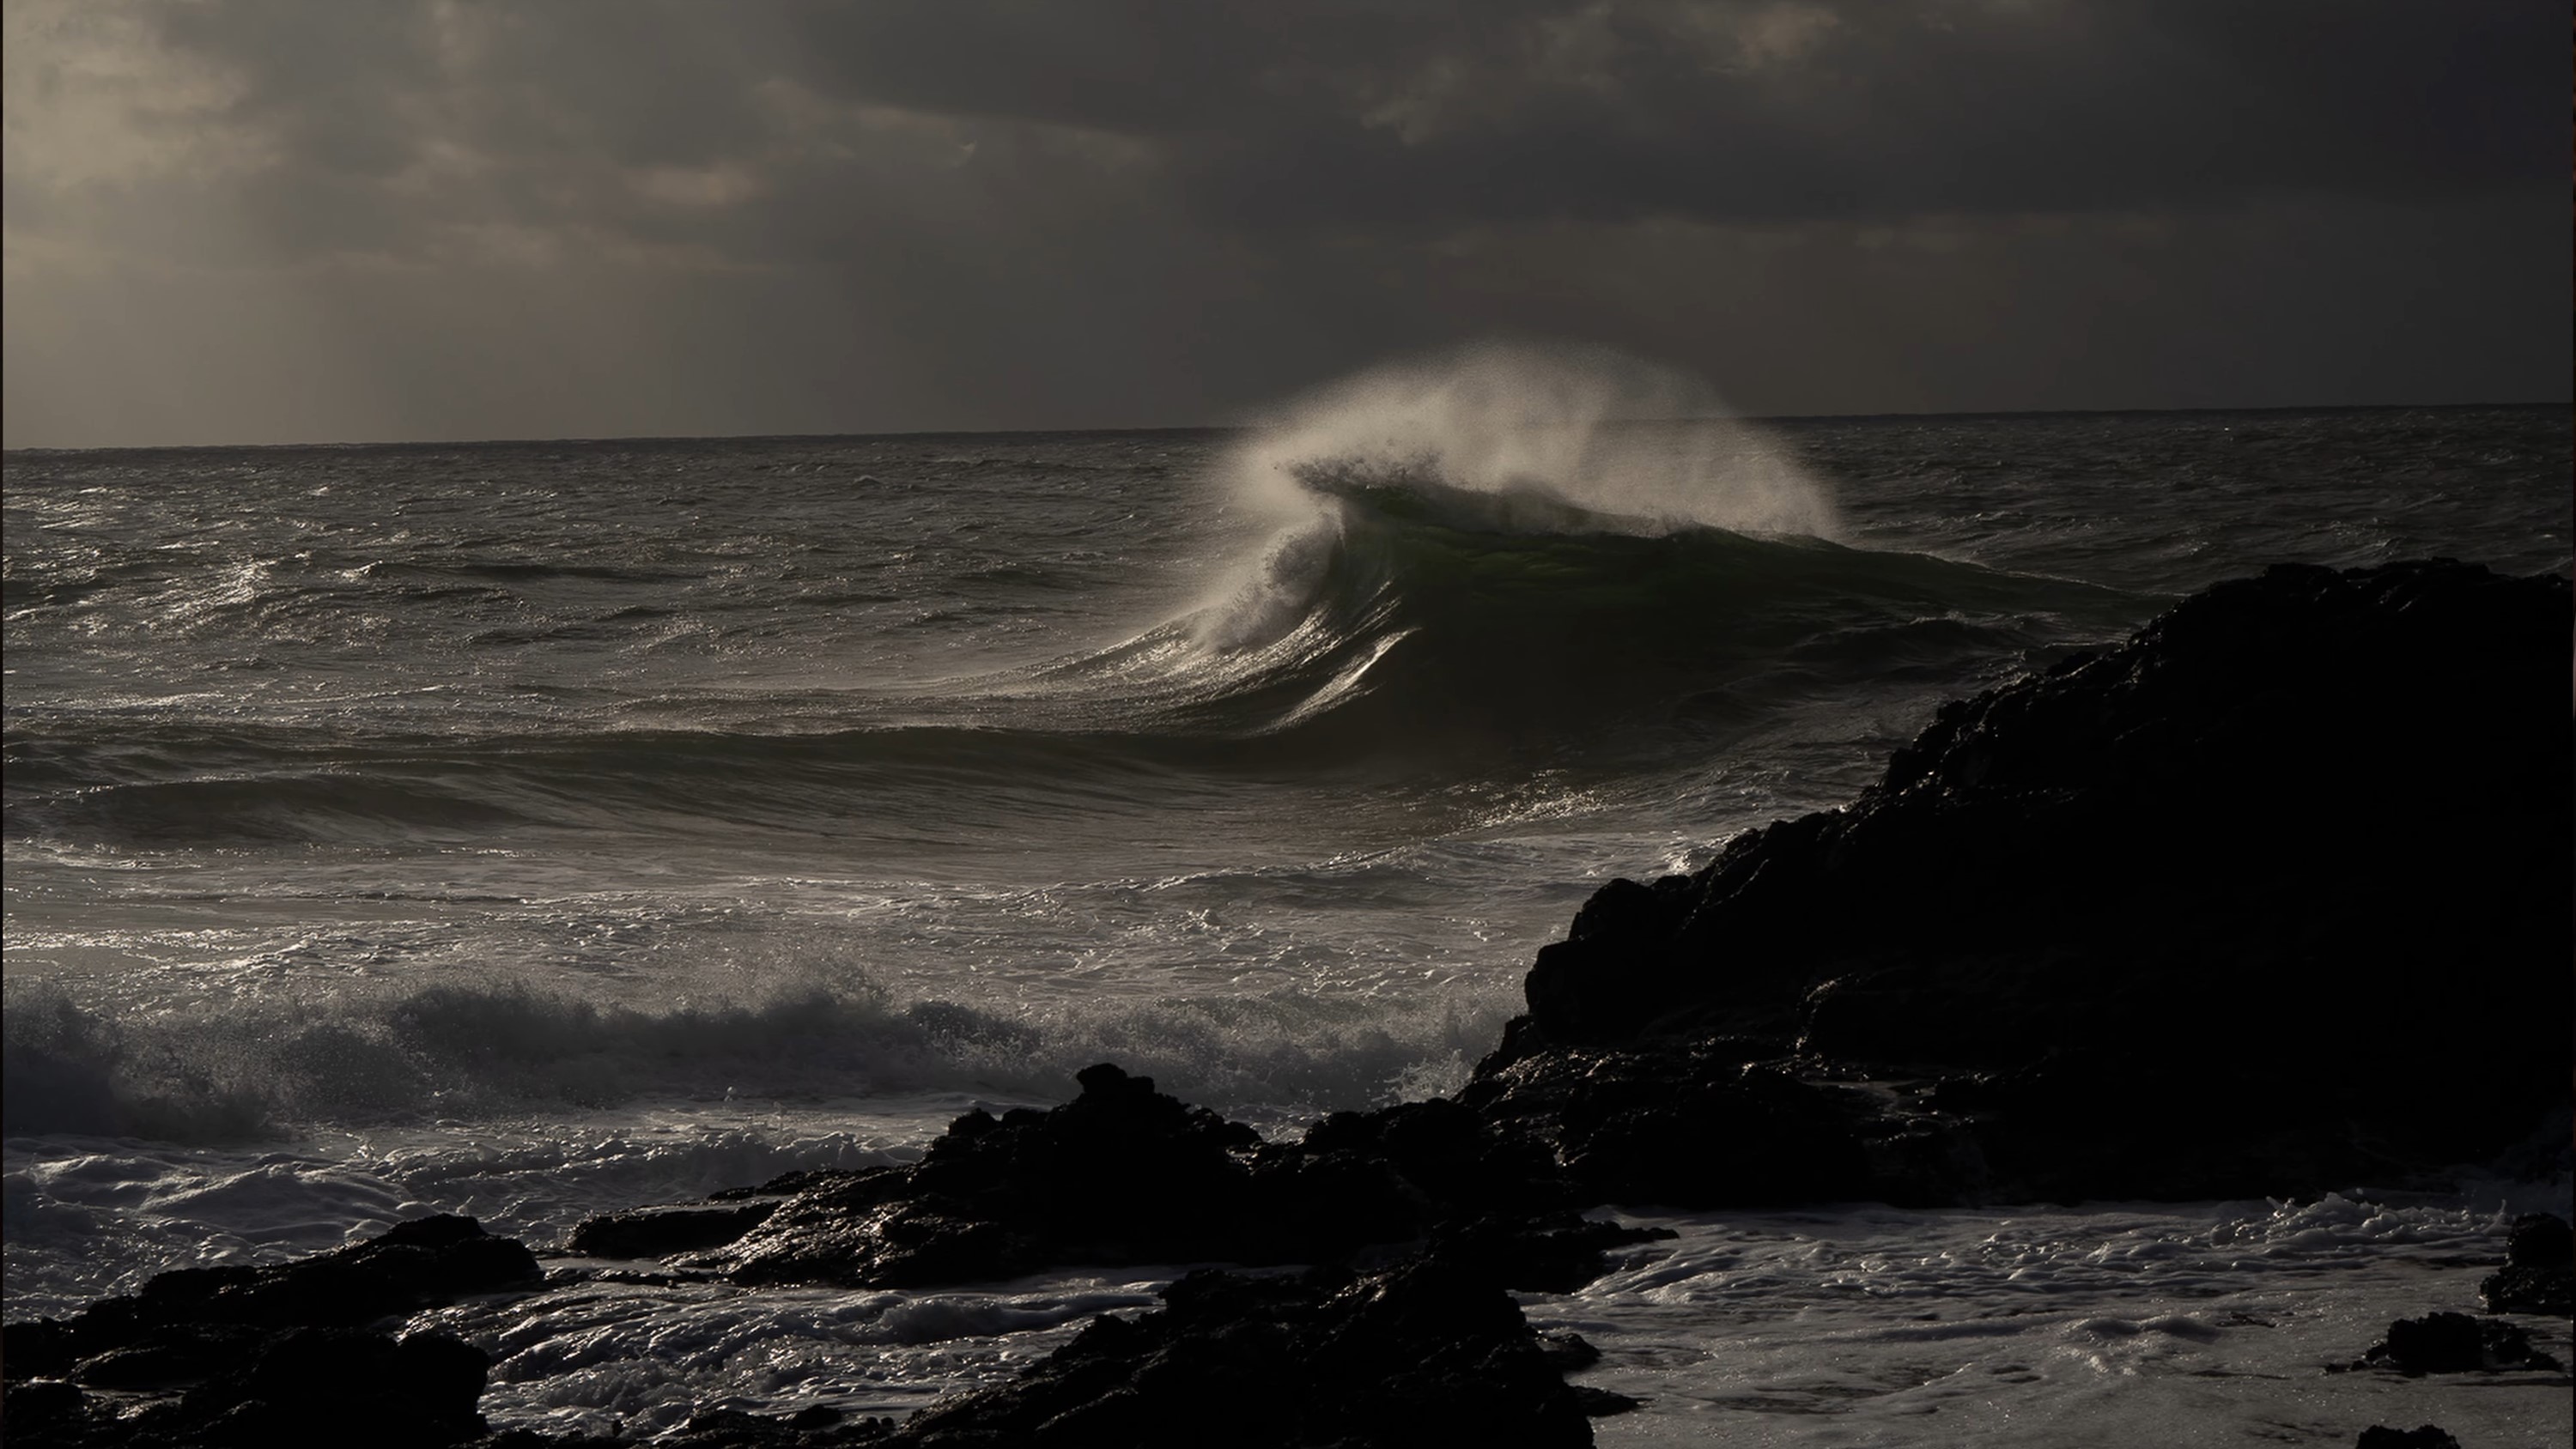
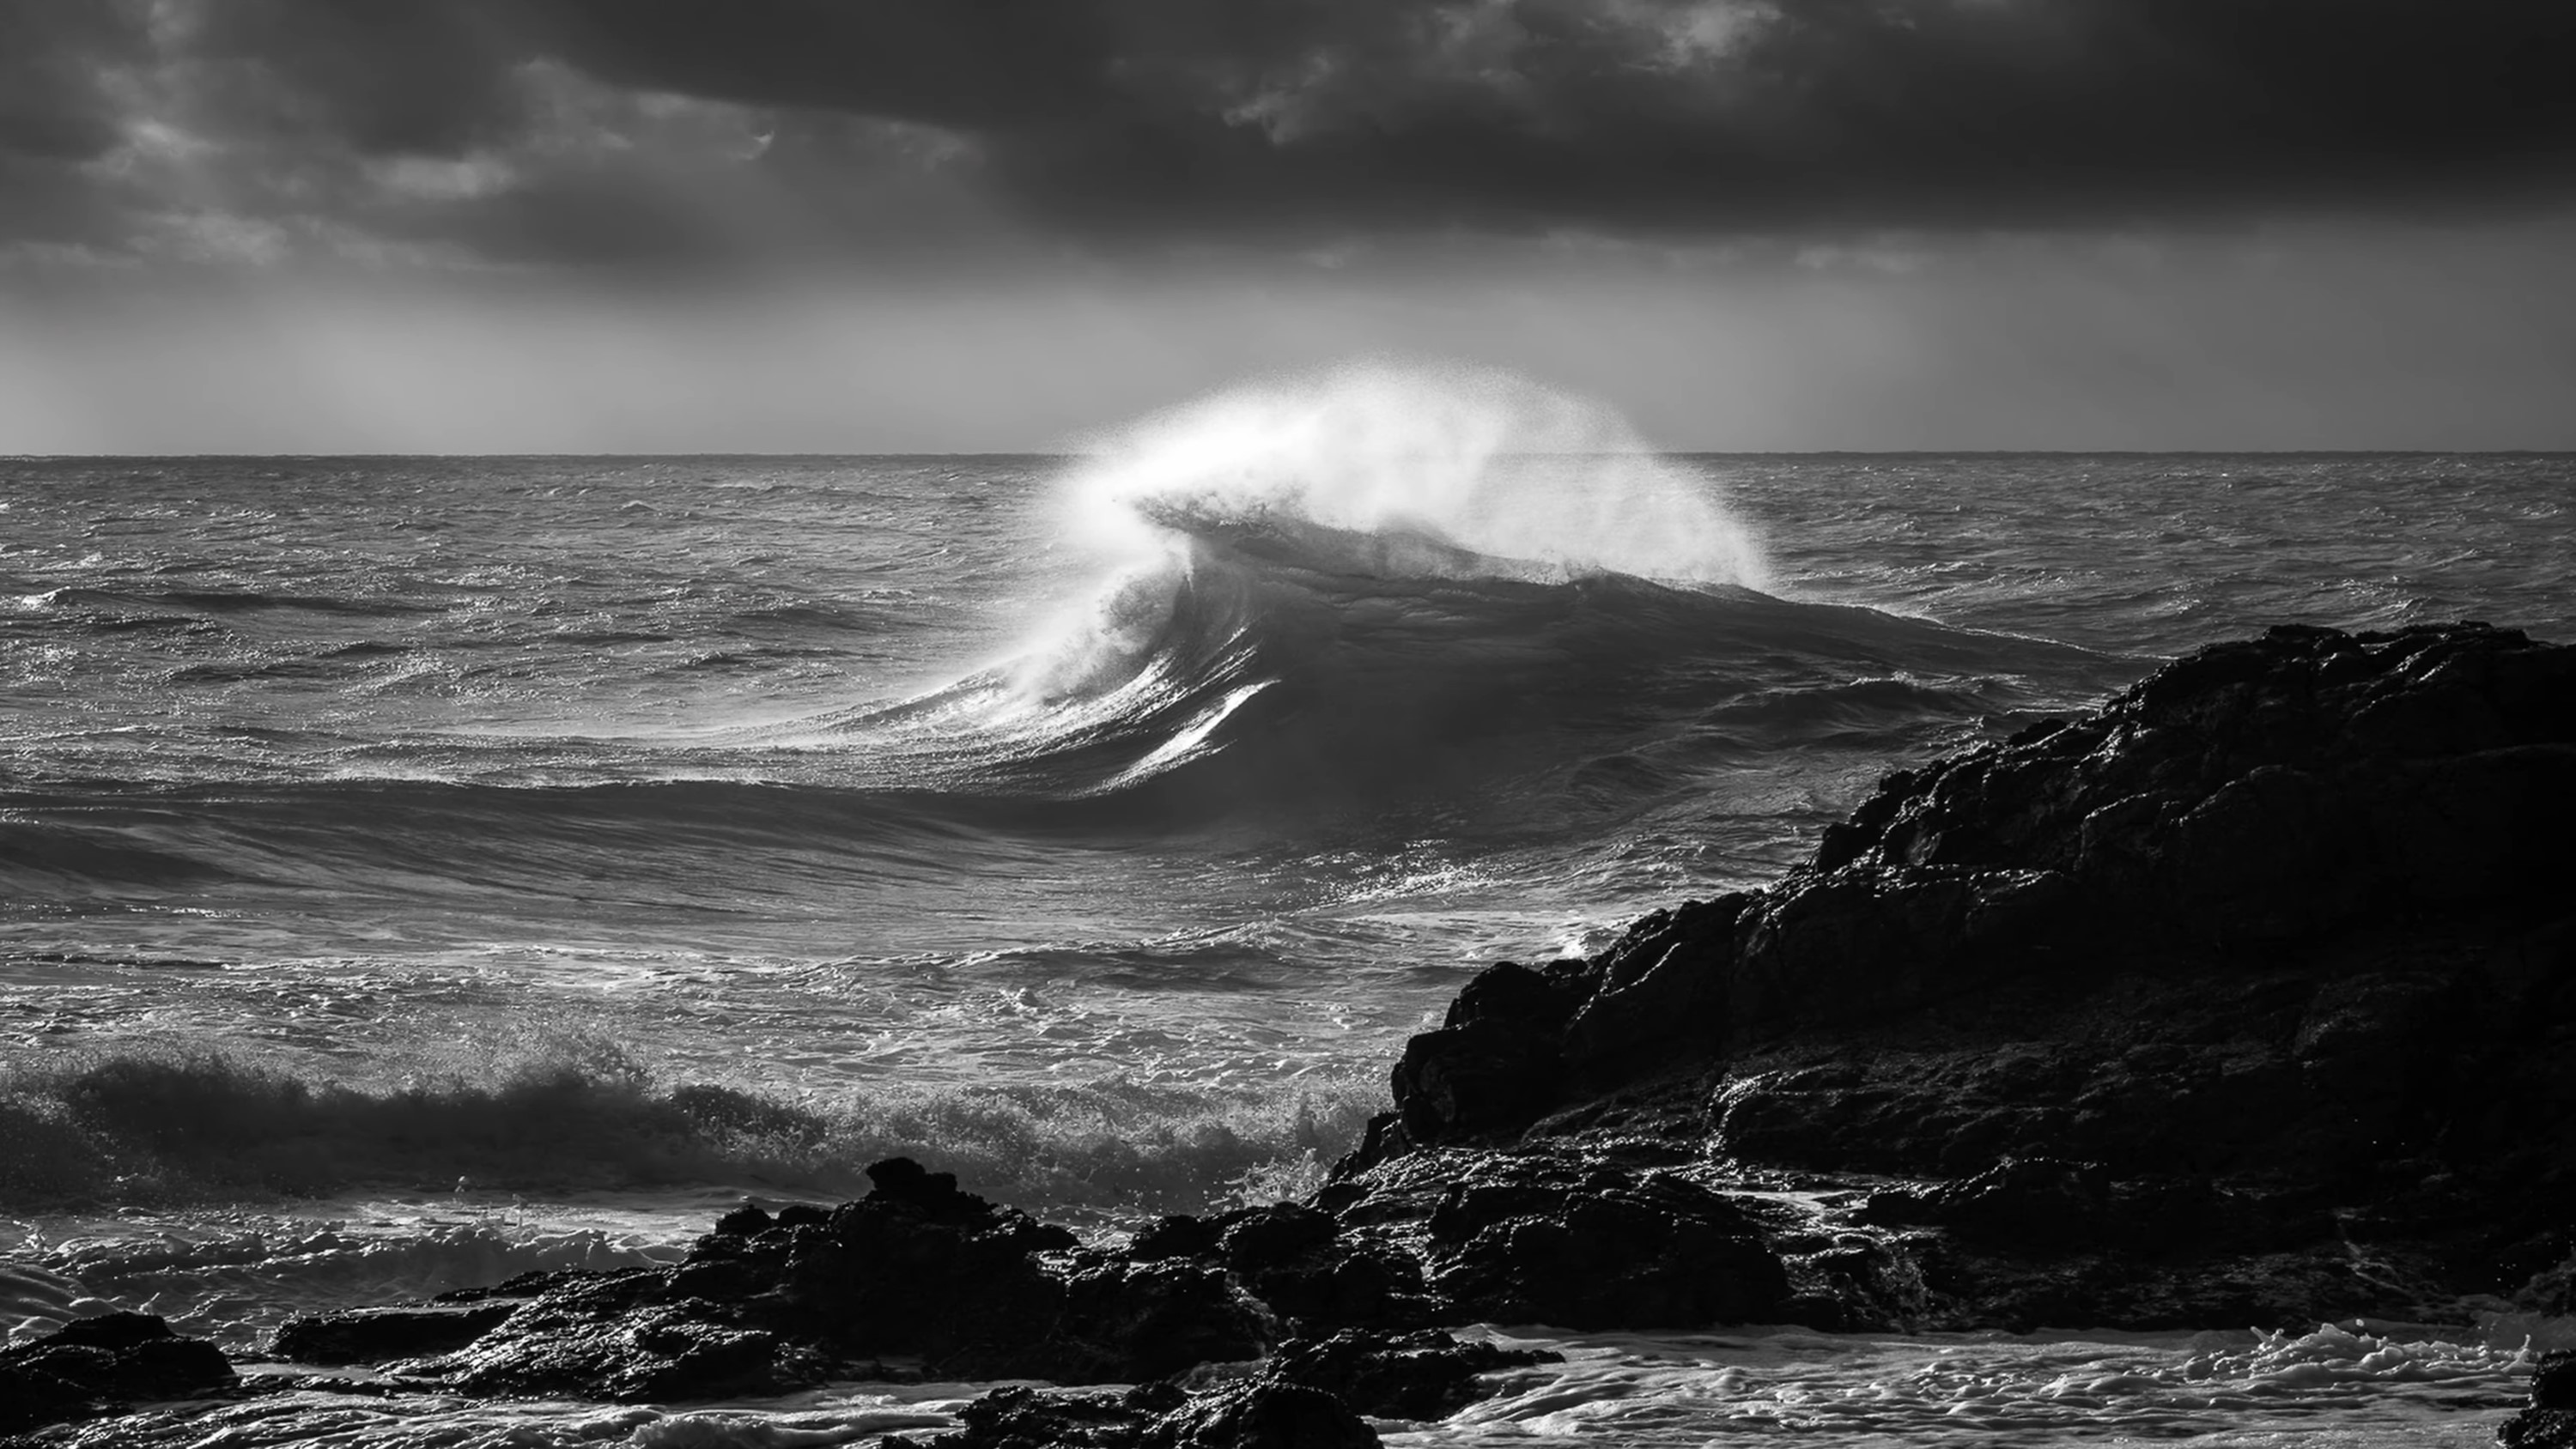
You can see the before image on the left and the after image on the right.
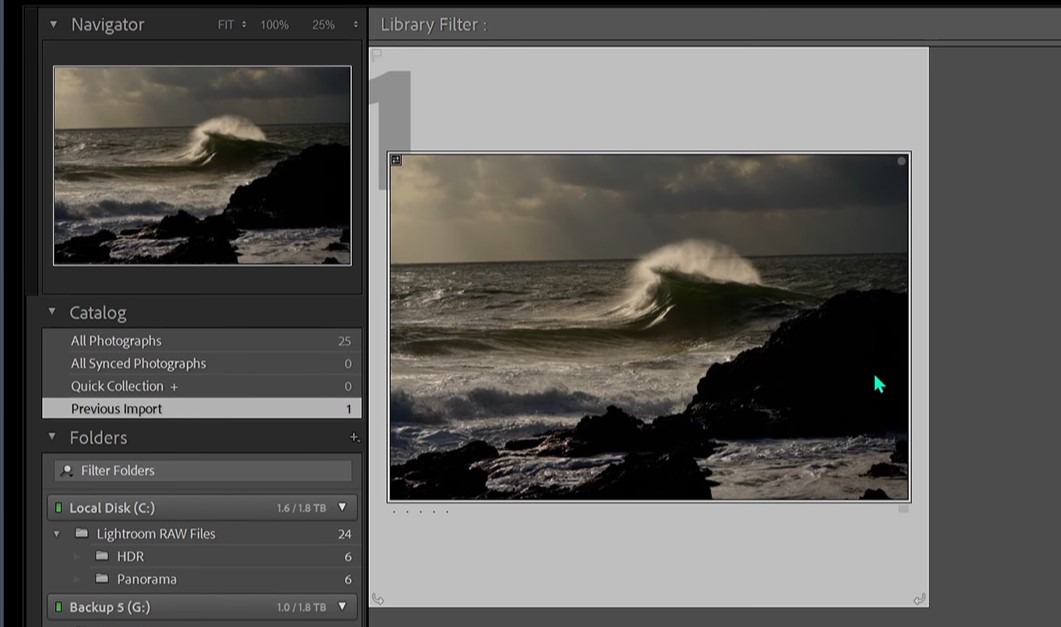
Checking the raw file
• Starting with the raw file, we’ll work our way through the process to the outcome displayed above.
Download the raw using this link to follow along step-by-step.
WHAT DO YOU NEED?
Lightroom is all you’ll need, however you may also use Photoshop and Adobe Camera Raw.
Learn how to create a dramatic black & white landscape edit in lightroom in this lesson, along with some incredibly simple tips for handling any Photoshop document.
#Step1: First Tweaks – Exposure, Highlights. and Shadows
Go into the > Develop module once you’re in Lightroom after pulling up your source file.
• You’ll see a straight-up, and
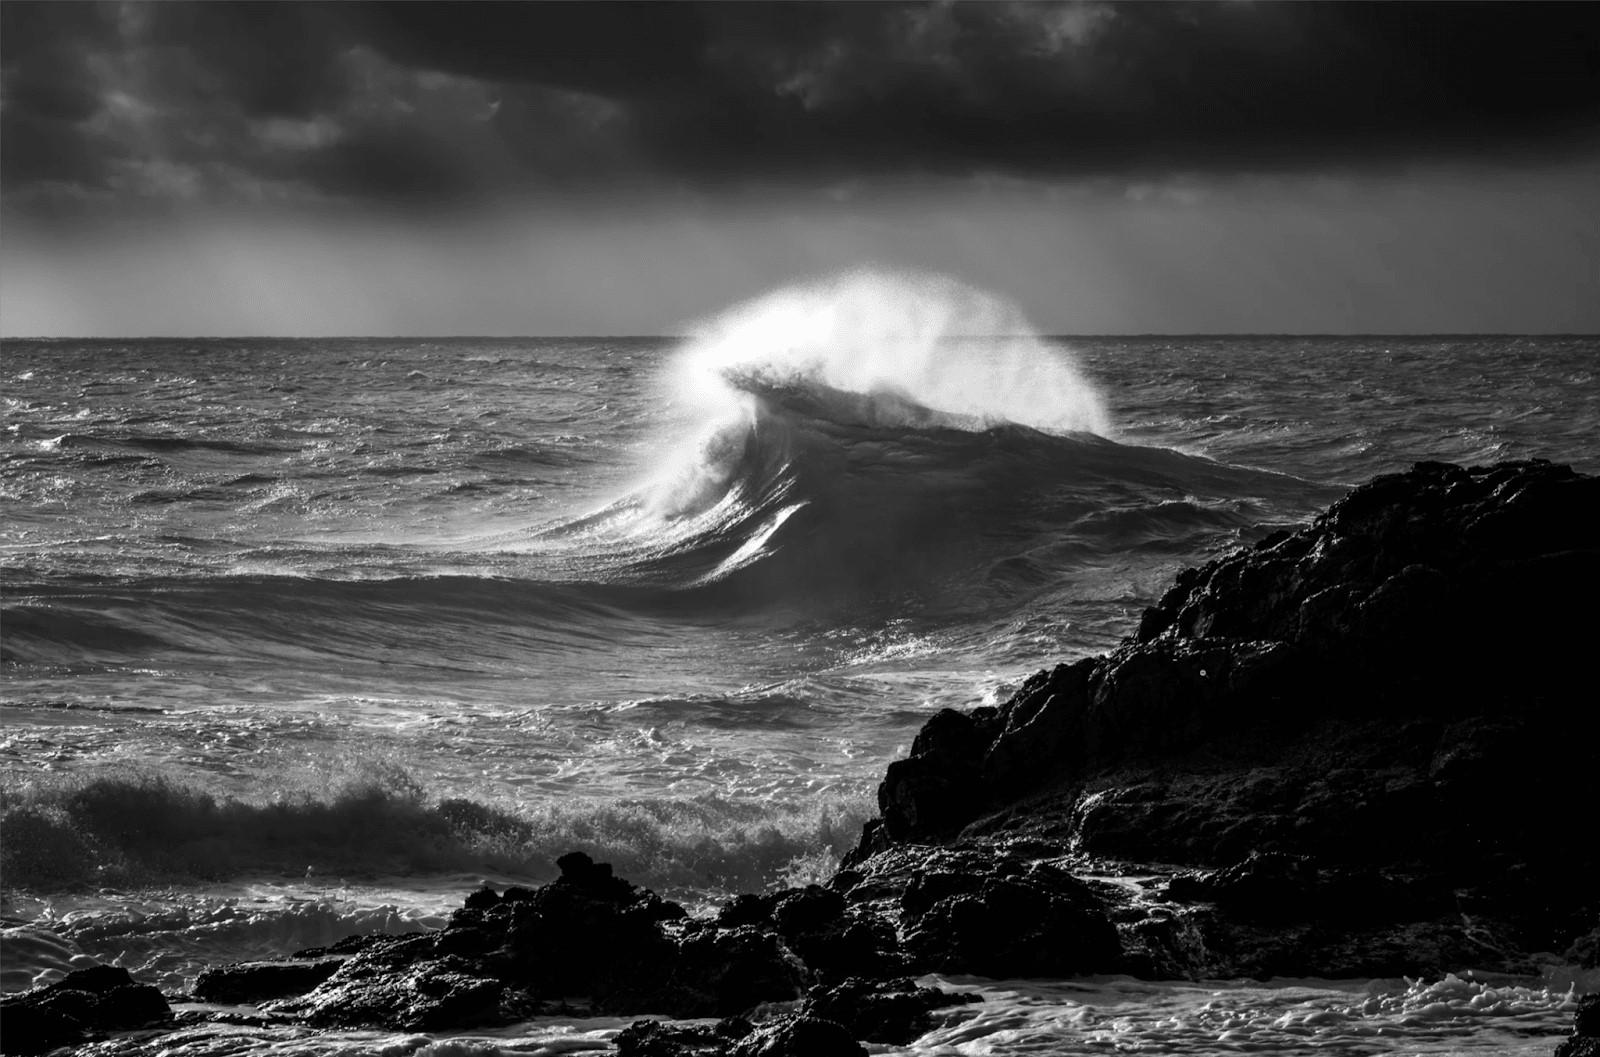
• Areas of light and dark highlight on the rocks, highlights across the wave’s surface, light in the sky, and different tones up there in those dark clouds all contribute to the scene’s amazing monochromatic, black-and-white image.
• First, strain it out and get out of that crop tool on the right after straightening it up, which is all over the place.
• Then simply increase the > Exposure to make this slightly brighter, and increase the > Shadows for the foreground.

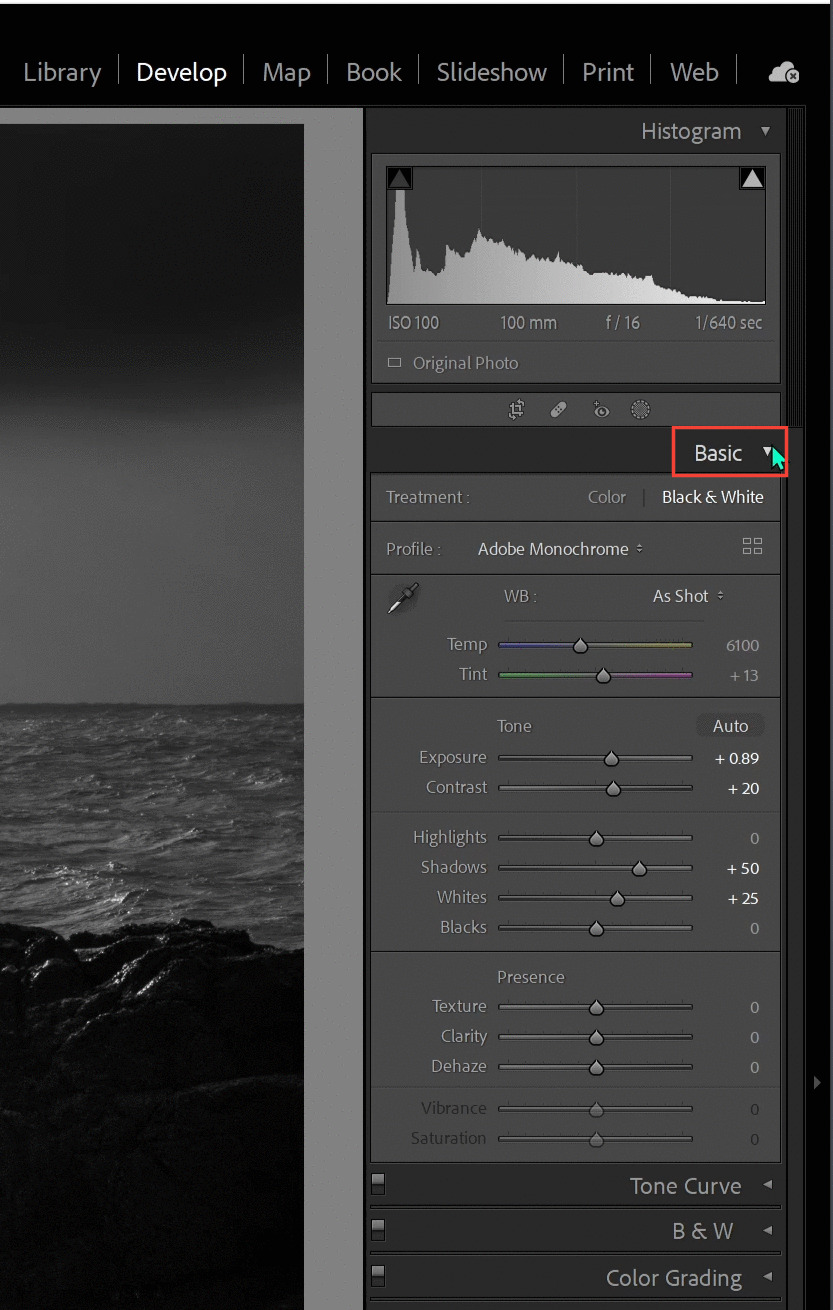
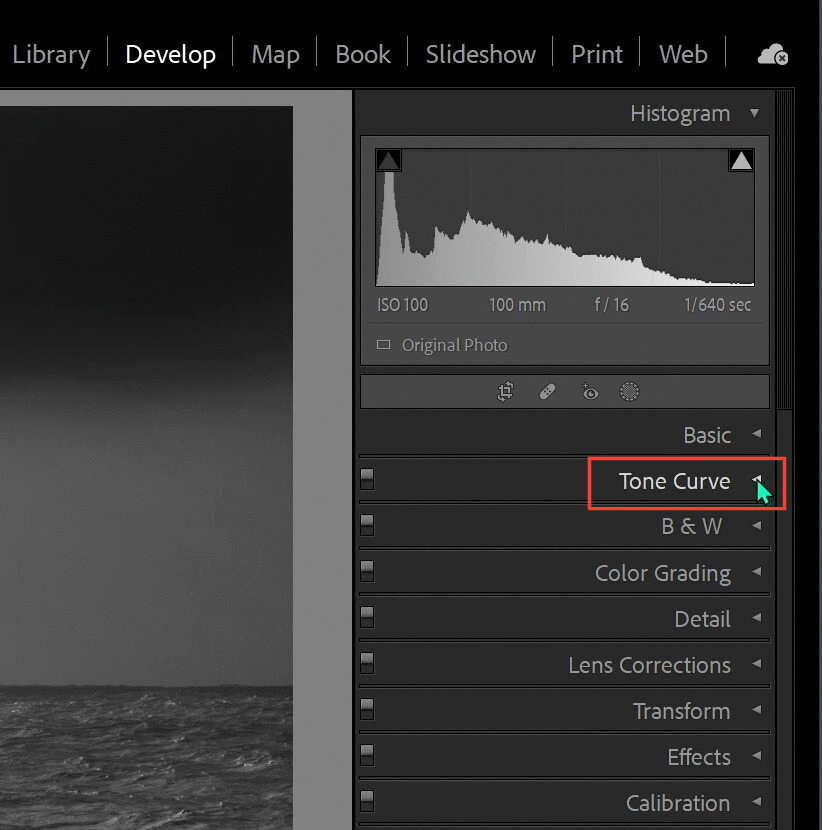
#Step2: Black & White Conversion
• Now go to a > Black-and-White conversion in the top right-hand corner.
• It strips the color and converts it into a black-and-white image.
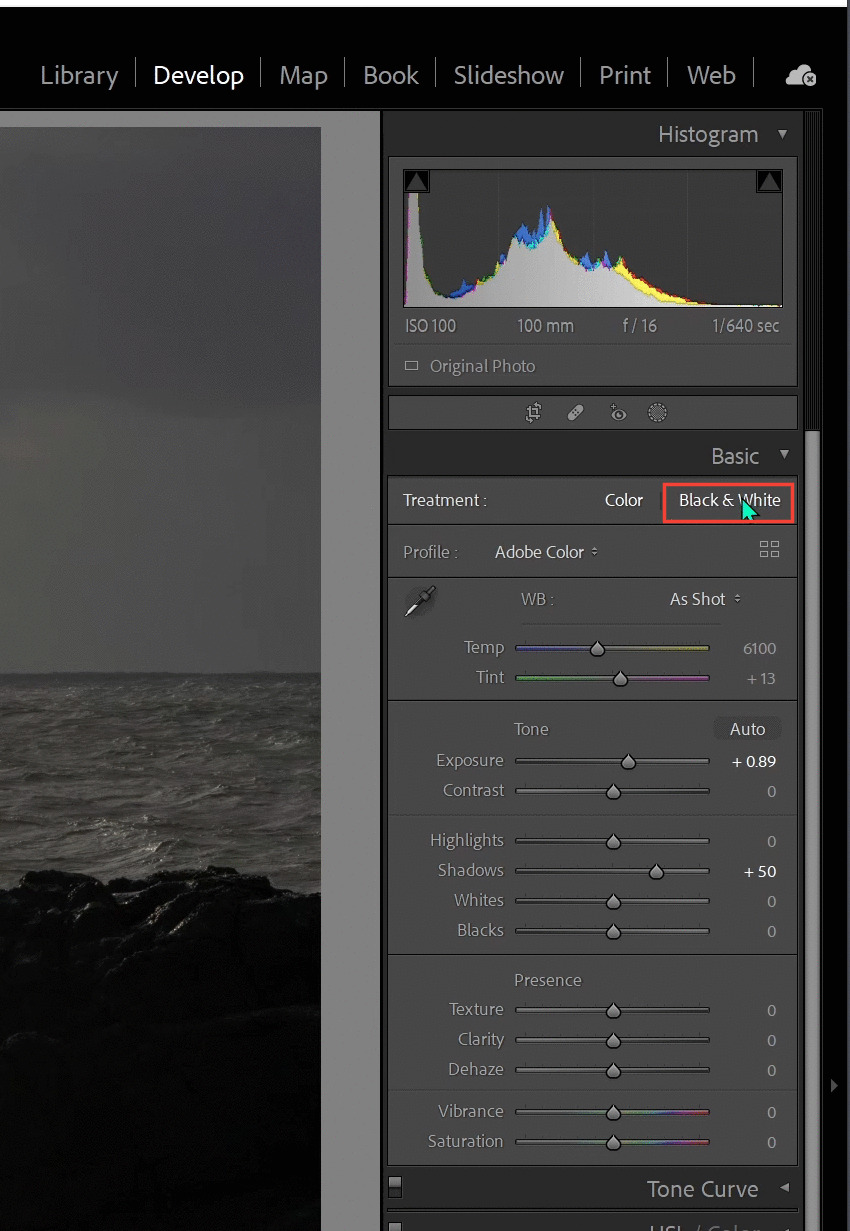
And now you’ll have a black and white drop-down box previously in the color tab that was for the > Hue saturation illuminance working on your colors but converting to black and white it goes B&W.
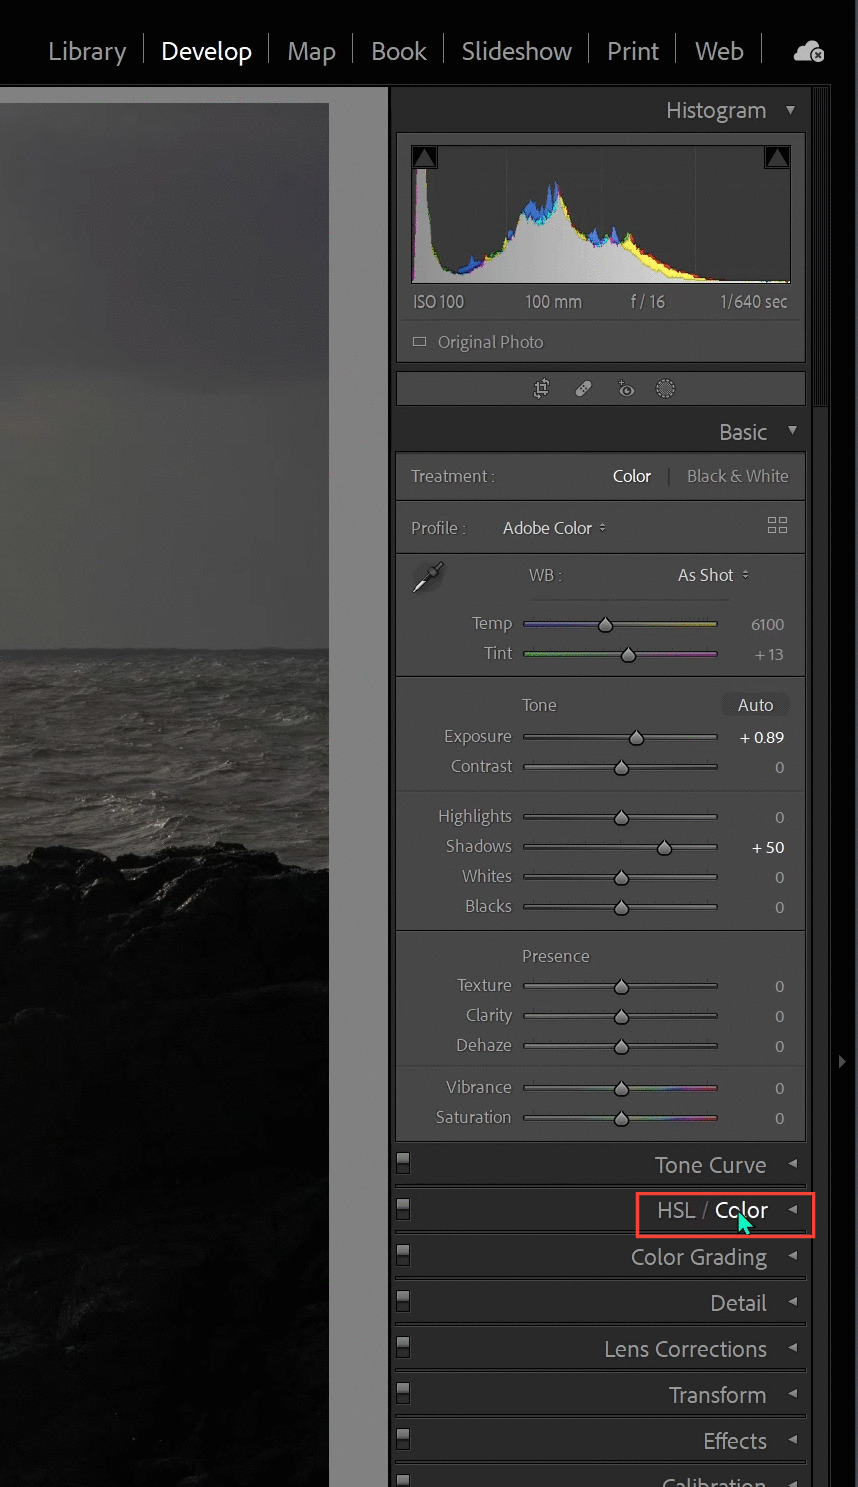
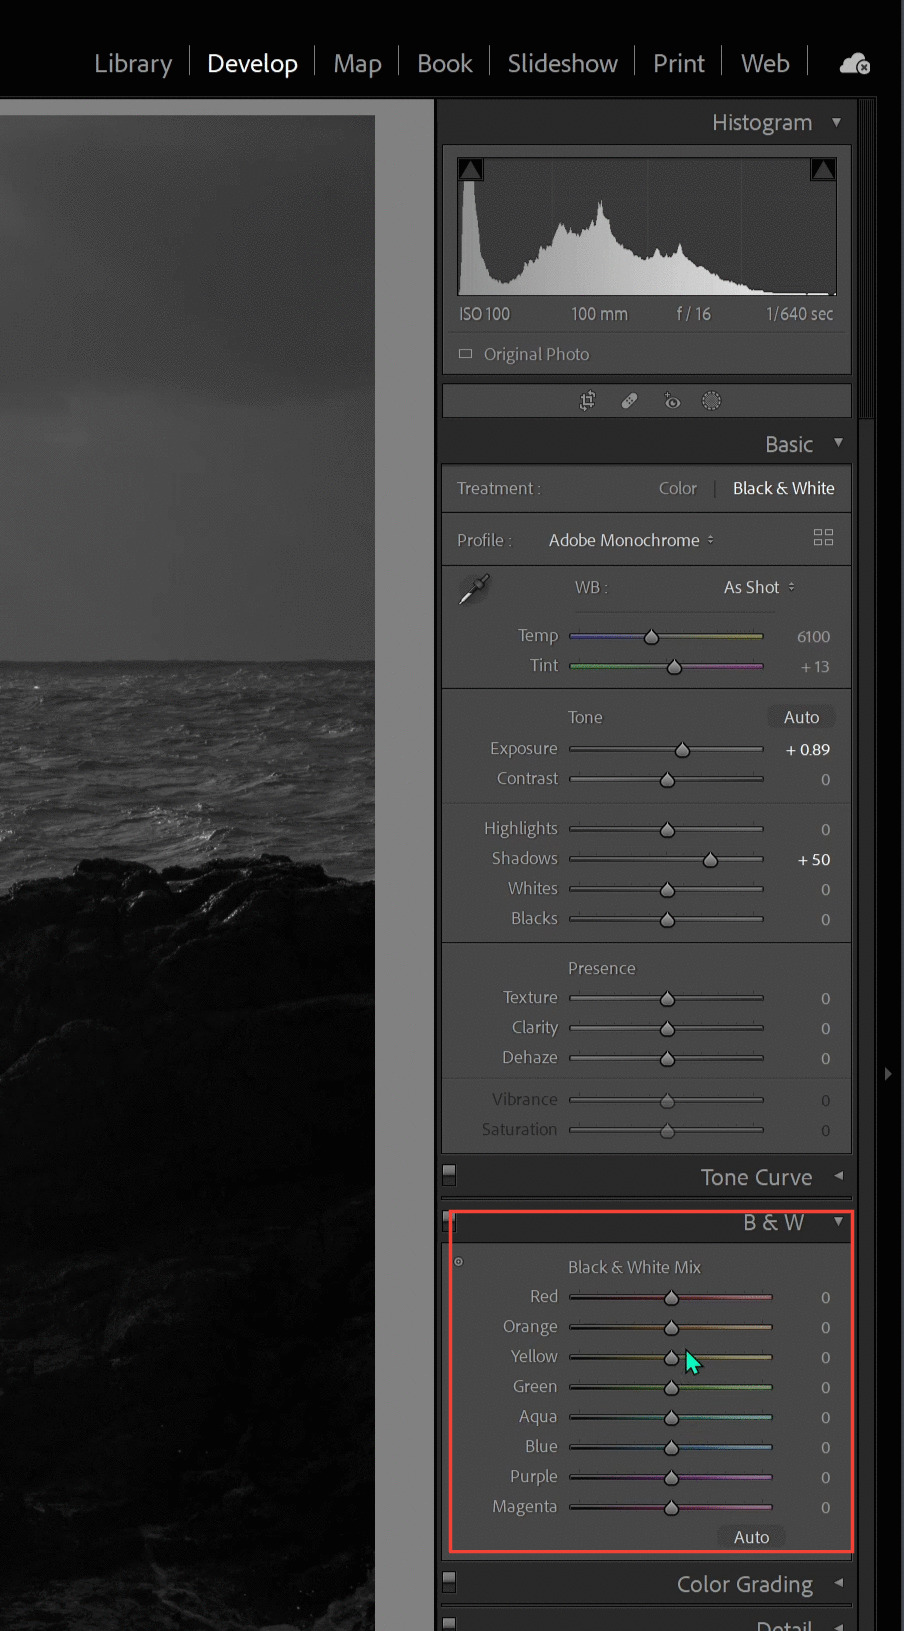
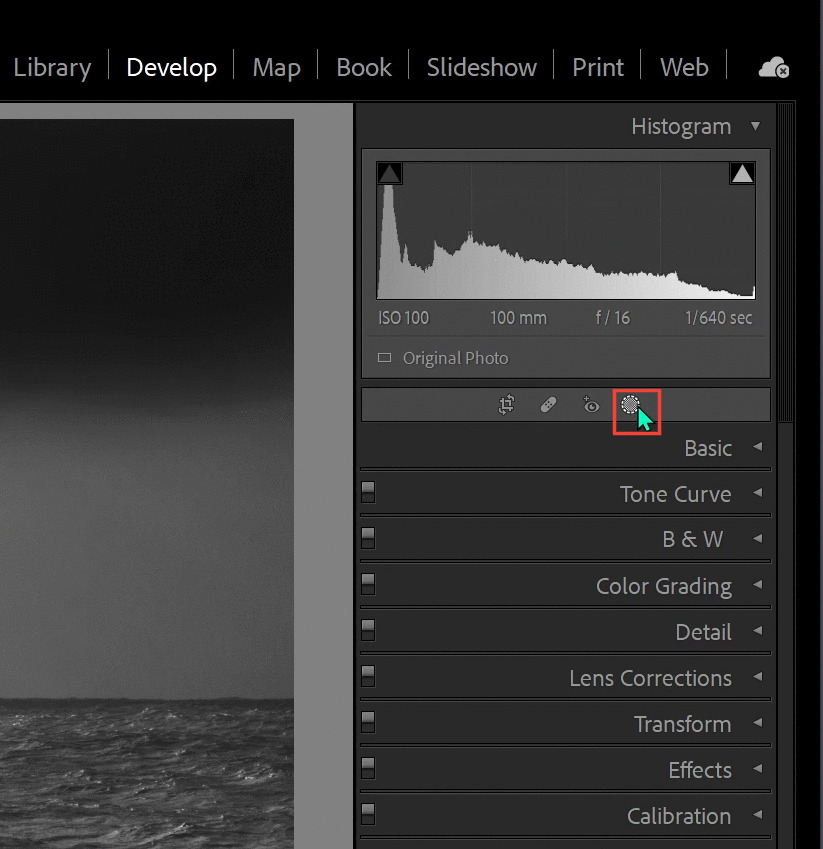
#Step3: Understanding the B&W Sliders in Lightroom
• Now select the option to adjust the Luminosity of the various colors in that file.
• So you pull up the yellows as it boosts the luminance of anything in the scene that has yellow in it.
• Make sure you don’t dabble in that too much because the goal is to create a more dramatic image.
• So, now you’ve got all the elements, make sure to draw the eye into that wave and create a sense of the power of the storm and everything that was going on on that particular morning, and showcase that beautiful wave that’s breaking in that glorious light.
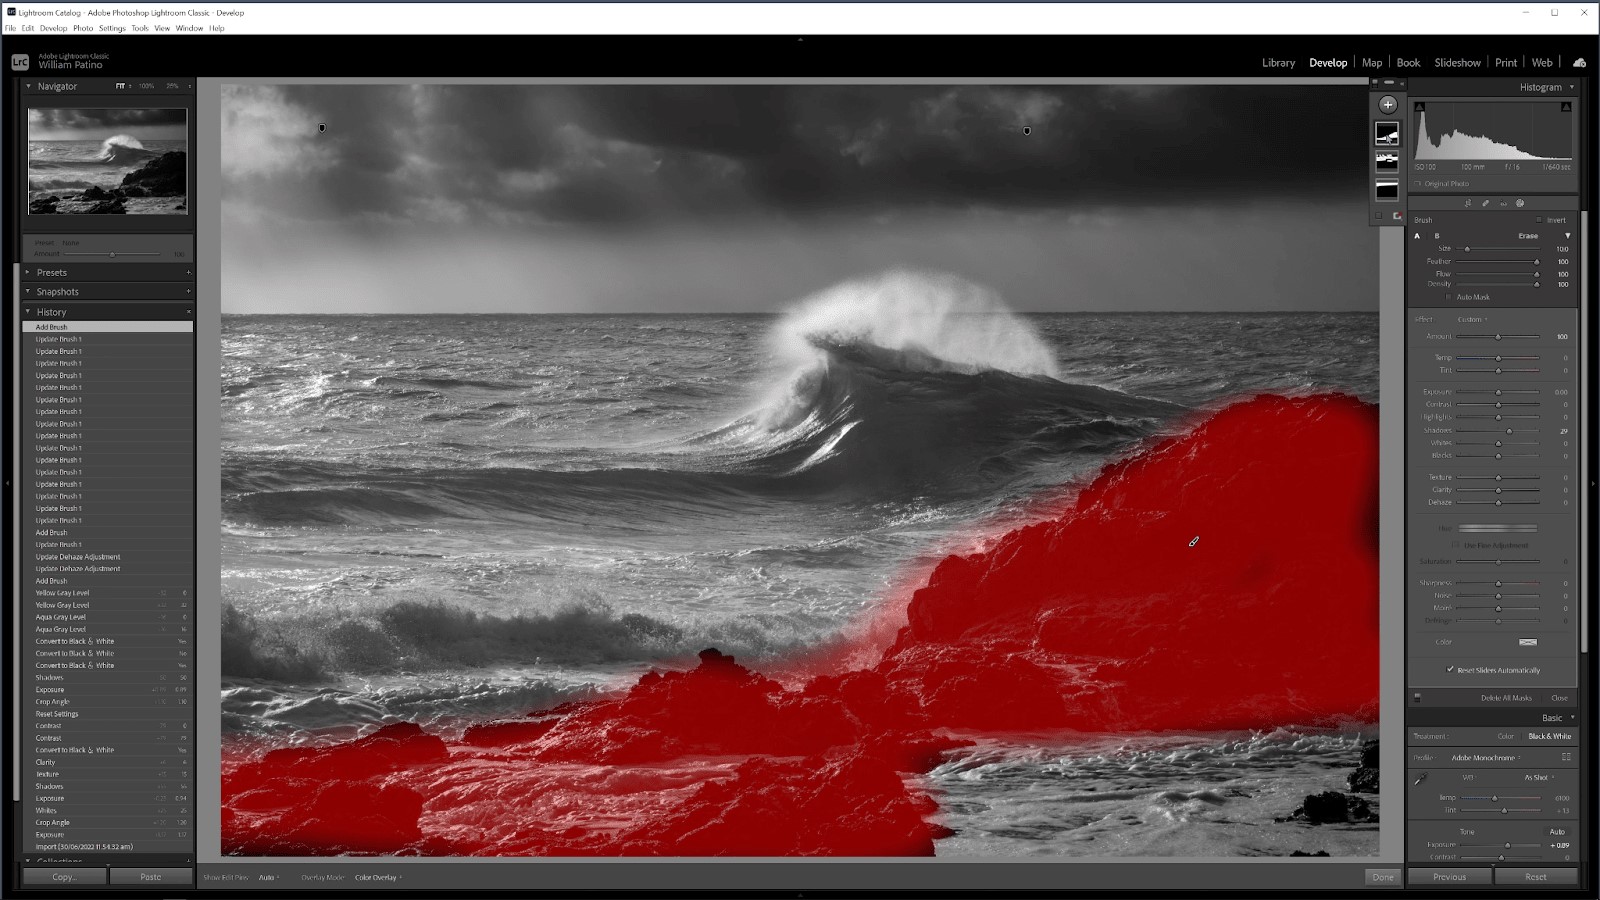
#Step4: Improving the Sky with an Adjustment Brush
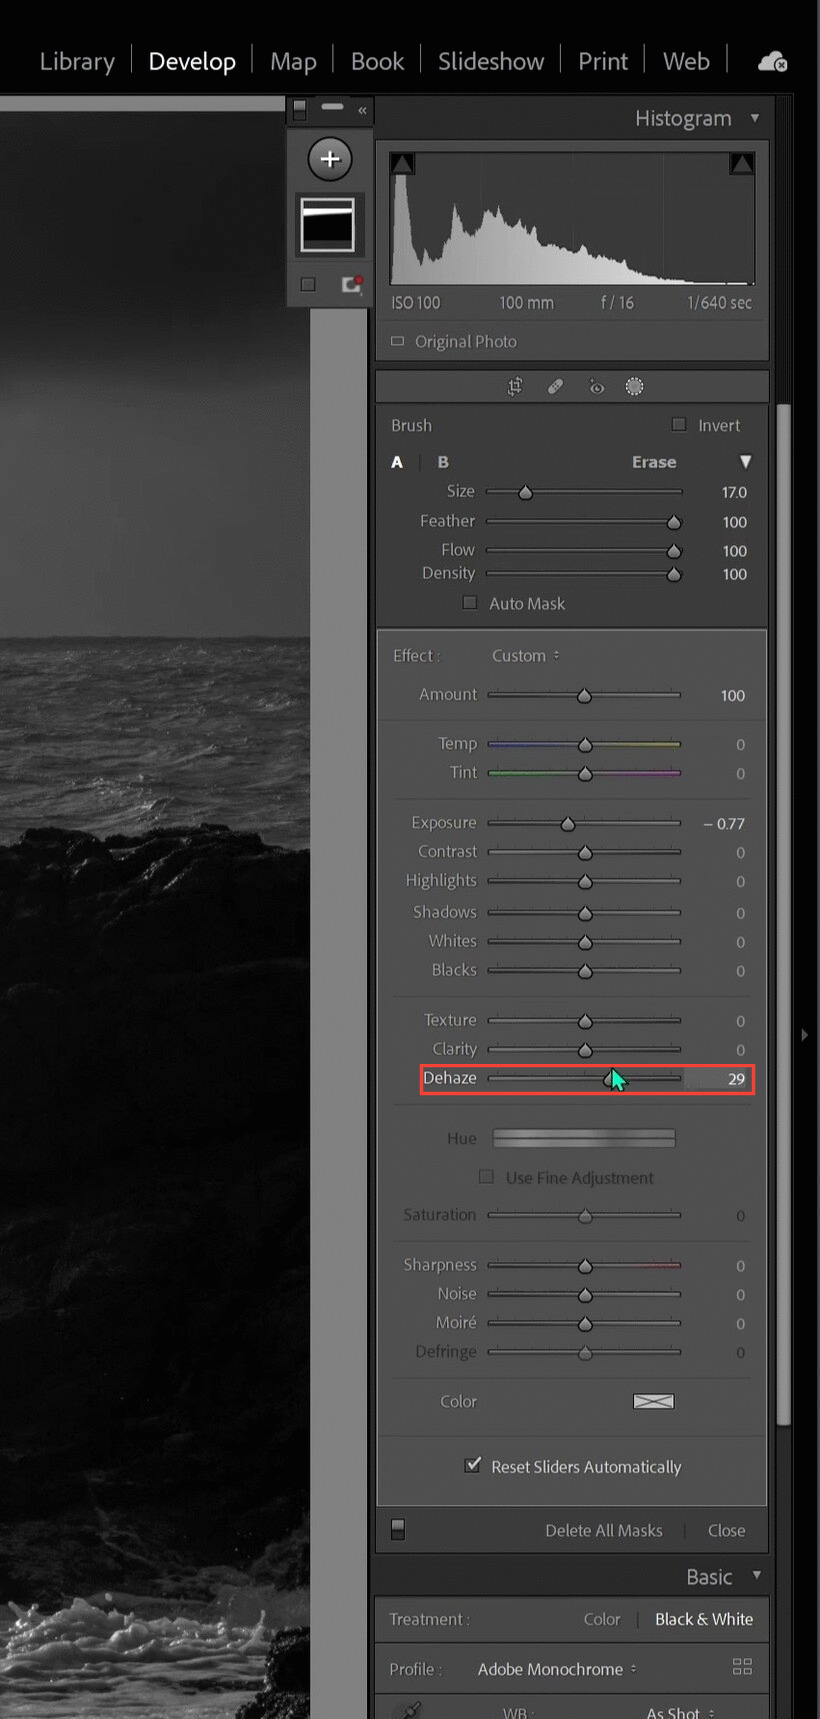
• Use a > Adjustment Brush, then by pressing K on the keyboard, we’re going to reduce this for a second, then go to > the masking box, and
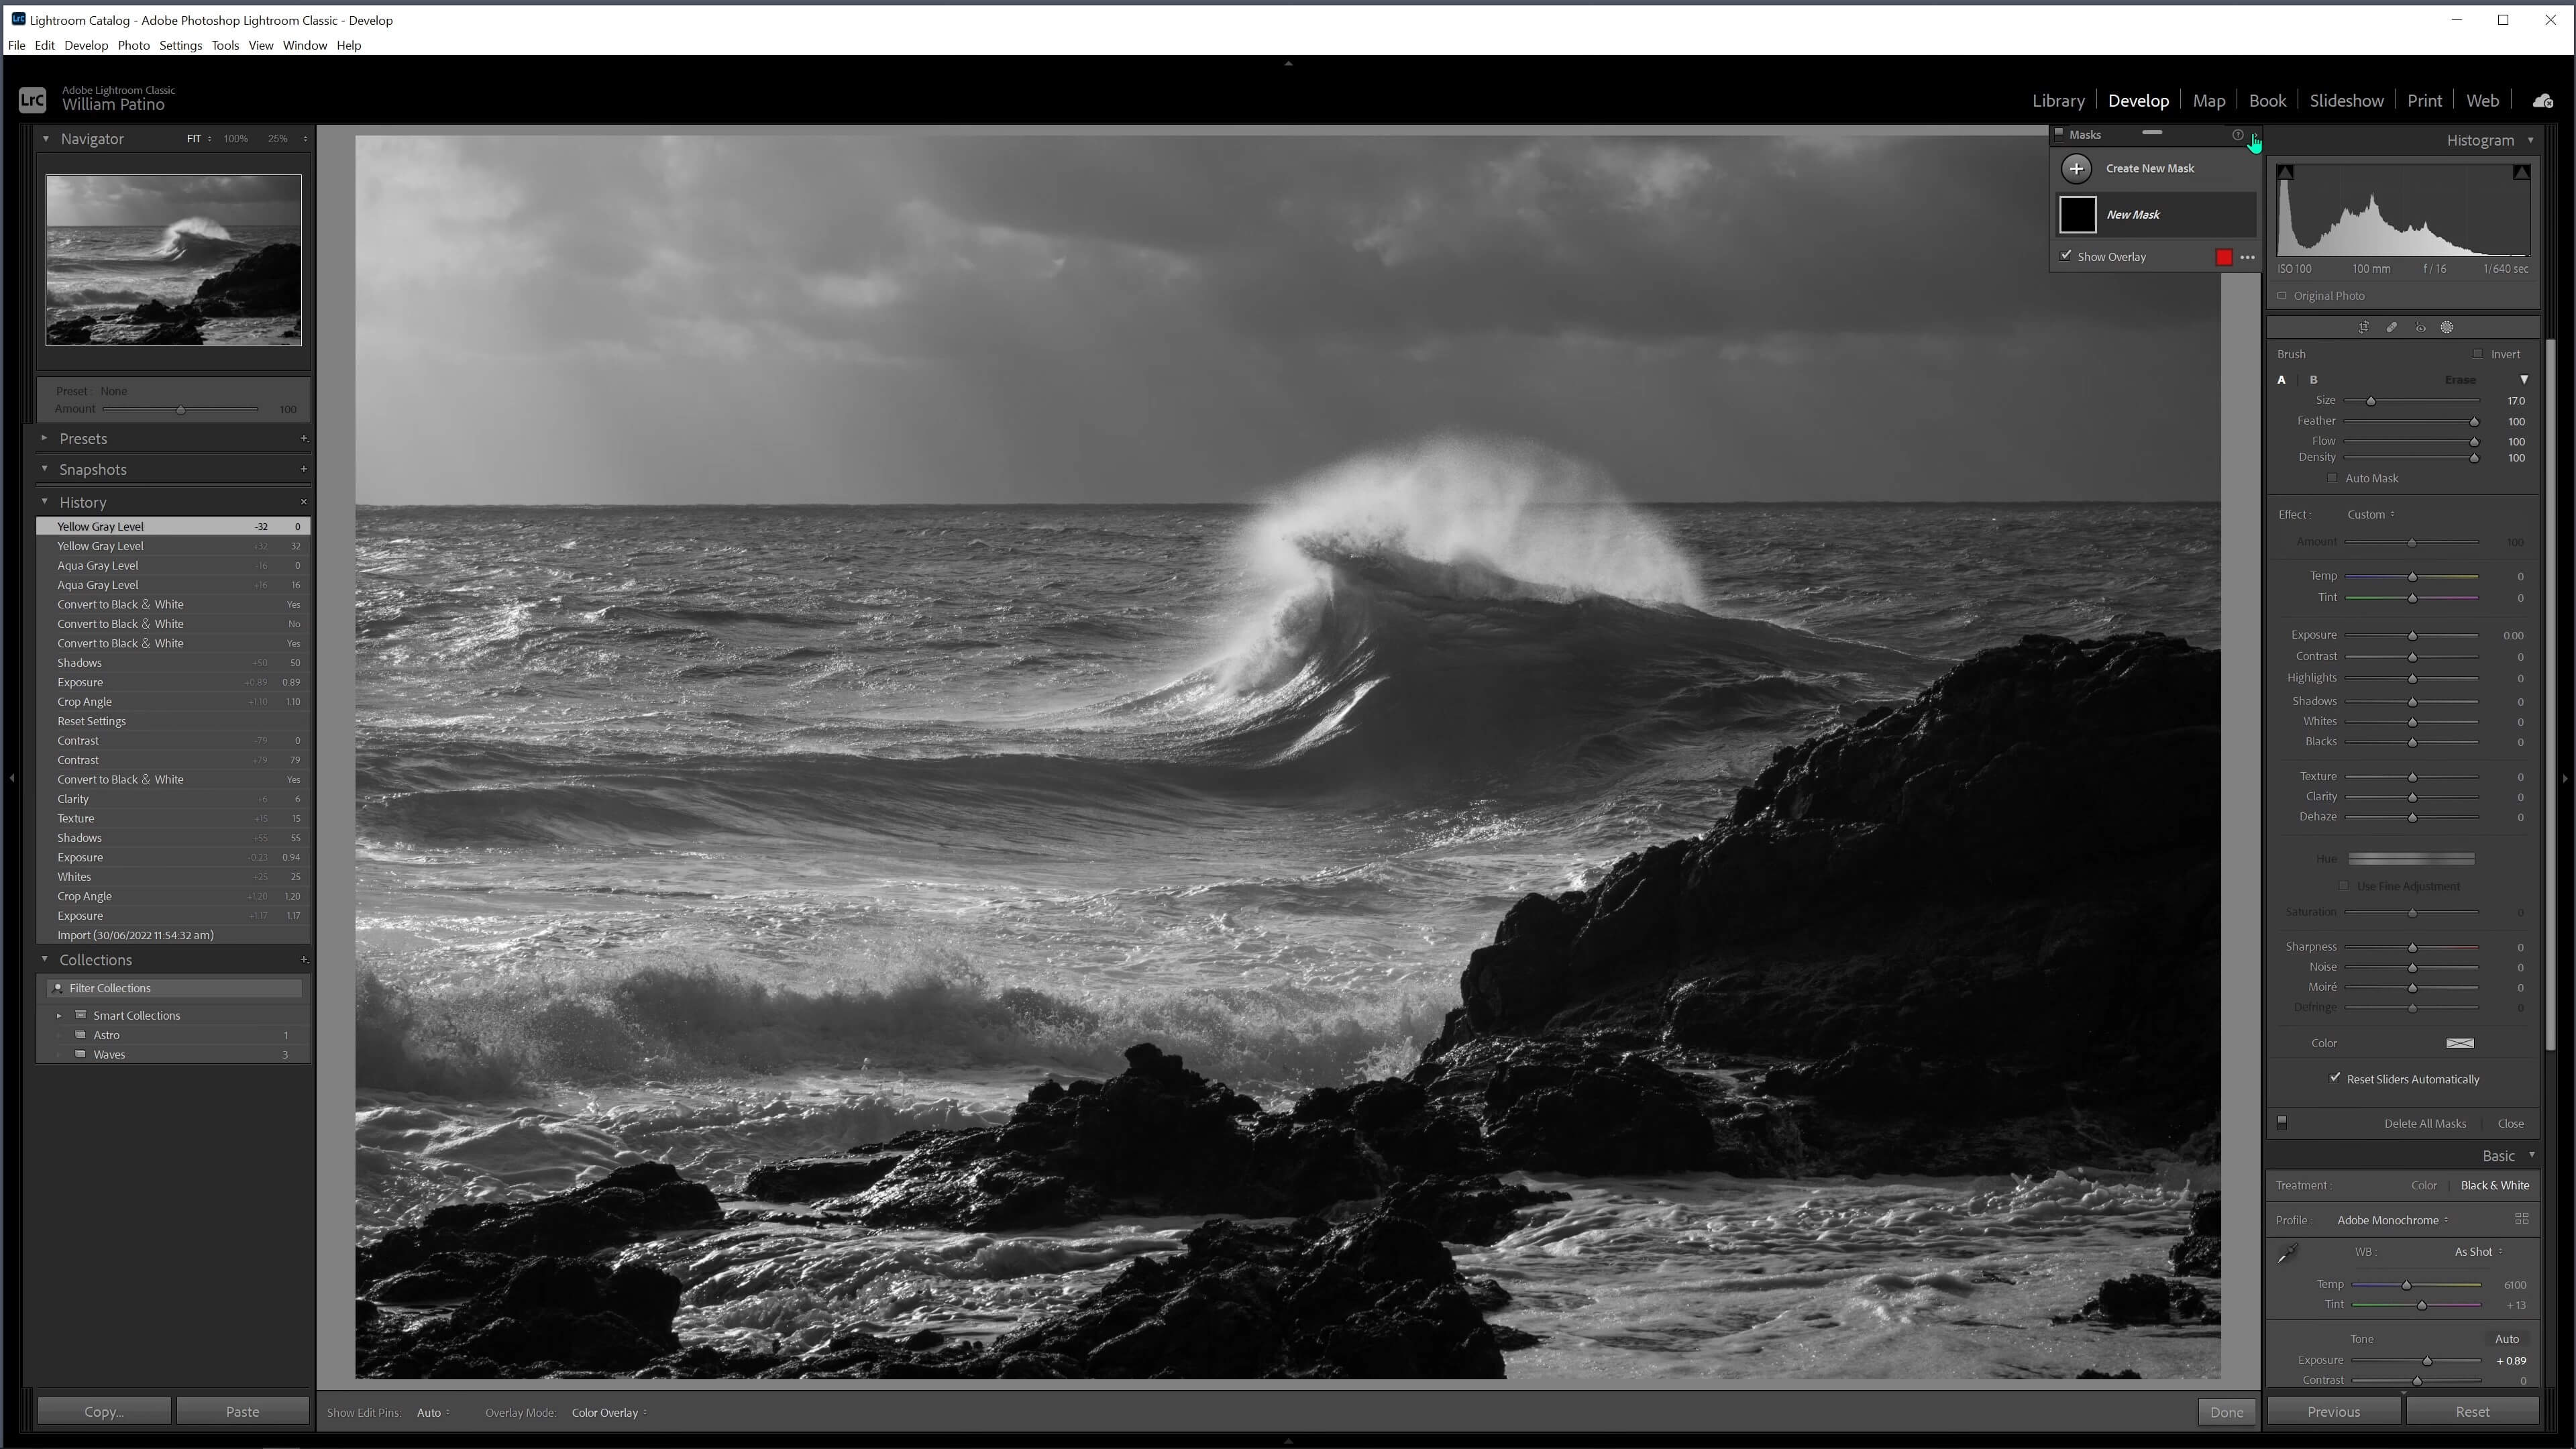
• Bring down the exposure first, which will darken things, but doing exposures darkening every single tone now go to > Dehaze and this is a bit of a contrast adjustment that it’s doing here. If you look at the histogram, you can see how the dehaze adjusts as we drag it down, but it’s not influencing the light up there, which is good because we don’t want to push the light down too far, which is what the exposure did initially.
• Now just make sure those darks come down and that’s how we’re getting that drama in those clouds you could even play with the blacks you pull the blacks down but that’s probably going to go overboard a little bit for us now with the light up there we’ve got those beautiful light beams which we’re losing with a new brush I’ve pushed K
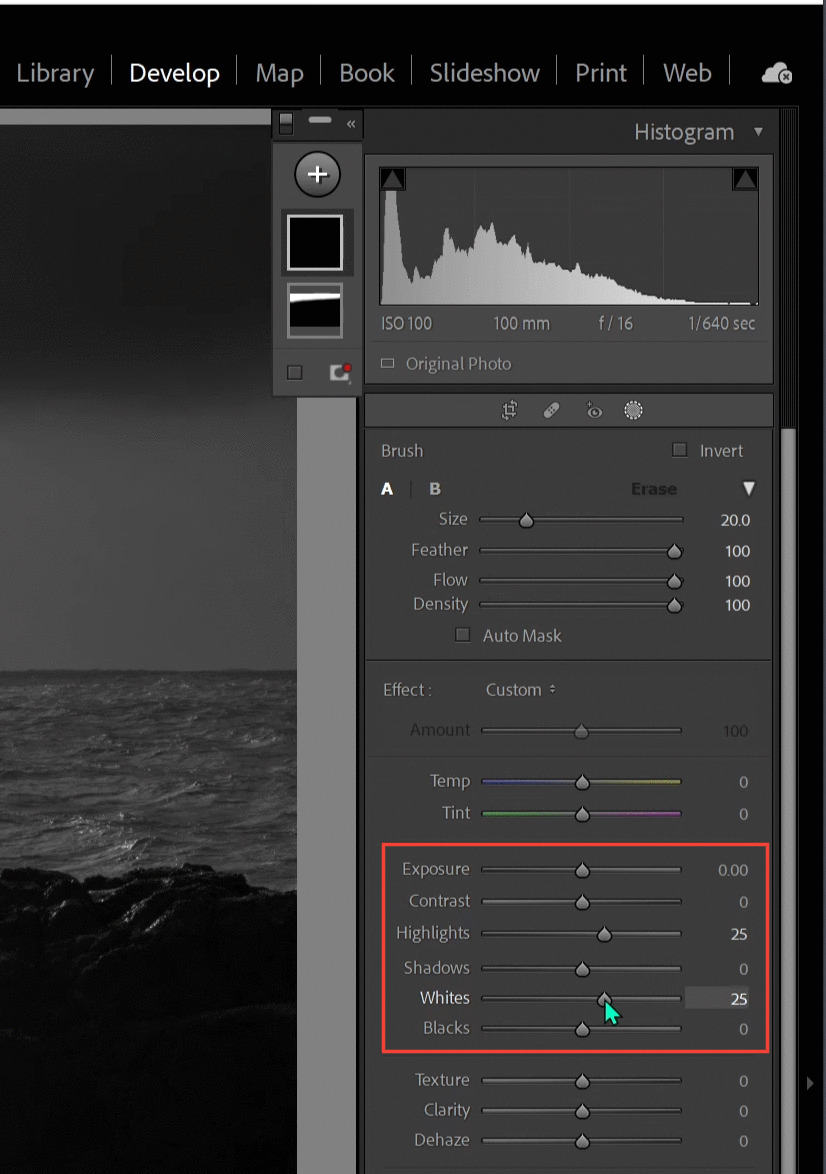
• Bring up the highlights in the whites.
• Run along the entire Horizon and then these pockets of cloud put the highlights and whites back into those because when we reduced the exposure we somewhat undid their brightness so this is just creating more depth back there with the same brush, keep running along, and hit the ocean as well now see how that goes for our run through on the wave…
• Now click the> mask. Adjust the whites and the highlights now push > K again to reveal some of those rough details with the shadow slider just enough and what we’ll end up doing.
#Step5: Building Contrast in the Foreground
• Now go for texture to create some extra gritty contrast detail in this front region, so just hovered all over that rock area.
• So if I go outside the lines as I did, it only affects a very small fraction of whatever my adjustment is, which is why I prefer to leave the feather alone. We’re going to turn the soft brush texture up a notch for rock-solid clarity.
• As the whites begin to pop out, the highlights become sharper, and as we drift off into the distance things become hazier, and that’s how we create depth and separation through the image.
• You will notice that as you bring up the highlights, the water will pop a bit, but that didn’t matter too much to me when I was doing the black, the shadows, and the texture. After highlights, we can create a Halo effect. If you want to remove it, simply click the minus button at the top of the mask and use a brush to erase it, and then remove that adjustment.
• Start a new brush, and this time just highlight the whites and add some light to the wave as you normally would, assuming that the first time you apply something to the brush you apply it, then obviously you can tweak the results as you see fit.
#Step6: Cropping an Image for a Better Frame
• Simply crop in while adjusting the wave, since we don’t need all that space on the left.
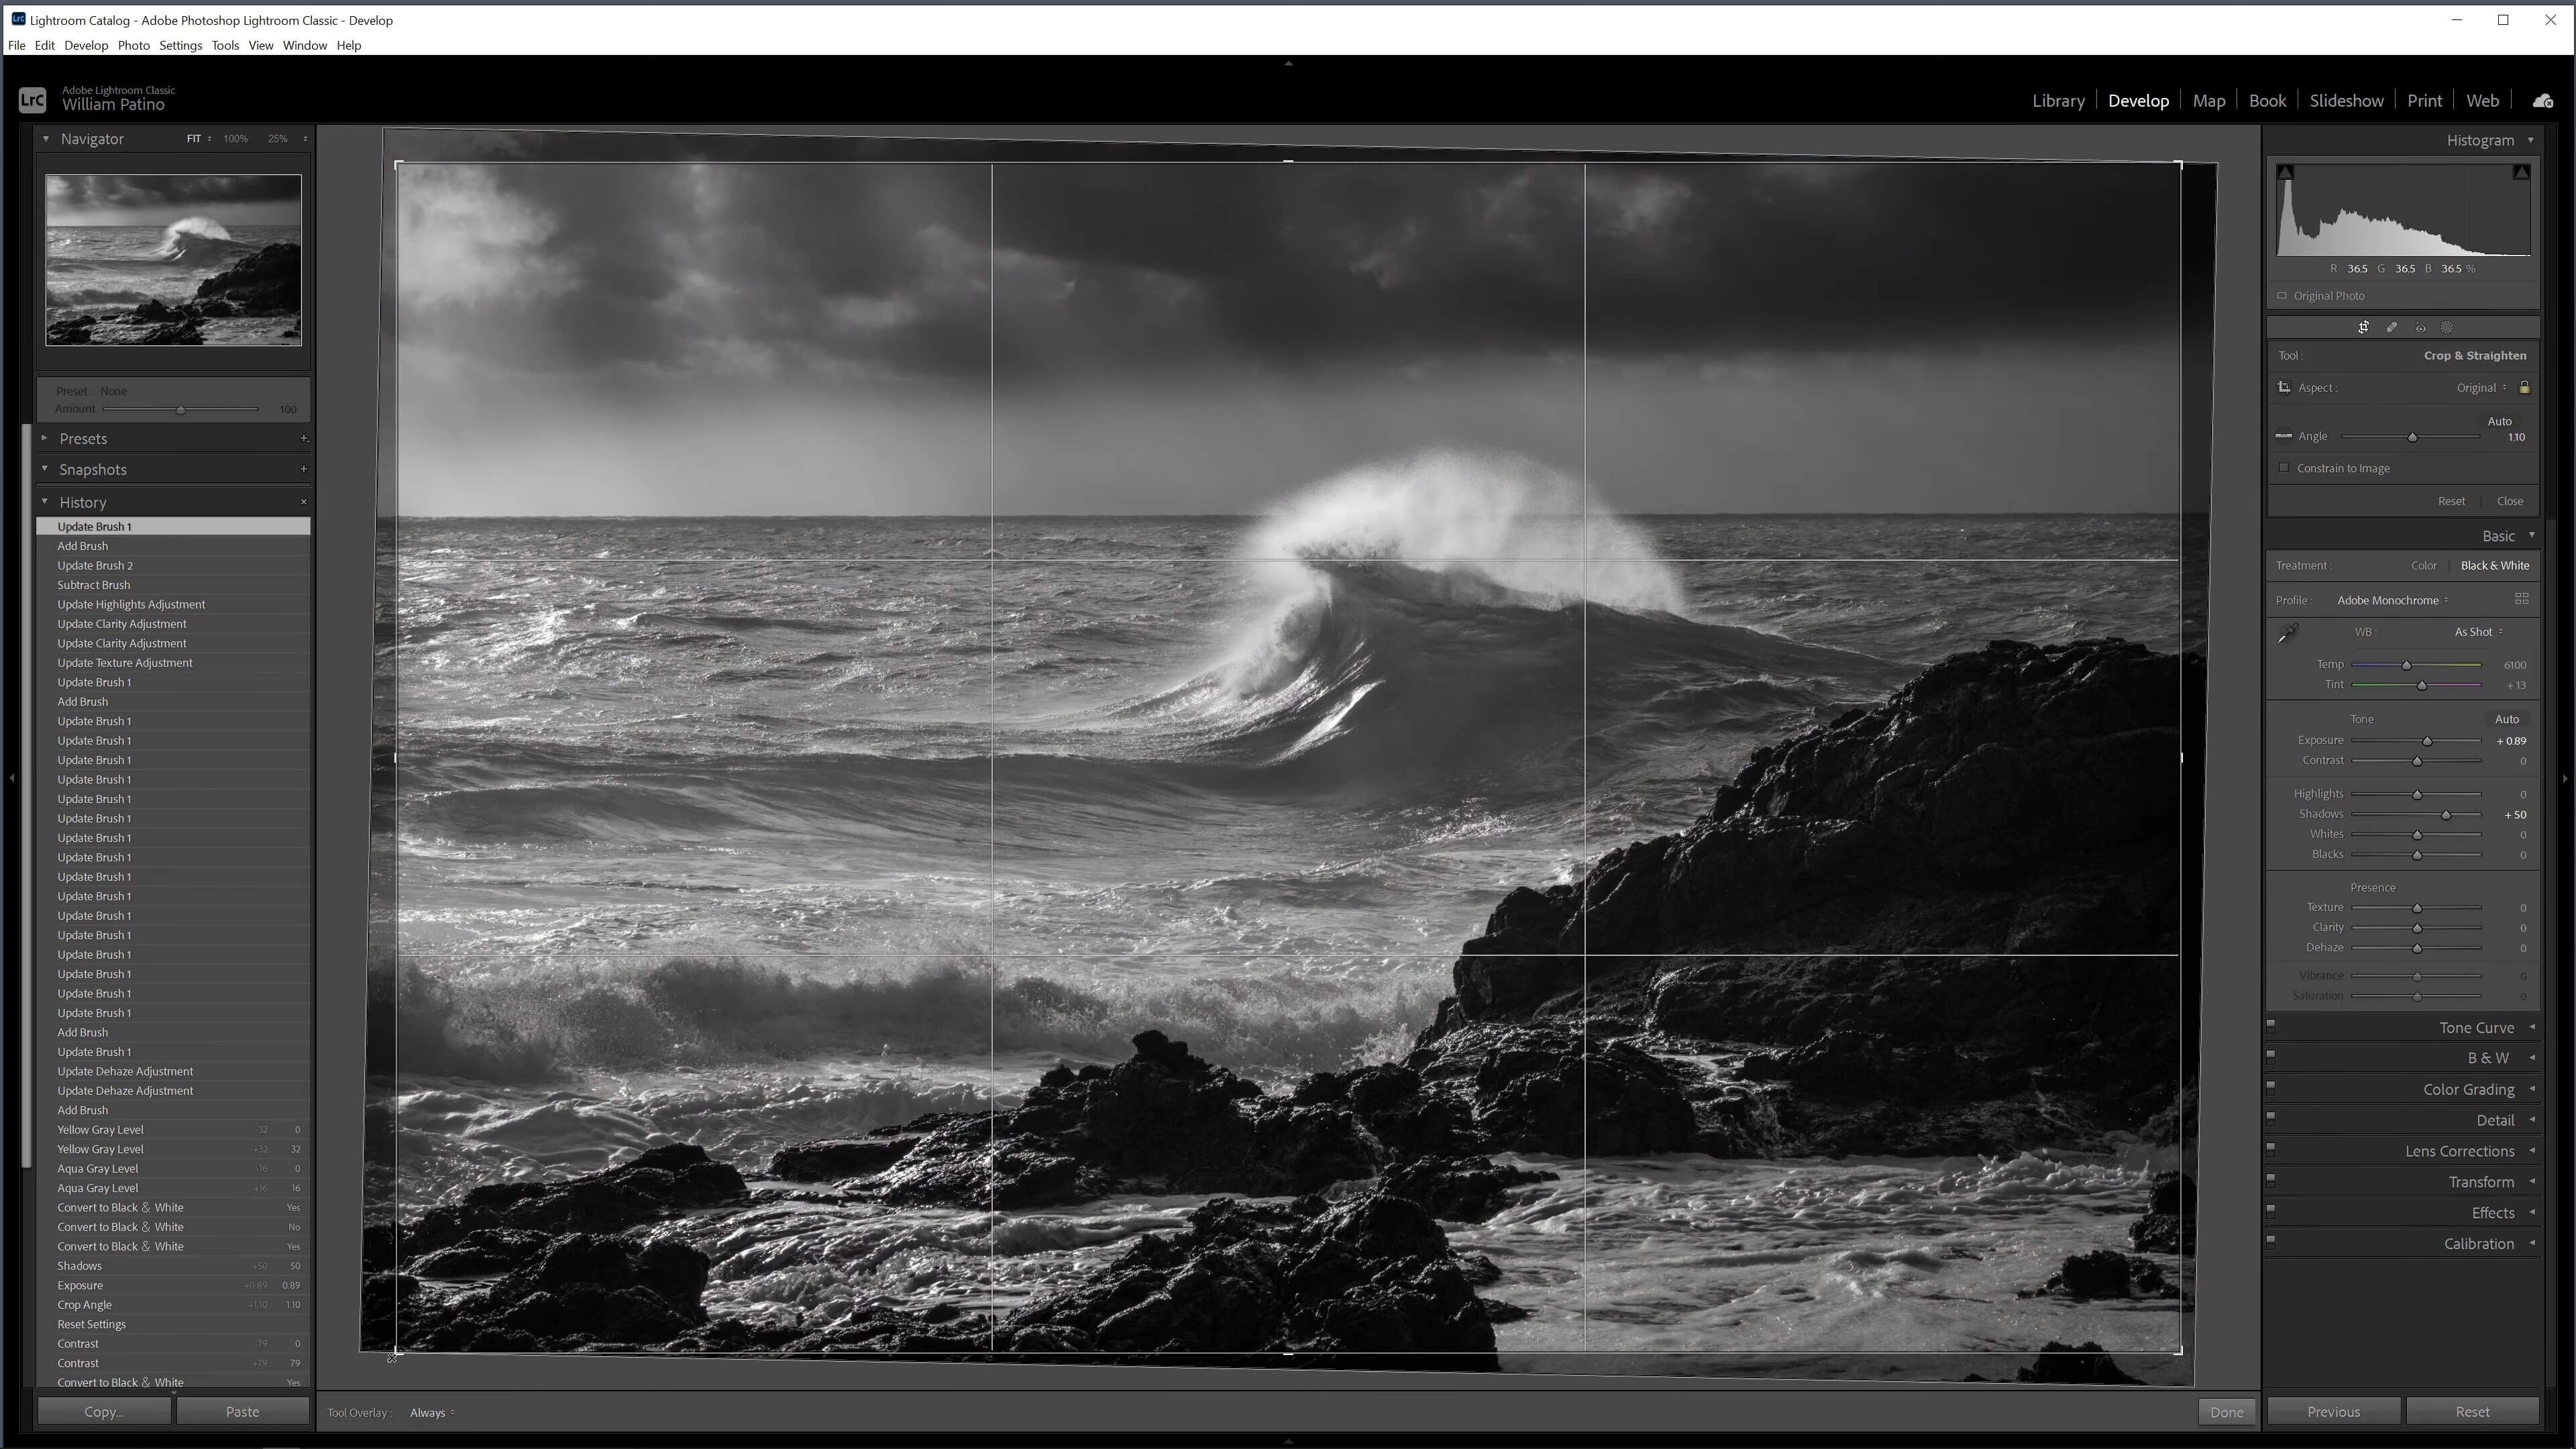
• Look at the horizon line on that third and you’ll get a nice balance, and you can crop in a little bit to bring it down…
#Step7: Global Adjustment and Trusting the Histogram
• Now, let’s do some global adjustments.
• Hit contrasts look at the histogram so you don’t have many bright tones in the image yet contrast will bring the darks darker and the brights brighter.
• So as we don’t want to make these rocks too dark, but high contrast is the key, we’ll also lift the whites.
• The histogram will then push to the right, which is ideal for getting that high contrast going on and helping to push the eye into that back area.
#Step8: Mid-Tone Adjustment Using the Tone Curve
• As we move into mid-tone contrast adjustments using the curve, touch on the darks going down while doing the global contrast, so you’re doing an ‘S-curve adjustment’ quite subtle in this case, and you’ll see how the whites have gone up and the blacks have gone down, resulting in a subtle that’s- an ‘S curve’..’
• Now darken the left-hand half of the frame; if you darken the left, it doesn’t violate logic in the sense that the sun should be coming from the left; you’ll see what I mean; so just go with a graduated filter.

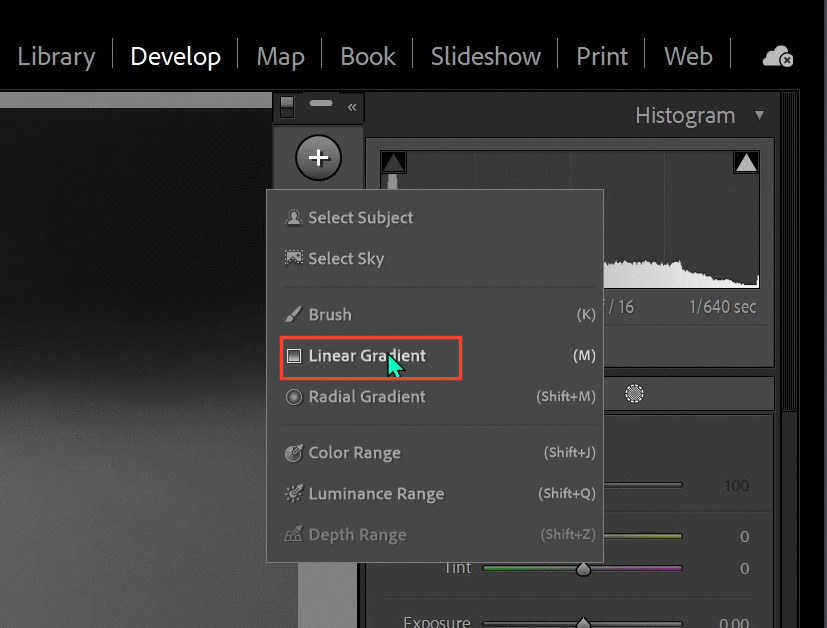
#Step9: Using the Gradient Filter to Make Your Subject Pop
• We’ll now press the mask button.
• Now click on new > linear gradient, but I’ll still refer to the grad filter as the graduated filter.
• Next, bring the exposure down a little bit and drag the eye to the center of the wave, darkening it just a little bit, maybe the top corner was a little too dark, if so, use the subtraction tool to remove it.
• Now, Push K to grab a new brush and go larger, and this time
• In the wave, dial it back a bit to bring the whites down a bit, and then from the Global adjustments, click that and dial down the highlights a little bit, since they are getting a little hot on the wave…
• If you don’t like how those beams are going beyond the white cloud then you can Subtract with a brush and we can just dial it back keeping a darker edge
• Subtract with the brush and clean it up

• To go even darker down the area push > K for a new brush to initially bring the exposure down.
• Additionally, you can play with the black-and-white mixer on the black-and-white tab, as I mentioned earlier. If you pull these up too much, it looks unnatural because you’re lifting that particular color or tone and leaving everything else behind. As a result, the sky may become quite nasty when you pull these up too much.
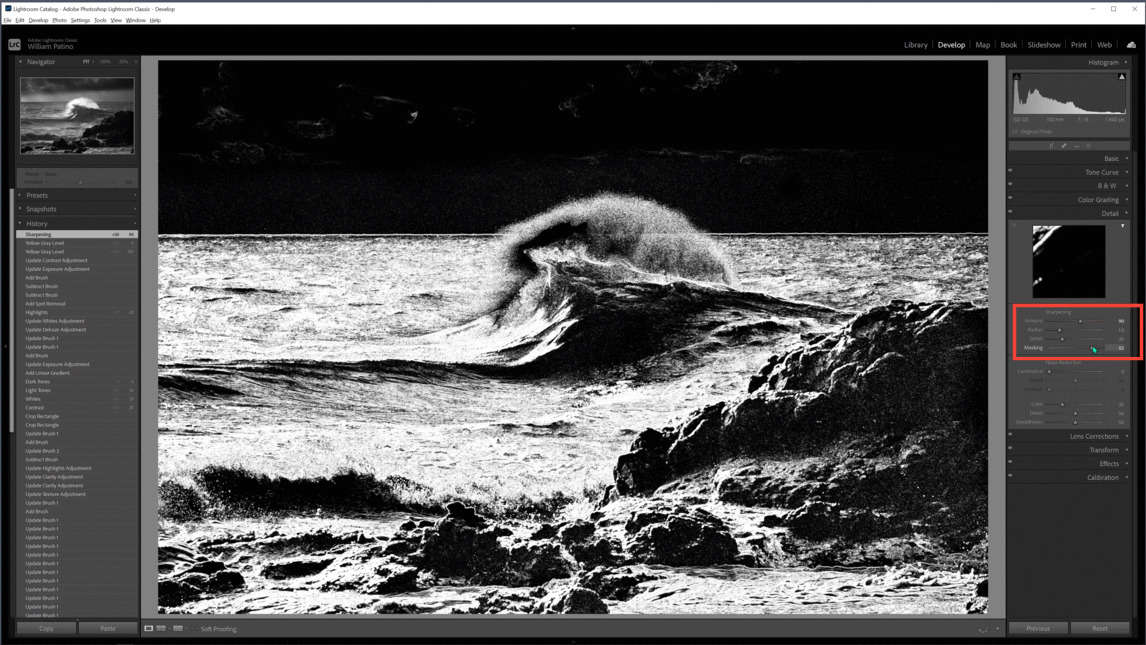
#Step10: Sharpening the Image
• Hold down Alt on the mask and slide it forward to mask it off.
• Go with the sharp-defined edge on the rock will work.
CONCLUSION: The Final Product
Looking Back and Final Tweaks
The backslash key shows a different feel than where we started and where we’ve ended up adding a lot more, doesn’t it? It certainly has a more timeless look.
There’s a bit of mystery there and I believe a lot more drama there. You certainly could make a gorgeous image from the original Raw since there are so many beautiful colors. In reviewing what I’ve done, I think that the black-and-white conversion works well. Maybe that darker sky up here drops off unnaturally instead of looking through and finding the mask that did it. You may wish to raise some blacks and shadows…
To convert an image like this to black and white, make sure you do all the above adjustments and try to make only minor alterations.
Hope you found this tutorial helpful.
Stay tuned for more insightful blogs and videos!