
Introduction to Photoshop generative fill and AI
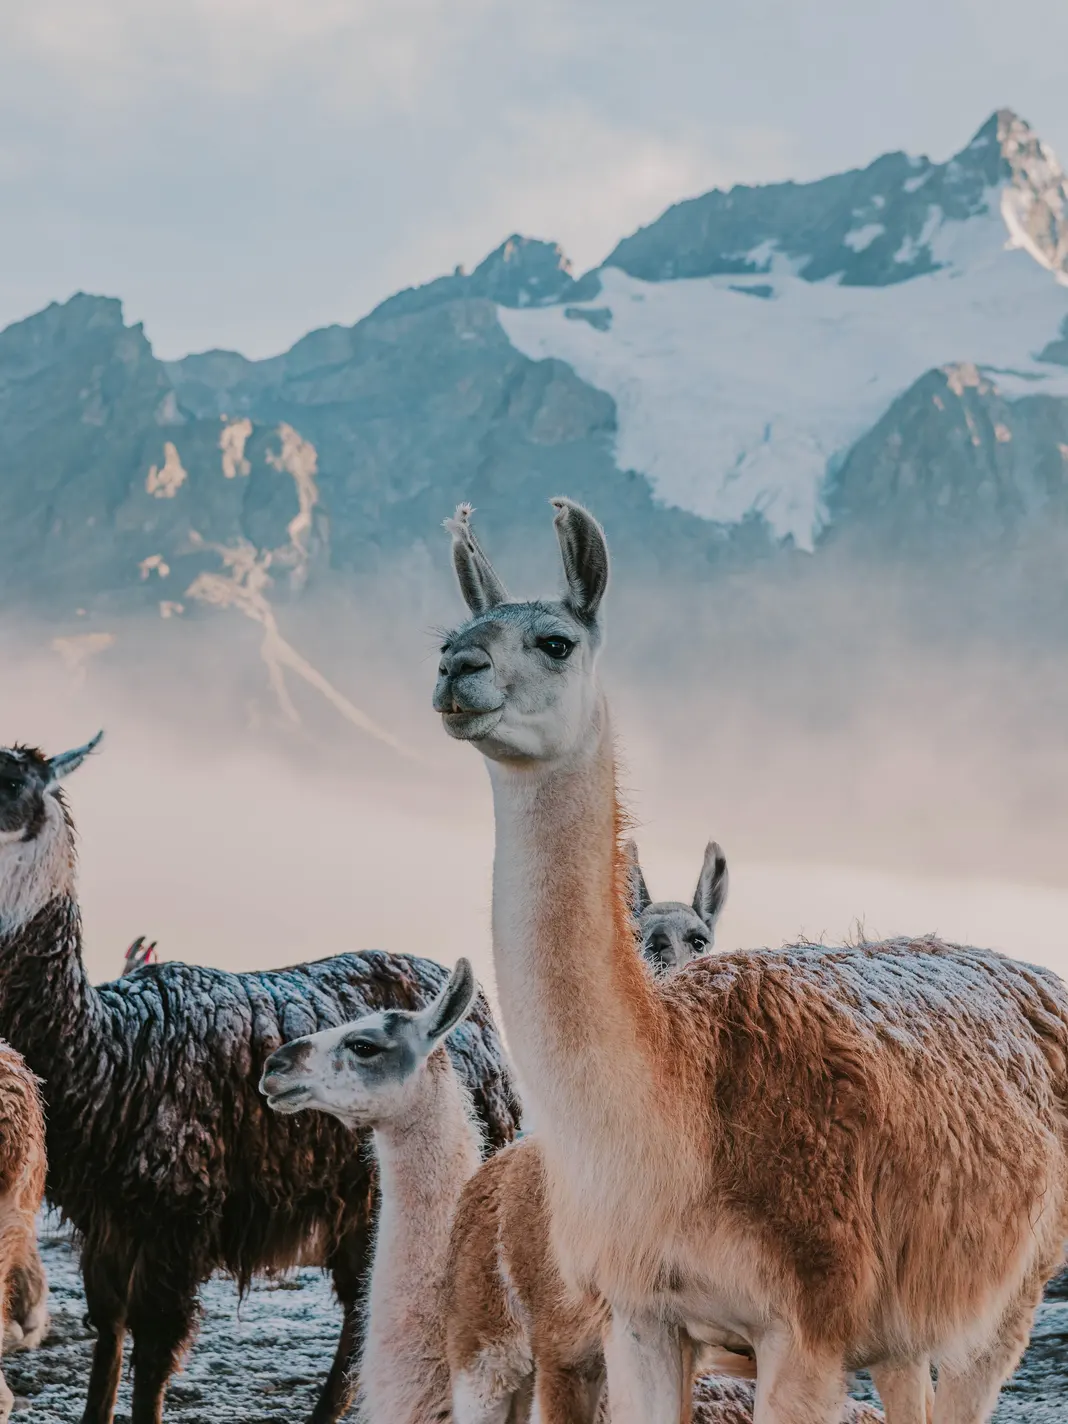
If you’re a Photoshop user, then you’re probably always on the lookout for new features and ways to improve your workflow. In this article, I am going to show you how to use Photoshop generative fill so you can see how this can speed up your workflow. Generative fill is a new feature in Adobe Photoshop CC that allows you to quickly select an area and then use a text prompt to change what you have selected. To use it, simply select an area and enter text into the “Generative Fill” toolbar that will appear. AI features are also fairly new in Photoshop CC. With this new tool you can quickly add a background that was not there or add an element that was not there before. Take this Lama for example – this is a partially cropped photo of Lamas.
**
 **
**
Using Generative fill we will remove some of the Lamas and add a missing background and head. Basically zoom out of the photo.
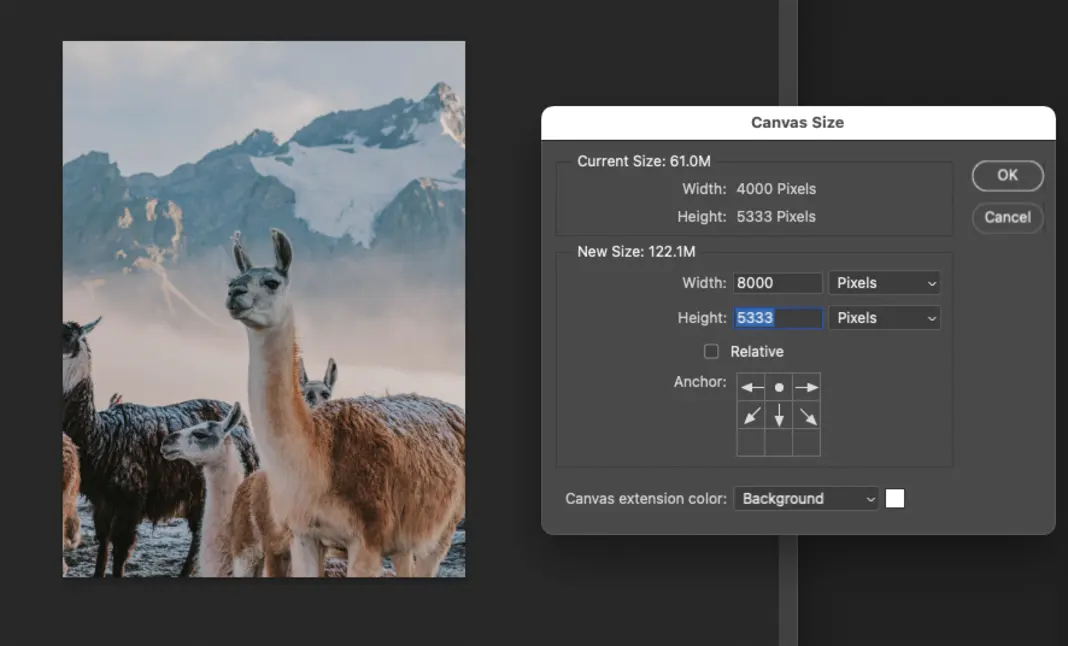
**1. First increase your canvas **
As first step simply increase your canvas size so you have space that can be filled.
2. Select the area that needs replacing
In this case just select the image and invert the selection by hitting** option + shift + I**. Keep in mind to select a little into the image so you don’t get a border or halo effect around your selection which can happen if there is any white in your selection.
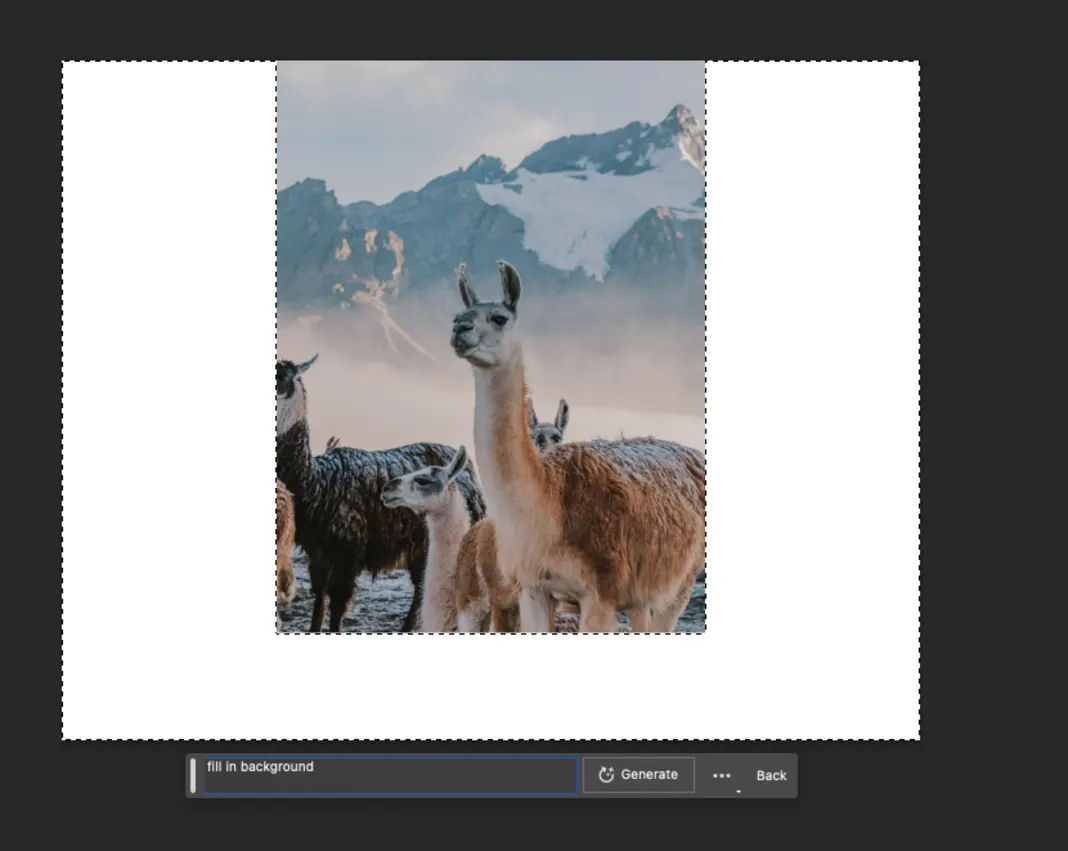
3. Enter prompt into Photoshop generative fill window
Now you fill in the prompt with “Fill in background” or “Add missing background” and hit the “Generate” button. Just make sure your prompt is specific.
You will then see a progress bar (keep in mind this feature requires an internet connection so cannot be done offline).
4. Select the variation you like or regenerate fill
After a few seconds the image will now have the missing background added as a new layer in the Layer stack called “Generative Layer 1”
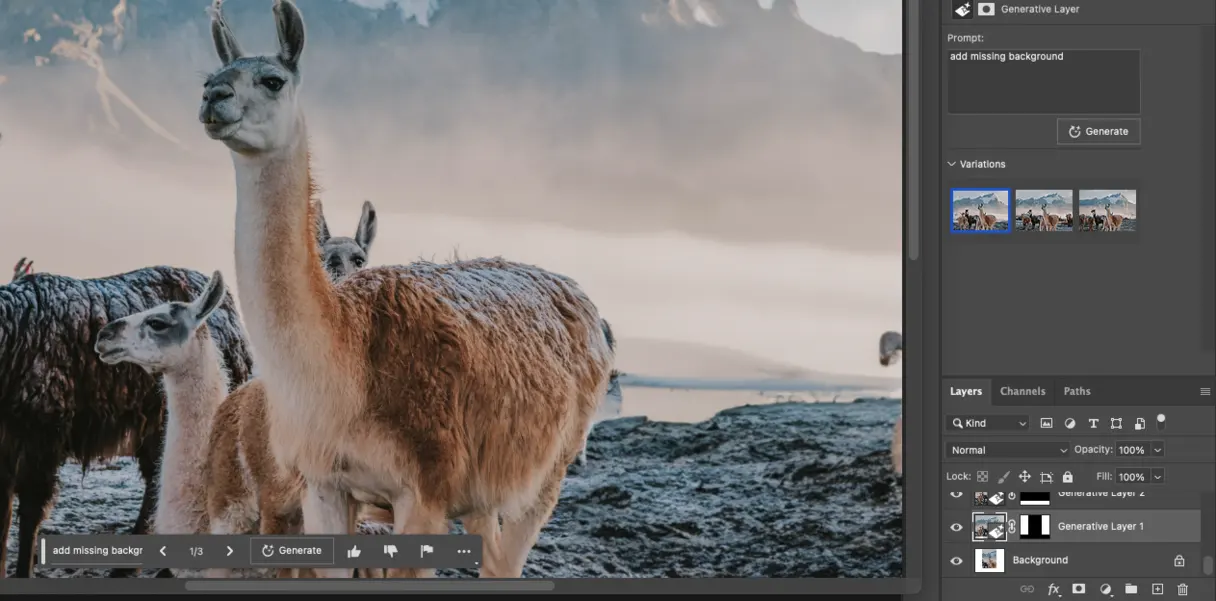
Generative fill gives you 3 Variations that you can select from. As you can see below.
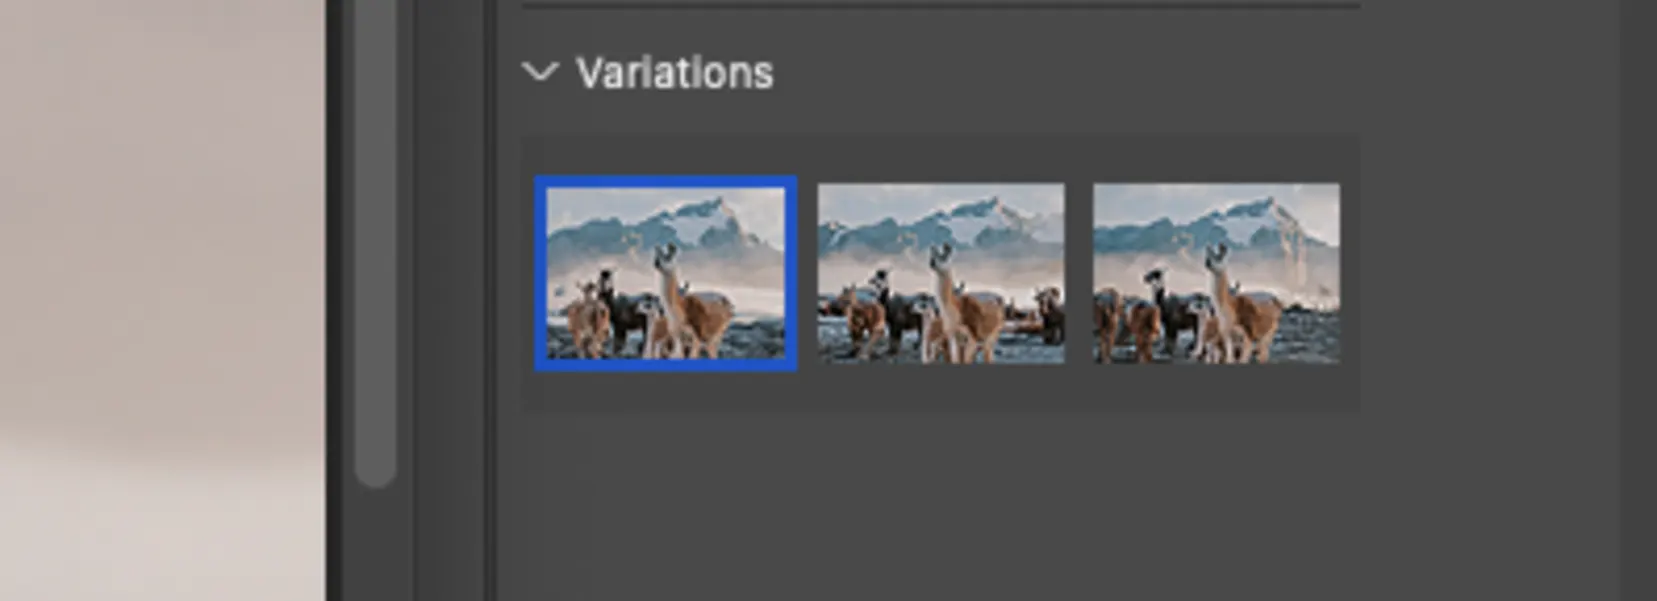
By default the first variation is the one displayed on your screen but you can simple click on the one you want.
If you are not happy with the result of all 3 variations you can simply hit the generate button and it will create an additional 3 variations. Keep in mind this does not delete your existing variations but simply adds 3 more. So you can still fall back to an earlier version.
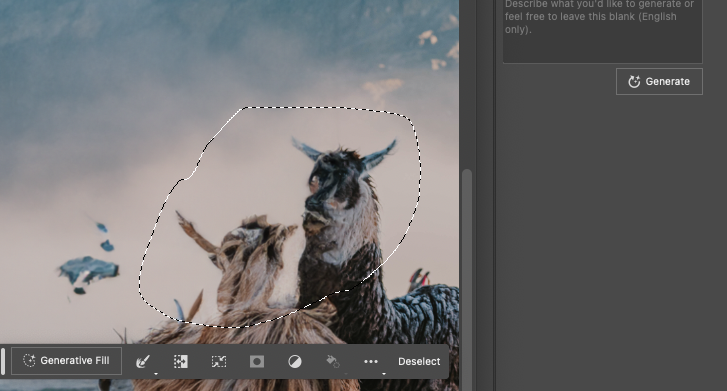
**3. Fixing smaller selections using generative fill **
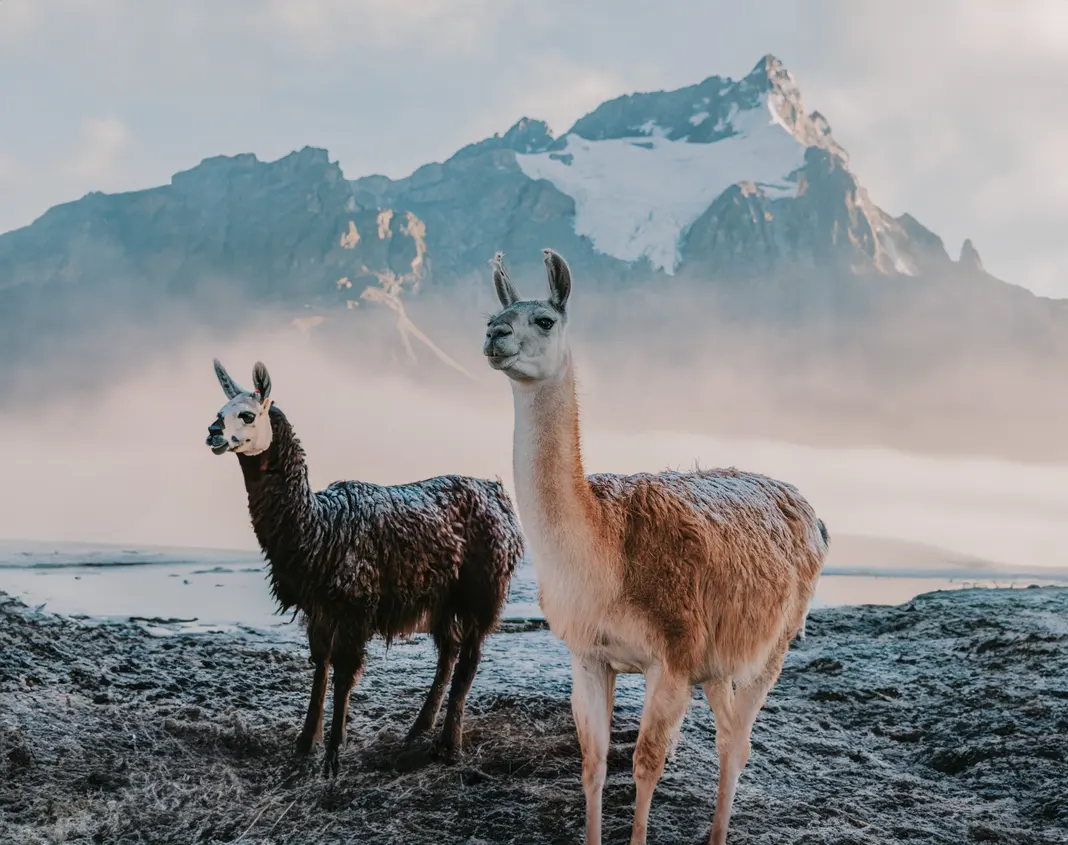
Now in my first version it messed up two Lama heads but the rest looked ok so instead of redoing everything we are just going to do a smaller selection and apply Photoshop generative fill once more.
First make a smaller selection
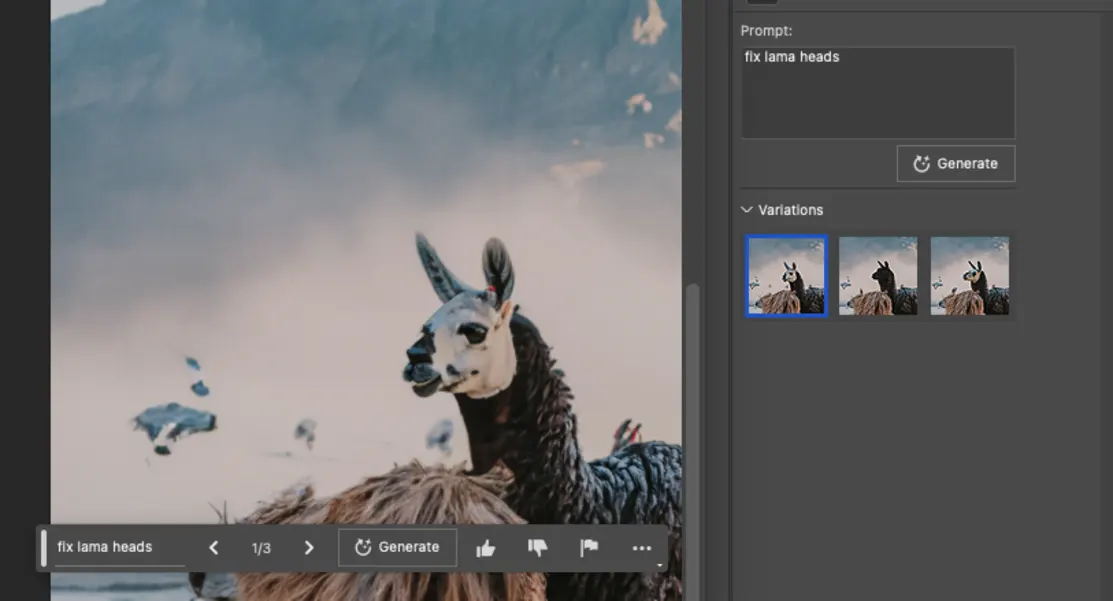
Now we enter a new prompt “fix lama heads” and it removed one of the heads and the 2nd lama got a proper head. I left the default as the others didn’t look as good.
4. Now repeat step 3 with other elements of the image
Here is another selection and me removing an element.
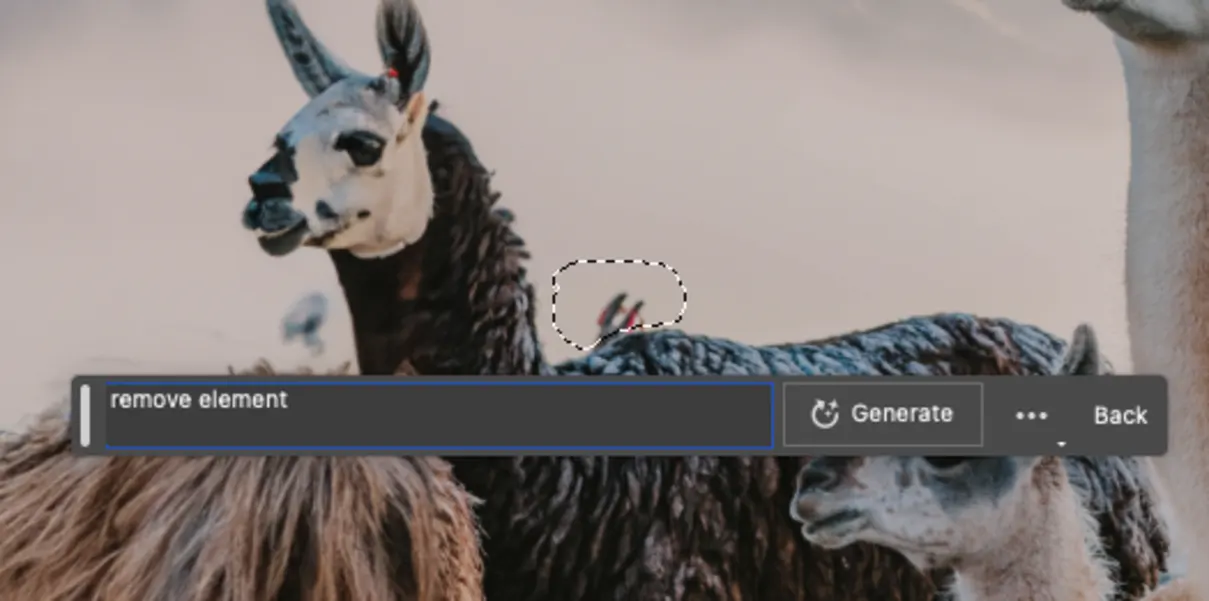
Now selecting a lama
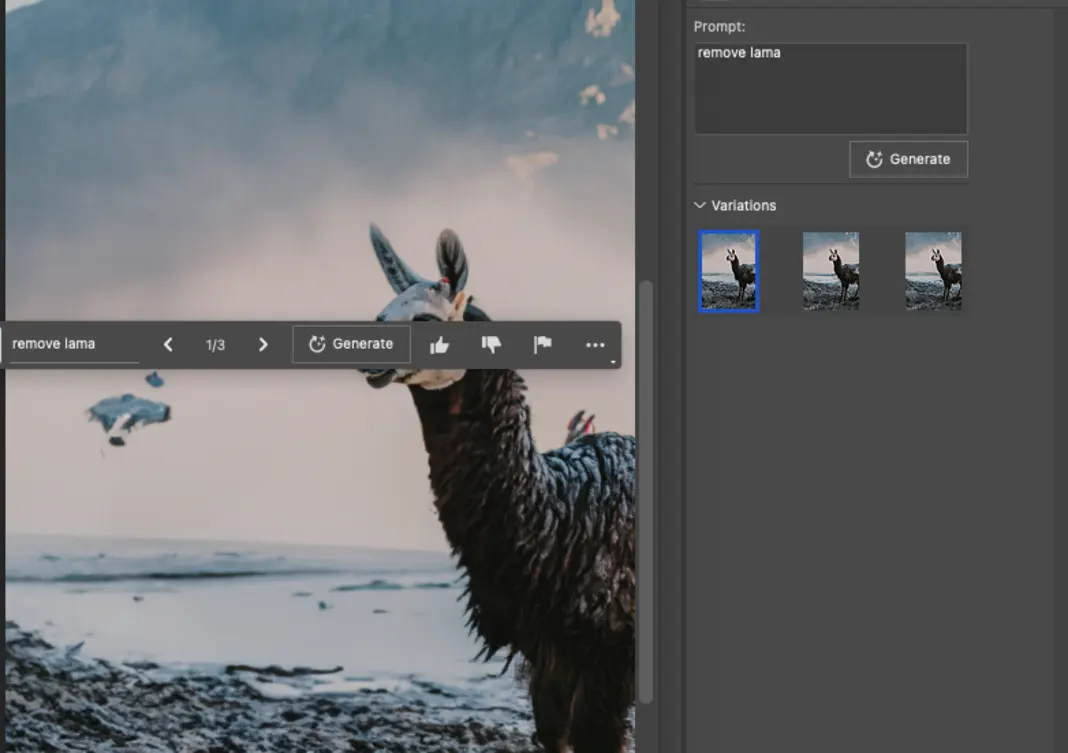
Enter prompt “remove lama” and it removes the entire lama in the front and adds the missing neck to the lama in the background. As you can see the selection can be rough saving you hours of work.
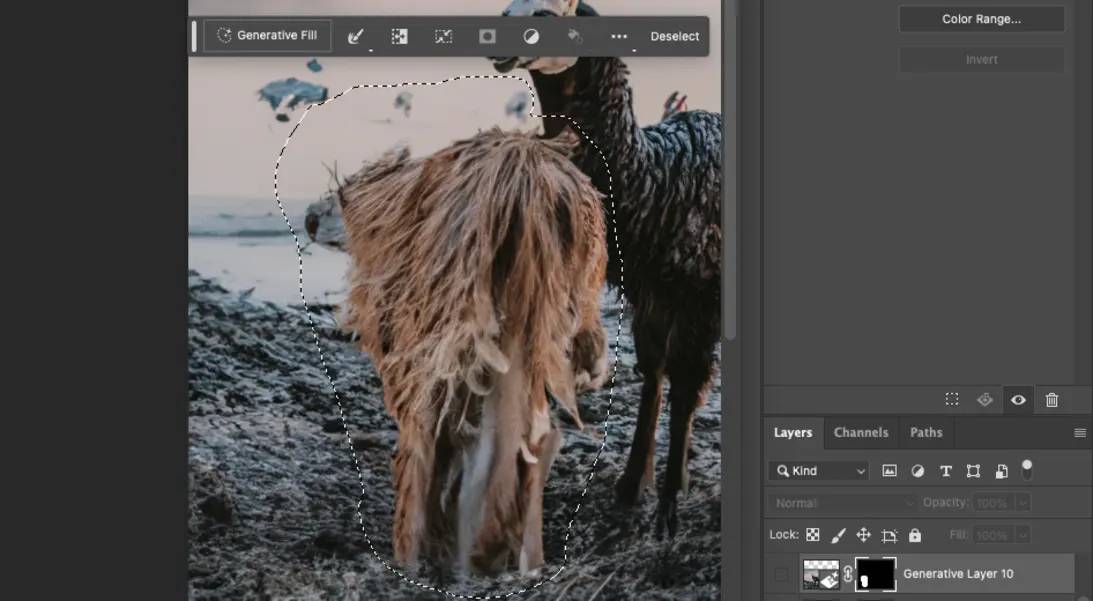
Now you keep on doing this 4-5 more times removing other elements that you don’t like. In this case I removed some more lamas in the middle and including their legs and other elements. Using a total of 8 more generative fills to get the below result. The beauty is you can do a** generative fill** on top of a generative so if the first one didn’t get all of it – get the rest with the 2nd or third generative fill on top of the first one. Just use more a specific prompt such as “fix the legs” or similar. Other prompts used were “remove lama in front of lama”, “remove items behind lama”, “remove” etc.
Conclusion
Now you might wonder – does this replace you as a photoshoper or artist? I would say no – as you still have to decide what needs to be replaced – what looks better and what looks worse. Come up with the selections, prompts and compositions that will get the image you are after that has an emotional impact.
However you look at it Adobe Photoshop Generative Fill is definitely a powerful tool that can save you hundreds of hours, especially when doing mundane tasks that are tedious and time consuming – such as selecting objects and removing unwanted elements etc.
In summary here are the steps again:
**1. Enlarge your canvas (might not be needed in your case)
****2. Select area that you want to change
****3. Enter generative fill prompt
****4. Select Version you prefer or re-generate
**5. Repeat 2-4 on smaller areas of the image.
Using Generative Fill in Adobe Photoshop is a great way to harness the power of AI to create unique images and to unleash your creative side. With the help of Generative Fill, you can have a bit of fun and experiment with new photo ideas in a fraction of the time it would usually take. Give it a try and see what amazing images you can create!
If you like this article **sign up here **to be notified of future posts and offers!
Comments
Leave a Comment