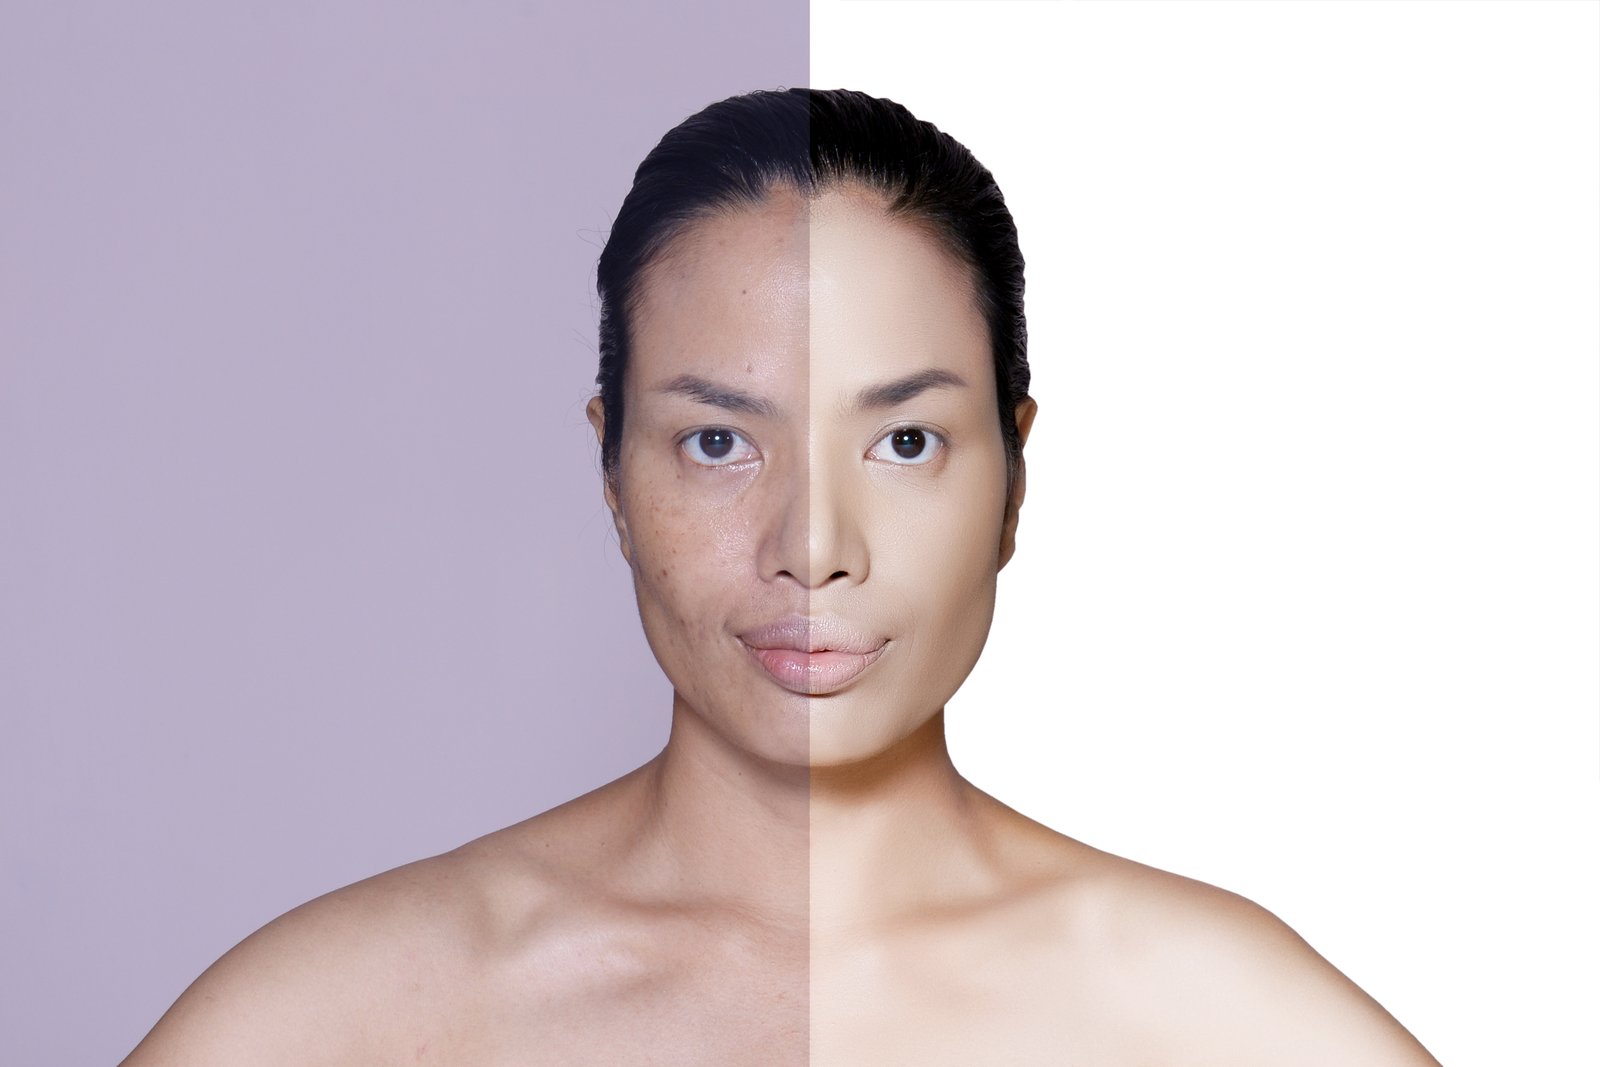
I once sent a retouched portrait to a client and got back a two-word reply: “Looks plastic.” She was right. I had smoothed the skin so aggressively that her face looked like it had been rendered in a video game. I had wiped out every pore, every texture, every trace of what makes skin look like skin. The tones were clean. The person was gone.
That was the moment I got serious about frequency separation.
What Frequency Separation Actually Does to Your Image
Most retouching mistakes happen because color and texture are treated as one thing. They are not. When you look at a patch of skin, two completely separate pieces of information are sitting on top of each other: the tone and color beneath (a reddish patch from a blemish, uneven warmth across the cheek) and the physical surface texture above (pores, fine lines, subtle variation in the skin’s topography).
Standard healing and cloning tools drag both layers of information around at once. That is why you get the plastic look. You fix a red spot, but you also accidentally flatten the pores around it, and suddenly that area reads as fake even if the color correction was perfect.
Frequency separation splits these two frequencies into separate layers. Low frequency handles the color and tonal gradients. High frequency holds the texture detail. Once they are separated, you can fix a blotchy patch of color without touching a single pore. That is the whole game.
How to Set Up Frequency Separation in Photoshop
There is no built-in button for this, so here is exactly how I build it.
Duplicate your background layer twice. Name the bottom copy “Low Frequency” and the top copy “High Frequency.”
Turn off the High Frequency layer and select Low Frequency. Go to Filter, Blur, Gaussian Blur. For portraits shot at typical working distances, I start at a radius of 3 to 4 pixels for high-resolution files (anything above 20 megapixels). For lower-resolution images or heavily cropped shots, I drop to 1.5 to 2 pixels. You want the blur heavy enough that all fine texture disappears and only broad tonal shapes remain. Click OK.
Now turn the High Frequency layer back on and select it. Go to Image, Apply Image. Set the Layer to your Low Frequency layer. Set the Blending to Subtract. Set the Scale to 2 and the Offset to 128. Make sure Invert is checked. Click OK.
Change the blending mode of the High Frequency layer to Linear Light. Your image should now look identical to how it started. That is the confirmation that everything worked. The two layers cancel each other out visually, but they are now fully separated and independently editable.
Working the Low Frequency Layer Without Wrecking the Texture
This is where the real retouching happens. Select the Low Frequency layer and grab the Lasso tool. Set a feather of 15 to 25 pixels depending on the size of the area you are fixing. Loosely select a problem area, maybe a red patch on the forehead or a shadow pooling unevenly under the eye.
Then go to Filter, Blur, Gaussian Blur and use a low radius (1 to 3 pixels) to blend that selected area into its surroundings. Or use the Clone Stamp at about 10 to 20 percent opacity, sampling from a nearby area with similar tone. Either way, you are pushing color and light around without touching the texture layer sitting above it. The pores stay intact. The skin stays real.
For larger tonal corrections, I sometimes paint directly on the Low Frequency layer using a large, soft brush at 5 to 10 percent opacity with the color sampled from a healthy area of the skin.
The High Frequency Layer Is Only for Structural Problems
New users tend to over-correct on the High Frequency layer. This layer is for fixing texture issues specifically: a stray hair crossing the face, a distracting pore cluster, the edge of a crease that reads too harshly. Use the Clone Stamp or Healing Brush here with the sample set to Current Layer. The opacity can be higher, around 70 to 90 percent, because you are dealing with defined structural detail, not gradual tonal shifts.
Resist the urge to use the Healing Brush broadly on this layer. Small, targeted strokes only. The moment you start painting across large areas of the High Frequency layer, you will start to see unnatural texture repetition, the tell-tale sign that someone dragged pore patterns across the face like wallpaper.
The Version I Show My Students First Always Surprises Them
When I run my live workshops, I do a before and after without telling the audience which technique I used. I show standard healing and cloning first, then frequency separation. Every time, people assume the frequency separation version took longer. It almost never does. Once the setup is done (and honestly, saving it as a Photoshop Action makes it a one-click process), the actual retouching is faster because you are not fighting the interaction between color and texture on every single stroke.
I started building those Action sets for my own work years ago, back when I was grinding through agency deadlines on portraits that needed to turn around in hours. Frequency separation, built into an Action, cut my skin retouching time roughly in half. Not because it is magic, but because separating the problem into two distinct, manageable pieces means you are never trying to fix everything at once.
Skin retouching goes wrong the moment you treat color and texture as the same problem. Separate them, and suddenly you are not fighting the image anymore.
Comments
Leave a Comment