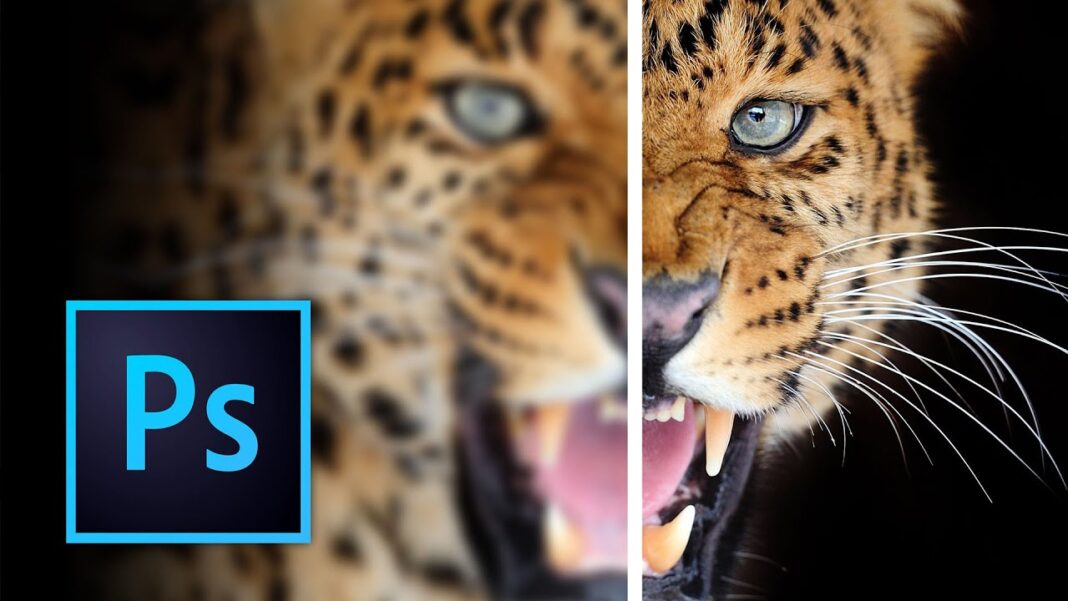
How to Sharpen an Image in Photoshop
Getting Started
Before we begin, download the source files for this How to Sharpen and image in Photoshop tutorial by using the link below. You can also watch the video by clicking here.
Once you have the files downloaded, open the first image in Photoshop.
If you are not already in the Essentials workspace, click on the “Essentials” option at the bottom. Additionally, if you have made any changes to the workspace, you can reset it by going to Window > Application Frame. Zoom in to 100% for a better view.
Unsharp Mask in Photoshop CC
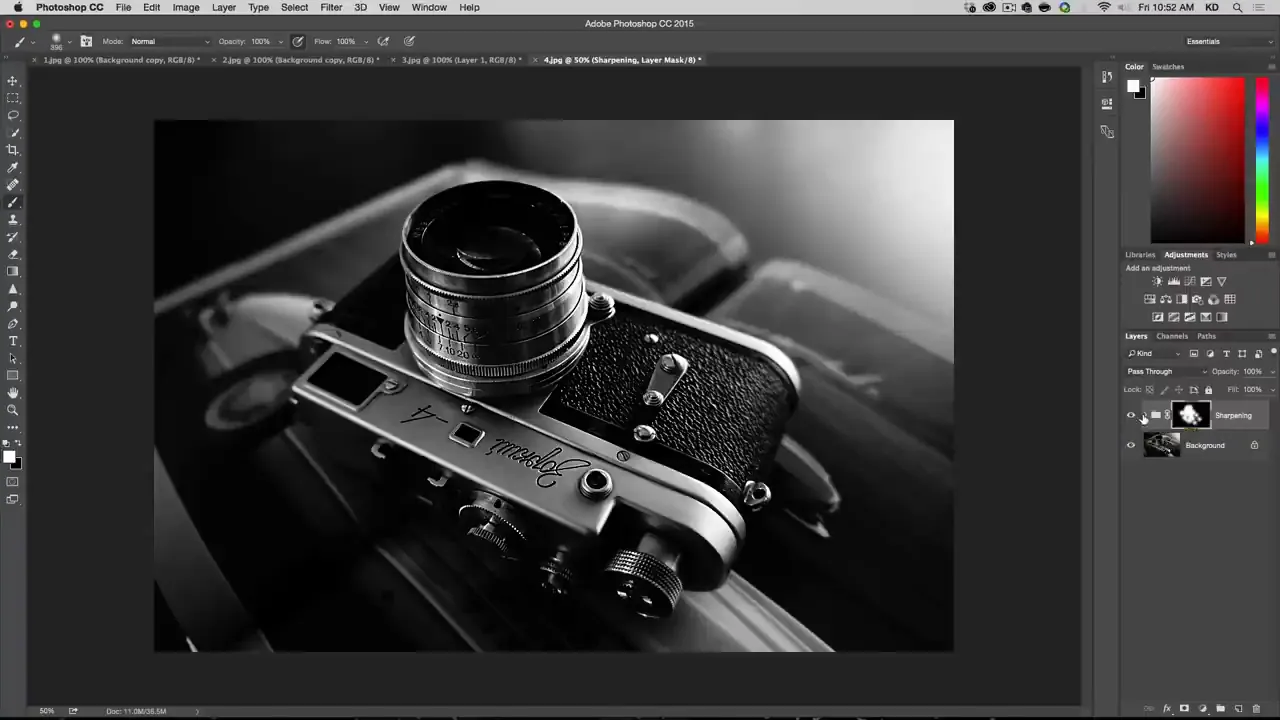
The first sharpening tool we will explore is Unsharp Mask, which is one of the most common methods.
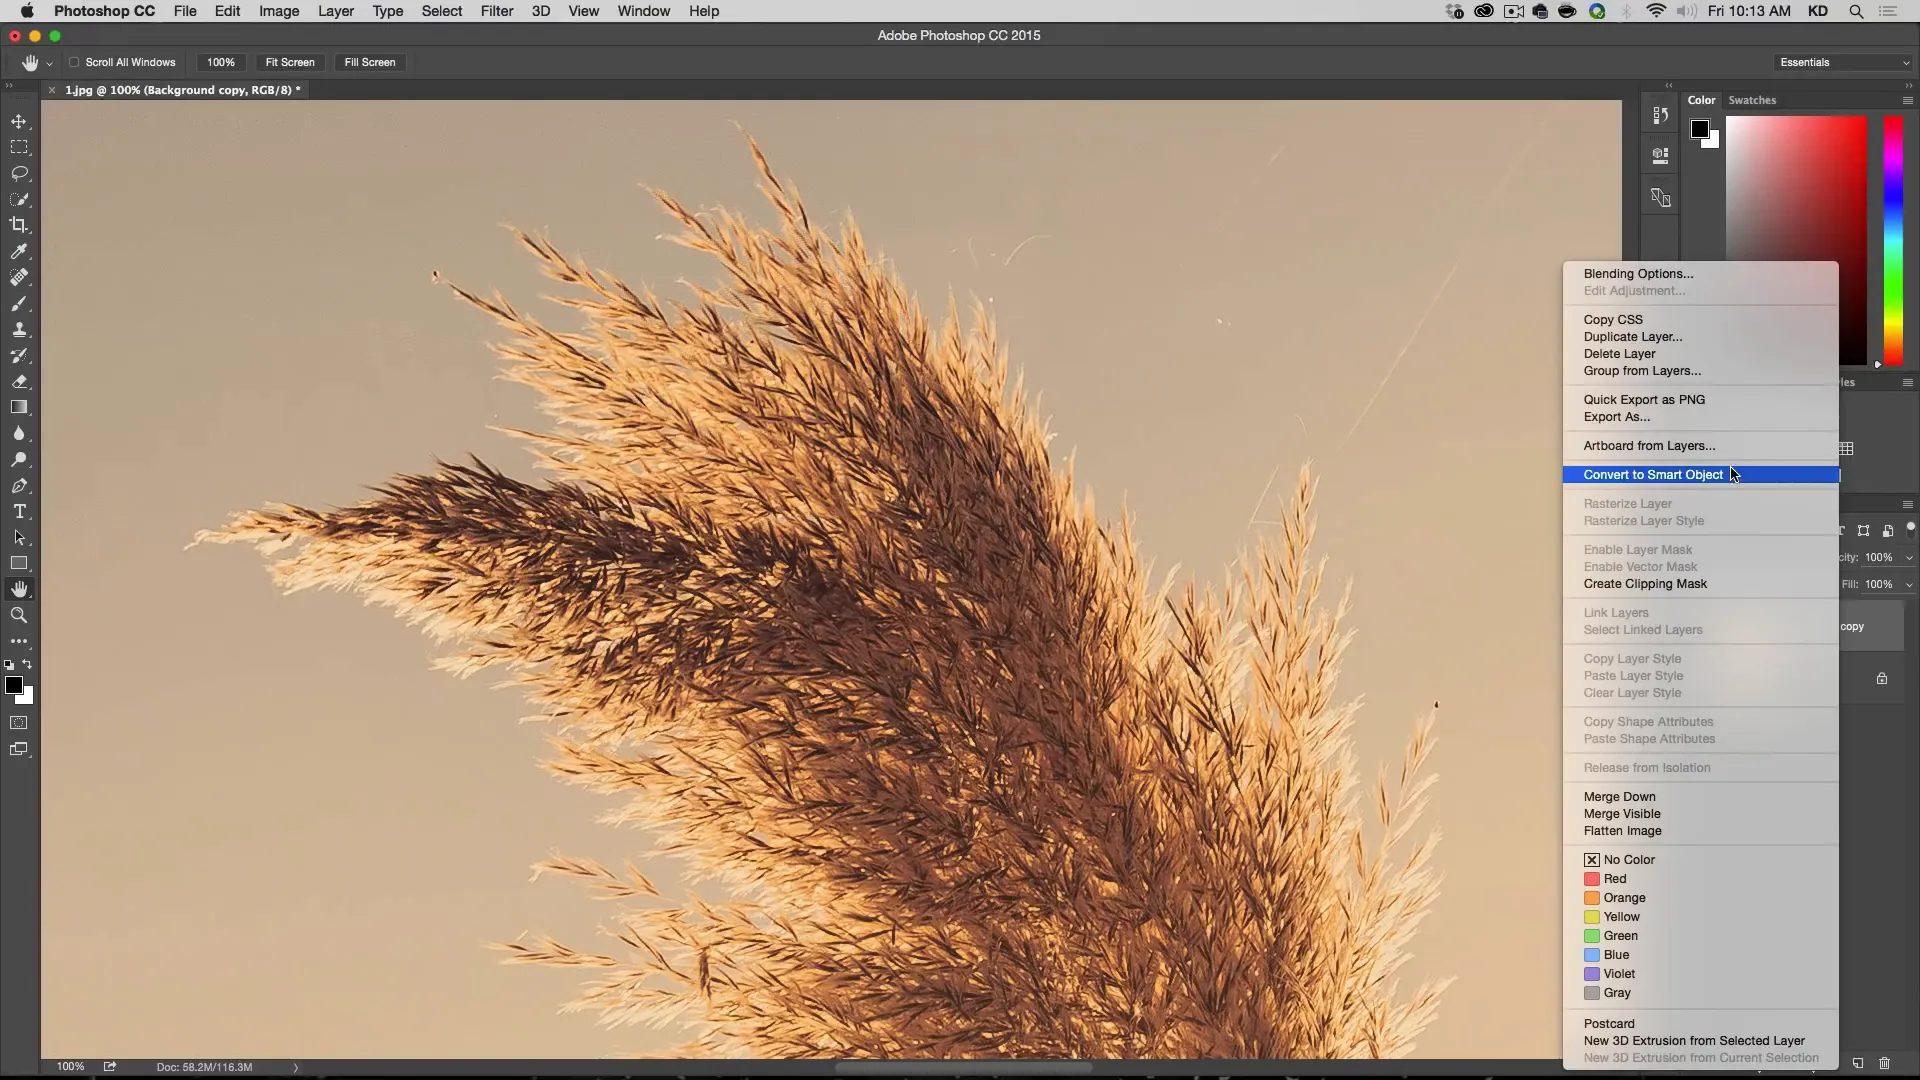
To start, make a copy of the original image by dragging it to the new layer icon. Right-click on the new layer and select “Convert to Smart Object” for non-destructive editing.
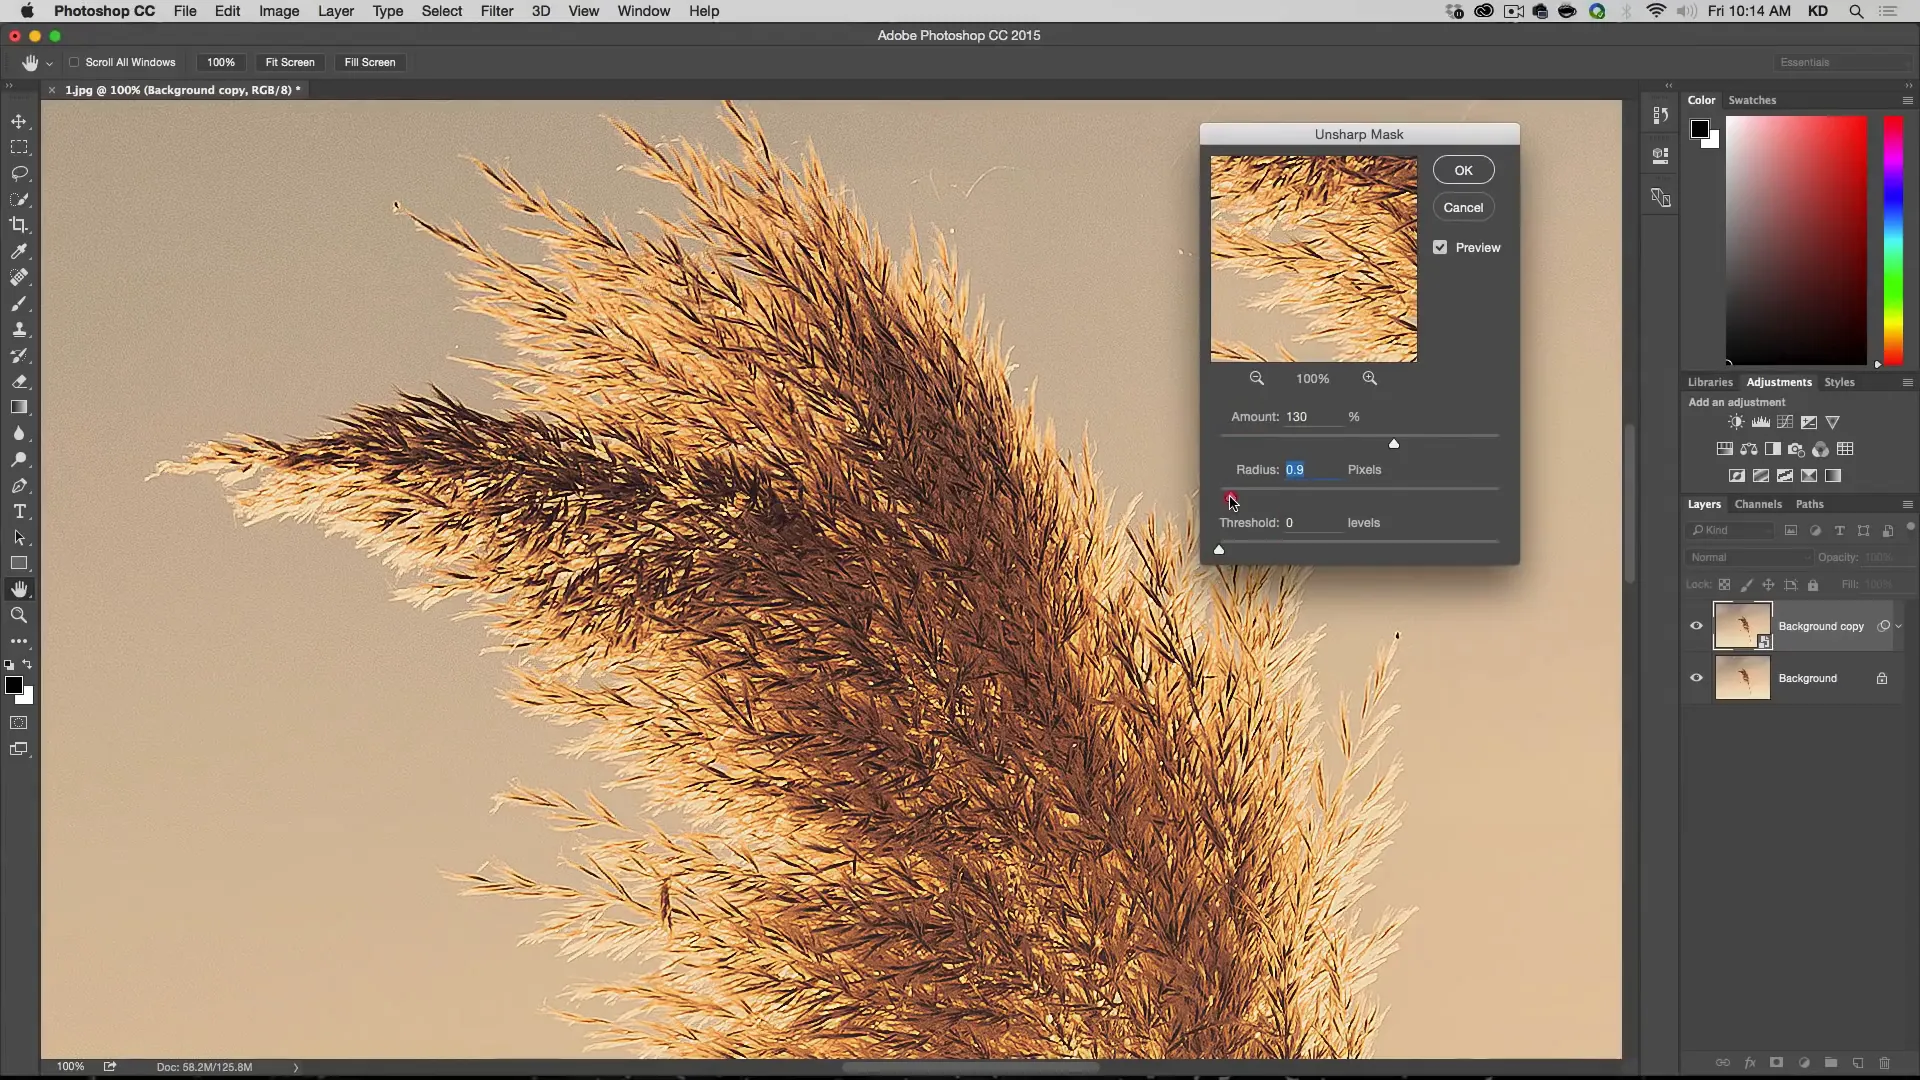
Next, go to Filter > Sharpen > Unsharp Mask. Begin with an amount of around 100 and a radius of 0.3.
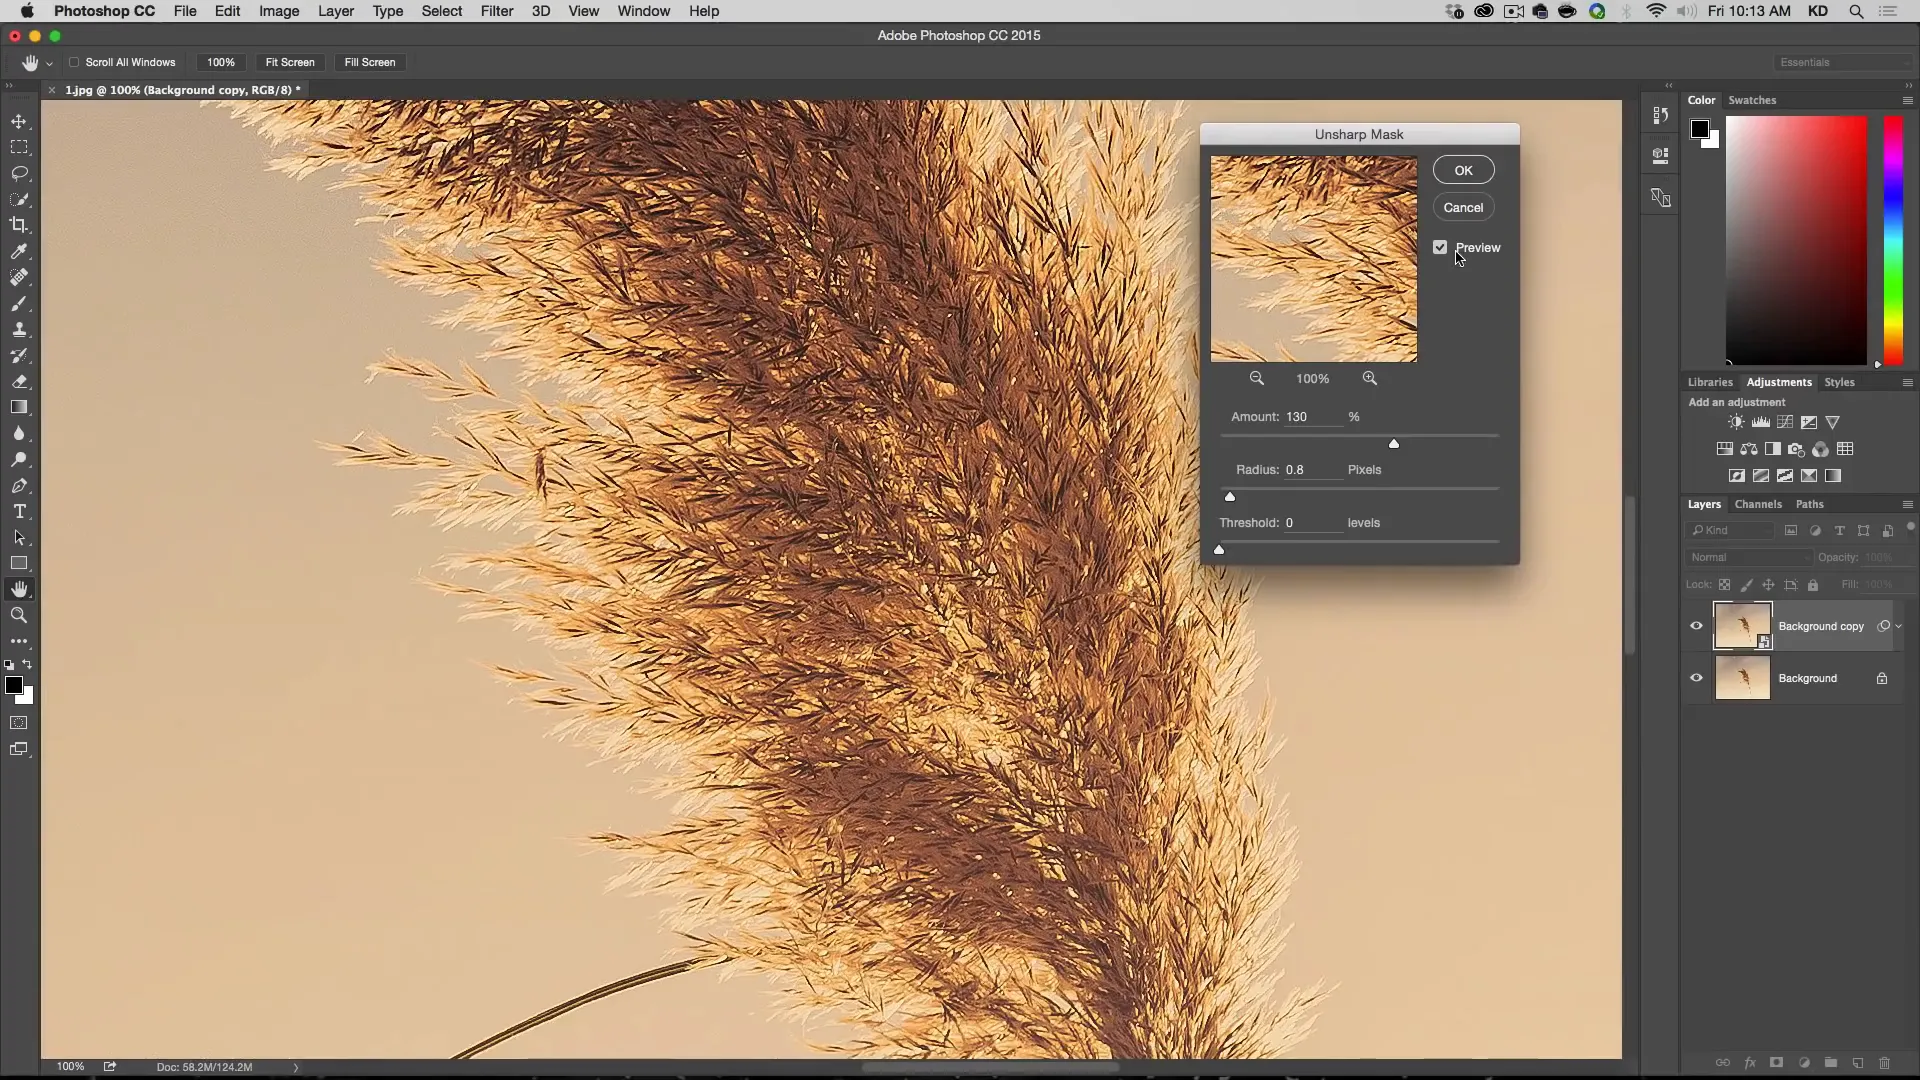
You can preview the changes before and after sharpening. Adjust the settings based on the level of detail in the photo. Be cautious not to overdo the sharpening, as it can become distracting. A good range for the amount is typically between 100 and 150. Keep the threshold at 0 for a more natural look.
Camera Raw Sharpening in Photoshop CC
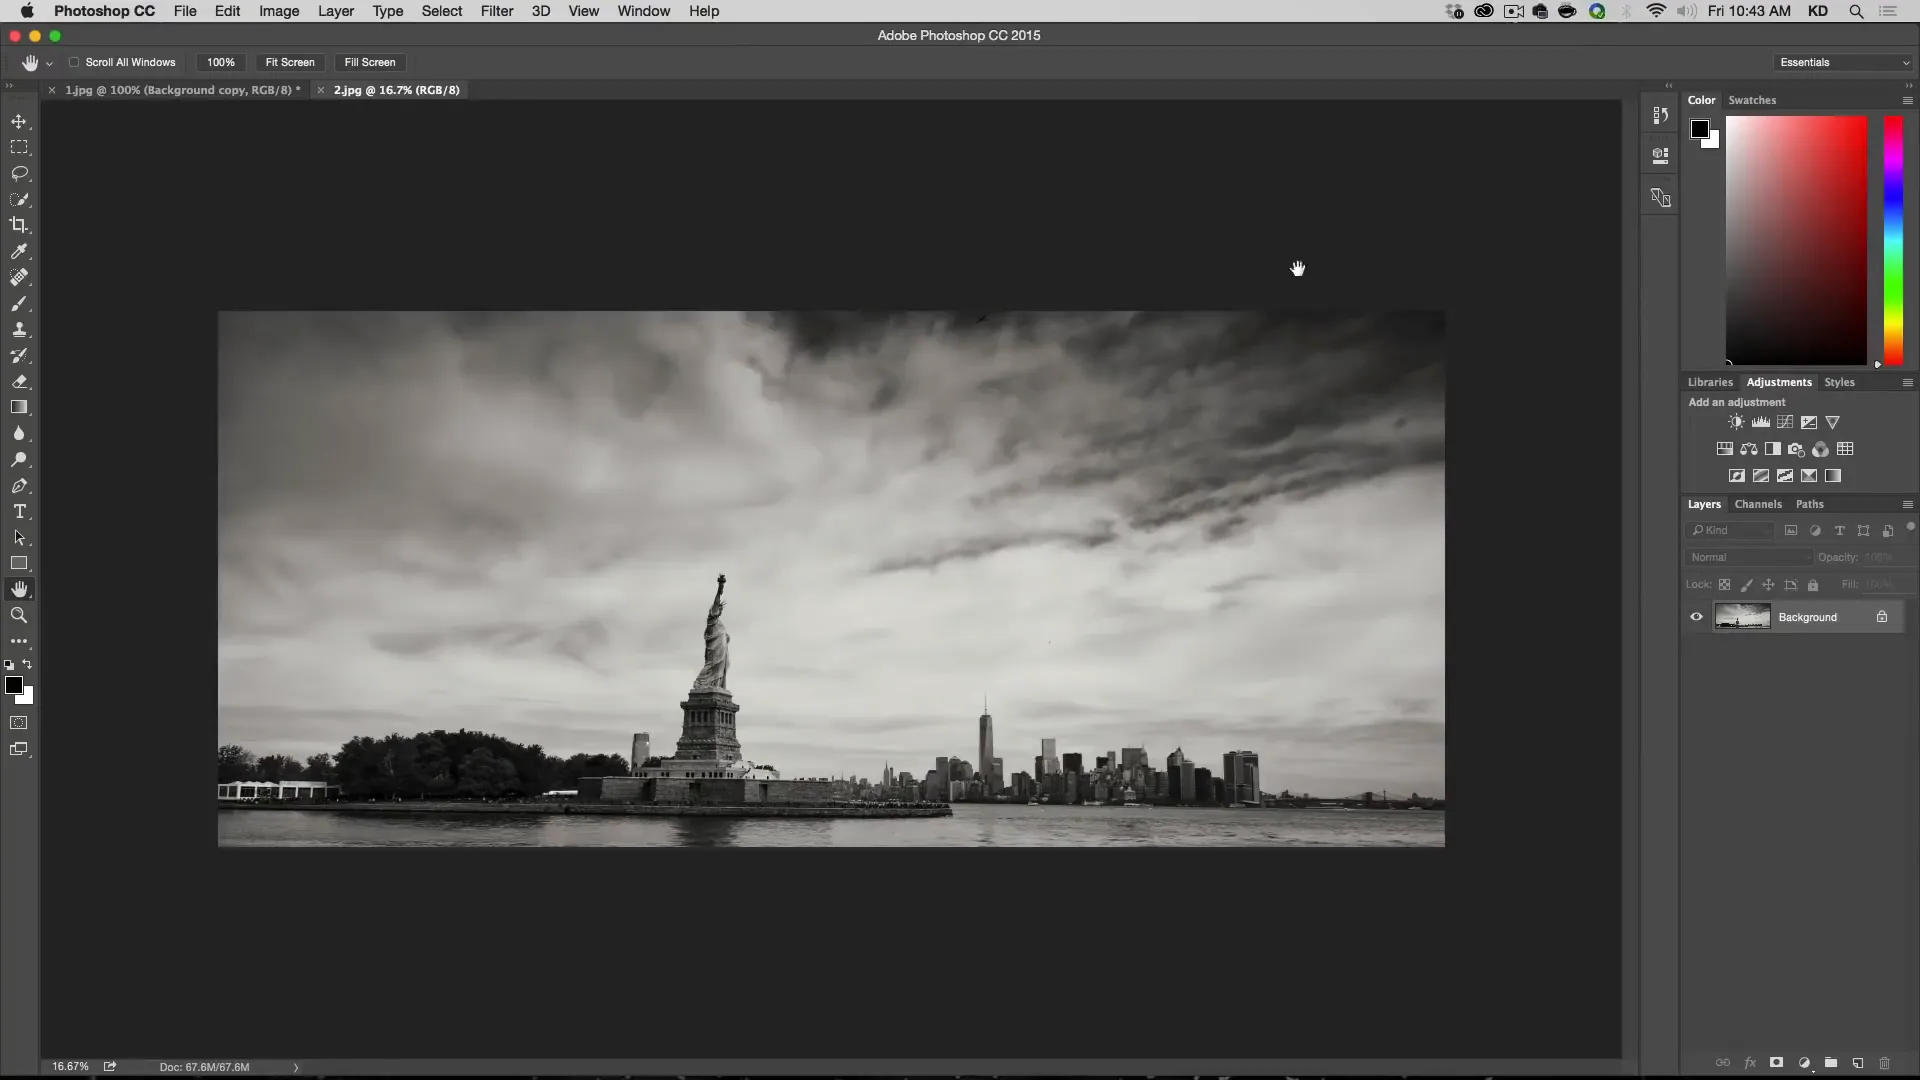
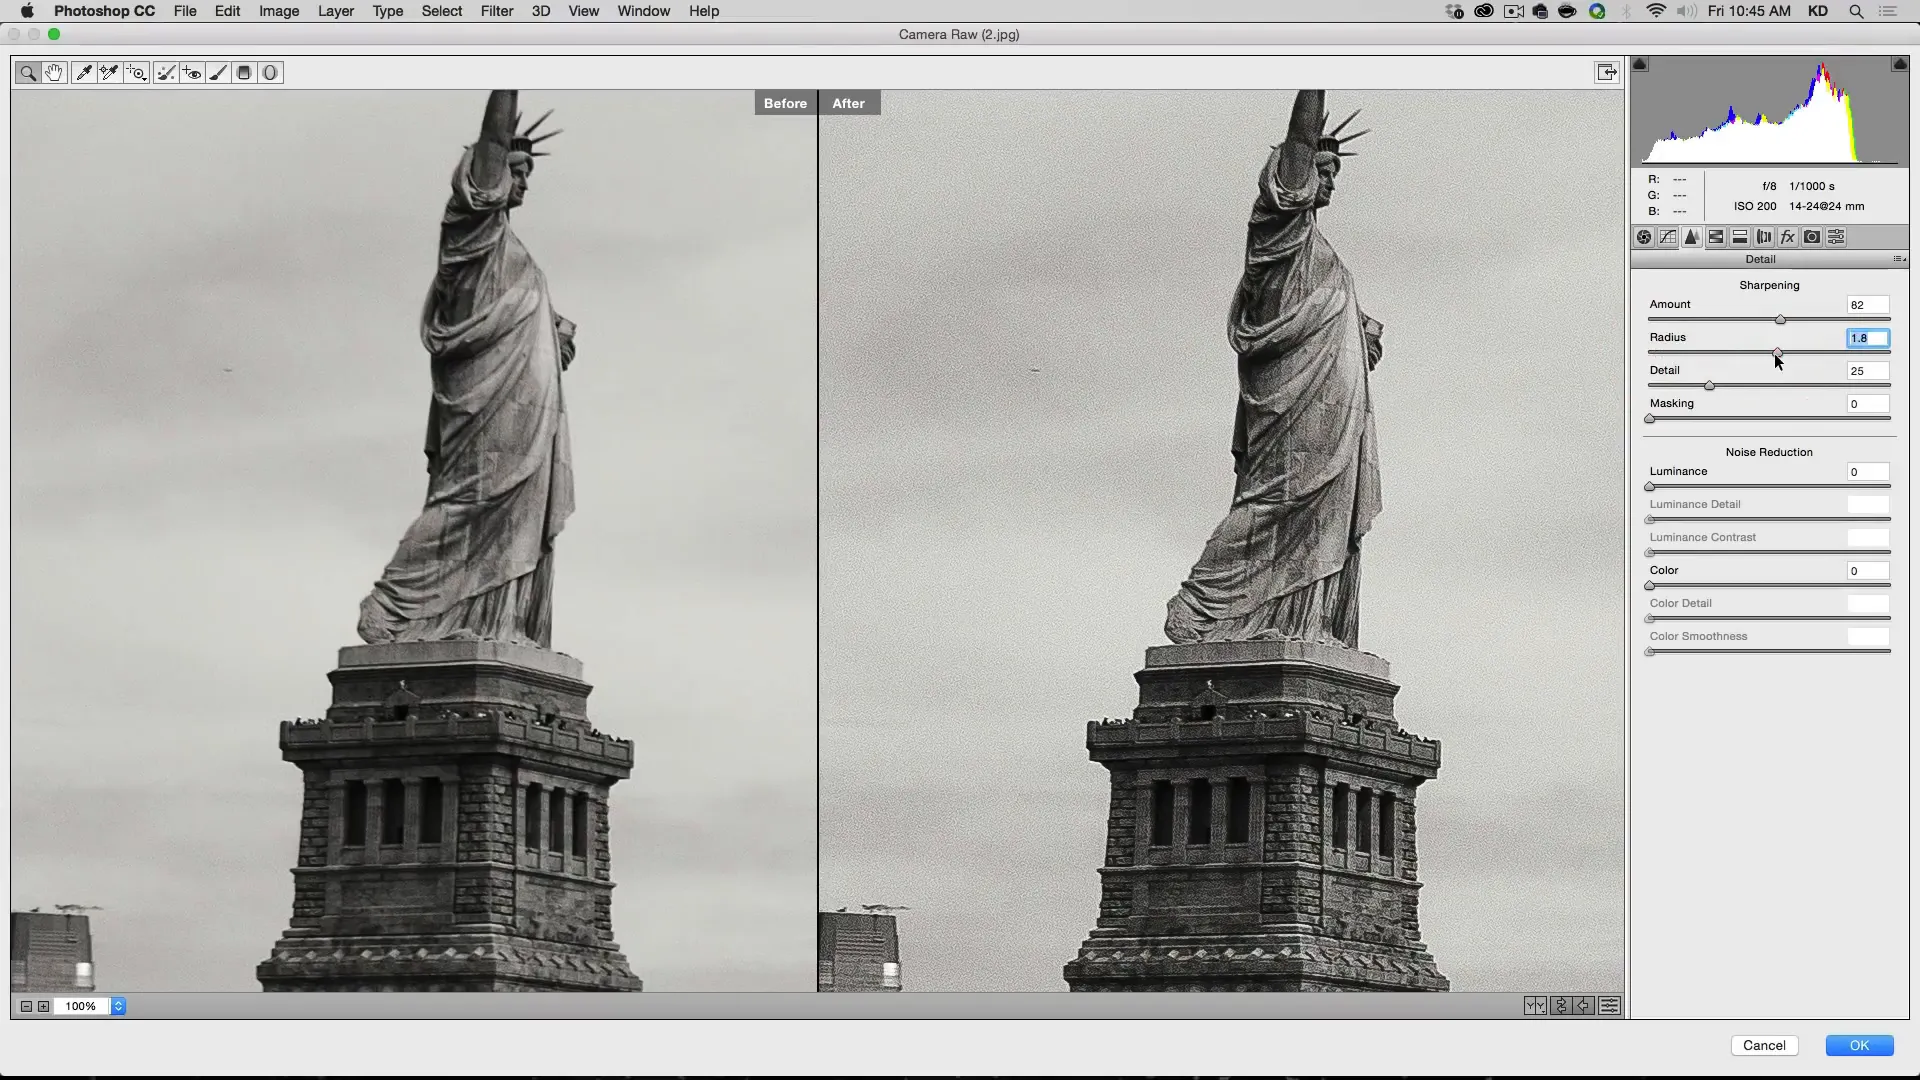
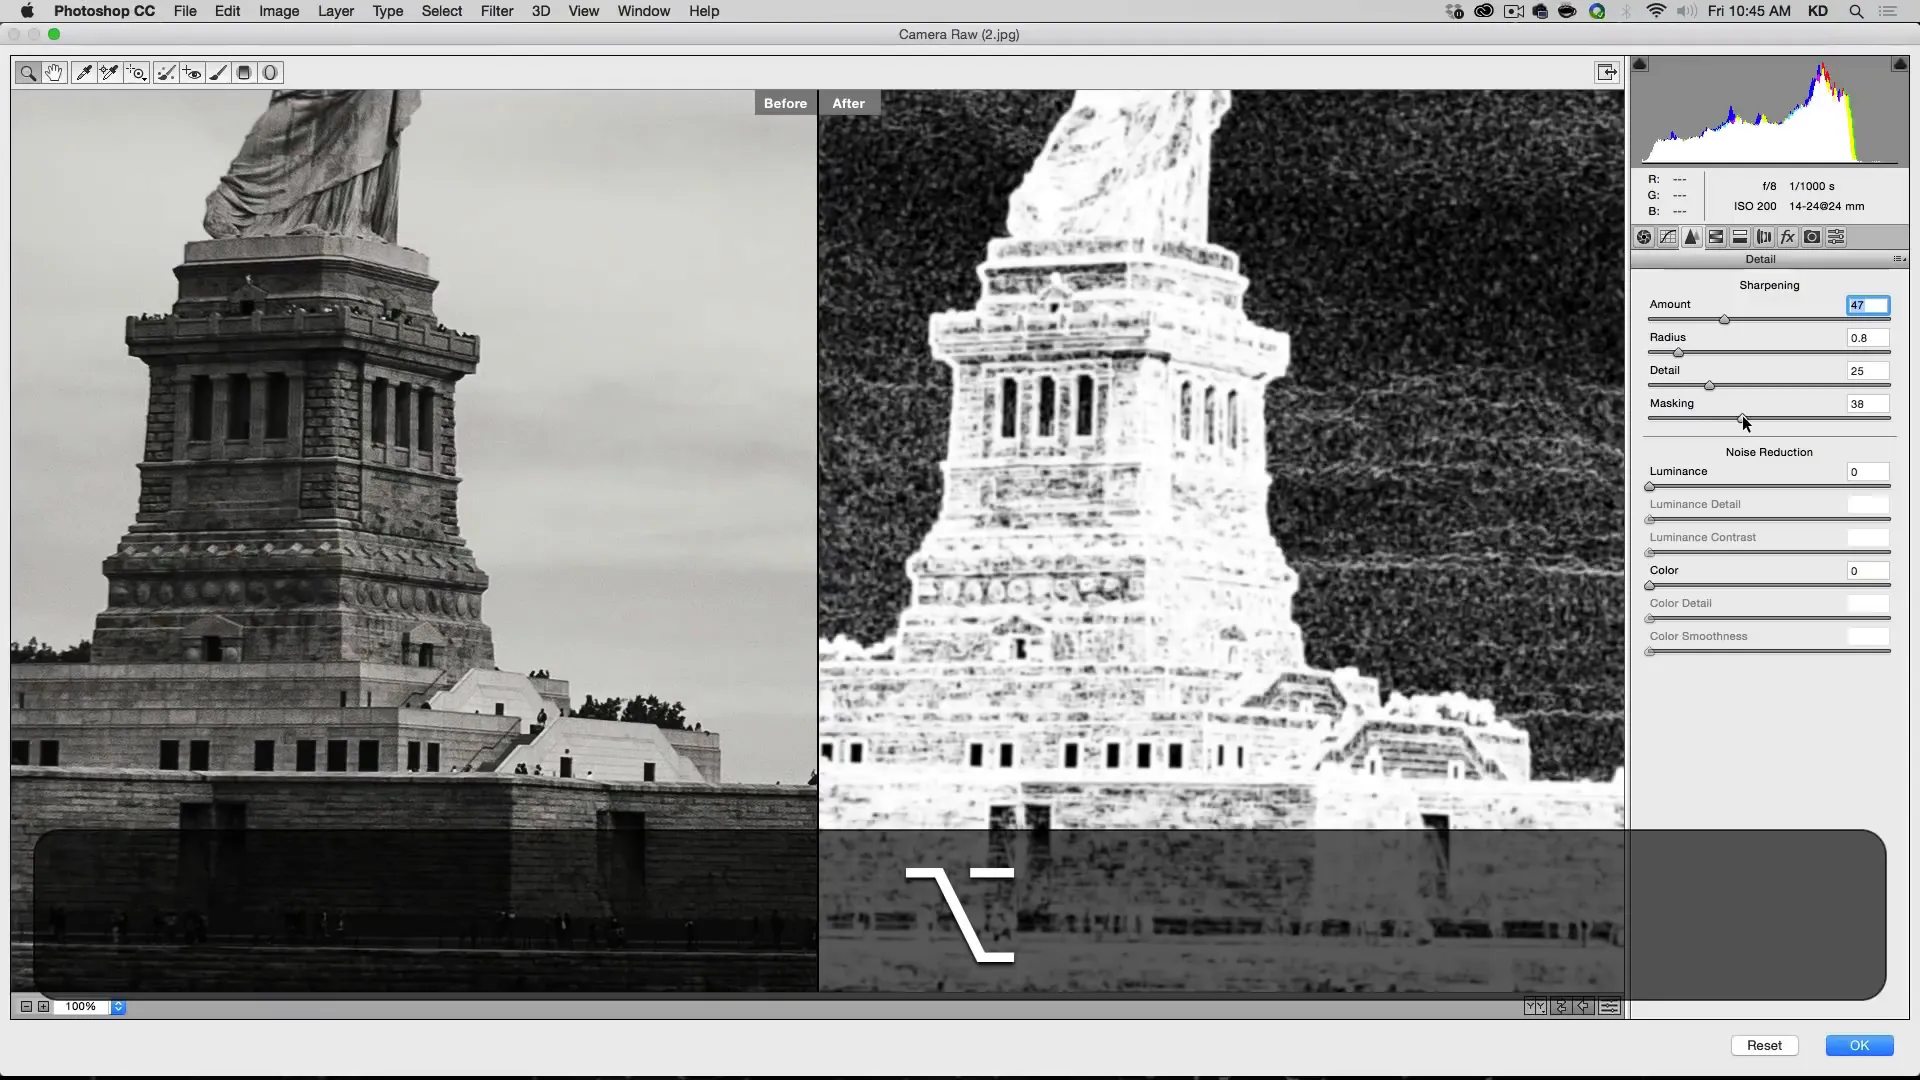
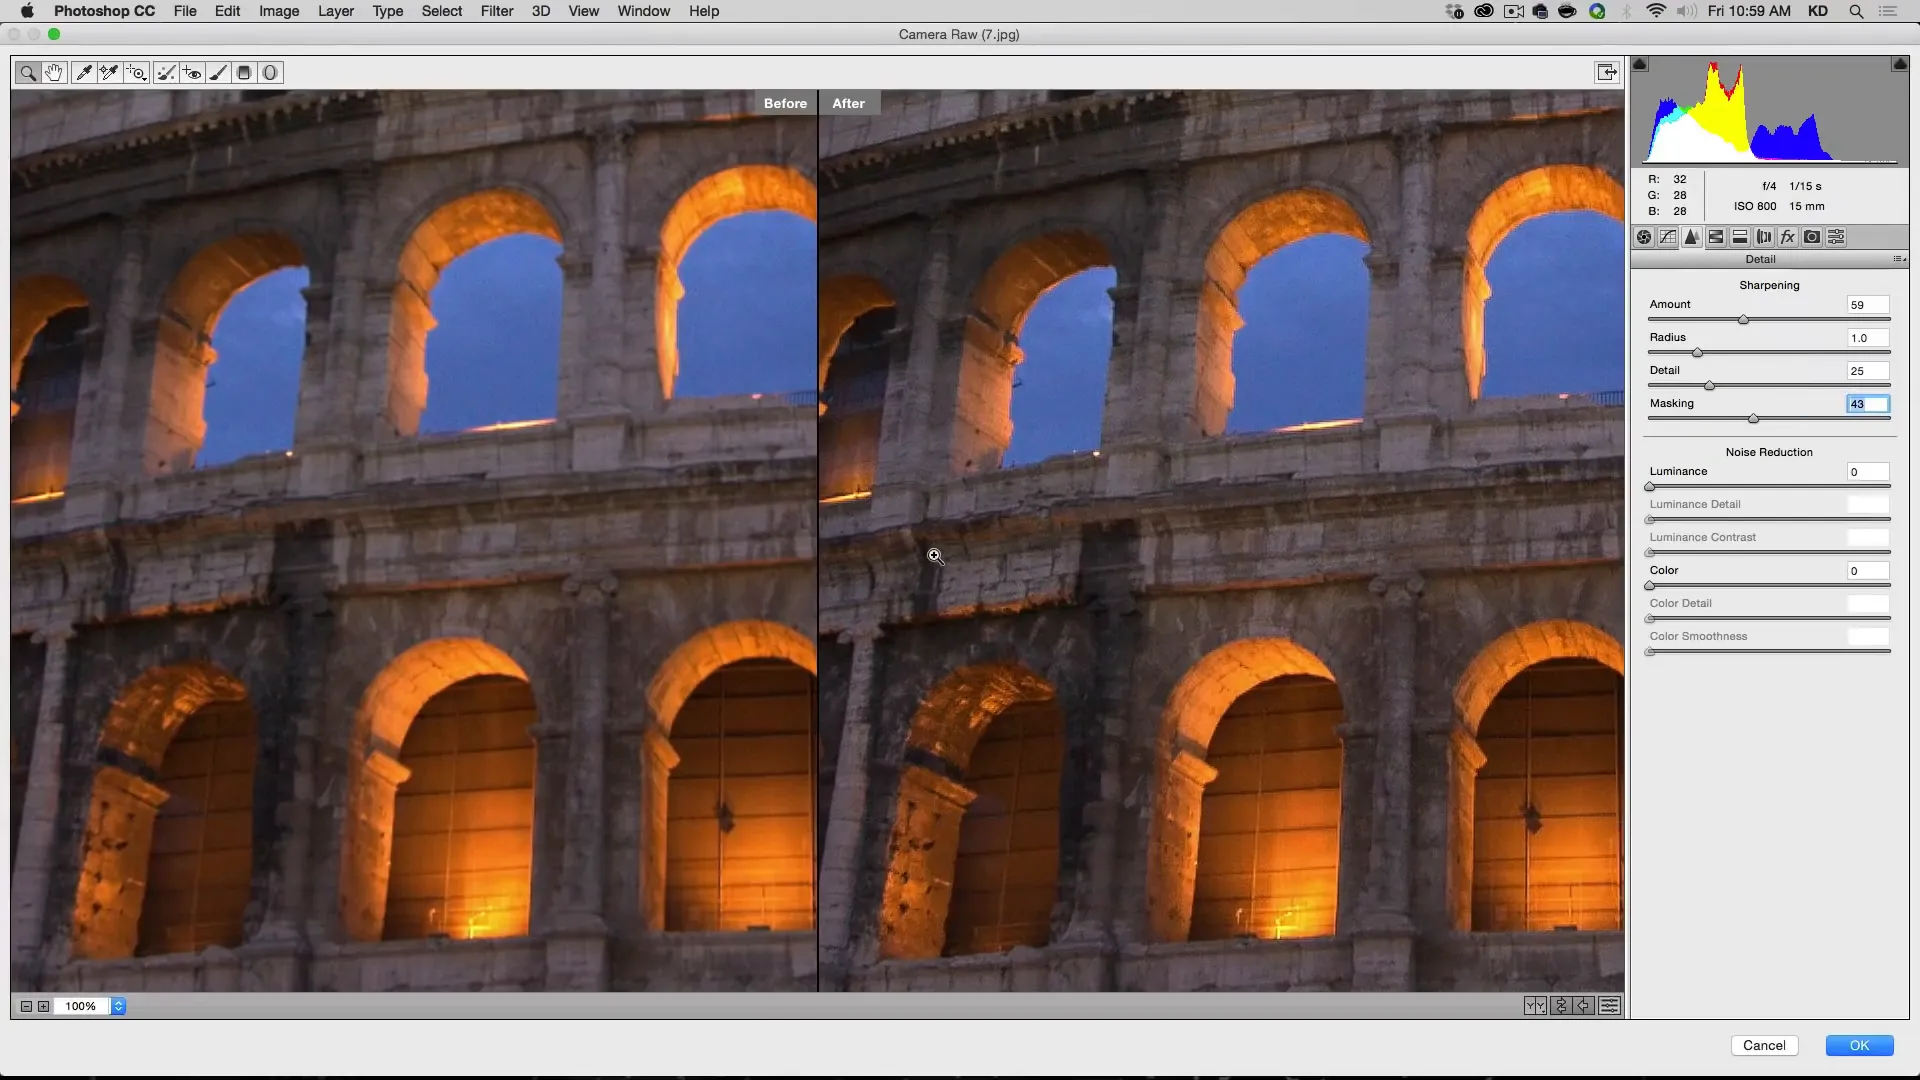
The next image we will work with is an urban landscape. In this technique, we will use the sharpening capabilities in Camera Raw. Please note that this method is available only in Photoshop CC. If you do not have this version, you can skip to the next sharpening method.
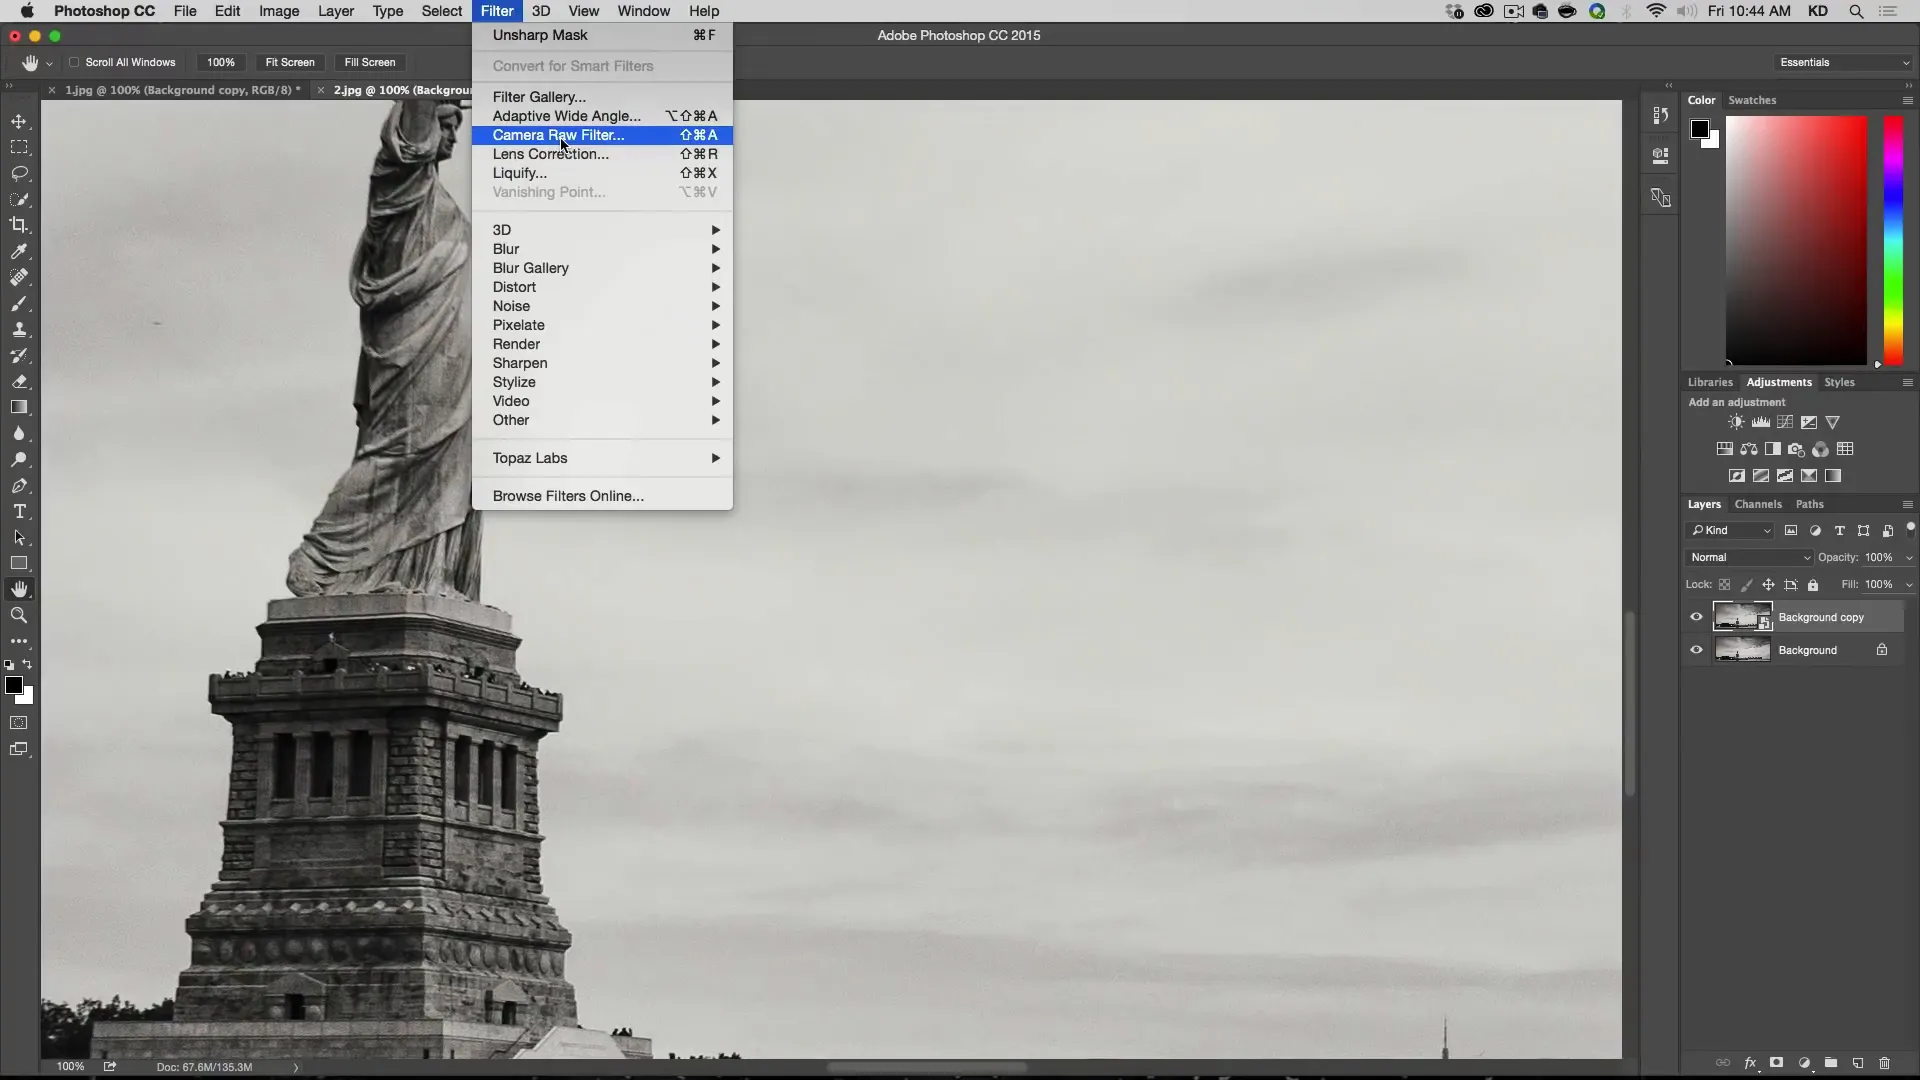
Open the image and zoom in to 100%. Duplicate the layer and convert it to a smart object. Then, go to Filter > Camera Raw.
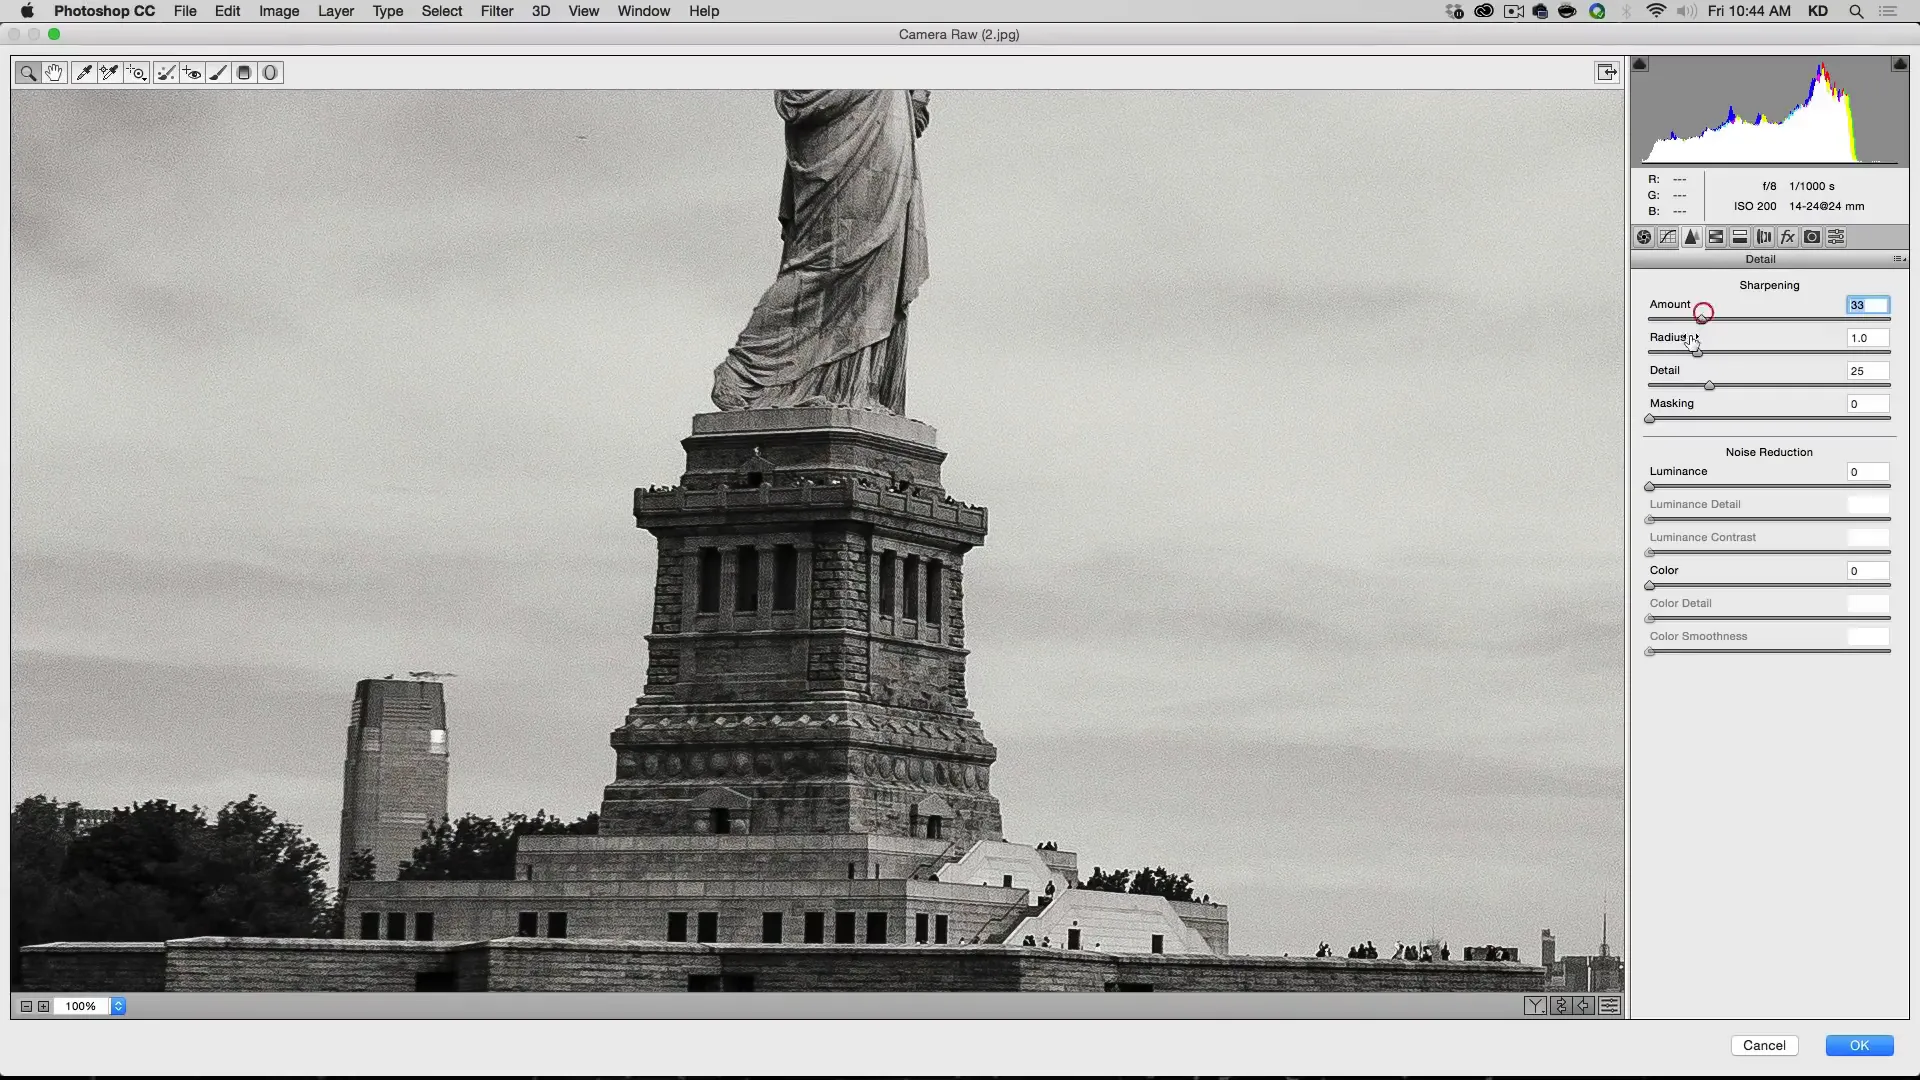
In the Camera Raw panel, select the “Detail” tab. Here, you will find options for sharpening and noise reduction. Adjust the sharpening amount and radius to enhance the details in the image. Be careful not to introduce too much noise while sharpening.
You can also use the masking feature to selectively sharpen specific areas, such as the buildings in the photo. Experiment with the settings until you achieve the desired level of sharpness.
Sharpening Tool in Photoshop CC
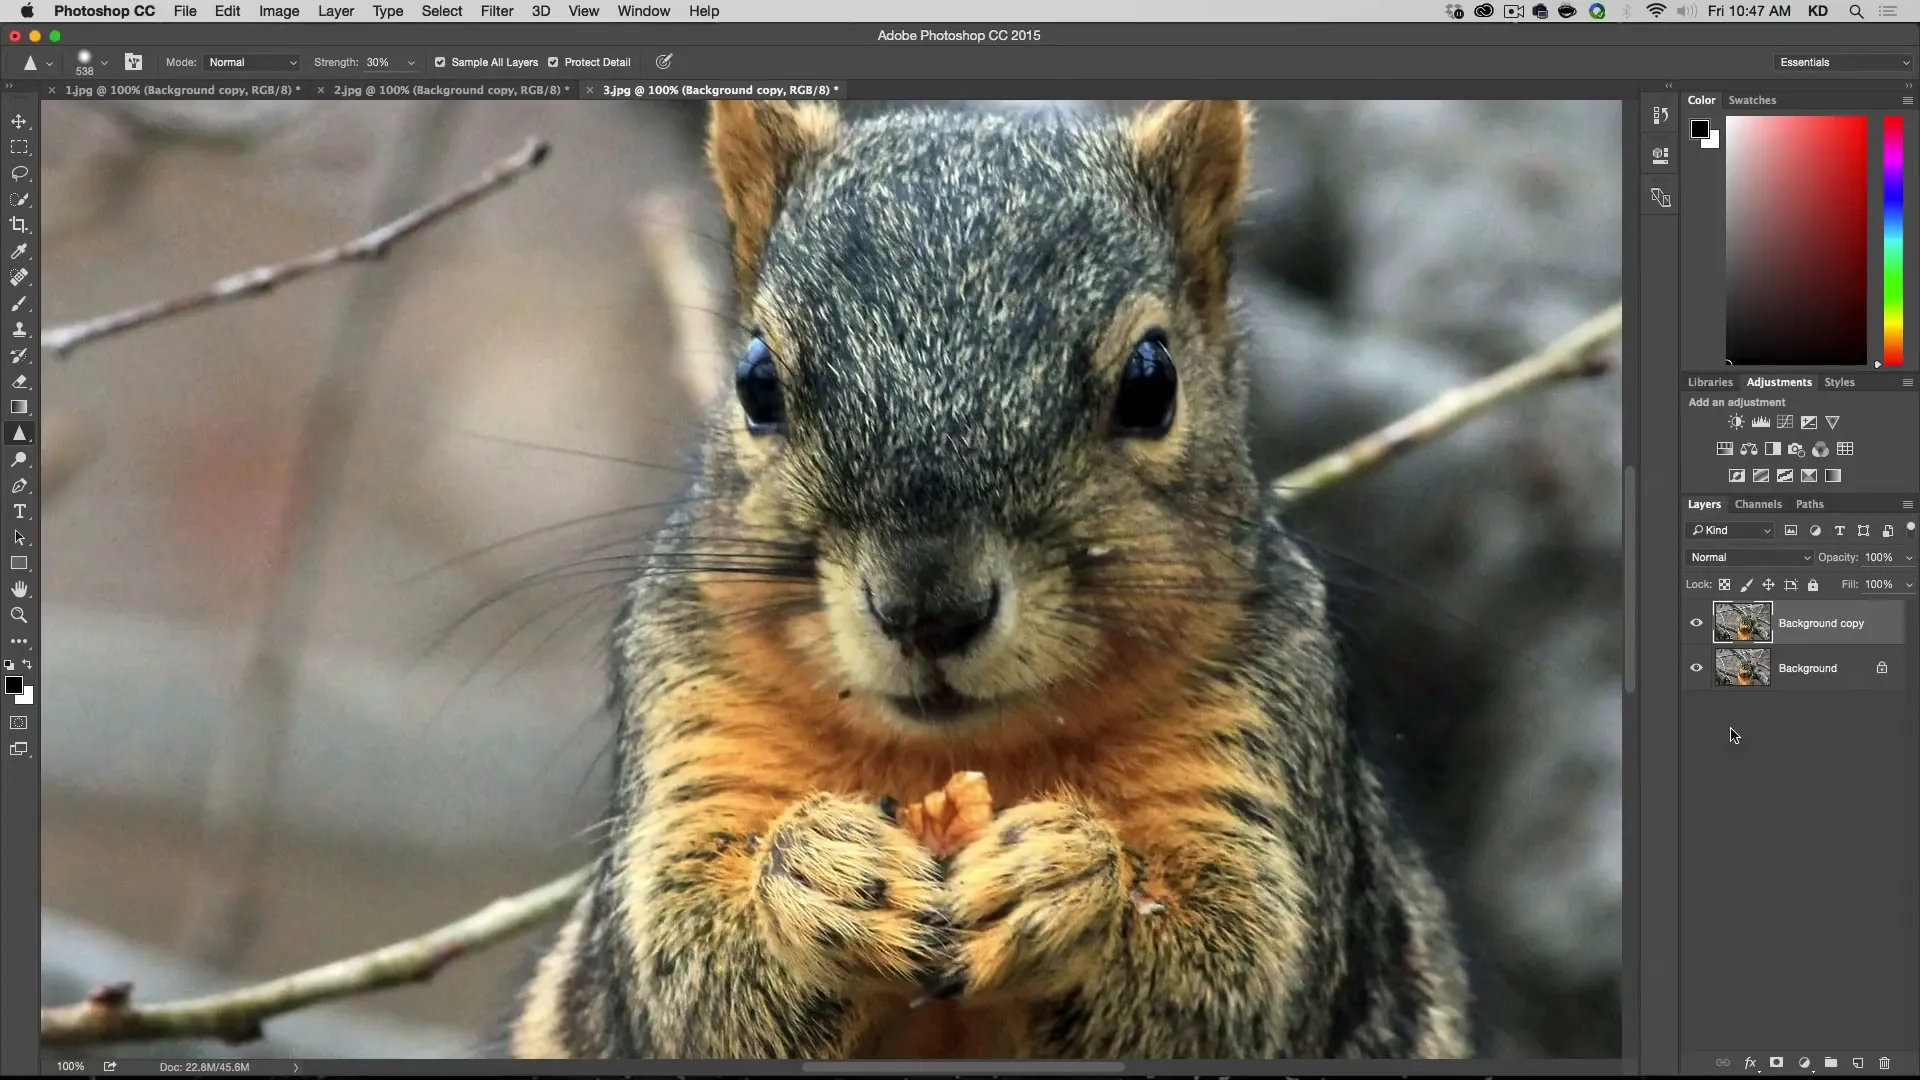
For the next image, we will use the Sharpening tool. Because we’re working directly on the layer and not making use of a smart object, this tool is destructive. To make sure we have the original image intact, the first thing we’ll do is make a duplicate of the layer.
Then select the Sharpening tool from the toolbar.
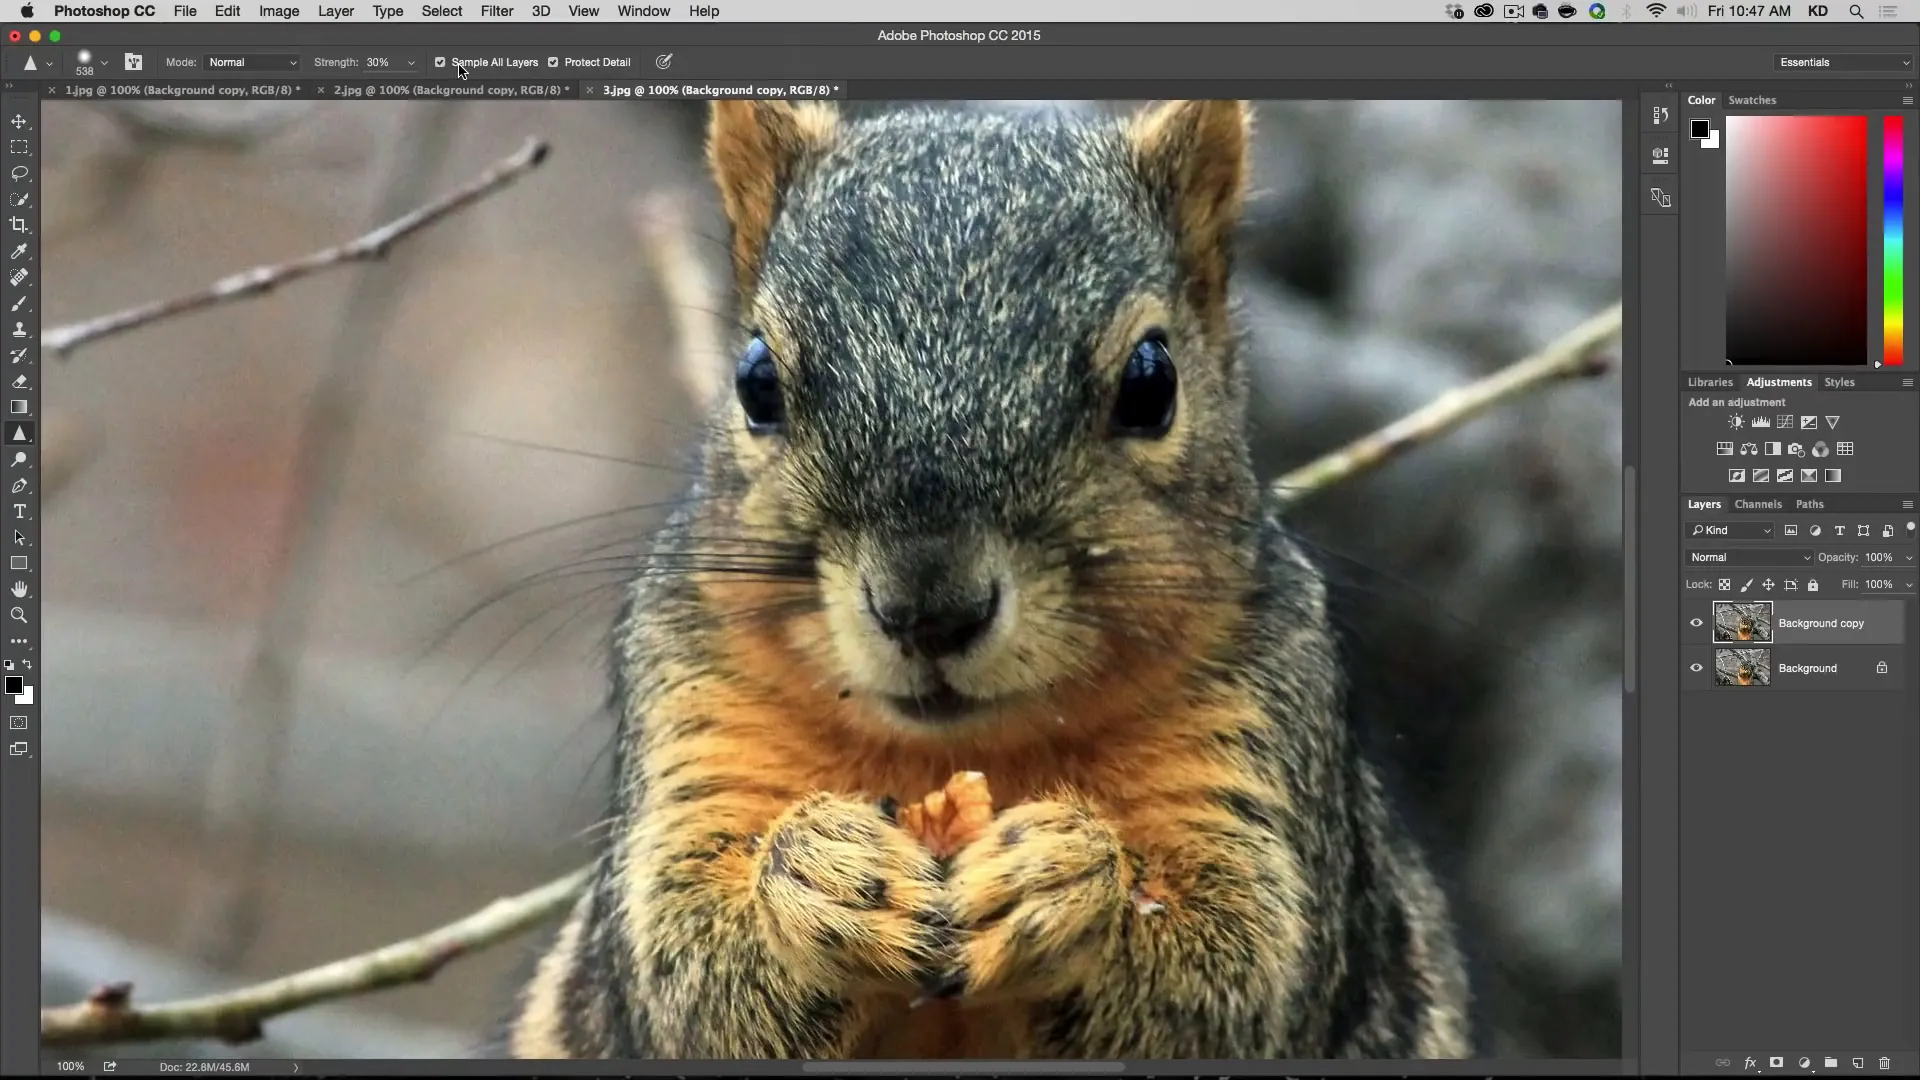
On the bar at the top, check the “Protect Detail” option and enable “Sample All Layers” to apply the sharpening to a new layer. Adjust the brush size and hardness based on the area you want to sharpen.
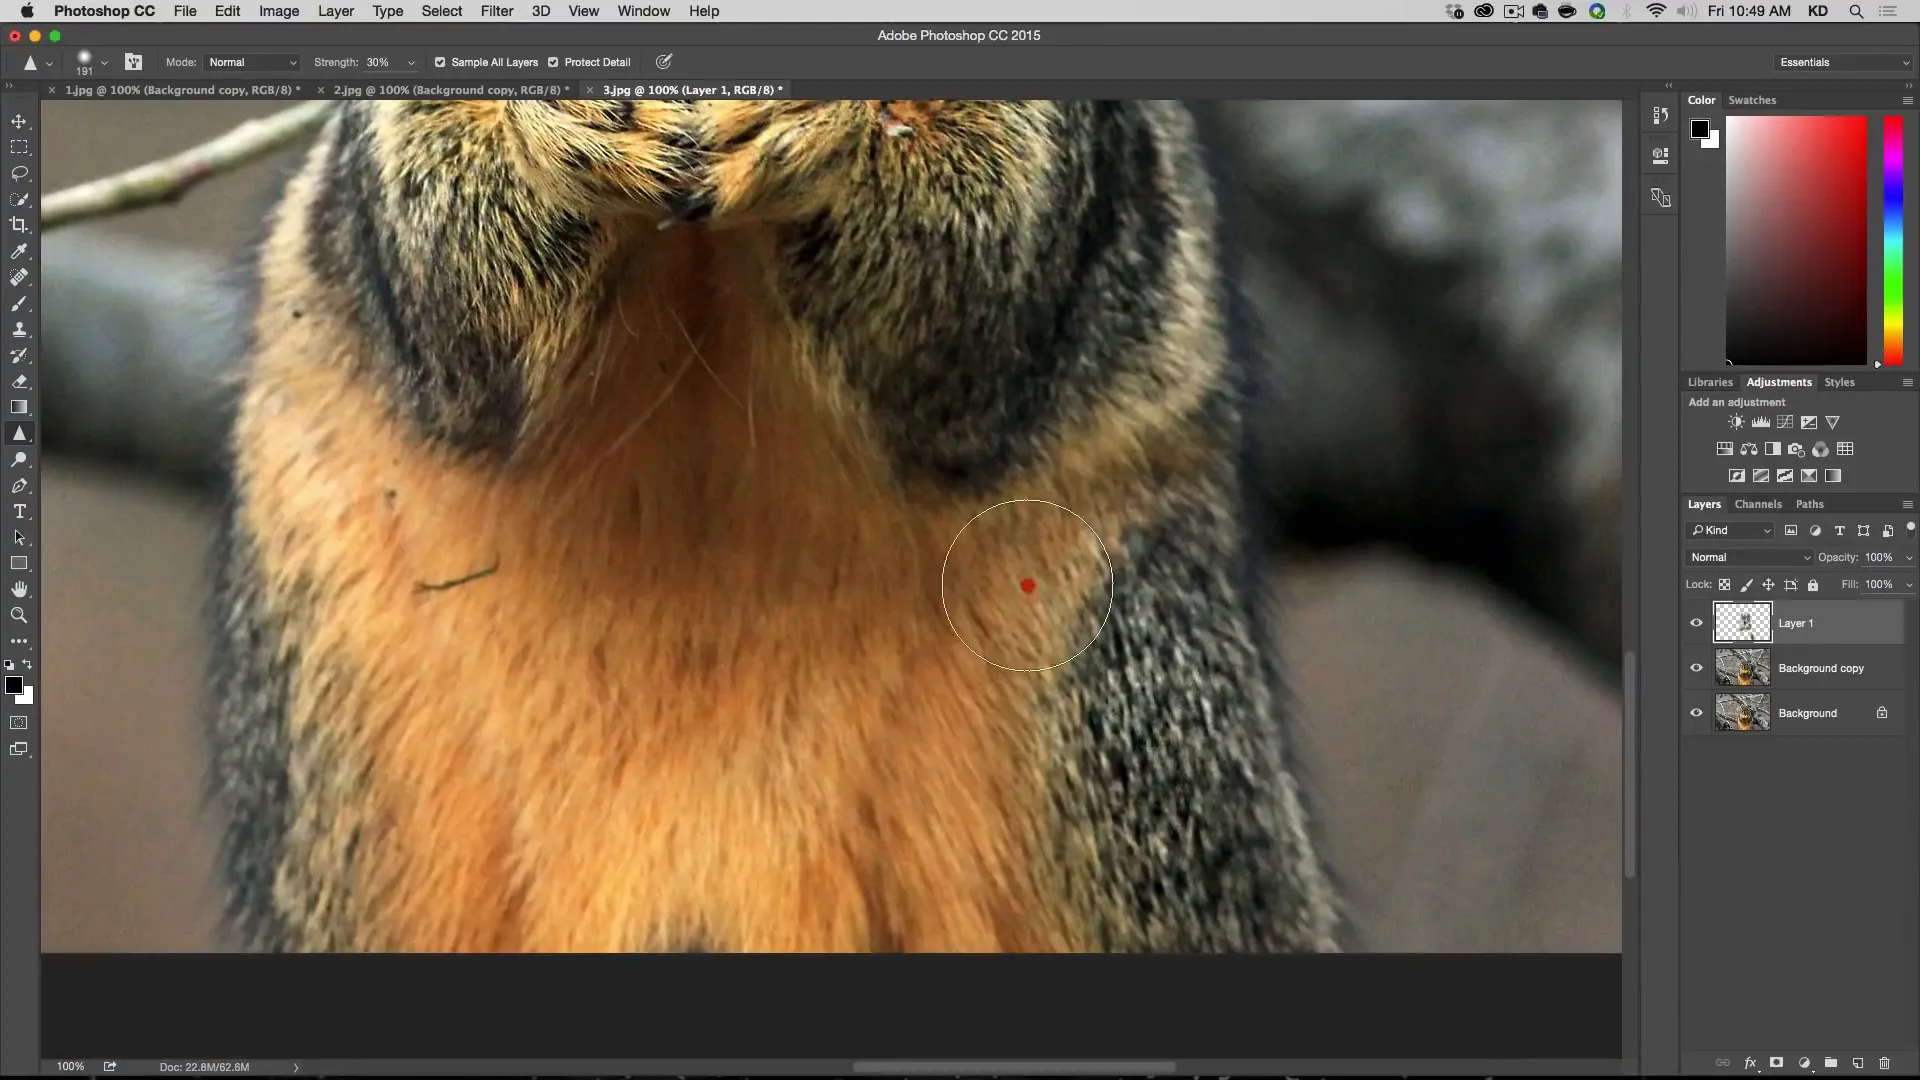
Begin brushing over the areas that require more detail, such as the eyes and fur. This method allows for precise control over the sharpening process.
High Pass Filter in Photoshop CC
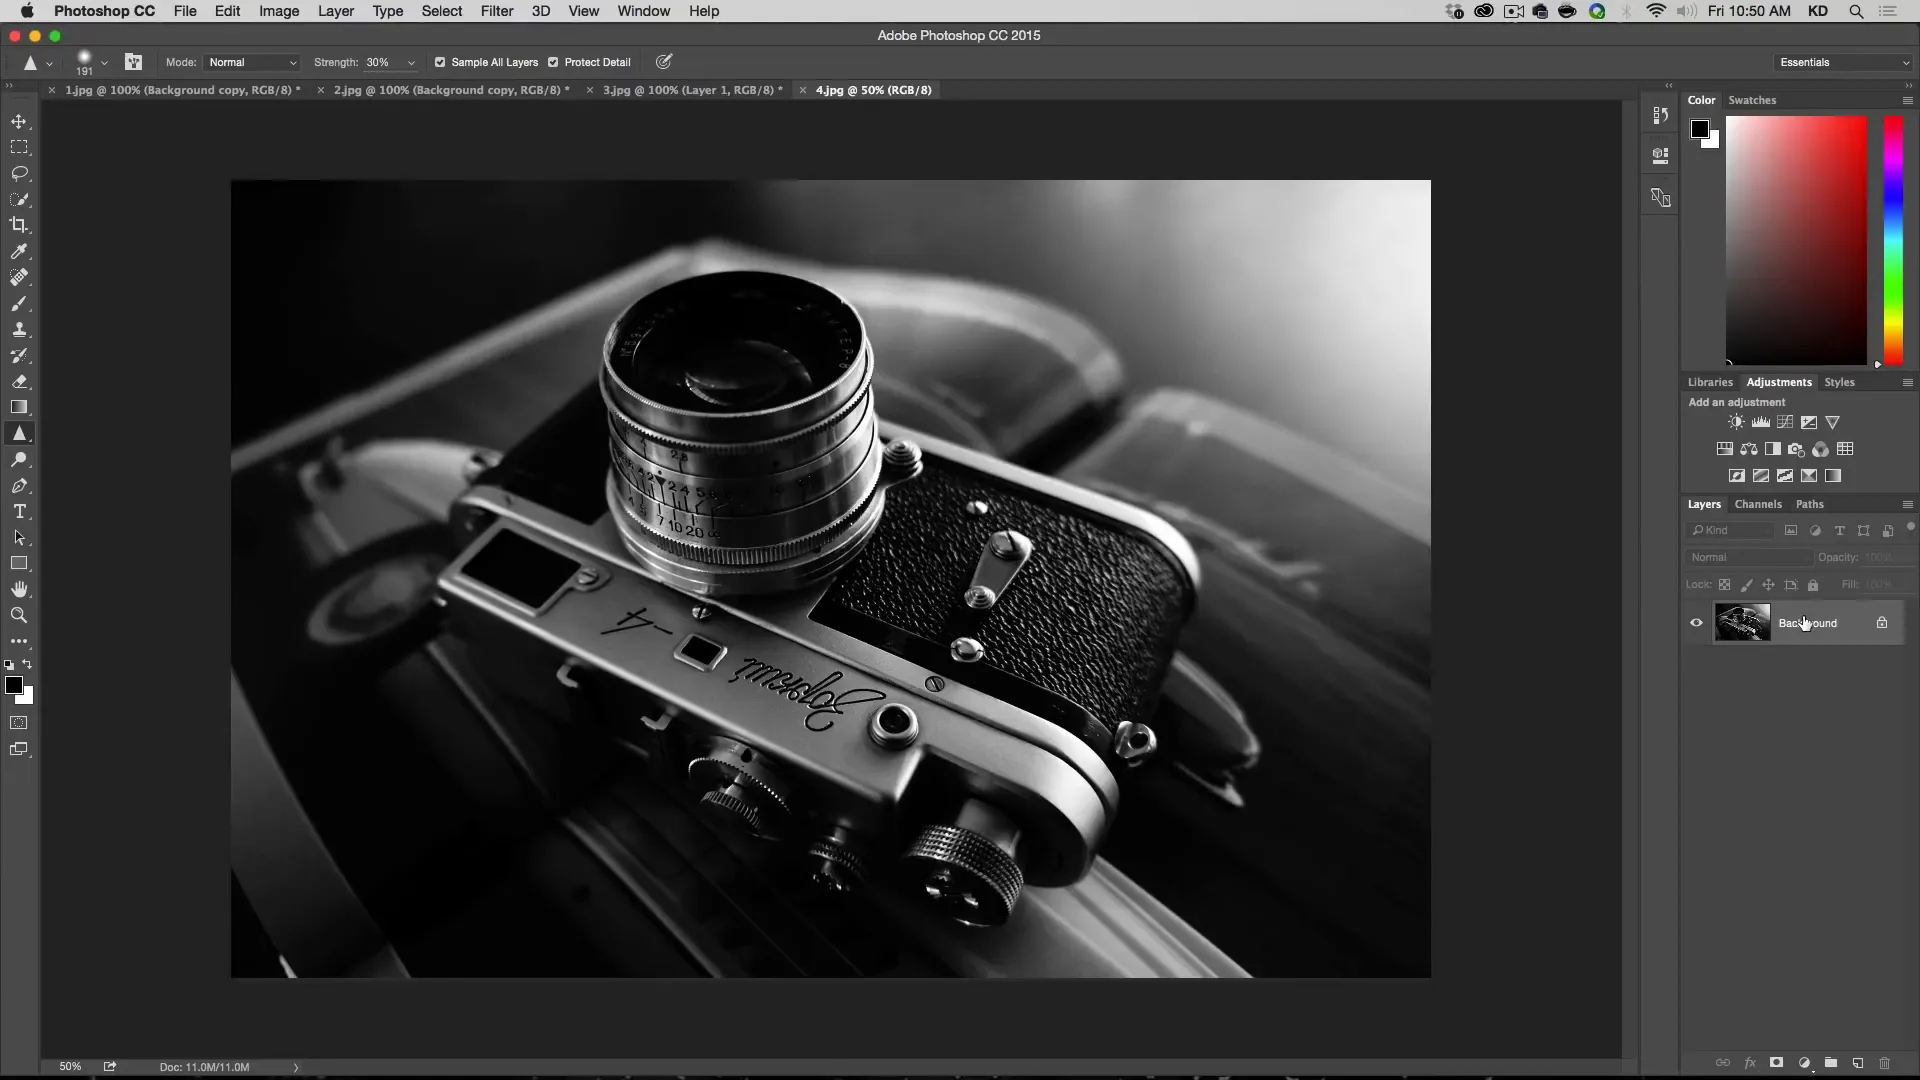
Next, we will demonstrate the use of the High Pass filter for sharpening. Duplicate the layer and convert it to a smart object. Then duplicate that layer. Name the new layers “Blur” and “High Pass” to keep track of the adjustments.
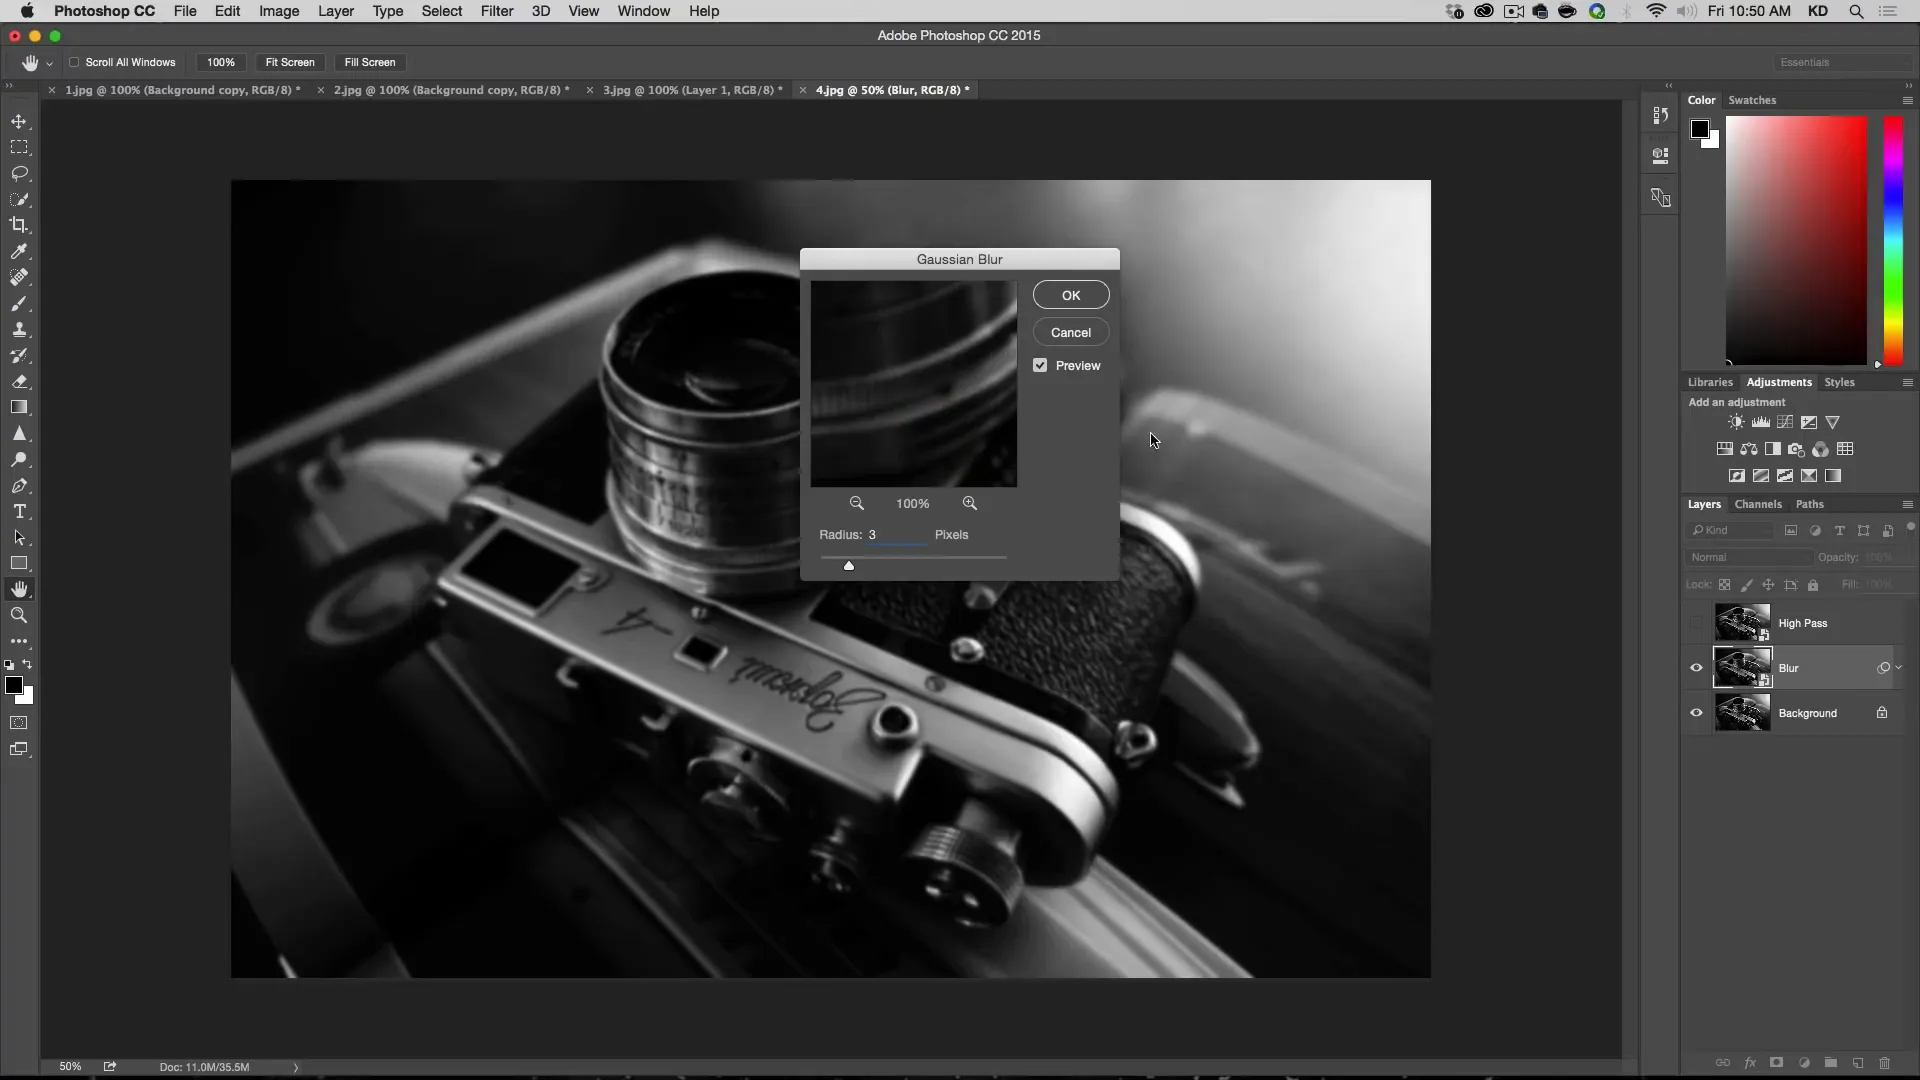
Apply a Gaussian Blur to the first new layer and adjust the radius to a suitable value, around 3 pixels.
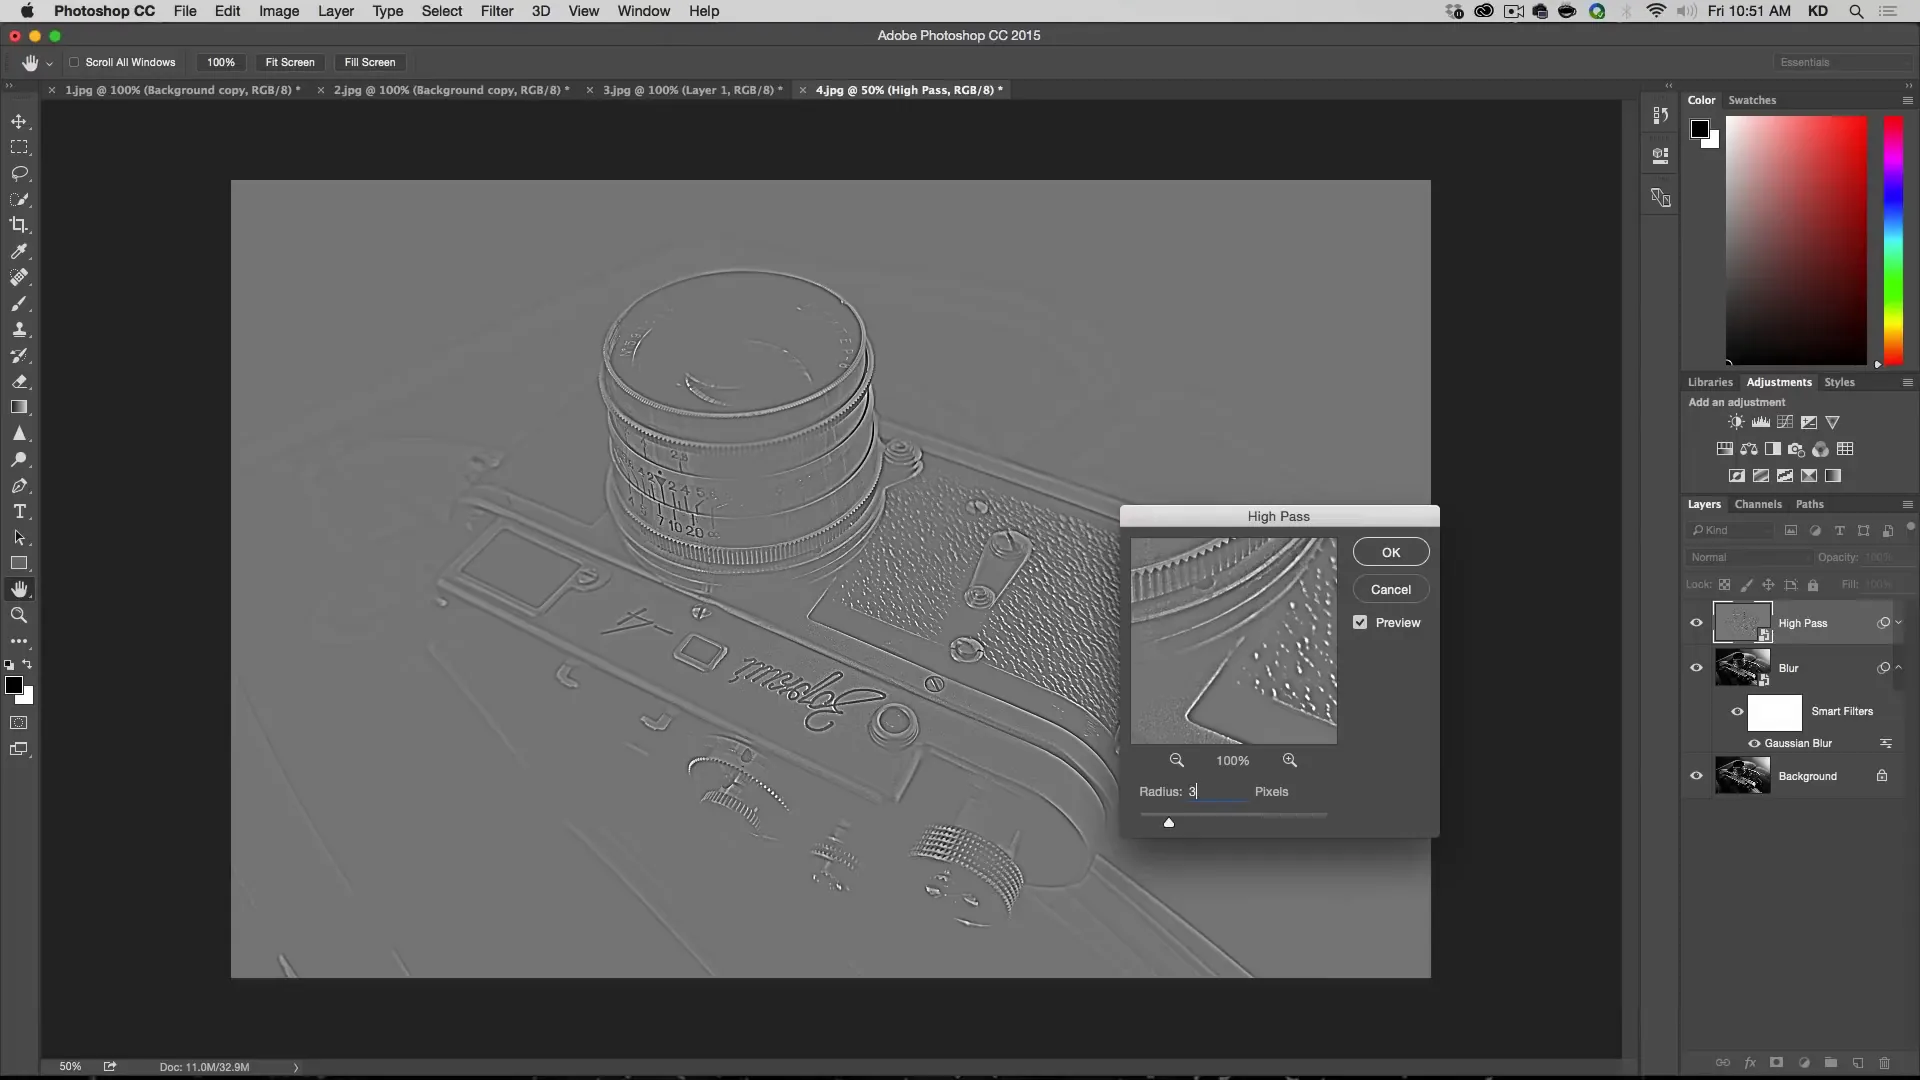
Then on the second new layer, go to Filter > Other > High Pass. Use a radius of 3 pixels, similar to the blur radius.
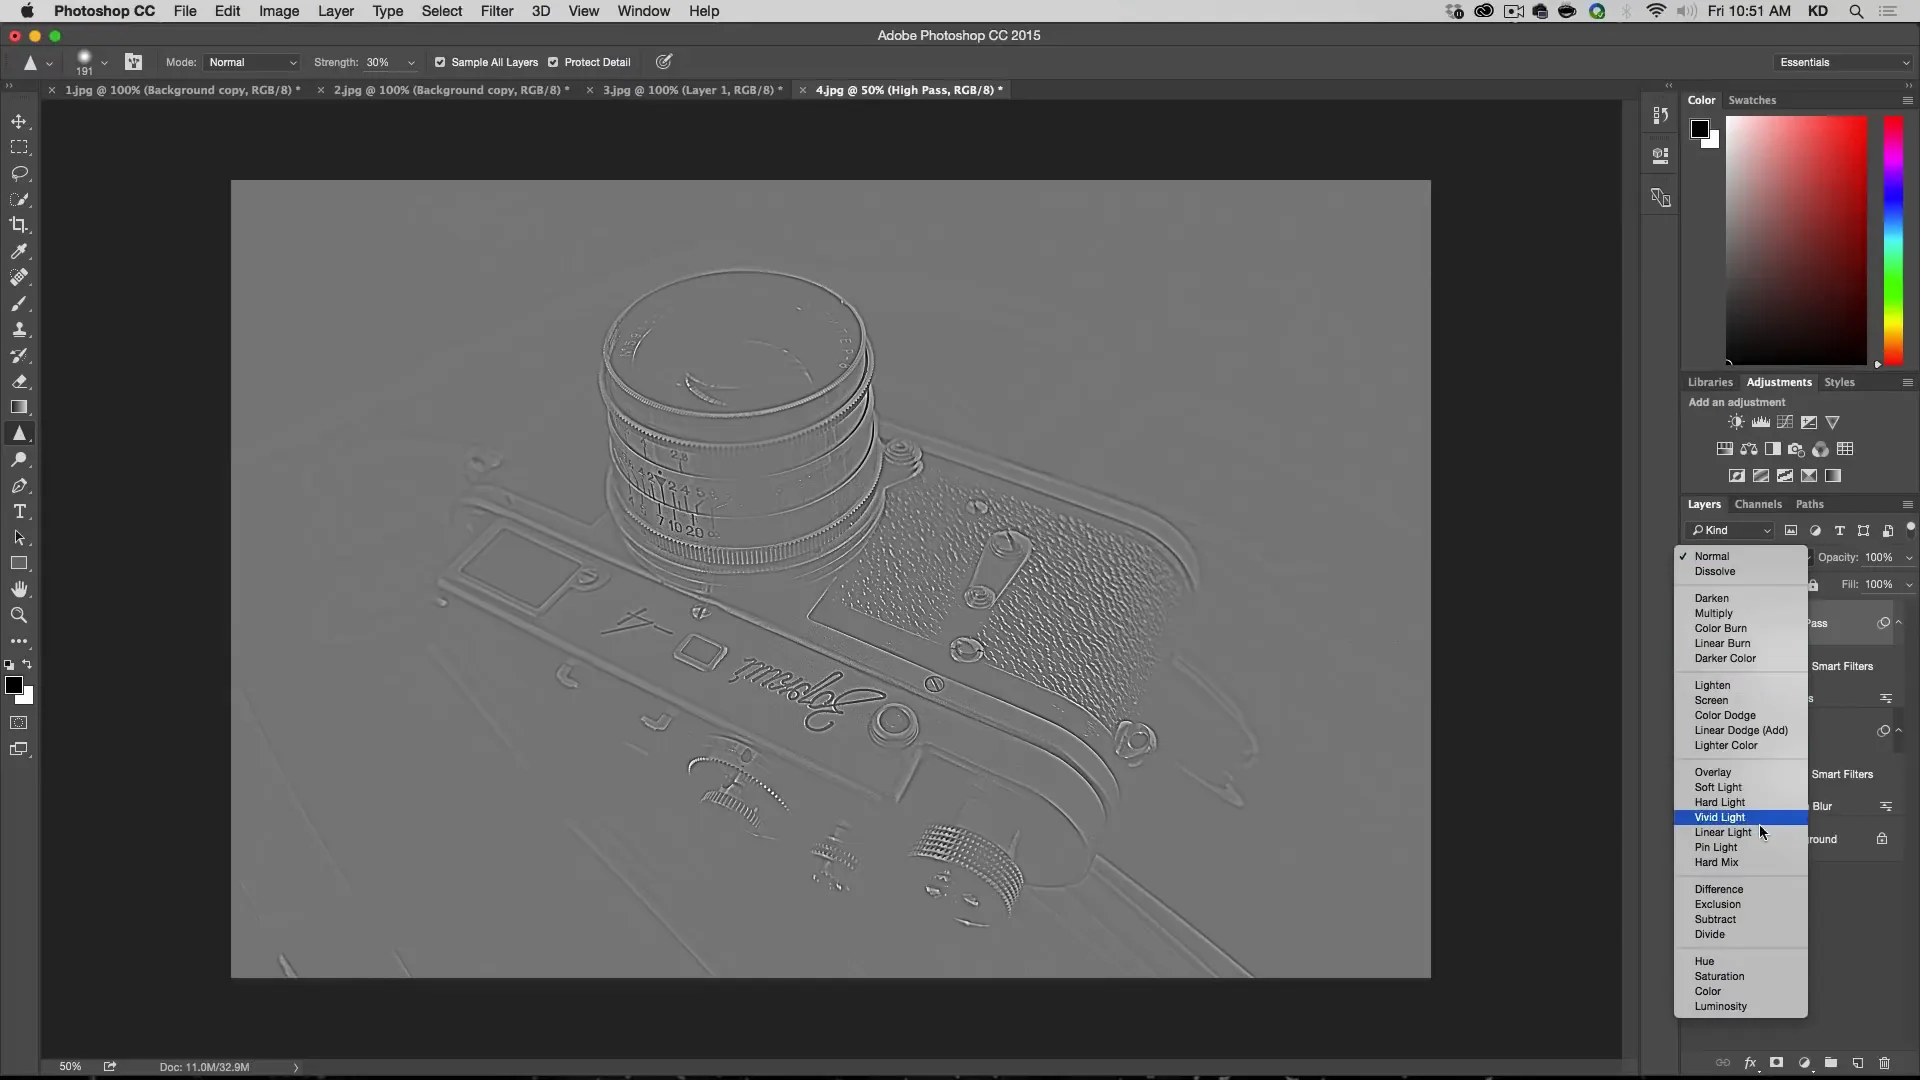
Change the blending mode of the High Pass layer to “Linear Light”. This method creates a sharpening effect with a fine level of control.
So you end up with an image looking like this.
Mixing Different Methods
You can also mix different sharpening methods for better results. In this case, we will combine the Sharpening tool and the High Pass filter.
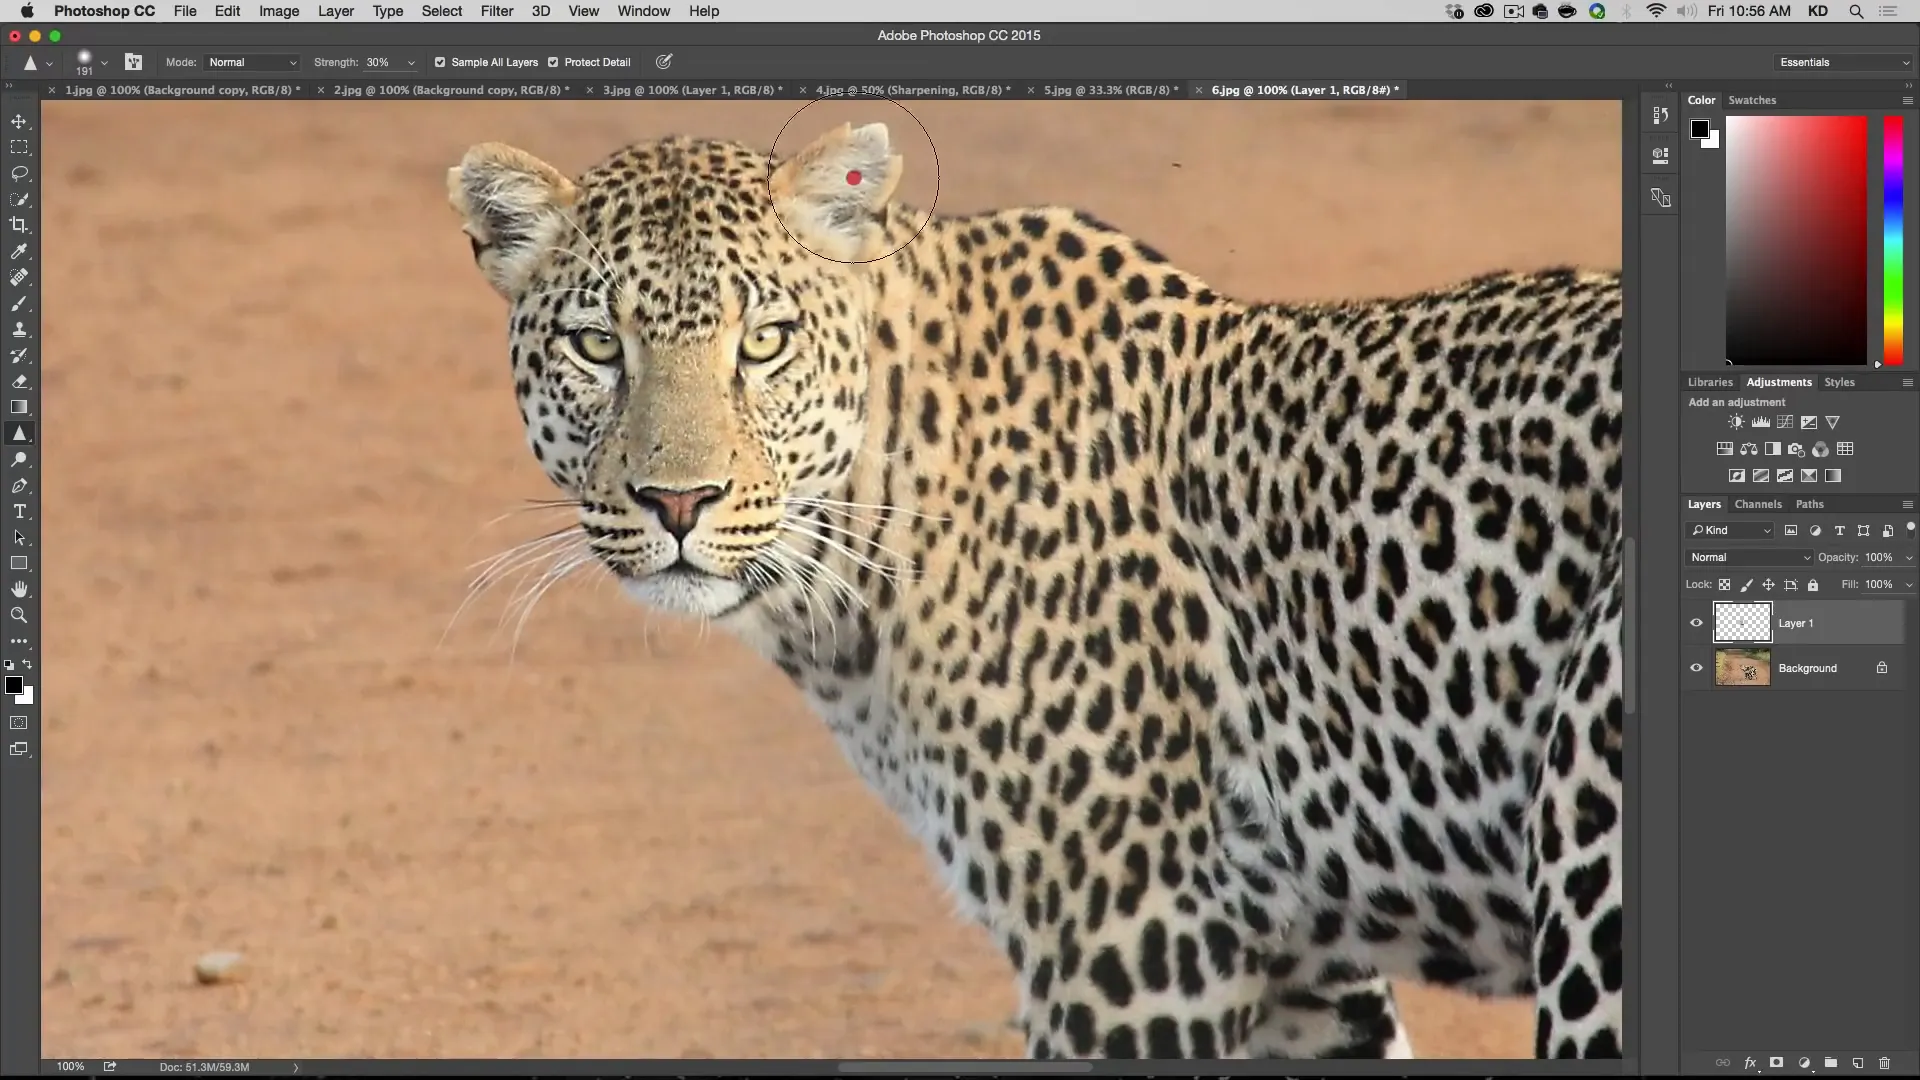
Create a new blank layer and start by using the Sharpening tool to enhance the details in specific areas, such as the face and eyes.
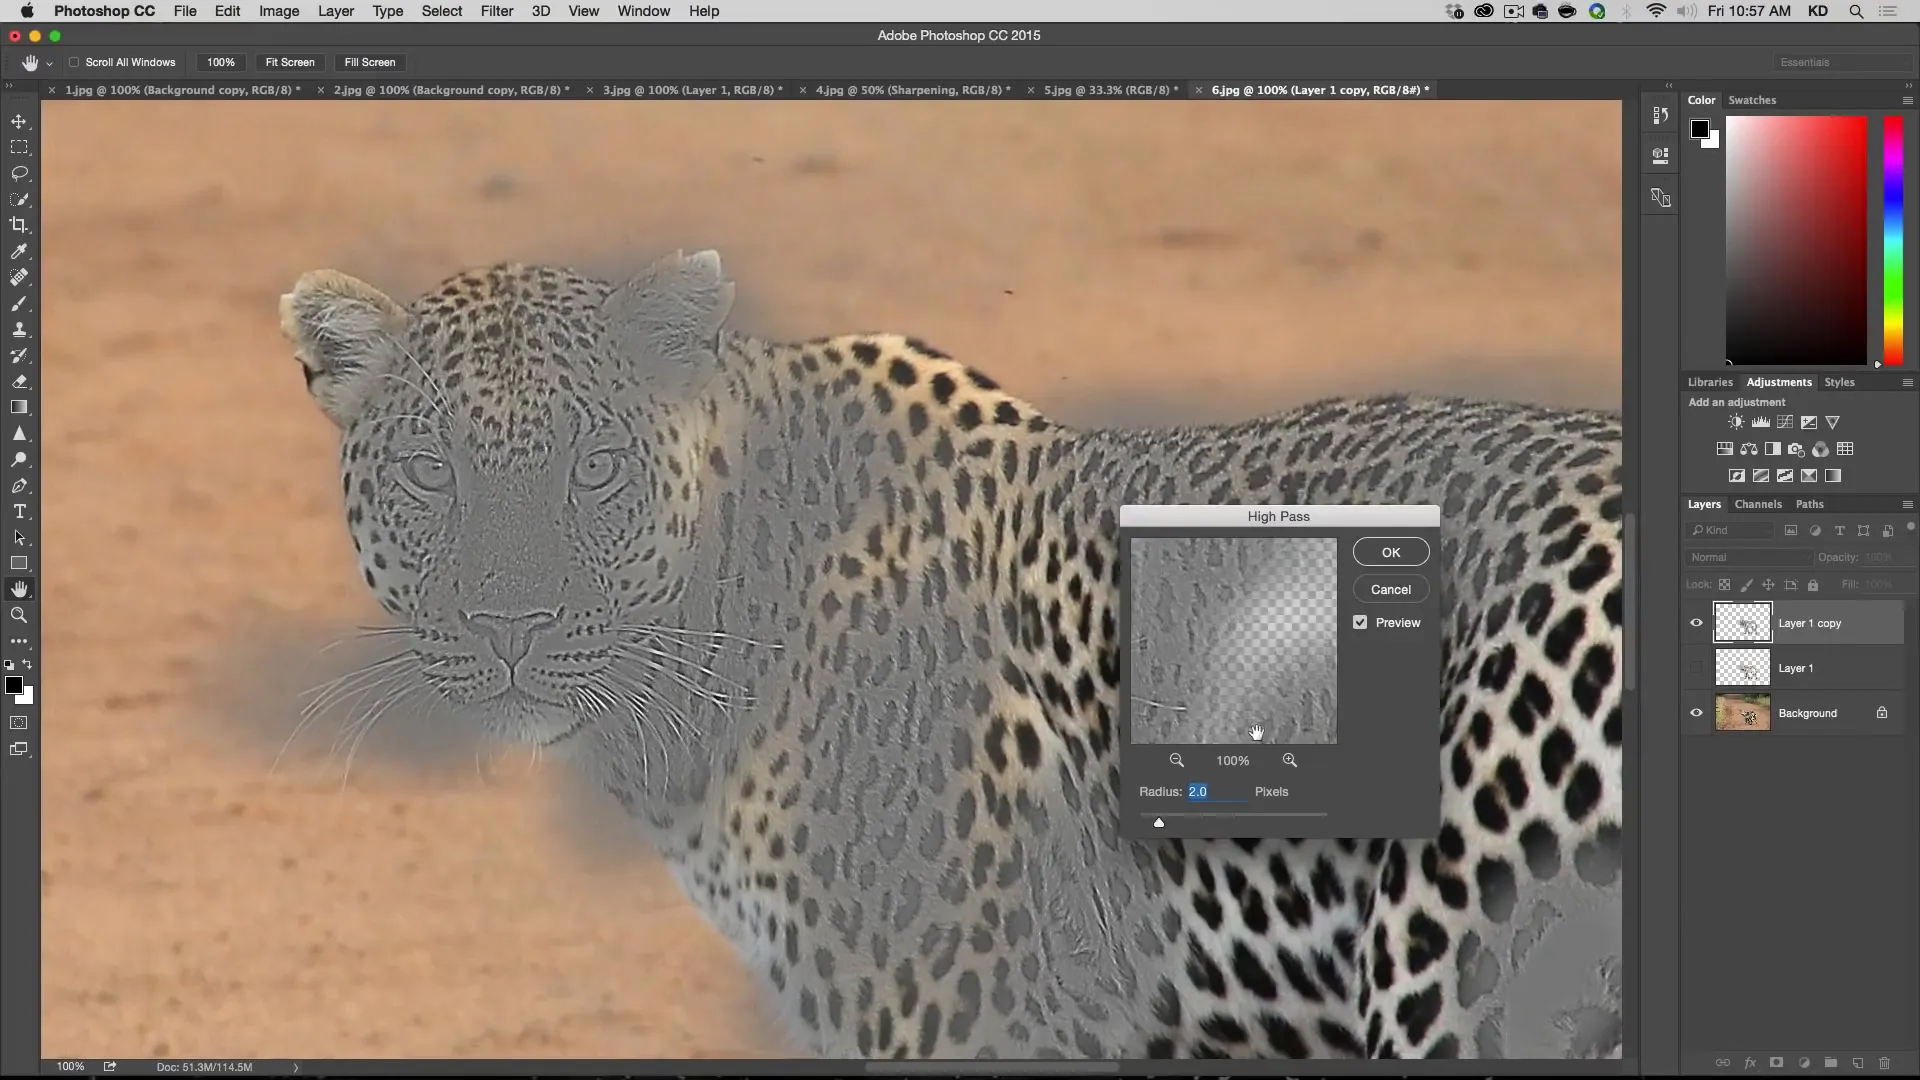
Then, duplicate the layer and apply the High Pass filter to the new layer. Adjust the settings to get the desired level of sharpness. Change the blending mode of the High Pass layer to “Linear Light”. You can also experiment with different blending modes and opacity settings to fine-tune the effect.
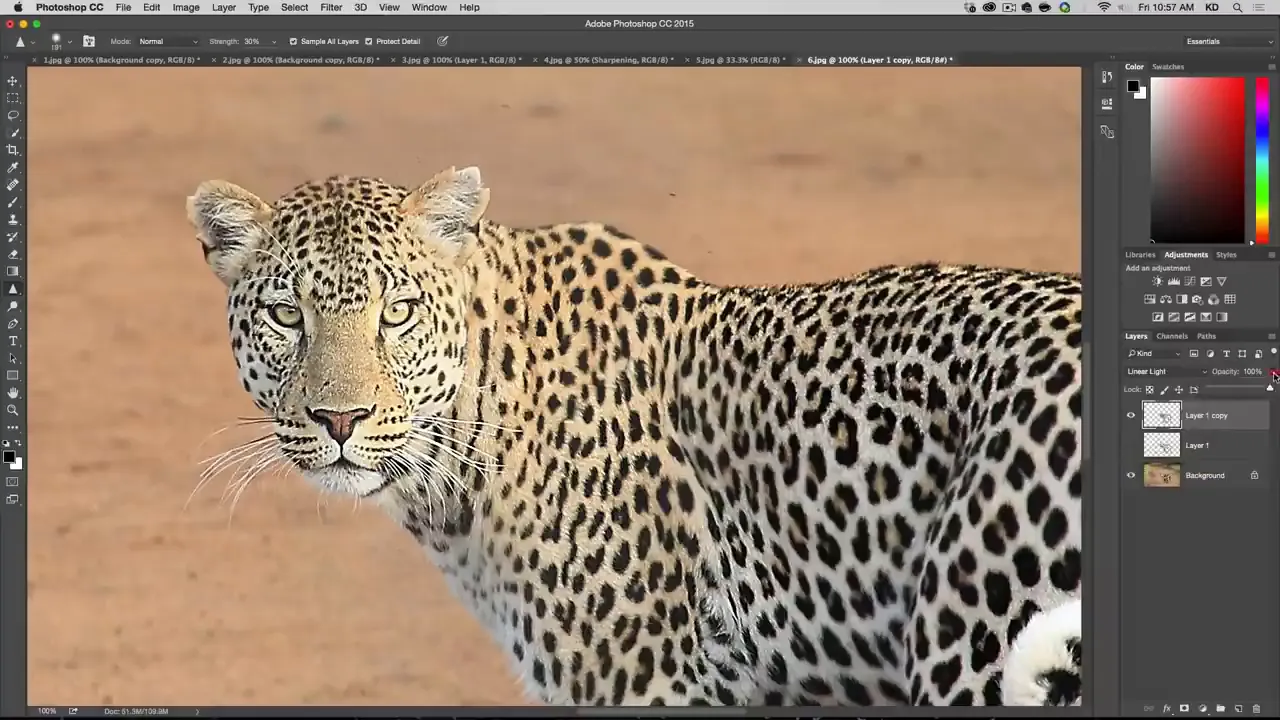
By mixing different methods, you can achieve a more customized sharpening result.
Conclusion
In conclusion, Photoshop provides various methods for sharpening an image. Each method has its advantages and can be used in different scenarios. Experiment with these techniques to enhance your photos and bring out important details. Remember to use non-destructive editing techniques, such as smart objects and layer masks, to maintain flexibility in your workflow.
Apply the appropriate sharpening techniques based on the specific needs of your images. With practice and patience, you will develop a better understanding of how to sharpen images effectively. I hope you learned something new and stay tuned for more tutorials in the future!
I hope you enjoyed this tutorial and learned some valuable techniques for sharpening an image in Photoshop, you can find a video of this and more on my YouTube channel, so please subscribe and check out my other article on How to use overlays in Photoshop to add additional effects to your image.

