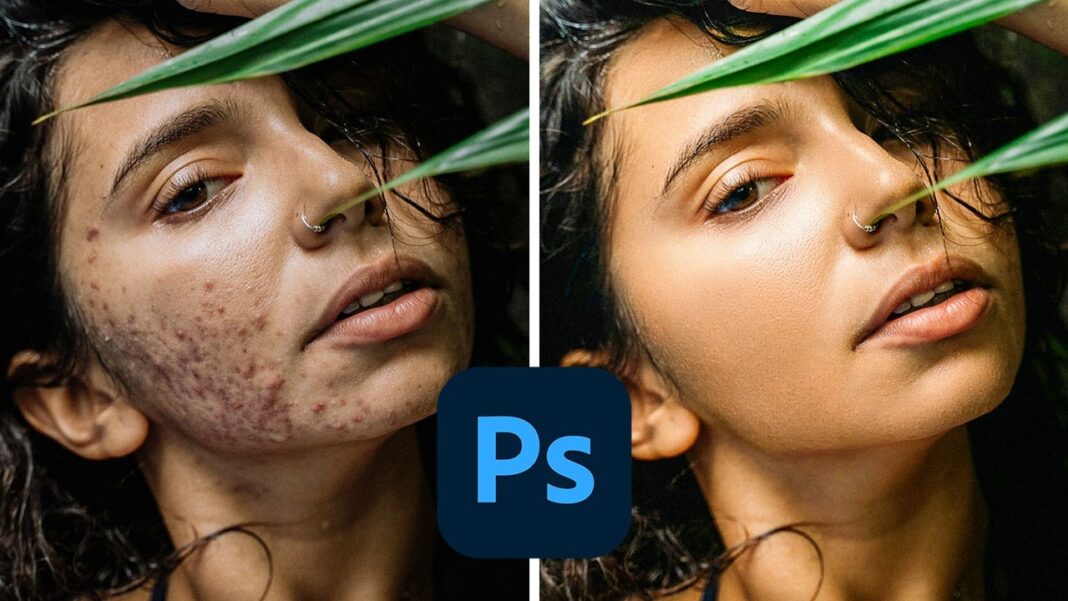
How to Smooth Skin in Photoshop
In today’s tutorial, I’m going to teach you how to smooth skin in Photoshop. We’ll start with a basic image and transform it into a beautifully retouched photo using a really cool fast action. Ready to dive in? Let’s go step-by-step so you can follow along!
Download the Resources
To fully benefit from this tutorial, make sure you download the resources and the action provided. Click the link below, input your email address, and download the images and the action file. This way, you can work on the exact same images as I do and see the impressive results firsthand.
Step-by-Step Skin Smoothing in Photoshop
Step 1: Polarizing Reds and Yellows
First, we’ll focus on polarizing the reds and yellows in our skin tone. Follow these steps:
- Create a black and white adjustment layer by clicking on the corresponding icon.
- Adjust the reds to be super dark and the yellows to be super bright. This creates a high contrast between the red and yellow areas of the skin.
*Red Value:* -161*Yellow Value:* 256This adjustment helps in distinguishing areas that need retouching from those that don’t.
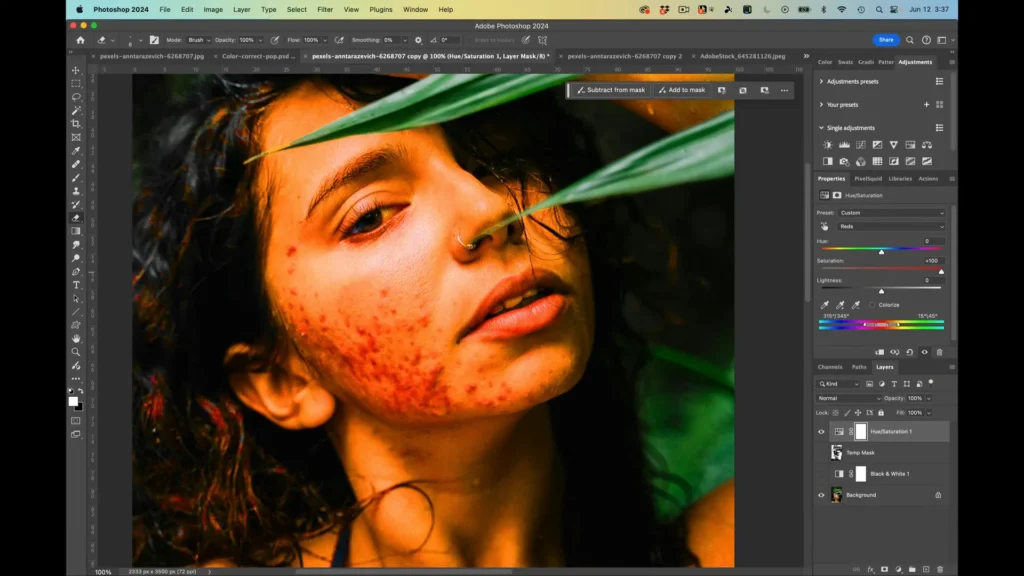
3. Merge all visible layers by pressing Shift + Opt + Cmd + E on Mac or Shift + Alt + Ctrl + E on PC.
- Invert the merged layer using
Cmd + Ctrl + I.
Enhancing the Contrast
To further enhance the contrast:
- Press
Cmd + Ctrl + Lto bring up the levels adjustment. - Adjust the levels so that problem areas in the skin are as white as possible, and the clear skin areas are black.
*Black:* 75*Midpoint:* 0.4*White:* 231We’re preparing the layer to be used as a mask.
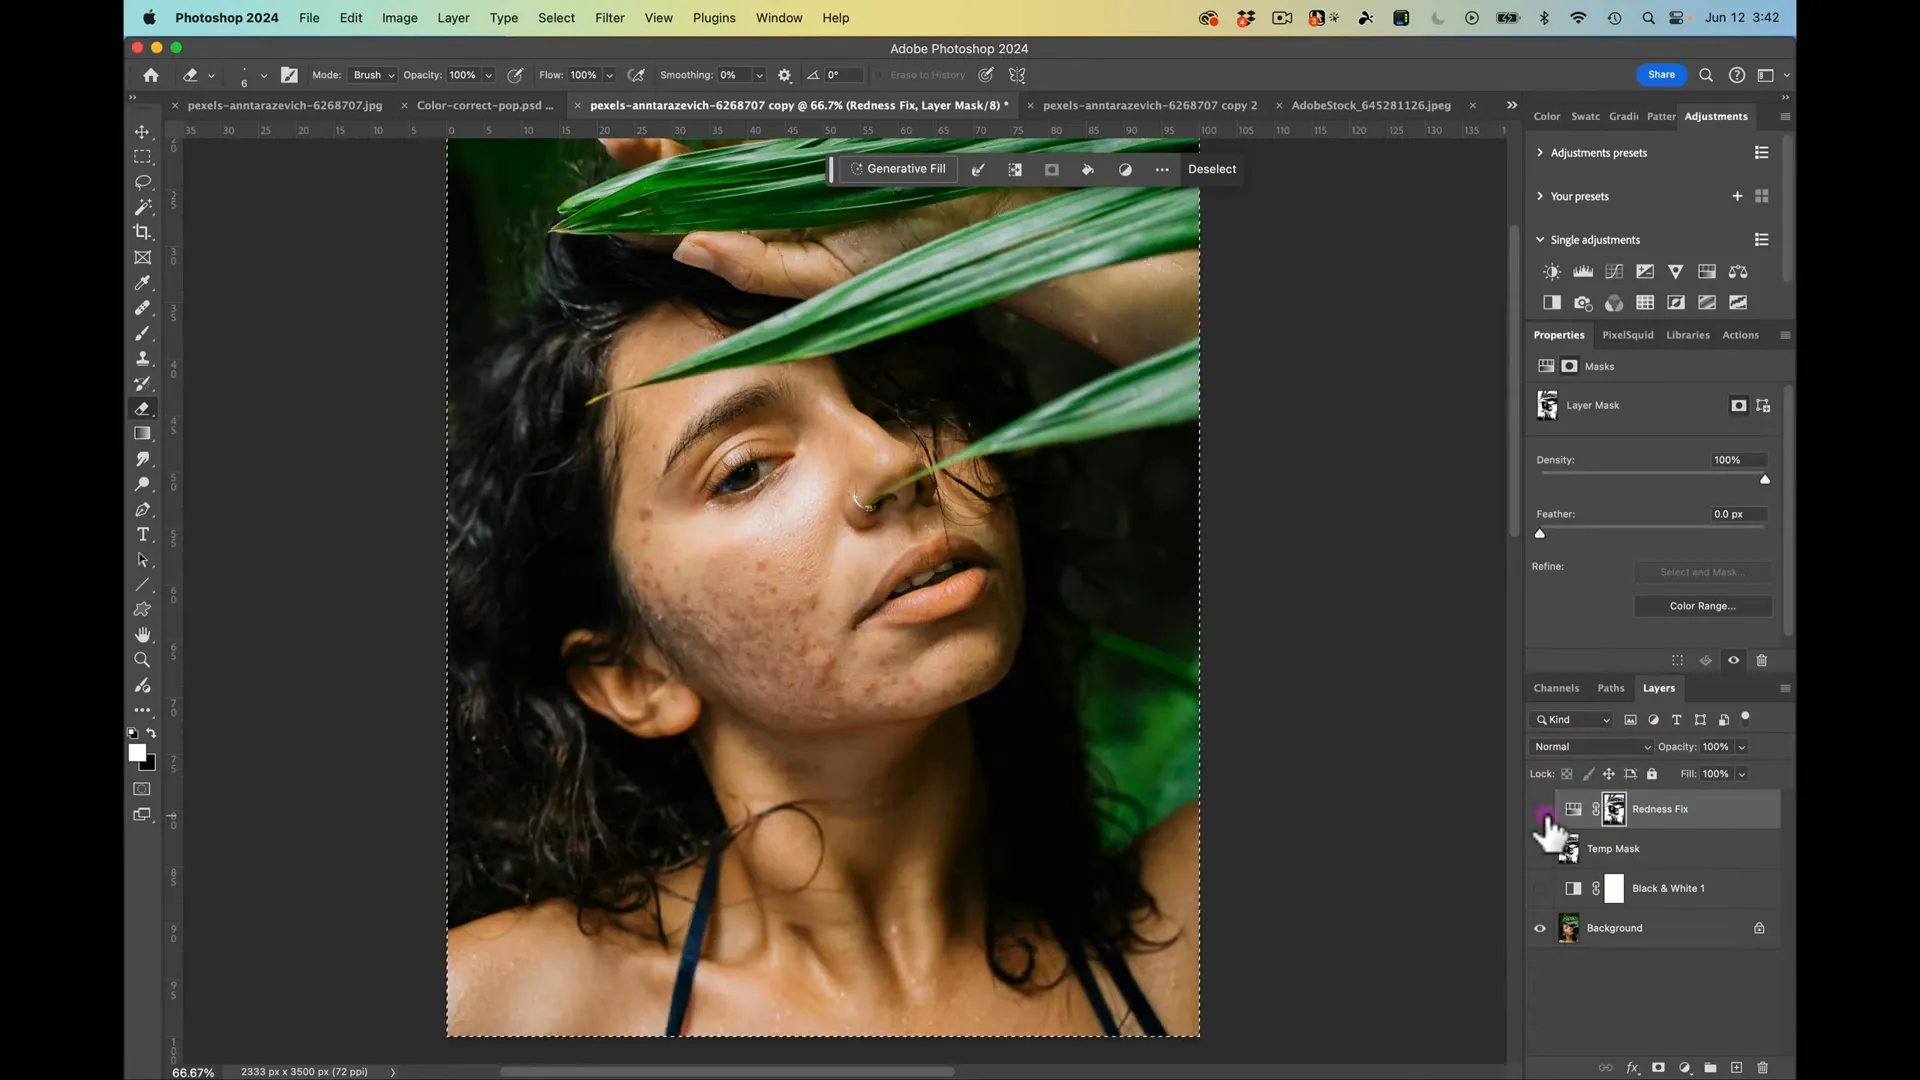
Step 2: Manage Red Tones
Next, let’s balance the red tones in the skin to match the surrounding color:
- Add a hue/saturation adjustment layer.
- Select ‘Reds’ from the drop-down menu and increase the saturation to 100% to visualize which areas are affected.
You’ll notice that yellow areas are over-saturated as well. Adjust the hue and saturation sliders to fine-tune the red levels without affecting yellow tones.
Step 3: Create and Apply the Redness Fix Layer
- Copy the pixels from our temporary mask (
Cmd + Ctrl + C). - Create a mask in the redness fix layer (
Opt + Alt + click on the mask icon). - Paste (
Cmd + Ctrl + V) the copied pixels into this mask.
This mask will now help us in correcting the skin redness accurately. Disable the temporary layers to see the result more clearly.
Step 4: Removing Blemishes
We’ll now remove major blemishes:
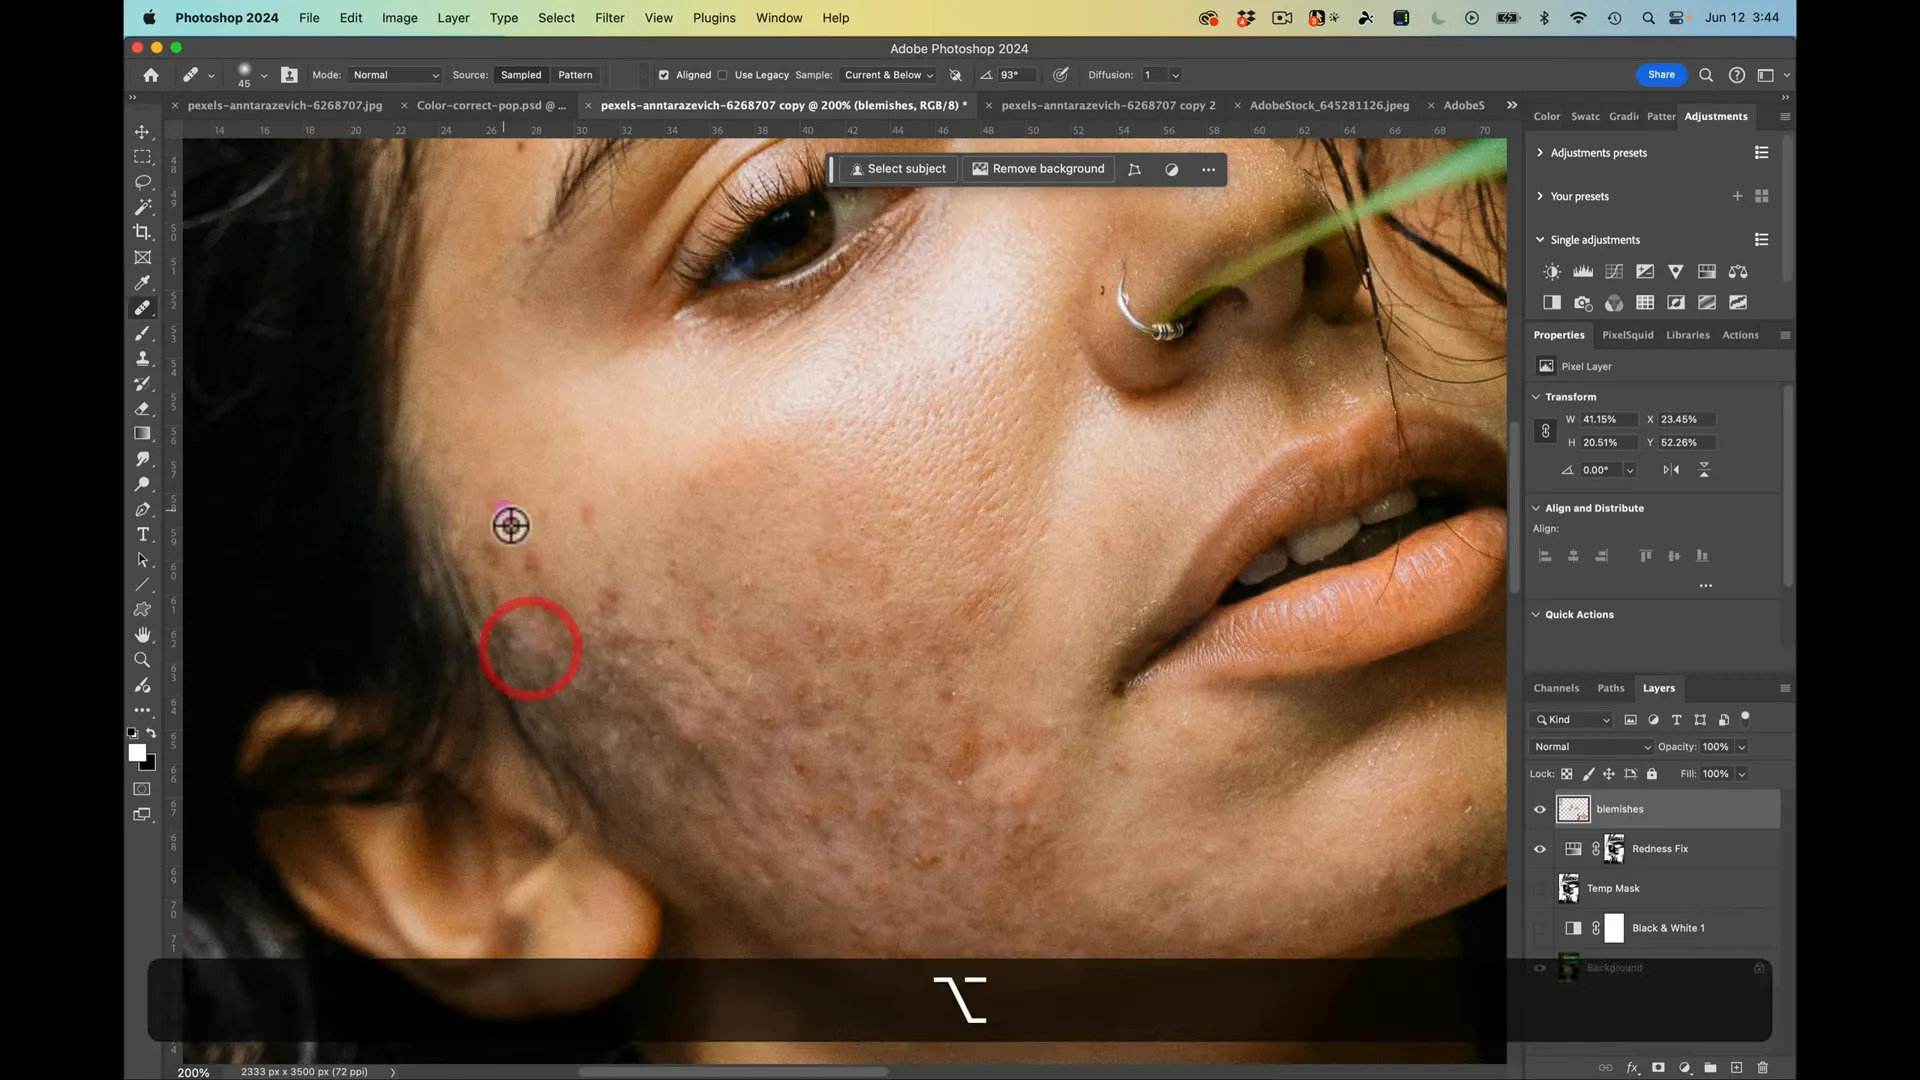
- Create a new layer and rename it ‘Blemishes’.
- Use the Healing Brush Tool (
J), ensuring the sampling is set to ‘Current and Below’. - Hold down
Opt + Altto sample an area with good skin texture and paint over the blemishes.
Step 5: Advanced Blemish Removal with Blending Mode
Sometimes, you might need to adjust darker scar areas without affecting lighter areas:
- Change the blend mode of the Healing Brush Tool to ‘Lighten’.
- Sample a bright area and paint over dark blemishes. It ensures that only darker pixels are affected.
This technique allows you to work smarter and faster.
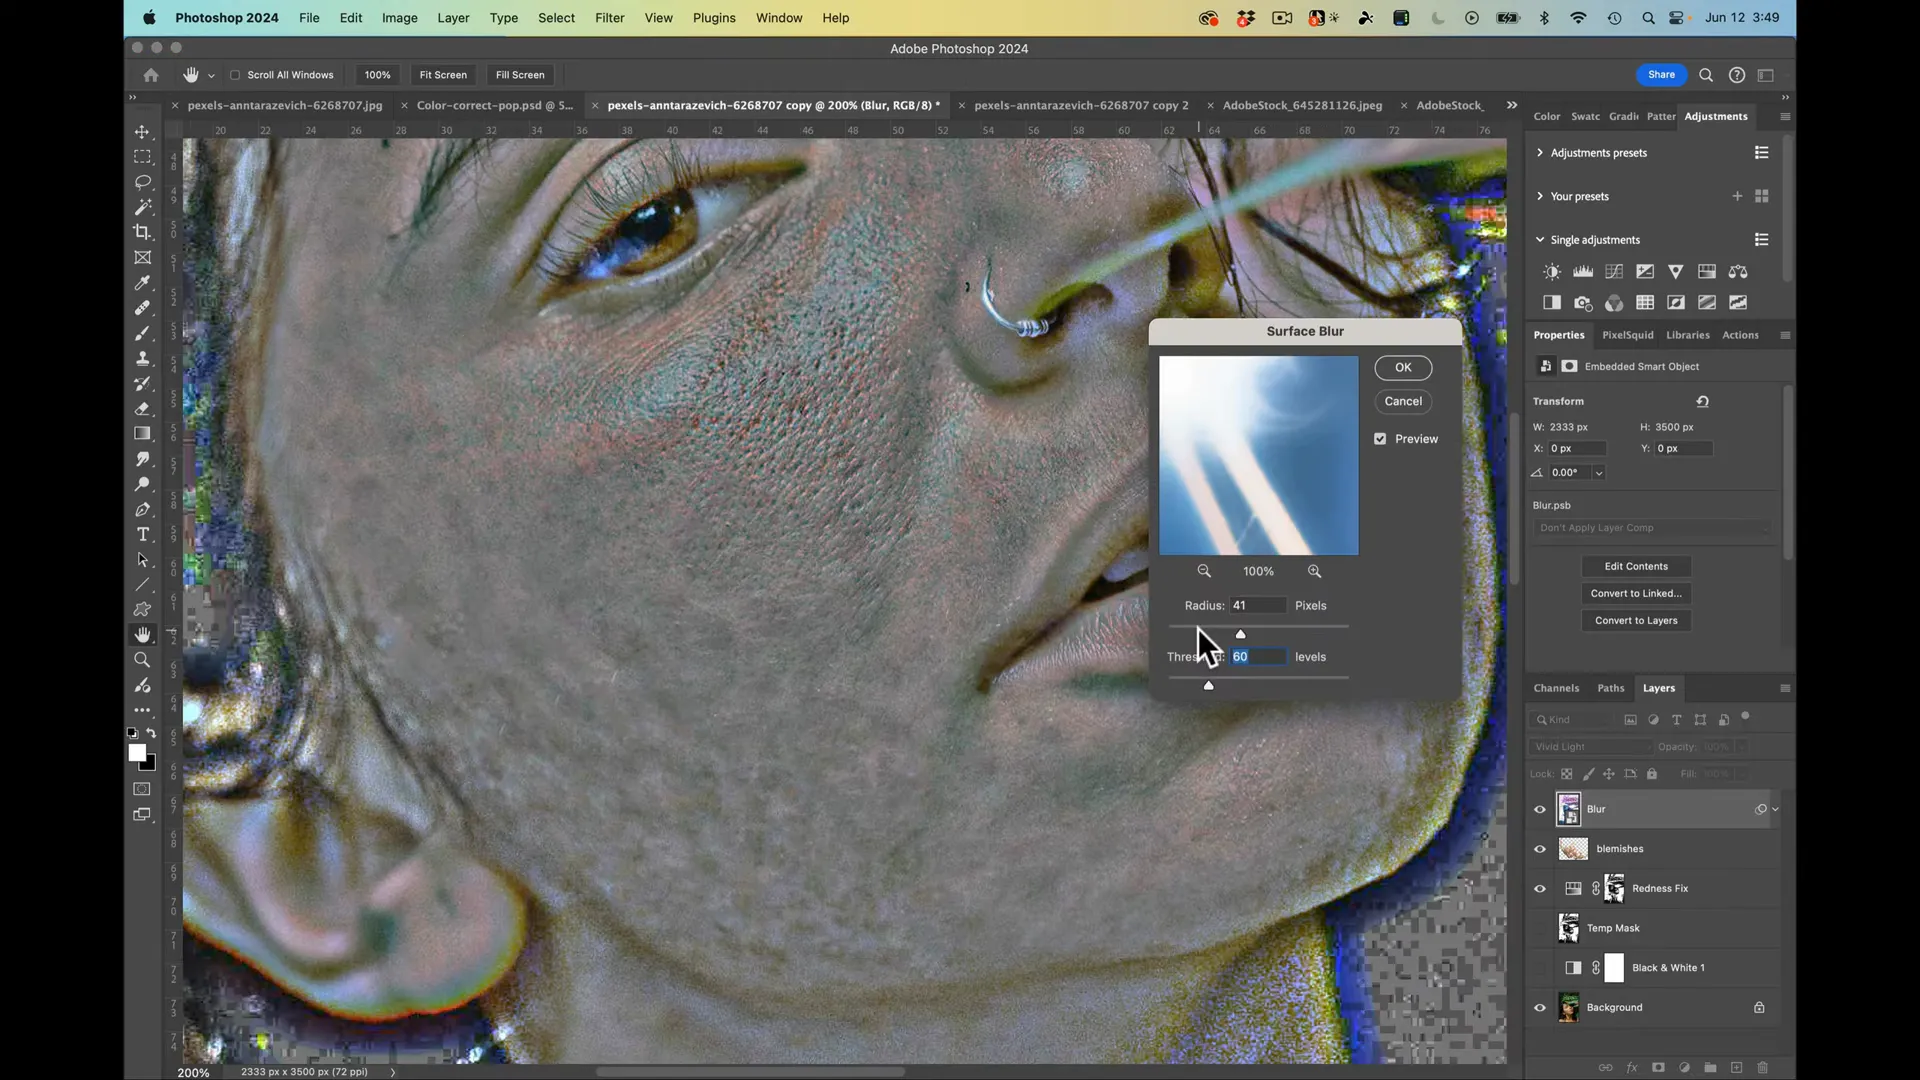
Step 6: Blur Layer for Smoothing
- Create a new layer from the merged visible layers (
Shift + Opt + Cmd + E). - Rename this layer ‘Blur’ and change its blend mode to ‘Vivid Light’.
- Invert the layer (
Cmd + Ctrl + I) and convert it to a Smart Object.
Applying Surface Blur and High Pass
- Apply a surface blur via
Filter > Blur > Surface Blur. Use the following settings:
*Radius:* 7*Threshold:* 60- Next, go to
Filter > Other > High Passand set it to 33 pixels. This flattens out the textures while maintaining the form.
Step 7: Enhancing Native Texture
To keep some original skin texture:
- Merge visible layers below the blur layer.
- Rename it ‘Native Texture’ and apply a high pass filter (
Filter > Other > High Pass) with a radius of 2.5 pixels. - Change the blend mode to ‘Overlay’.
Step 8: Group and Mask
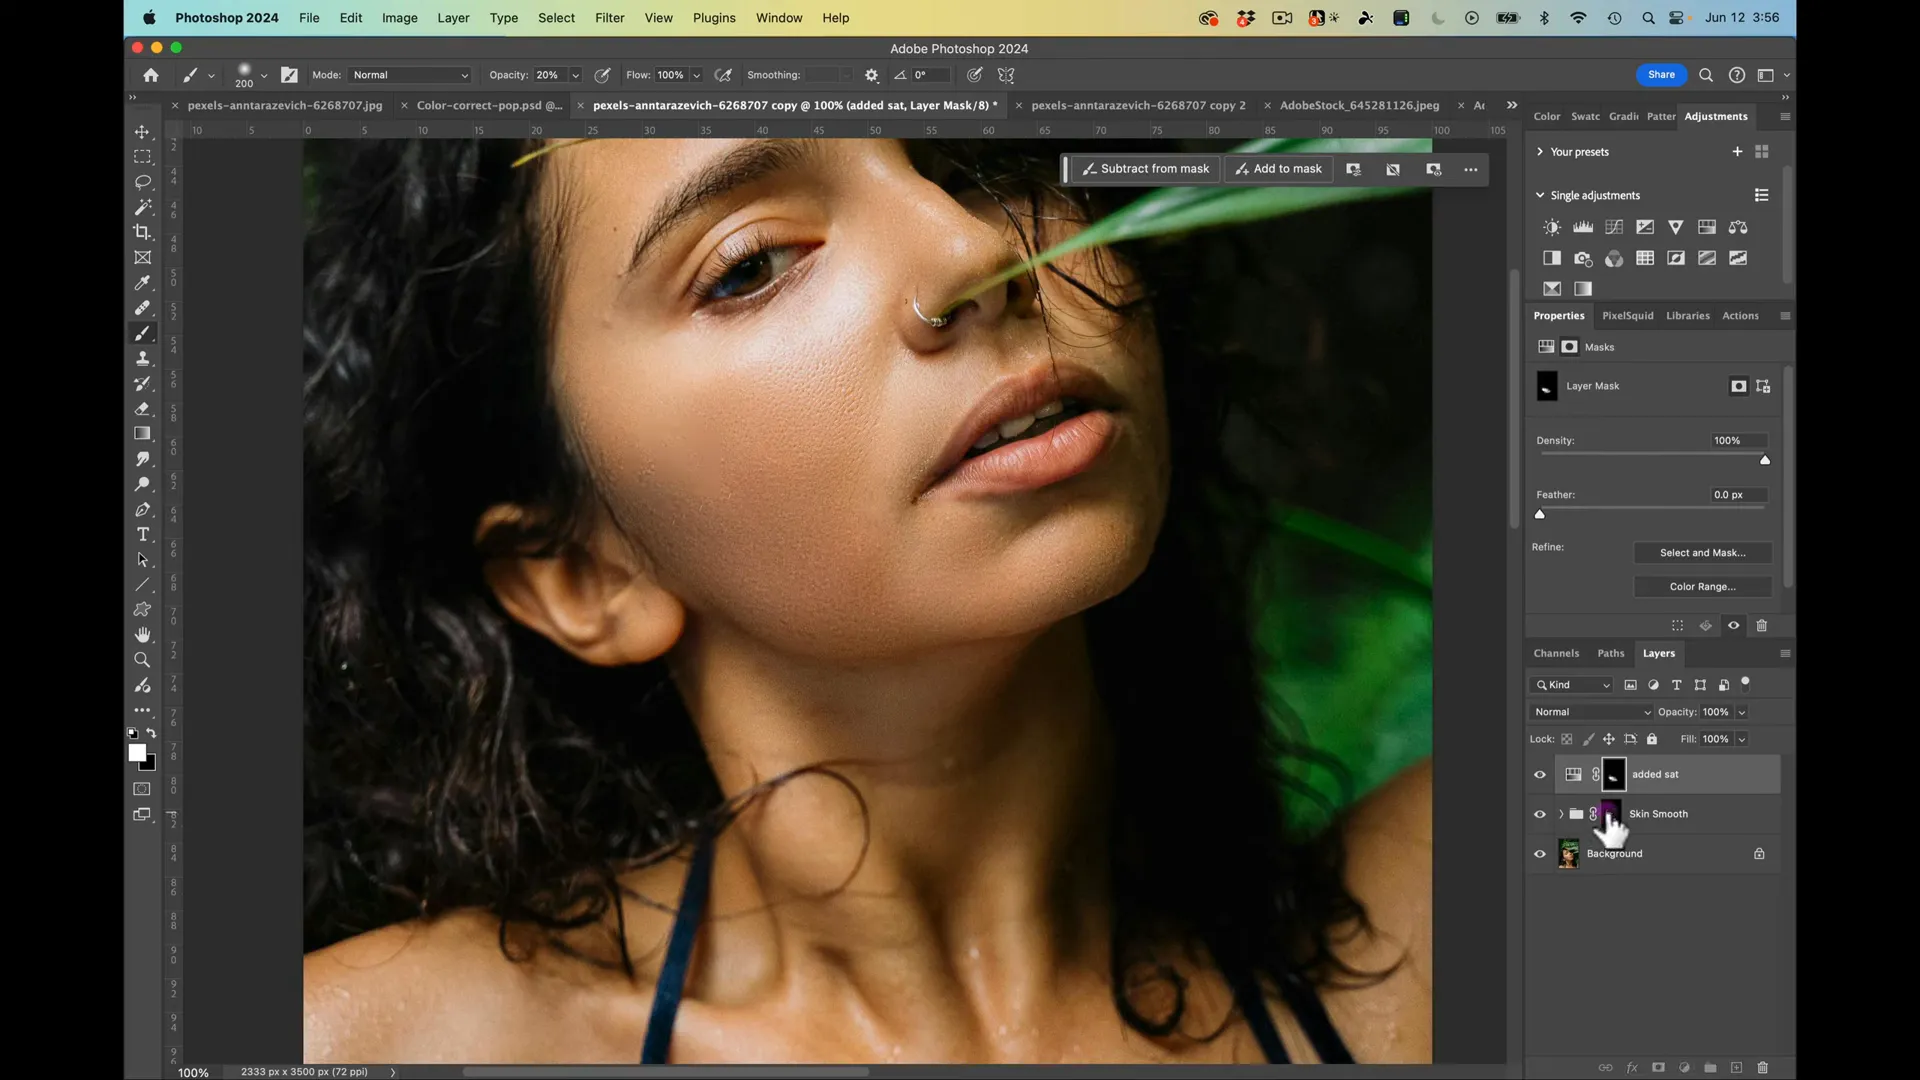
Group your texture and blur layers, add a black layer mask and use a brush to paint with white over the skin areas you want to smooth.
Step 9: Adjusting Saturation
- Create a new hue/saturation adjustment layer.
- Increase the saturation slightly in the master channel and invert the mask.
- Paint with white on the mask to apply the saturation boost where necessary.
Step 10: Dodge and Burn
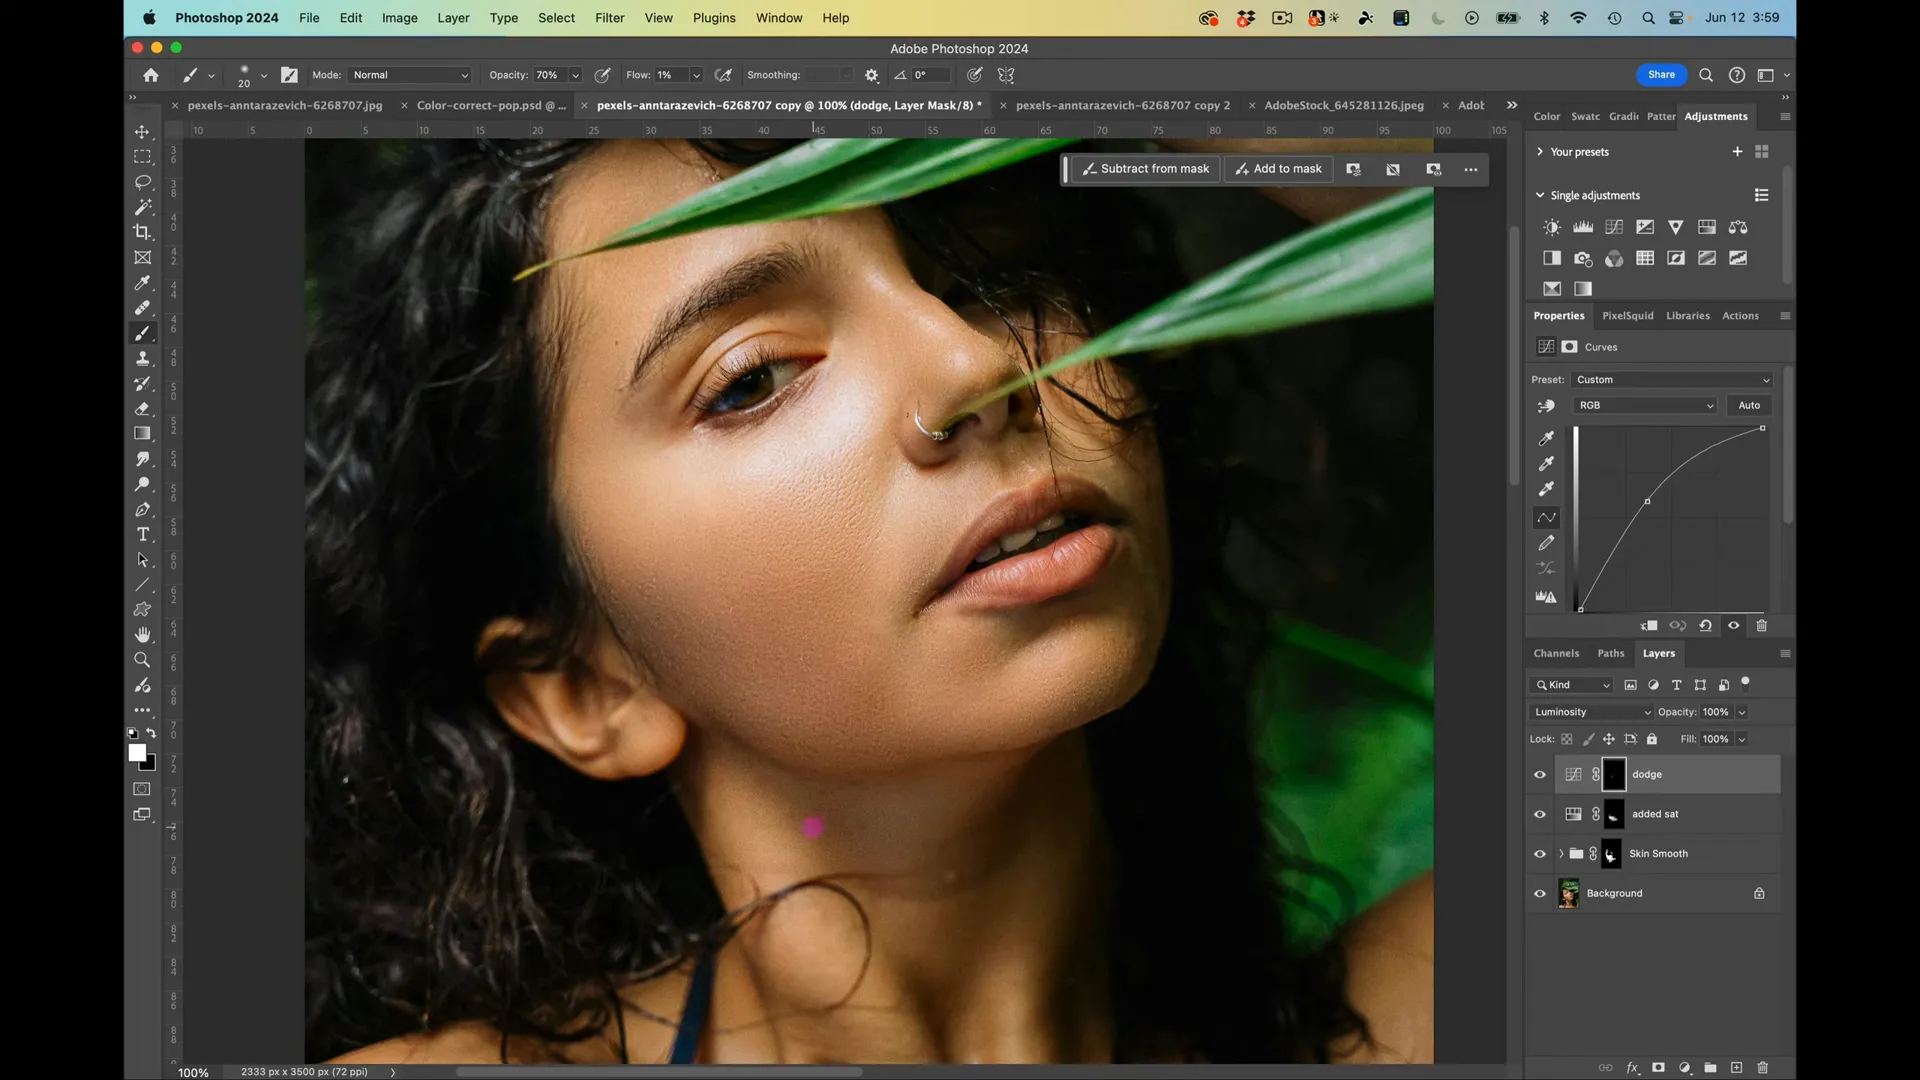
For final touch-ups, use a curves adjustment layer:
- Rename it ‘Dodge’ and change the blend mode to ‘Luminosity’.
- Lift the mid-tones and invert the mask.
- Using a soft brush with 1% flow, gradually paint over areas needing lightening.
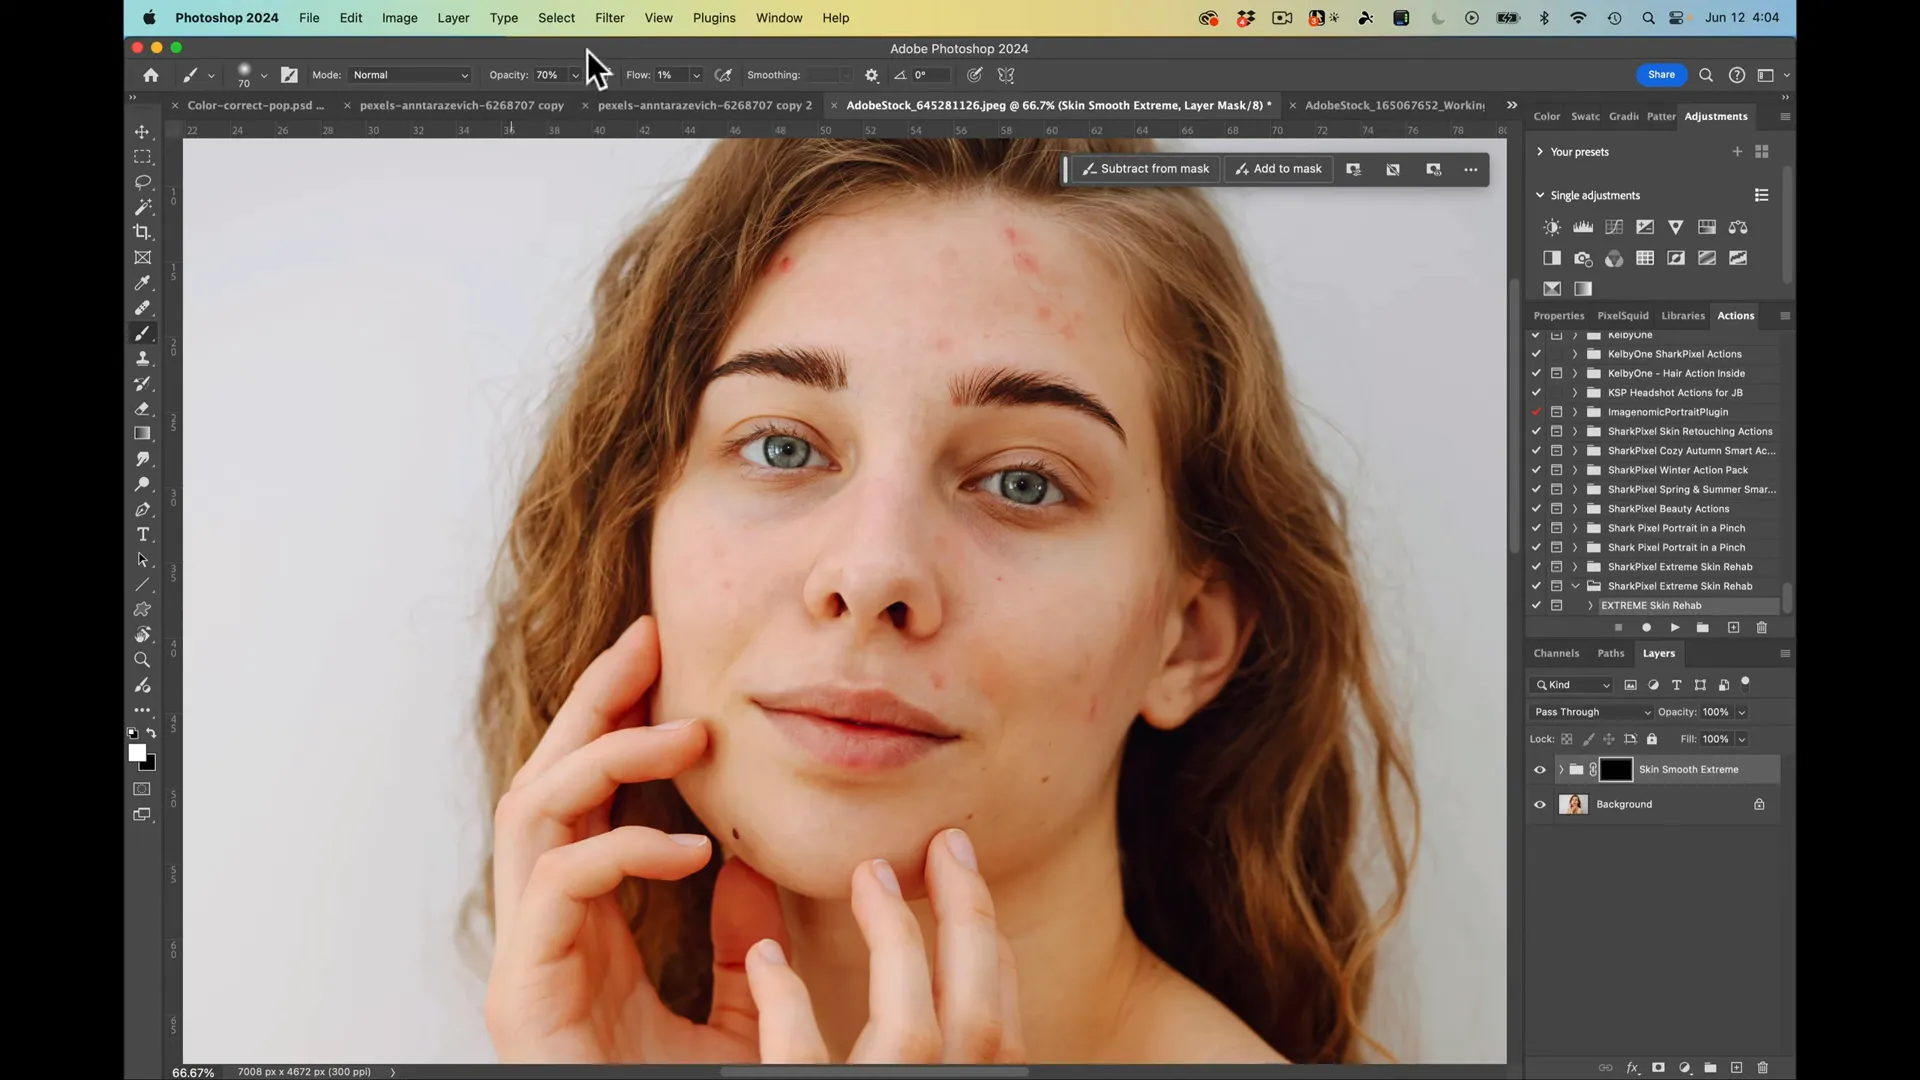
Final Touches
Merge all necessary visible layers, do any last-minute touch-ups, and voila! Your image is now expertly retouched.
Using the Extreme Skin Rehab Action
For a more automated approach, use the ‘Extreme Skin Rehab’ action provided. Make sure your Neural Filters are downloaded, then load the action and play it. This action simplifies the whole process immensely.
"Remember, this action is only for extreme cases and should not be overused on every image."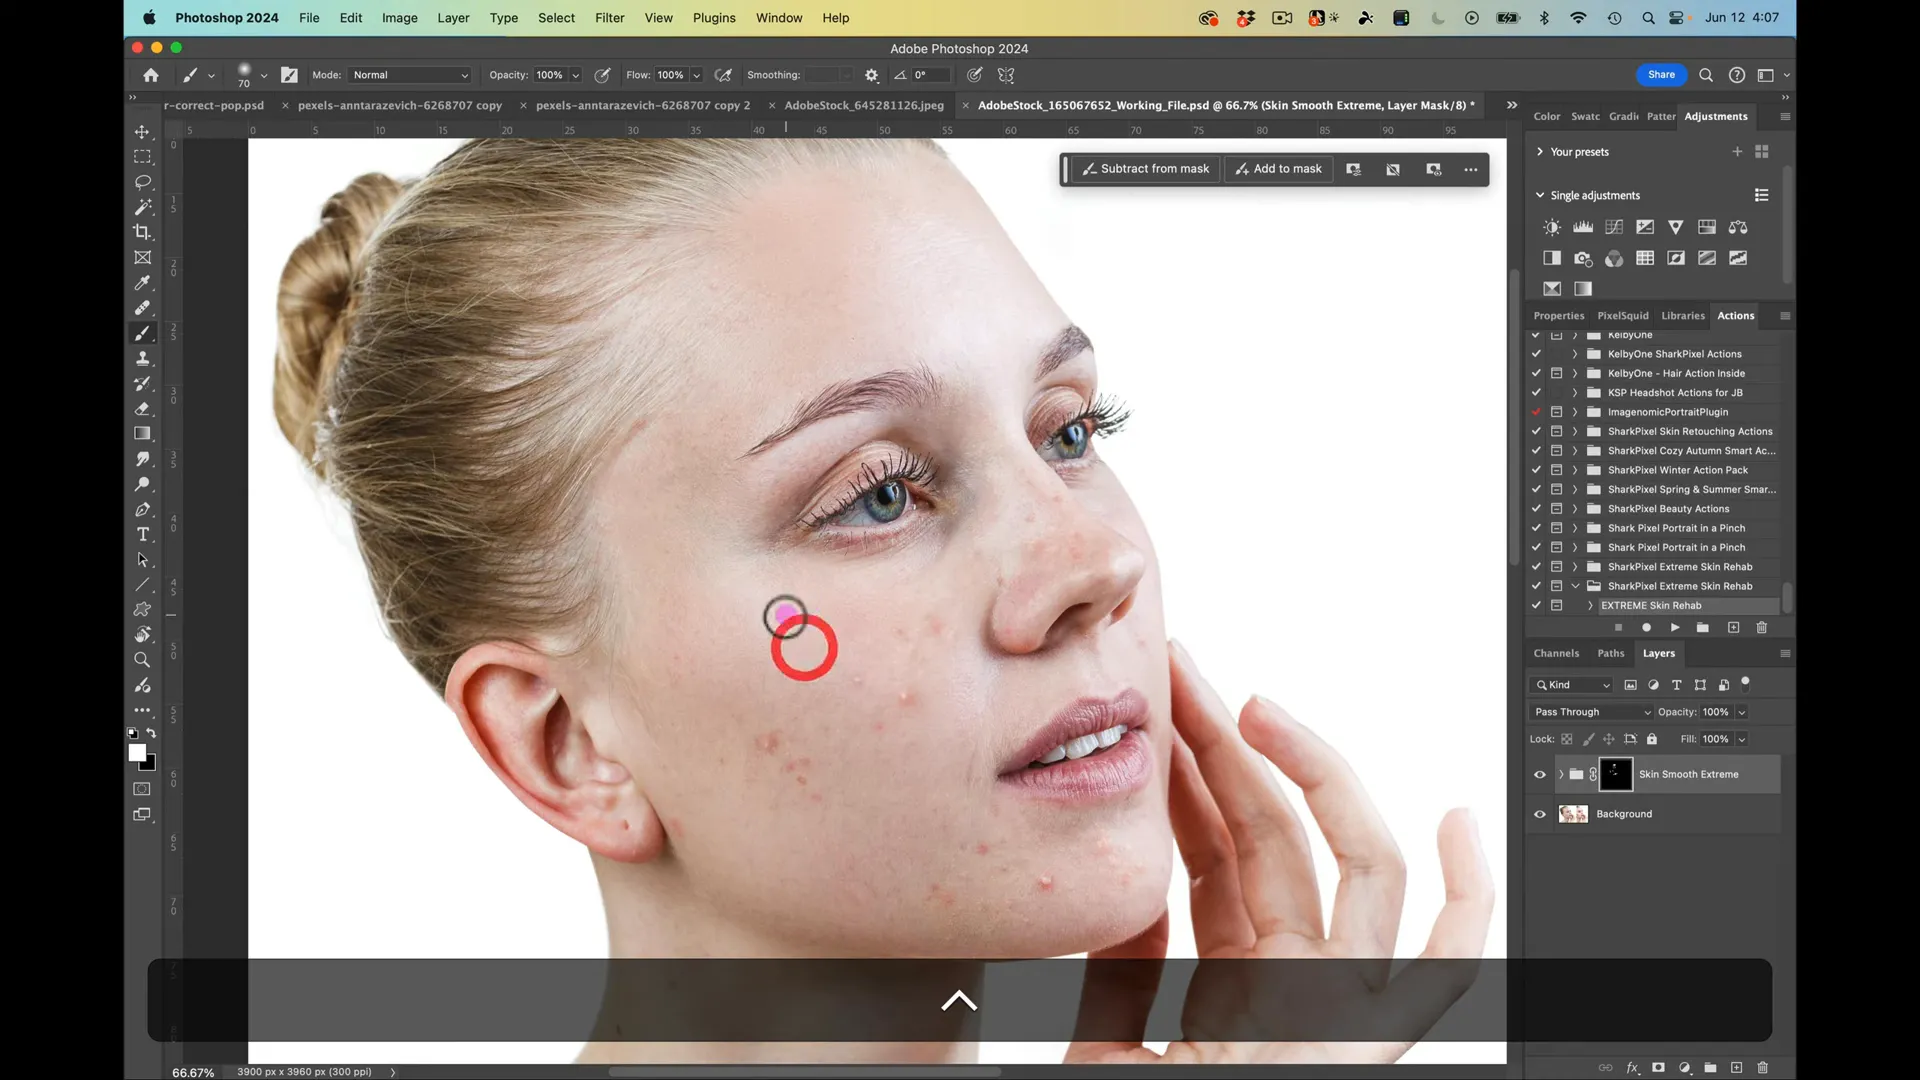
Conclusion
With these steps, you can seamlessly smooth out skin in Photoshop. Follow along with the tutorial using the provided resources and action, and experiment to see what works best for your images.
Don’t forget to like and subscribe to the Sharkpixel channel for more tutorials.
Happy Editing!

