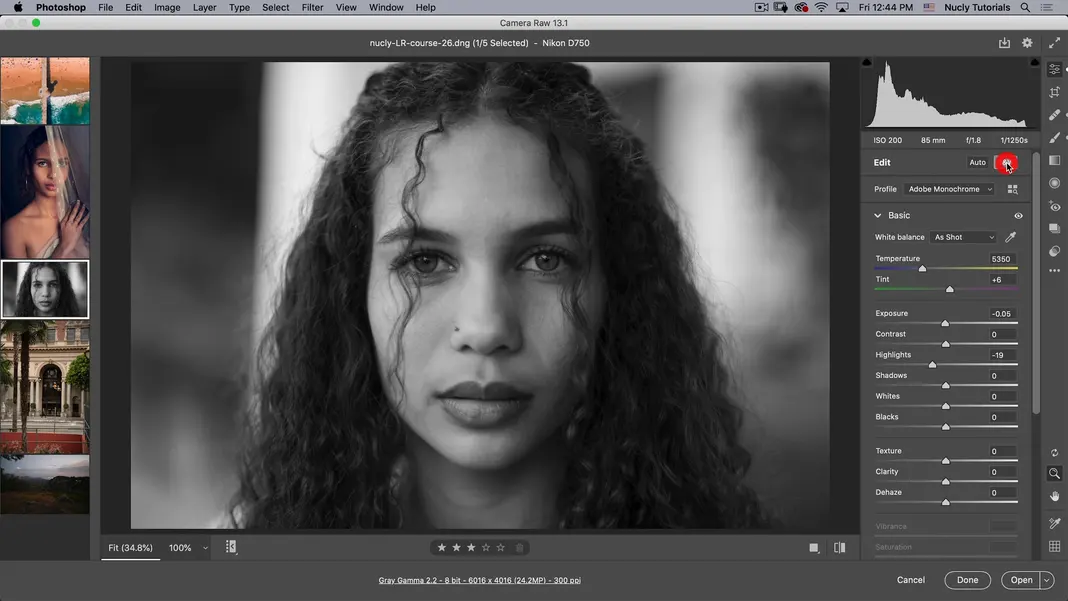
In this photoshop tutorial, I will show you the basics of the Adobe Camera Raw plugin found within Adobe Photoshop. This tutorial will cover the changes made to the new version of the Camera Raw plugin, the location of various tools, and how to use available functionalities. You can access all the files used in this tutorial if you want to follow along by clicking here.
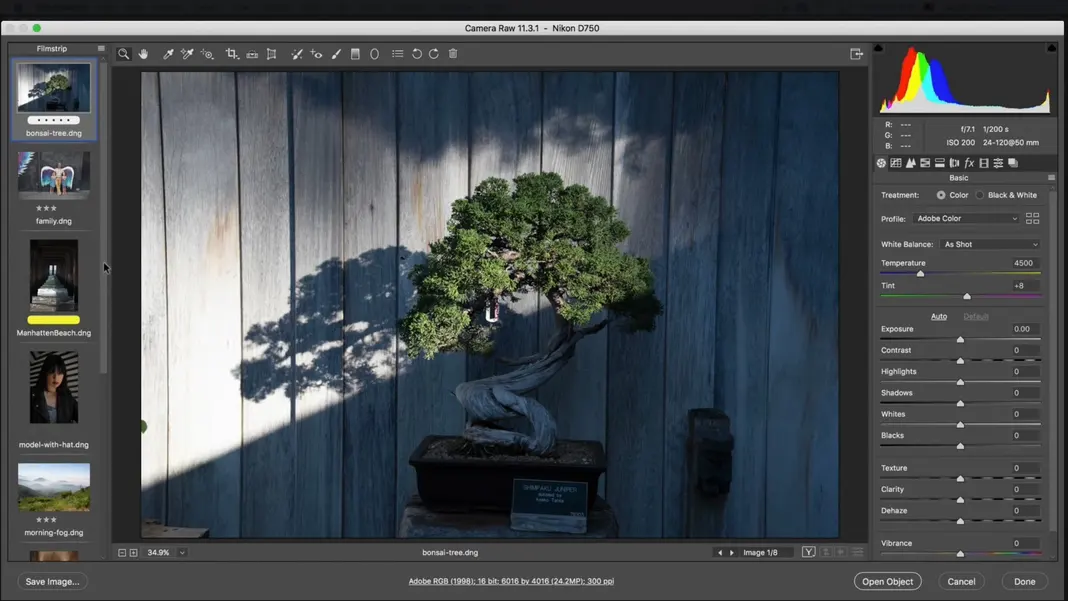
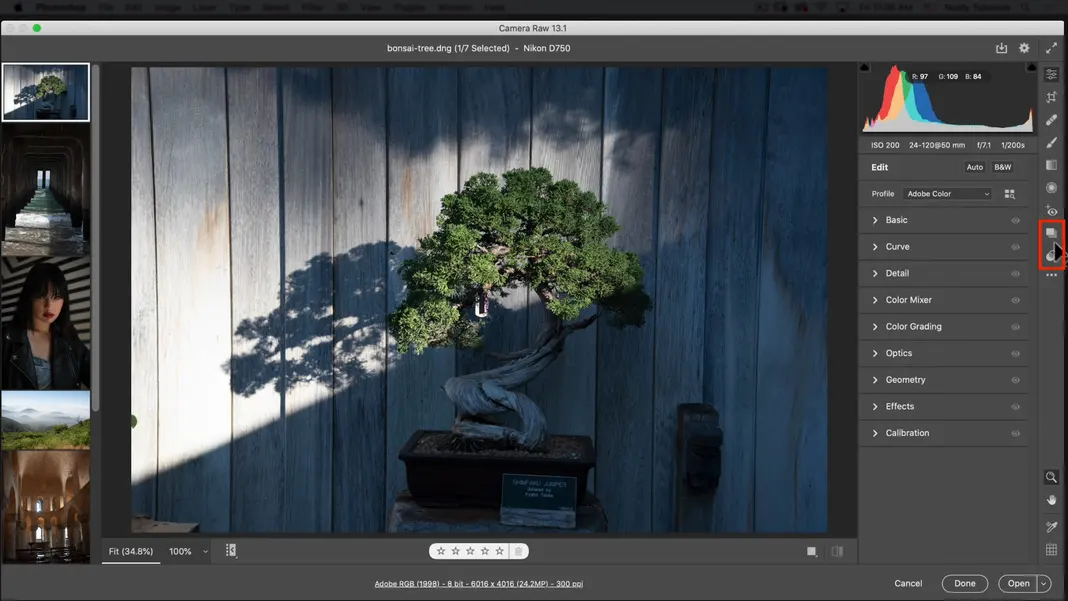
Before we move to the tools and features of the Adobe Camera Raw plugin, let’s quickly go through the interface of the Adobe Camera Raw plugin. Here is the interface for Camera Raw 11, which is the previous version of the software.
This is the new interface for Camera Raw 13, which is the latest version.

As you can see, there were some significant changes to the interface between the old and new versions of the plugin. I want to highlight the changes between the version first. So this is where the tools used to be.
And this is the new interface.

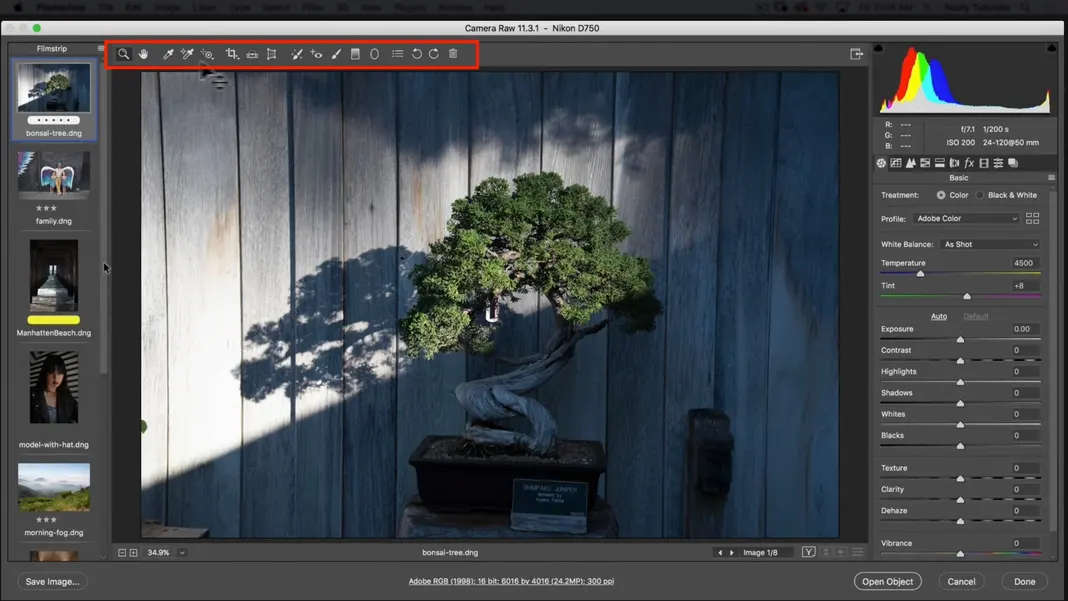
As you can see, the tools have moved to the right side. So all these tools that used to be along the top here have moved except for a few exceptions. With that said, here are all the changes between the old and new interfaces:
So the first change is the white eyedropper tool that is now moved to the basic panel to the right.
Then we have the straighten tool and which is now inside the rotate and the crop tool next to the angle.

The geometry tool here is now one of the panels; you can find it on the right side called geometry.
Another significant change you may notice is that in the old Camera Raw 11, you can find all your panels for developing your Images have now been converted into drop-down Panels in the new version.

So rather than tabbing them along the top – the new version has essentially made them collapsible panels in one straight line. If you want to access the panels, you could open them and then scroll through all of them rather than having to tab through all of them. The presets and snapshots, which used to be above, have now moved to the side in a vertical orientation.
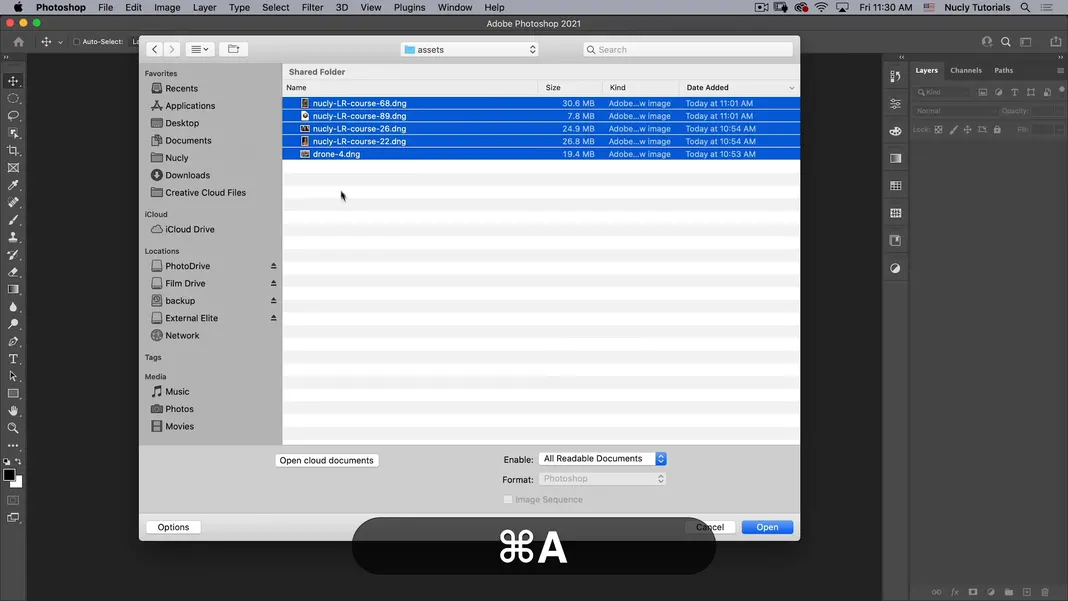
There were some major changes made in Camera Raw 13, and to sum it all up, all the tools within Camera Raw have not changed, but they’ve simply been moved to a different location inside the interface except for color grading. Editing the first photo. Now that we know where things have been moved, we’ll take our first photograph and run it through all the basic tools and functions of the new Adobe Camera Raw. You’ll get an idea of how some of these tools work. So I’m going to go ahead and open some camera raw files.
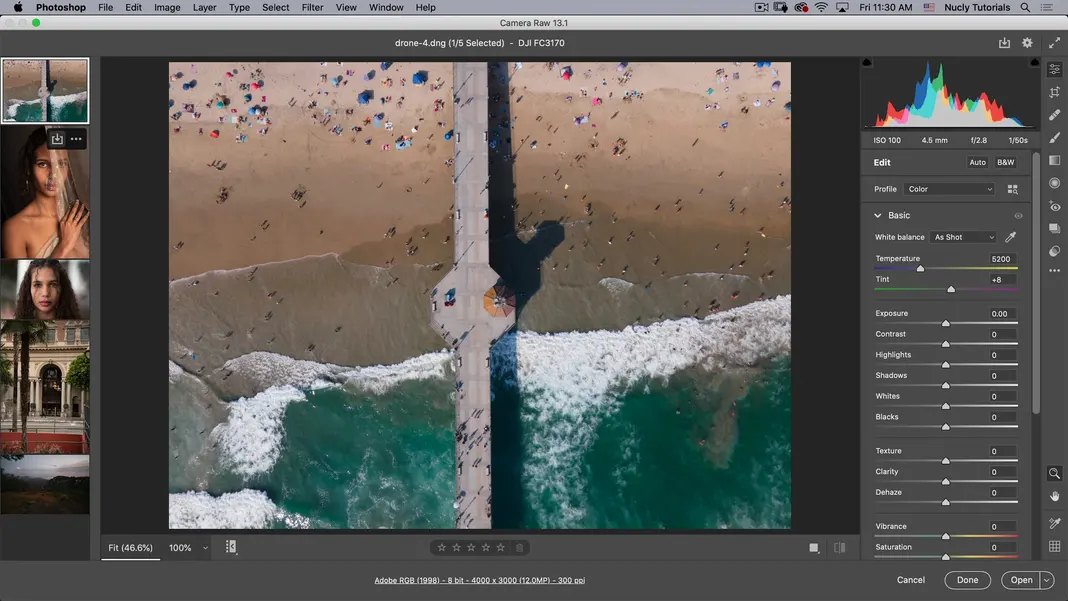
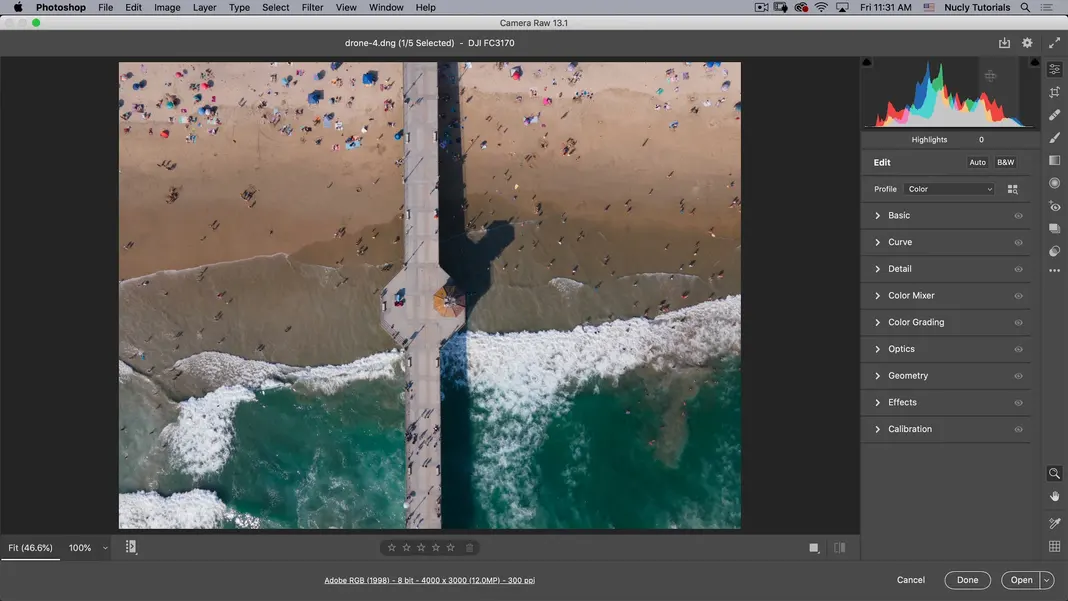
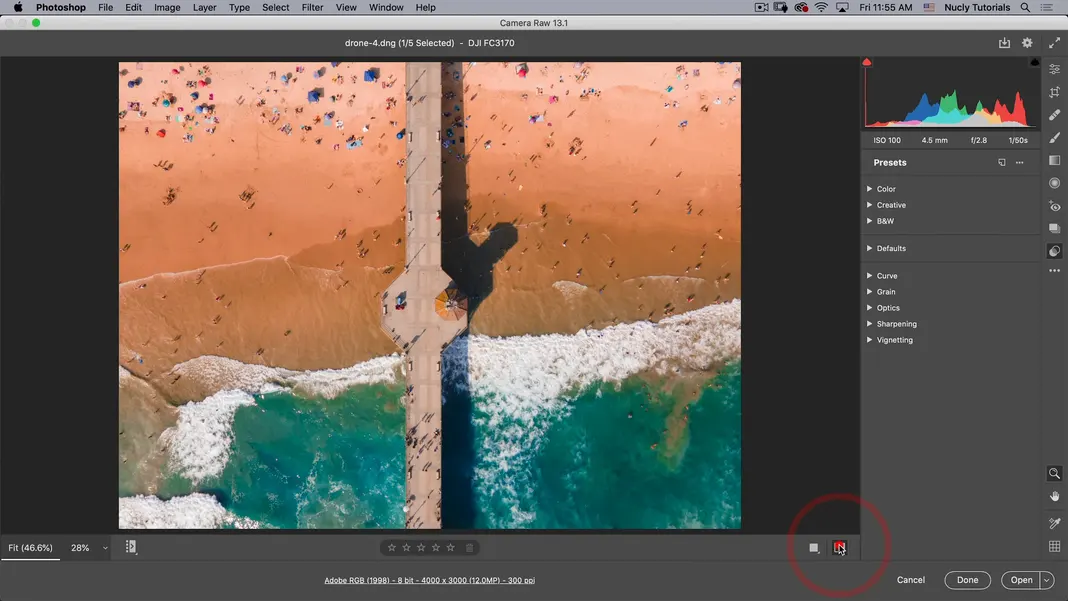
Beach Photo Edit (image 1)
As you can see here on my left side, there’s a film strip of the various images.
If I want that film strip to be along the bottom, I can click and hold on to this depicted button.
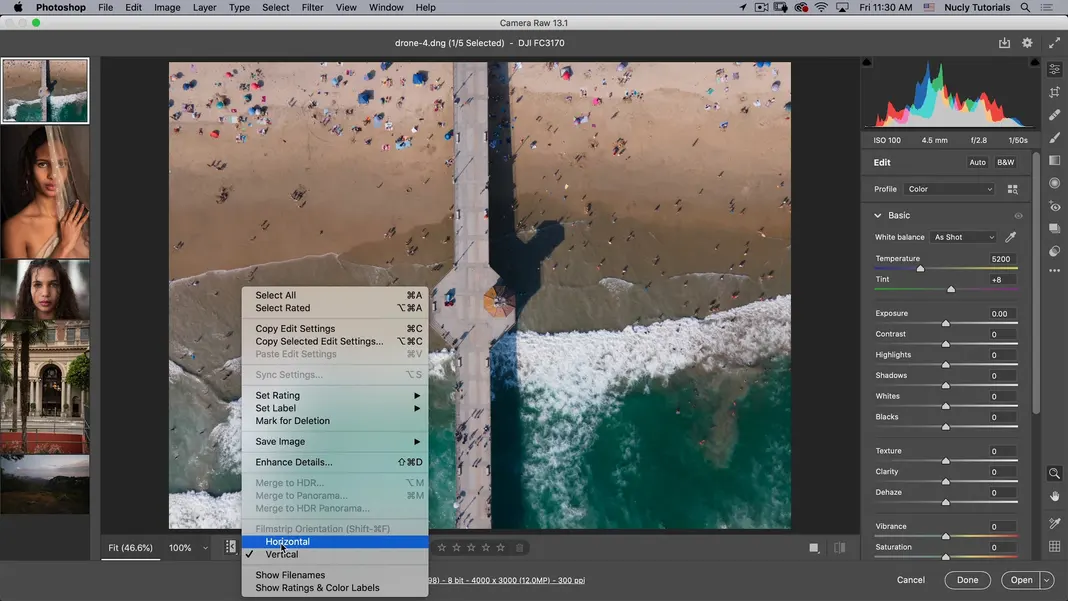
This button gives you the option to go horizontal, that’s going to show the images horizontally at the bottom. If I don’t want to see them, I can click on the film button once, and now I’ll just see the image I’m working on, not the strip. I can click the film view button again to reopen the hidden film strip on the left side.
So I’m going to put it back on the left side, and for now, I’m going to hide the film strip. Next, I’ll go through the various panels we covered earlier on the right side of the screen. Here you have your histogram; you can use your histogram to adjust the blacks, shadows, exposure, highlights and whites.
But you can also make these adjustments using the Sliders, the function is the same for both of these methods. When I move this area in the histogram by clicking and dragging, I also move the exposure slider.
Basic
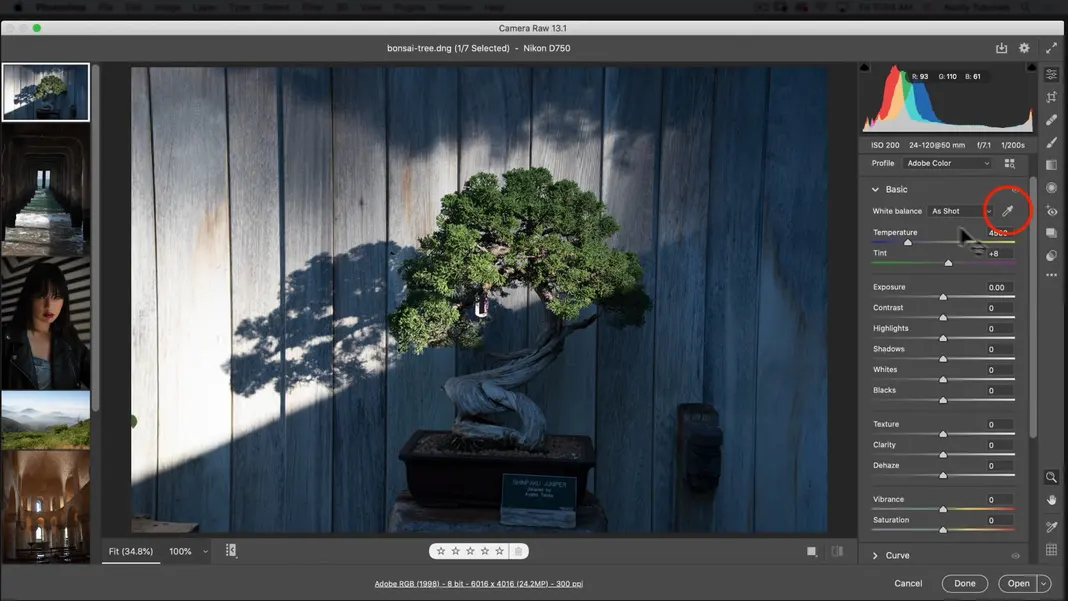
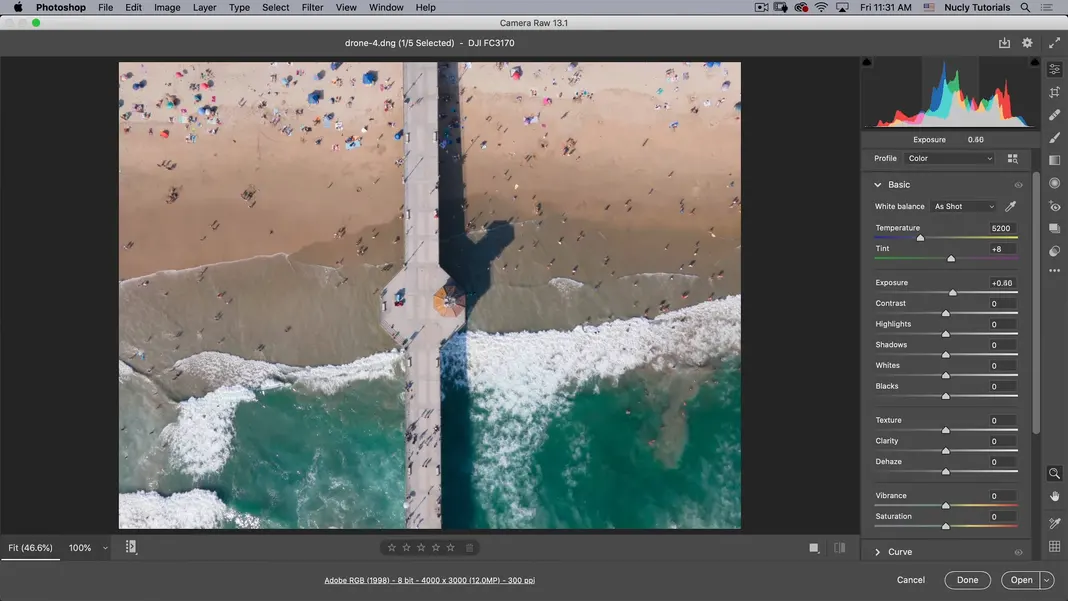
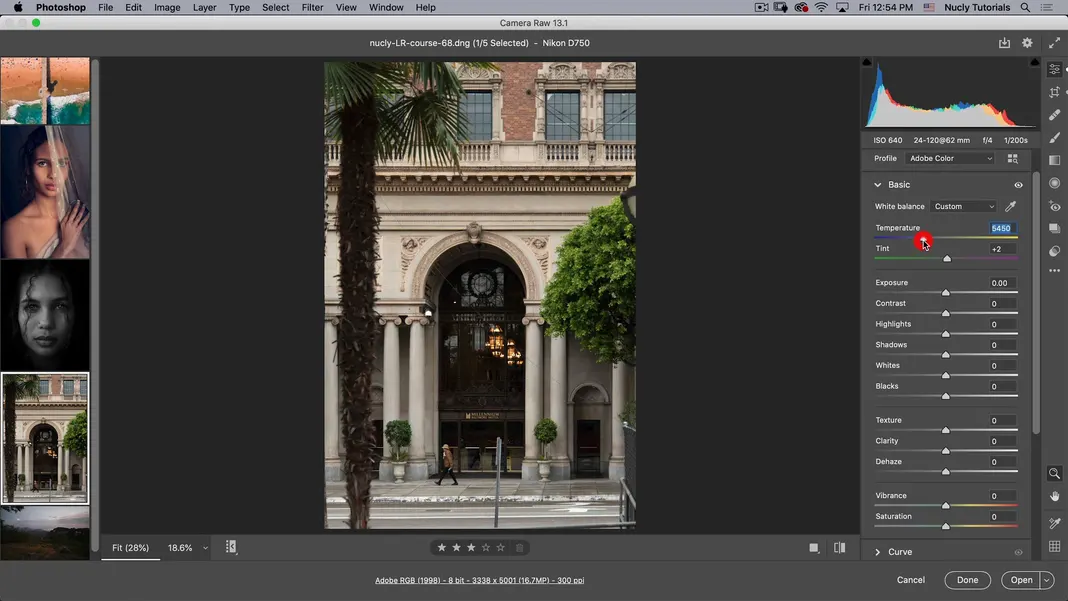
The first thing that you can adjust under the Basic section is the temperature, which is essentially the white balance and tint of the photo. If I want, I can use the white balance tool and select an area of my image that should be neutral. So it should not have colors in it this area.
Here, I have selected the concrete ground, which should be relatively neutral.
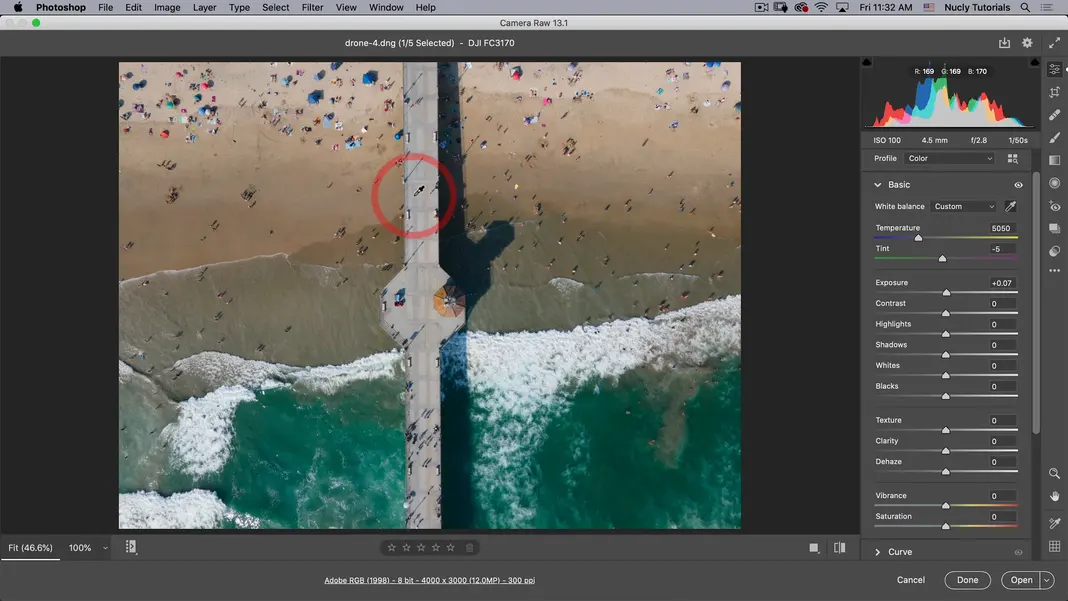
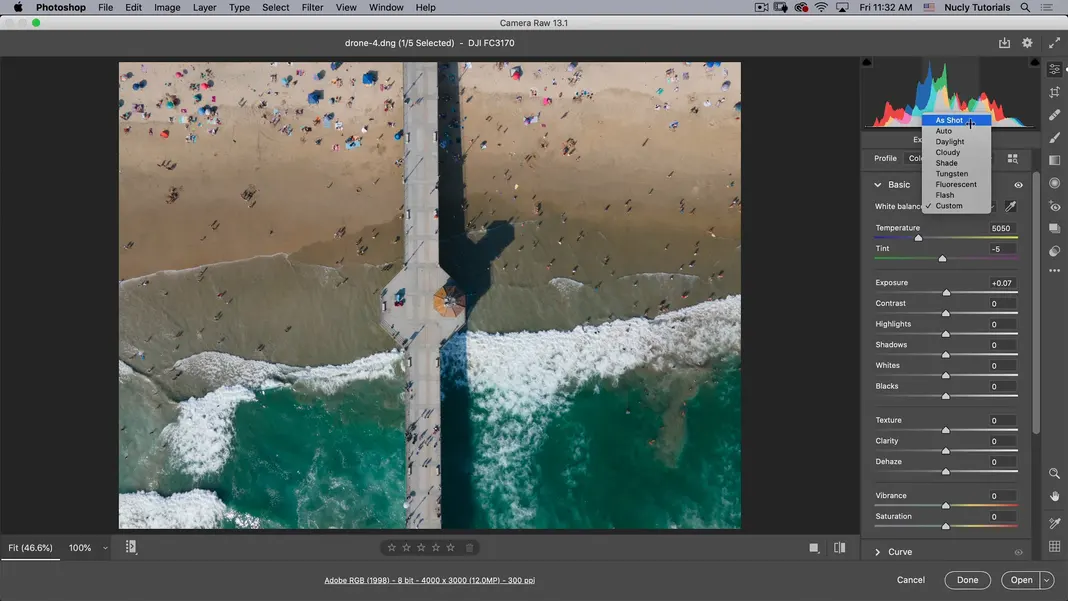
If I click on this neutral area, it’s going to try to correct it based on that selected neutral area. So all the other colors in the image will automatically be adjusted based on our selected neutral area. You will notice that the white balance tool has given the whole image a cyan tint, which probably means that our selected area isn’t neutral. It probably has a bit of a cast on it, so let’s go back to the as-shot option.
We can also just adjust these settings manually. So if I want this image to be warmer I can adjust the warmth – that, generally for a beach scene, always looks a bit nicer. If I want to increase the exposure, I can do that using the exposure section. The exposure on this image is already pretty good, so I might bump it up slightly. The next adjustment we will make is contrast; that will allow me to adjust the contrast in the image. We can bump the contrast up a little bit.
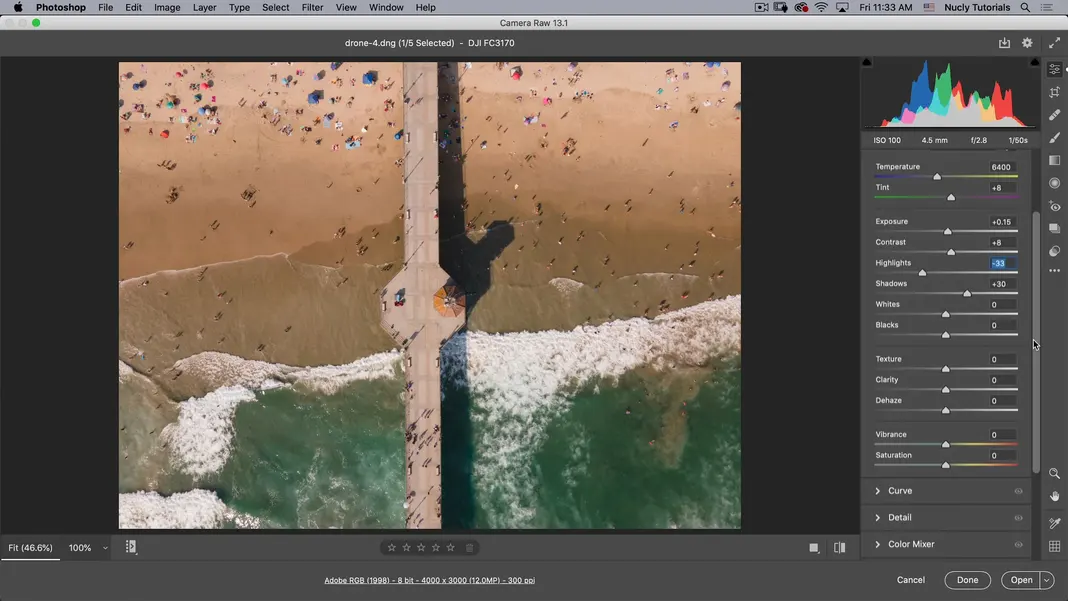
Then next you have highlights and shadows.
If you want to add more dynamic range to your image, you can reduce the highlights and bring up the shadows.
Doing this will bring out some of the detail in the shadowy parts of the image and bring some of the detail back into the highlight areas of the image. I generally do that for most images to give them a more dynamic range.
Whites and blacks are two settings that you usually don’t want to mess around with. But if you want to give the image kind of a more high-contrast look, what you can do is bump up the whites and take down the blacks. That will push the whites and blacks toward the edges; as shown in the historgram.
Next, we have texture clarity and dehaze within the basic section. What these do is add contrast to various frequencies of your image. So you can kind of imagine dehaze as the low frequency, the texture as the high frequency and clarity as the mid-frequency of your image. So if I increase the texture, it will sharpen the image by increasing the contrast in the very high-frequency areas of the photo.
Clarity is going to do pretty much the same thing but to the mid-frequency areas. So as you can see, when I adjust clarity, it contrasts my mid frequencies.
Dehaze is almost like adding contrast to the image. It’s going to add contrast in the low frequencies. In addition, we have the option to adjust vibrance within the basic section.
If you want to add some vibrance to give the water within the photo a little bit more color, you can adjust the vibrance option.
Then we have saturation, and the difference between vibrance and saturation is that vibrance is smarter than Saturation as a tool. Saturation is going to increase the color across your entire image. Whereas Vibrance is going to increase the color or the saturation of the colored areas and tries to leave the neutral or skin tone areas untouched. So generally, if you’re going to add color to your image, use vibrance instead of saturation.

Curves
Now to curves, this section will allow you to add a curve to your image. If you’re familiar with photoshop, you probably already used a curve at some point. The curve option allows you to add points to adjust the image. Similar to your histogram, the lower end of the curve is your shadow area, and the top end is your highlight area. Adding an S curve will increase contrast by increasing the lightness of your light areas and decreasing the darkness of your shadow areas. You can also use the channels here to make some nice color effects.
For example, If I want this to be a little bluer, I can click on the blue and just bring up the bottom part of the curve. Since the above part is the light area, if you bring down the light, you will notice that you will get that yellow back in the image.
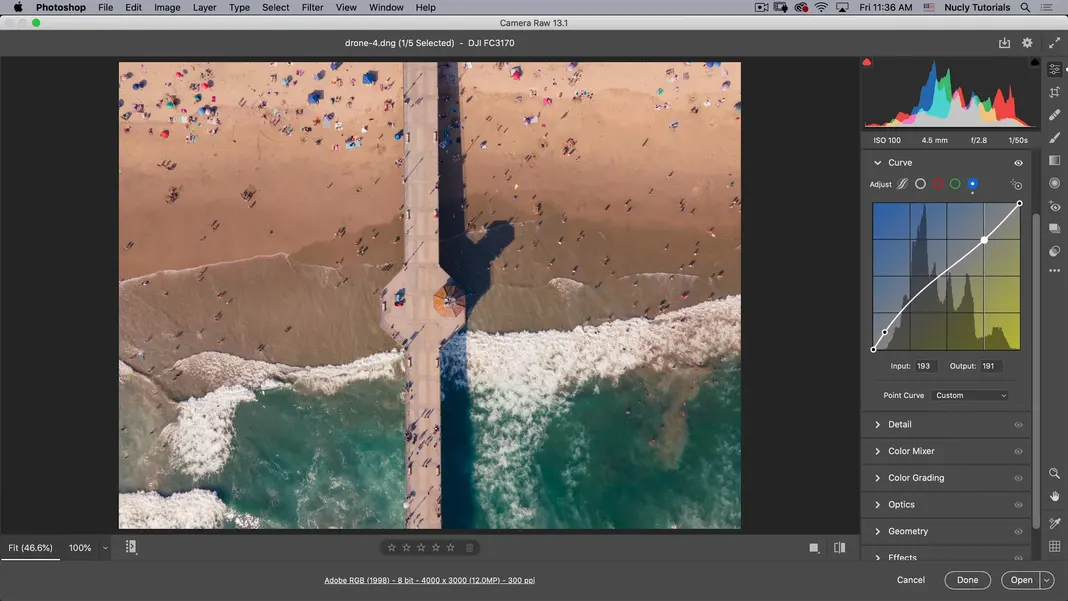
If you want to reset any of them, just hold down option, and you’re going to get a reset option. So if I want to undo anything, I can do that quite easily.

Detail
Next, we have detail, allowing you to sharpen, reduce noise and reduce color noise. This option is pretty self-explanatory. Not to mention for an image like this, I don’t need any of those. Our image here doesn’t have high noise; we’ll cover some other images during this tutorial where we might make some noise reduction. But for this image, I don’t need noise reduction, so we’ll leave that alone.

Color mixer
Next, we have the color mixer, which allows you to adjust the hue saturation and luminance of targeted colors. So in this particular image, I want my greens and aquas to appear bluer. So I will go to Hue here and push the greens toward blue. I will also push the aquas toward blue, and you can see that the water in this image is becoming bluer. But I am not affecting the rest of the image or its colors. So this is a nice way to target select colors in your image. I might also want to make my yellows a little warmer and adjust other options to increase the warmth of yellow areas.
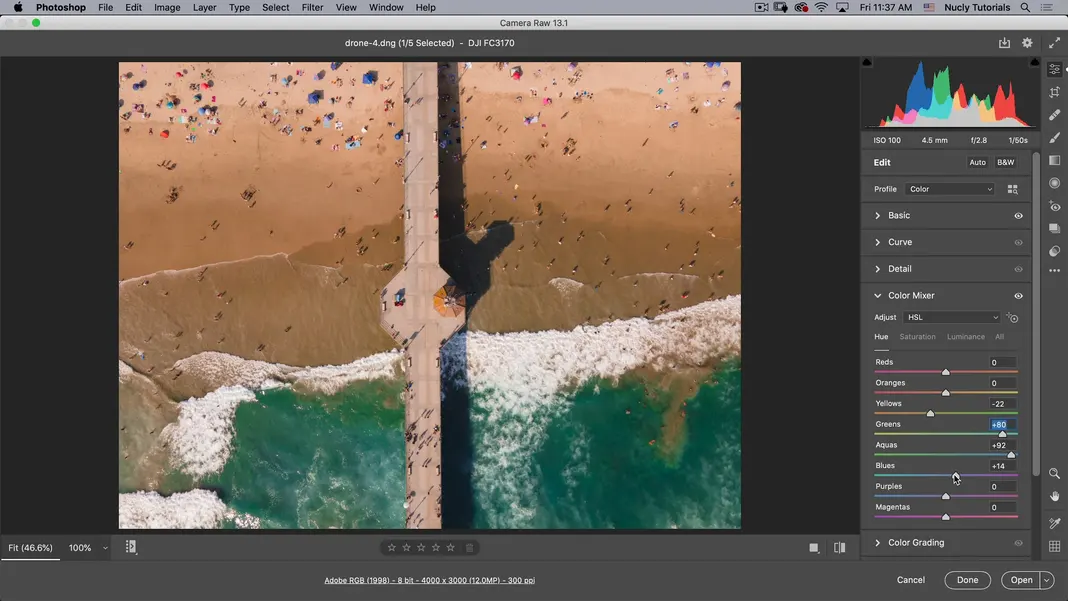
I can also do that to the saturation if I want my water more saturated. I can push up the greens and the aquas. We’re going to make a little more adjustment to the water area of our image to punch up the contrast between the water on both sides of the dock using a different tool. But we can make a little bit of an adjustment with the color mixer mentioned above.

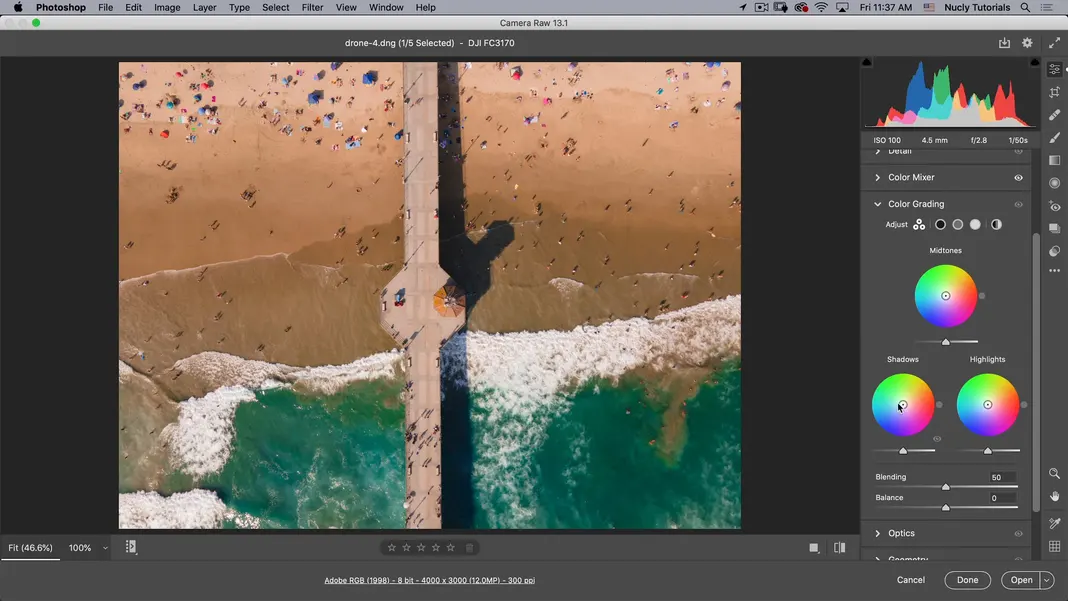
Color grading
I will not cover too much color grading in this tutorial, but it is important to mention that this is an advanced method of split toning. Using color grading, you can add colors to your shadow and add color to your highlights. With the color grading tool, Adobe has added mid-tone so that you can add color to your mid-tones. You can also use the global option to add color across your whole image. So if you want to give it a color tone or photo filter, you can do that using the global option, but for this image, I don’t need it, so let’s reset it for now. To reset any changes, here again, just hold down the option key and then you can click on the center point to reset color grading.
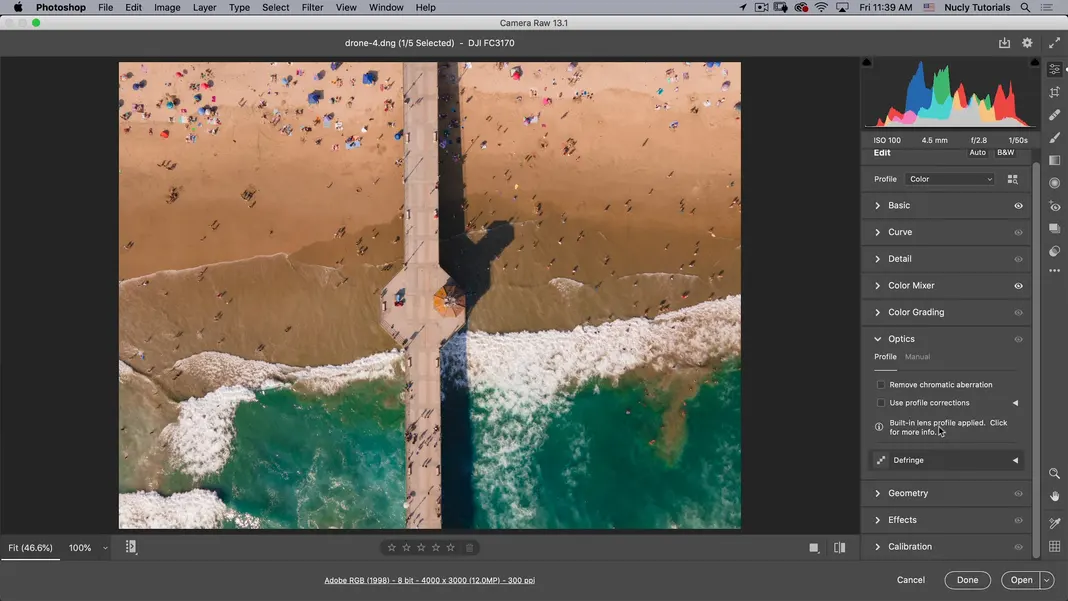
Optics
The next option in the new panel is optics, which allows you to make corrections based on the lens you used. You can use this feature to remove chromatic aberration and correct distortion and vignetting of the lens. Since the image we are using is from a DJI drone with these features built-in, we’re not going to use it for this image. However, we will use this feature on one of the other images we have for practice.
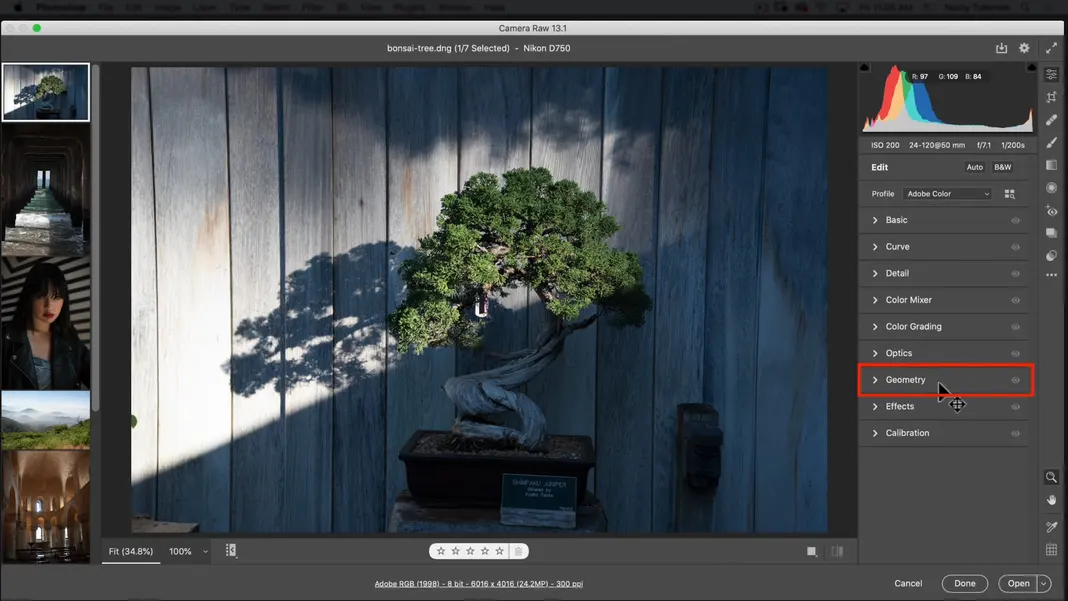
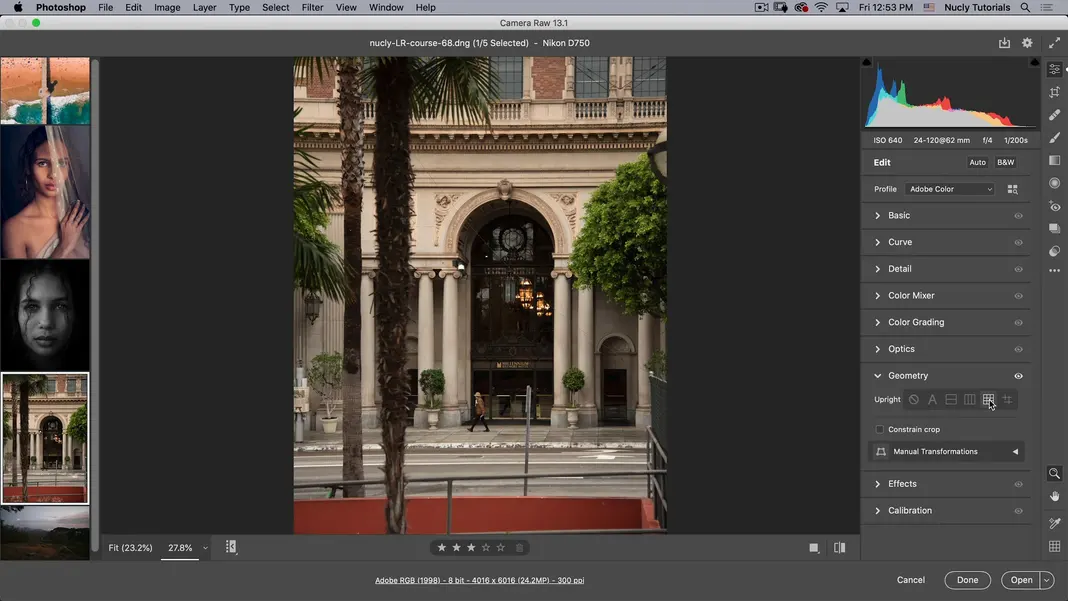
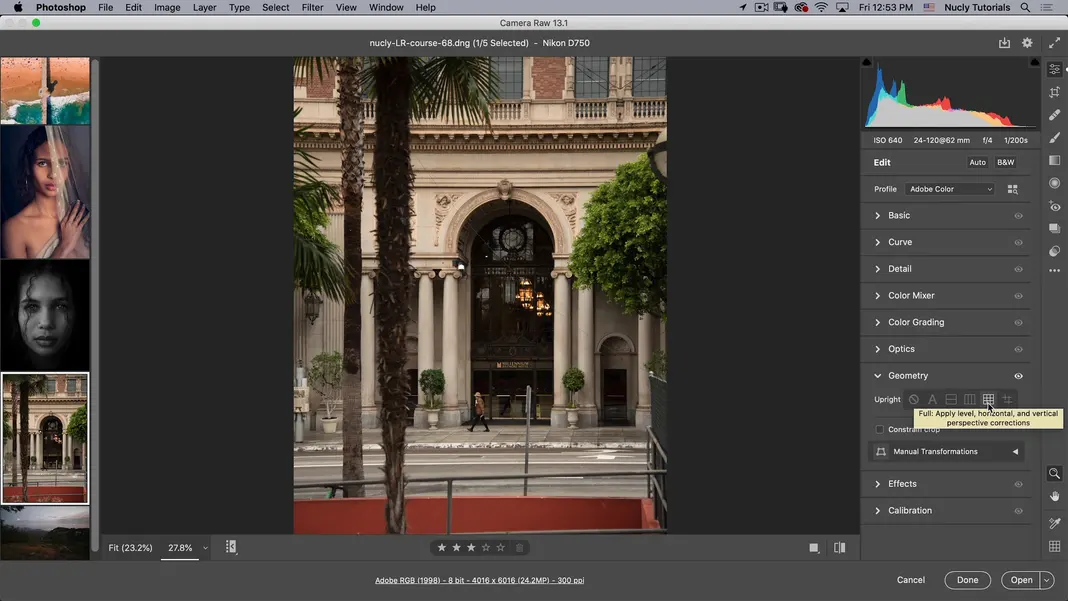
Geometry
Next, we have geometry, and this feature allows you to straighten the image. If we push the auto option, you can see that the feature straightened the image. You can just straighten the horizontal lines and straighten the vertical lines using dedicated options. Then finally, you have the guided version; this is my preferred way to straighten an image.
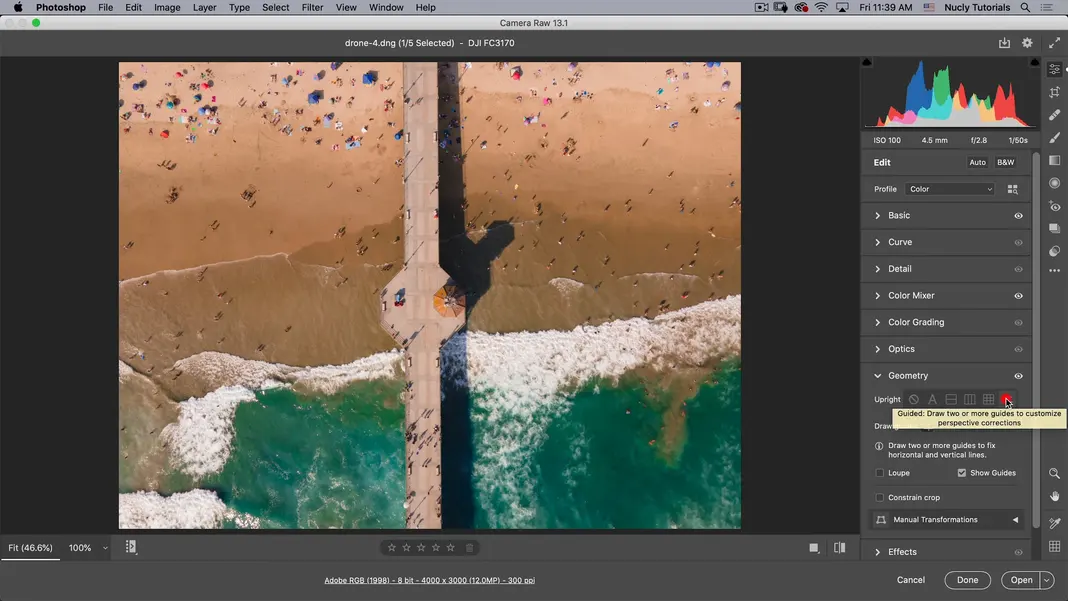
When you select the guided option, you will draw lines that tell the software what areas need to be straightened. So I want to draw a line there and here, and it will use that information to straighten the image.

So, in this image, I don’t need any horizontal adjustment so just putting those two lines does all the straightening I want. Hit escape to get out of the tool.
Effects
Now we have effects that allow us to add grain to the image. This tool also allows you to add vignetting to the image, neither of which I want for this particular image. So we’re just going to hold down the option key and reset the changes.

Calibration
Finally, we have calibration, and the calibration option allows you to make fine-tuned adjustments to how your image defines the colors. So if you want to make changes, for example, if I feel like my red is too much on the orange side I could push it toward the magenta side. This is useful for scenarios such as if you shot a wedding, for example, with two different cameras. If one of the cameras determines the neutrals a little more magenta, you could come in and make those adjustments using the calibration tool. I don’t use this feature, but there are some interesting tutorials on youtube where people use this tool to color-grade their images.
I feel like there are other tools with which I prefer to do the color grading. So, we have covered all the basic panels you see above.
Next, I just want to quickly go through these tools on the right side.
Crop and rotate
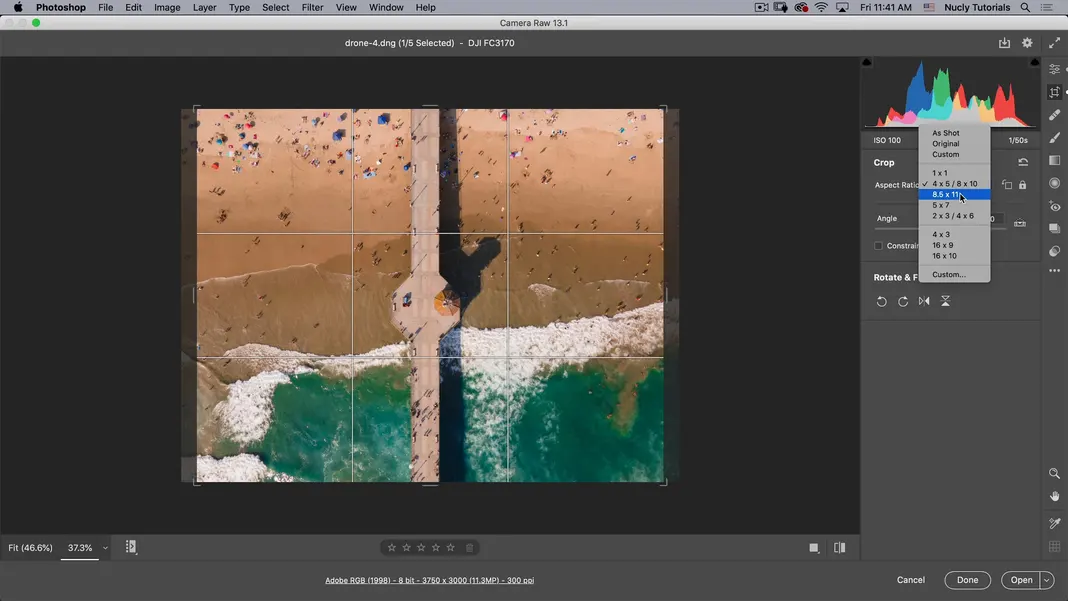
You can see that the first tool is Crop and rotate. So in the case of this tool, you can use Crop to make a portrait for Instagram, for example. You can choose four by five within the crop section, which will crop it to the Instagram proportions.

If I’m printing an image on 8.5″x11″ (letter sized paper), I could do that using the 8.5×11 option listed here.
This tool just allows you to crop your image, and using it is pretty straightforward. As far as the rotate tool is concerned, just put your mouse outside here in the dark area, and you can rotate the image.

You can also use this straightening tool available within Crop and rotate. To use this tool, you will click and drag along a straight line in your image. The tool will adjust the rotation to the drawn line.
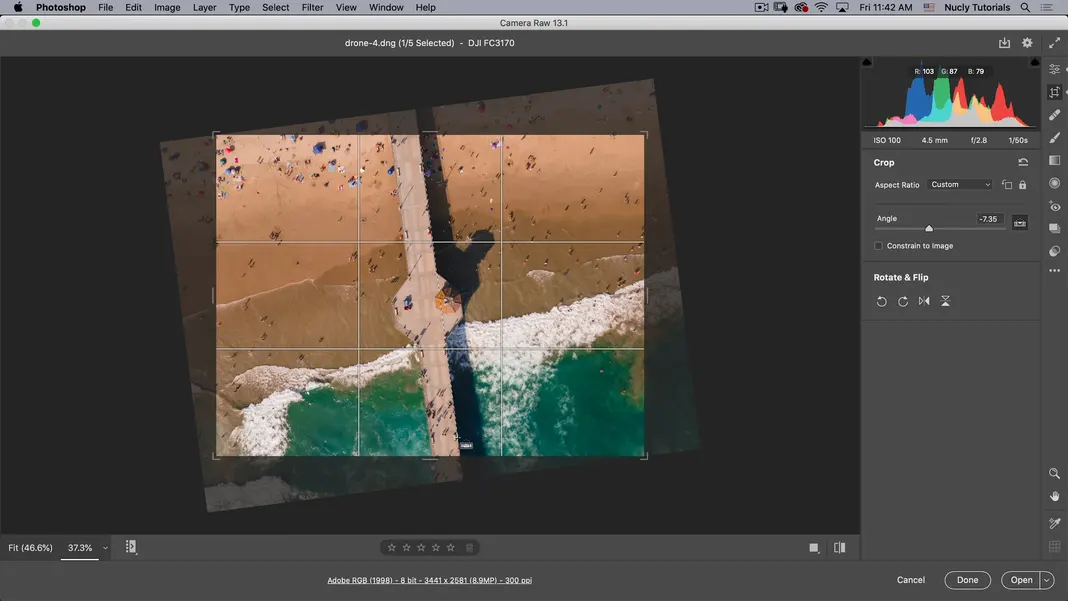
For this particular image, I don’t need to do any of that, so this reset crop tool would reset it. For some reason, they didn’t apply the same reset method here, where if I hold down the option key. So if you see this undo button here, that’s what it’s for.
You can also rotate your image and flip it using the buttons at the bottom. For example, if I wanted this whole image to have the water along the top, I could do that using the rotate feature.
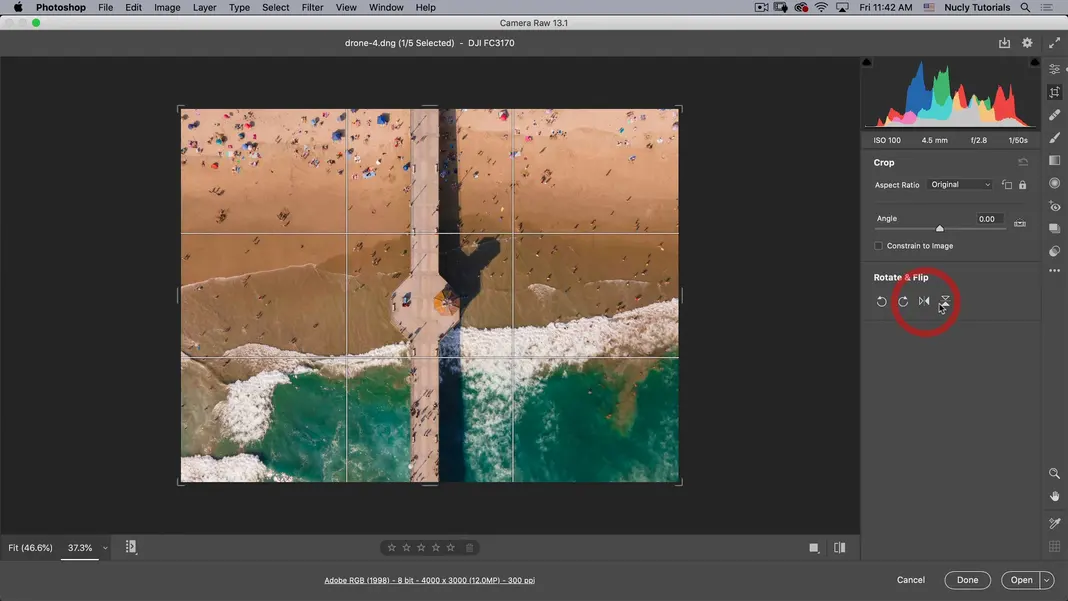
Rotating gives me a whole different view of this image. I like how it was originally shot, the bottom is where your mind wants the water to be.
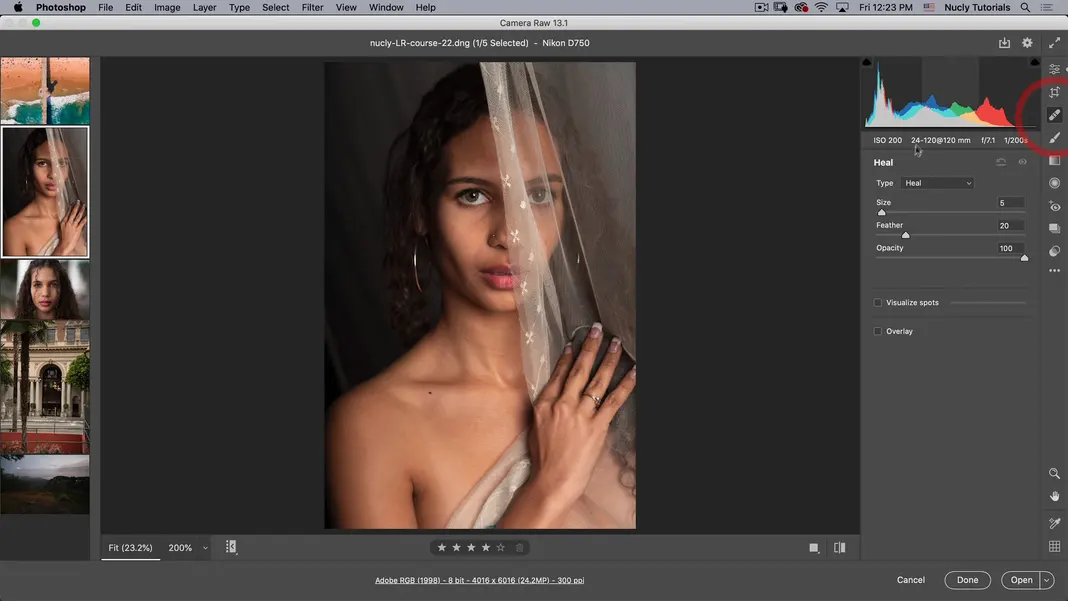
Spot healing brush
Next, we have the spot healing brush, which allows you to select a point and work on the selected area of the image. I will zoom in, maybe set it to 400 and paint over this area.
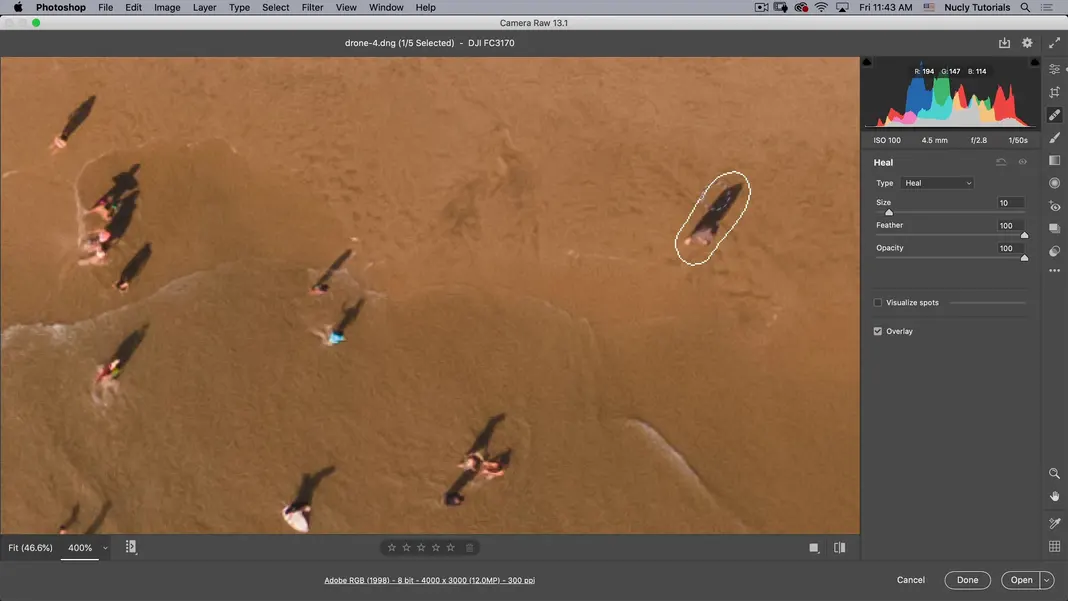
What this tool is going to do is it’s going to choose an area next to the selected area or somewhere in the image to paint over the section your choose.

Now, if I don’t want to see these overlays, I can hit the V key to turn the overlay off and then click V again to turn them back on. So if I wanted to get rid of some people, I could do that using this tool.
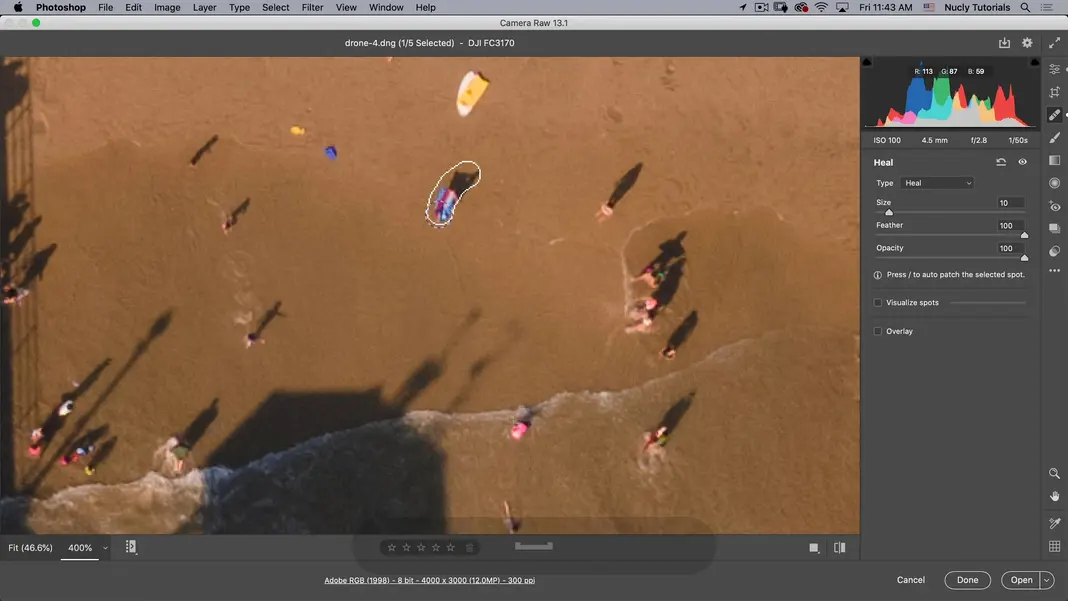
Now you’ll notice that this change is leaving some of the shadows. So to fix that, we can turn V back on, and I might want to adjust the location of the overlay.
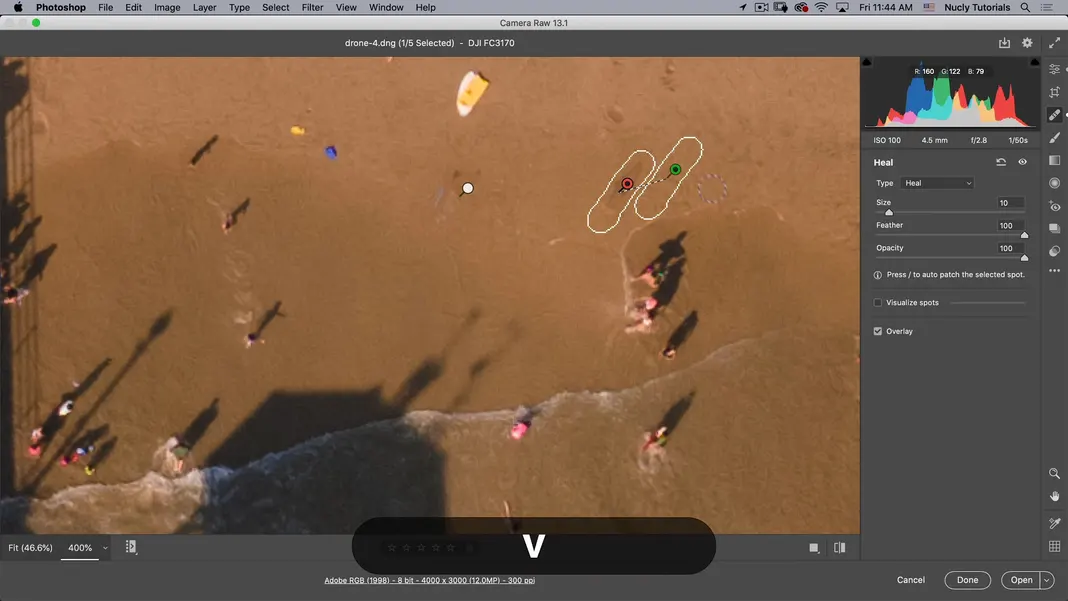
Or I might think that the feather is too strong, and that’s why it’s showing some shadows. So you can adjust the size of the brush, and the size tool will adjust your brush; it won’t affect the area you have selected. But feather and opacity will affect the selected area. Now let’s zoom out because I don’t need to do any corrections on this particular image. We might use it for portrait retouching, so we’ll cover this tool further when we move to the next image we will work on.
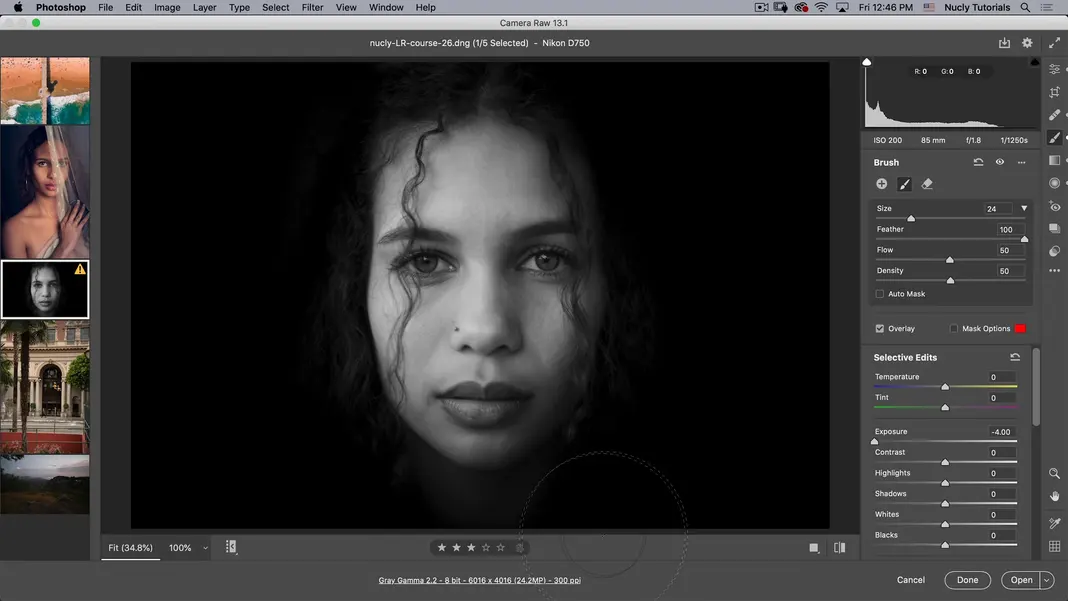
Brush
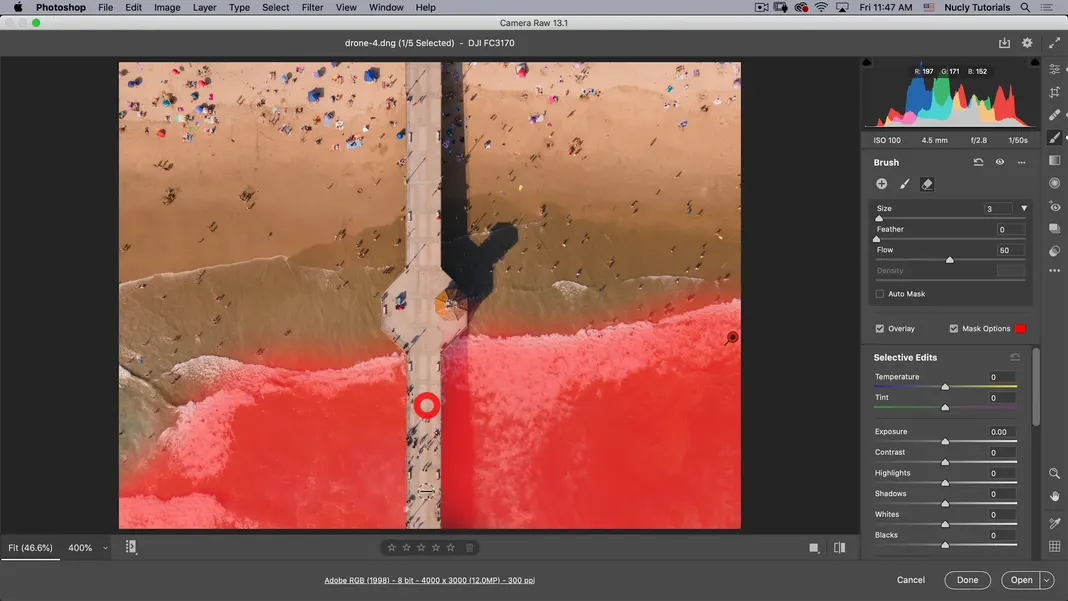
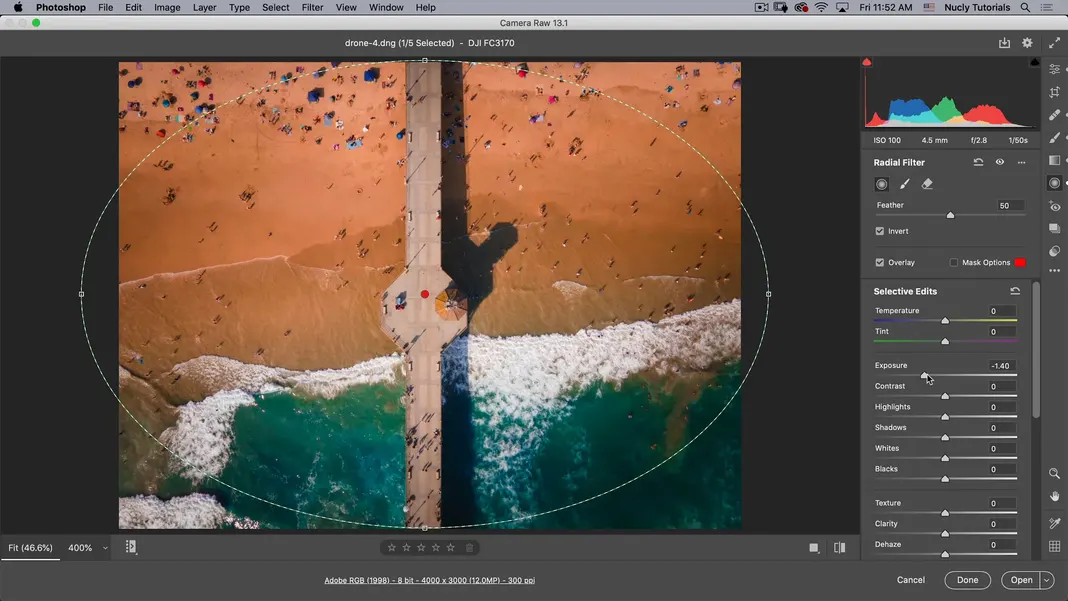
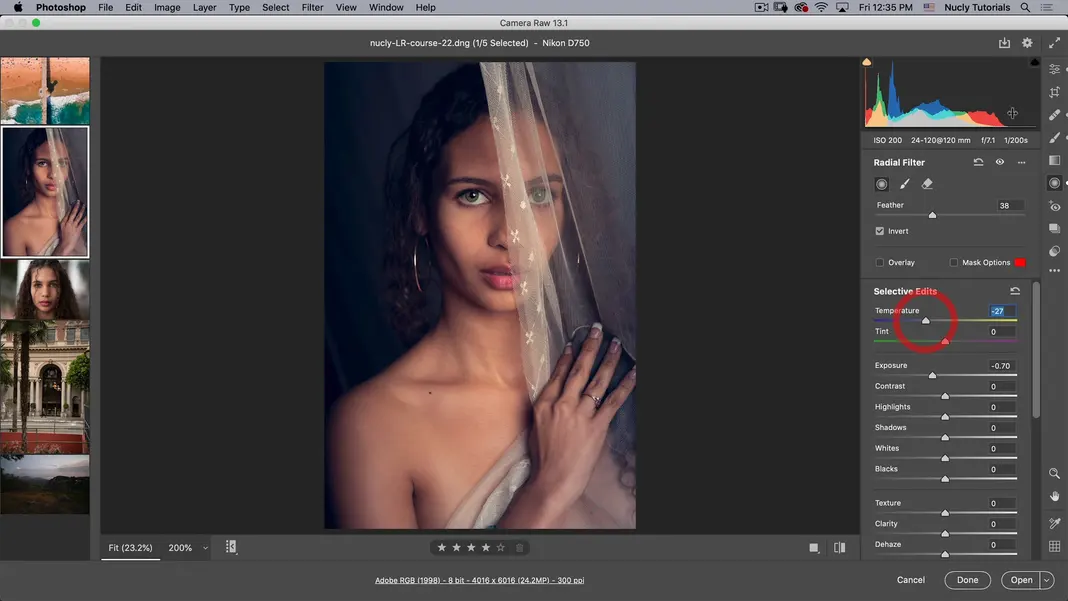
Next, we have the brush adjustment tool and brush adjustment, the gradient adjustment, and the radial adjustment tools. What they do is that they allow you to target specific areas of your image with the help of adjustment tools we covered in your basics panel.
So you can adjust the temperature, tint, exposure, and contrast in a targeted area. And there’s also one cool addition here, this Hue, which allows you to shift the color in your image. Now let’s go ahead and paint our water here; now you’ll see that it’s making the water darker, and that’s because there’s an exposure adjustment already active. I don’t want this adjustment, so I will reset it.
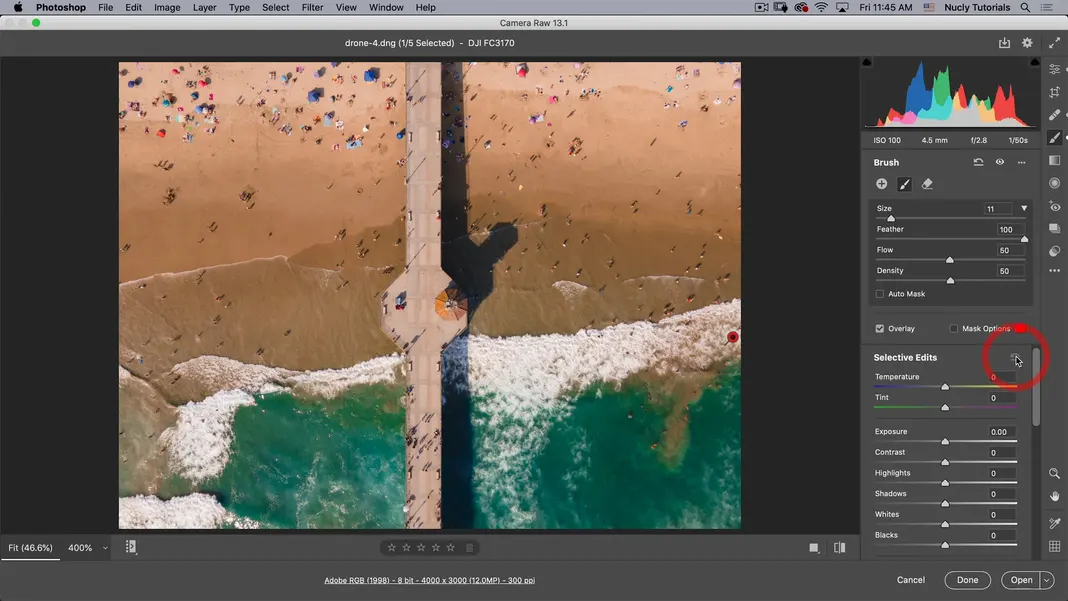
Now the problem is if I have no adjustments, I can’t see where I’ve painted on the image. So you can turn on Mask Options
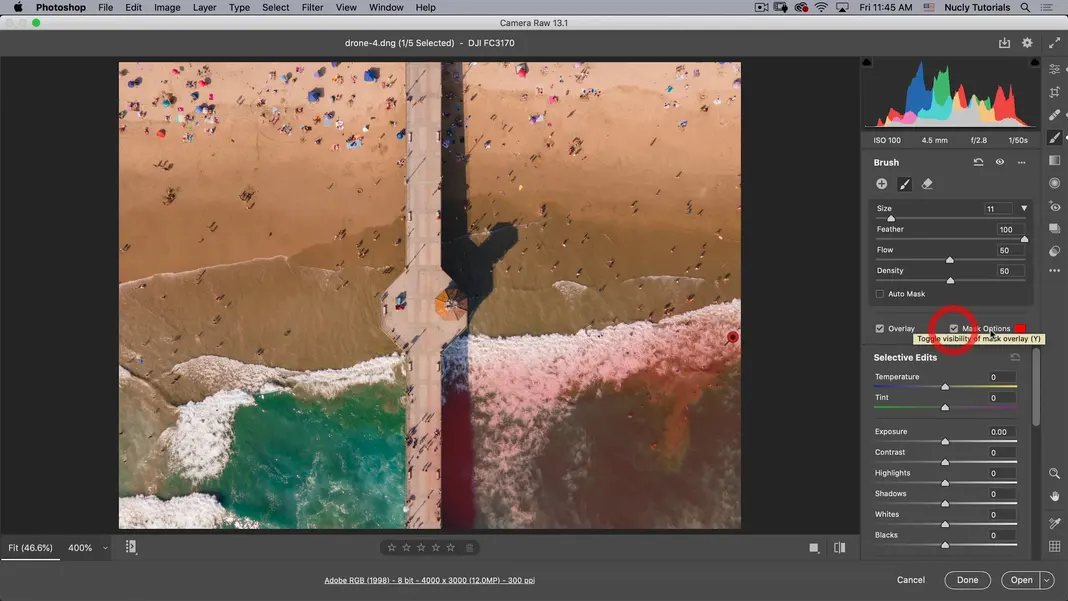
That’ll allow you to see where you’ve painted. Here you can see where I’ve painted, and I’m just painting over this water area as shown below.
If I click on the Mask Options, you can see that I can adjust the opacity and also the color and brightness. So you may want to have the opacity on 100 because, as you can see, my flow and density settings will determine how much effect will apply to this area when I paint. So having this set on 100 opacity shows me if my mask is fully applied.

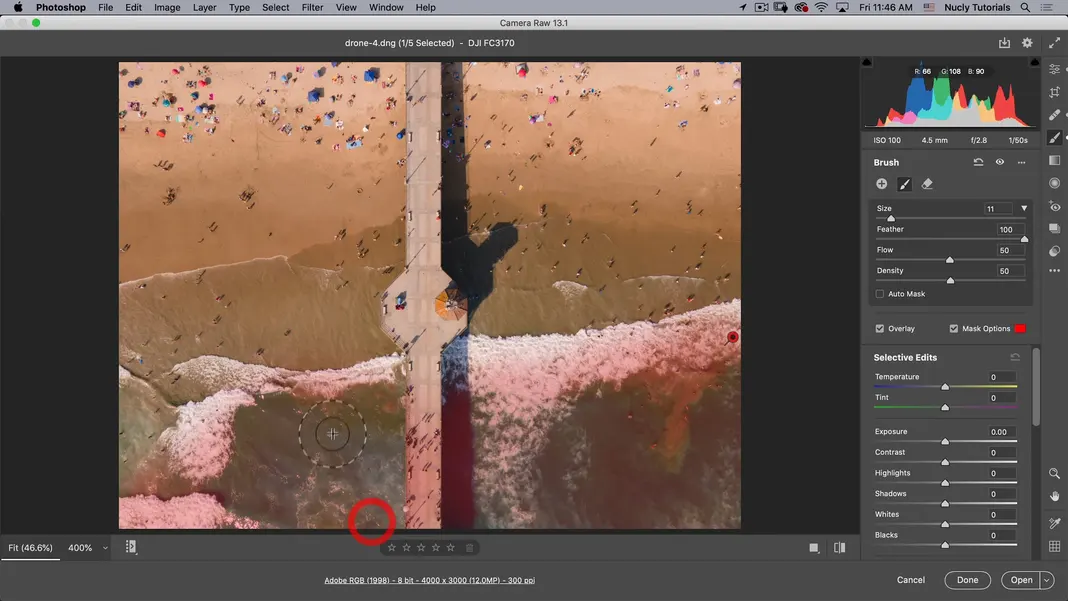
I can also erase, for example, this bridge here, so I’m going to make my brush small enough and then just go in and paint out this bridge.
When you use all these tools, you can make quite a few fine adjustments in your image using Camera Raw. Another helpful thing to know is that if you understand how to use all these tools in Camera raw, you can pretty much do everything in lightroom as well.
Lightroom also uses a similar engine to Camera Raw to develop photos. Alright, so if I want to turn off the mask overlay, the shortcut for that is the Y key, and now I can move the water’s color more toward blue using temperature and maybe increase the exposure as well.
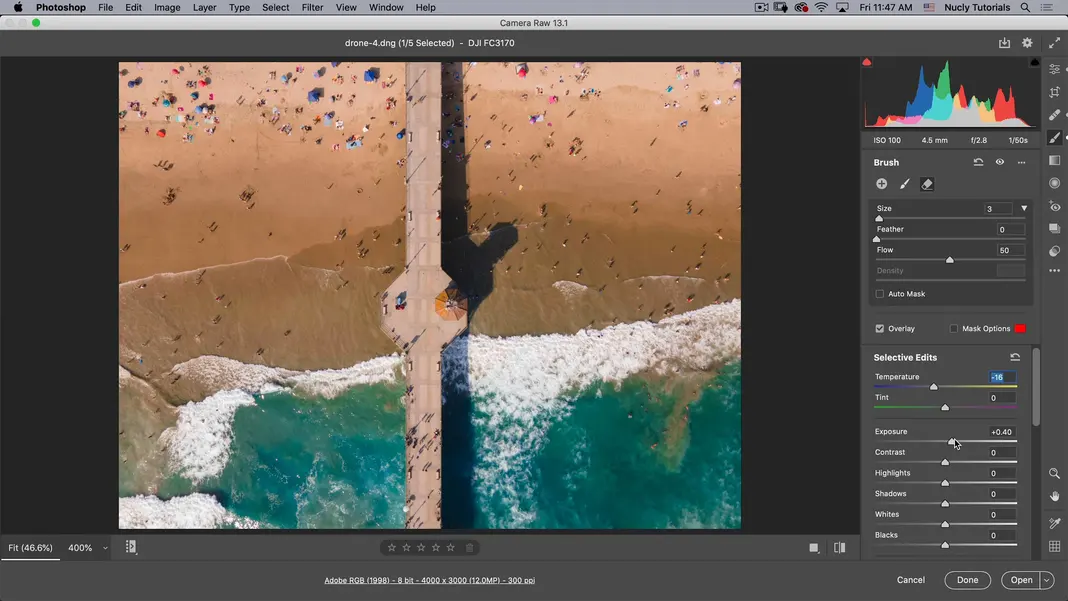
I can adjust the Hue using the hue section if I want to go more toward blue. However, I like more of a cyan blue here, so I’ll adjust the Hue here.
We can reduce the highlights, so we get a little more detail on the white waves within the image. We can also increase the vibrance and saturation.

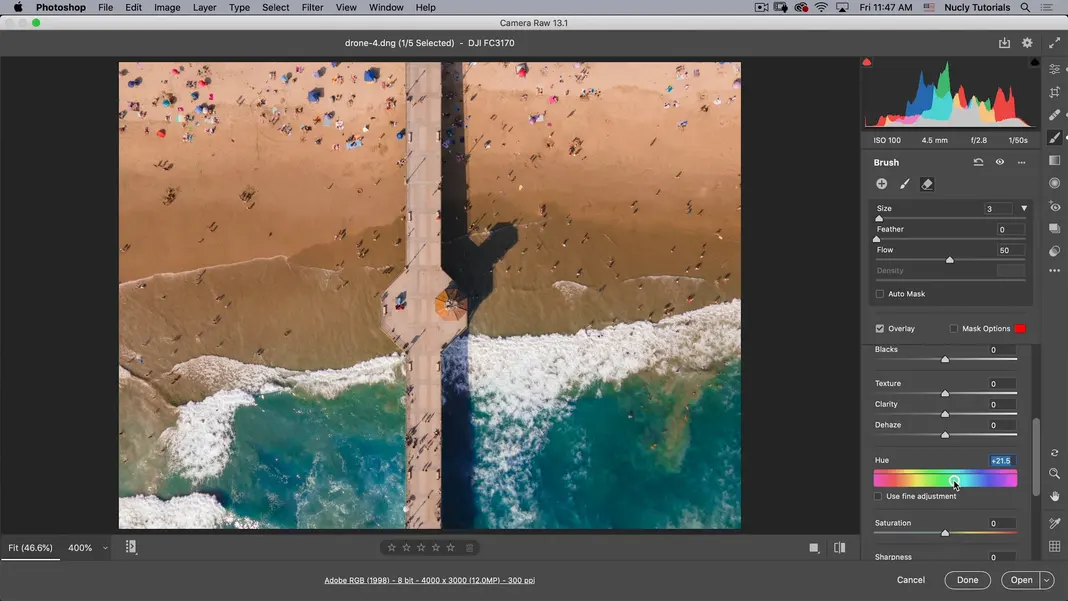
And you will notice that now the image looks perfect. So now I’m done with this, too; I can hit Esc, which will take me out of the brush tool. But you’ll notice it went to this when I hit escape still on the brush tool, and I have this option here to start a new adjustment.
Graduated filter
So if I wanted to make adjustments on the sand, I could do that. For the sand, we’ll just use a gradient grey graduated filter. I will drag this tool to make zones on the image when working on sand rather than brushing. Anything from the green backwards will be fully applied, while the area from the red forward will have no effect after application.
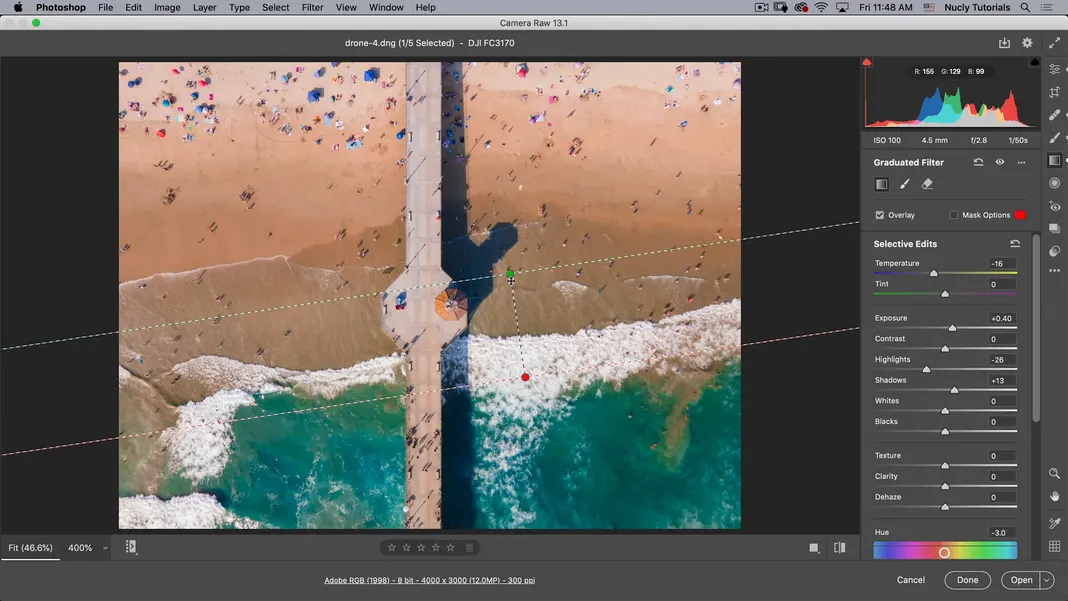
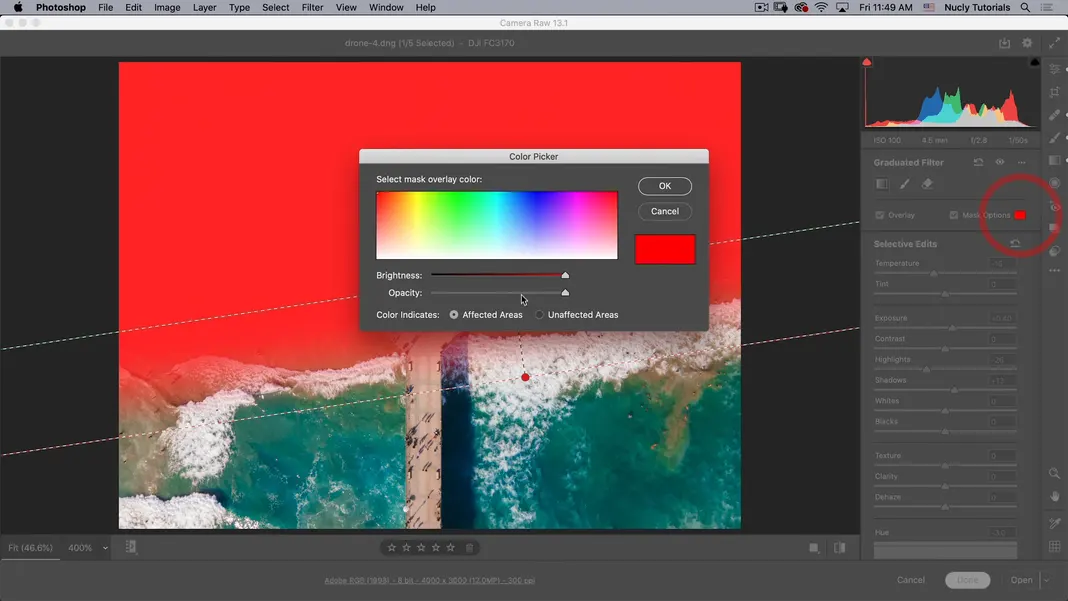
The area between the green and red zones will be a graduated filter between the green and the red. If you want to see my mask, I will turn that on using mask options similar to what we did last time. You’ll notice here you can also turn on or off the overlay using the overlay option, which is pretty useful. We don’t want this image at 100 opacity because I want to see the changes behind the mask.
There are some cool tricks that you can do with the graduated filter, which we’ll be getting into.
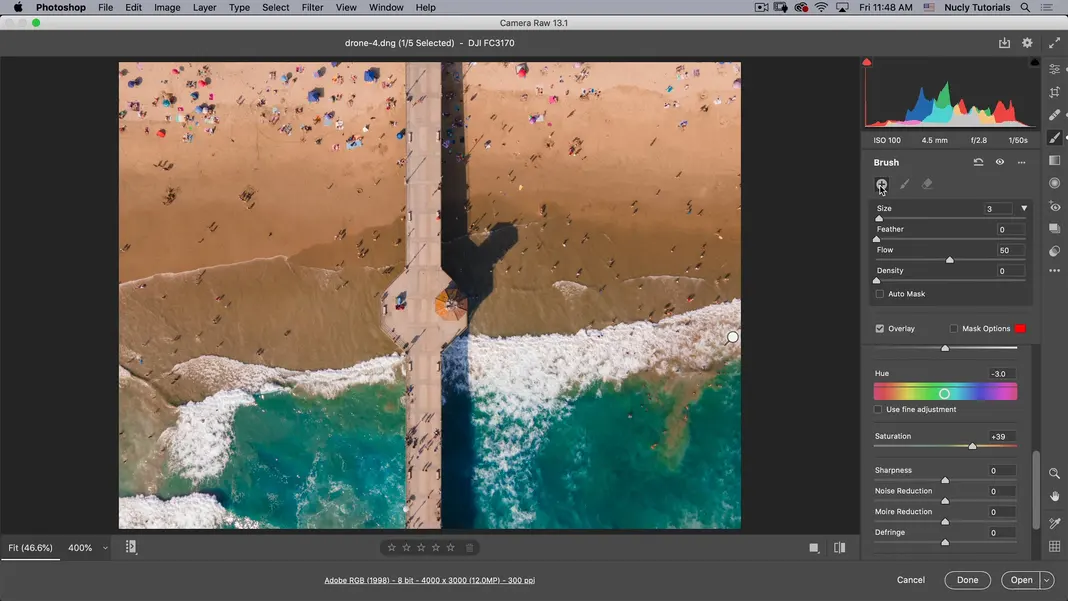
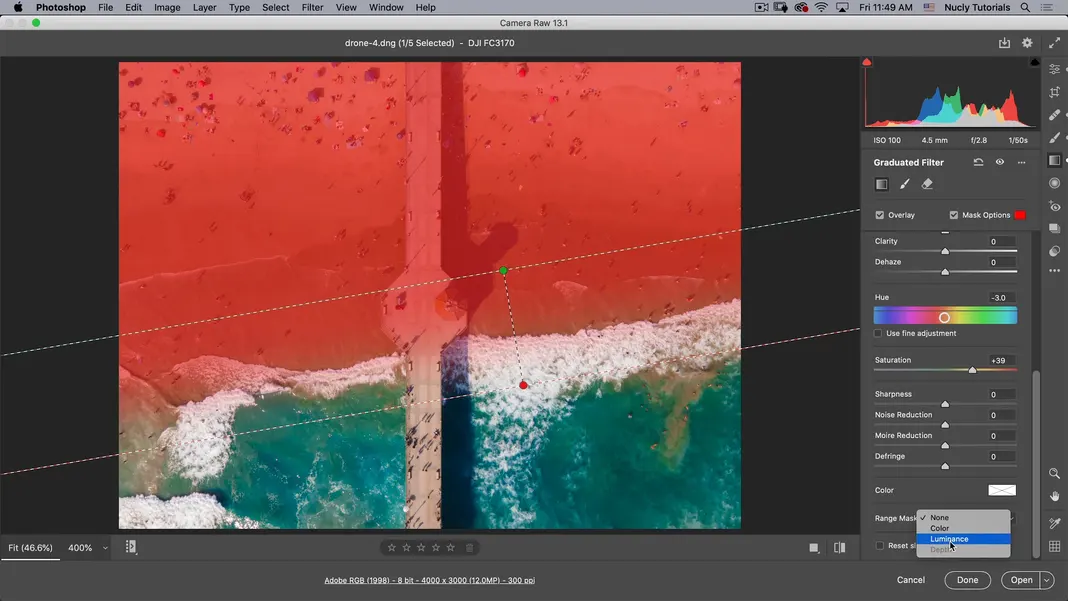
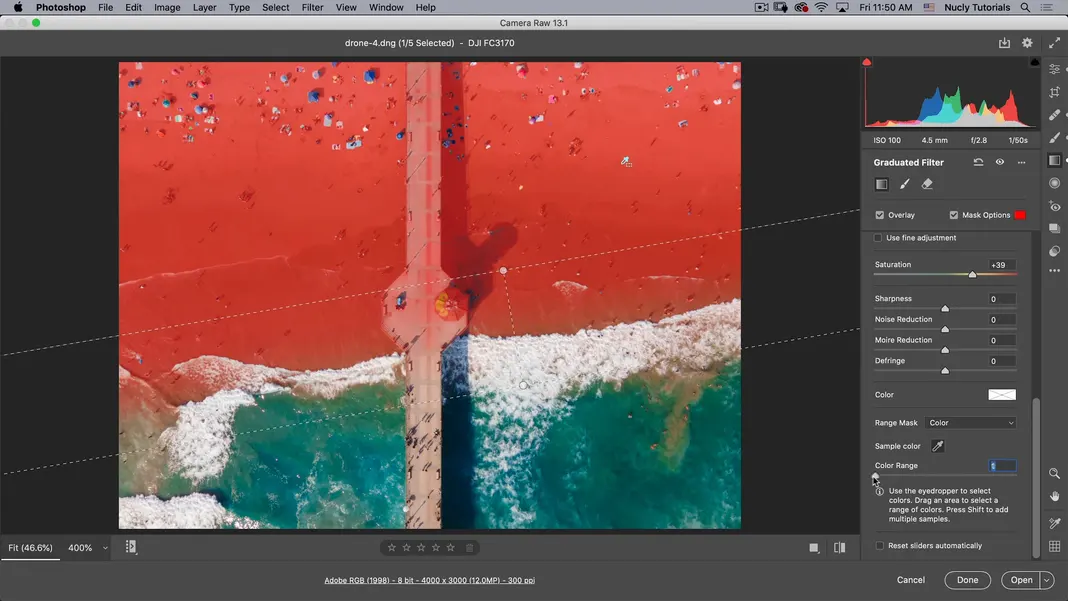
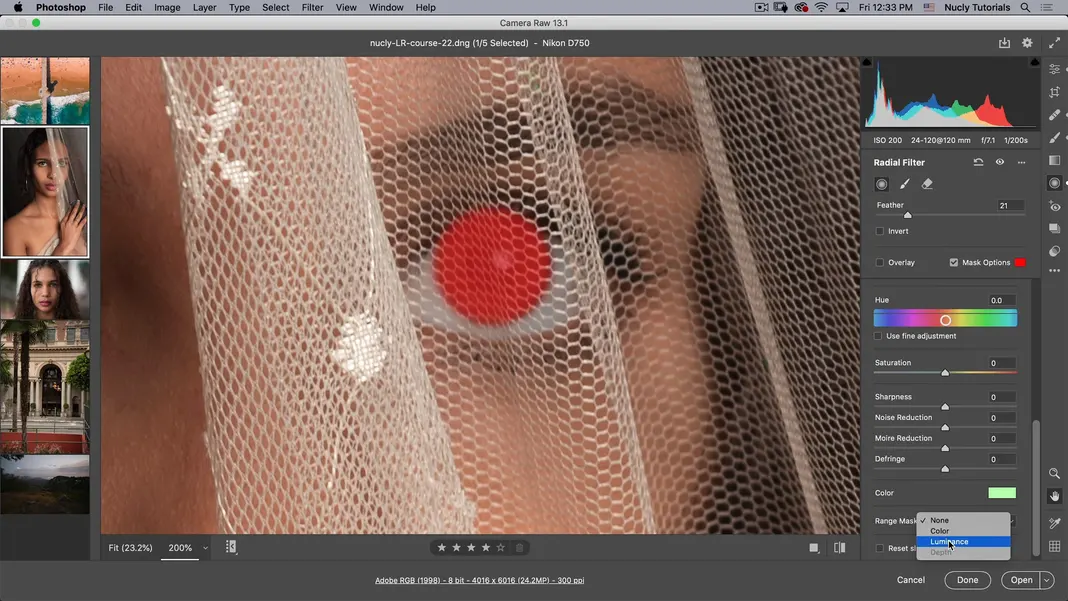
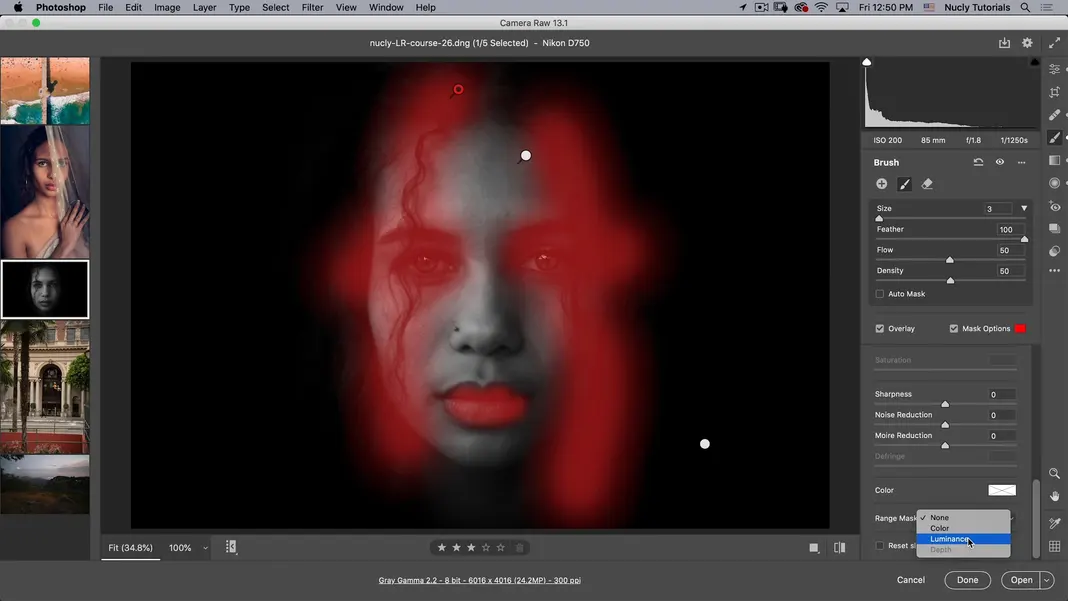
If you move down here toward the bottom within the Graduated filter tool, you have a range mask. This option allows you to adjust to a color area or a luminance area depending upon the situation; now I know I want to apply the adjustments I am about to make primarily to my beach colors. So I can go to color here in the range mask section, click on the color sample
Then select the color from the beach location. Now, if I hit Y to turn off the overlay, I can select this light area of the beach.

If I wanted to select from this light color to the dark, I could click on sample color to select a color sample and drag like this, and it will select that whole color range from light to dark.
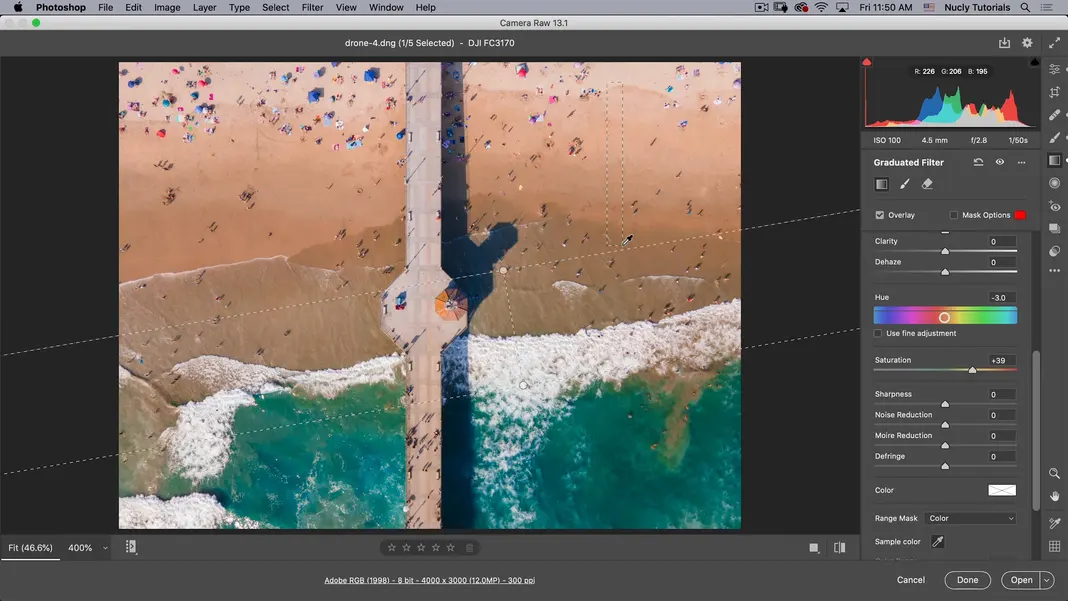
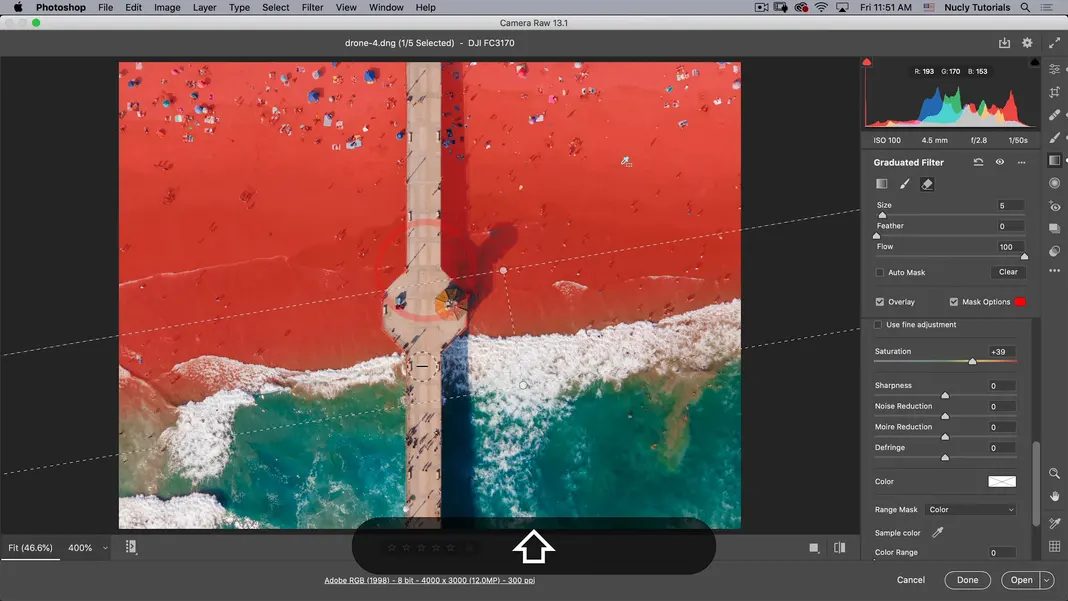
You’ll see it no longer selects the other colors inside the beach area. It is still selecting the bridge, so I could go into the color range section and adjust it to a much lower setting, so it doesn’t have as much tolerance.
It’s now getting rid of more of this bridge area. I can also go here and erase the area I want to exclude. To do that, I can go to the erase section, take the feather down and take my size down for the eraser. Bring my flow up and then erase the part I don’t want to be affected by the graduated filter, so you get a lot of control over areas you want to exclude.
You can either select the area you want by erasing manually, or if you want to make a straight line click once and hold down shift at the starting point and click again at the ending point.
What this will do is it’ll make a straight line between those two points.
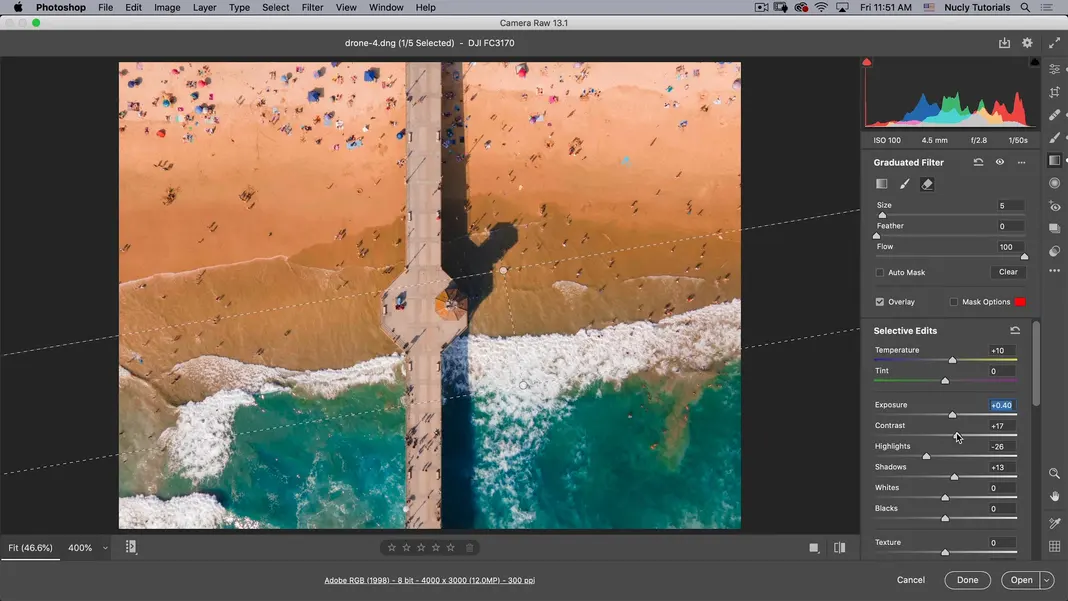
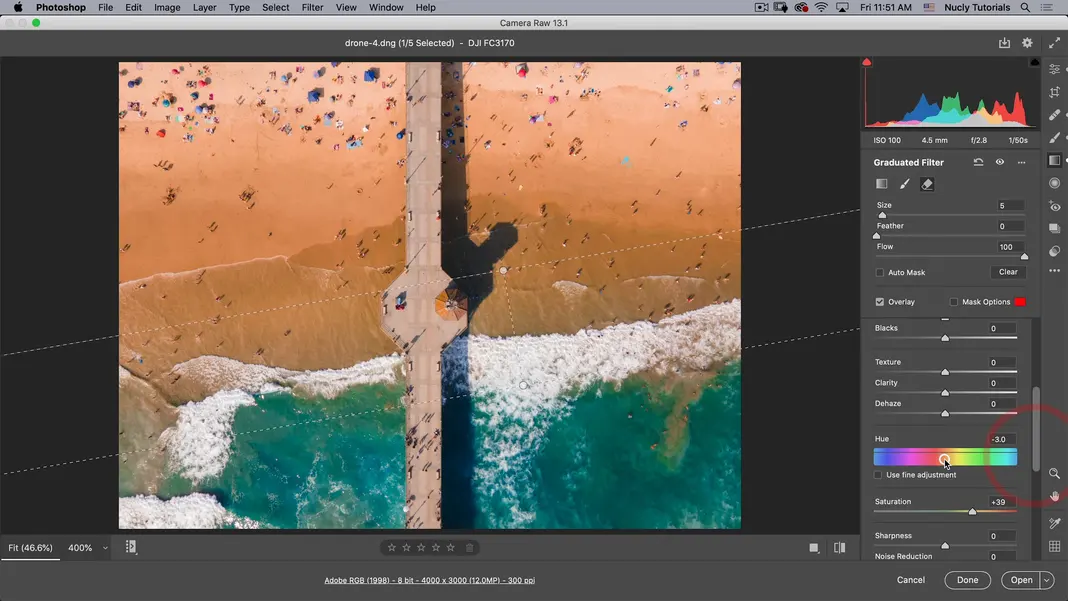
So this neat trick often comes in handy. Now let’s hit the Y key again to turn off the overlay, and now I have my mask nicely built. Then we can scroll up and make the adjustments we want. So for this selected area, I want it to be warmer. I want my sand to be more golden in color. To achieve those colors we can adjust exposure and increase the contrast a bit. Then I want to move the Hue a little more toward magenta.
Then I’m going to hit the escape key. I can create a new graduated filter here because I still have the tool selected. If I want to get out of the tool, I can click Edit, and these tools also have shortcuts for the options on the side here. So if you just hold down your mouse, you’ll see E is the shortcut for Edit, C is the shortcut for Crop and rotate, B is the shortcut for spot removal, and so on. That is similar to photoshop; just a single click will bring you to the tool you want to use.
Radial filter
All right, next, we have the radial filter for this image. I don’t need a radial filter, but it’s very similar to the gradient filter, except that it’s obviously a radial filter. This filter looks something like this.

I don’t want any of these adjustments already present, so I will just reset them first. This is my preferred way to do vignettes because I have more control. I can expand the mask’s area and turn it off using the Y key now you’ll see if I reduce exposure to make it darker; it’s adding a nice vignette. We can adjust our filter there using a feather, but we don’t need any of that for this image, so we’ll just press reset to eliminate the changes made.
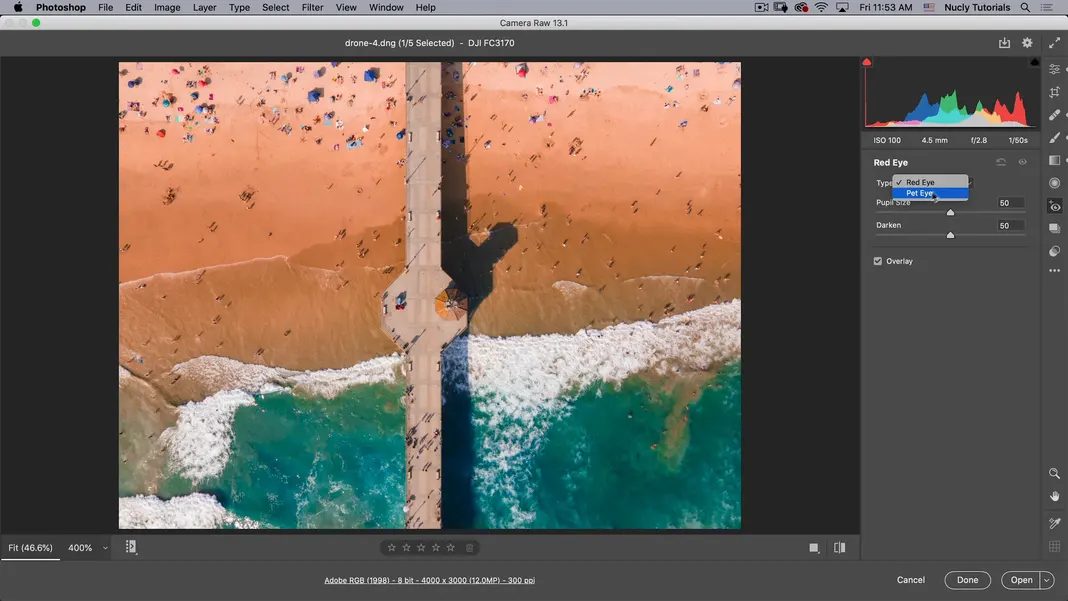
Red eye
Next, we have the red eye tool, which fixes red eyes. It only applies to portraits where a person has a red eye and perhaps a red eye in pets. All the time that I’ve ever used Camera Raw, I’ve never used this tool. That is because modern cameras do a good job of not having a red eye in the first place.
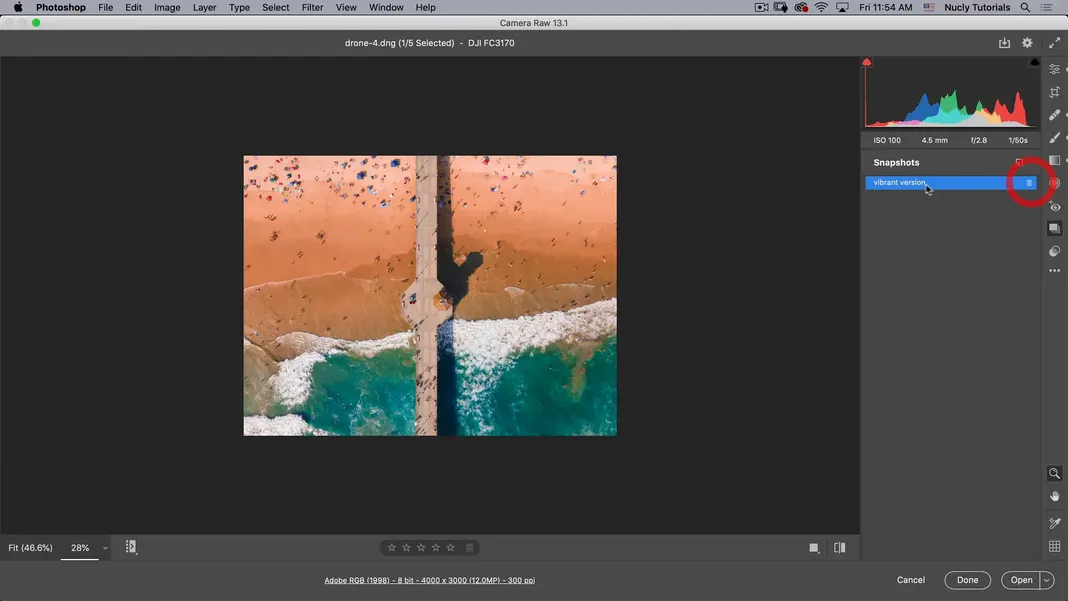
Snapshot
Next, we have a snapshot, and this tool allows you to add a snapshot. To demonstrate this tool, you can make a vibrant version like so.
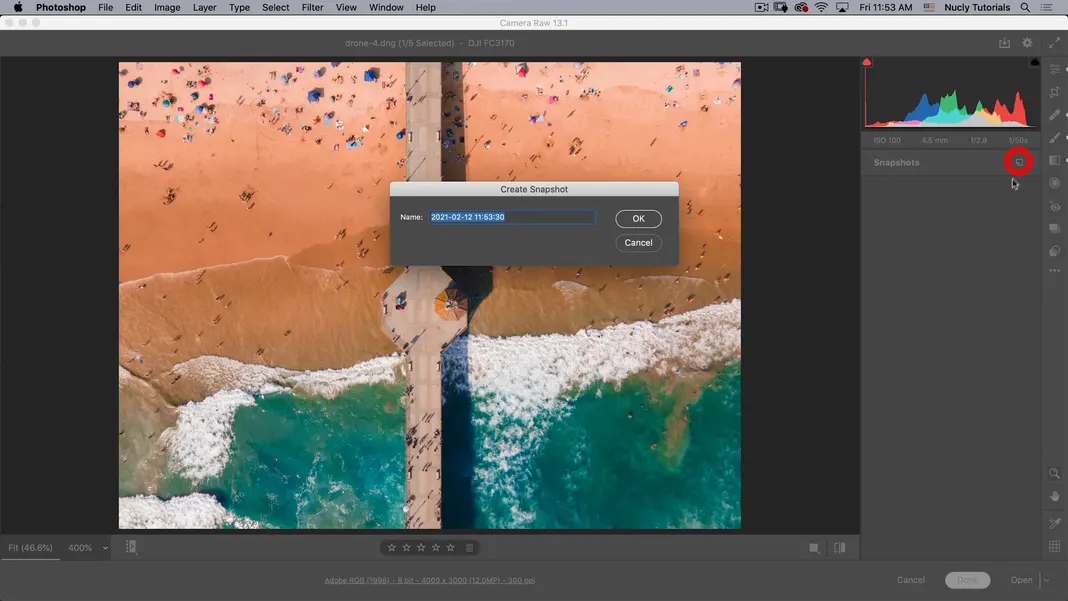
Then, if you want, you could make a whole different set of edits.
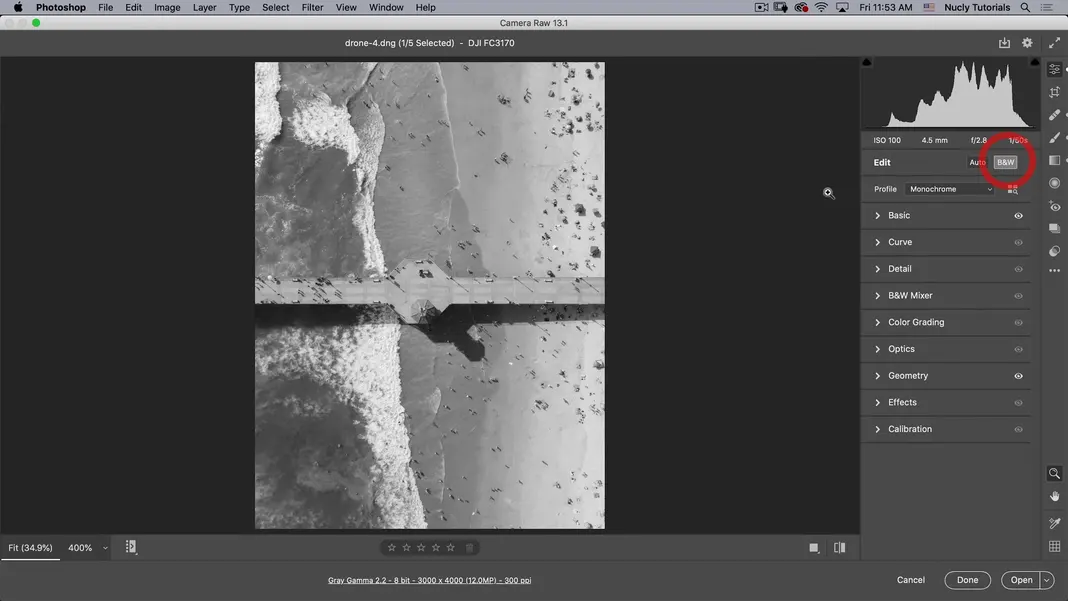
Maybe make this pretty different here from the image we edited so far and then go back to here and call this version black and white.
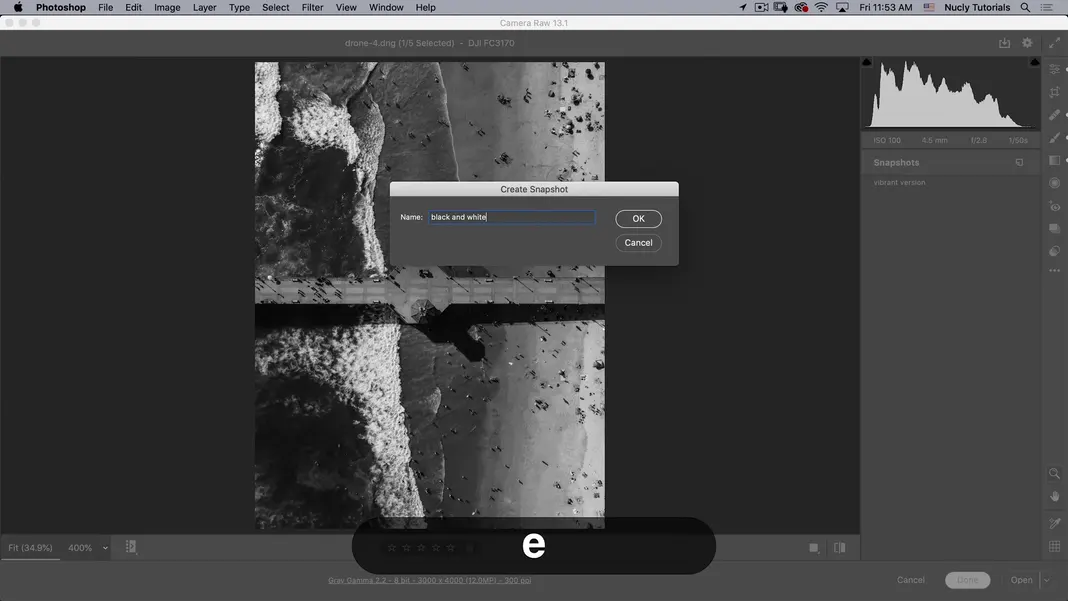
Now, what I can do is I can go here and look at those two versions.

You’ll notice that the rotation did not stick, so just know that some things in the snapshot will not be affected. But all your actual edits and settings will be affected by it. If you want, you can always remove these snapshots by clicking here.
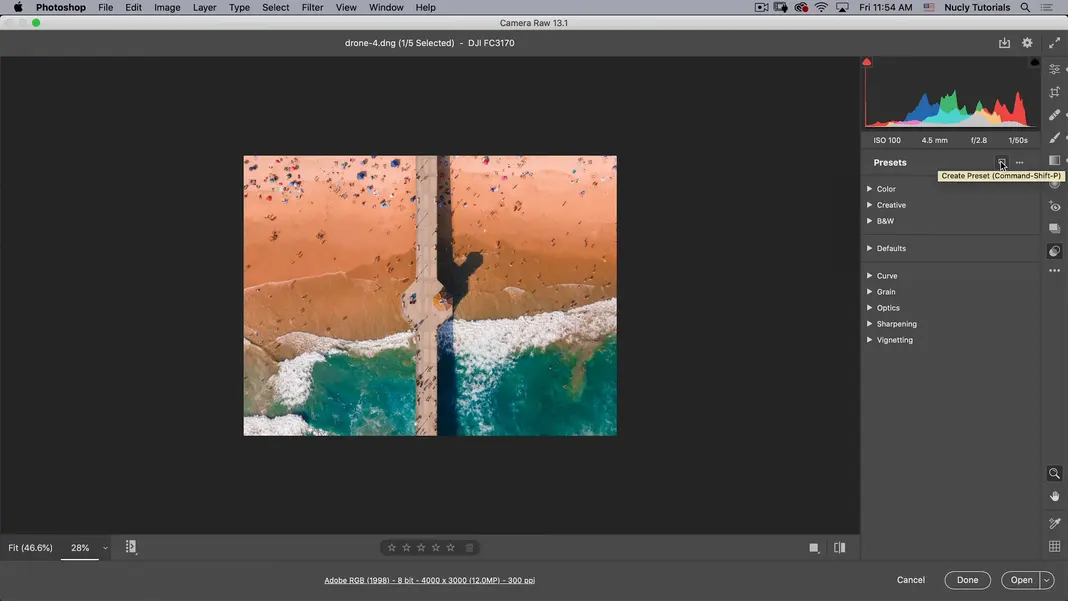
Presets
Next, we have preset, so presets are, as the name suggests, a set of presets, and they make things simple as far as editing is concerned.
You can also build your own presets, so you can create a preset by clicking “Create Preset…”.
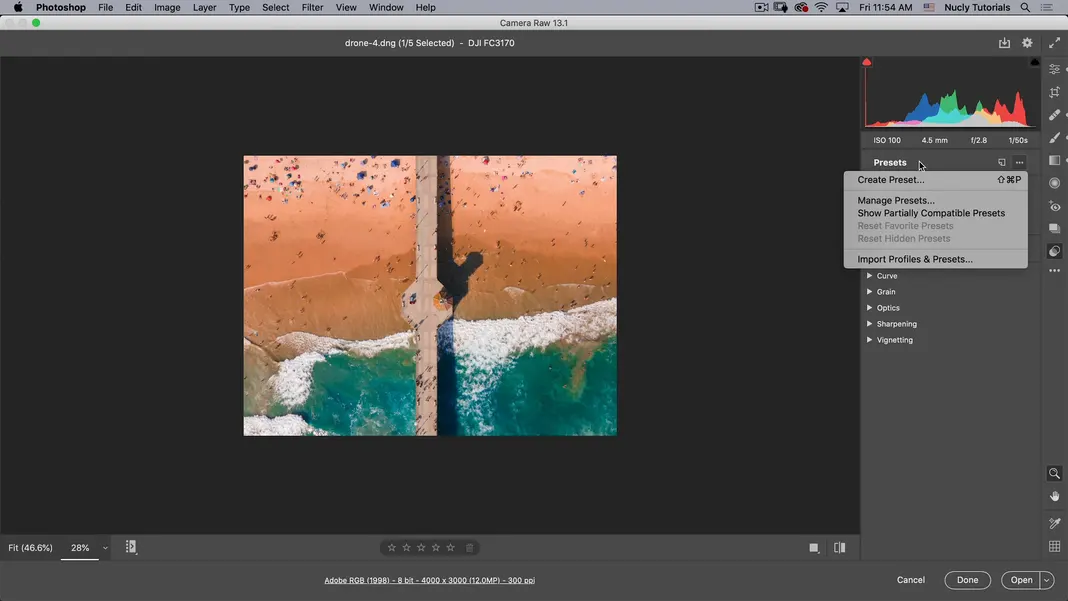
If you click on the copy icon, It’ll take your current settings and turn them into a preset. You can also load presets, so if someone might be selling Camera raw presets, you can load them by going to the ellipsis icon.
Profiles
You can also load profiles you can load profiles using the same option. Additional tools Lastly, you have some additional tools here, like reset to default applying previous settings, creating a preset, etc. You can do all that from the additional tools section.
Comparing the before and after versions, I’m happy with the corrections I’ve made to this image. If I want to compare them to the original, I can click the comparison button shown here.
This is a cool image, but it kind of feels dreary and dead, and the corrected version is straightened out; it has a lot more vibrance, and so on. This option here.
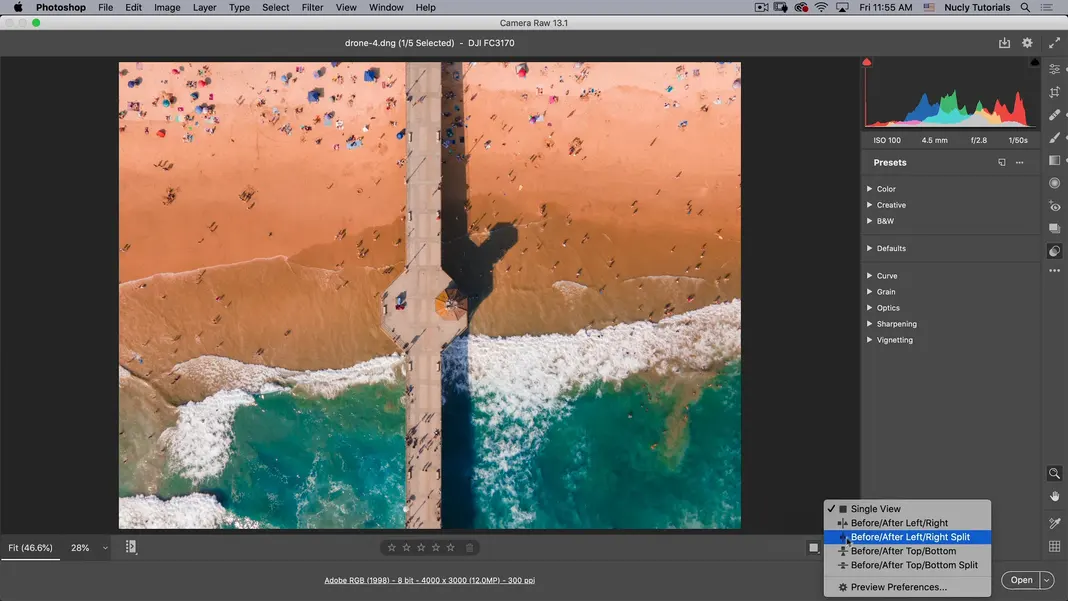
It gives you different views of the comparison, so if you want to make a left and right comparison or you want to make a split comparison you can see that the option is splitting the image in half, so these are all comparison options for how you might want to view the modified image. I like the single view and being able to just toggle between before and after. You’ll notice if I hold my mouse down on the comparison button (the shortcut for that is the backslash “\” key) you can quickly toggle between before and after versions.
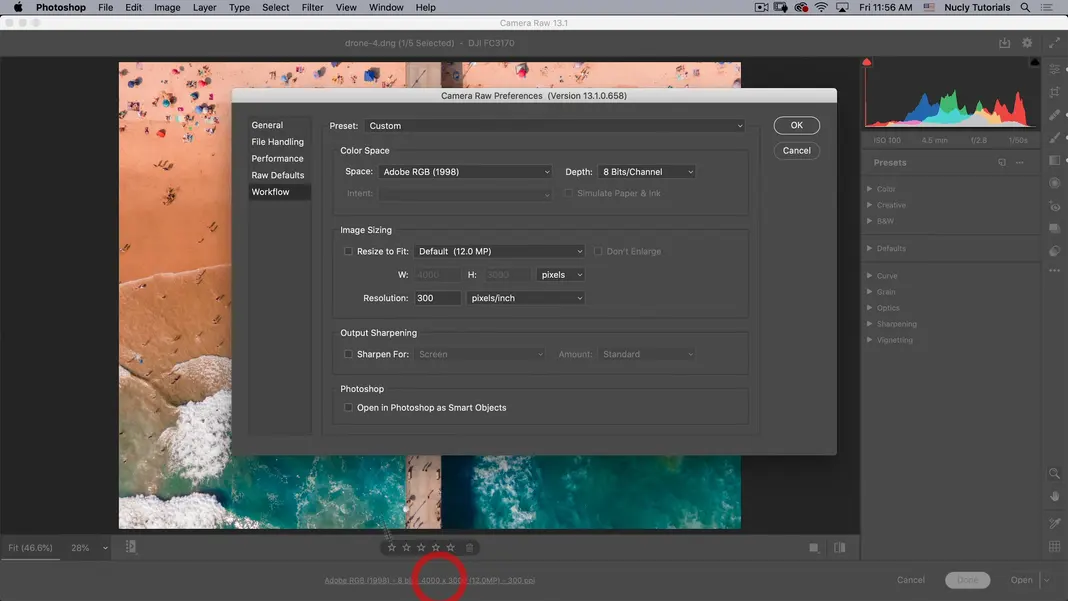
If I click on the version info of Camera Raw, you’ll see my preferences. This will show you how I’m saving the files, if I resize the image files, what depth the image will have in photoshop, and so forth. So that’s what clicking on the version info does, it sets up your workflow.
Then I can click cancel to get out and quit editing; I can hit done, which will apply the changes to my Camera raw file. And finally, I can hit open which will open this image in photoshop.
Another option
If I click and hold Open, I can open the image as a smart object, open the original, or open as a copy. Generally, if you use an image in a composite, you would want to open it as a smart object, so you can always go back. So that’s just my default setting, but you can also change it by clicking on the version info to open it in photoshop as a smart object.
You’ll notice that my default here has now changed to open object. So that was just the basic run-through, and as you can see, we’ve made quite a few adjustments to this image which I’m quite happy with.
Now let’s go ahead and click open that’s going to open it in photoshop.
Editing a Portrait (2nd image)
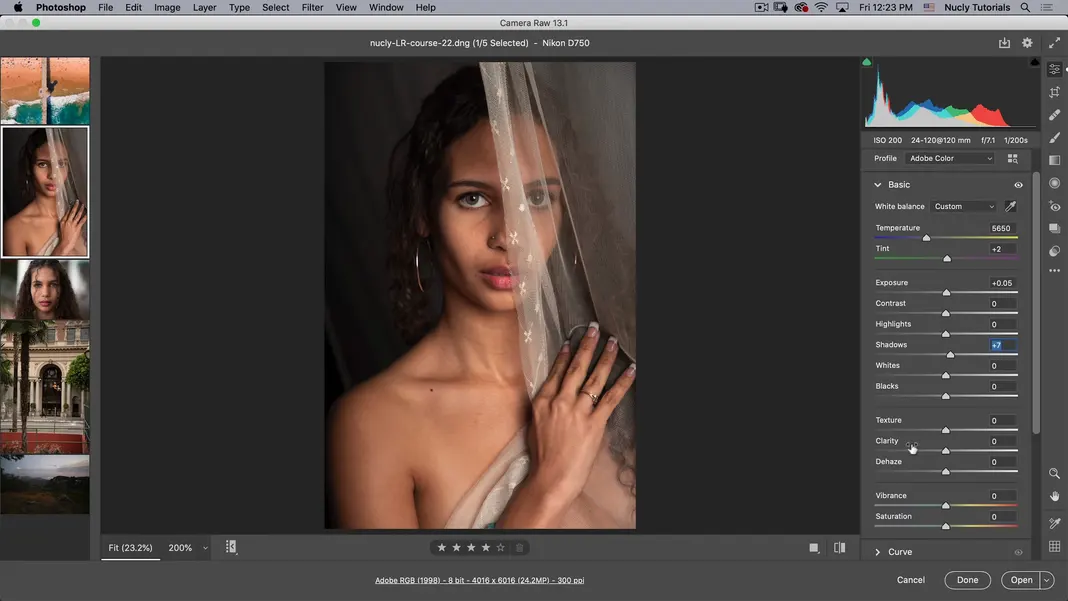
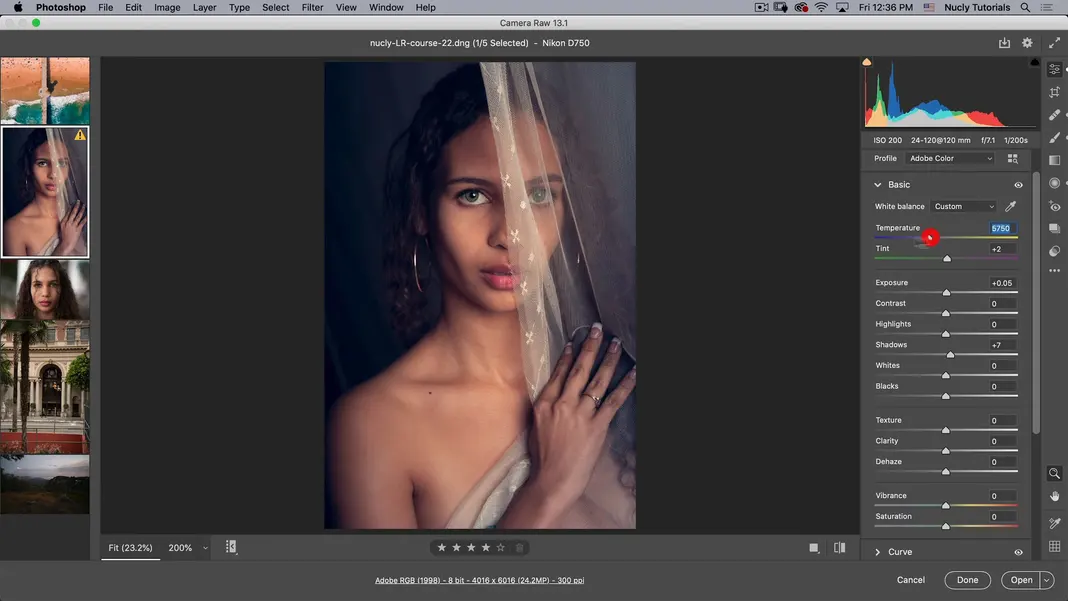
The next thing we’re going to do is take a studio portrait and run that through adobe camera raw. In the course of this portrait retouch, you’re going to learn about some of the more advanced retouching tools. I will also show you a cool trick to do a quasi-frequency separation inside adobe camera raw. Let’s get started, so first things first, whenever I start a portrait retouch, I adjust some of the basics, whether I’m doing it in Camera raw or Lightroom; for starters, I will adjust the white balance; to do that, I can select this background.

As you can see, the tool has corrected it quite nicely. I generally prefer a warmer tone for skin colors; I just think it looks nicer. So for temperature, I’ll adjust it to something like that

For her skin tone, this image has a green tint, so I might just push the tint more toward magenta. This allows us to have a nice warm skin tone. The exposure is quite nice already. I don’t want to make it overly bright, so we’ll leave that. I might want to make the shadows a little lighter, so let’s increase shadows just a little.
When I’m doing a female portrait, I don’t want to mess with texture, clarity, and dehaze because the effect isn’t nice. However, using clarity on male portraits is a good idea but not on female portraits.
That’s all I’m going to do here, and I’ll skip most of the features in this panel. I want to go to optics to correct the remove chromatic aberration and use profile corrections for my lens. It’s going to select the lens that I use, a Nikon lens, so as you can see, it’s already done all that for me and removed chromatic aberration.

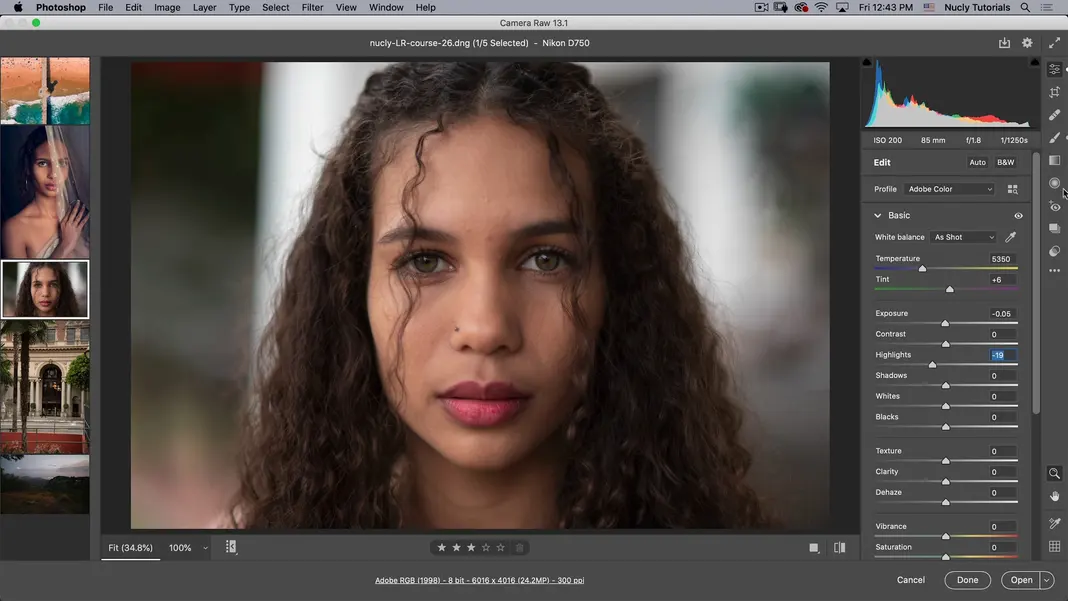
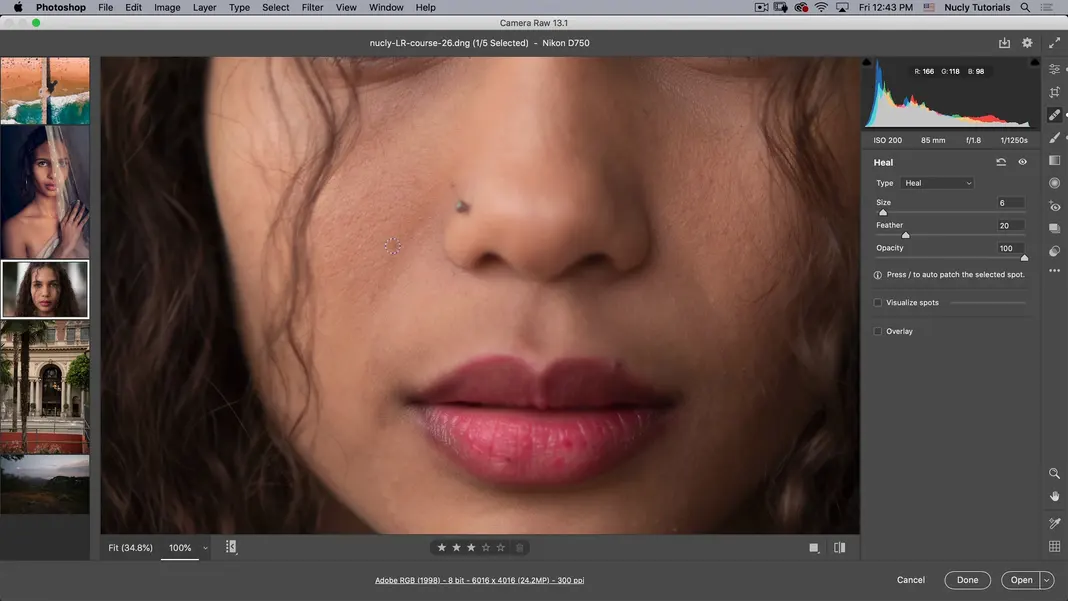
Geometry in this portrait is fine. I don’t want a vignette or effect, so I will leave all the rest alone; we don’t need to change the Crop or rotation either. So let’s go to the healing brush, and on portraits, you’re gonna end up using the healing brush a lot more than you would on landscape photos.
Heal brush is used more often with portraits to clean up little skin blemishes and things of that nature. So I already have the heal tool selected.
Everything looks good. You can also visualize spots here.
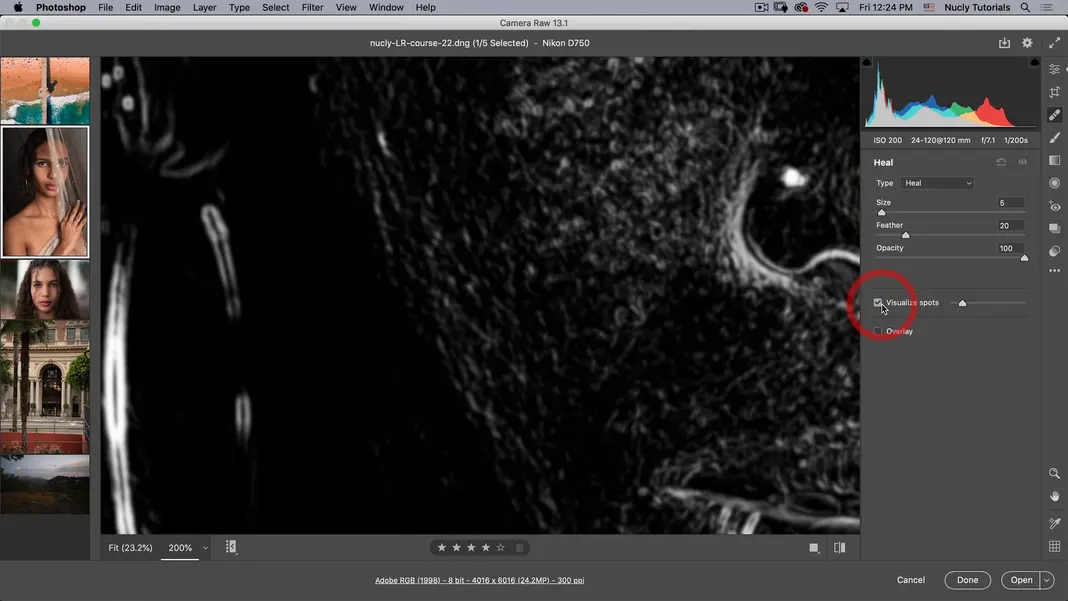
Let’s zoom out just a little bit here, and as you can see, this feature allows you to look at what spots might need to be fixed up. You can slide this setting across; however, I don’t find this very helpful unless I’m looking for either sensor noise or dust on my lens. For actual skin, I think looking at it visually is much easier.
Let’s go ahead and start cleaning these sections up. You’ll notice that I don’t have the overlay turned on. If I want to turn it on, I can hit the V key to make it appear. But it gets quite distracting when trying to clean up the skin to constantly see these overlays. So I would leave those out and remove overlays by hitting V again to hide them. We can keep painting over these spots here, and you can always adjust your brush size with the left and right bracket keys. I’m not a big fan of the nose ring here, so I’ll get rid of that; now you’ll notice that this looks like something got removed. So I’m going to hit the V key to make overlays appear, see where it’s sampling from, and maybe sample something closer to the texture there.
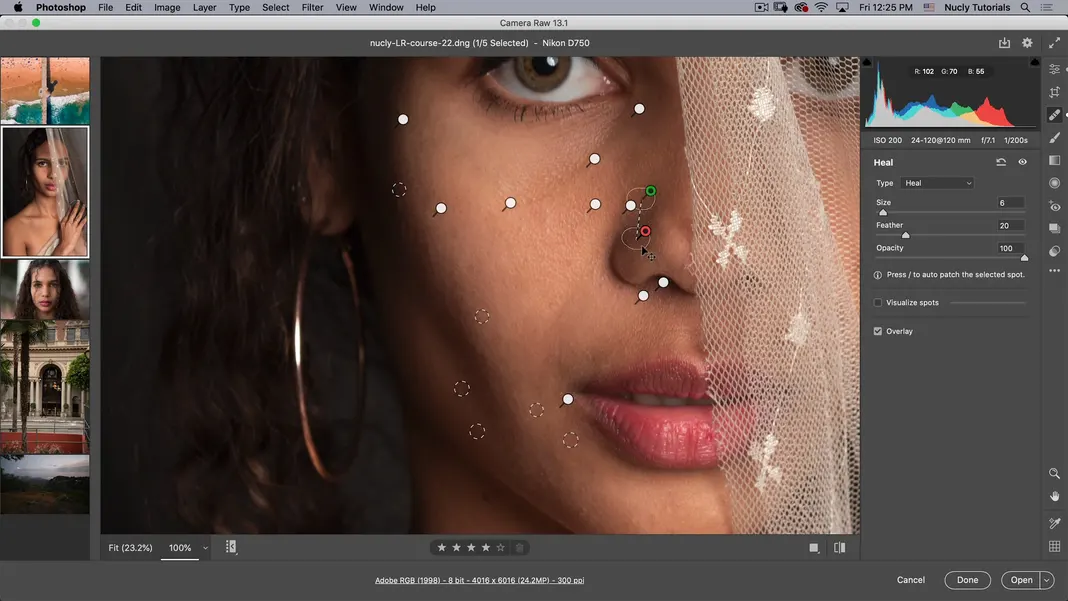
We want to sample something similar in texture and tone. As you can see here, now, we’re getting those same skin pores that match up with the surrounding; it just looks a bit more realistic. We are going to keep painting over areas where required.
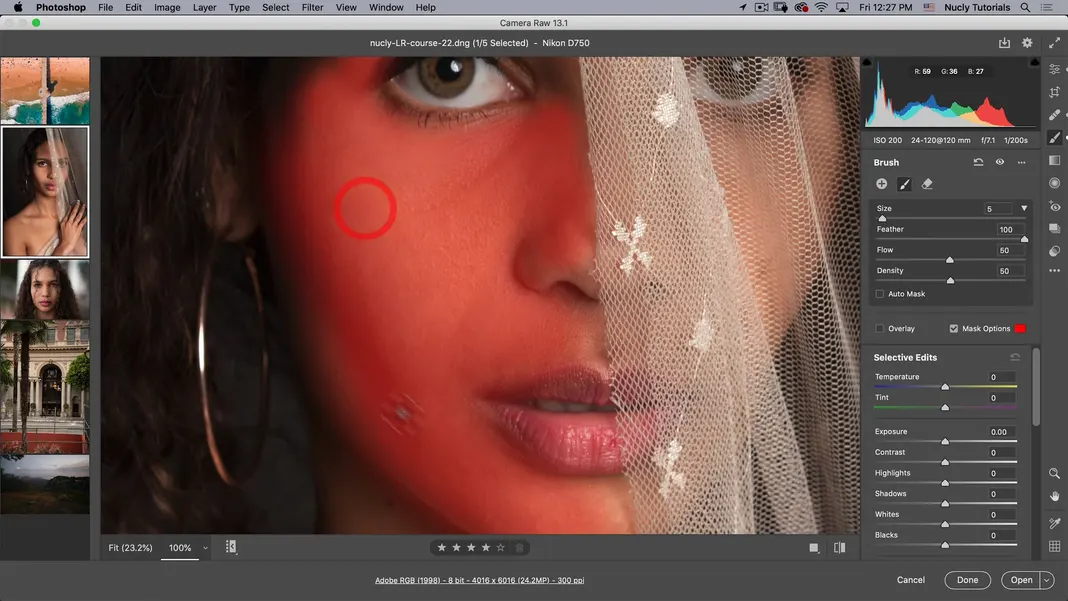
Now let’s zoom out; this portrait already looks nice. Next, we’re gonna go to the adjustment brush.
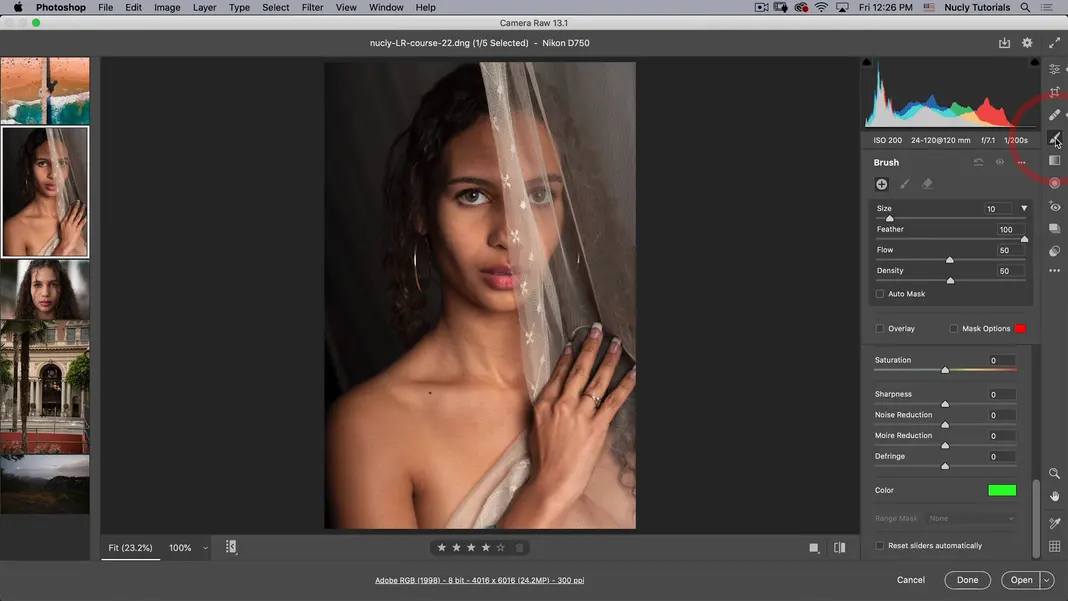
What I want to do here is reset it. So it’s not going to apply any changes, and I want to turn on my mask overlay so that I can see where it will apply the effect as I’m painting here.
So let’s just start painting, and I want to apply a kind of a fake, or I should say a Camera Raw version of frequency separation. It’s not anywhere as close to as good as what you can do inside photoshop, but it’s a neat trick. So I’m painting all the areas that don’t have high detail.
And I’m pretty happy with that. Now, let’s zoom out so we can see the whole face simultaneously. I will turn the mask overlay off and scroll down to texture clarity and dehaze. And what I want to do is bump up the texture just a tiny bit. Then take down the clarity and reduce the dehaze just a little.
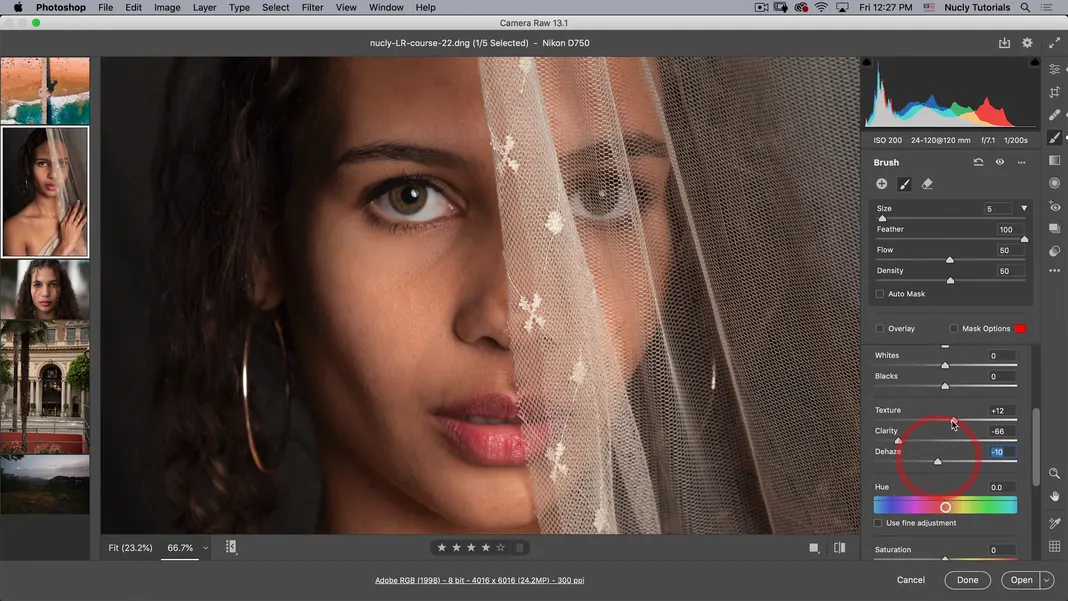
So now the way frequency separation works is that it blurs the low frequency while keeping the high frequency. So by bumping up the texture and taking down the clarity, which is essentially what the effects are. The difference might not be obvious, but you can see a before and after if I turn this off by clicking the eye icon here.
You can see the effect it’s doing, so it’s getting rid of some of these harder lines and making her skin look a little softer. If I like this effect, I can also go here by clicking on the three dots and pick a new local skin correction. I can call this “skin,” and if I want to apply the same effects again, just make sure I have selected skin.
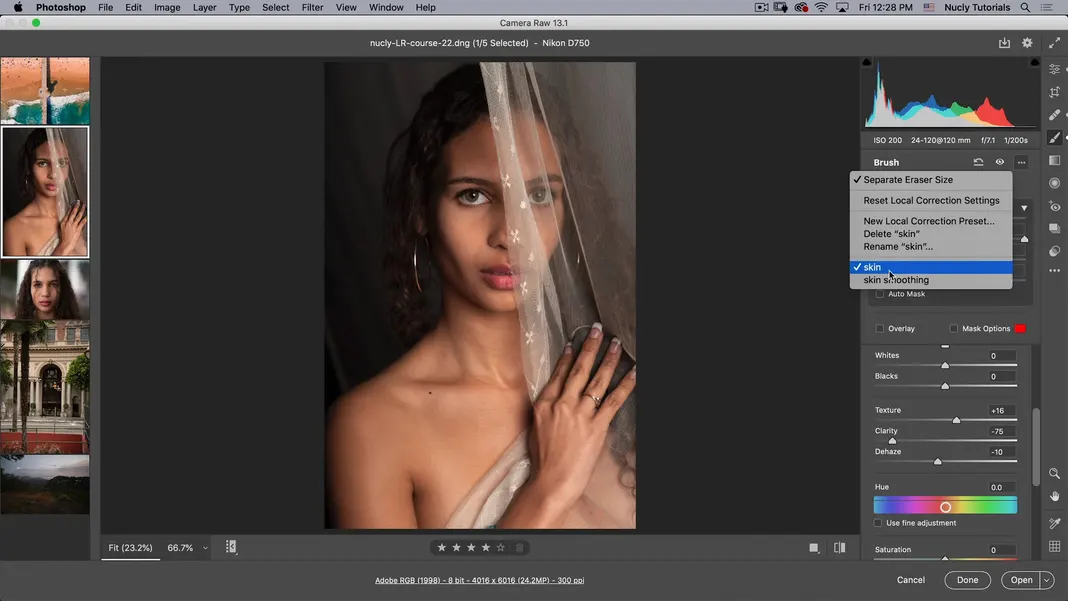
It will apply those corrections in the area I want, and then I can easily paint where I want that particular skin effect. So anywhere where her skin is, I can go in and paint it; if I want to see my overlay, I can just hit Y. And also, if you hold down the option key, it’s going to give you the erase option. And you can adjust the size of the eraser if you want to get the overlay out of the areas that aren’t her skin and then hit Y again until you are happy with your local adjustments.
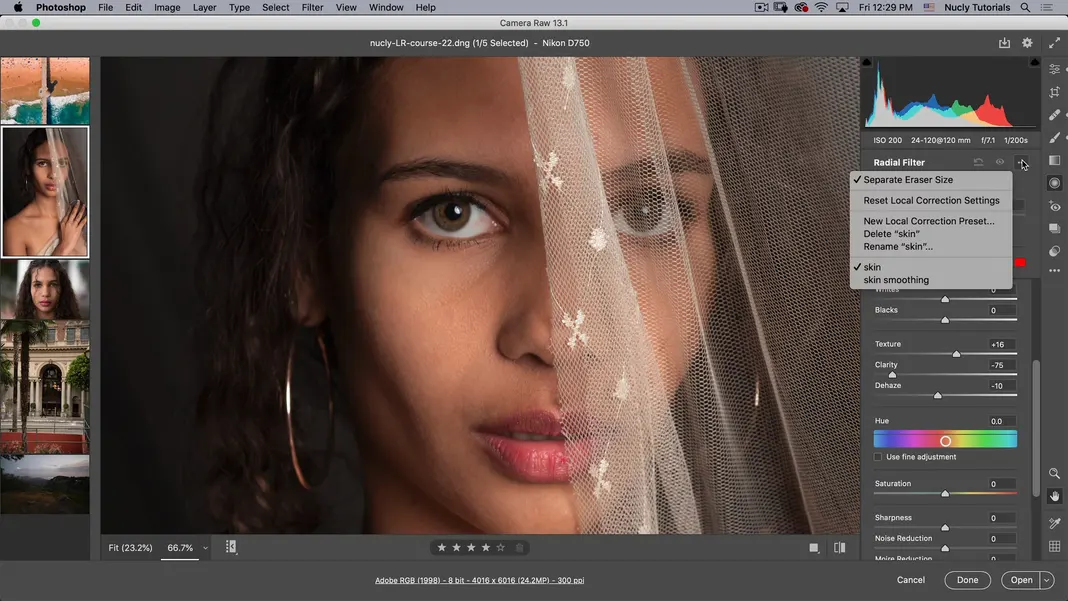
Graduated filter / Radial filter
Next, we have the gradiated filter or graduated filter. I’m not going to use that for this portrait.
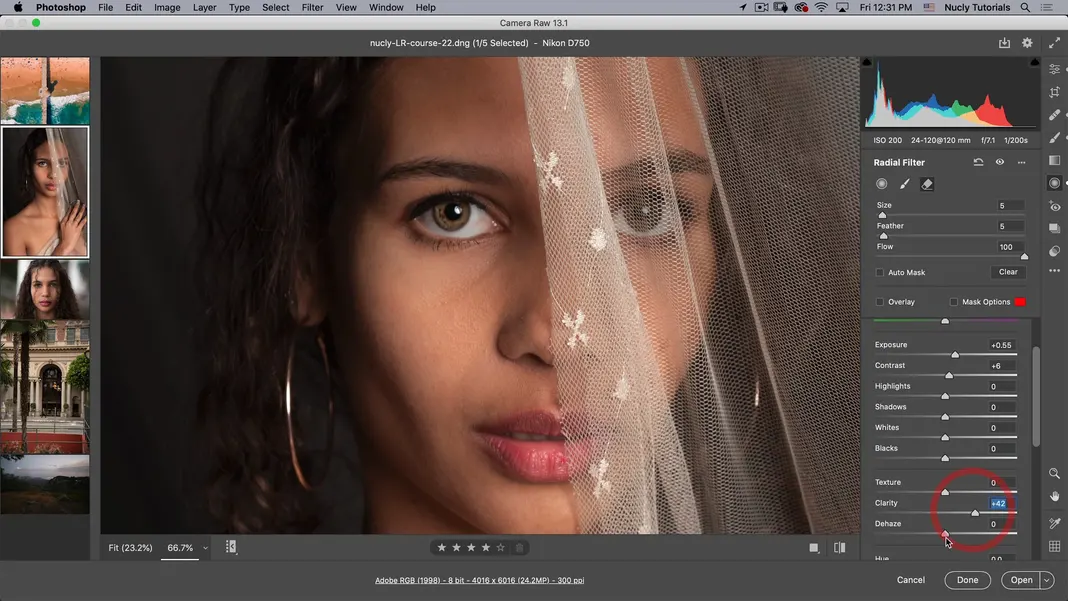
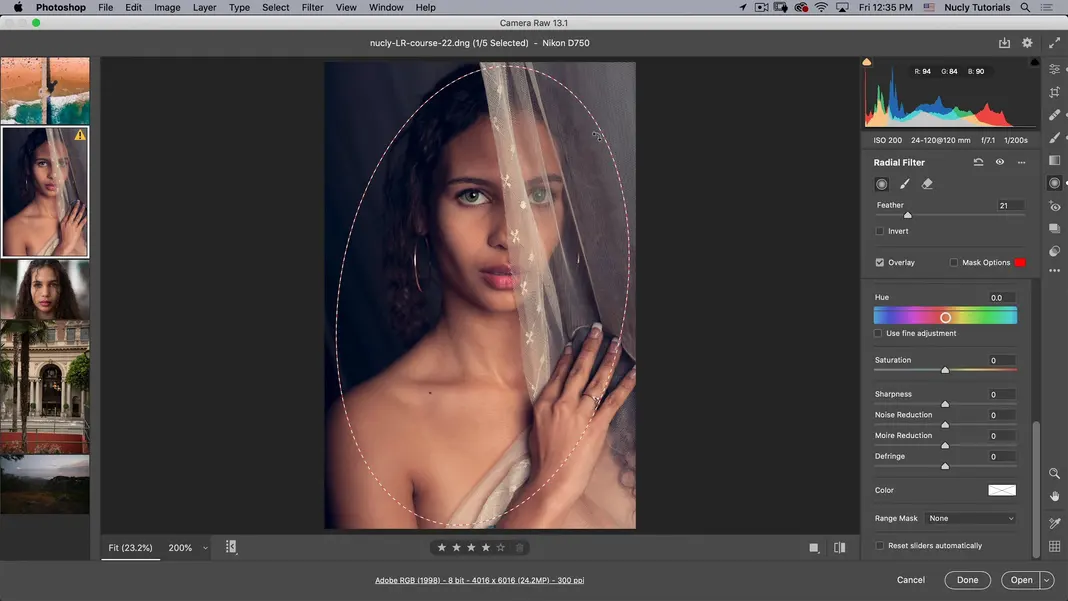
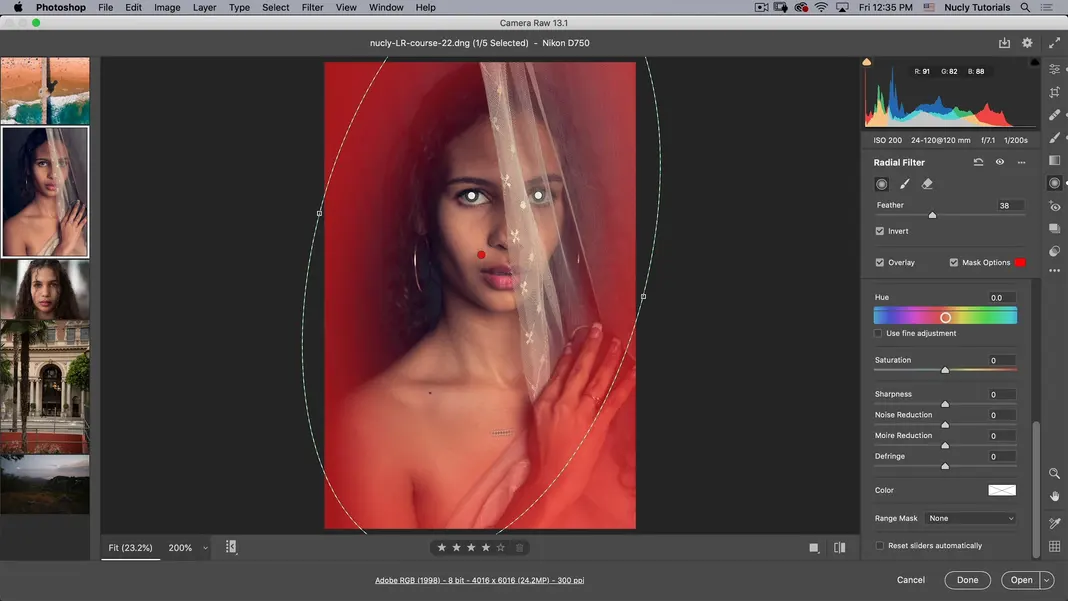
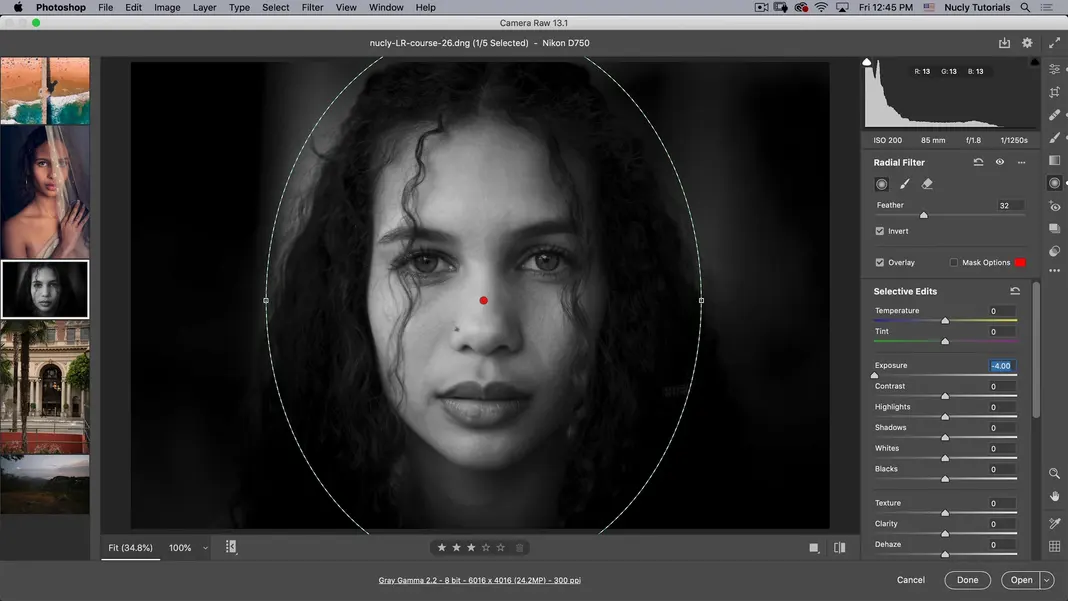
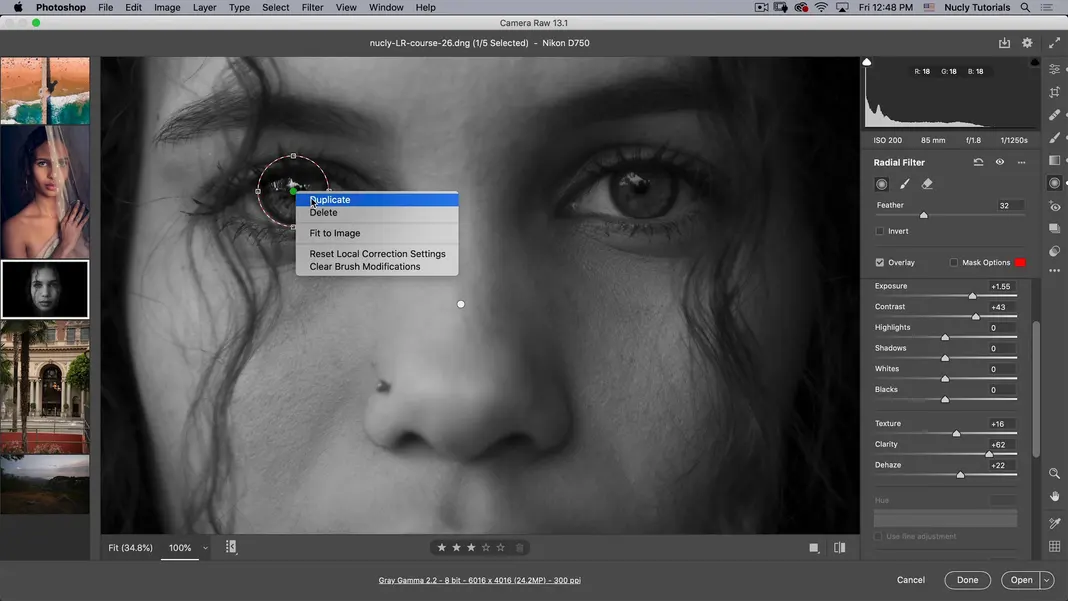
The radial filter is the tool I like to use on all my portraits, and that’s to punch up the eyes. So first, I will click the three dots to reset the local correction – so that it’s not applying any correction.
Then go into the eye area with the radial filter selected. Since I can’t see my overlay, we’ll turn that on here and let’s also hit Y so I can see which part I am working on.

You’ll often see that this overlay is inverted; just make sure the red part, which is the part that the tool will apply the effect to, is the part that you want it to work on. In this case, I don’t want it affecting the top of her eye there, so I can just use my erase tool to adjust the feather and just erase her eyelashes from this overlay, so It’s just applying it to her eye.

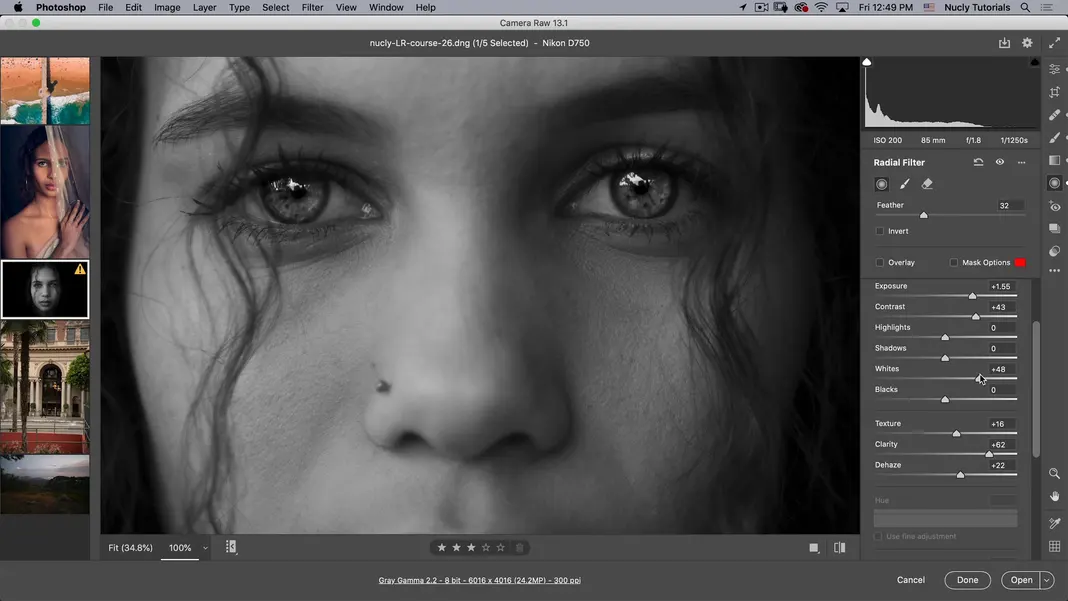
Hit Y to get rid of the overlay. Now what I want to do here is I want to increase exposure. Some settings may seem too bright, but we’re going to compensate for that with a little contrast, taking down the blacks. Or we can leave the blacks alone, and instead, let’s use clarity to get our darkness back in there and maybe even some texture.
Let’s see a before and after real quick by clicking the eye icon. We’re not adding lightness, but what we are doing is adding crispiness. We are also adding a bit more of catch light in her eye, and that just looks good for her eyes. We can also add a tinge of more color into her eyes so we can go to color and do that there.
Note: In case you notice any adjustments you do are not applying, check if you were deselected. If deselected turn on your overlay and just click on it.
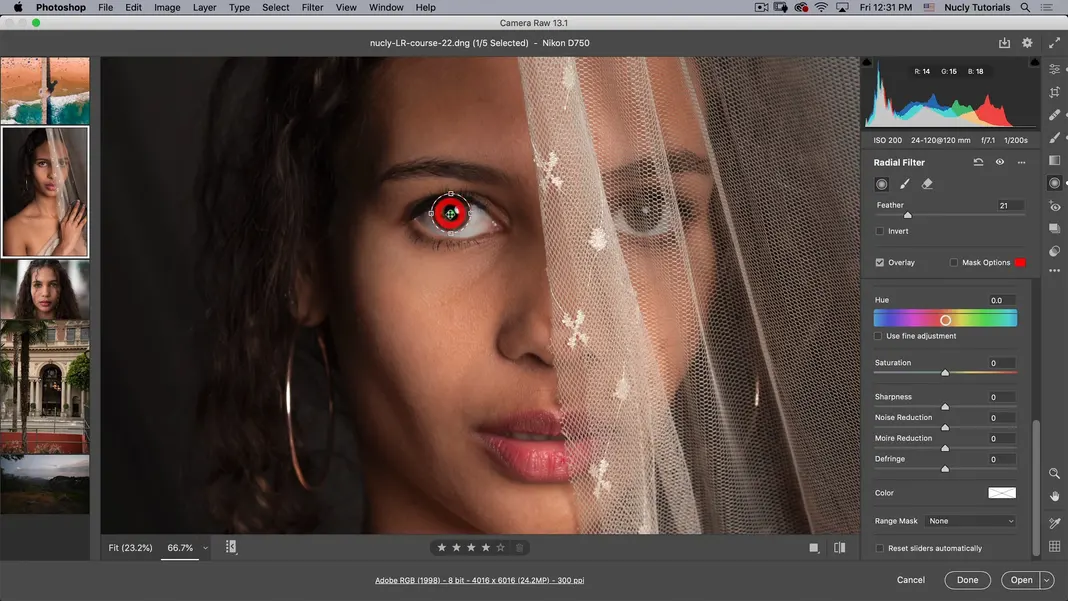
Now you’ll be able to make those adjustments by going to color here.
If you ever wonder why changes aren’t happening, that’s probably because you unselected the adjustments you were working on.
So this is her natural eye color, with tinges of green and brown. I want to just accentuate her natural color, so I am not gonna overdo the color but just add a touch of a little bit of warm green to the eye. Next, I could also try to apply the adjustments to this other eye; the problem right now is that it looks like this is a more brown eye, whereas this is a more green eye. So let’s go ahead and turn the overlay on by pressing V and make a duplicate which is a right mouse click.
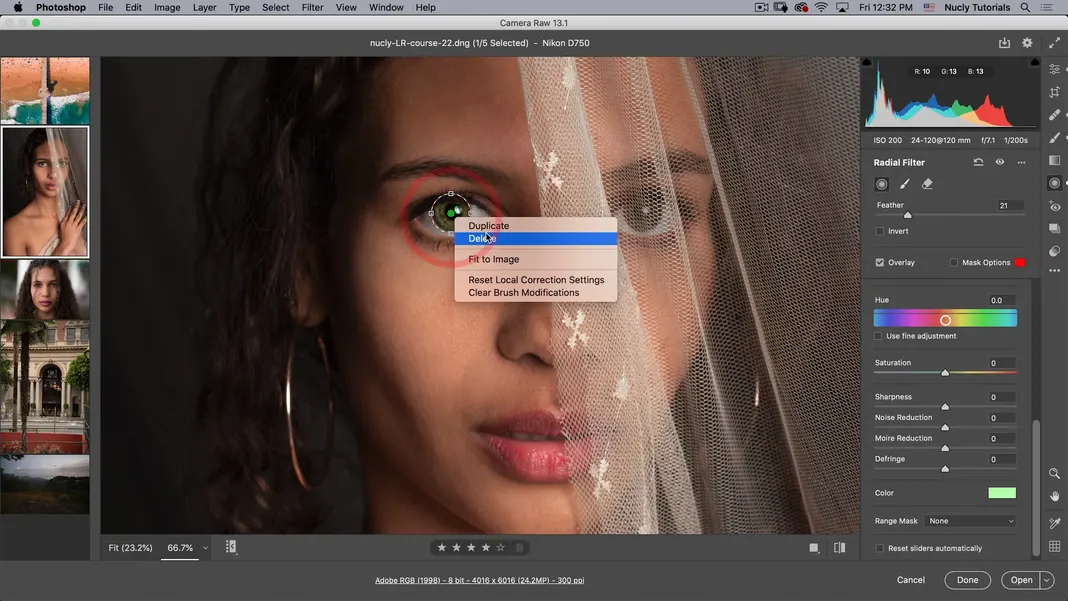
Now bring this overlay over to the other eye. You will notice that this looks better. The problem is this white shouldn’t be affecting the net on top of the eye so much. So let’s zoom in on the eye more and see if we can fix that. Turn on the mask and what I want to do is under range mask, go to luminance
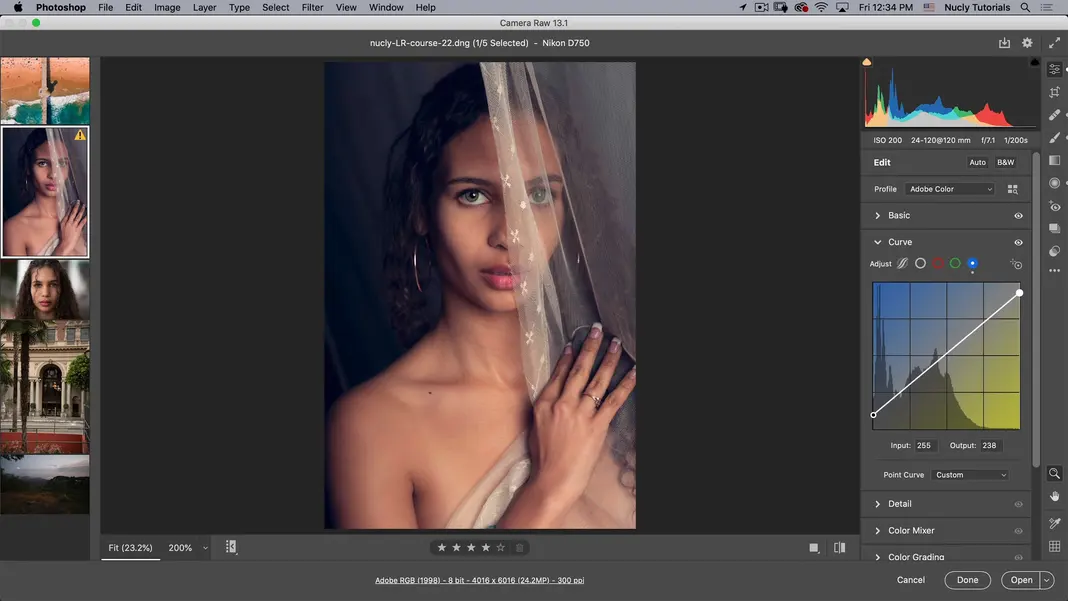
I know it’s the light areas or the net that I don’t want it to affect. Next, I can go to the luminance range, and this works similarly to the blending options in photoshop. You can just go here and pull luminance down from the top. Now it’s gotten rid of it in that effect in the highlighted area. If I press the command and 0 keys to zoom out, I can see that it looks good. Both her eyes look like they’re the same color which is the effect I want to achieve. Alright, I don’t need to use any red-eye tools. I’m also not going to use any presets, so I’m pretty happy with how this portrait looks. Now I can go back to the edit section and see if I want to give it a nice color grade. I can do that here with the curve option. So I’m going to go to the blue, bring up the bottom, bring down the top.
That looks nice. Then I could also go to the detail section and maybe give it some sharpening before I upload it.
Vignette
I want to give it a bit of a vignette, so my preferred way of doing vignettes is with the radial filter. So I’m going to make sure I have no corrections being applied. I’m just going to click the three dots and reset to ensure no corrections were being applied.
Then I make a big circle after turning this overlay on and make sure I have the right circle size.
The nice thing about doing a vignette with this method is you have more control and rotate the vignette to highlight the area you want to highlight. And then I can hit Y, and you’ll notice it’s going to apply the vignette to the subject instead of around it. So we’ll just invert that. I will increase the feather and then maybe make the size a bit bigger, but this is the area that I want to be vignetted all around.
So now I’m going to Press V and Y to turn those off and then scroll up to take down the contrast, and I also want to make that bluer, so I adjust the temperature, which adds blue around her so that her face is warmer. Maybe adjust the temperature around here like that.
Then go to edit, and I might even compensate for the adjustments made around her by going here to the temperature and making her a little warmer.
I’m pretty happy with what we have changed so far. By hitting \ you can see the before and after image within Camera raw.
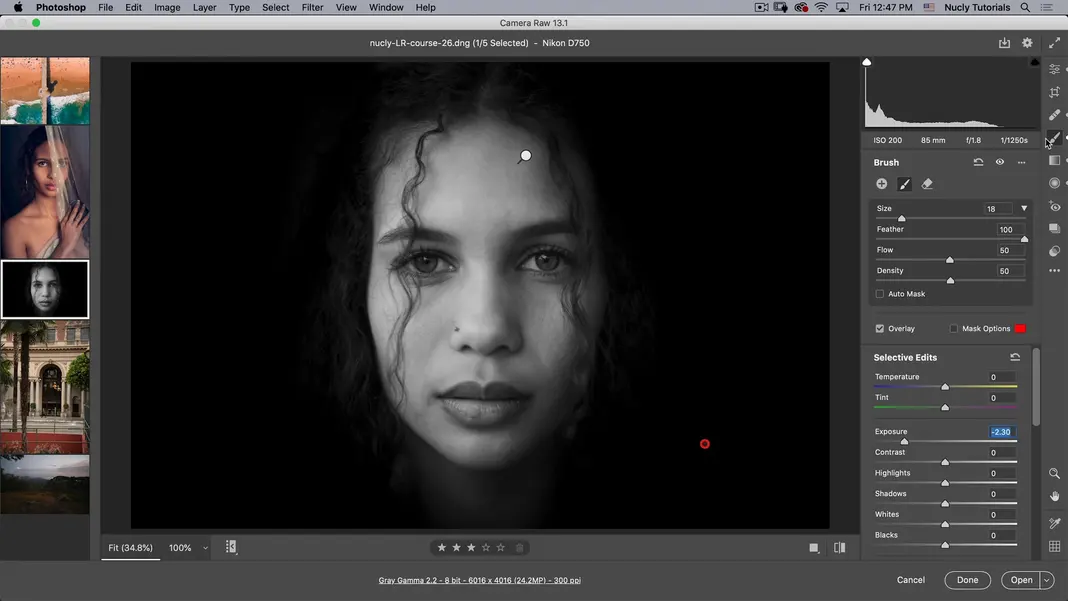
Turning an image into a Black and White (Image three)
For this next one, I will take a snapshot and turn it into a striking black-and-white photograph. This is a photo I took that I wasn’t that impressed with, but after playing with it in adobe camera raw, I came up with an image that I liked. So I’m going to show you how I did that.
Now for this image, I want to address some of the black-and-white features. So this is the same model as the previous image we used for our tutorial of a beautiful woman, and this is a photo I just took kind of casually outside during a cloudy day. So we had nice ambient lighting, and I decided to just shoot one photo, but I didn’t know what I could do with the photo.

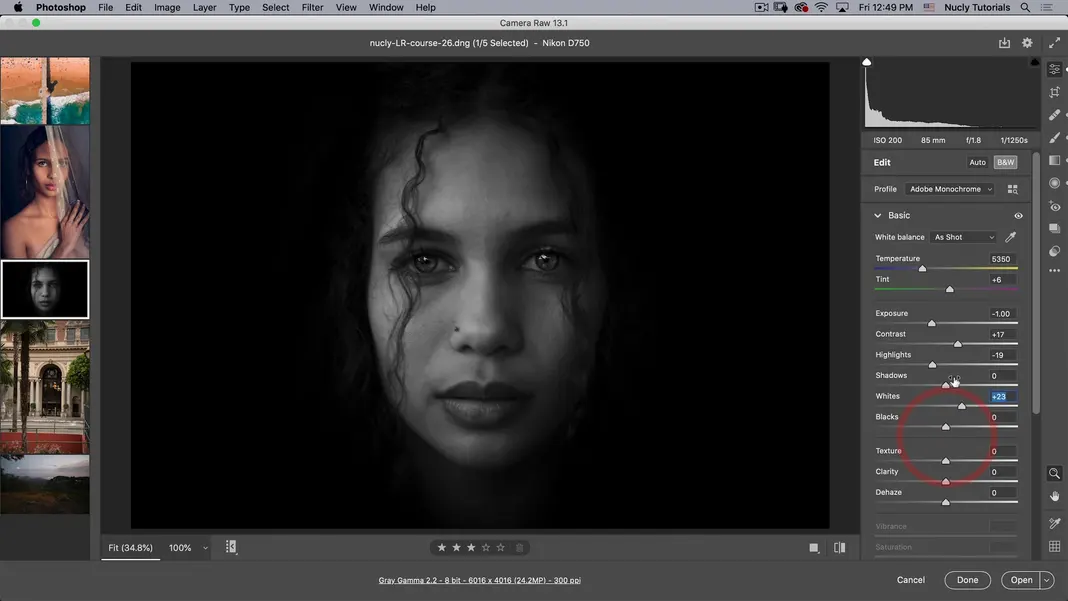
It looks like a snapshot; it’s not a studio portrait like the previous one we edited, and this is where black and white came into play. I turned this into a photo I liked. I will show you how to do that just using Camera Raw. So first things first, let’s just make our basic adjustments.
Basic Adjustments
Within basic adjustments, let’s take down the exposure and reduce the highlights just so we’re getting a little more detail back in the image.
Heal
Then I want to go into Heal to make these skin corrections before turning this to black and white. So I’m going to zoom in, hold the option key and clean up these few spots on her face. On some of these, where the spots are very small, you want to make your brush as small as possible by using the bracket keys [ ] to fit the smaller spots.
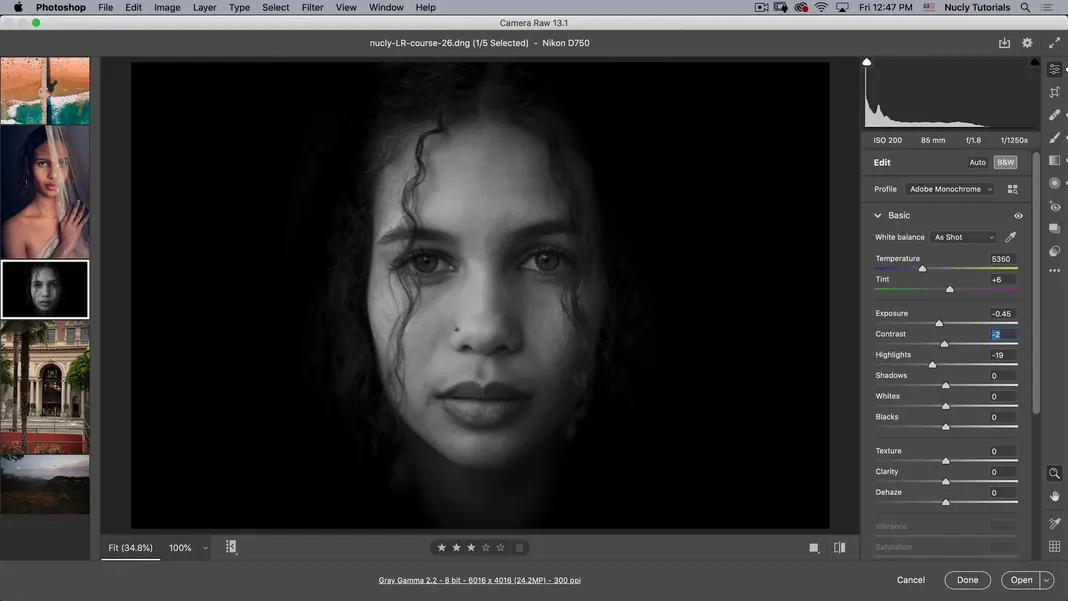
We adjusted the brush size so that it’s going to leave more of the original image intact. Alright pretty happy with the adjustments, and the next thing we’ll do is click here to turn the image into black and white.
Adding Filters
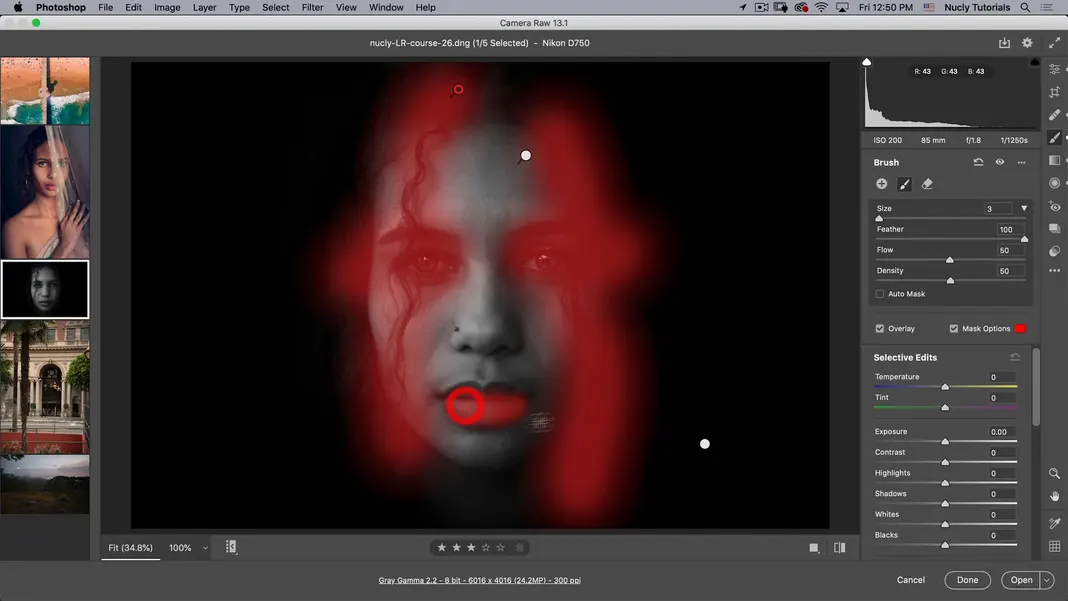
I kind of want to have her face appear as if it is appearing out of the darkness. So to achieve this effect, I will have to use a few filters to get the background dark enough.
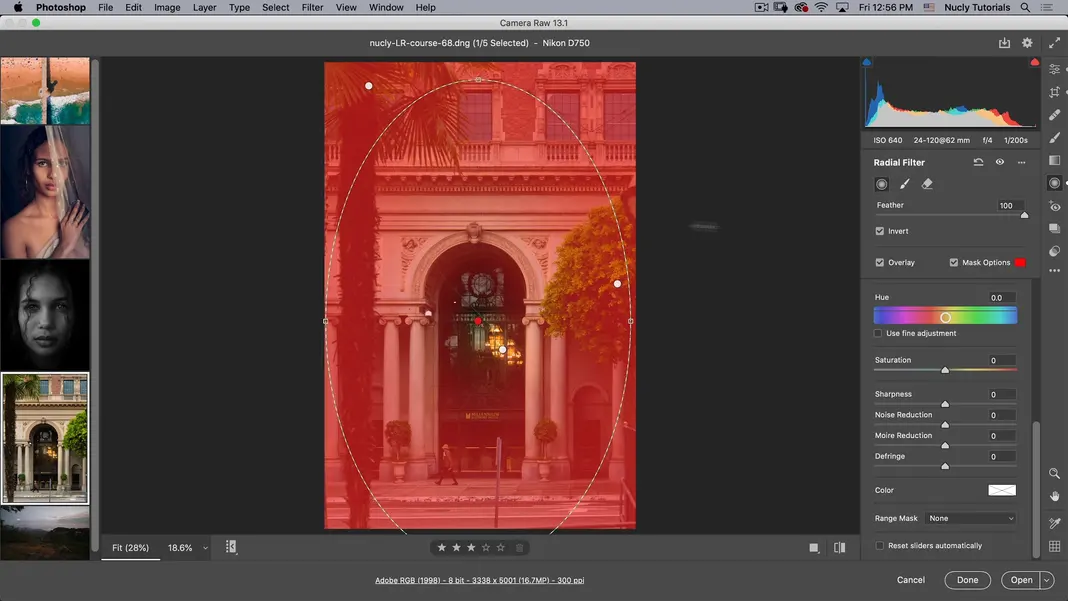
So let’s start with just a standard radial filter. I want to make sure that I reset it by clicking on the three dots so that it does not have any effect applied to it. Now we want everything outside of this selected area to be black so let’s go ahead and click mask options to ensure we’re applying it to the right spot.

Vignette
I need to make the selected area wider because I want some hair detail showing. So maybe exclude hair as well like this, and then we’re just going to take the exposure down.
Now you’ll notice it does not bring it to black even at -4, which is as dark as I can make it.
Adding Linear Gradients
Now I could try to mess with some of these other adjustments, but what I’m going to do instead is go to my linear gradient, and we’ll reset it. Now we’re just going to add a few linear gradients like shown in the picture below:
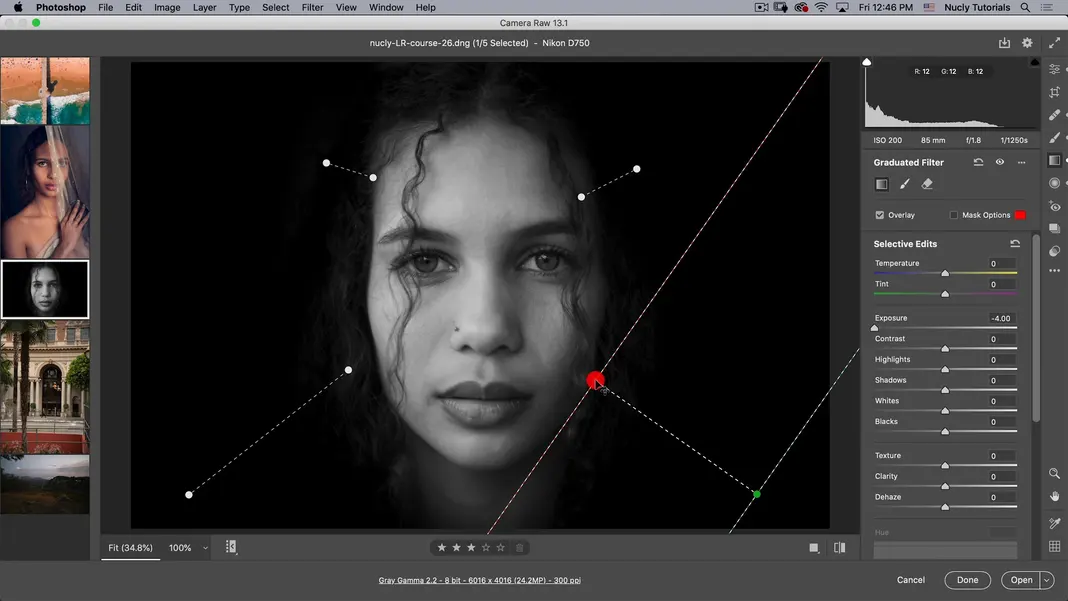
I also want to make this neck region darker but not as black as the background, so I’m going to go to a local adjustment tool here, and we’ll make this brush a little bit bigger. For this, I want to see as I’m painting to know how much effect is being applied.
I’ll also go to my erase tool to ensure the darkening effect is not hitting her chin.
I might even increase the feather there just a bit more, and then for this area, I don’t want to do quite as much darkening, so we will adjust the exposure, which looks quite nice.
I’m going to press E to return to my basic edits here, and now I want to add some contrast and take exposure down.
Then I want to improve her eyes, so let’s go to the radial filter. I’m going to reset this tool and zoom into her eye area. Now hold down the option key to select her eye region, and let’s hit Y you can see we need to invert this. Then I want to erase the part that’s not her eye there like this.
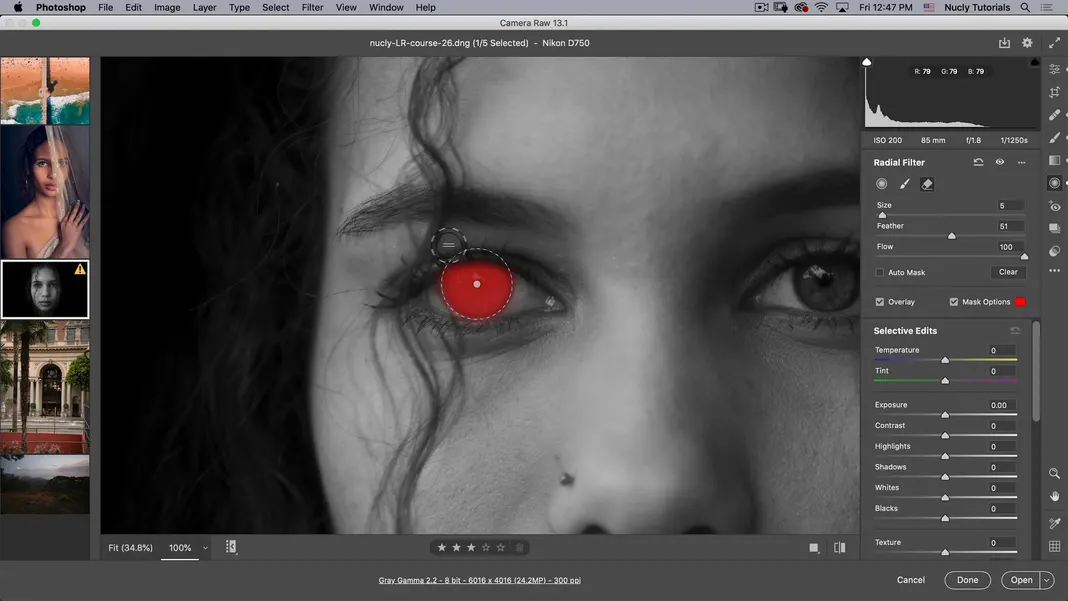
Now we can press V and Y to hide the overlay; now I’m going to increase the exposure, and I’m going to go a little bit more than I usually would on a color photo here.
Then I can compensate for the extra exposure with clarity, texture, and even dehaze.
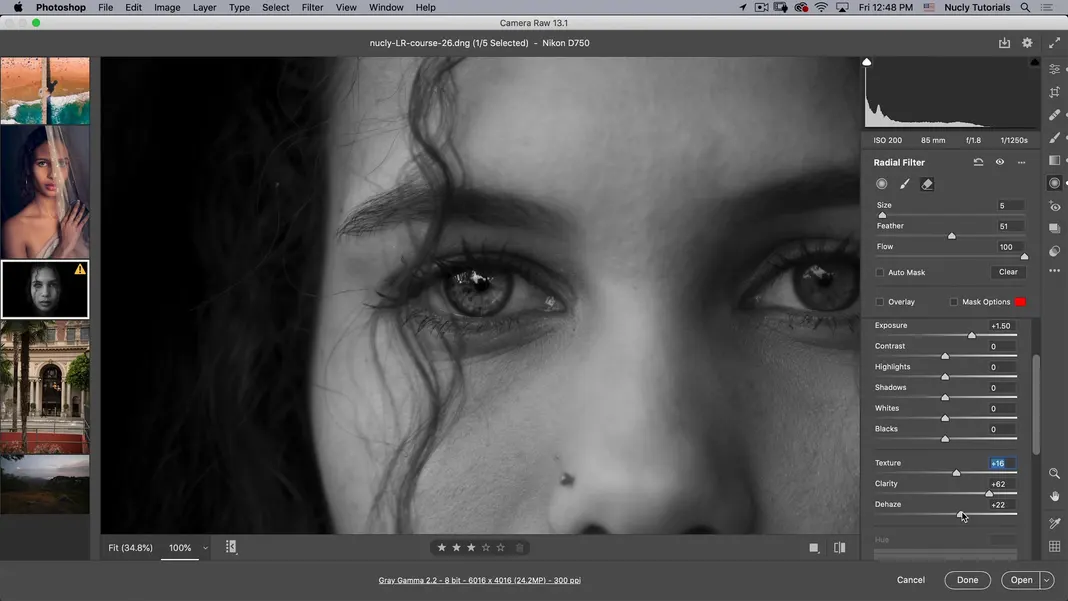
I’m increasing the contrast in that area and then adjusting the exposure to try to get it where I want. I can compare the two eyes, and I know the retouched eye is brighter than this, but it’s not significantly brighter. It’s just the highlights are brighter. And I like the effect we have achieved so far for the eye. Now let’s go ahead and copy the adjustments we made to this eye to the other eye. So I’m going to turn my overlay back on, do a right mouse click, select duplicate, and then just bring it to this eye.
This eye has a stronger catch light, so I may have to compensate for this by just making the whites brighter. Now both eyes look about the same.
So let’s press the command and 0 keys to zoom out, and you can see that the image looks nice. I still think her skin is a little bit too bright, so I’m gonna go to my basic panel here and just take the exposure down a little bit, adjust the contrast and maybe bring up the whites.
I also want to add some clarity to her hair and eyelashes to give it a nice effect. So let’s go back to our local brush, reset it and turn the mask on to see where I’m adding the local adjustments. I want to add it to this hair region that’s going down here to reduce the size of the brush, and I want to add the effect to this hair on both sides that’s going down here. I also want to add it to eye areas like that and maybe even her lip there.
I don’t want it to affect her skin, so I can go to the range mask to adjust luminosity and take effect away from the lighter areas.
As you can see now, the mask is primarily hitting those darker areas, and then I’m going to press V and Y, then go to clarity and increase it as well, maybe even increase the texture.
You can see that the adjustments give the hair more of a kick and highlight this region, so I am pretty happy with that.
The last thing I want to do is crop it by going to the crop section so we don’t have so much dead space on the sides. So here I’m going to make it 4×5. That’s the format for Instagram now. I can also switch it from profile to portrait if I hit the X key on the keyboard. Now, if we do a before and after using the \ key, you can see that we have turned this snapshot into an interesting and captivating portrait.
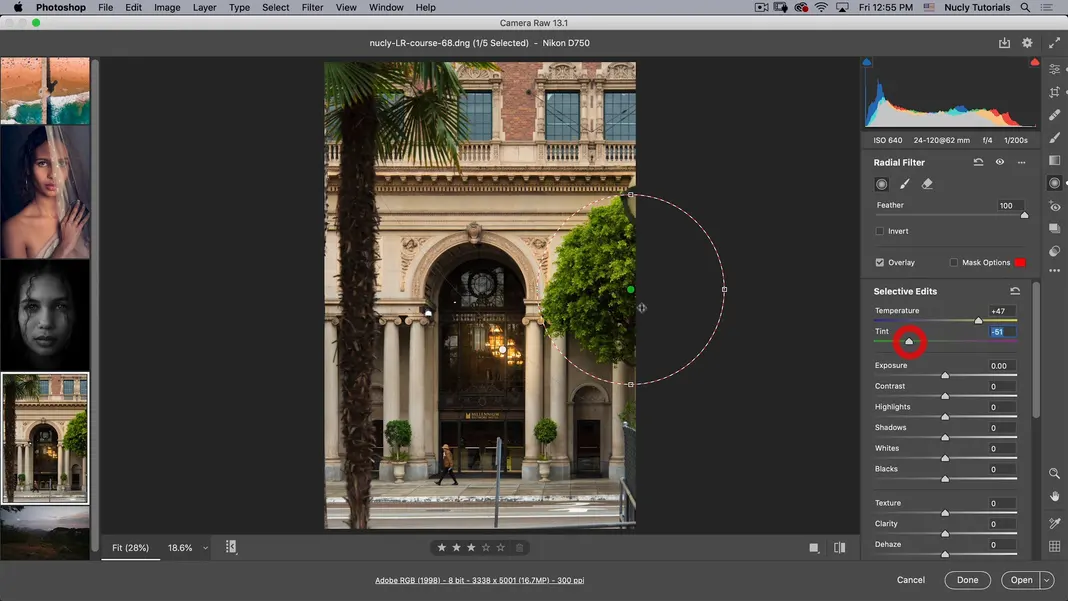
Street Photography (Image 4)
This next photograph is a street photograph, and I will use it to show you some of the geometry tools in adobe camera raw and the new color grading feature, which replaced the old split toning one. The next thing we’re going to do is open this photo.
For this image, I want to show you some geometry tools and what we can do with them. We will also see how we can selectively adjust various colors. So this image is already pretty nice in terms of exposure and all that, so I’m not going to mess with that.
Using Geometry to straighten a photo
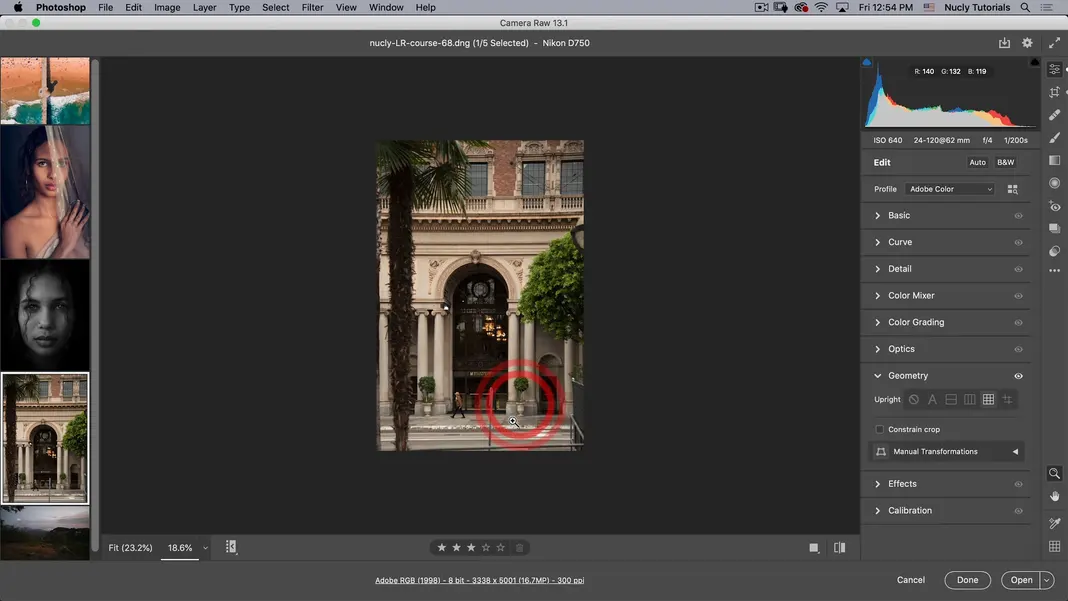
I’m going to go straight into geometry and start straightening it. So I’m going to select Guided here; now you could select Full, and you can see like that already does a pretty good job. You can also try Auto, and I think this one does a better job personally at straightening the image out.
I also want to crop it a bit so that this image feels centered, so let’s go to our crop tool and adjust it. The top of the building is more interesting than having this foreground element so let’s crop the image like this.
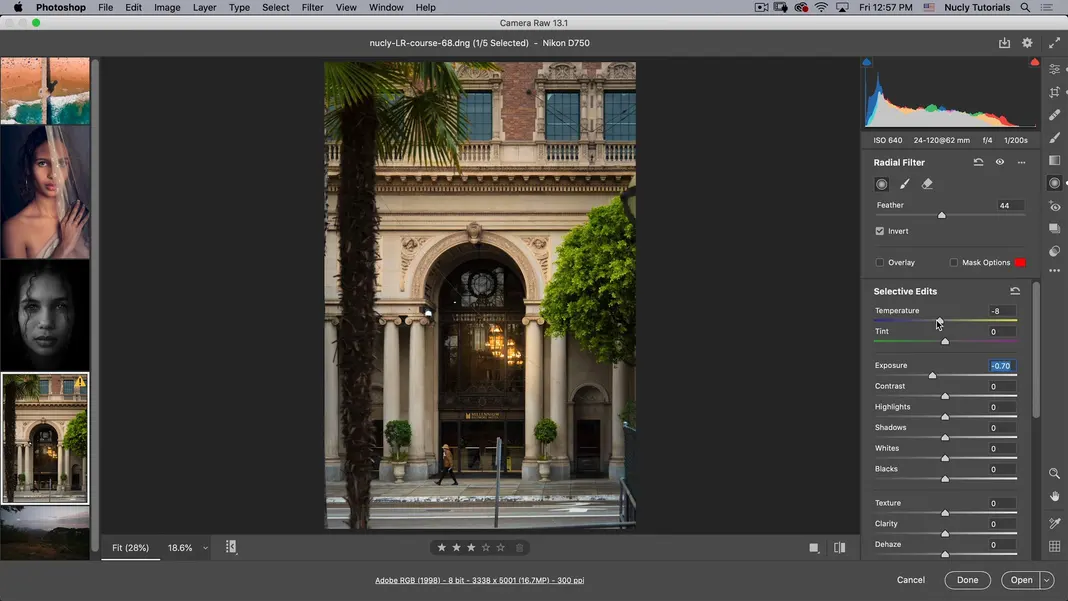
The image already looks pretty cool. Now you do notice that this line along the balcony is not straight. So let’s go to optics and turn on the profile correction; now you can see it straightened that line out. Next, I want to punch up the color in this image, so I’ll go to basics and first, let’s try to push it more toward neutral by adjusting the temperature and moving it toward blue here.
That way, when I punch up the colors, they’re gonna contrast more. Let’s also adjust the vibrance, which looks nice; I want the lights in the doorway to look a little more bright. So I’m going to go to my radial filter and turn this overlay and mask on to see what it’s doing there. So need to make something like this.
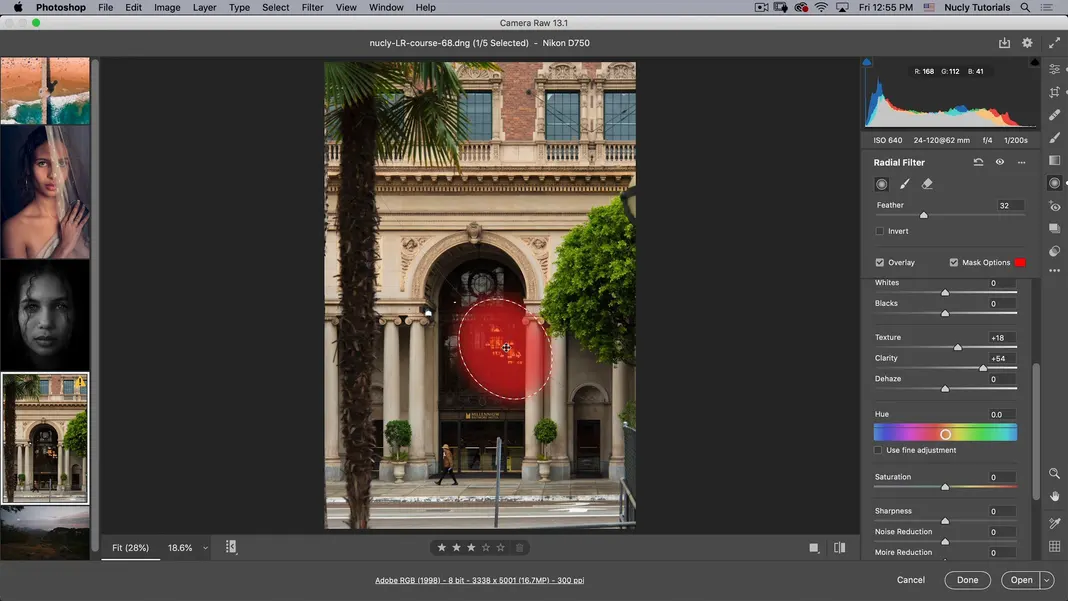
I need to make this mask more feathered using the feather option and let’s turn the overlay and mask off.

Now I’m going to reset selective edits, then push the yellow up, push the exposure up, and I want to decrease the Dehaze.
Adding a glow
So we get a glow from the lights. Then I will go down to colors and push a little yellow light into that glow. This will give me a nice effect, like seeing a glow on those lights.
Punching up the Green using a radial filter
Next, I want to punch up the green on this tree, so I’m going to create a new radial filter, and you can see it’s applying the existing effects to that filter.
We’ll reset the existing effects up here, and I just want to adjust the temperature toward yellow and green.
And I just wanted to apply this to this green effect here in the tree. So to limit this effect to the tree, what I can do is go to range mask and then select the color option.
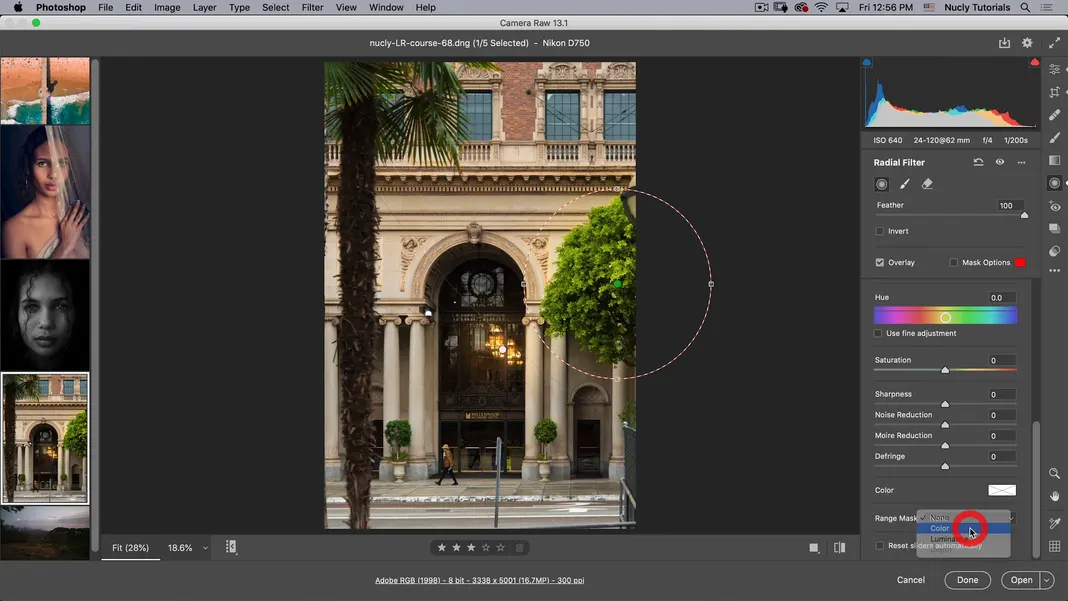
Then just select that green color there, and you can see it just got rid of it around the tree, so now it’s just applying it to the tree region.
Next, what I’m going to do is I’m going to right mouse click and duplicate this mask and then just apply it to this tree that’s there.
Adding a Vignette
Then I want to vignette the whole image, and for that, I will use a radial filter, but before that, I will reset it. I’m going to invert the selection to make sure that it’s applying it to the outside area to make something like this.
You might notice that my feather is probably too strong, so we’ll reduce it. Then we’ll reduce exposure and reduce warmth out of the shadow areas. Now I am pretty happy with how that looks.
Color Grading
I want to show you some of the features of color grading down here in the color grading section. So what this does is it allows us to add colors to our highlights and our shadows independently. So let’s push our highlights toward gold and then our shadows toward a bluish color, and for our mid-tones, we’re going to leave those in the center there.
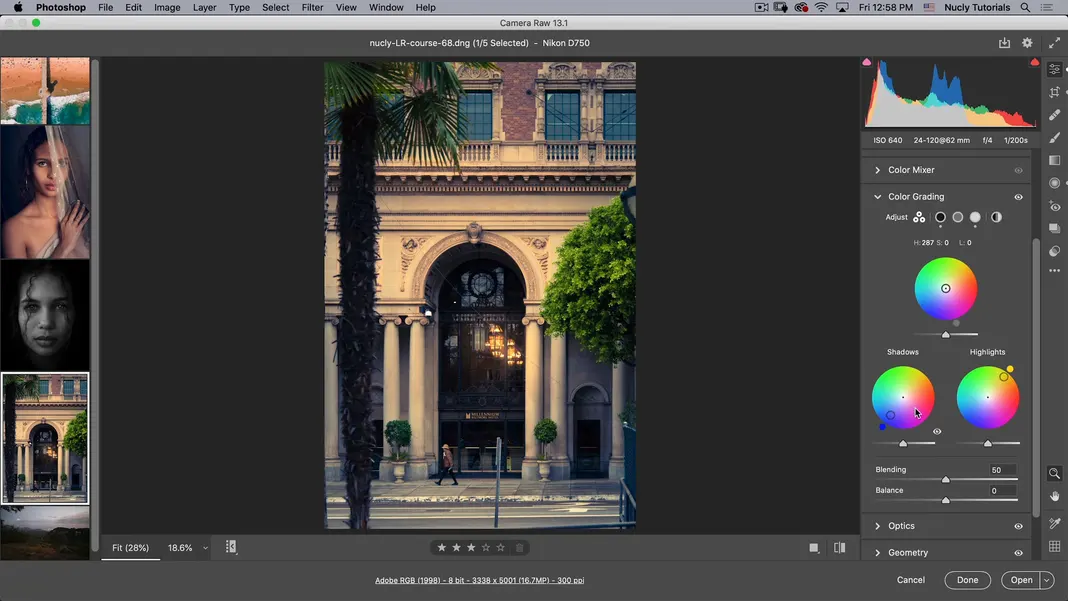
If we double-click in the center, it will reset the changes. In the center it is not applying color changes at all, and then as we drag it out to the edge, it’s applying more of that color. The blue makes it darker for example and we can adjust the luminance. If we want to just play with the color, we can drag this around and see what other colors are applied there.
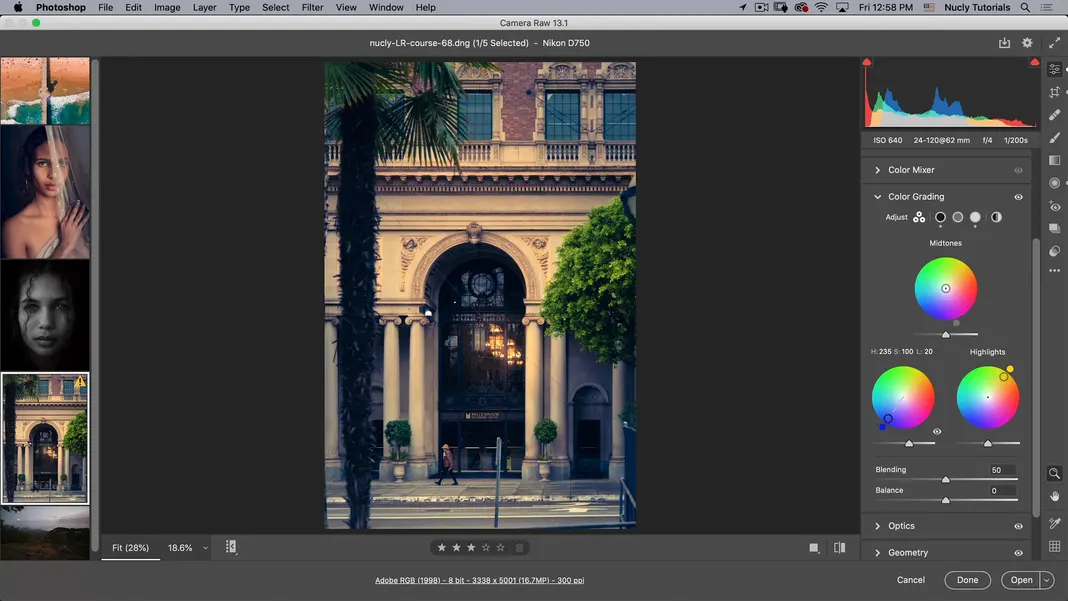
We can always drag it from the center to see how much it’s applying there, and if I click the eye icon here, you can see the before and the after, just giving the whole thing a more interesting look. Also, if we want to give the whole image a little color, we can do that here. Maybe adding an orange tinge here making the image more interesting, and I like it.
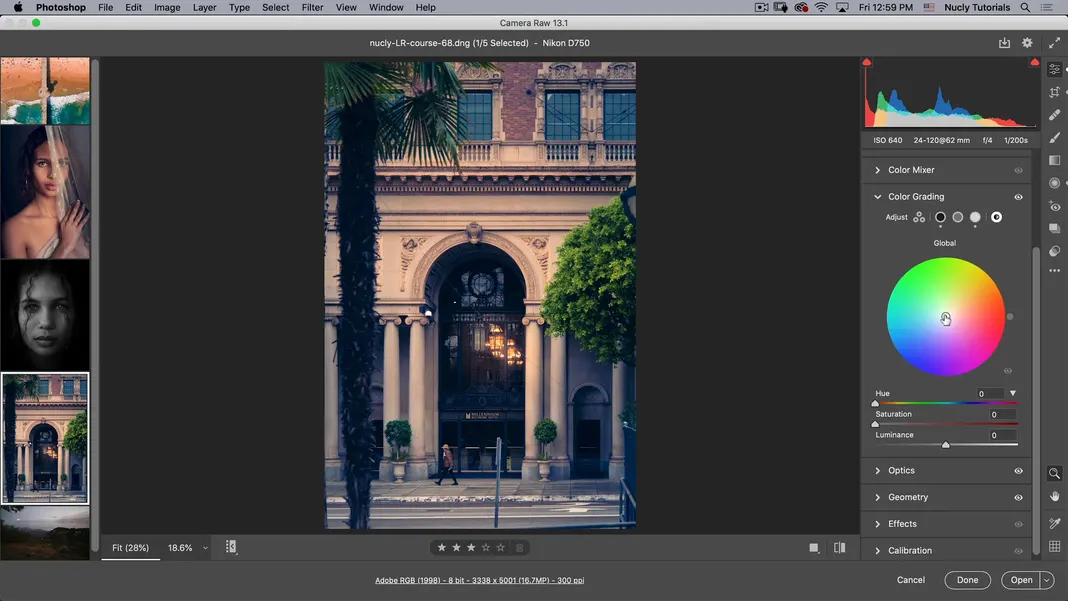
That’s how you use the color grading panel.
Also, through this first option, you can see the mid-tones, shadows, and highlights simultaneously. If you want to go in and just adjust the shadows, mid-tones, and highlights, you can do that with these options individually. All the same controls are there, including the luminance control and the saturation control. So you can make adjustments at once or individually.
Using Curves
Then the last thing I want to do on this image – add a bit of a curve to the blue. I just want to bring up the blues, and you can’t do this with color grading.
So without that curve, my pure blacks will stay pure black. If I want to affect the blacks to take them away from a pure black, you do have to use the curves there. Adjust the curves to this setting.
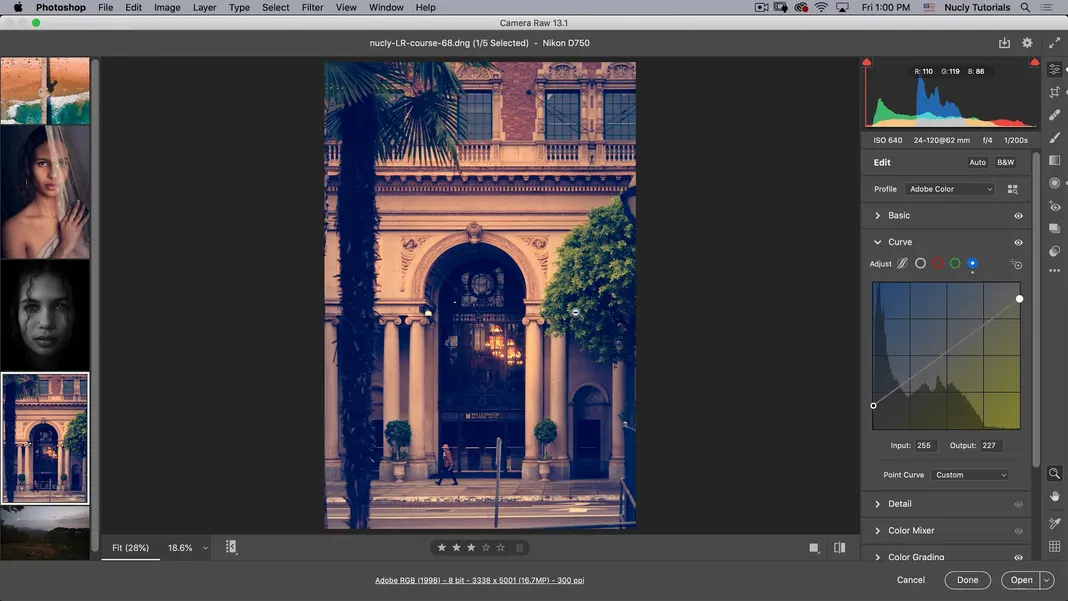
You can see this photo’s before and after by pushing \.
Editing a landscape photograph
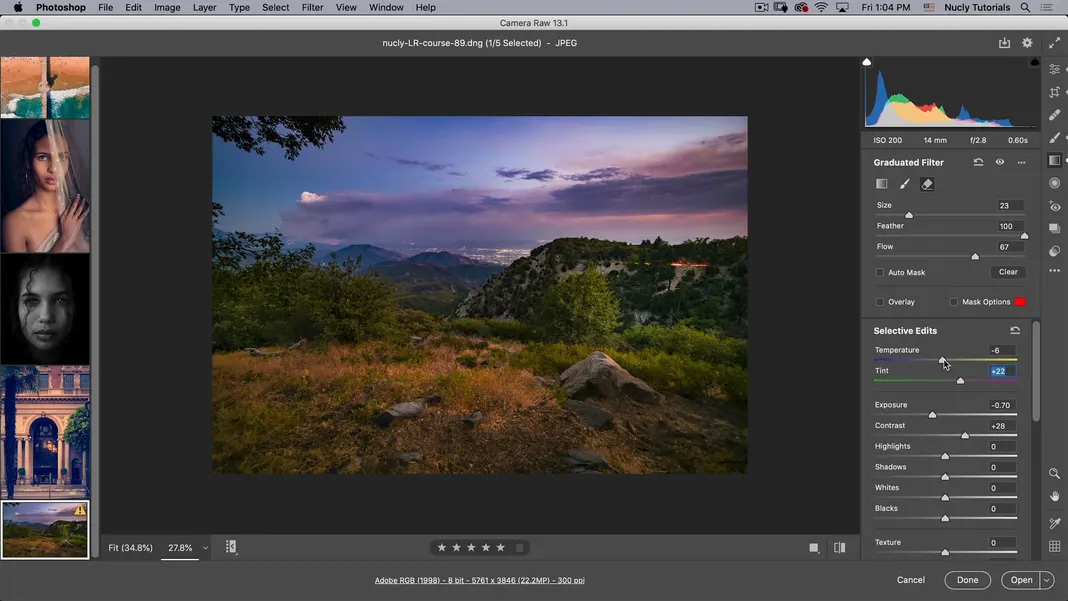
The last photograph is a landscape, and I’m going to show you how you can restore lost information in both your shadows and highlights with some of the tools in adobe camera raw. You can turn a rather boring image into something much more exciting. Let’s go ahead and do that. The last image I want to tackle here is this kind of landscape photo taken from Big Bear. For this shot, let’s go to our basic panel first and adjust the exposure to get a little more detail into this area here.
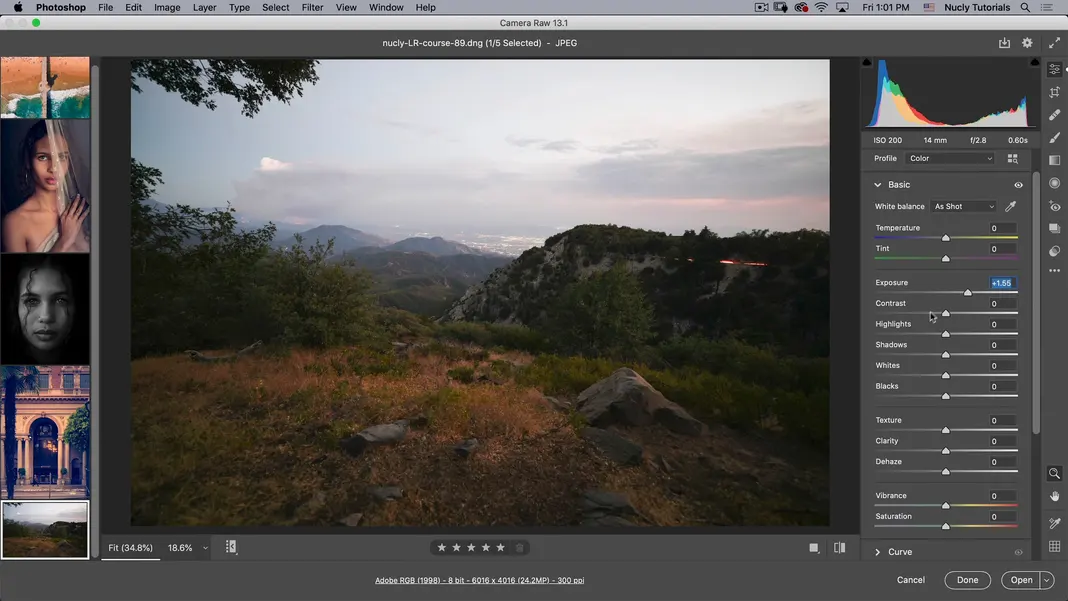
Now you’ll notice as I do that I’m getting rid of detail in the sky, so let’s bring our highlights down; you can also bring the exposure back down a little bit and just pull the shadows up to try to get more detail in this grassy area.
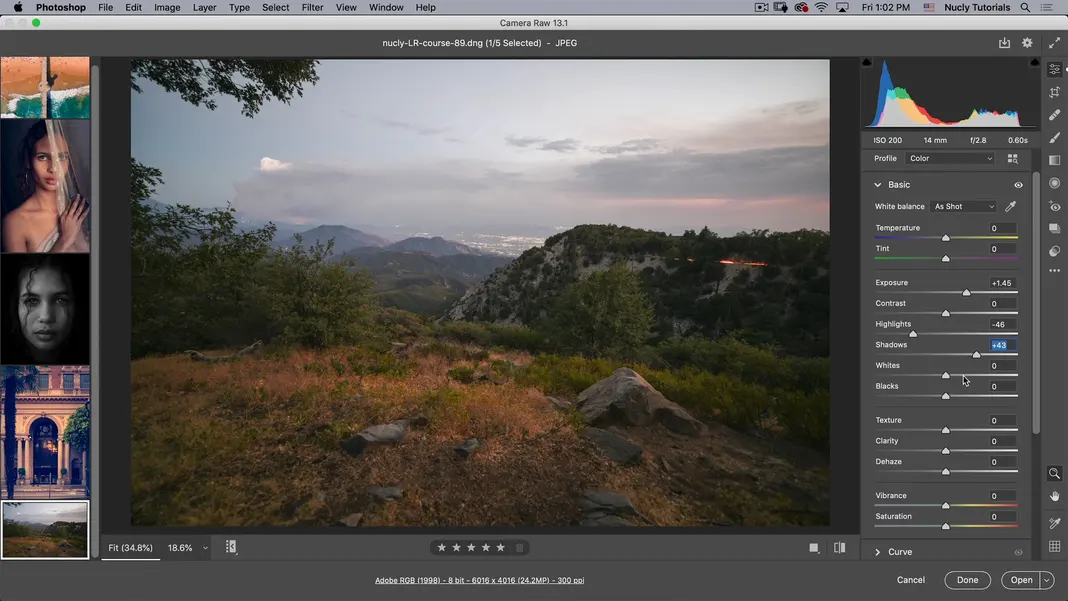
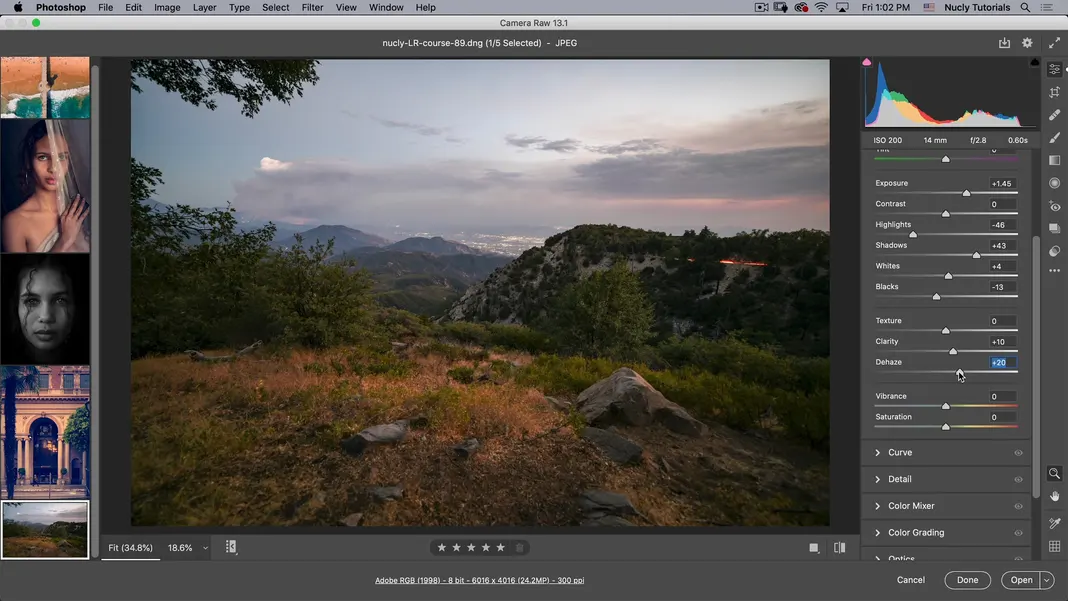
The ground near the Camera has a little bit of a flat look, so I might just pull up the whites a little bit and take the blacks down a little bit to give it a little bit of a contrast. I can also try adjusting clarity and dehaze here, so clarity will give me a little more textural detail in the grassy area near the Camera. Then dehaze is going to do the same but in the background area.
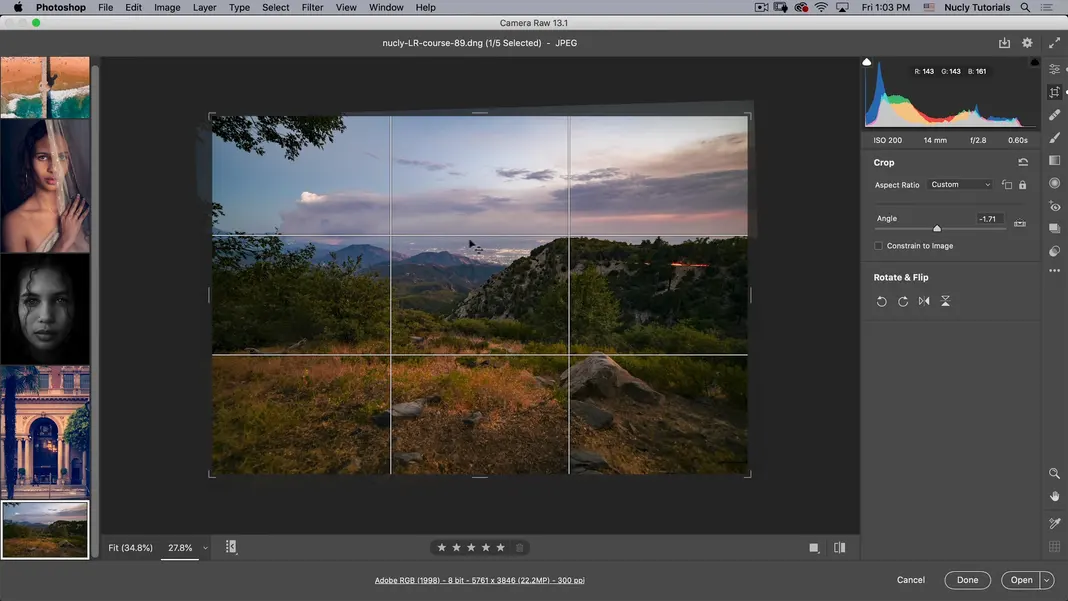
Using the Straightening tool
Let’s go to our crop tool, and I’m gonna use a straightening tool. You can see my horizon in the background is not straight. If we use the tool from one side to the other and see what that looks like already, that looks much straighter. So let’s leave it at that, and I think that’s good enough.
Now let’s add some vibrance. For this purpose, I want to use my local brush adjustment here. I will turn on the overlay and mask and target these areas while brushing.
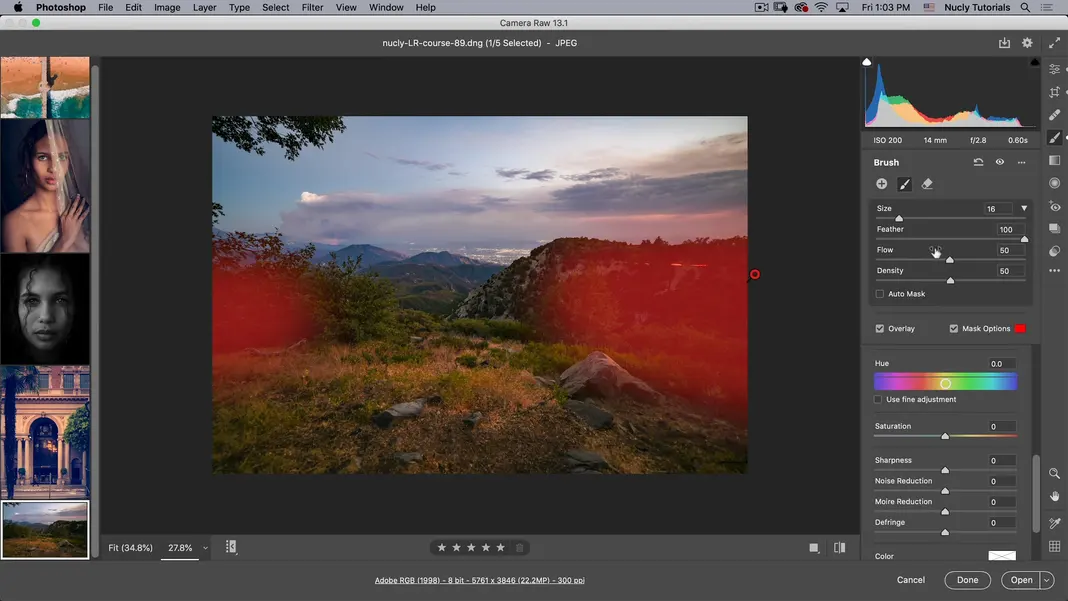
Now let’s turn the mask and overlay off; what I want to do is I want to increase my exposure in these areas and just try to get some more detail out there. I am also going to adjust the temperature.
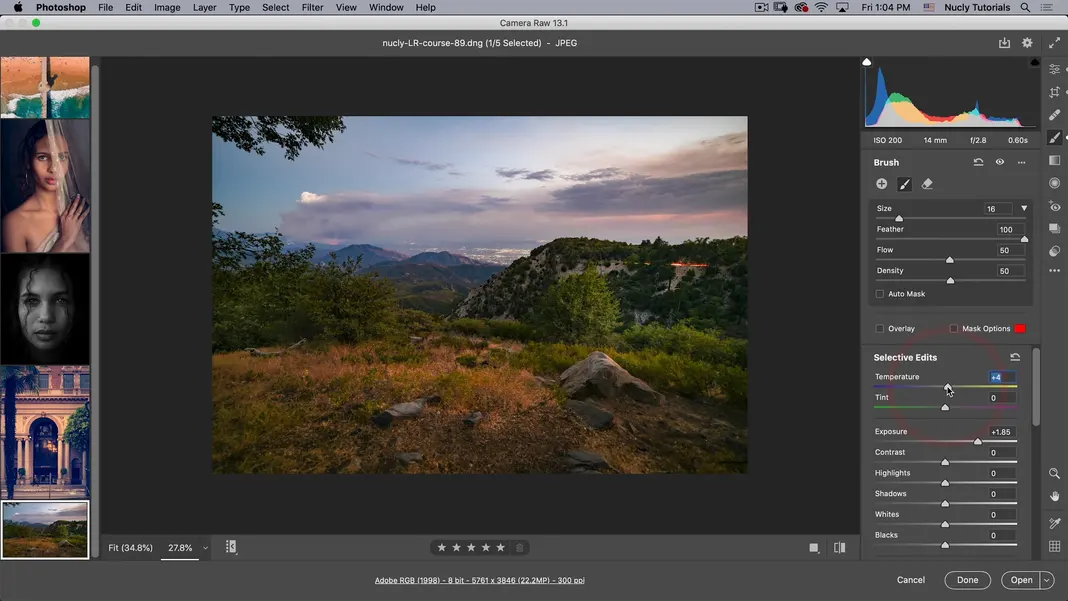
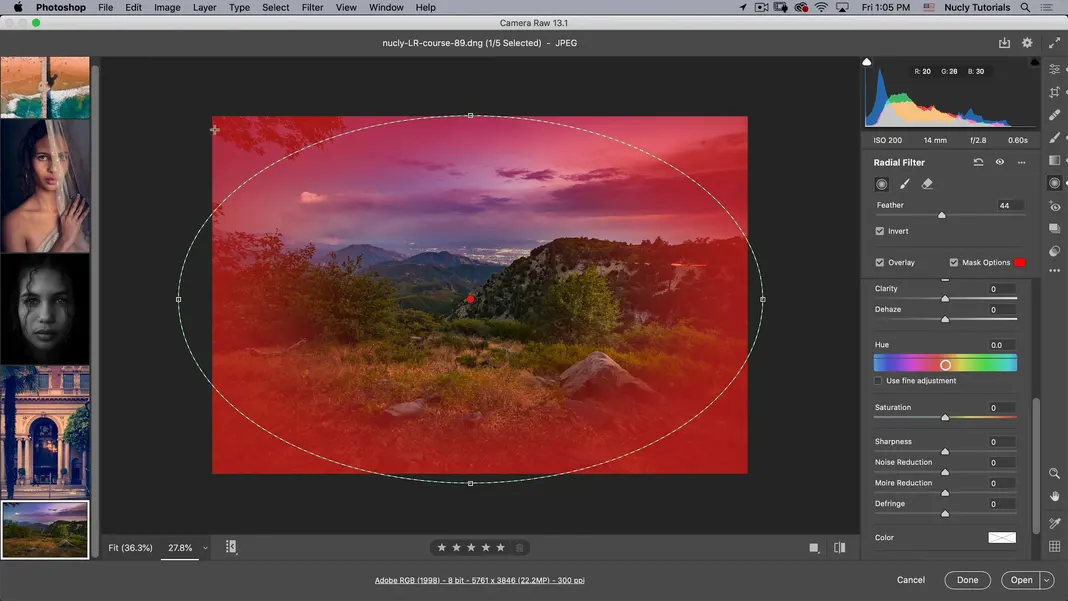
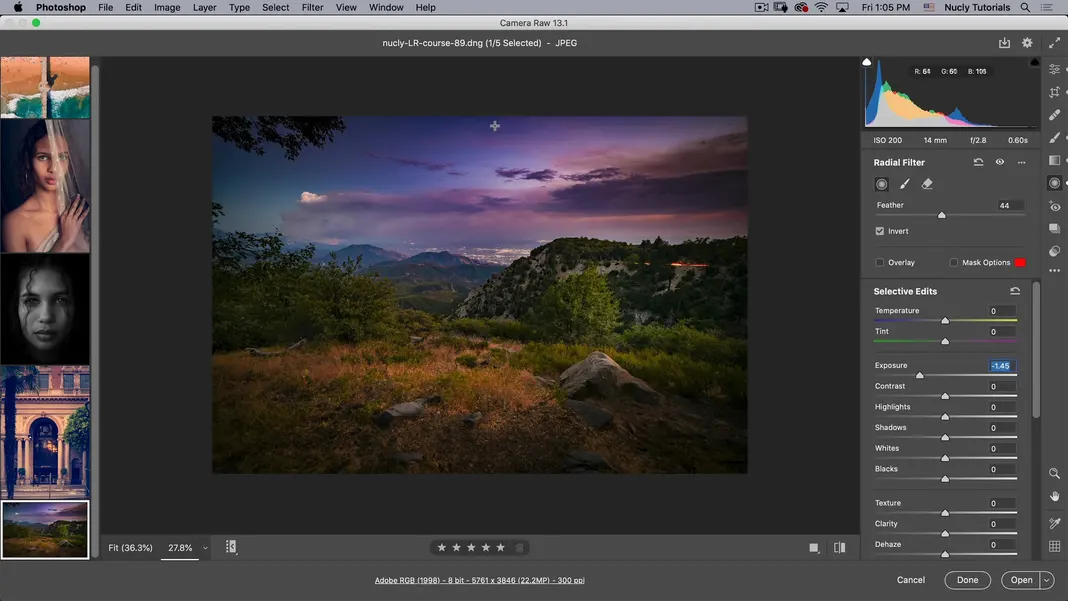
Next, I’m going to use the gradiated filter; I want to add a bunch of color to the sky. I’m going to add points like this, and I’m going to reset these adjustments and turn on my mask.
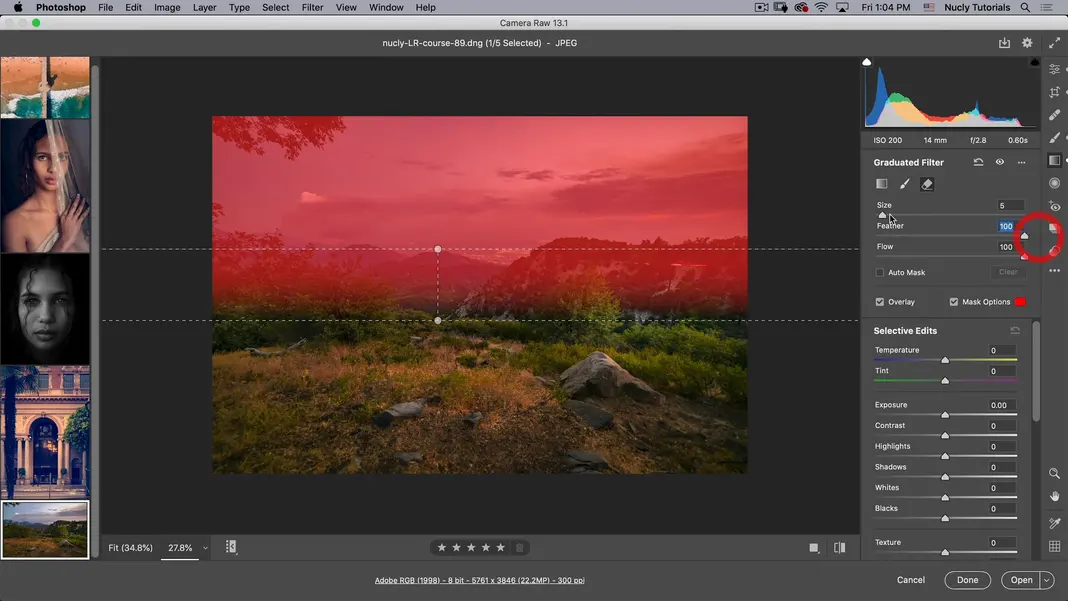
Then I can use my erase tool to remove areas where I don’t want the adjustments to apply. So I don’t want it in these foreground areas; we’ll just paint that out like that.
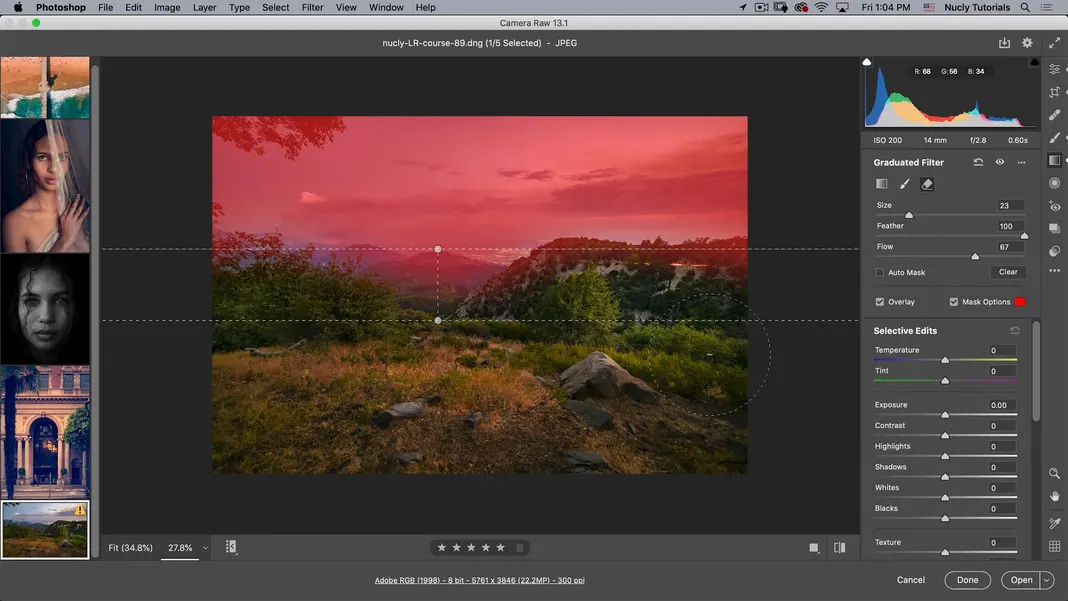
Then, I can turn off the mask and overlay so I can see what I’m doing. I will take the exposure down, increase the contrast, and maybe push the tint and temperature toward magenta to give the sky a nicer color.
I can also try adjusting clarity, which will bring out the detail in these clouds. Then also, I’m going to erase just a little bit of the effect near the bush and the sky because I feel like that looks a little more natural there. Then we can also add a little saturation there, which looks pretty nice. And then, finally, I want to add kind of a vignette to the whole image. To do that, I’m going to go to the radial filter. I’m just going to reset the radial filter and then add an overlay.
Now, if I hit Y just to ensure that my mask is on the outside, not the inside of the overlay. And then I can turn this mask and overlay off and just take the exposure down.
After I’ve done that, I can see I could have more exposure in my center. So I’ll hit E to go back to my basic panel here and just bring up my exposure a little bit. If you hit \ you can see the before and after, and this shows you the power of the Camera raw.
Using photos in a raw format is unique as you have so much more information than you would ever have; if this was a jpeg, trying to get all that detail back in would be almost impossible. And this is all done by Camera Raw, no photoshop, just using the information in the raw file to pull all that out.
So there you have it. That completes this tutorial. Now there are more features of adobe camera raw. If you want more training on adobe camera raw and photoshop, I have a course called Photoshop basics for Photographers that goes quite extensively into all of this. The training also covers everything you would want to know as a photographer or someone who wants to learn and use photoshop.