
In Part 2 of this Photoshop tutorial, I will teach you how to use multiple overlays in Photoshop.
This post has been adapted from the YouTube tutorial found here.
Part 2. Using multiple overlays
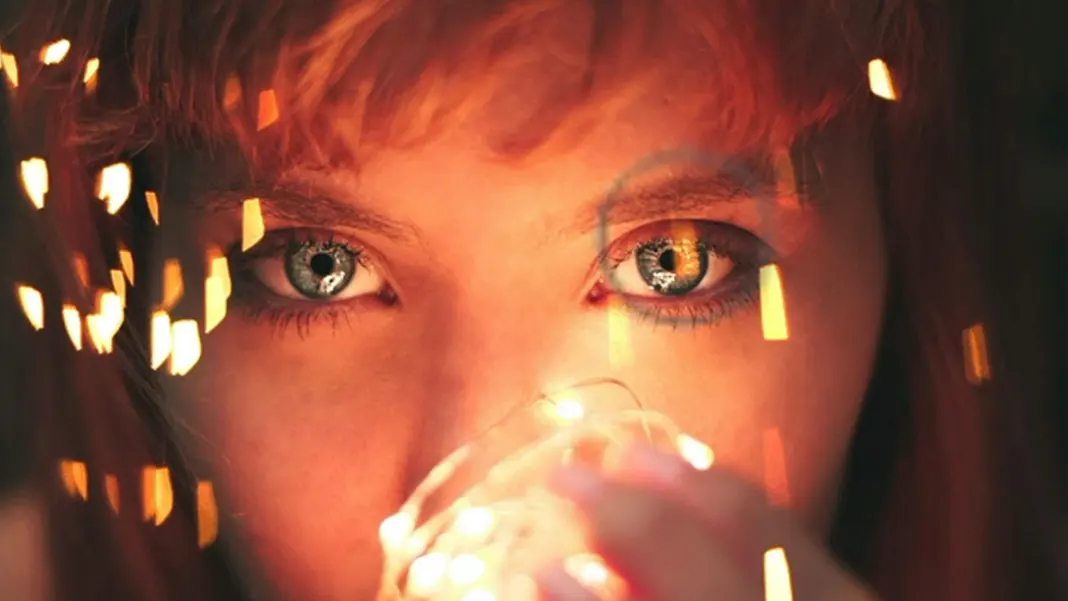
In the second project, we’re going to introduce multiple overlays. You can see the before and after here:
See before (on the left) and after (on the right) below:
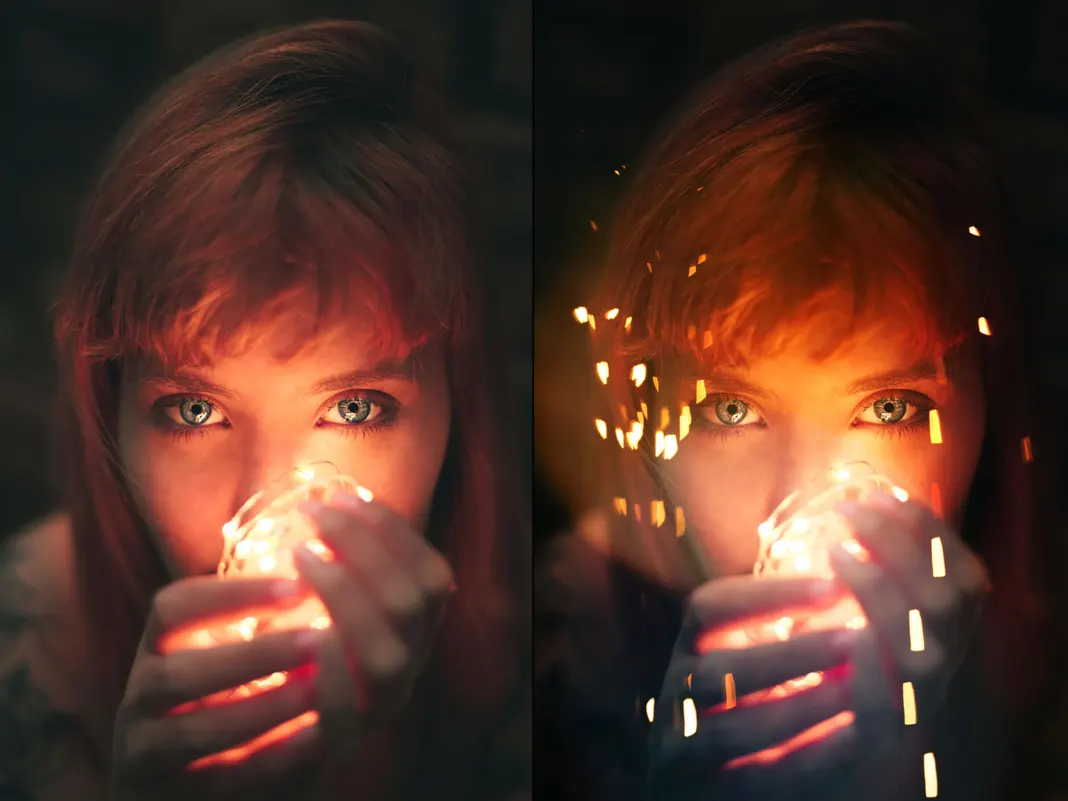
Quite spectacular, right? This effect is actually really simple as well, just like the first project. If you’ve never used overlays before or hardly know any Photoshop, you’ll see how easily we can do this, too.
Let’s get started
Project 2: Using multiple overlays
Well, hopefully you found that a pretty easy project to start off with. In this next project, I’m going to teach you how to use two different overlays in slightly different blending modes, and we’re even going to introduce some masks in overlays.
Let’s start by opening up the second image.

And once again, I’m going to want to occupy all the space I have available to have a nice workspace. So I’m going to hit Command-Plus (+) a few times until the window occupies the full screen, and then hold the Option key and hit Command-Minus (-) to zoom out on the image.
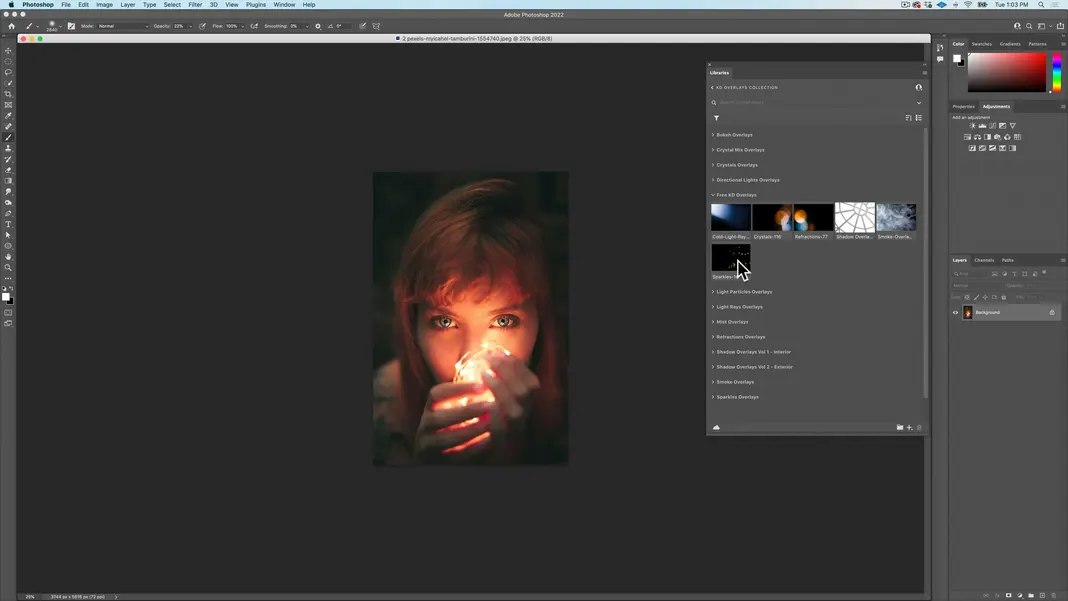
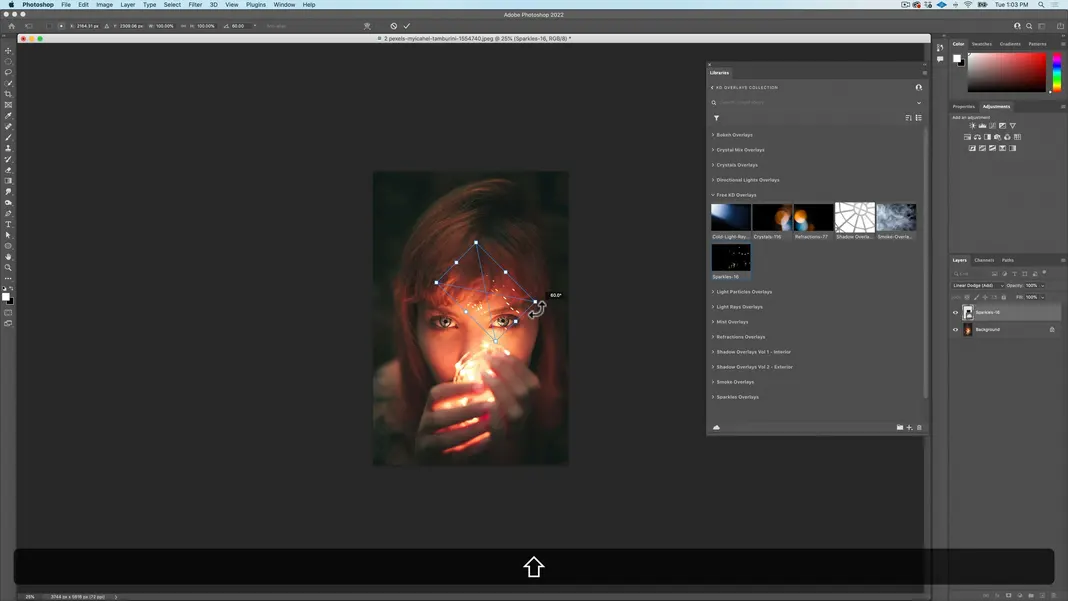
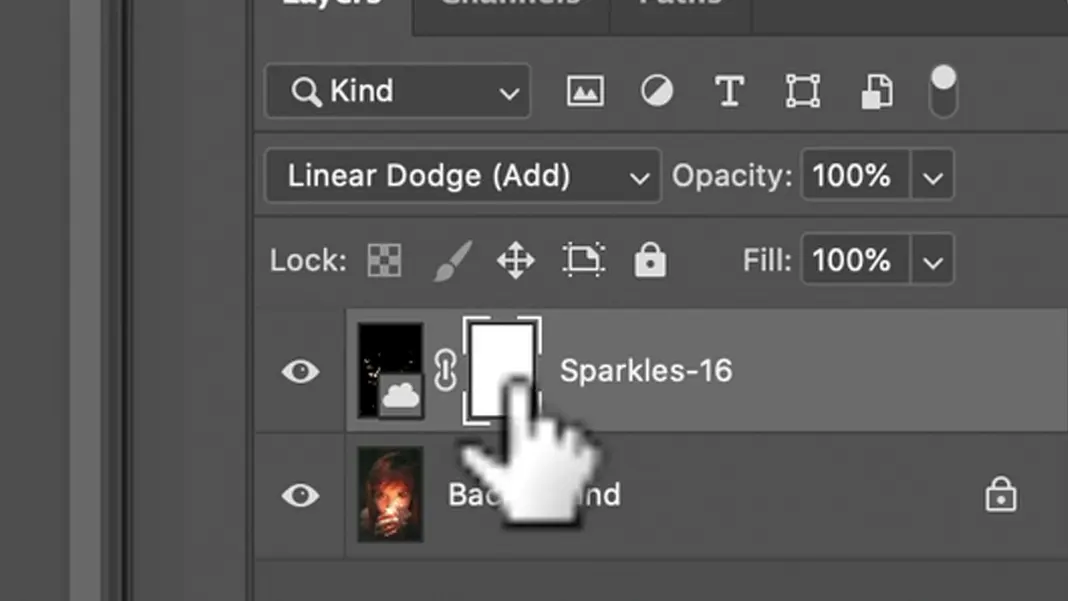
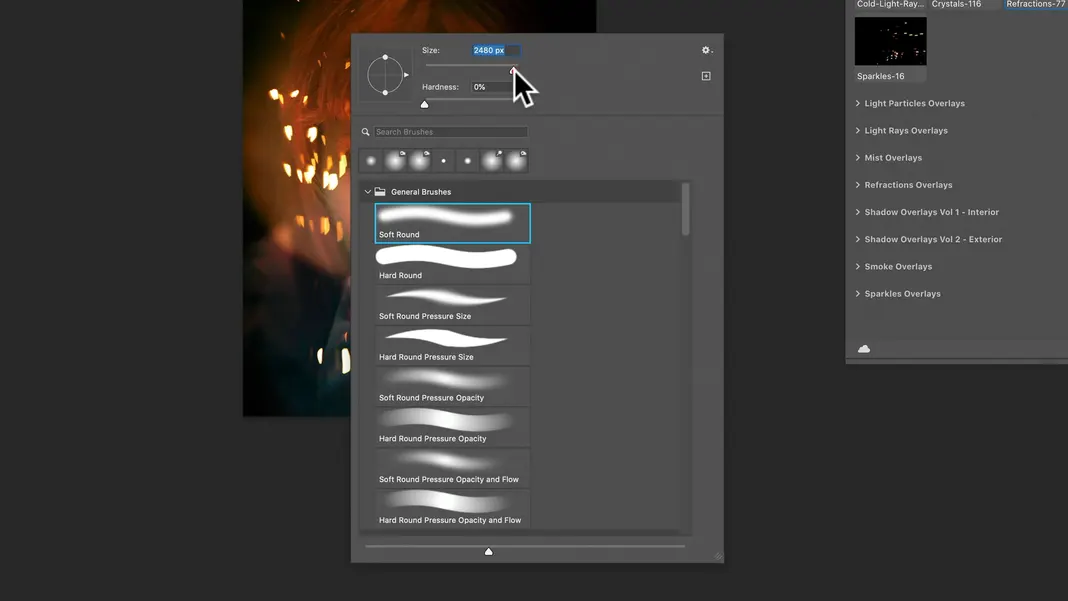
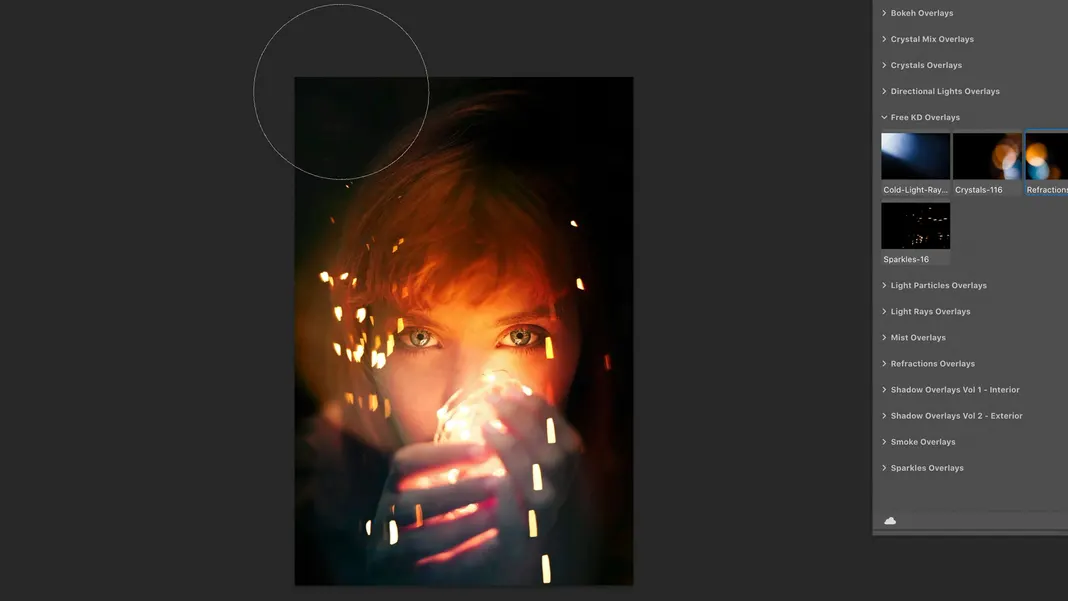
So the first thing I want to do for this image is drag and drop the “Sparkles-16” overlay from the Libraries window to the picture.
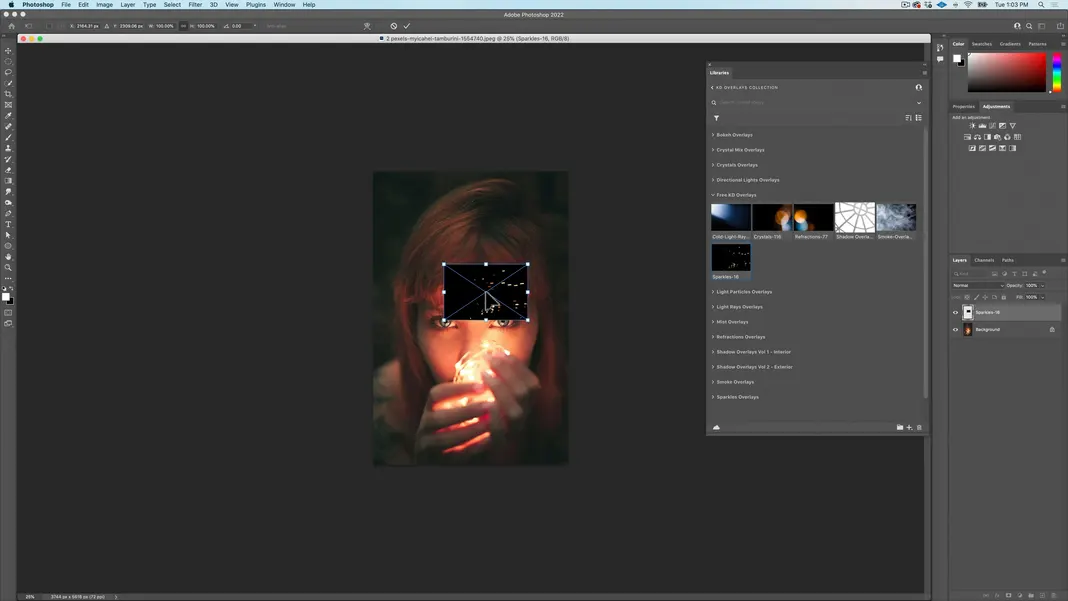
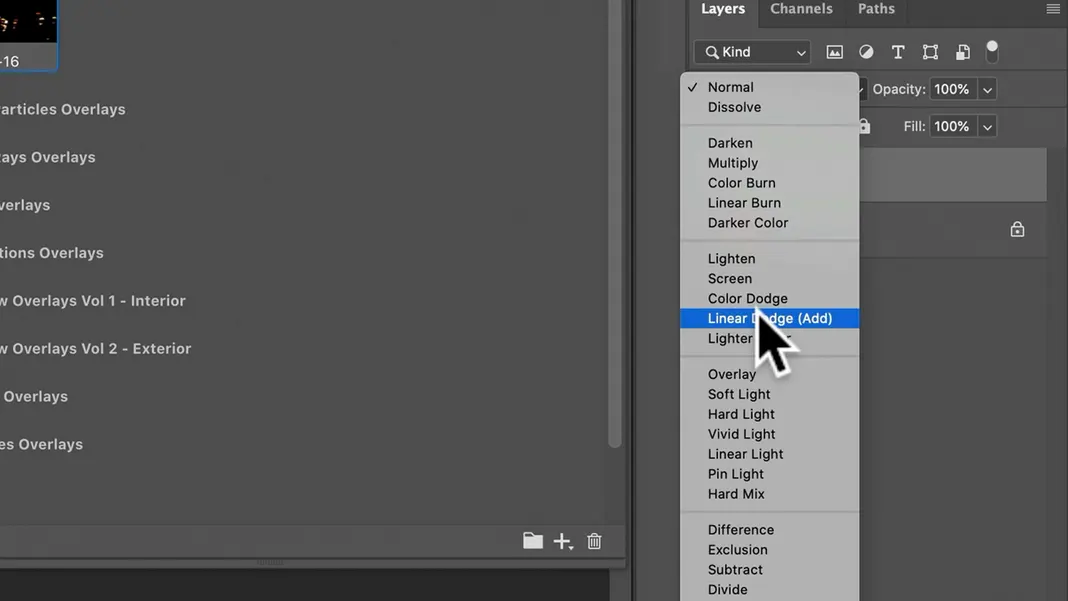
Hit return once again, which will create a smart object from my library. And in this case, I’m going to choose the linear dodge blending mode.
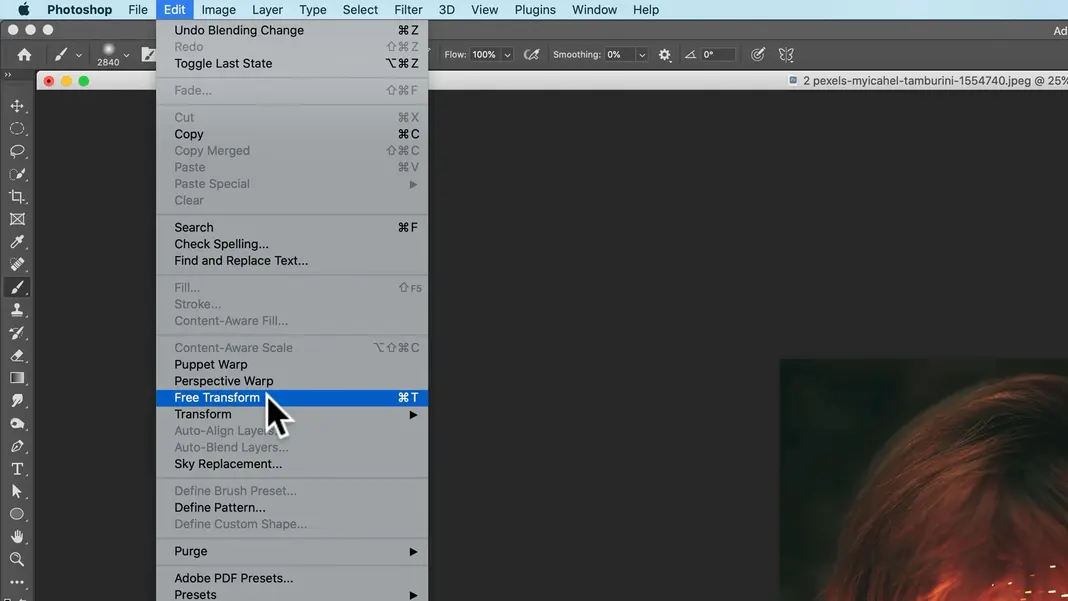
Now select the Free Transform tool again, either by going to the Edit menu and hitting Free Transform or by using the Command-T keyboard shortcut.
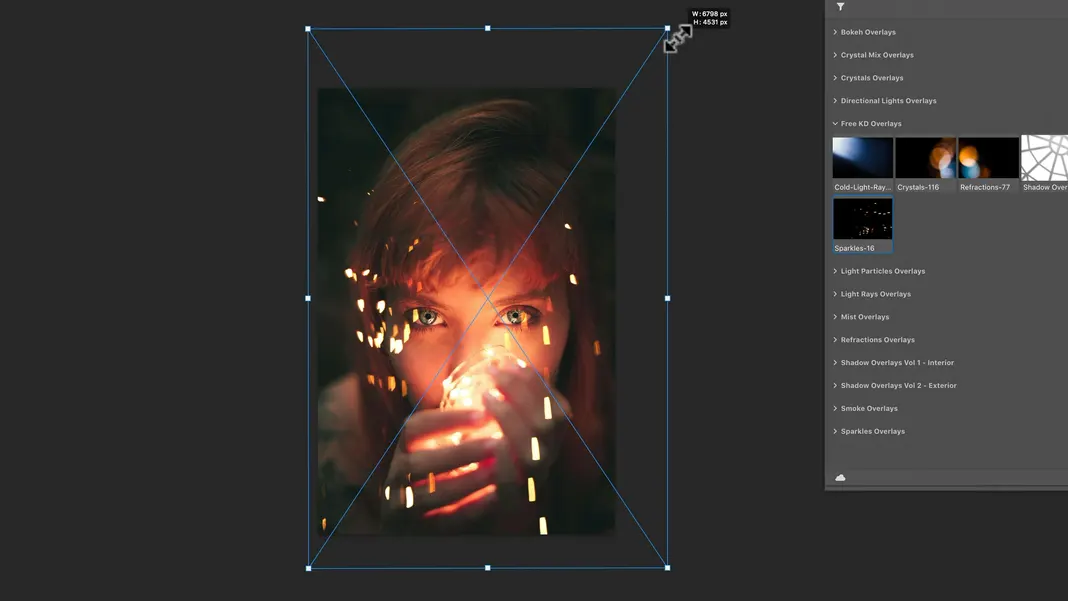
Hold down the Shift key and grab the corner handle to rotate the overlay in 15 degree increments.
Then hold the Option key and resize the overlay so that it expands from the center. I’ll set the size so that the sparkles sit around her face and frame it.
Above you can see my final result. Now, there is a sparkle over the eye on our right, and while it does look kind of cool, I’ll show you how to edit that out.
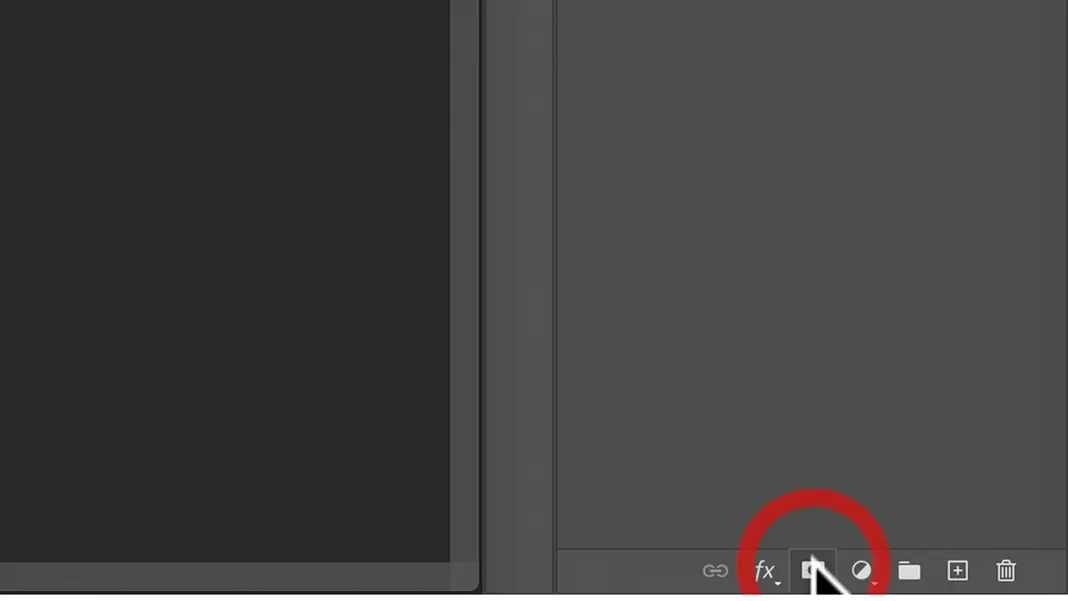
First hit Return. Then go to the layers menu, make sure the overlay layer is still selected, and click on the Mask button as shown below.
I’ll set my brush to a smaller size, around the size shown below. To open this brush menu, just right click on your mouse.
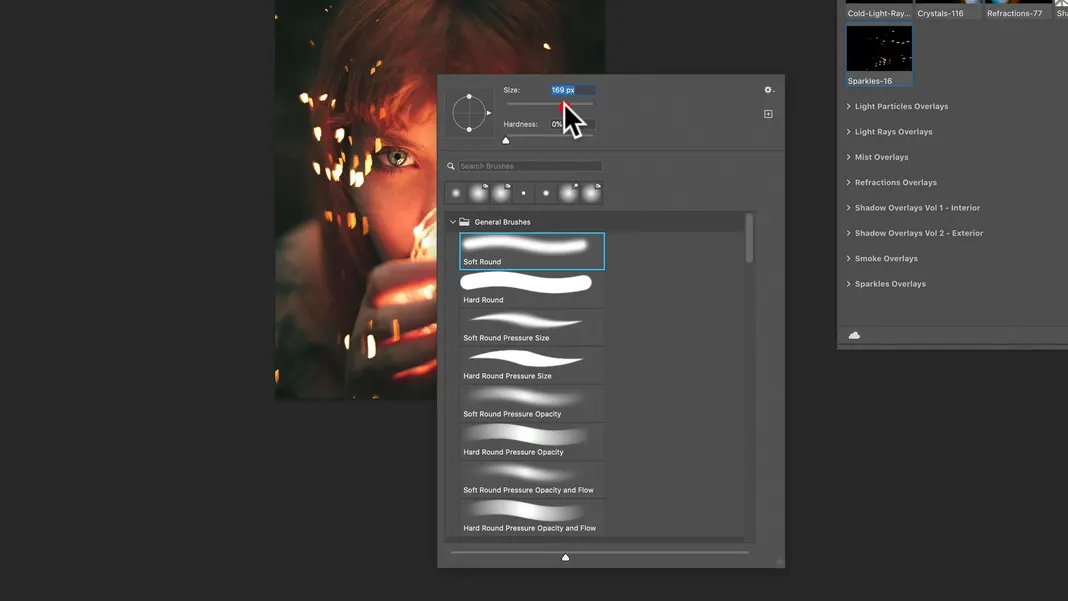
Set the brush opacity to 100%.
Make sure that the foreground color is set to black as shown below.
To do that, you first click on the small black and white squares button above the foreground and background colors. This resets the colors to the default, which is white in the front and black in the back.
Then click the arrows button just above the foreground/background colors. This will reverse the colors so that black is the foreground, which is what we want.

So now we have a black brush. Confirm that you are on the mask, not on the layer, as shown below.
Now we can just go ahead and brush the sparkles we don’t want out. Mainly these are the sparkles over the eye on our right, and some of the sparkles on the edges of the image, so that they don’t distract us.
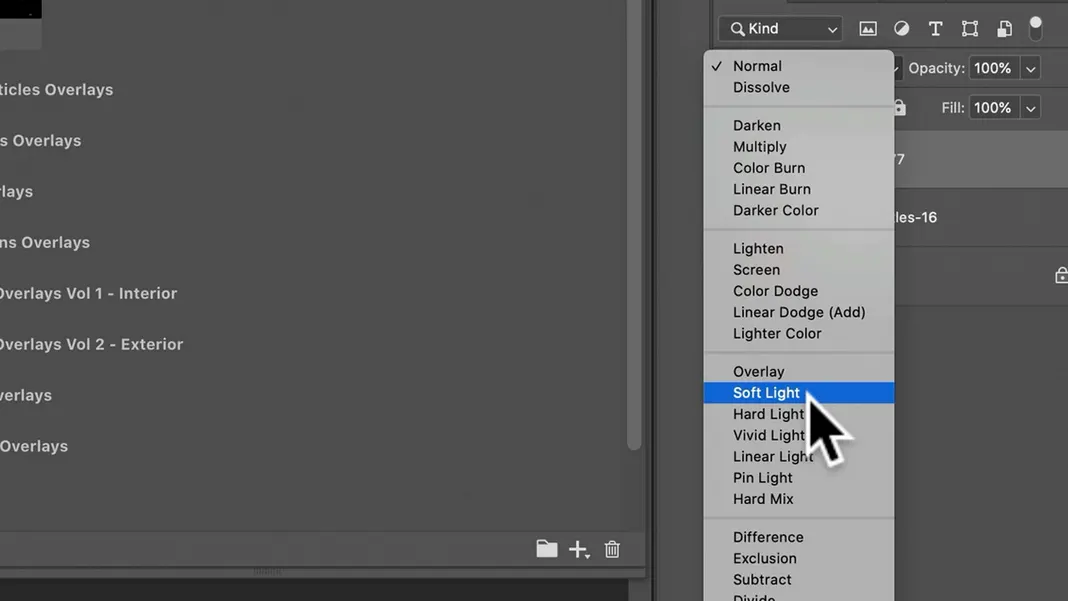
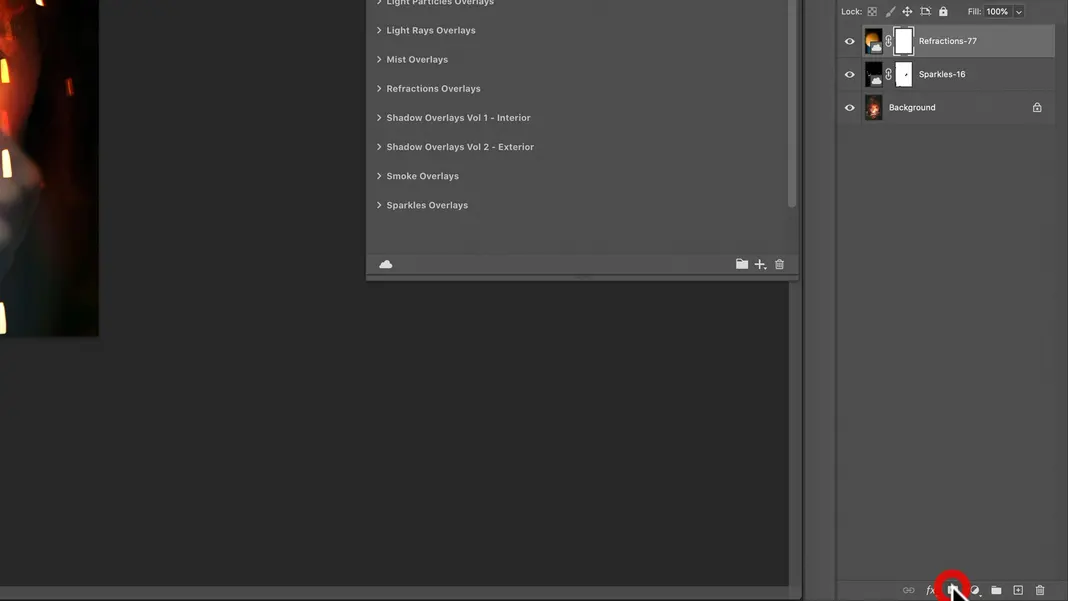
That’s it for the sparkles. Now I also want to add some refractions from the refractions pack, so I will drag and drop “Refractions-77” into our image.
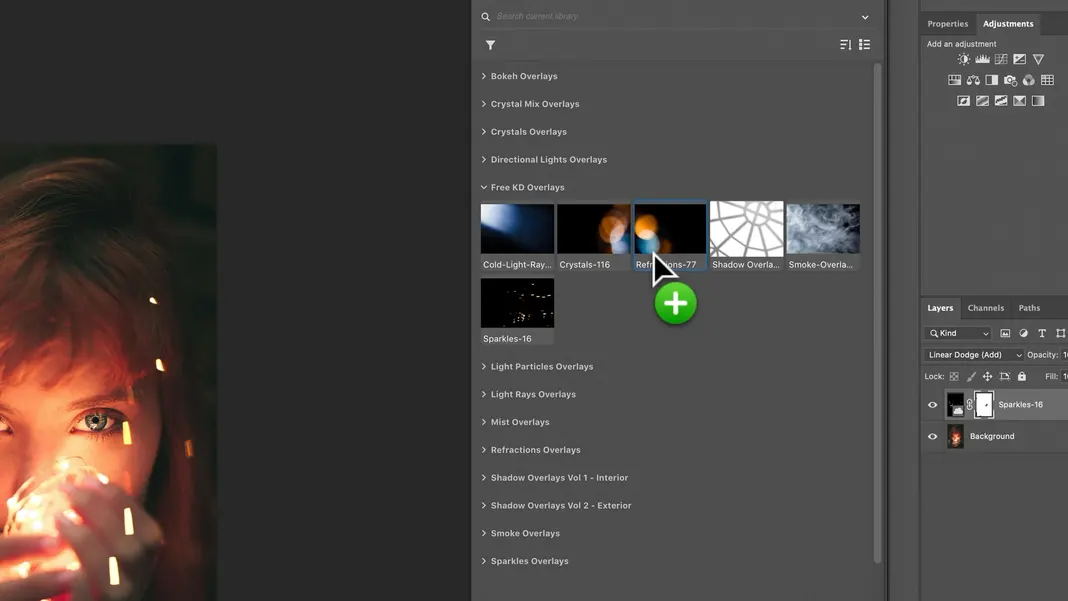
Hit Return again, and in this case, we’ll set the blending mode to soft light.
Once again, we will select the Free Transform tool, and again, we will hold the Option key while resizing the overlay so that it expands from the center.
My goal is to light her face using the refractions in the overlay, so I will move and resize the layer accordingly.
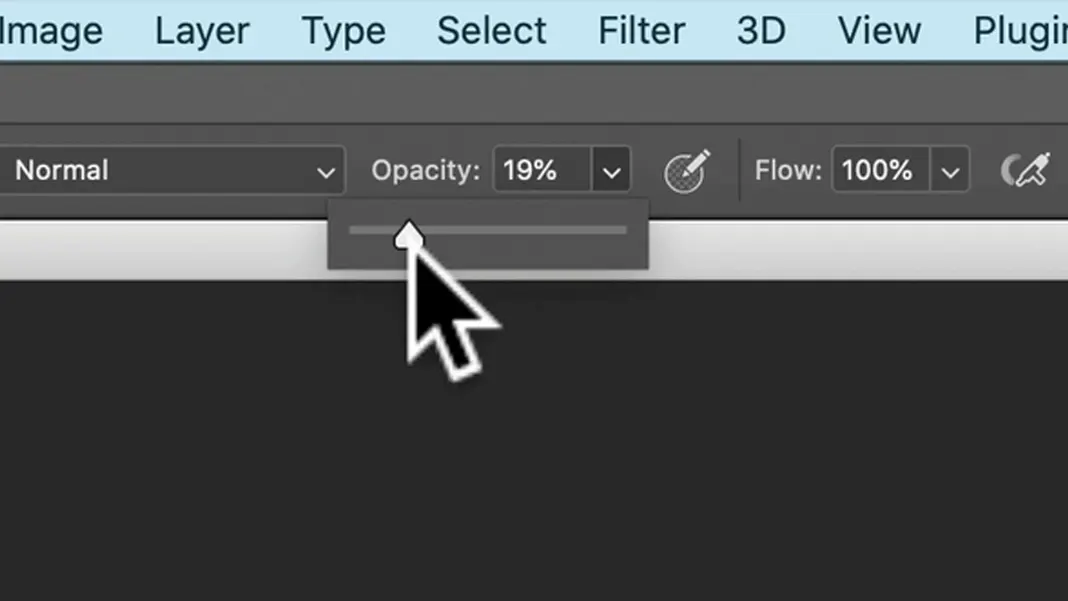
In doing this, I do find that the layer has darkened the dark areas too much. To remedy this, I’m going to go ahead and make another mask here on on this layer.
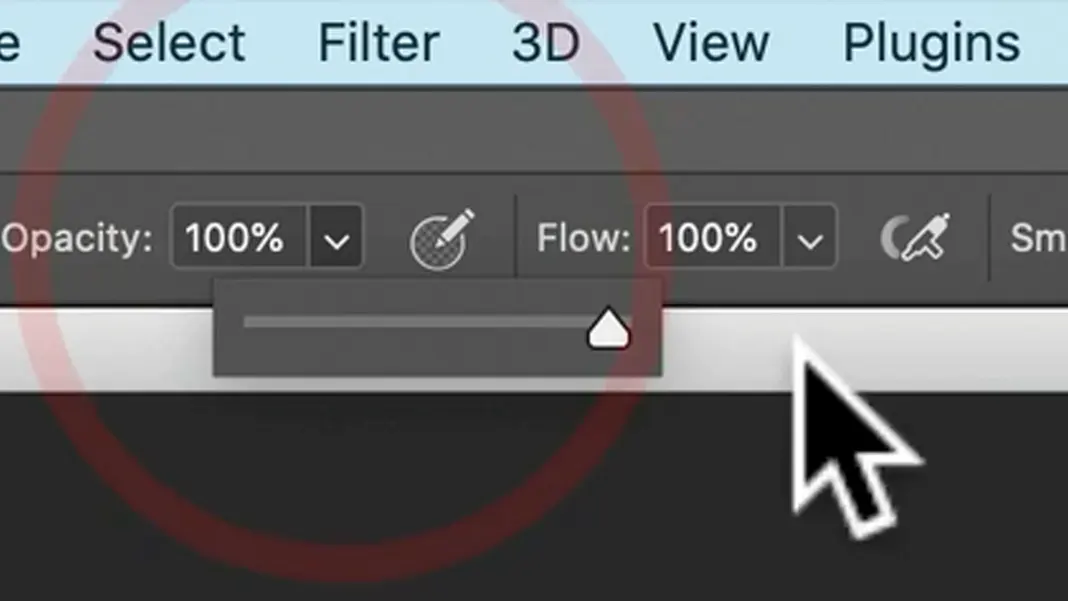
Now I’ll lower my opacity to around 20%.
Now we can make our brush a lot bigger.
The brush size you choose in this step depends on the size of your image. In my case this image is pretty big, around 3700 pixels wide, so I chose the size as shown above to match and hit Return.
Now we can just brush out and mask some of this overlay so that the image is mainly being affected in the center area.
If you want to add some of that darkness back, you can reverse the colors again here so that the foreground color is white, and you can brush it in the same way.
Remember, black Conceals and white reveals; that’s the default in Photoshop.

At this point we’re done with project 2! Hopefully you found that to be very simple as well and have an idea now of how to use multiple overlays and how to use masks in overlays.
I suggest you play around with some of the blending modes to familiarize yourself. The Photoshop Blending modes I use the most are Overlay, Soft Light, Hard Light in some cases, and Linear Dodge (which is pretty amazing but mostly useful for stronger, smaller lights such as the sparkles in this case).