
With Photoshop, it is possible to make some pretty dramatic changes to the background of photos. Of course, nobody wants an end product that looks like you just cut and paste a background and foreground together. So, in this free step-by-step Photoshop tutorial with images, I’ll show you how to change a background in Photoshop step-by-step as well as how to seamlessly integrate the foreground and background together into one composition.
Keep reading below to learn the basics of how to change a background in Photoshop or watch my step-by-step video tutorial of how to change a background in Photoshop.
Free Photoshop Source Files
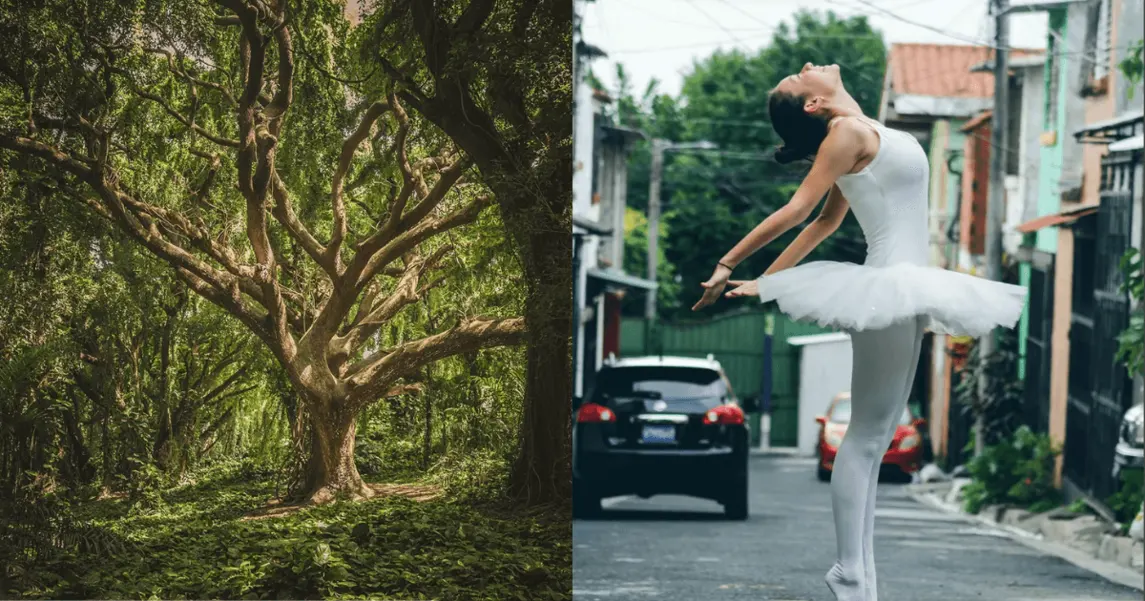
For this tutorial, I used a photo of a dancer and a forest background. You can download my source files for this free step-by-step Photoshop tutorial here.
How to Select the Foreground in Photoshop
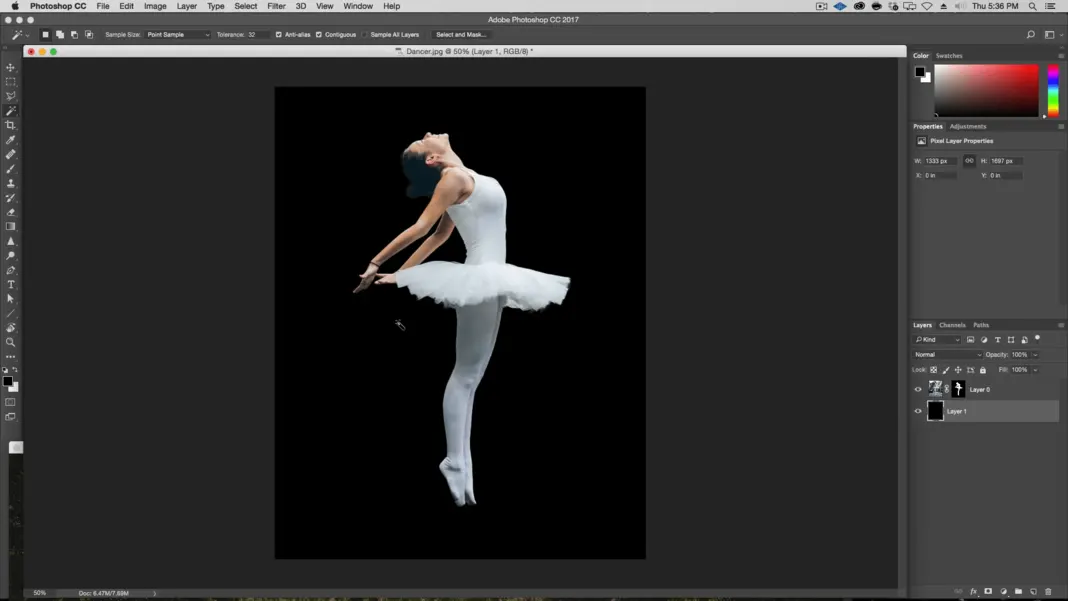
The first step is to select the dancer and extract her from the background.
Keep in mind that a simple, blurred background will be easier to work with than a colorful or busy background. That said, this free Photoshop tutorial will help you combine any foreground with a complex background.
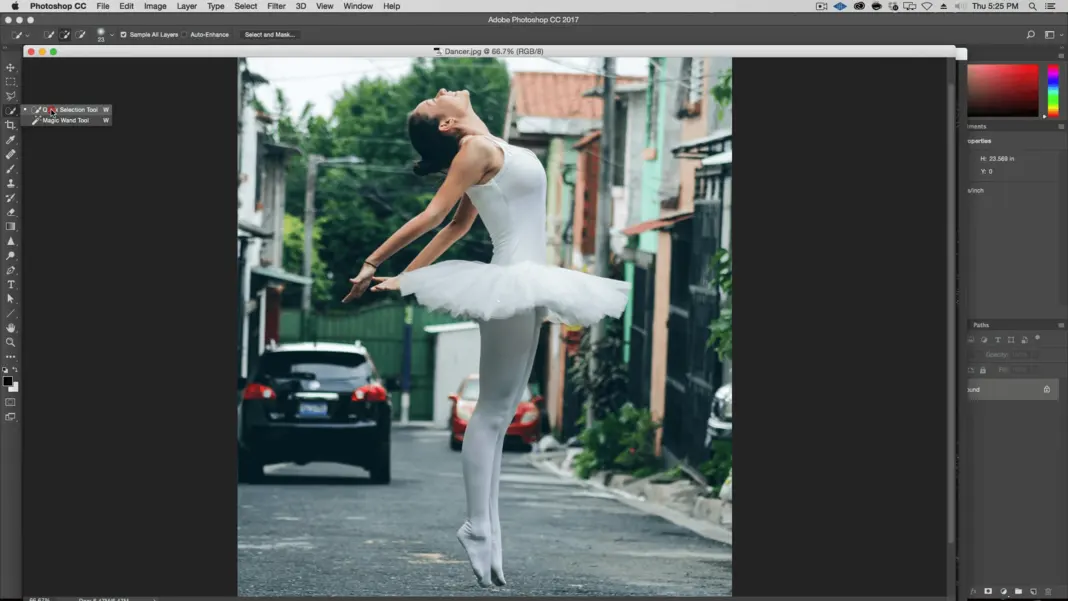
For this tutorial, start with the quick selection tool and select everything but the dancer. If it selects part of the foreground that you don’t want, just hold down the alt key to minus out those parts. Alternatively, you can also take the polygon lasso tool, hold down shift, and select anything in the background. Once you’ve got everything selected, zoom in to capture any smaller details and fine-tune the selection.
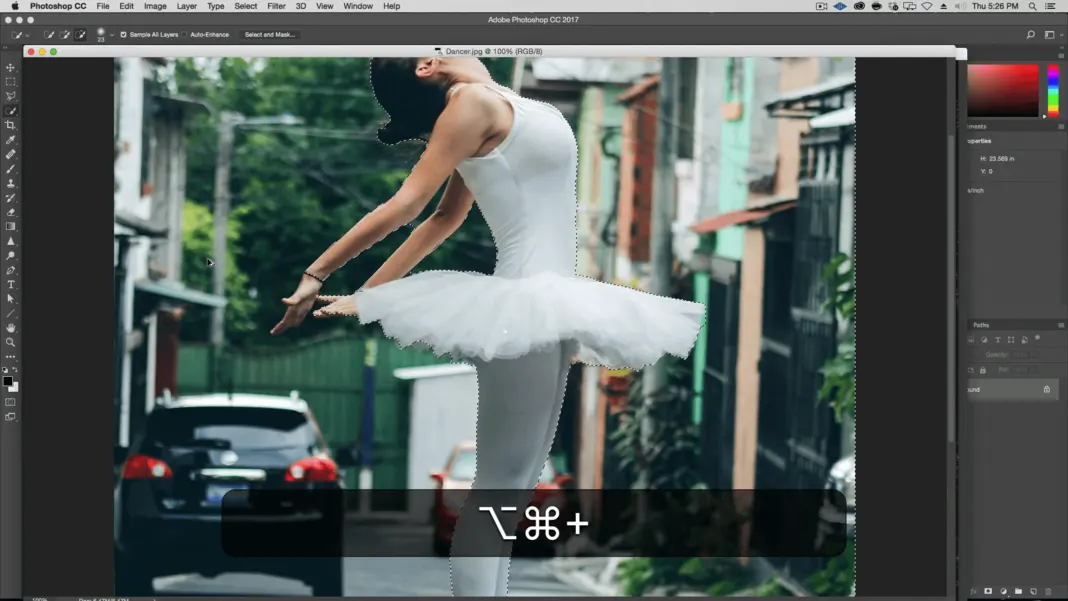
Once everything is selected, use Command+Shift+I or Control+Shift+I, or use the dropdown menu Select > Inverse to invert the selection.
How to Select Semi-Transparent Areas in the Foreground
Once you’ve selected the dancer, hit Select > Mask. This will take you to an alternate screen where the background will appear black. This is where you can fine-tune your edge detection. Use the small edge brush on any semi-transparent areas to tell Photoshop to recalculate the edges of the selected area. I like to do this on 200-300% zoom.
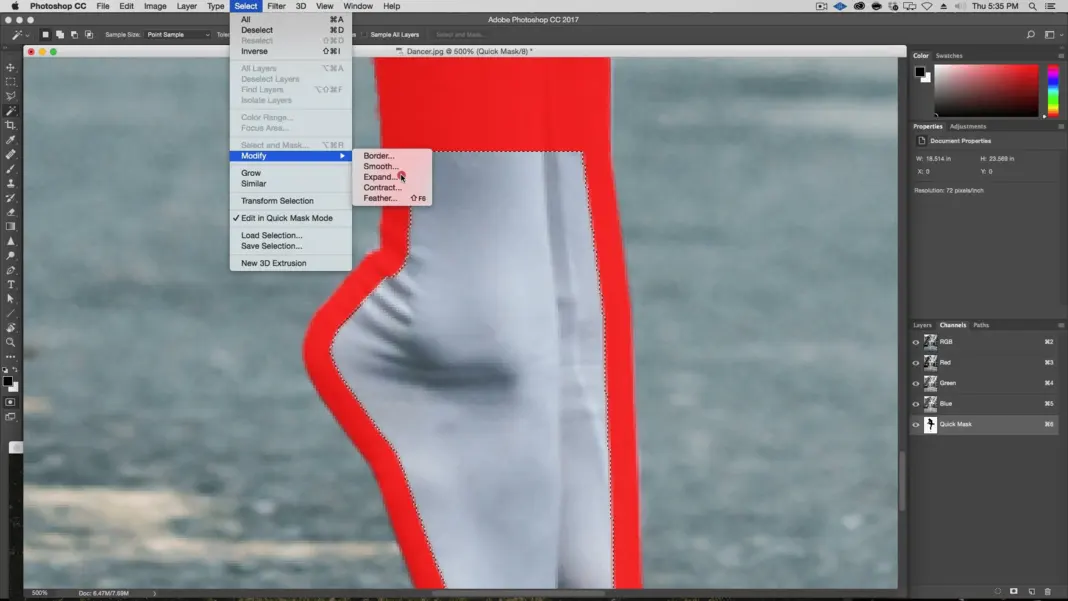
Once you’re happy with the edge selection, hit OK to go back to the original screen and then hit Q to create a quick mask.
Next, go in manually to mask any semi-transparent areas. You want to create a smooth, clean edge. I like to use a brush with 45 size, 85 hardness, and 100 opacity for this process. I also like to use the dodge and burn tool and adjust the mask levels post-selection to fine-tune the semi-transparent edges.
If any areas don’t look good, you can use the marquee tool to remove it and redo the selection manually. It is easiest to check your edges on a black background (a new layer) rather than on the checkered background.
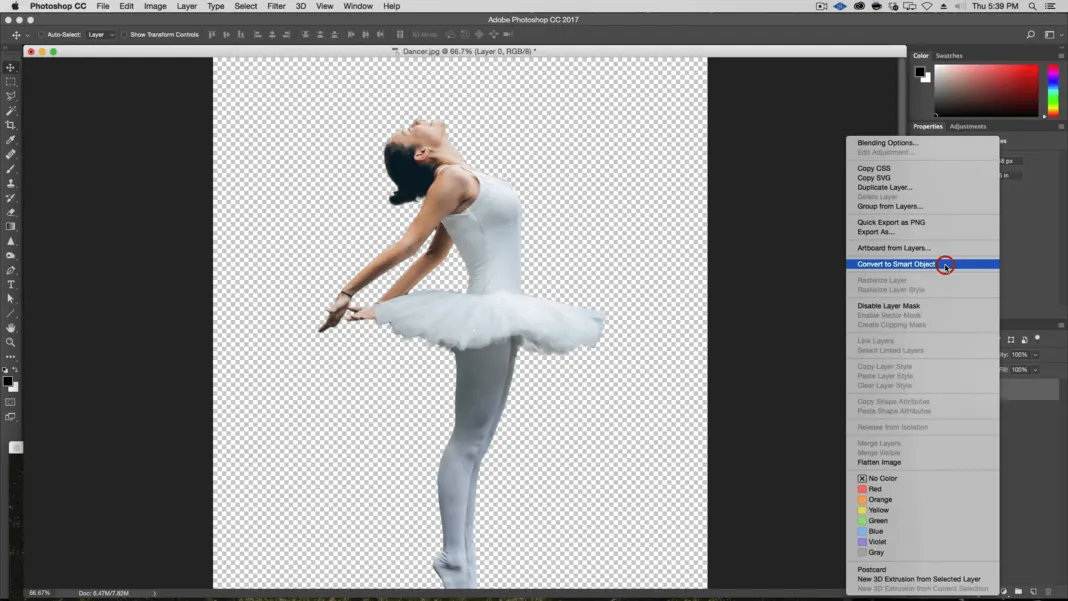
Convert the Foreground to a Smart Object
Now that the selection is complete, you can remove the background and covert the foreground to a smart object. Using the Photoshop smart object feature will allow you to add effects without damaging the original foreground.
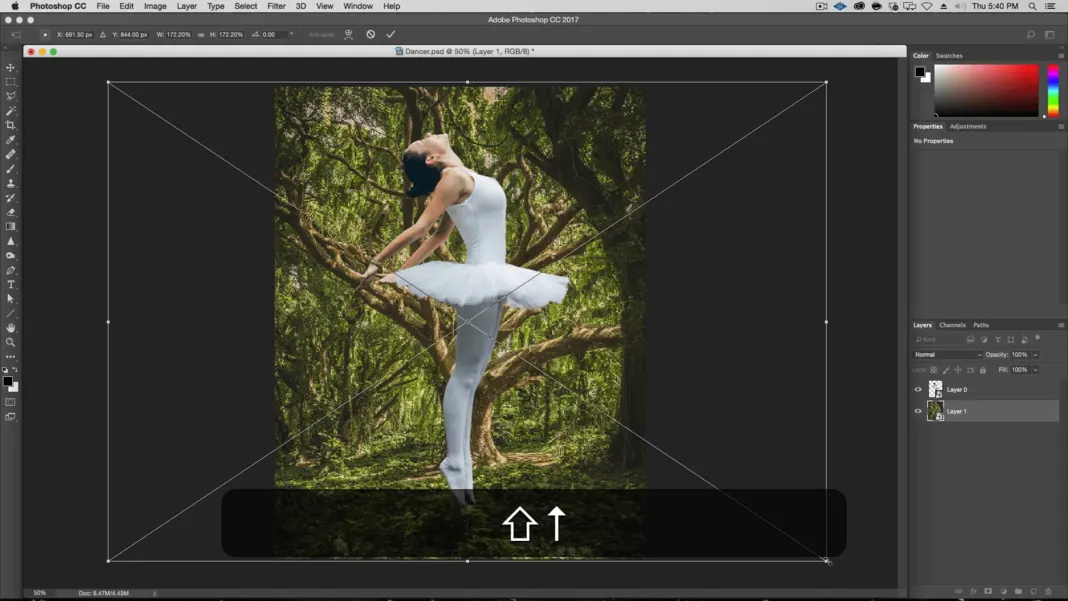
Add the Background into Photoshop
Now it is time to bring in your background image. First, convert it to a smart object and size it.
Once the background is in place, you can reduce the noise by selecting Filters > blur gallery > field blur. This will create a natural-looking blur with a shallow depth of field. I also like to add in some bouquet.
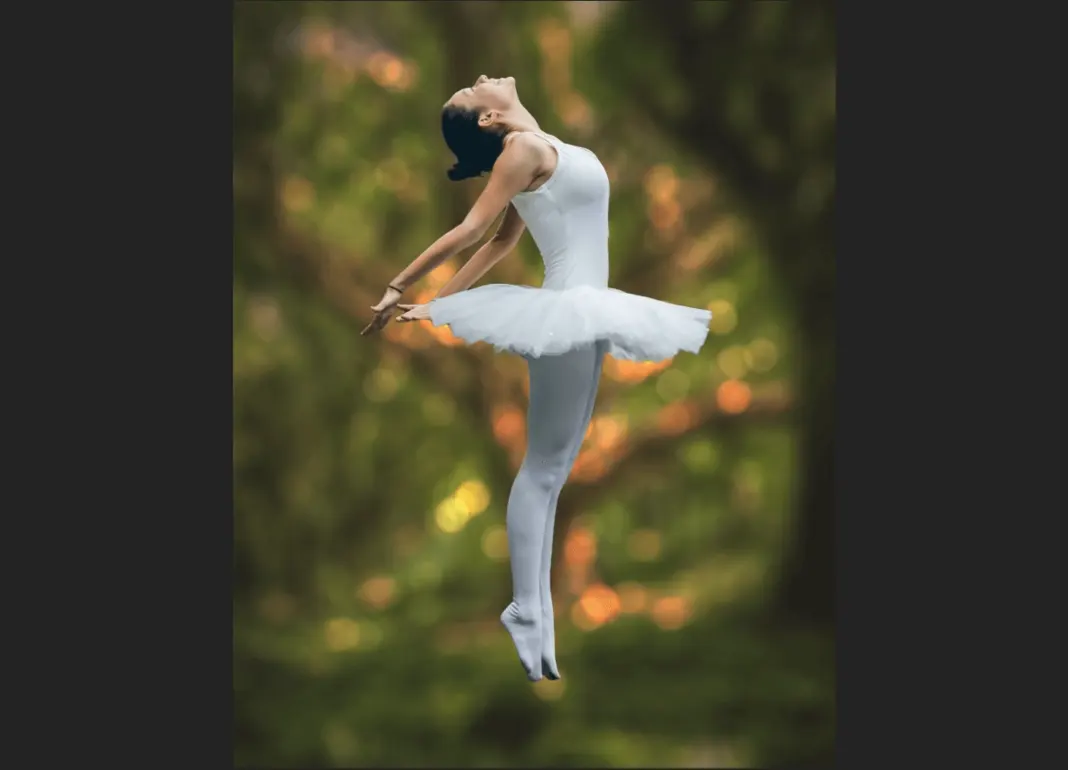
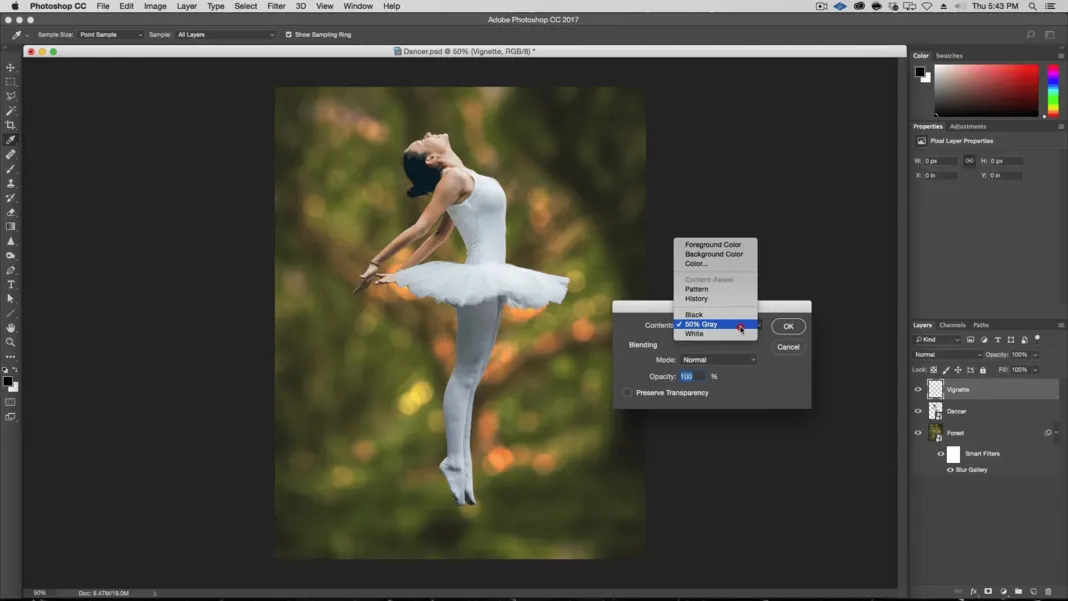
Next, create a 50% grey overlay layer and convert it to a smart object so that it is completely transparent. This will allow you to add the camera raw filter and adjust the color grade, feathering, vignette effects, and lighting.
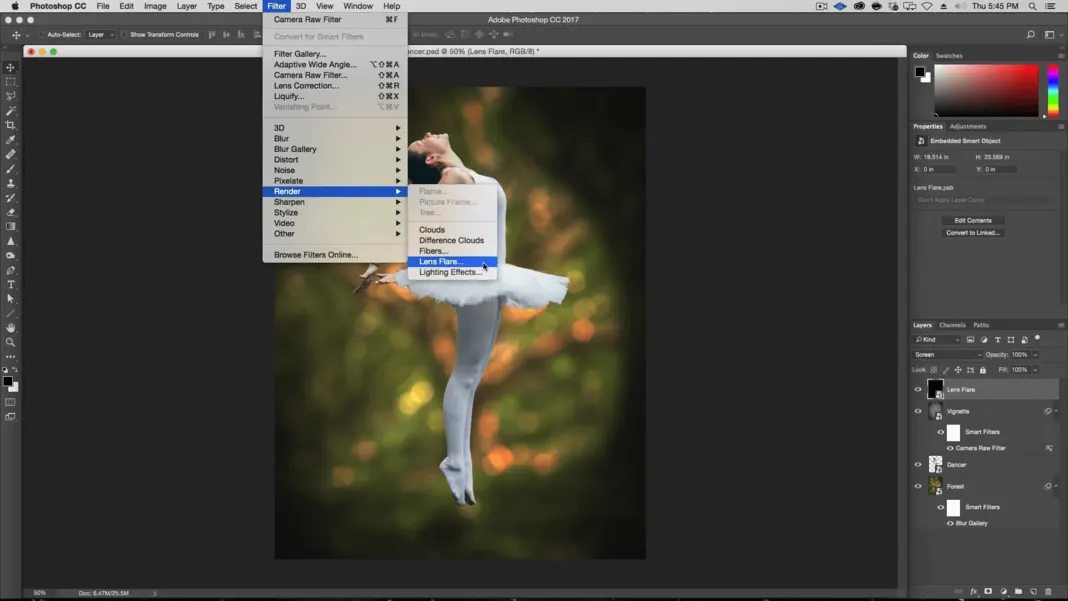
Next, I like to add another layer (smart object) to add a light source. Creating a light source that affects both the foreground and the background will help marry the two together into one scene. Select Filter > Render > lens flare, and then play around with the colorization, sharpness, blur, size, and opacity.
To take this a step further, you can use a brush to manually mask areas that would be in the shadows and remove the lens flare light source from them. You can also use the path selection tool, a brush, and the outerglow effect to create a stronger highlight on the light areas.
Advanced Tips for How to Integrate the Background and Foreground in Photoshop
The more effects that you add to both the background and foreground, the more they feel like they belong together. Check out the step-by-step video tutorial to learn more about how to seamlessly integrate the background and the foreground in Photoshop.